I’m so happy to be sharing a new gluten free sourdough bread recipe today because I think you’re going to love it. It’s vegan, gluten free (obviously) FODMAP friendly, nut free AND free from rice flour. That covers basically every dietary niche under the sun, does it not? (aside from grain free, sorry).
I have been baking gluten free sourdough for over four years now. While my initial loaves were ‘full of character’ and ‘homely’, I learnt so much about the sourdough process. I published my gluten free sourdough starter guide last year, thinking I’d save the bread recipe for my next cookbook. Then the 2020-2021 hit, and I figured we could all use a distraction. So, I published my gluten free sourdough bread recipe. I specifically designed it to include flours that could be acquired as easily as possible. I also tried to keep the different flours to a minimum.
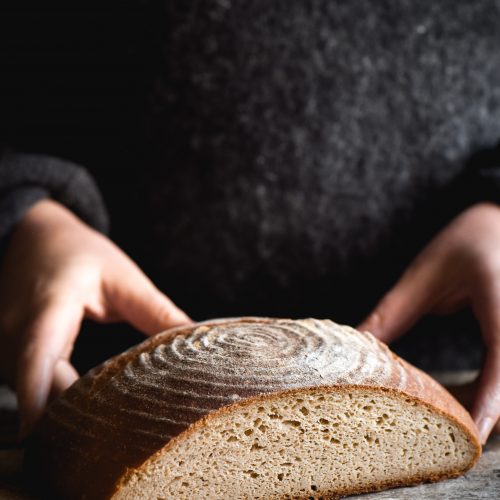
Gluten free sourdough bread without rice flour
This new beautifully light gluten-free sourdough-bread recipe doesn’t adhere as much to pandemic restrictions. Here in Australia, the inability to find flour at the shops has eased, although restrictions have not. With that in mind, I decided to play around and create a loaf that I could make on a bi-weekly basis. A loaf that suited my dietary needs.
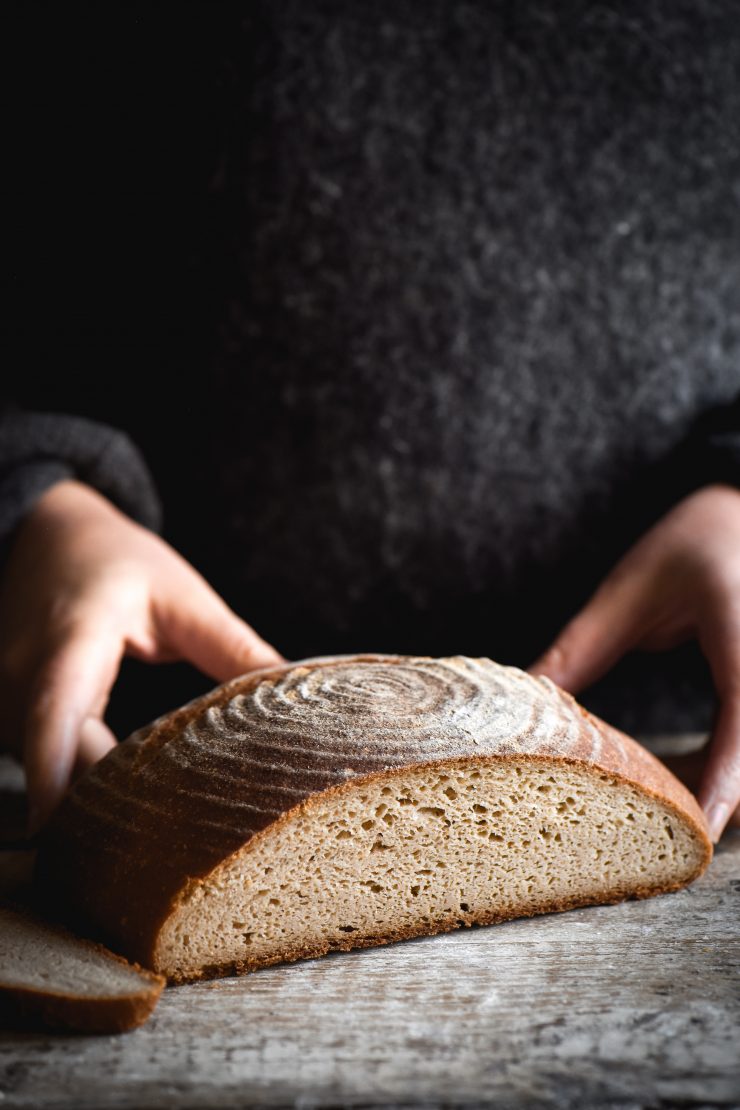
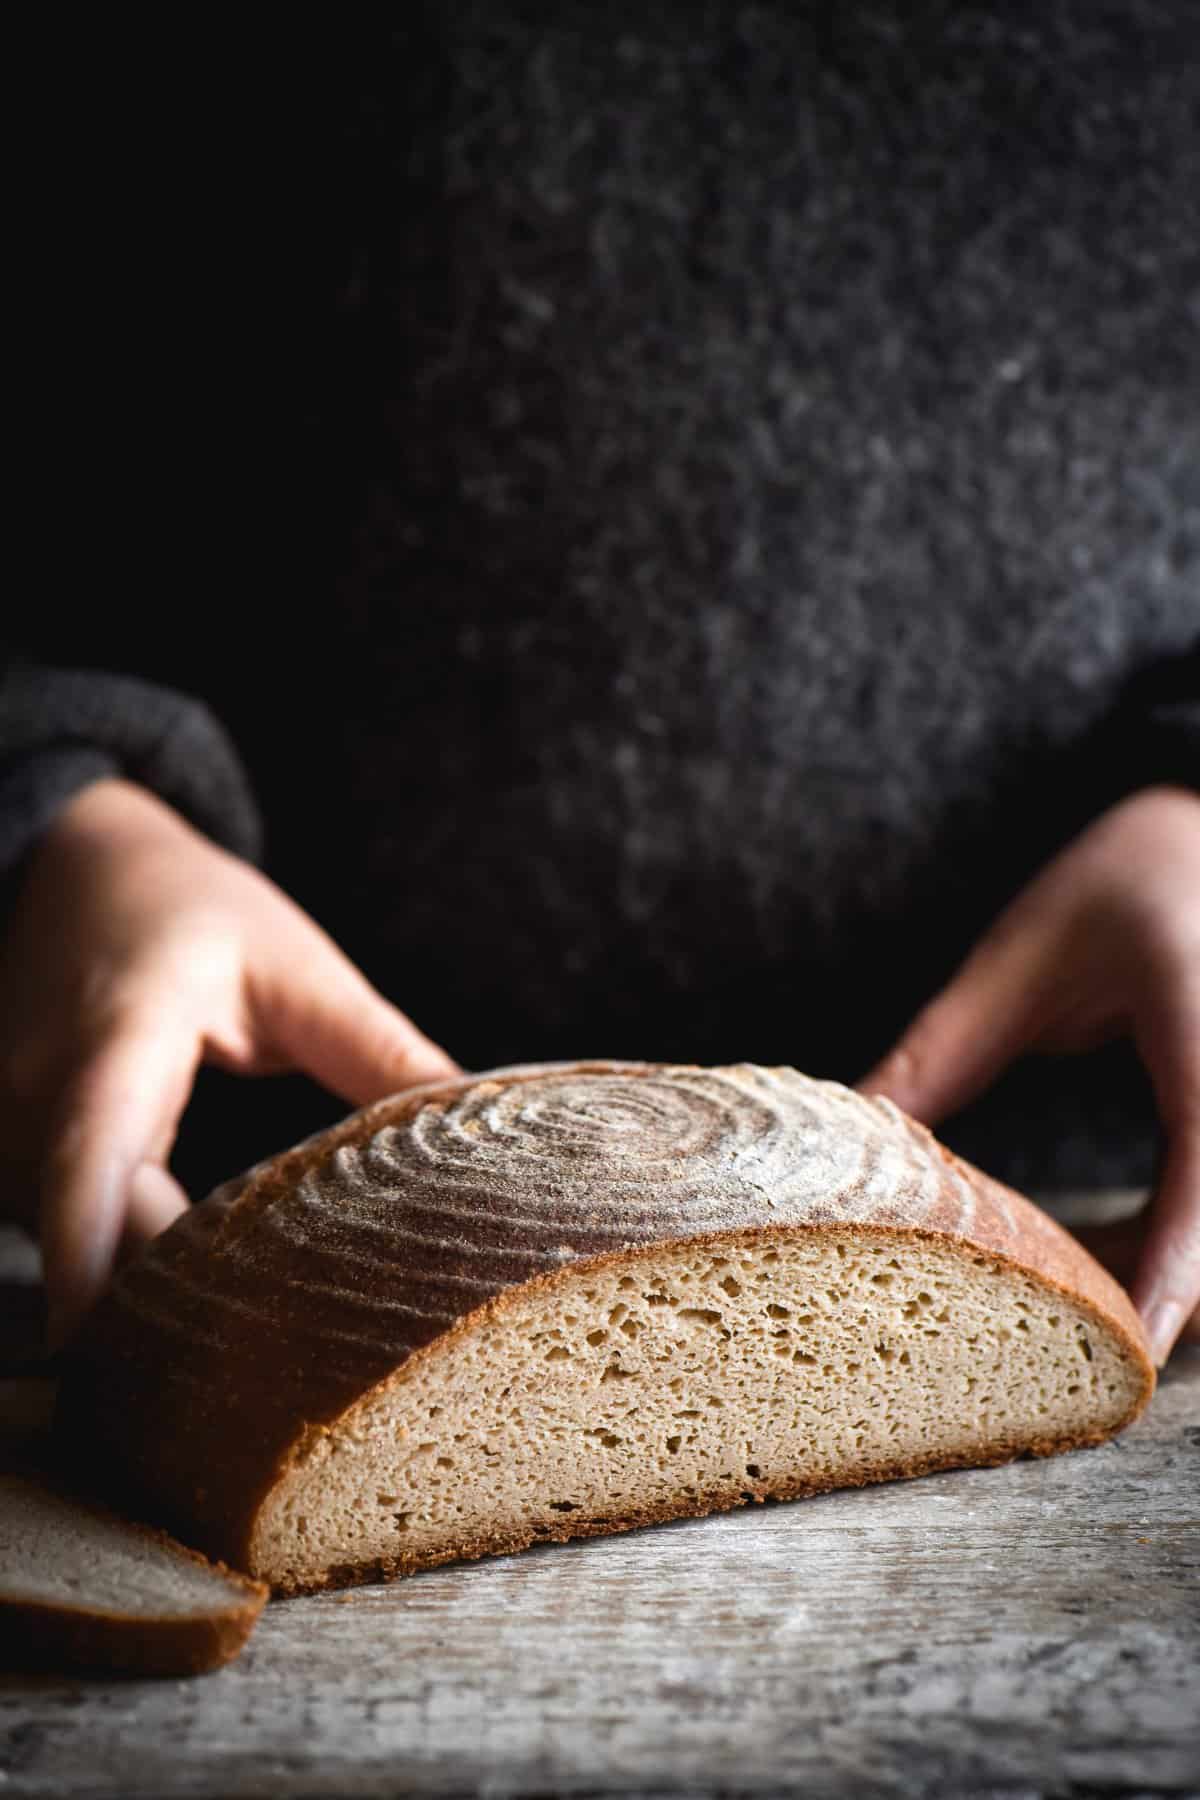
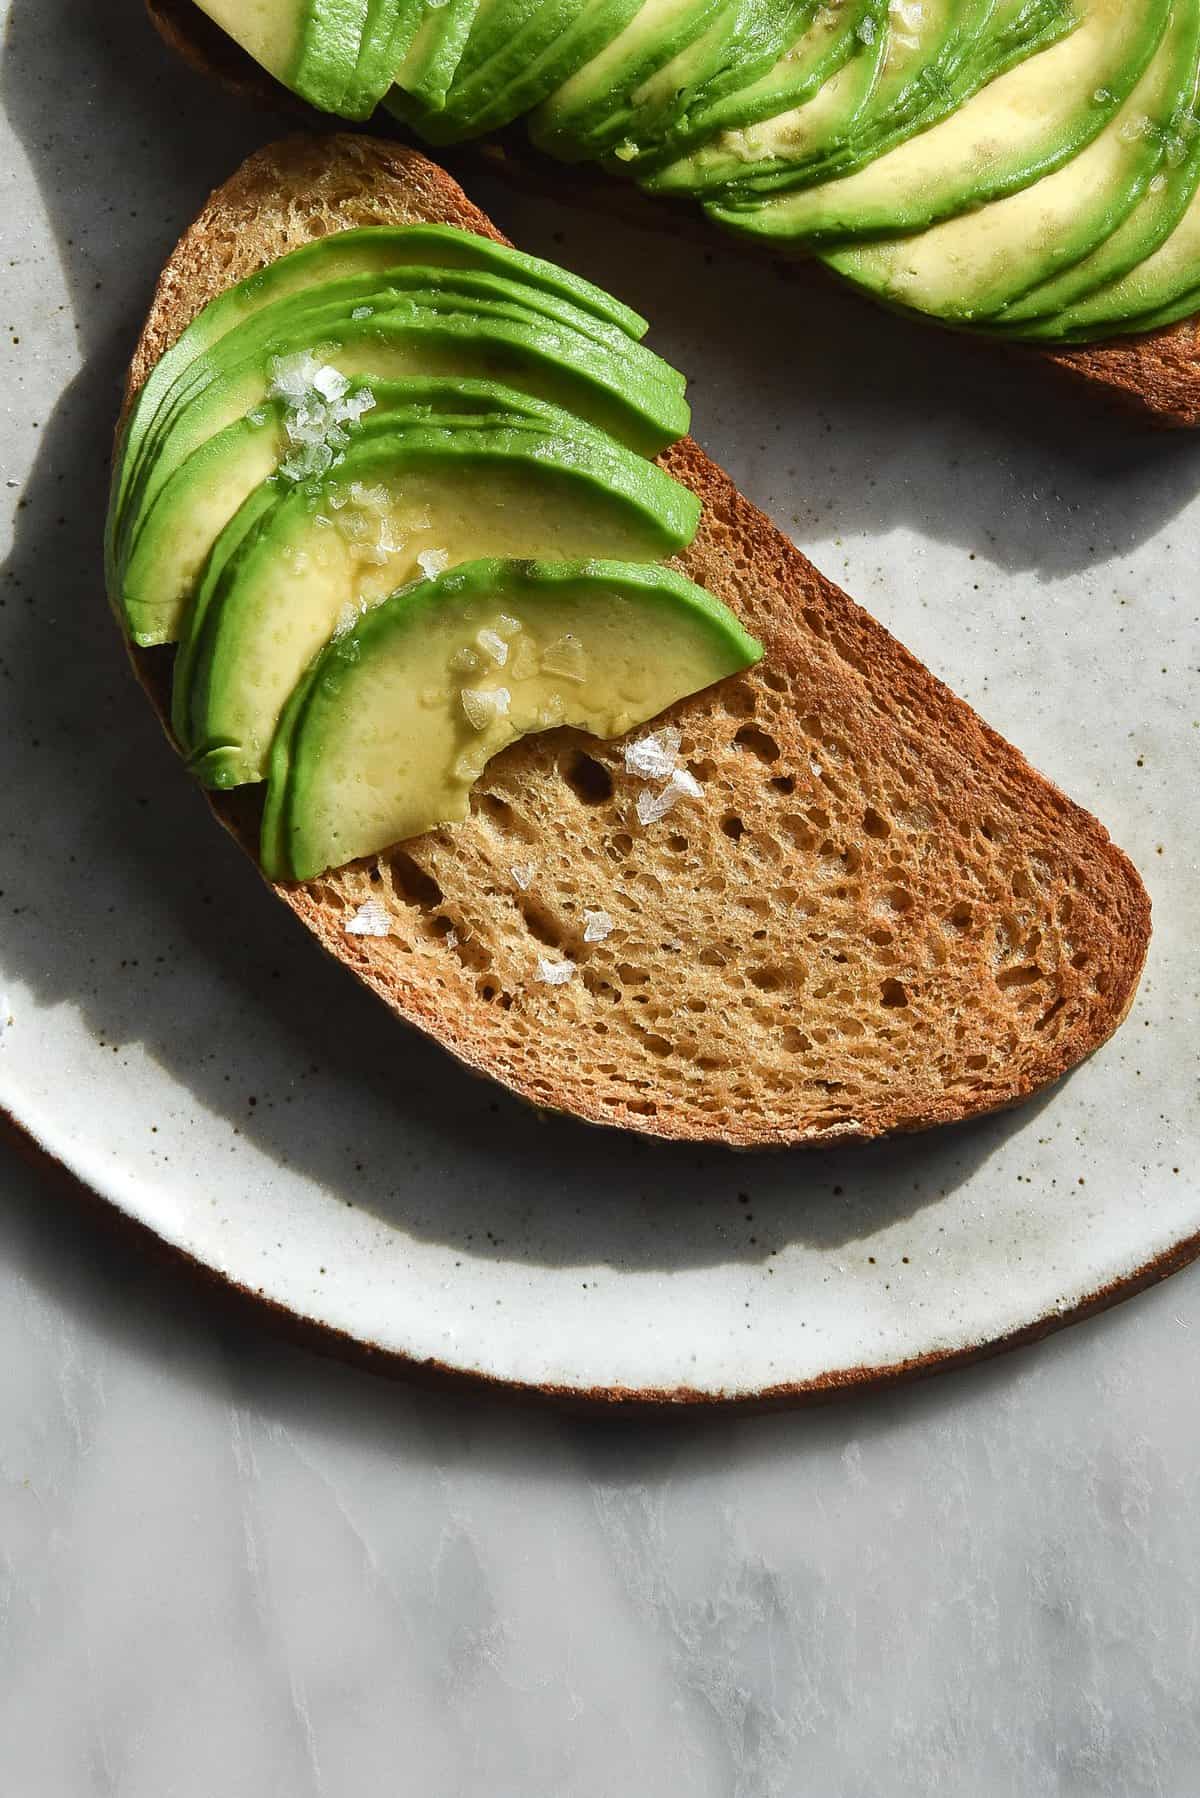
This loaf is a mostly wholegrain, nutty, everyday sort of loaf. More like a wholegrain bread than a white bread loaf, this is a moist and easy number that makes great bread fresh, and great toast thereafter.
This gluten free sourdough is vegan and xanthan gum free. Gluten free sourdough starter has some sort of magic binding capability that works like a charm for holding bread together. None of my gluten free sourdough recipes use xanthan gum.
New gluten free sourdough methodology
This gluten free sourdough bread recipe is a little different to the other recipes on my website. Firstly, it is made by combining all the ingredients into a batter and leaving them to firm up. My other recipes use a psyllium husk gel, but I’ve started skipping this step in favour of the batter format. It’s quicker, involves less bowls and I find it more evenly distributes the psyllium husk in the loaf.
Secondly, this loaf uses psyllium husk powder as opposed to psyllium husk flakes. I decided to give it a whirl to see if it resulted in a more open crumb and/or less of those little pock marks on the crust of the loaf. I also wanted to see if it make for a less gummy slice of loaf. While I can’t say yet whether it definitively achieved these outcomes, but I can say this is my favourite sourdough bread recipe yet.
Ingredient notes for your gluten free sourdough loaf
A note on psyllium husk powder
In this section I want to quickly discuss three ingredients in this bread that I have received a lot of questions about. Namely: psyllium husk powder, honey or maple syrup and oil.
- Think of psyllium husk as gluten. In this recipe and in general, it holds a lot of moisture (important for a soft loaf) and it creates structure. Without any structure or binding properties, your loaf would not be able to support itself as the sourdough produces gas and pushes upwards. You’d very likely have a flour soup as opposed to anything resembling bread. So yes, psyllium husk is necessary. No, I haven’t developed a recipe without it yet. Maybe one day!
- Psyllium husk can often (although less so these days, I find) be marketed as a bowel movement product. It is the main component of Metamucil. I suppose it’s precisely that absorbent ability that makes it so useful in bread making.
- Other ingredients in this family include chia seeds and flaxseeds, as well as xanthan gum as a sort of second cousin. I don’t use much flax or chia – in part because they seem to agree with my digestive system less, in part because they can be visually unappealing. I don’t use xanthan in this loaf because I found it creates an incredibly sticky dough without providing much benefit.
- AN IMPORTANT NOTE ON PSYLLIUM HUSK: I use psyllium powder in this loaf, not husk like I usually do. They have very different absorbencies and should be treated as different products. However, you can grind psyllium husk flakes into powder using a spice grinder. This is generally what I do.
Adding oil and sweetener
- Alright, onto honey or maple syrup! This addition acts as food for the yeast to grow. Personally I have found that my loaves with this inclusion are bigger, better and often have a more toasty crust. I also find they lead to a more moist gluten free sourdough when compared to an equivalent amount of granular sugar. I think they’re an important addition and I don’t recommend omitting them. Needless to say, use maple syrup for a vegan loaf.
- Same goes for some form of oil. In my testing, I have found that some fat in a loaf leads to a more moist crumb and a more flexible, sliceable crust. An easy addition that yields big results. It also seems to bring the dough together and make it less grainy in the mixing stage.
Notes on the flours used for this gluten free sourdough
This gluten free sourdough makes use of a variety of different gluten free flours. Keep in mind that if you can’t find them, the original gluten free sourdough recipe is an option. It uses basic flours and still creates a beautiful loaf.
If you can’t find a flour but you can find a grain, remember that you can grind it to a flour yourself with the help of a high speed food processor. It doesn’t have to be super expensive – I use my Nutribullet. This method has worked for me for quinoa, millet and buckwheat groats. Buckwheat is a little harder on the machine, so try to buy the flour if at all possible.
Sorry, I don’t have substitution suggestions at the moment. I will work on some, but there is only so much bread a girl can make!
I don’t use oat flour in any of my recipes anymore and I haven’t for a few years now. Not only it is no longer classified as gluten free in Australia (and the protein in oats is extremely similar to gluten) but it makes me bloat. For those who are fine with oat flour; apparently it is a great flour for sourdough, given that it works in quite a similar way to glutenous flour.
This is a rice flour free recipe (aside from my white rice flour starter!) This is because my Dad (who I give loaves to) has found that rice flour can makes him feel unwell. Apparently it’s not at all uncommon. So, a rice flour free loaf! I have to say that I miss the nuttiness that rice flour gives a loaf, particularly the crust. If you do too, see the original recipe, or my white bread sourdough recipe.
A special note on quinoa flour
Quinoa flour can be a divisive subject. It has a grassy flavour which some people don’t enjoy. The key to getting the most out of quinoa flour, however, is simple. Toast it! Toasted quinoa flour takes on a deeply nutty, graham cracker like flavour. I use it in my gluten free graham cracker recipe (vegan and regular) for this precise purpose.
You can toast quinoa flour in the oven or on the stove in a dry saucepan. Toasting it in the oven generally results in a more even, full toast, while the stove can be hit and miss. That said, the stove takes a lot less time, so there are pros and cons to both. If you choose to toast your quinoa flour on the stove, keep a watchful eye out as it burns quickly.
It’s also worth mentioning that quinoa flour can be ground from whole quinoa or quinoa flakes at home. I use my Nutribullet for this. I have written a full guide on making and toasting quinoa flour here.
Hydration notes
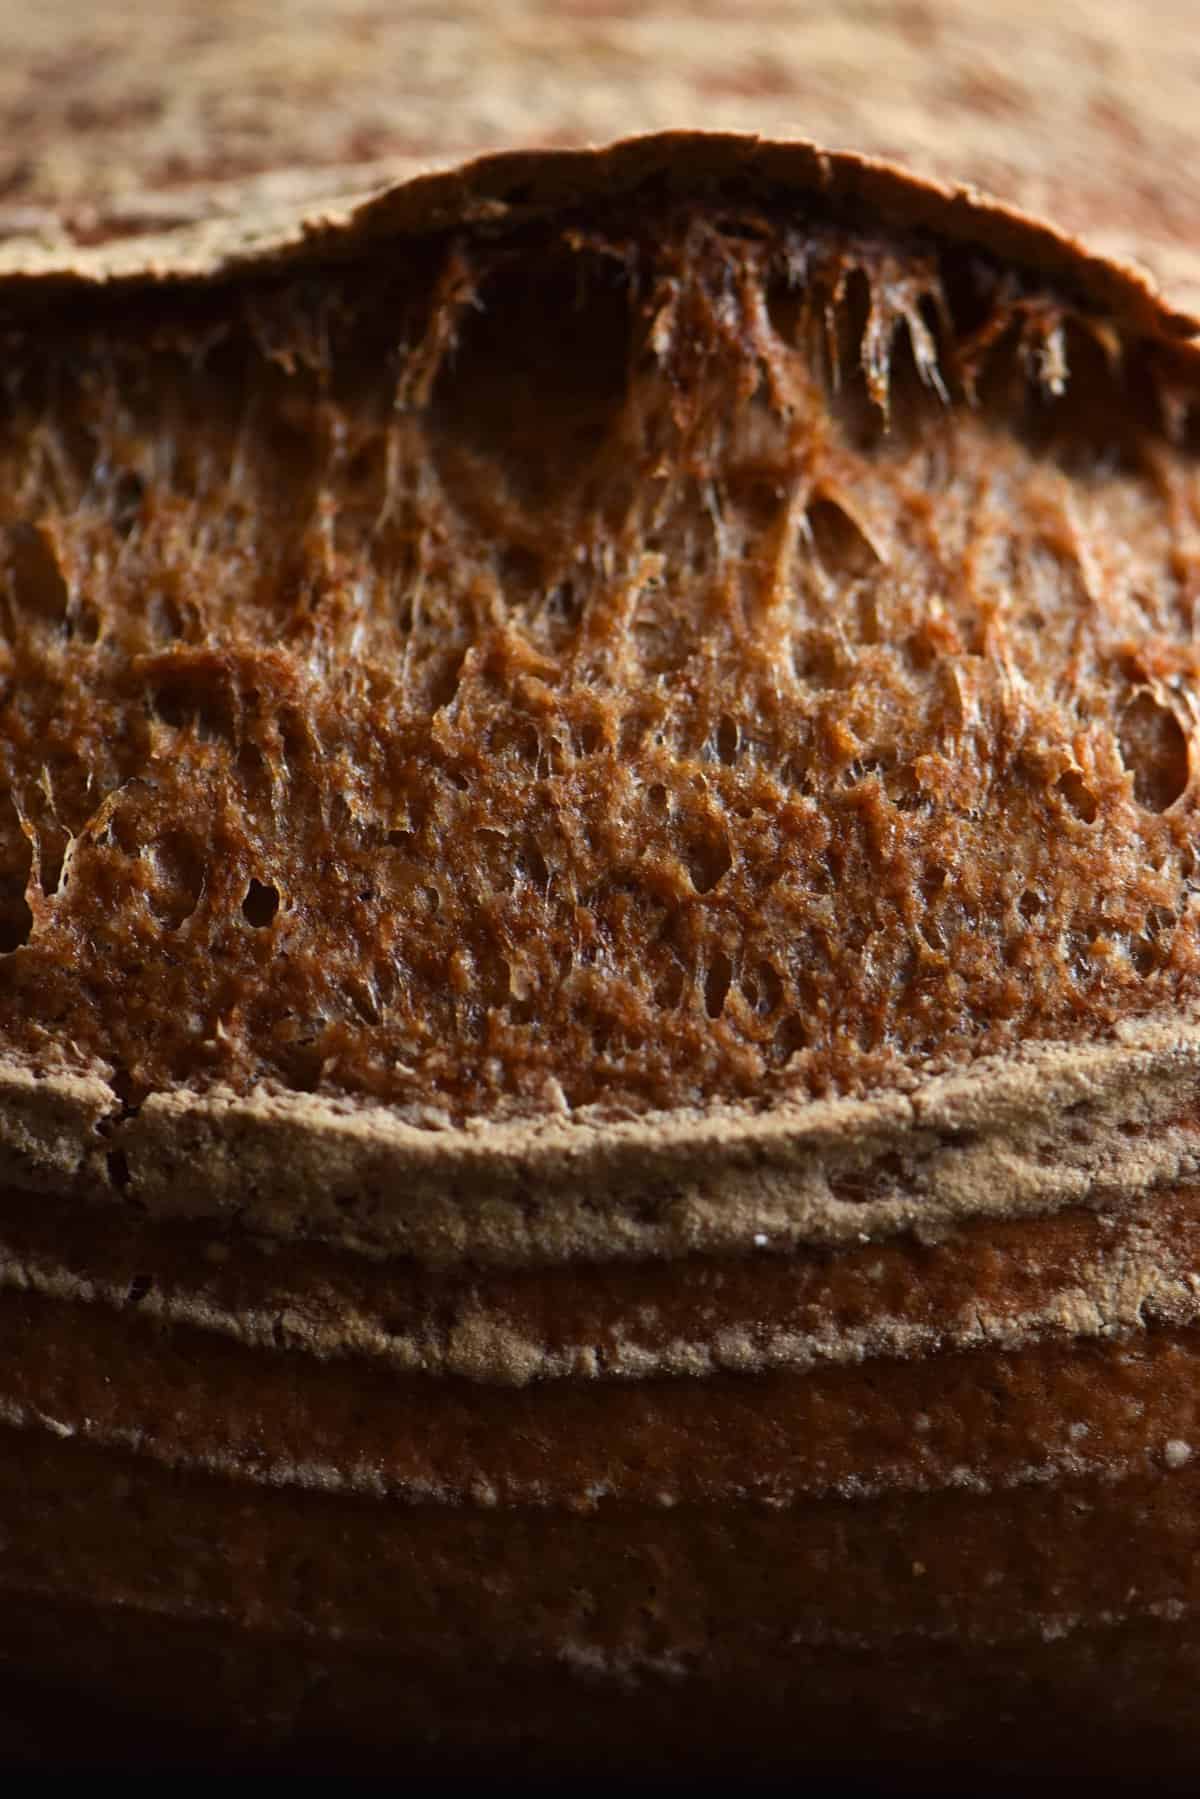
Within reason, the higher the water content of your loaf (also known as the hydration percentage) the more likely you’ll have an airy crumb. An airy crumb means lots of air bubbles and holes in the loaf. While a gluten free sourdough will probably never achieve the same crumb as a regular one, water certainly helps.
I have given the option to include anywhere from 500-550g in the loaf itself. If you’re newer to gluten free sourdough making, I recommend adding 500g to start. The higher hydration a loaf is, the harder the dough is to handle. This can be an anxiety inducing experience for a beginner bread maker, so start with the lesser amount. Keep in mind that your light gluten-free sourdough bread also includes water in the preferment.
I once saw someone complain on a sourdough recipe, so I would like to point this out. A hydration percentage that works well for me might be too high for you. How hydrated your loaf is depends on the flours you use in the country you live, on the weather the day you’re baking, on the humidity of your kitchen. I could go on, but you get the picture. There are SO MANY variables to hydration and to sourdough baking in general. Part of the fun is learning and adapting recipes for your specific conditions.
Depending on where you live, you might also need to use filtered water in your gluten free sourdough. The yeasts in your sourdough starter don’t play well with chlorine, and it may impact the final result. Here in Melbourne I haven’t noticed any adverse effects, but the water quality near you might be different.

Gluten free sourdough enhancer notes
Yes, there exists such a thing as dough enhancers! They are ingredients that push the yeast in your starter into overdrive. I read a description of dough enhancers somewhere as being ‘coffee for your sourdough starter’, which I quite like.
They are a rather hodge-podge group of ingredients, and you can play around with what suits you. I use 1/4 teaspoon of dried ginger powder and 1/4 teaspoon of vitamin C powder in all my loaves now. I really do think it makes a big difference.
In Australia, ginger powder is readily available at supermarkets and bulk food stores. Vitamin C powder can be acquired in sachets at the Pharmacy – I just bought it because I was in a nerdy bread mood. According to my sources (and tests) 1/4 teaspoon of apple cider vinegar is a great replacement for Vitamin C powder. Just don’t use them both at once (Vitamin C and Apple cider vinegar) because they interact.
There are also commercially made dough enhancers available the shops, but they often contain gluten or FODMAP unfriendly ingredients.
Temperature and oven notes
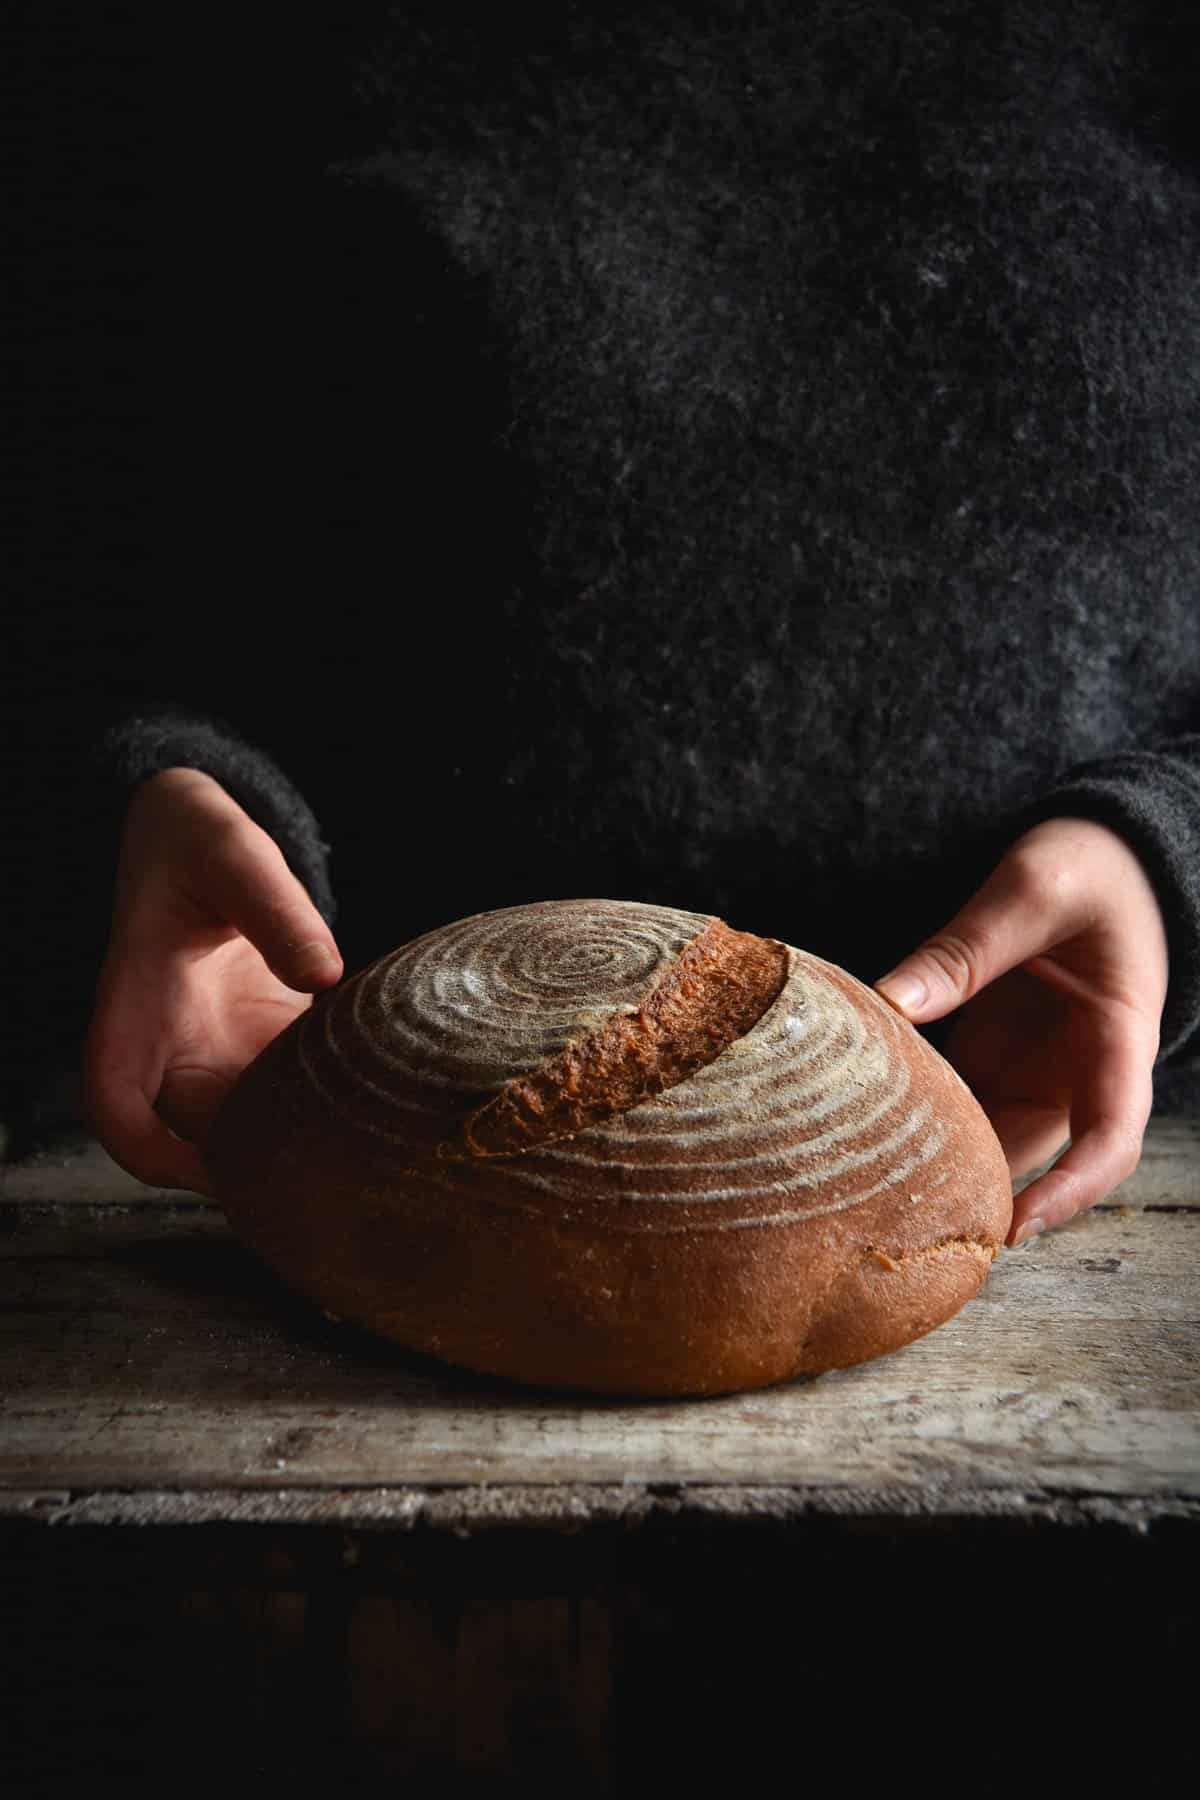
In order to create oven spring (liftoff in the oven) a home oven needs to be at a very high temperature. This, in conjunction with a dutch oven, baking cloche or makeshift lid (I used to use foil) emulates the conditions in a bakers oven as best as possible. One result of this, aside from oven spring, is that the crust of a loaf can be quite dark. I love the caramel flavour that results from a dark crust, but some people have asked me how to bake a loaf with a lighter crust.
Please note that I haven’t tested this method with any other recipes of my own – just this loaf. I find this recipe produces quite a lofty loaf even when you think it looks small, so it might just be a particularly opportune ratio of flours to starches. Either way, proceed as follows for a lighter crust:
- Preheat the oven to it’s highest setting with the dutch oven inside it. Do this for 30 minutes as opposed to 1 hour.
- When the loaf and dutch oven are ready, place the dough inside the dutch oven and into the oven. Immediately, turn the oven down to around 200-220c or 392-428F. You can cook the loaf on this temperature for the full hour.
- Once the hour is up, take the lid off the dutch oven. Turn the oven down again to 180c or 356F. Cook the loaf on this temperature for the remaining 20-30 minutes. You can also leave the lid on but ajar (to allow steam to escape but protect the crust from direct heat).
Gluten free sourdough tips and tricks
There are basically two crucial elements that will determine the success or failure of you gluten free sourdough bread: sourdough starter and temperature.
I think it’s easy to forget, but without a healthy sourdough starter, you have nothing. There is absolutely no point plodding along with a sup par starter and expecting a great loaf of bread – it’s not going to happen. Work on your starter before you plan to do anything else.
It is worth noting that a lot of people say a starter takes around a month to produce anything near a decent loaf. Patience is key.
Part of the beauty of sourdough is that it plays by nobody’s rules. It doesn’t have an exact schedule as to when it will be ready, you have to use your own intuition. I can’t help you beyond the instructions in this post – there are so many variables that go in a successful loaf. Have a read of them here.
Equally important is temperature! I don’t think people realise how important temperature is in sourdough making. A loaf that might proof in 2 hours over summer might take 5 or 6+ in winter. The cultures in your starter thrive in warm temperatures, meaning your loaf will grow and ‘proof’ more quickly than in winter.
You’ll get better at learning when a loaf is perfectly proofed as time goes on, but you need to have the confidence to judge that for yourself without blindly following a recipe. Google proofing for tips – I can’t claim to be a proofing expert yet.
Notes on shaping and proofing
- Here is the link for the Youtube I follow to shape my loaves. Note that you don’t need to use the scraper and rounding motions for a gluten free loaf – just the stitching, folding and seams processes.
- If you’re using a very new banneton, flour it extremely well. First time bannetons are very prone to sticking.
- Same goes if you’re using a bowl and a tea towel. Flour the tea towel very well. it’s also important to make sure that you don’t use one that is dyed or textured, as that will transfer onto the loaf is it proofs. Trust me.
- I can’t remember if I’ve talked about proofing elsewhere in this post because I tend to ramble when I talk about sourdough. However, keep in mind that proofing is so heavily dependent on temperature that, unless you’re my next door neighbour, you should take my suggested times as SUGGESTIONS. What works in Australian winter will not work in Californian summer, etc. I have to say, though, that I’ve found this loaf pretty hard to overproof.
More gluten free sourdough recipes
- First up, you’ll need a gluten free sourdough starter
- A gluten free ‘white bread’ sourdough for those white bread occasions
- As well as a regular sourdough for everyday eating
- A seeded sourdough made into cheesy tartines
- Gluten free sourdough pizza bases
- Need to use up discard? Try the sourdough crackers
- On the sweet side, this easy and delicious sourdough banana bread
- Sourdough brownie cookies
- More chocolate: sourdough brownies
- Some deliciously decadent sourdough hot cross buns
- Breakfast time? Try the sourdough discard pancakes
Gluten free, vegan sourdough bread
Ingredients
For the preferment:
- 150 g thick bubbly active gluten free sourdough starter, fed 3-4 hours before and on a rise
- 150 g water
- 100 g sorghum flour
For the sourdough bread:
- 100 g buckwheat flour
- 100 g tapioca flour
- 250 g toasted quinoa flour
- 13 g fine salt
- 1/4 teaspoon ginger powder see notes on dough enhancers
- 1/4 teaspoon vitamin C powder see notes on dough enhancers
- 30 g psyllium husk powder
- 500-550 g water see notes
- 2 tablespoons olive oil
- 1 tablespoon maple syrup or honey
Instructions
The night before:
- Use a whisk to combine all the ingredients for the preferment. Cover with airtight wrap and leave on the bench overnight.
The next morning:
- The preferment should have a strong, fermenty smell (perhaps a little acidic) and look like there are old popped bubbles on the surface. It might be a little watery on top and look like it has risen and then subsided. This is all OK. You will be feeding it again with the addition of the flour in the bread.
- In a large, non-reactive mixing bowl (glass or plastic) combine all the ingredients and whisk really well until a smooth batter forms. It will start to thicken up considerably as you whisk. Cover and allow the batter to sit for 20 minutes. By this time, it should have firmed up (thanks psyllium) sufficiently to form a ball of dough.
- Flour a bench with rice flour (contradictory I know, but rice flour is used even in regular sourdough baking!) or sorghum flour. Flour the ball of the dough so that it doesn't stick to your hands or the bench. Try to use as little as possible whilst not skimping.
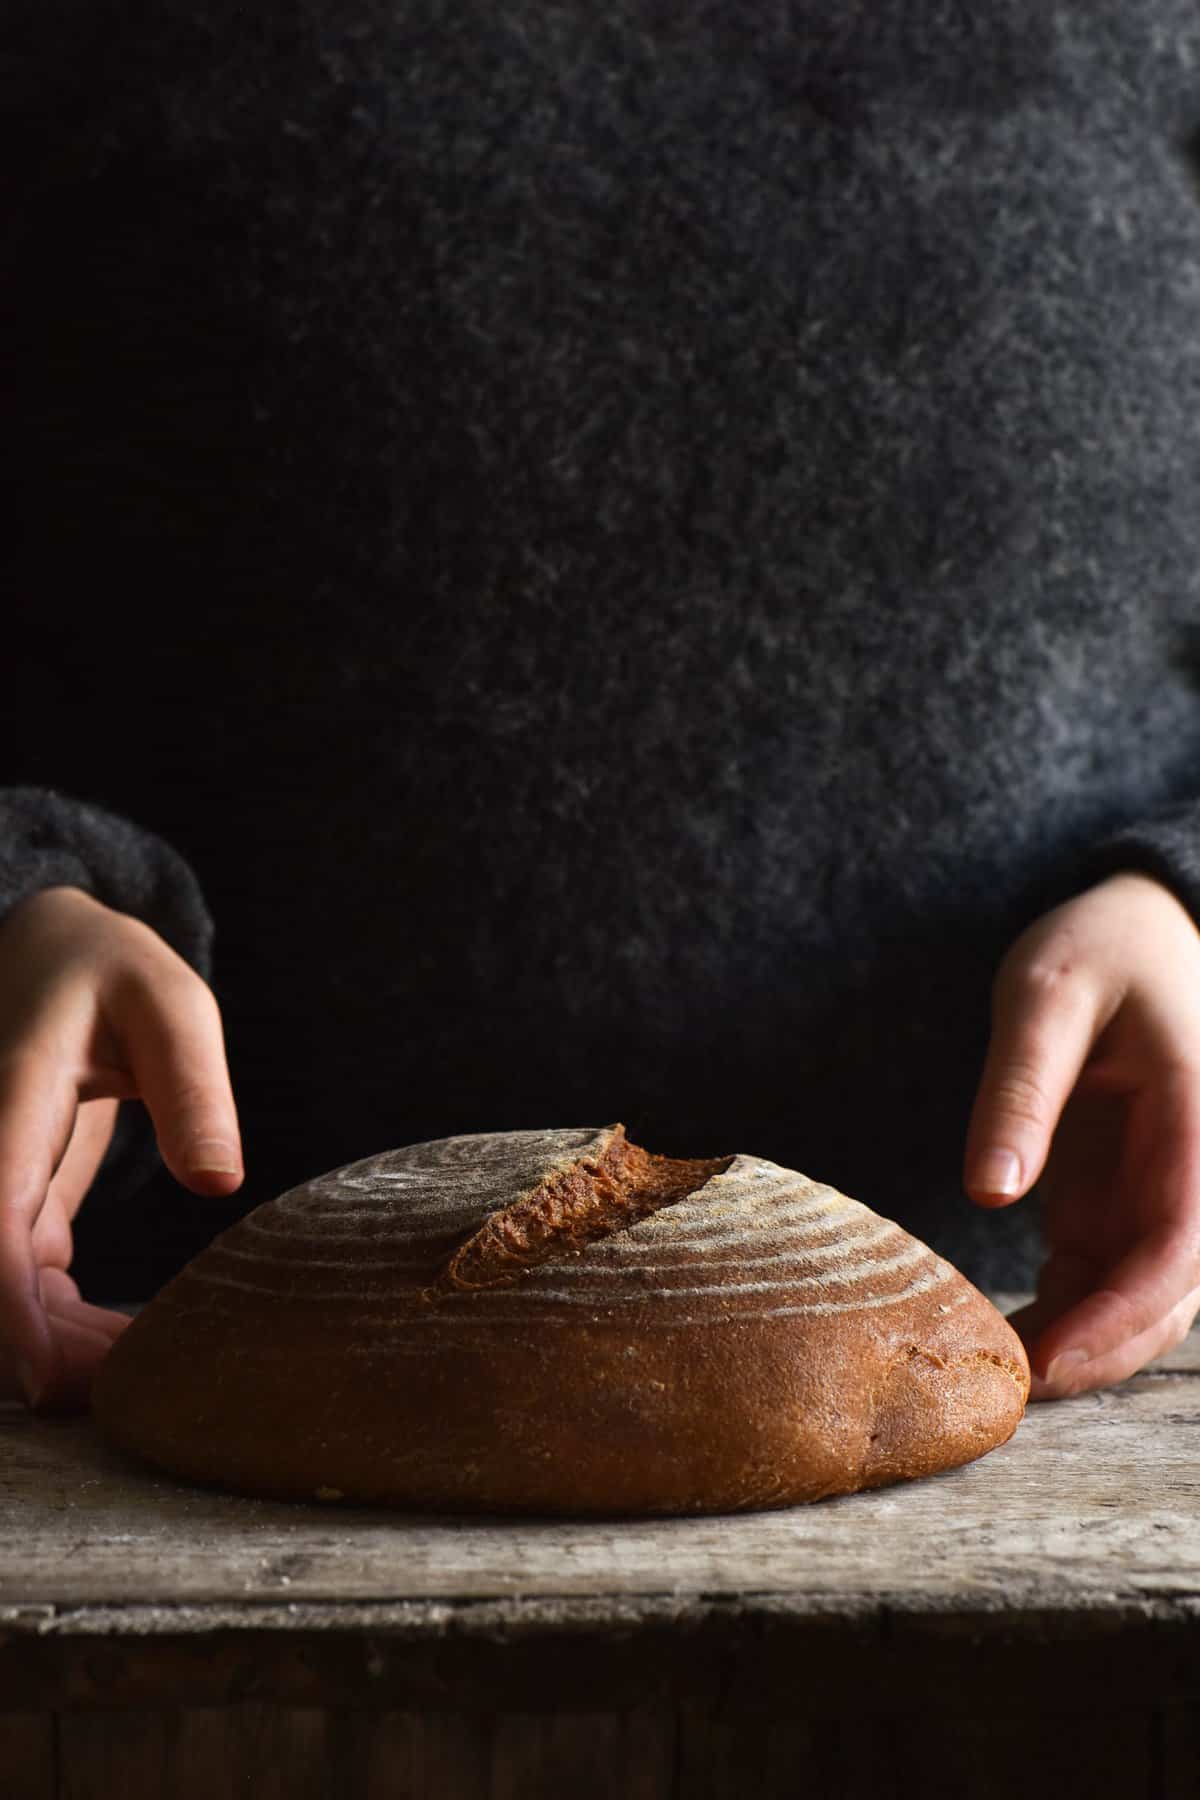
- Mould your dough into a round banneton shape or a loaf shape. I use the shaping techniques linked in the tips section above.
- To get the loaf into the banneton, I lift it up and place a hand underneath the loaf, touching the seam. Using my other hand, I lower the banneton onto the loaf and then flip the banneton over.
- Place the banneton in a jumbo ziploc bag and seal it shut. Proof the loaf for 2+ hours on the bench, nothing that the temperature of your kitchen and the season you’re in is critically important in proofing times.
- After around 2 hours or when the loaf has tangibly risen, transfer it to the fridge for 1-3 hours to finish proofing. I find this an easy, almost foolproof way to ensure the loaf proofs nicely without over proofing. Note that these timings are for a warm kitchen in an Australian summer – your timings might vary dramatically.
- 45 minutes before the loaf is ready, preheat your oven with your dutch oven inside to 350C or 660F. Note that some dutch ovens are not designed for high temperatures so only go as high as you can without damaging your dutch oven.
- When the loaf is visibly ready to go, dampen your kitchen bench slightly and lay down some durable baking paper. I like the reusable stuff as it has good strength. I find the regular Multix quite weak when damp, meaning I deflate my loaf trying to get it into the dutch oven.
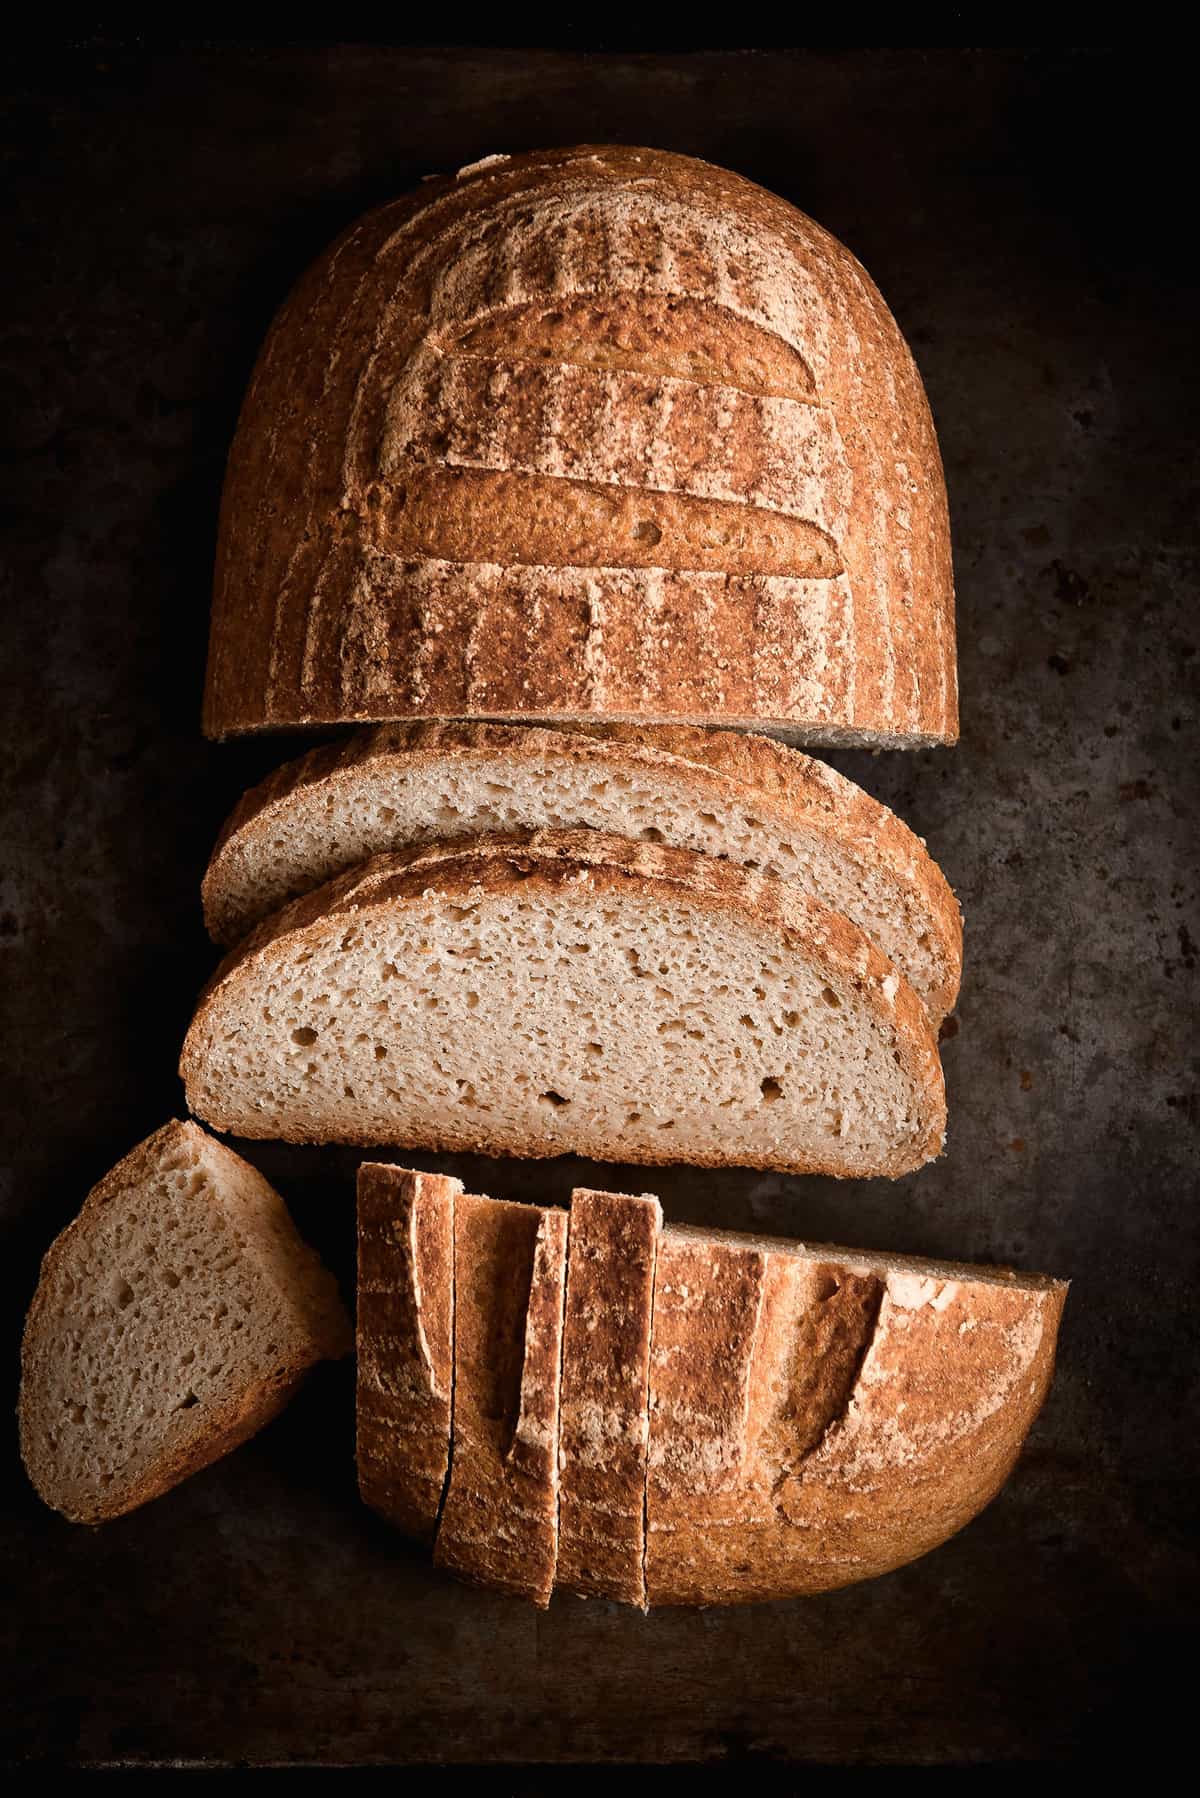
- Invert your loaf very gently onto the baking paper, and score using your lame or a very sharp blade.
- Working quickly, remove the dutch oven from the oven and take the lid off. Very gently and carefully (it is scorching hot) lower the loaf on the baking paper into the dutch oven, and very gently place the lid back on. Any jolting can knock the air out of the loaf.
- Bake the loaf at the highest possible setting for 20 minutes. Oven spring occurs in this time, so you want the oven to be as hot as possible. After that, turn the oven down to to 200-220C or 390-420F and cook the loaf for an additional 40 minutes.
- Take the lid off and cook for an additional 25-30 minutes (with an option to turn the oven down to 180C/350F for a blonde crust) or until the loaf is golden and feels hollow when you knock on it. If the loaf is already quite dark, keep the lid half on but slightly ajar so that air can circulate into the dutch oven.
- Once cooked to your liking, remove from the oven and baking paper and set on a cooling rack. I find with this loaf it only needs to cool for a couple of hours before you slice into it, but it might be a little wet to the touch. Ideally, slice it the next day after baking.
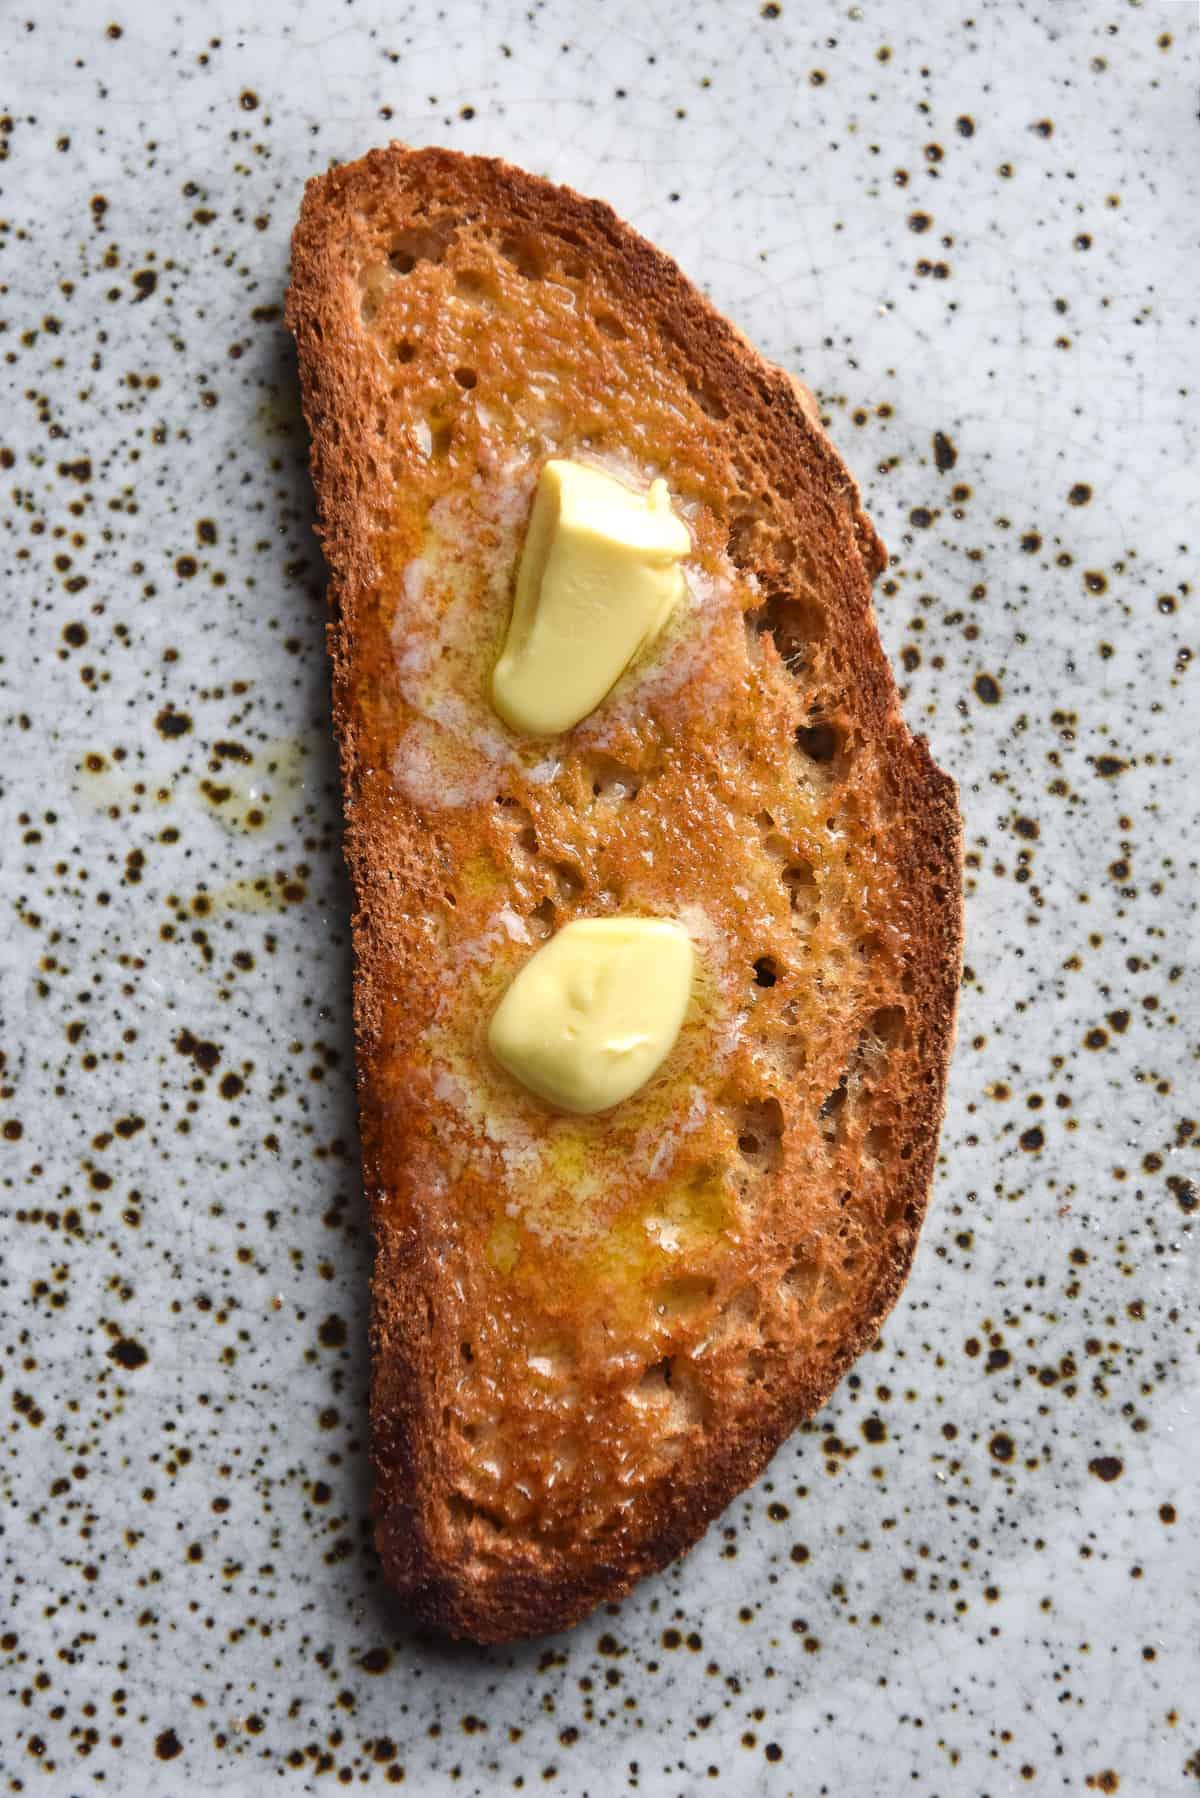
- I find it lasts well stored in a clean tea towel. While best fresh within a few days, it makes great toast and also freezes well in slices.
I love this recipe and I am brand new to sourdough. I find the process really clear and easy to follow. I used your sourdough starter recipe, but ended up using white rice to get it going. This recipe makes for a delicious loaf, I learn something every time I make it. I love all of your notes. I toast the quinoa and grind that and the buckwheat. I am GF and FODMAP- I love this bread and it loves me .
Have you ever soaked the buckwheat? or does it need its goop in the mix?
Thank you for my weekend joy x
Hi there, how long do you toast the quinoa in the oven for and what’s the temperature that you use?
Hello, there’s a link to how I make quinoa flour in the ‘special note on the quinoa flour’ section. In summary, I grind whole quinoa into flour and then bake it at 160C/320F for around 30 minutes to an hour, stirring it regularly. The full process is here: https://georgeats.com/how-to/toasted-quinoa-flour-a-guide-to-making-your-own/
Hi Georgia! Well your recipes are amazing, but I can’t seem to have any success. I first tried the Buckwheat bread, and it came out heavy and dense. It seemed to have too much water.
Then I tried the ‘no rice’ sourdough bread. It rose BEAUTIFULLY, but it never seemed to cook through. It ended up as another Curling Stone, dense and heavy. I’m desperate for a GF bread.
I don’t have a Dutch Oven, so used my Corning Ware White casserole (good to 500 degrees), topped with a quality stainless steel pot (also good to 500 degrees), put a pan of water underneath to mimic steam, but no luck. I almost cried! HELP!
Hi Debra!
Sorry to hear you aren’t having any luck!
What made you think the bread had too much liquid? In my experience, dense and flat breads don’t have enough liquid added. Yeast (both instant and sourdough) needs water and moisture to thrive and grow, so a short and dense crumb is generally because you haven’t added enough water for the dough. Yeast is also sluggish in cold climates, but adding extra liquid and proofing the dough in a warm spot will help.
Every bag of gluten free flour will have a different absorbency, so it does take a bit of experience to know how much liquid to add. However with a series of dense loaves my hunch is that you aren’t adding enough liquid.
A lady in the comments ended up needing to add a full litre of water to the buckwheat bread recipe to get a nice tall loaf after a series of dense and short loaves, for example.
As for the sourdough, the unfortunate reality is that a casserole and a pot won’t conduct heat the same way a dutch oven will (and they’re not air tight to trap the heat in).
If it rose beautifully but didn’t cook through, that suggests to me that the oven temperature wasn’t hot enough to finish the job, which I suspect comes back to the dishes you cooked them in.
I would recommend cooking loaves as opposed to boules without a dutch oven because they don’t rely on the heat so much.
Hopefully with a bit of tweaking you can get there!
Hi Georgia: How sweet of you to respond so quickly!
The reason I think there was too much water, is b/c when the loaf (sourdough) had proofed & I placed on counter to flour & score,I could barely keep it confined. It kept spreading and I had difficulty -gently- placing it into the preheated Corning. Could this mean it wa over-proofed?
So if I add more water, how do manage the loaf (buckwheat & sourdough) to place in a bake receptacle?
Do you have a video that shows how the dough(s) should look at various stages?
I had thought to place Ms.Sour into a standard bread pan, but wasn’t sure if bake time would be the same.
Apologies for all the above.
I’m a very good cook, but I’ve never been able to master a decent GF loaf of bread, after 10 years of trying. The boxed or bought offerings are pitiful!
Thank you again.
OK so maybe there was too much liquid in the sourdough. What was the texture like of the actual loaf once baked?
I was thrown by the description that it was dense. Was it gummy and wet inside?
Perhaps it might be down to the oven not being hot enough to cook the bread through. You can always cook it longer than specified, particularly if you are not using a dutch oven.
The buckwheat loaf is baked in a steel loaf pan. The great thing here is that you can add more water (more water generally equals a taller, more airy crumb) without worrying about the dough needing to be shaped or moved. The steel tin holds it all in and allows it proof upwards instead of outwards.
https://www.amazon.com/USA-Pan-1175PM-Bakeware-Pullman/dp/B00DUF1TUW – this is the loaf pan I use for all my loaf recipes and it is the perfect size for the loaf.
Because it is small, it’s the right size for a gluten free loaf (but still holds the dough in). Larger pans can create squat loaves because the bread spreads out and the loaf becomes naturally shorter.
I hope you can conquer gf bread! It’s a real treat when you do. I will try and get a sourdough starter going again to work on a sourdough loaf.
Good luck Debra 🙂
Hi Georgia (again): The loaf was ‘very heavy’ and ‘dense’ and looked like it wasn’t cooked. I did bake it in standard steel loaf pan.
That being said, I will pick up a Pullman pan (something that has been in the back of my mind for awhile, but it’s an expensive addition (Canada), if I’m not close to having some decent results.
Thank you for your kindness in trying to help me out. I will soldier on and keep trying your recipes, because they’re exactly what I’ve been looking for.
Thx again, all the best.
D
“SUCCESS!!”
The buckwheat loaf came out perfectly. If you remember, Ikm had trouble with a dense, heavy loaf, and you suggested more water. So, rather than going by volume of water and mixing by hand, I took it to my stand mixer. Being familiar with how a GF loaf with proper hydration ‘should look’, I added water until I saw the right consistency of the dough; and you were absolutely correct, I needed more water. It worked!! I even placed it in a standard load pan and it turned out beautifully!
I made a loaf 2 days after all your supportive responses, thank you very much, and haven’t posted back because I’ve been making a loaf every week.
This bread is delicious! I use to make a sandwich, plain or toasted, and just have a slice toasted on its own with some honey.
I just purchased my first Cast Iron Dutch Oven to make this Sourdough bread. So excited! It’s a 5 QT / 4.7L size. Will the proofed dough and finished bread be too flat with this size? What size of Dutch did you use?
Thanks again.
Thank you!