Gluten free sourdough brownies are probably my favourite ever low waste recipe. A gluten free sourdough starter needs to be maintained by discarding extra starter. This extra starter provides a complex flavour base for many recipes, sweet and savoury:
- Gluten free sourdough brownie cookies
- Sourdough discard crackers
- Pizza bases
- My original sourdough bread recipe
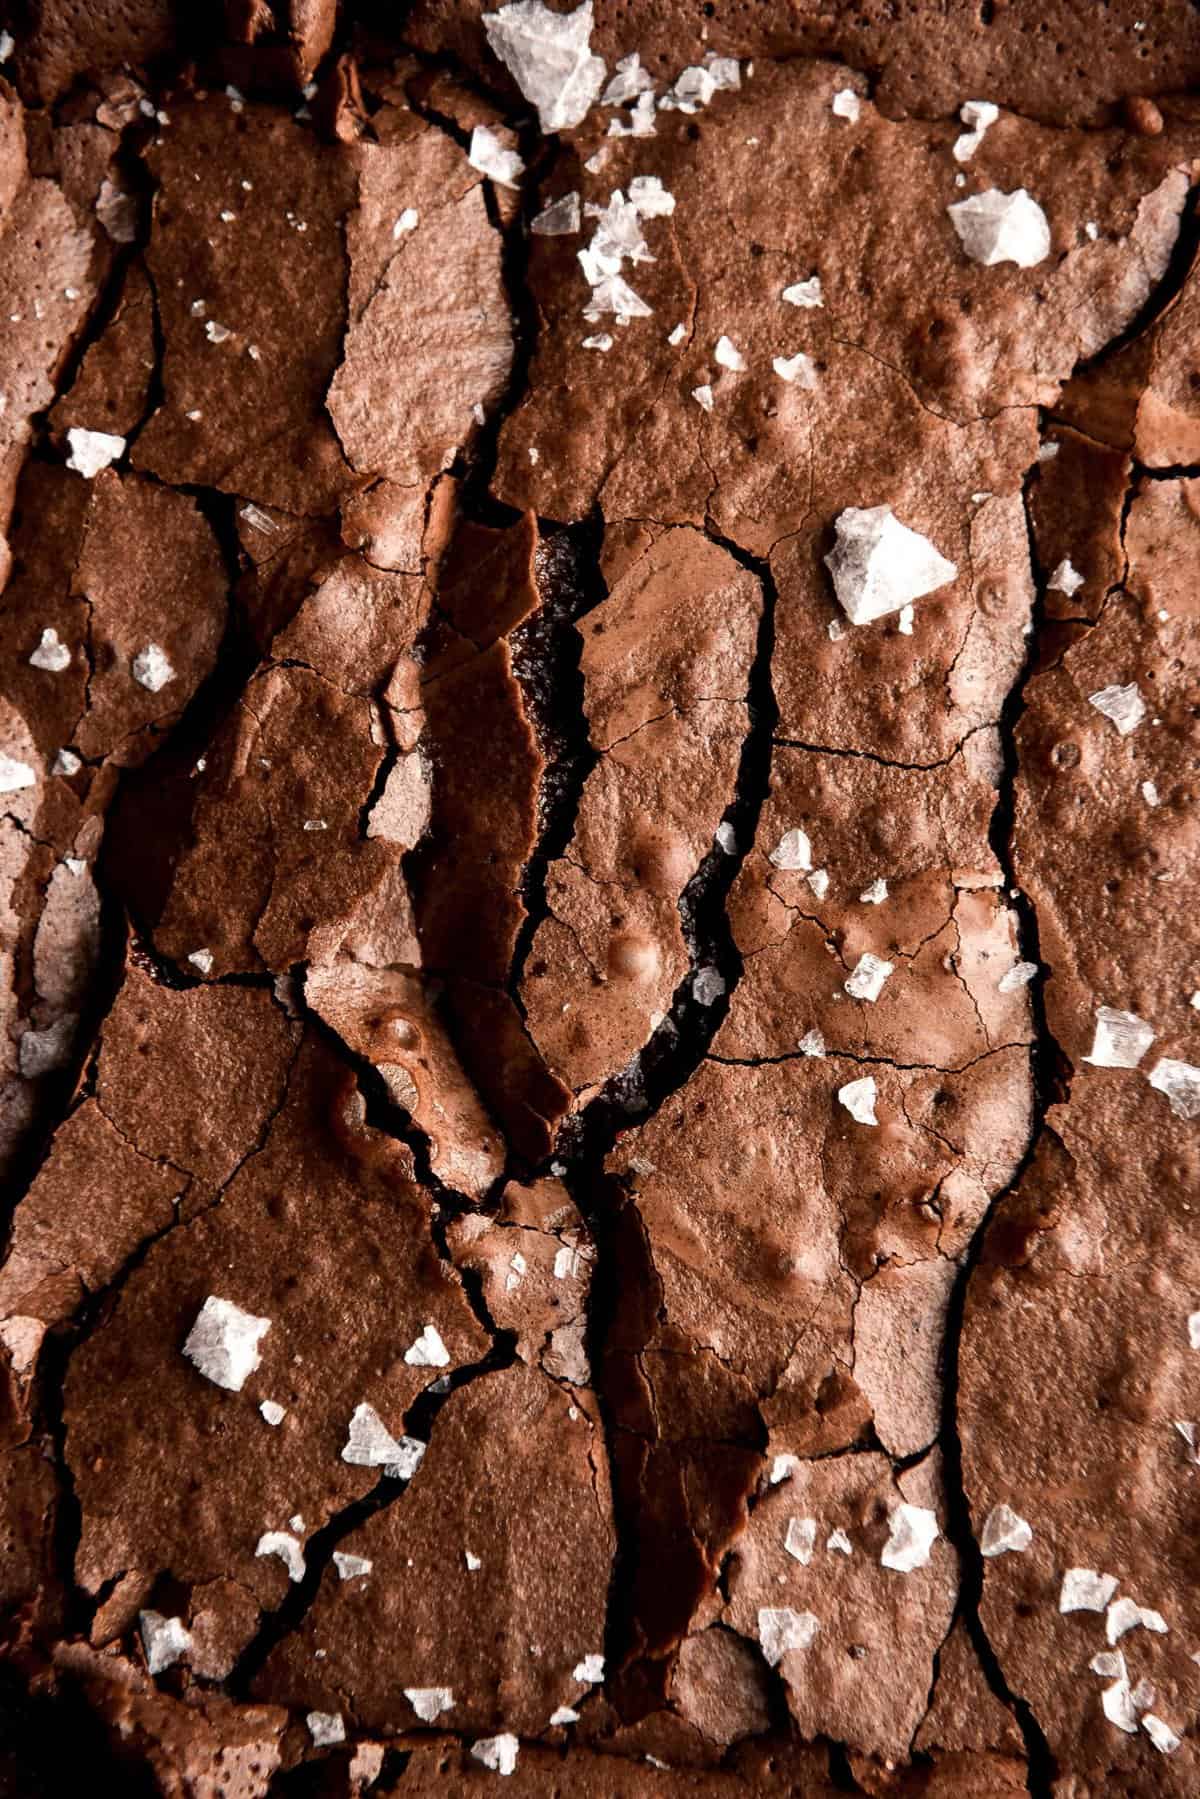
Gluten free sourdough brownies
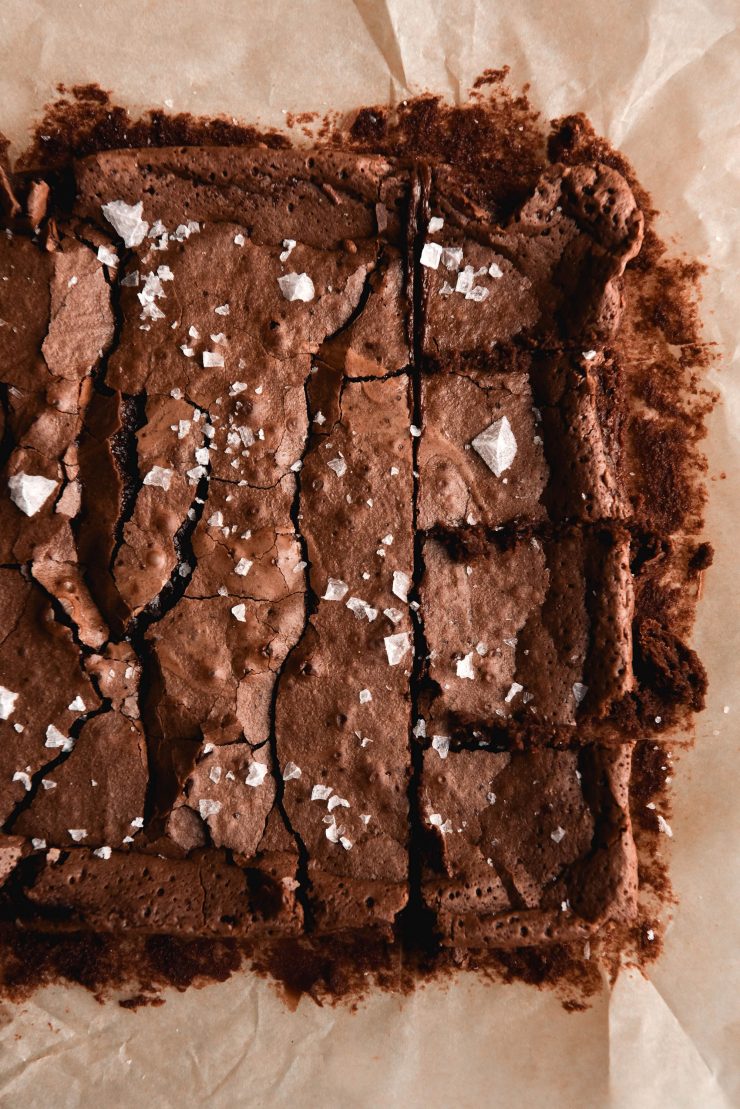
These brownies are gluten free, xanthan gum free and nut free. They are made from an easy mix of gluten free sourdough discard, brown butter and dark chocolate. The brownies are fudgy, rich and incredibly complex in flavour. They are for the serious brownie connoisseur.
First and foremost, I’d love to point out that this is not my own idea. Personally I’ve felt that the food blogging community can be quite quick to jump on other people’s ideas, just barely altering them before posting them as their own. So, please let it be known that I was inspired to create gluten free sourdough brownies by Izy Hossack, the baking Queen/Queen in general. Not only does Izy have a recipe for regular sourdough brownies, but vegan ones too. Please join me in singing her praises.
So yes, these gluten free sourdough brownies are inspired by Izy. It’s such a genius idea for using sourdough discard, and I actually think it makes better brownies than flour does. To quote a friend who ate some on the weekend: ‘I think you’ve outdone yourself.’ Thanks Izy.
What you will to make these gluten free sourdough brownies
First and foremost, you will need a gluten free sourdough starter. I am currently using a white rice flour starter that is at 130% hydration. This means I add around 70g of water and 50g of white rice flour per feed. I find this hydration percentage optimal for white rice flour. It was originally fed on the diet outlined in my gluten free sourdough guide – the combination of high protein and fibre flours really helps get it going. I then transitioned it 100% white rice flour feed, both for cost effectiveness and for a neutral flavour on which to base different breads and recipes.
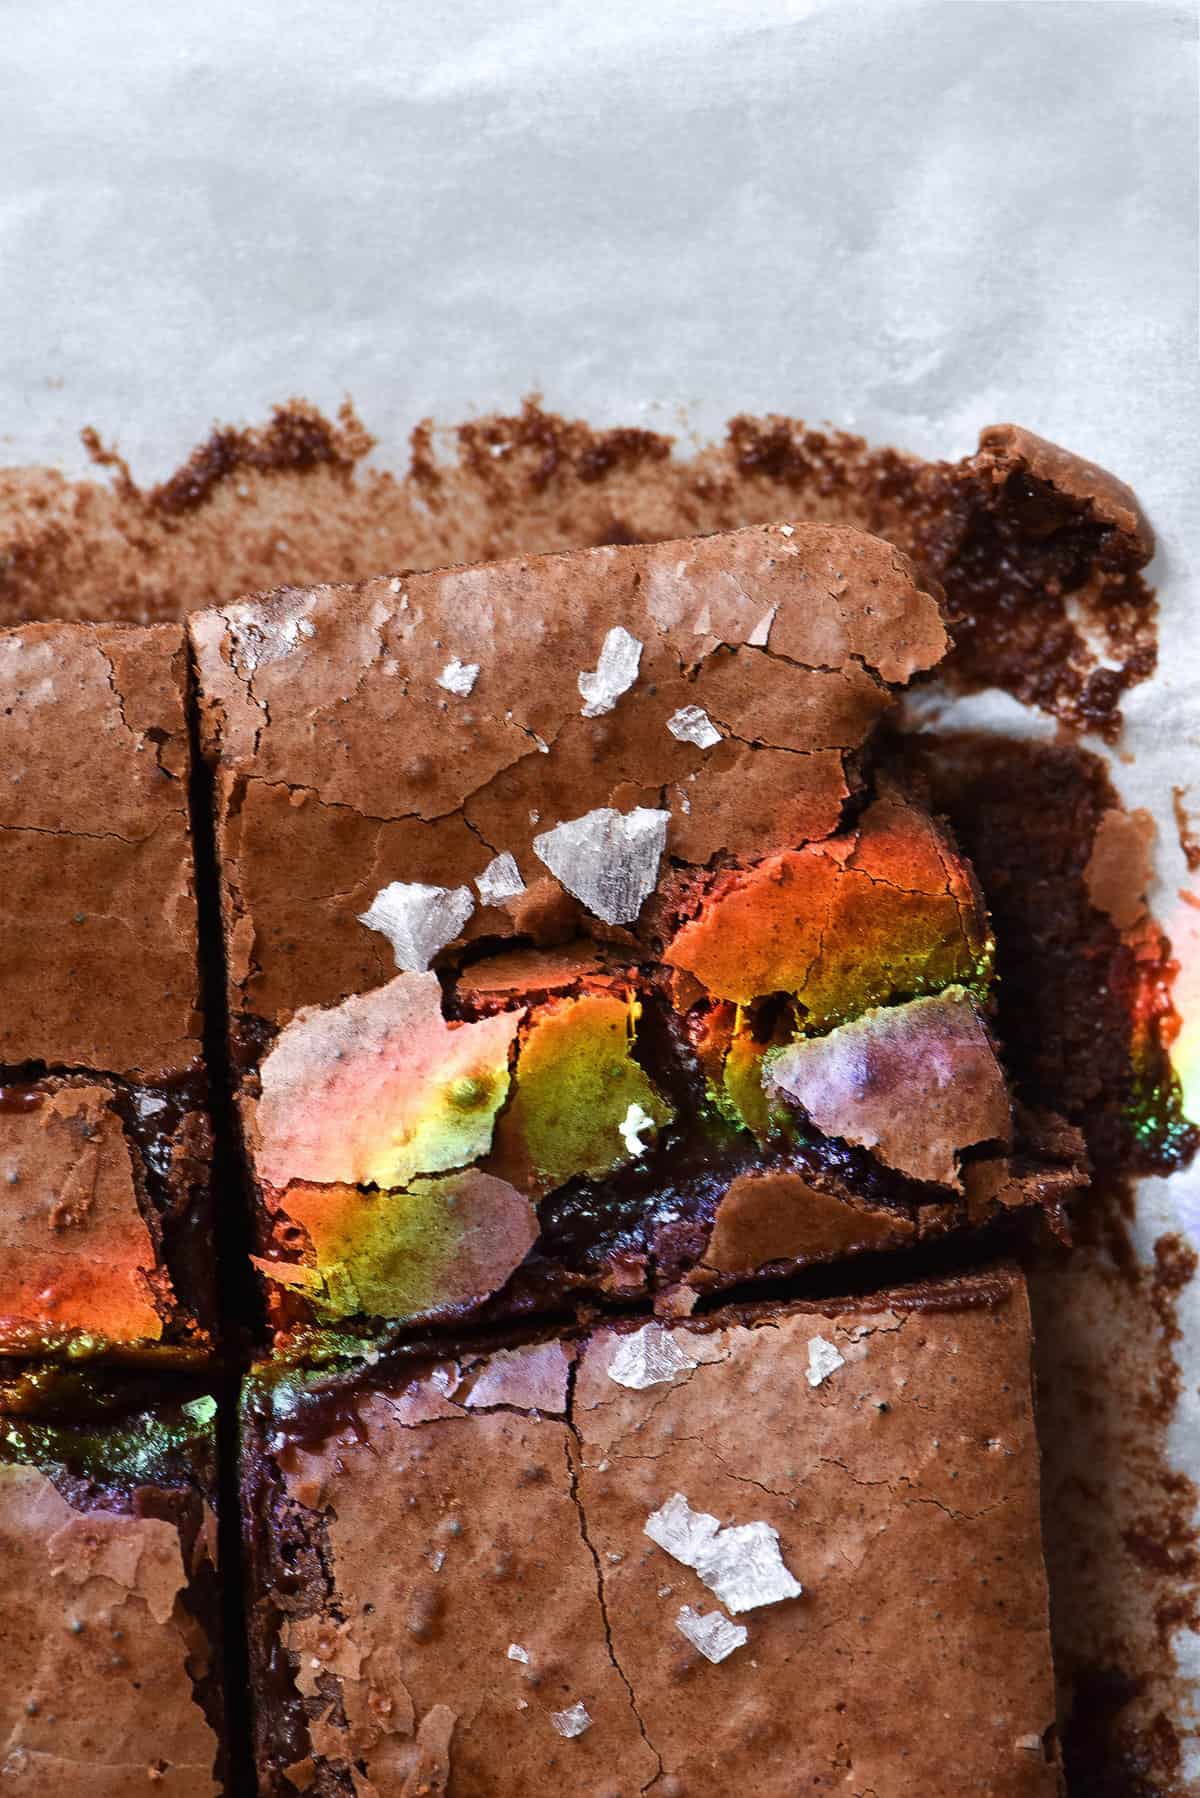
A chocolate that contains emulsifier, a decent amount of sugar, milk fat and milk solids. I haven’t quite gotten to the bottom of why this matters in producing a shiny crust, but it does. Stay tuned for a deep dive into this topic, though.
Gluten free sourdough brownie recipe notes
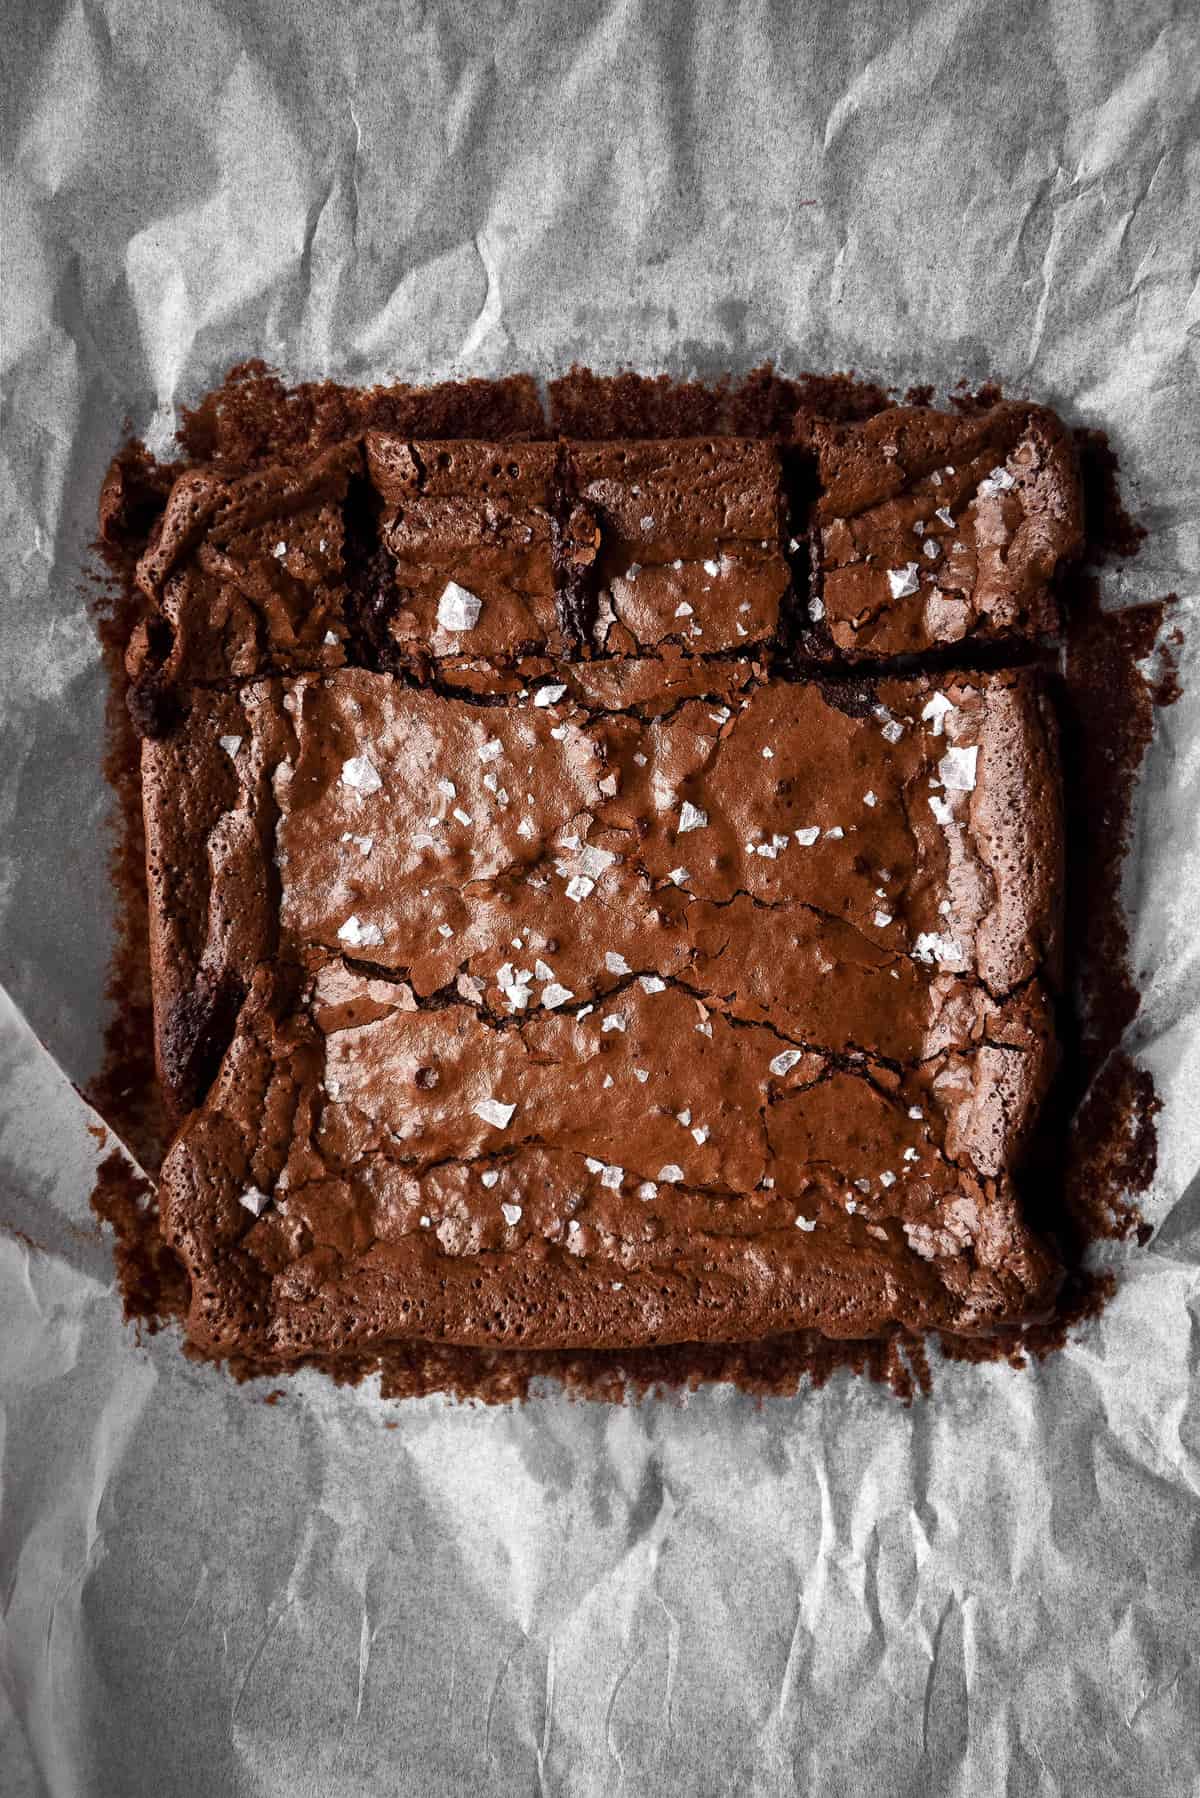
If you follow me on Instagram, you’ll know that I’m currently deep diving into the effect of different chocolates on a brownie top. At the moment (without being able to conclusively say why) my recommendation is 45% dark chocolate and regular, good quality cocoa.
The sourdough starter should be thick and bubbly – a spoonable consistency. If it’s a new starter or very runny, save it for pancakes and make one of the brownie recipes above. These brownies are incredibly fudgy and a watery starter runs the risk of ruining a batch. A very sad outcome.
Salt is necessary. Trust me. Vanilla bean paste also adds an incredible depth of flavour, although I’d say you could use extract in it’s place. Better yet, a vanilla bean?
I HIGHLY recommend, where possible, making brownies ahead of time. In an ideal world these brownies would be made the night before, or at least the morning of. Why? Because in their fresh state, they’re essentially molten cake batter. This is part of what makes them so delicious and rich, but it also means they’re very hard to handle fresh. I recommend making them the night before and allowing them to cool on the bench or in the fridge. The added benefit to this is that the flavours will further develop overnight, resulting in even better brownies.
More gluten free brownie recipes
- My best ever gluten and grain free brownies
- Brown butter, nut and gluten free brownies (this sourdough brownie recipe is based on this original)
- Vegan, gluten and grain free brownies
- Gluten free brownie cookies
Gluten free sourdough brownies
Ingredients
- 100 g butter dark browned
- 70 g 1/2 cup light brown sugar
- 110 g 1/2 cup caster sugar
- 200 g dark chocolate 45% is what I used for all my tests, see notes
- 2 extra large eggs
- 2 tablespoons 16g cocoa (see notes)
- 2 tablespoons boiling water
- 130 g 1/2 cup thick sourdough discard (see notes)
- 1 teaspoon vanilla bean paste
- 1/4 + 1/8 teaspoon fine salt
Instructions
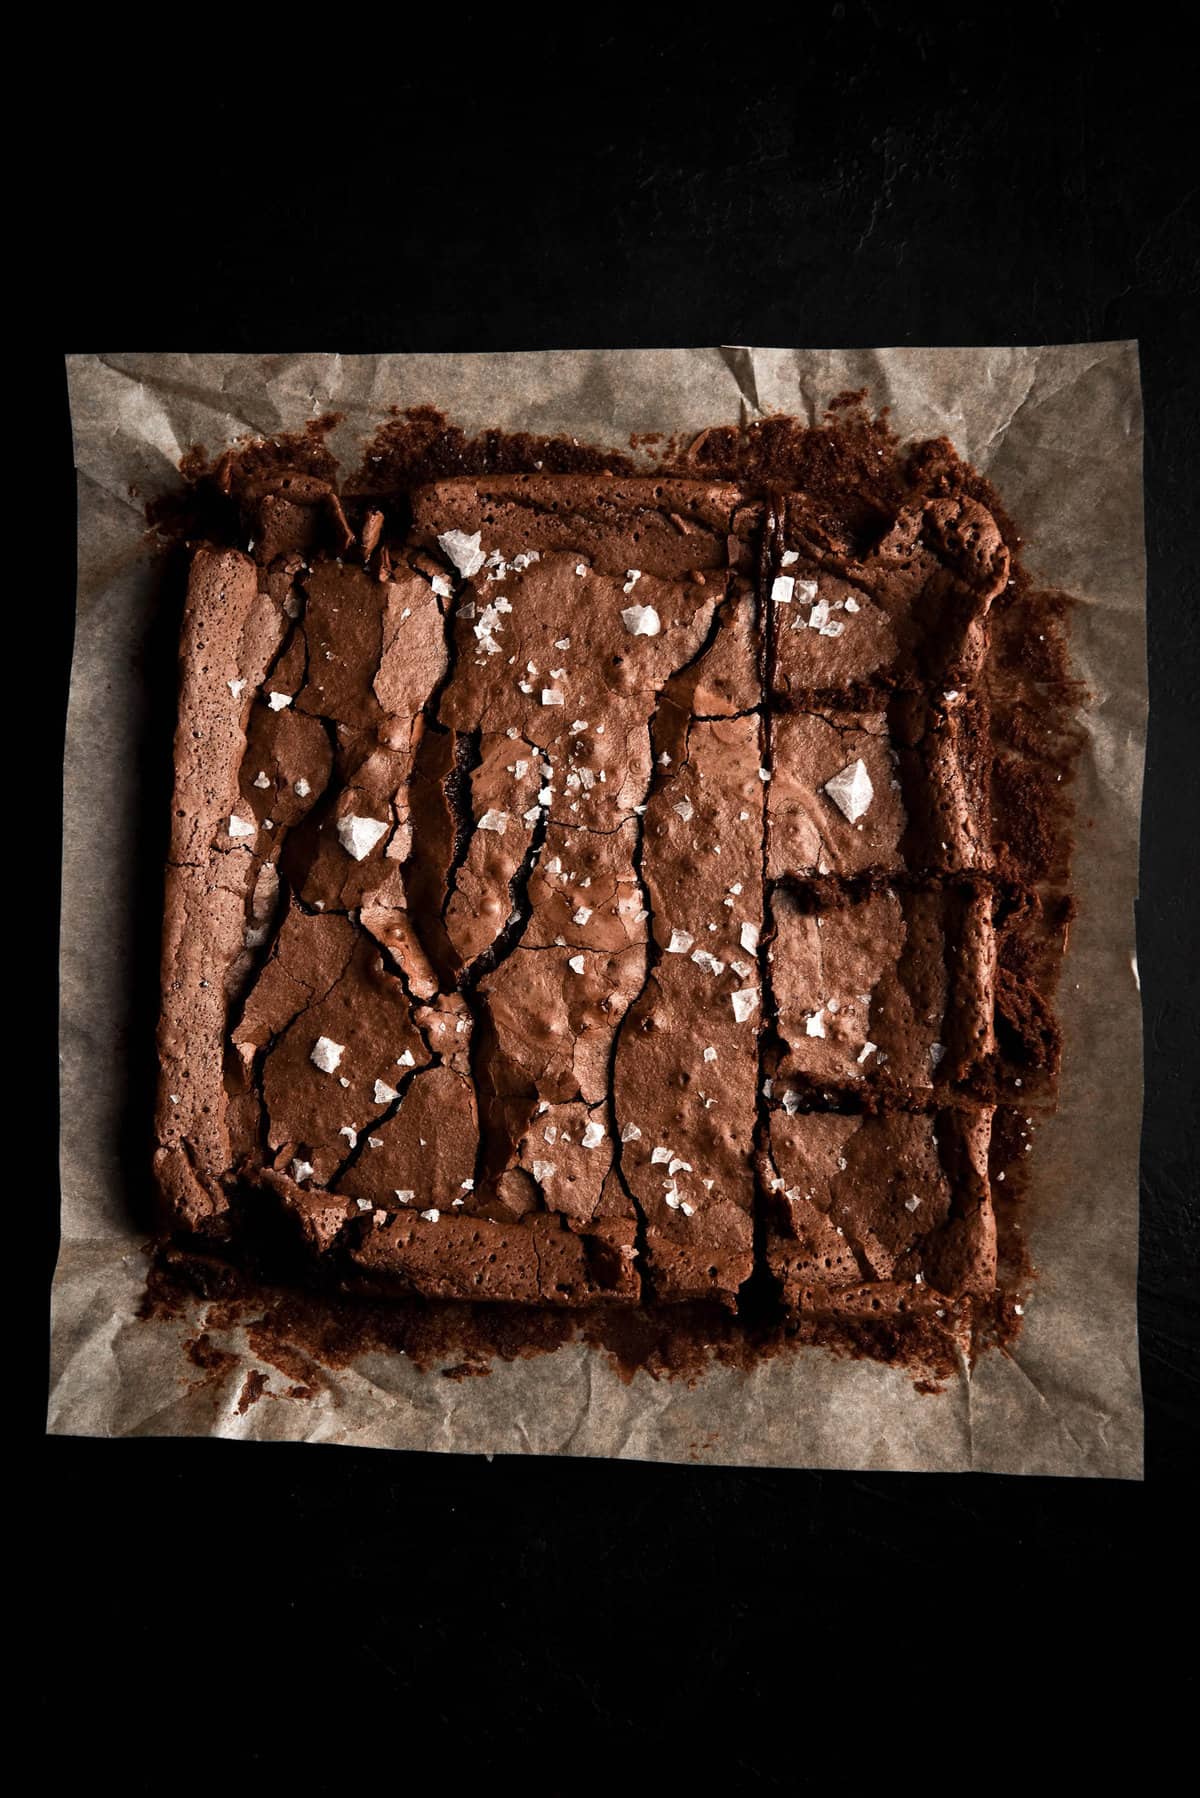
- Preheat the oven to 180 degrees Celsius or 356 degrees Fahrenheit. Line a 24cm square baking tin with baking paper – leave long edges so you have a handle to pull the brownies out.
- In a small saucepan, melt and brown the butter until the flecks are a deep brown colour. It should smell nutty and fragrant but not acrid or burnt.
- Pour the butter into the bowl of your kitchen mixer with the whisk attachment. Add the sugars to the bowl, and whisk until they’re just combined. It should look like light brown wet sand at this point. Once combined, turn off the mixer and allow the butter to cool a little.
- Half fill the small saucepan you used to brown the butter with water (saves on dishes!) pop a metal bowl on top, and place it over a low –medium heat. It should not touch water – this could burn the chocolate and make it seize up. Melt the chocolate until completely smooth before removing from the heat.
- Turn the mixer onto a medium high speed (I used speed 5 on a Kitchenaid) and add the eggs, one at a time. Stop to scrape the sides and bottom of the bowl, before returning to a medium high speed. Quite quickly, the mixture should lighten in colour and take on a meringue like appearance and texture. It will be a light brown colour with a sheen to it. Beat the mixture for around 3 minutes or until it is visibly light and fluffy. I have had my mixture split before at this point, and although I haven’t figured out specifically why, it won’t ruin the brownies so you can proceed as normal if this happens.
- While the mixer is running, add the cocoa and boiling water to the melted chocolate. Use a spatula to JUST combine – any more and the mixture will stiffen. Boiling water is used to bloom the cocoa and give a more pronounced chocolate flavour.
- Lower the speed of the mixer and add in the chocolate mixture. Whisk on a lower speed until totally combined. Turn the mixer off to add the sourdough discard, salt and vanilla bean paste – the paste gets stuck in the whisk if it’s moving.
- Whisk again to combine before removing the bowl from the stand. Pour the brownie batter into the prepared tin and tap it on the bench a few times to remove any excess air bubbles.
- Place the brownie in the oven for 20 minutes – this produces an incredibly fudgy brownie. You can cook it a little longer if you prefer your brownie more well done.
- As per the notes, I suggest making brownies the night before and allowing them to totally cool, on the bench or in the fridge. This gives the flavours time to develop, and the fudginess of these brownies means they’re essentially cake batter consistency when they first come out of the oven.
- They keep well in an airtight container for a few days.
You’re the first food blogger I’ve left a comment for who isn’t a close friend. I LOVE your page. and I don’t just mean the food – everything you write is a fact. it’ s concise, informative and yummy looking and I cannot wait to try some of these. typically I never read a blog because it will go on and on about the second cousin – twice removed’s nephew who one loved the flavour of peanut butter and pickles together and alas this recipe was born 7 meandering pages later. I sound like a jerk. I love all food bloggers as I wouldn’t have so many lovely recipes myself, but I love information and research and when people just get to the meat of the blog lol! As a pastry chef cum aspiring acupuncturist and holistic nutritionist and a person dealing with digestive/health issues for what seems like a lifetime I really appreciate someone who can make something good come out of their own struggles. Keep creating please 🙂
Am I missing something? I can’t see where you add the sourdough starter to the mix.
Hi Ann, it’s added in step 7 – with the vanilla bean paste and salt 🙂