
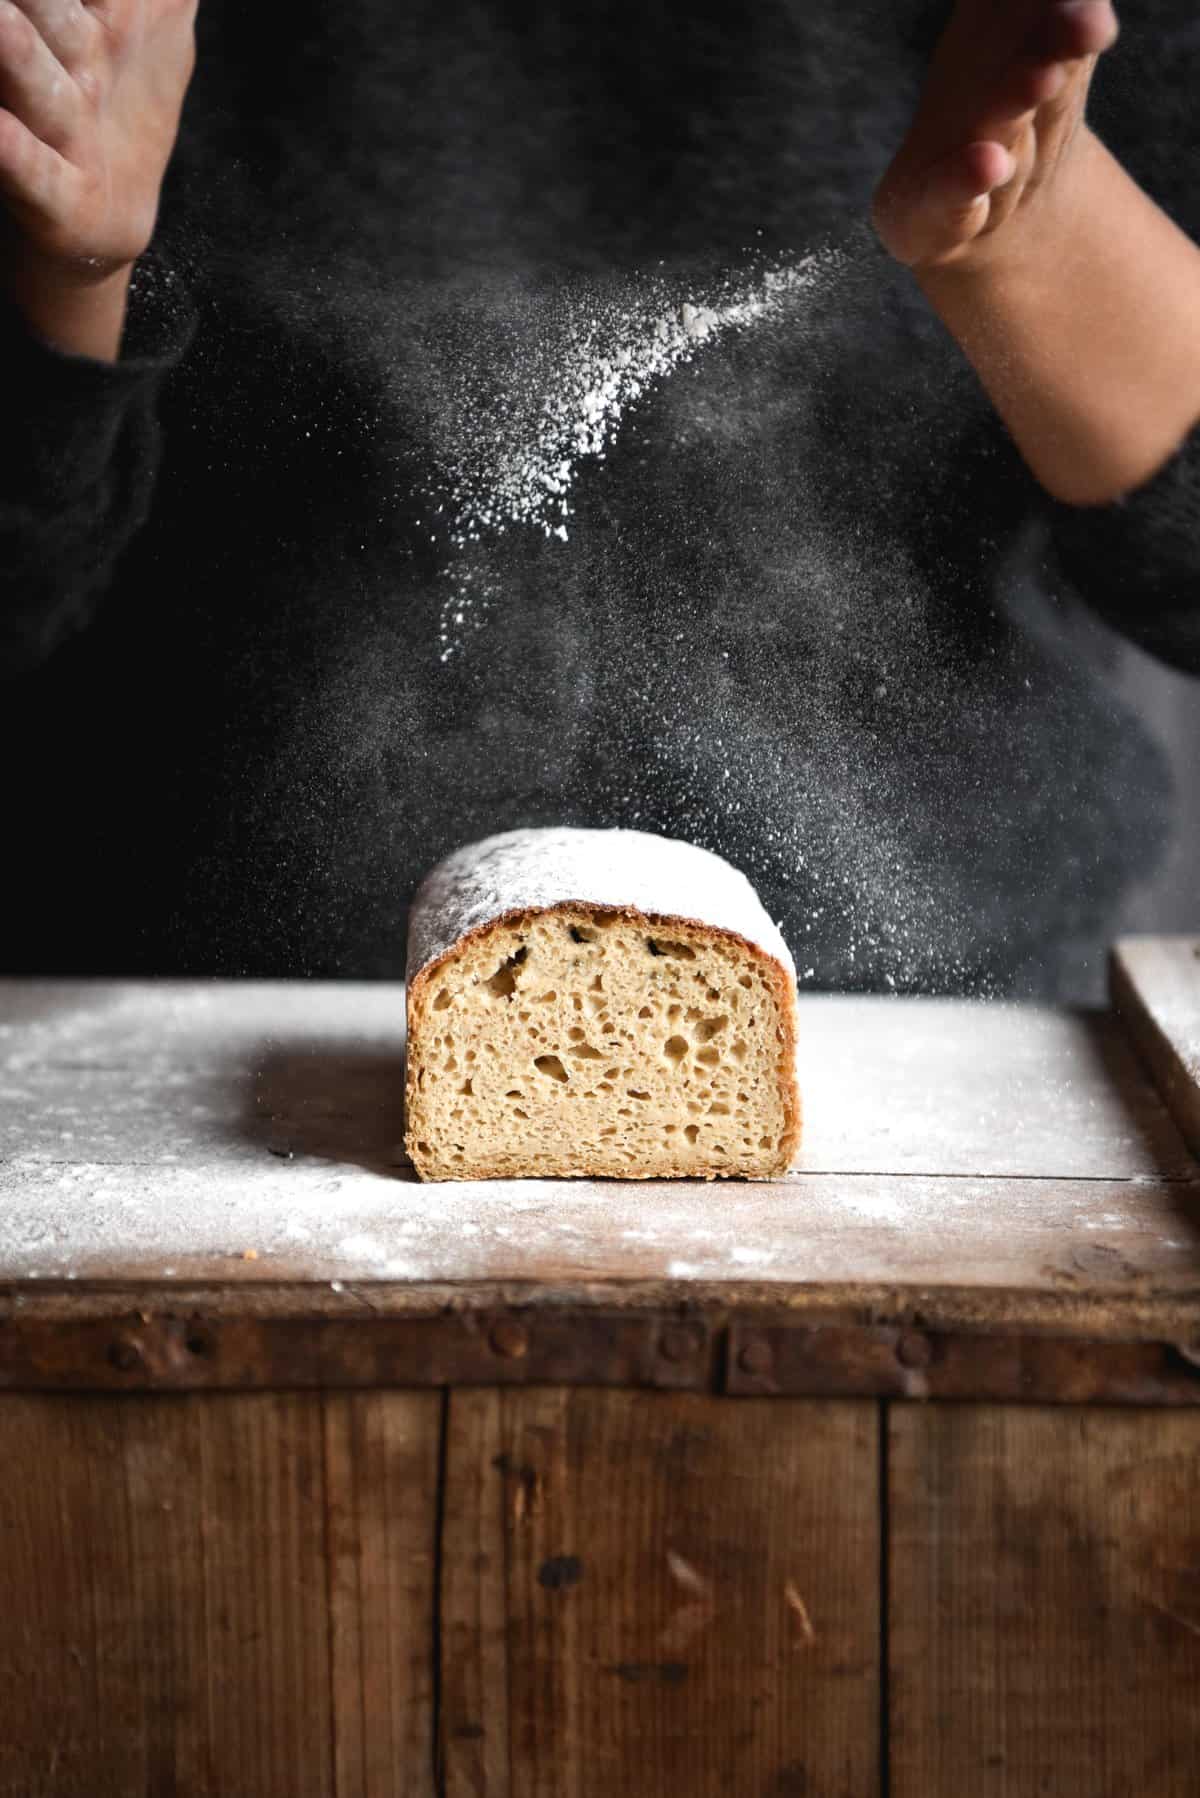
Aaaand we’re back on the gluten free sourdough train. A train, might I add, that I have never gotten off. I am totally and utterly obsessed with the world of gluten free sourdough bread right now. I have been baking around the clock, learning the ins and outs of sourdough. After sharing my original recipe for gluten free sourdough a few weeks ago, I figured it was time for another loaf. So today I’m sharing a recipe for gluten-free ‘white bread’ sourdough.
Gluten-free ‘white bread’ sourdough recipe
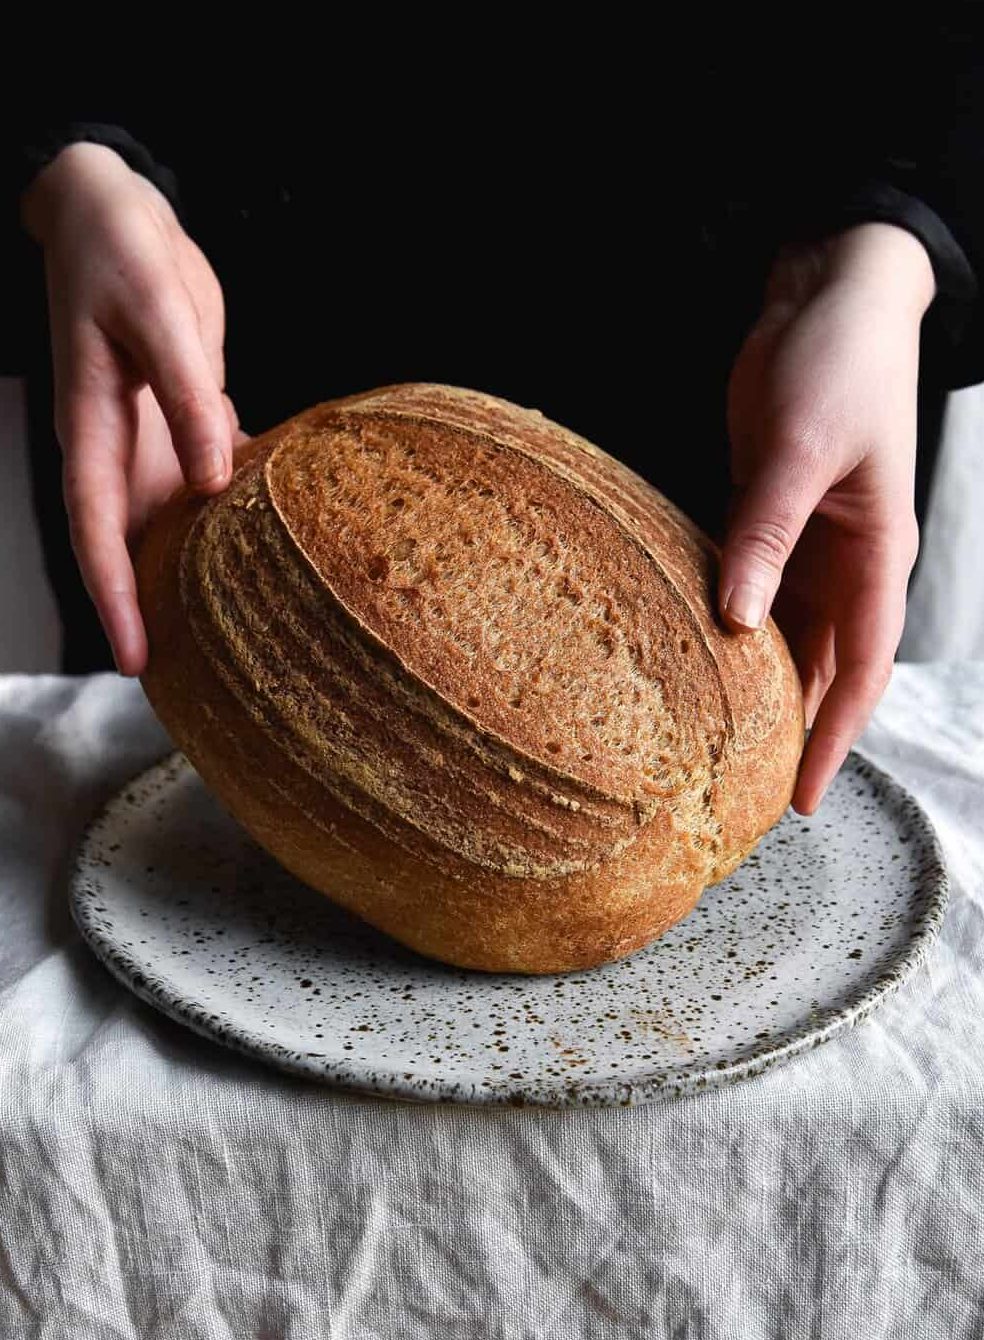
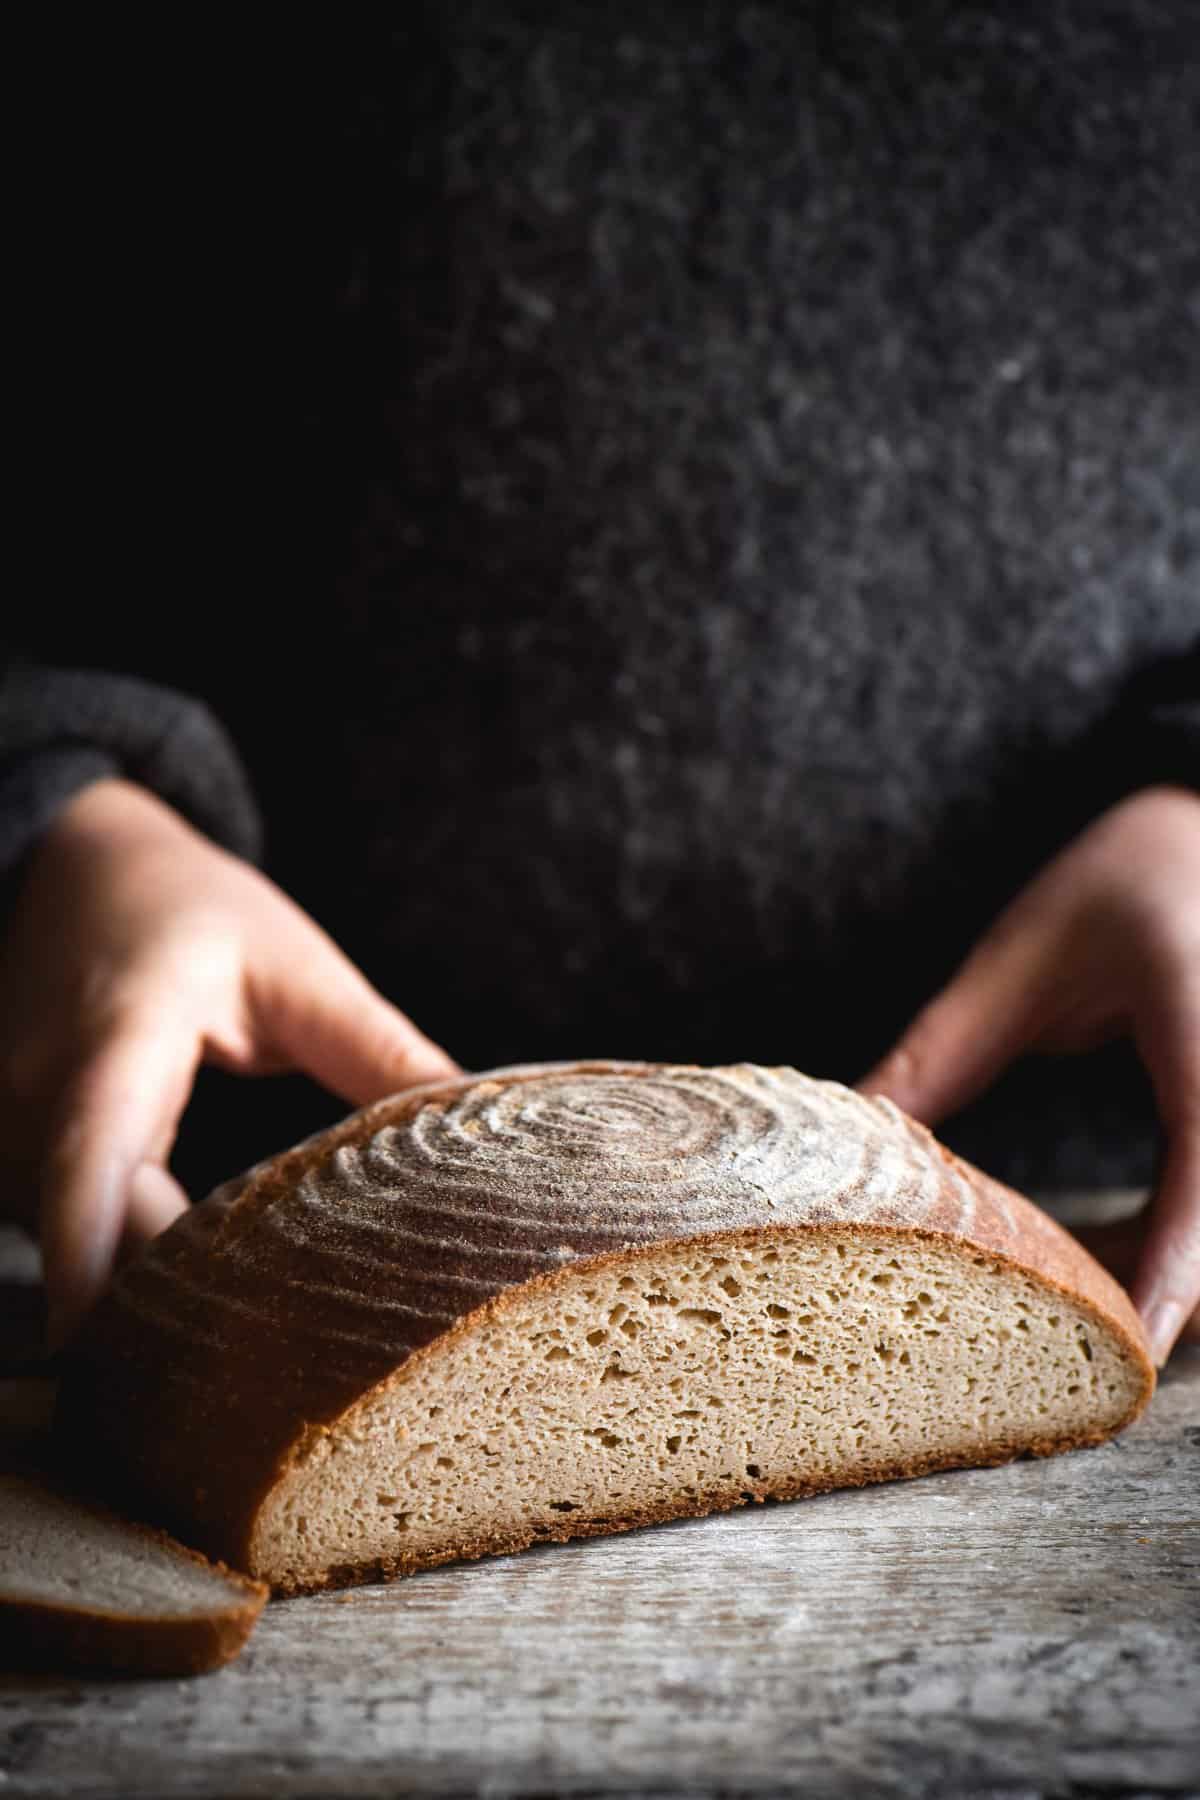
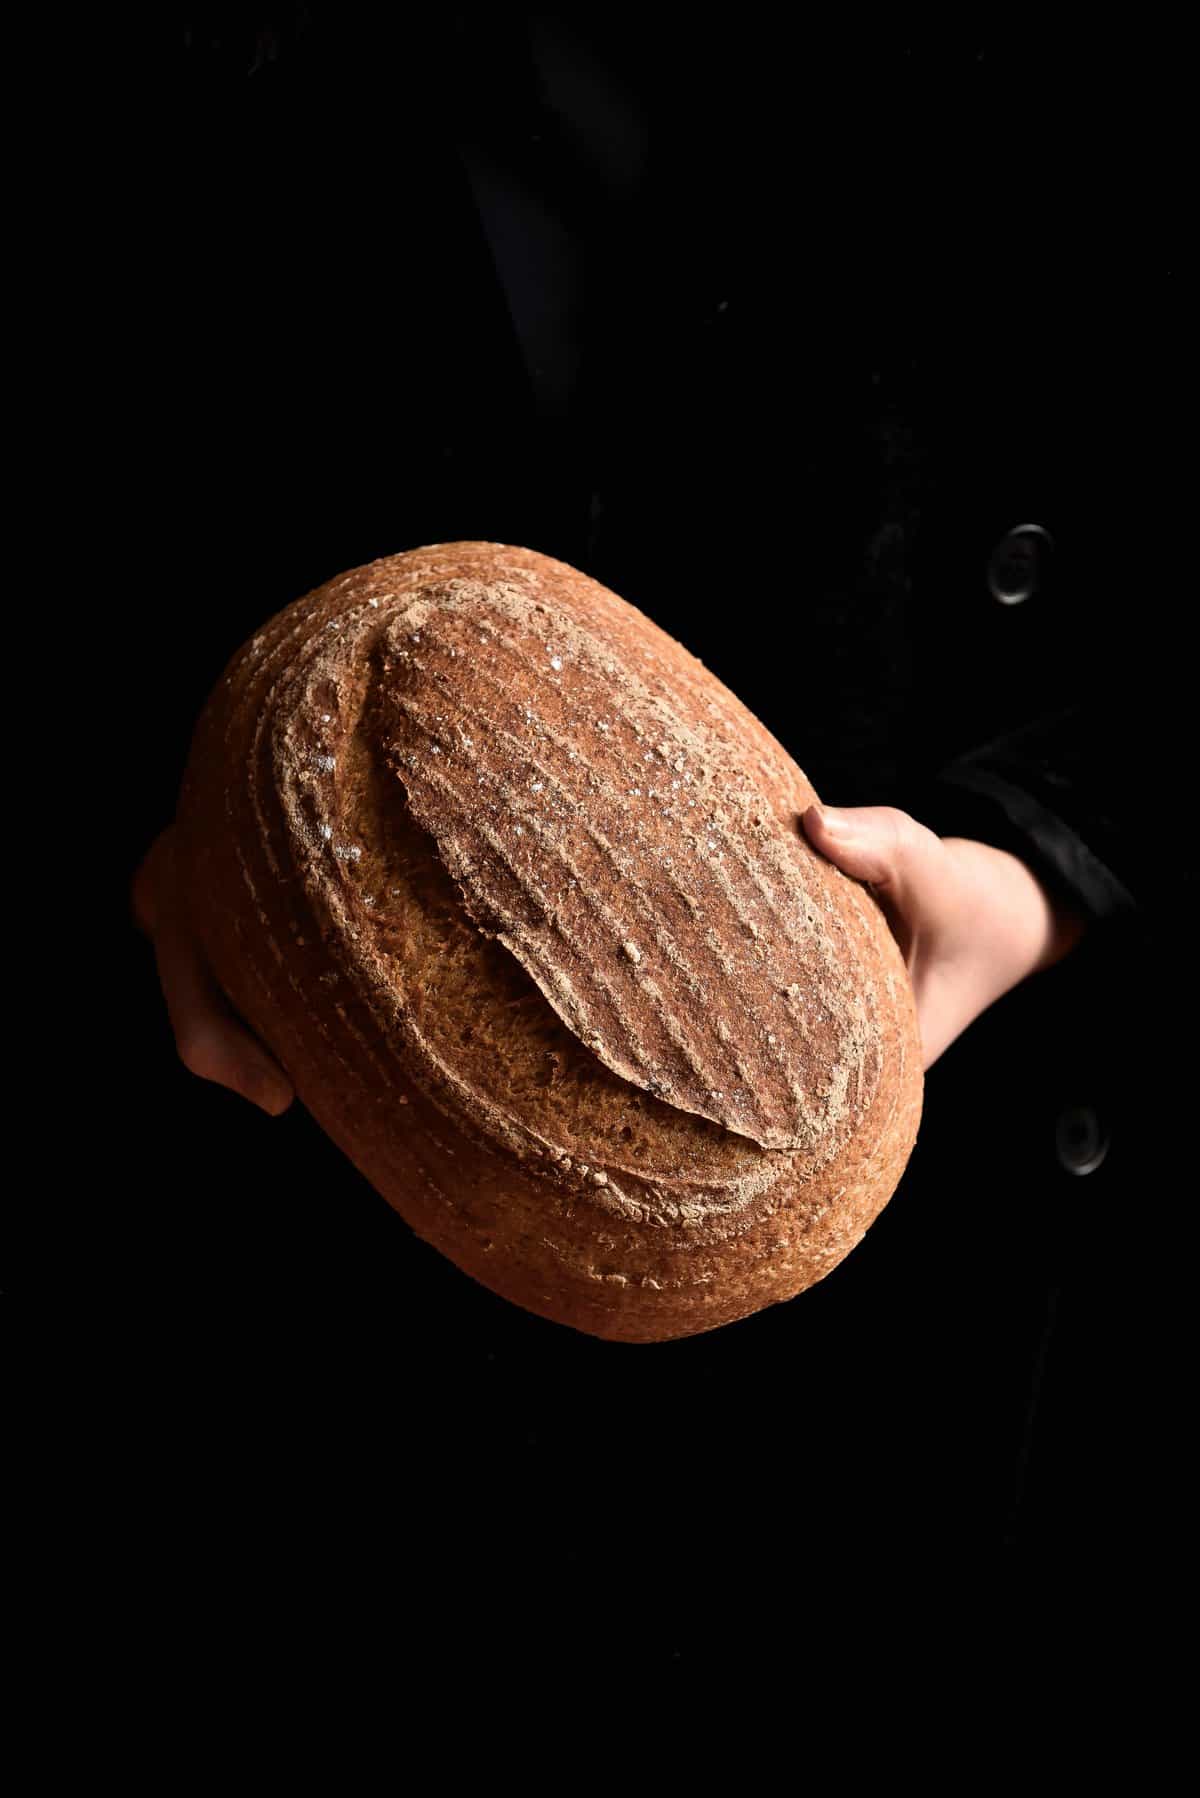
This gluten-free ‘white bread’ sourdough is vegan, FODMAP friendly and nut free. It combines the techniques of traditional bread making with the necessary adaptions for gluten free baking.
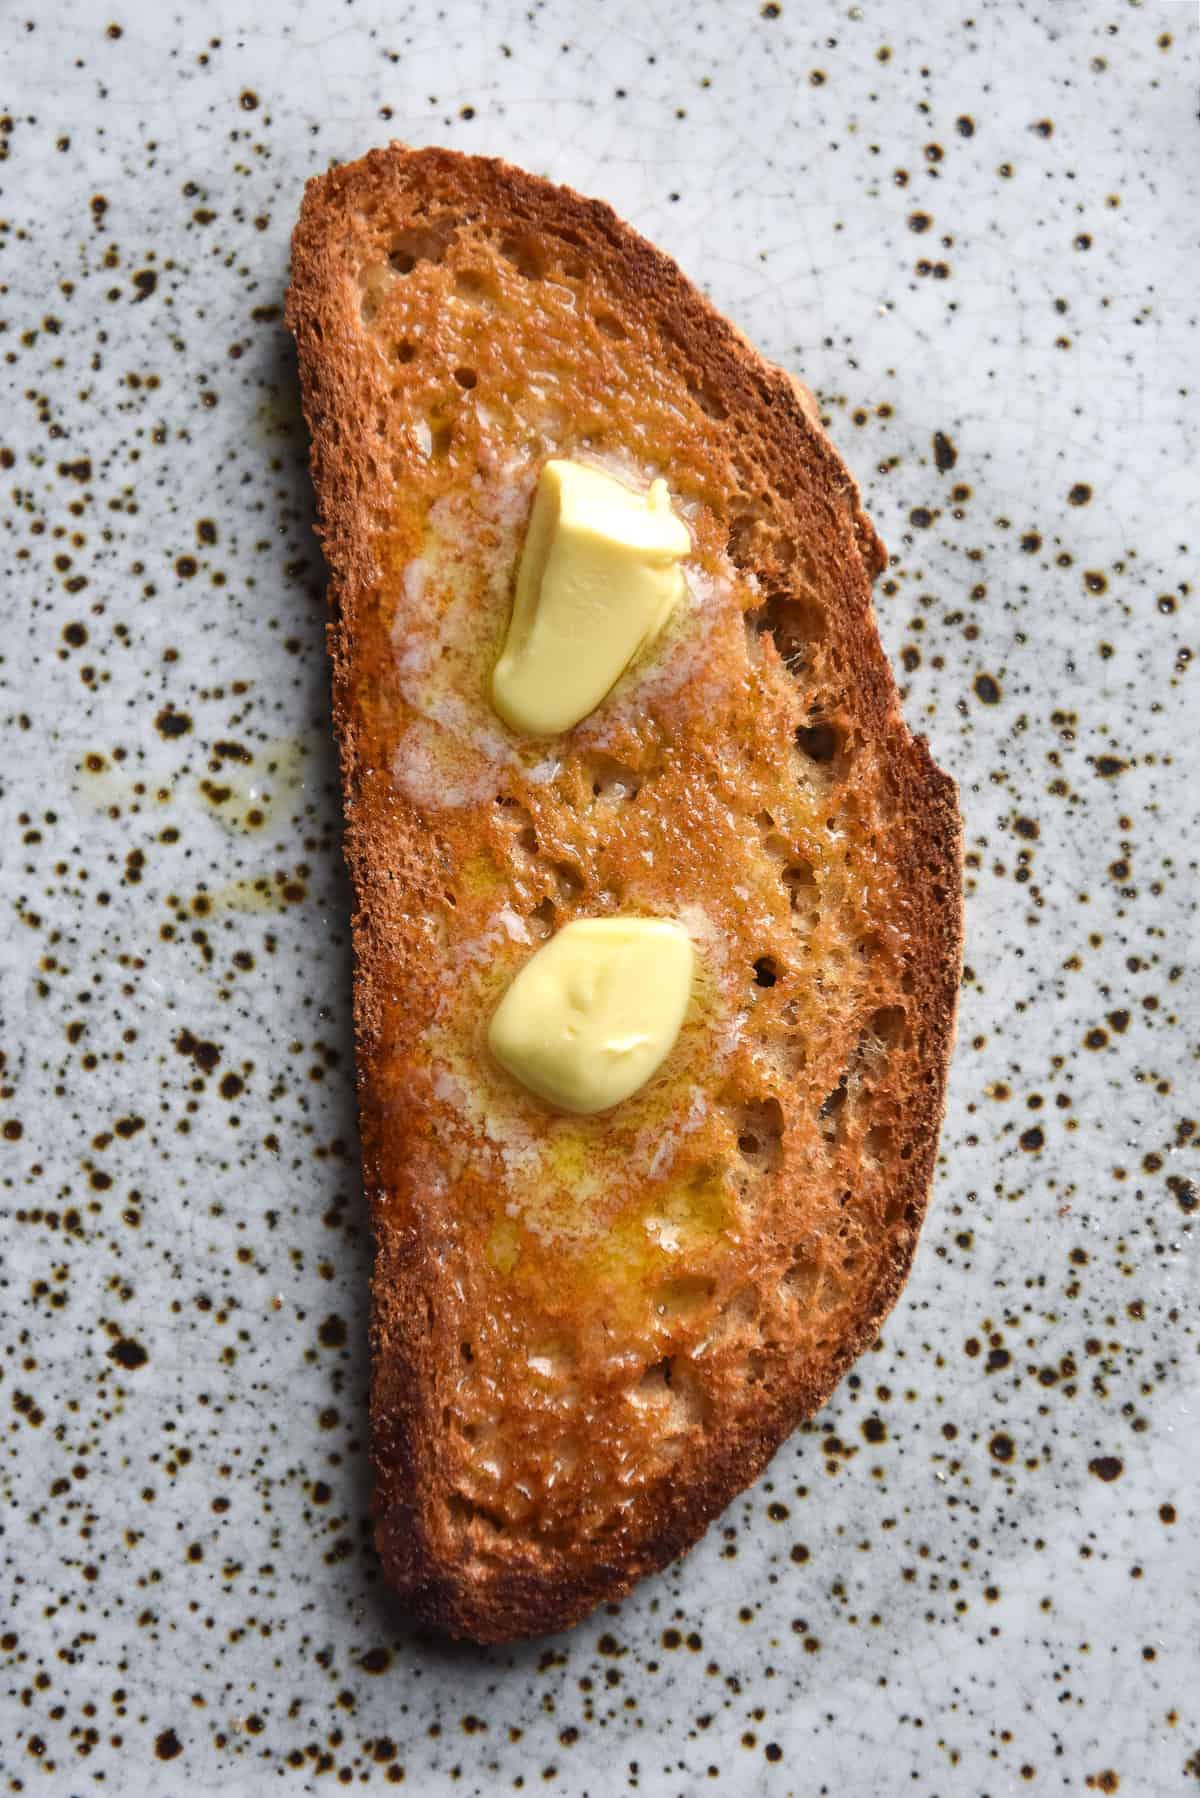
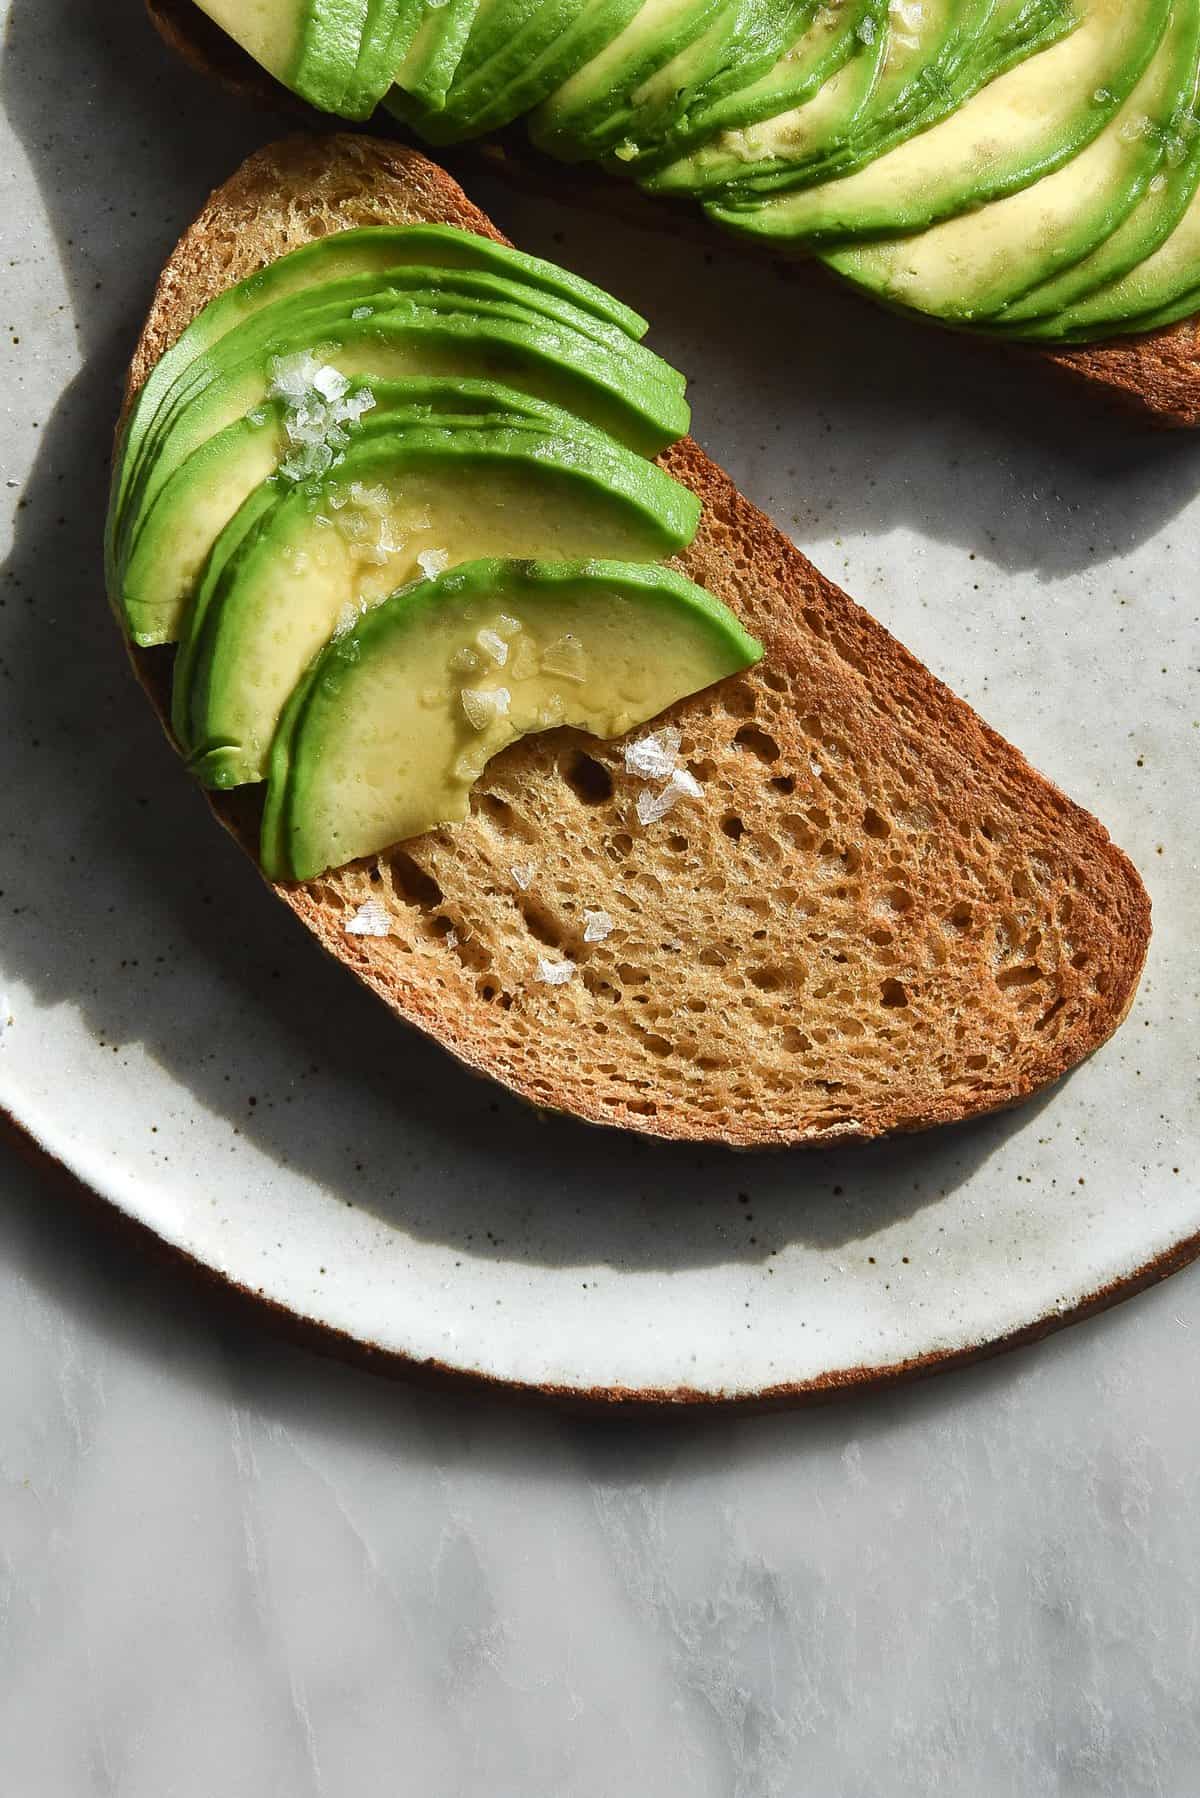
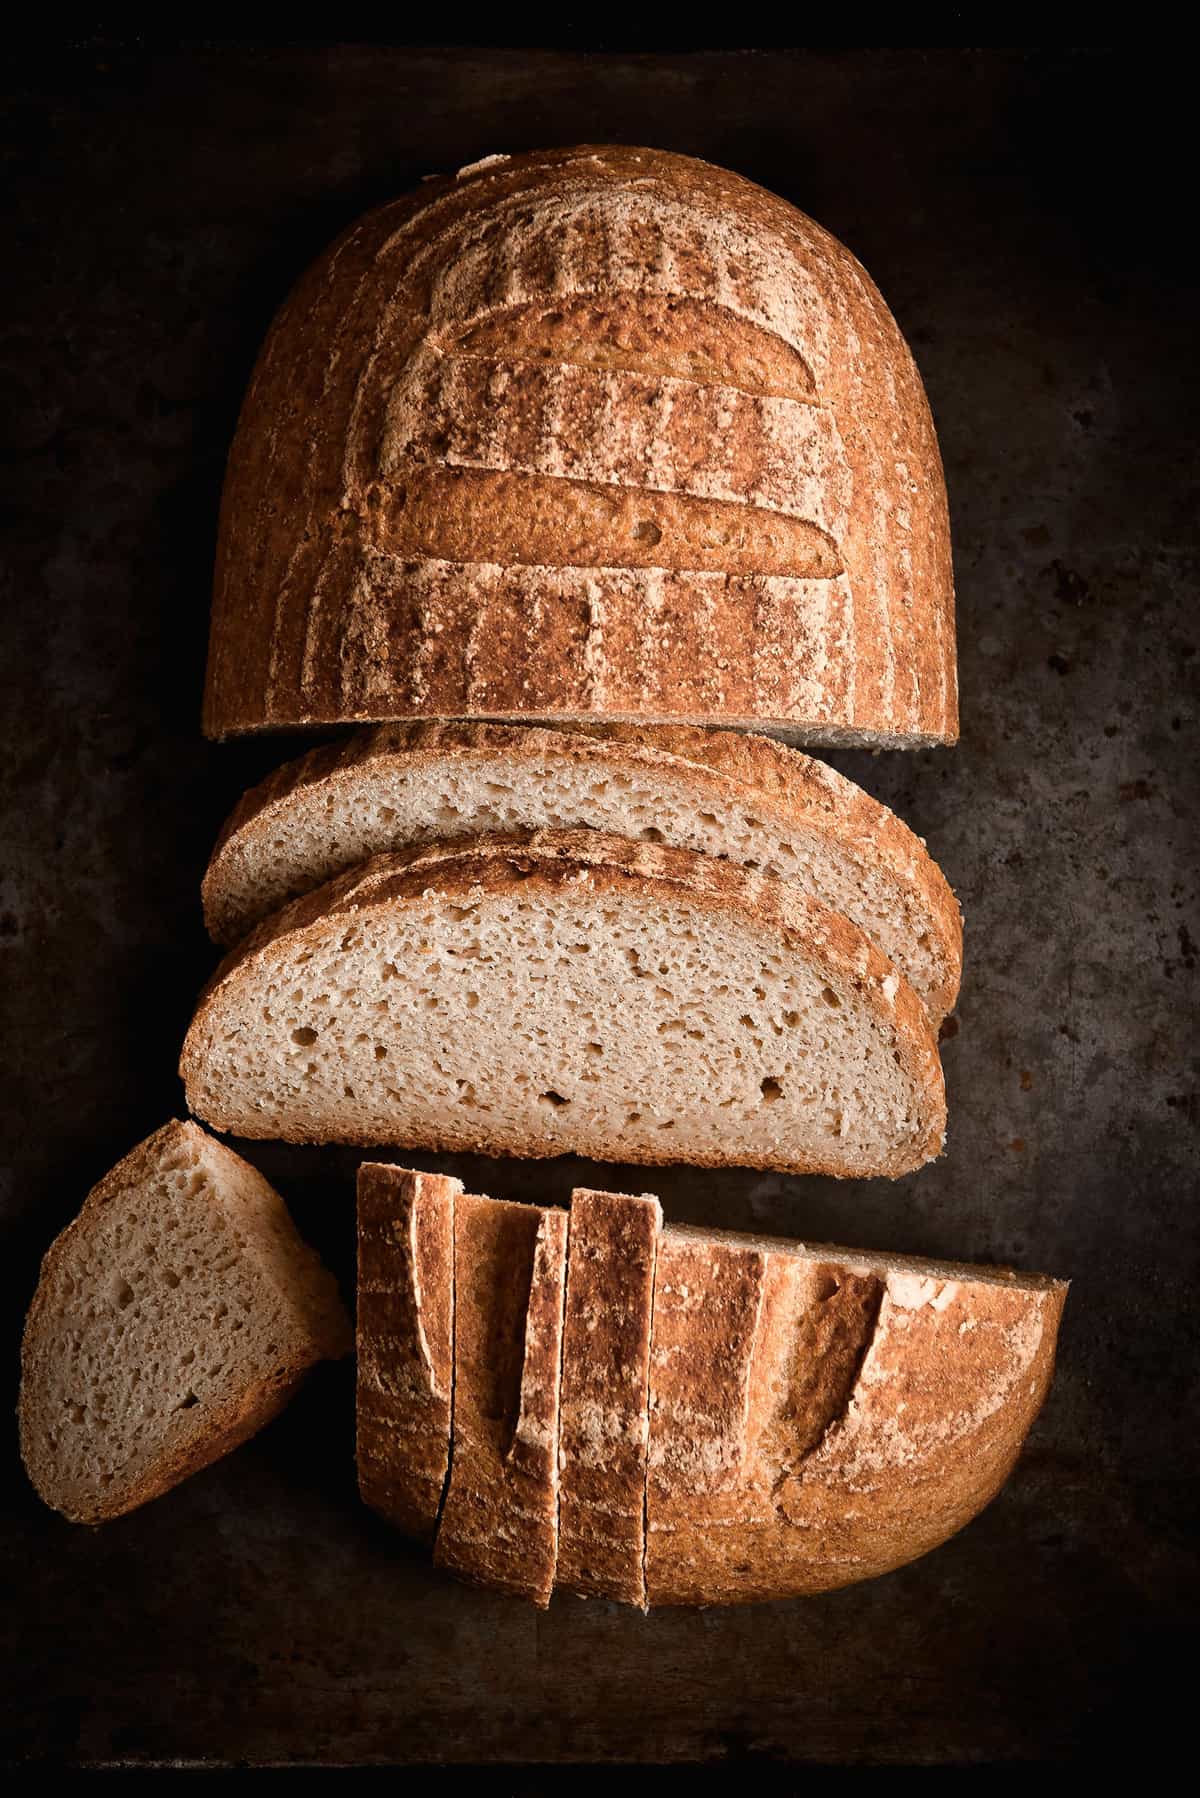
The recipe contains no xanthan gum, eggs or dairy. It is easy to make with a few simple steps for ensuring a great loaf of gluten free bread. I love using it as a sandwich loaf or with some added olives.
The ingredients for your gluten-free ‘white bread’ sourdough
This gluten free sourdough uses a higher proportion of starch to wholegrain gluten free flours. The starch in this recipe is responsible not only for the ‘white bread’ nature of the recipe, but also for the loftiness of it. Starches are light and fluffy, and their inclusion makes for a light and fluffy bread.
Sorghum and millet flours have been purposefully chosen. They are both great performers in a gluten free sourdough – they are wholegrain, which gives the starter something to feed and grow on. However, they’re also neutral in flavour, which assists in the whole white bread thing.
Sorghum is my new MVP gluten free flour. I highly recommend you seek it out. If you had to choose one wholegrain flour to work with, I’d recommend sorghum.
Millet is a lovely sweet flour, but it does tend to make bread taste a little cakey, which is why I rely more heavily on sorghum. Needless to say, it might also tint your bread yellow.
I have pivoted from using white rice flour in the preferment. I now use sorghum flour. Using a wholegrain flour in it’s place amplifies the sourness of the loaf, because the starter has something ‘wholemeal’ to eat. If you prefer a less pronounced sourdough, you could probably use white rice flour. However, I’d recommend adjusting the water content to suit, as white rice is a thirstier flour than sorghum.
At the moment I am using a 100% white rice flour starter. Personally I still recommend growing the starter on wholegrain flour before transitioning it. Here is my sourdough starter guide, in case you haven’t read it yet.
I am loving potato starch in my bread recipes. It has a great quality to it that I can’t describe but really love. Potato starch is often misnamed as potato flour. All you need to know is the potato starch you’re after is snow white and powdery. If you have a more grain like flour that smells like potatoes, it is not suitable for use here.
Why do I need to use psyllium husk in gluten free bread?
Gluten free flours are inherently free from gluten (obviously!) so this means that there is nothing binding our loaf together. Psyllium husk acts as our binder, providing structure and elasticity to gluten free bread. Basically, psyllium husk is your gluten.
An added bonus of using psyllium husk in gluten free baking is that it absorbs a lot of water. Gluten free baked goods can often be very dry, so psyllium husk allows you to add enough liquid to your dough to create a lovely baked good.
While there are other ingredients that act in the same manner as psyllium husk (flax meal, chia seeds) psyllium husk is my preferred ingredient. It is all I ever test my loaves with. It is super accessible here in Australia, predictable to work with, and doesn’t leave little seedy bits in your loaf. Seedy bits aren’t always a bad thing, but I don’t want them in a white bread sourdough.
Please note: psyllium husk and psyllium husk powder are two distinct ingredients. While yes, they are technically the same thing, psyllium husk powder is milled much more finely and has a much greater absorbency. My experiments suggest you should use around 75% of the quantity if you use the powder. I can’t offer any more advice than that, though.
A note on gluten free bread dough enhancers
This is a topic we didn’t really cover in the first gluten free sourdough post. There exists such a thing as ‘bread enhancers’ which can be thought of like an espresso for your yeast. I’m tinkering with a few, but for this recipe I have used ground ginger powder and vitamin C powder.
They are simple ingredients that you can use to boost the yeast in a loaf. Ideally, they will contribute to a more open crumb and a better rise.
Just 1/4 teaspoon each of ginger powder and vitamin C powder is enough for this purpose. You can add the powder into the flours as you’re mixing them.
I am aware, however, that you might not have pure vitamin C powder lying around if you’re not a bread nerd like me. So, I have read that apple cider vinegar vinegar is a suitable replacement. Add it in with the wet psyllium husk mixture as opposed to the flour. Another tip? Vitamin C powder and apple cider vinegar counteract each other, so don’t use them together.
How much sourdough starter should I add to this gluten-free ‘white bread’ sourdough?
I’m learning that the amount of sourdough starter that should be added to a loaf in dependent on a number of factors. Firstly, a loaf with more starches will proof quicker than one with more wholegrain flours. This means that a loaf with more starch can use less starter. I think this is because the starter easily feeds on starch, although I haven’t bothered to google these suspicions.
Secondly, a loaf made at the height of summer will proof quicker than one in the depth of winter. This means that you could play around with adding less starter in summer. The idea is to balance out these out these factors to create the perfect proof. The perfect proof is a balance between the dough having enough strength to rise, while also having had enough time for a longer proof, which develops flavour.
Thirdly, this will depend on the strength of your starter. A newer starter might need a little extra added for oomph, whereas a mature starter might need less.
If you bake a loaf that proofs particularly quickly, try adding less sourdough starter to your next batch and see where that leads you. A classic sign of an over proofed loaf is a hollow, cavernous top of the loaf and a dense bottom. If you experience this with a relatively short proof (2 hours in a medium heat kitchen) then add less starter to the preferment next time.
How long should I proof my gluten free sourdough?
As we all know, proofing time is hugely dependent on the temperature and climate where you live. A hot kitchen in summer could proof a loaf at twice the rate of a cold winter kitchen.
You’ll notice that the proofing schedule of this recipe is different than the original sourdough, and this is for two reasons. Firstly, I wanted to give people an alternative option to a bench proof, which essentially consumes an entire day. It’s helpful to know that you can utilise the fridge in order to make the proofing process more life friendly.
Secondly, fridge proofing is a more foolproof way of proofing such a high starch, high hydration loaf. The starch is much more quickly consumed by the culture in the sourdough starter. This results in a more rapid growth, which can quickly spiral into an over-proof, particularly in summer or a hot kitchen. A cold fermented loaf stays nice and perky when compared to a room temperature loaf. This makes it helpful in achieving a tall, aesthetically pleasing loaf.
If you really don’t want to use the fridge, you can still proof this loaf on the bench. However, I recommend watching it carefully, and potentially adding only 100g active starter if you’re baking in summer or a hot kitchen.
I only recommend products I love and use daily and all opinions are my own. This post contains affiliate links, and I earn a small commission for any qualifying purchases, at no extra cost to you.
What you will need to make this gluten-free ‘white bread’ sourdough
- A gluten free sourdough starter. It should be thick like paste, super bubbly and active. Many people say that you won’t get a great bake out of your starter until it’s at least a month old, so be patient and stay the course. I’ve got a bunch of recipes coming up for things to make with your sourdough starter discard.
- Something to proof your loaf in. This could be a banneton or just a bowl with a tea towel. I like both, although make sure you use a tea towel without colour or ink. Learned that one the hard way.
- A baking vessel. Ideally this will be a Dutch Oven, although as we discussed in the first sourdough recipe, not all are suitable. Because we’re cooking at high temperatures, some have lid handles that aren’t destined for this. At the moment I’m using a very old Chasseur (whose lid handle has popped off) but ideally I’d love a Le Creuset. One day. If you don’t have a dutch oven, go and read the section in the gluten free sourdough about alternatives.
- A sharp scoring blade (lame) or a really sharp knife. Some box cutting blades will do in a pinch – I bought some at Bunnings while I was waiting for my lame to arrive.
- Patience! Sourdough is an art, and we’re throwing gluten free into the mix. You can’t rush sourdough because the results don’t lie.

Troubleshooting your gluten-free ‘white bread’ sourdough
The basics
Before proceeding, let’s run over the basics – the gluten free bread version of ‘did you try turning it off and on again?’
- Did you weigh all your ingredients? Could have potentially used an ingredient not listed? Did you slip and add a little extra water by accident?
- Was your starter active, paste like in thickness, and on a rise before making your preferment? You can lie to me, but you can’t lie to yourself.
- Was your oven hot enough? Did you preheat the dutch oven too?
My dough is too sticky to shape?
First of all, run through the basics checklist. Secondly, note that all flours can have very different absorbencies- no two bags are the same. There’s variation from brand to brand, country to country. So, if you are consistently getting a wet dough, consider adding a little more flour.
Thirdly, it is worth mentioning: gluten free sourdough is much more shapeless than regular sourdough. It can also be a lot wetter, particularly with this dough. High hydration doughs mean more of that open crumb we covet, so this is necessarily a wet dough.
Reasons
- Your starter was too wet. Starters are a tricky beast. For gluten free starters, you often need more water than flour to create the thick paste you’re after. The ideal consistency of a starter is thick, paste paste, and both spoonable and pourable (in a blobby way). If your starter is thin (anything from crepe batter to pancake batter in consistency) you’re adding more liquid to your dough than rising power. This contributes to a sticky dough and often to a flat, dense loaf. You should gently stir a starter before using to check the consistency (a thick top and liquid bottom is no help either) and feed it again if you must. Your oven light is your saviour here – a heat boost can often give your starter that push it needs.
- You just need to walk away for 10 minutes and let the psyllium husk do it’s thing. If you’re getting nowhere and you really can’t do anything with the dough, leave it for 10 minutes. The psyllium husk will absorb some extra liquid, and it should be easier to handle when you return.
- Not troubleshooting, but solutions! Firstly, make sure you flour your bench and hands thoroughly. I like to sprinkle the dough with rice flour and rub it in to dry out any wetter patches. I also find the tea towel bowl proof very helpful with a wet dough. Firstly, the tea towel and the rice flour absorb a little liquid. Secondly, the loaf is much easier to remove after proofing than it is from a banneton. A banneton can get a bit of mould on it if it’s left damp for a long time, so a bowl is better in this instance.

My loaf didn’t rise much in the oven?
If it’s not of the above, there are a few reasons as to why your loaf didn’t get much height.
- Your starter isn’t sufficiently mature. Yes it’s bubbly, yes it’s thick, but sometimes newer starters take a while to get into the swing of things. It’s reasonable to expect your starter to start producing more loft in your loaves after a month or so.
- You were heavy handed with the dough. Treat it gently or you’ll knock the air out of it!
- Your kitchen isn’t warm enough. I think a lot of people underestimate the importance of warmth in the sourdough process. They also underestimate just how warm a starter/loaf likes to be. If you can’t use an oven light, a proofing box or something with consistent heat, you will find it a lot harder to create a lofty loaf in the cooler months. That’s just the nature of the beast. Similarly, an oven that isn’t hot enough won’t provide this gluten-free ‘white bread’ sourdough with the oven spring it needs.
- Your proofing vessel is wide and flat. This seems too obvious, but it’s a real thing. Because a high hydration dough (and gluten free sourdough in general) doesn’t have much strength, it will mould to the shape it is placed in. Try to find a banneton with a deeper base, or use a round bottomed bowl.
- Fridge fermenting your dough will help it keep a perky shape. Consider trying this if you are consistently getting flat loaves.
- Your proofing time was off. Proofing is an art that you really just have to master with experience. Personally I still don’t think I am 100% with my proofing, but I’m getting better with time.
My loaf is dense?
Dense loaves are generally a result of one of the basics being off kilter. However, everything that applies to the height section also applies here. Personally I think that proofing and temperature are two big issues that result in a dense loaf, in addition to issues with your starter.
My loaf is gummy?
The credit for this one goes to a few things. Firstly, not giving your loaf enough time in the oven. I KNOW that it’s exciting when you take the lid off and your sourdough looks perfect. You might think ‘I don’t want it to get any darker! The crust is my ideal colour!’ and whip it out of the oven. There’s a lot of liquid in this dough – both the preferment and the water itself. If you don’t give this time to cook off, you’ll have a wet, gummy dough. You never gave the poor darl time to set. It’s the same as a cake – sometimes it looks done on the outside, but is dead raw on the inside. Give it time.
If your really want to stop your loaf from taking on more colour, you have a few options. Firstly, you can lower the oven temperature. Easy. Secondly, you can cover the loaf with a piece of tin foil, while still leaving plenty of room for steam to escape. Finally, I have read that you can VERY CAREFULLY remove the bread from the dutch oven and set it on the oven racks to finish it’s time in the oven. Because the dutch oven has so much radiant heat, removing it will allow to loaf to finish cooking at a lower temperature.
Secondly on the gummy loaf front, you might have A) cut it without letting it cool B) somehow deflated the loaf (I find dropping it into the dutch oven a culprit here).
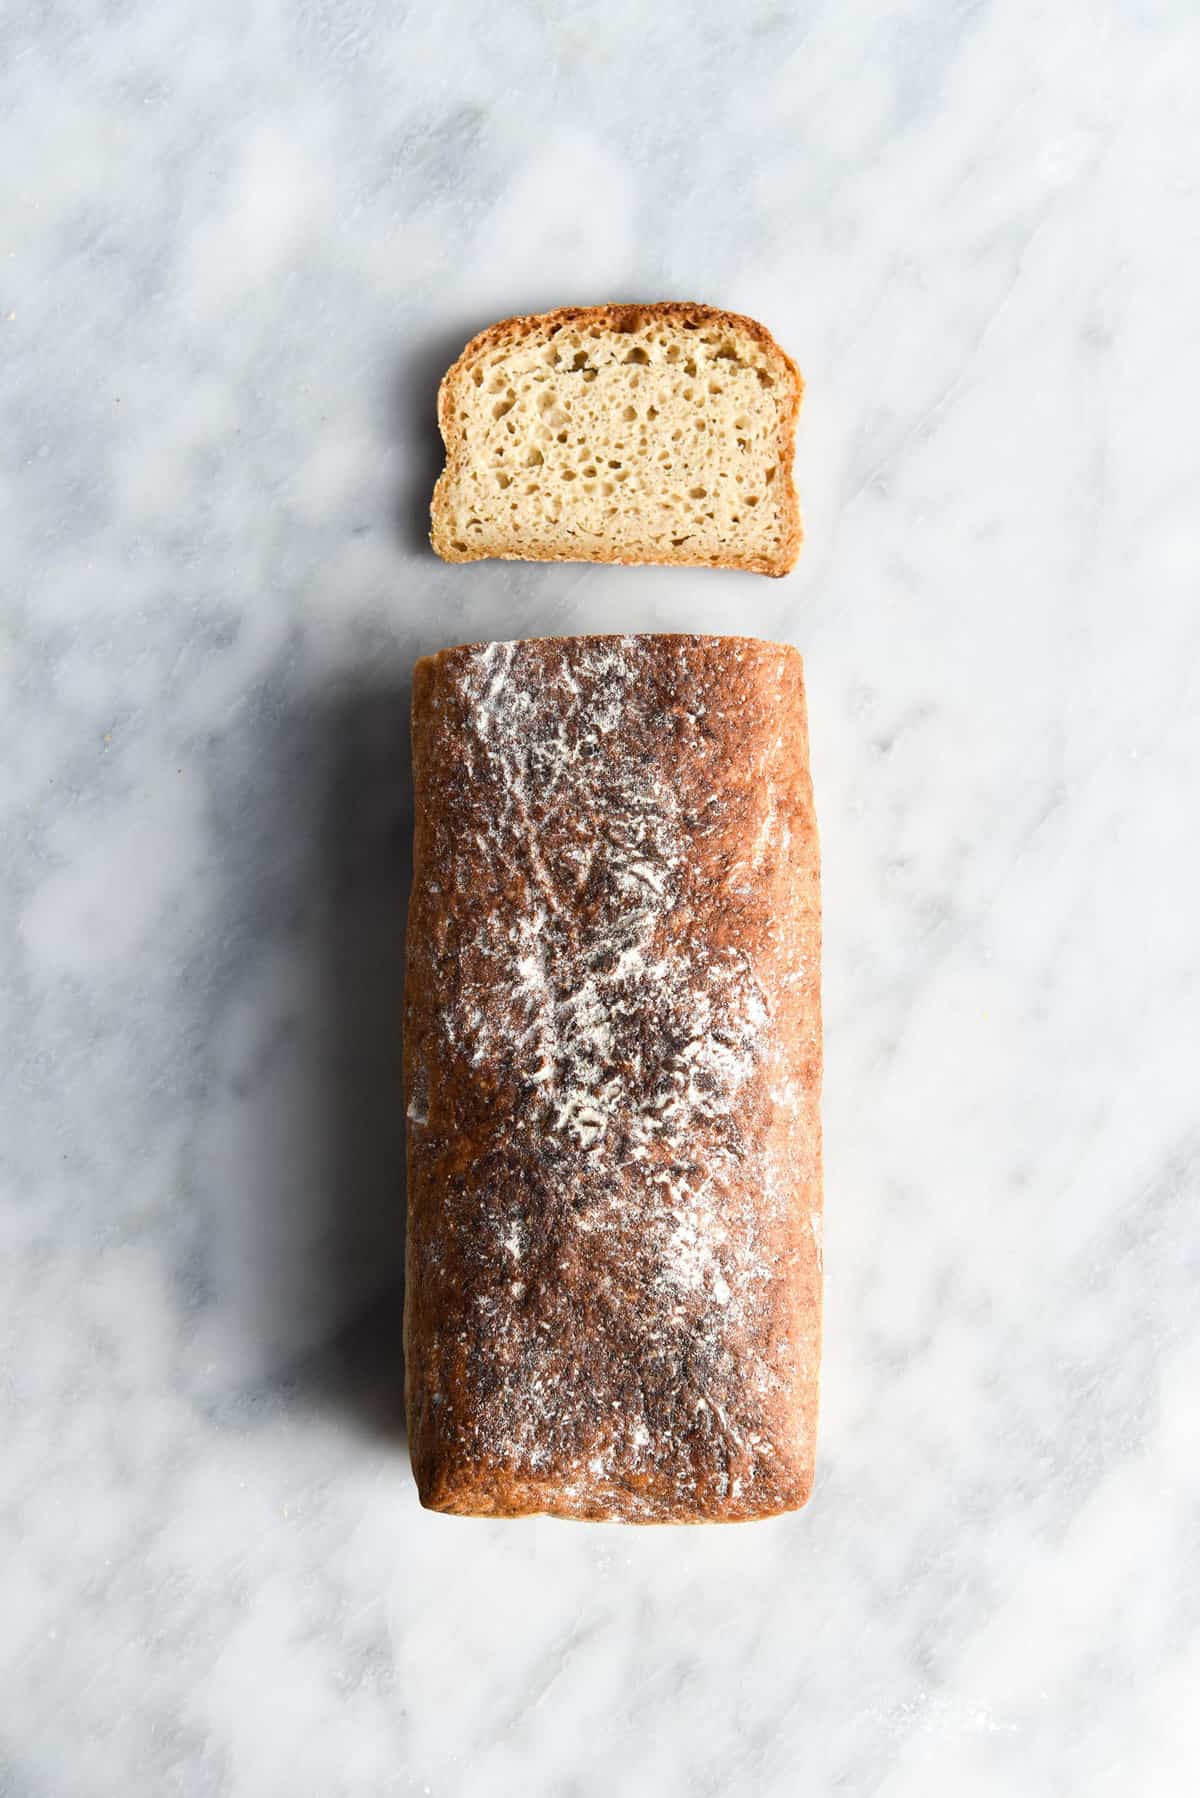
Can I make this gluten free white bread sourdough into a loaf?
Making a loaf as opposed to a boule requires a few changes to the recipe. I would recommend acquiring a loaf pan. Personally, I use a USA pan steel Pullman in the small size. I strongly recommend using a metal loaf pan – metal conducts heat well and has firm sides so that the loaf doesn’t proof outwards as well as upwards.
Next, you’ll need to place a small baking dish at the base of your oven prior to preheating it. Preheat the oven as per usual – an hour at a high heat is ideal. 10 minutes before you’re ready to bake your loaf, boil the kettle. VERY CAREFULLY pour the boiling water into the base of the baking dish and close the door. The steam created will be reminiscent of the steamy environment created in a dutch oven. It will also have the capacity to burn, so be really careful.
Bake the loaf for the specified time, uncovered, in the steamy oven. This will replicate the oven spring capacity of a dutch oven as best as possible. You can lightly cover the loaf in the second half of baking if you feel the crust is becoming too dark. You can also remove the loaf from the tin (after the initial 50 minute baking) so that the heat from the metal doesn’t darken the bottom crust too much. Note that if you take it out too early, you’ll risk collapsing the loaf.
If you don’t have a steel baking tin, you could potentially use a silicone baking tin. Have a read of this forum discussion here. They suggest putting the silicone in something for the duration of proofing to hold the walls steady so the loaf doesn’t proof outwards. Note that you might sacrifice a bit of oven spring, but the bread will still be delicious.
Keep in mind that there is more oven temperature variance and heat conductivity variance when baking a loaf. Use your intuition and adjust the baking times to suit your set up. The loaf should stand proud, have a lovely golden crust and sound hollow when you tap on it.
More gluten free sourdough recipes
- My original gluten free sourdough
- This sourdough without rice flour
- My sourdough discard brownie cookies
- These sourdough pizza bases
- Sourdough banana bread
- Sourdough hot cross buns
- 100% buckwheat sourdough loaf from my buckwheat e-book

Gluten free ‘white bread’ sourdough
Equipment
- Large glass or plastic mixing bowls
- Boule shaped Banneton (bread shaping basket) or a bowl with a clean tea towel
- Lame (scoring blade) or sharp knife
- Dutch oven, baking stone, baking cloche or a Pullman pan
Ingredients
To make the preferment:
- 130 g active thick and bubbly starter (see introduction for link, also see notes)
- 100 g sorghum flour or millet flour
- 100 g water
To make the loaf:
- 100 g millet flour
- 50 g sorghum flour
- 100 g tapioca flour
- 100 g potato starch
- 2 – 2 1/4 (11-13g) teaspoons fine salt (I used table, note that different salts are different salinities)
- 1/4 teaspoon ginger powder
- 1/4 teaspoon vitamin C powder (or substitute with apple cider vinegar, added to psyllium liquid mix)
- 25 g psyllium husk (not psyllium husk powder)
- 400 g water
- 1 tablespoon olive oil (optional, makes for a softer crust)
Instructions
To make the pre-ferment:
- Firstly, ensure you’re using a starter that has been fed a few hours before. It should be on the rise and have a domed top when you measure it into the bowl. I’d suggest feeding your starter at 1 or 2pm, and then waiting until the peak of your starter (2-3 hours in a warm place) to make the pre-ferment.
- Once the starter is ready to go, mix it with the water and then add the flour to create the preferment. Stir until combined and cover with cling film or a wrap. I hate recommending cling film but it does do a good job here. I do recommend reusing the cling film for bread purposes (and everything else, really).
- Leave this in a warm, draft free place overnight. The preferment should look like a starter that has begun to fall after not being fed for a while. The top should have some popped bubbles but it will still look quite watery. Even if you think it has 'failed' it should still strengthen both the flavour and the physical dough. If it has absolutely no bubbles, doesn't look any different and has no sour smell, discard it and start again.
To make the loaf:
- In a medium sized mixing bowl, combine the psyllium husk, water and apple cider vinegar if you can't get Vitamin C powder (never use them both together). Whisk to combine, and then leave for 5-10 minutes to thicken into a gel.
- While you’re waiting, combine the flours, ginger powder, vitamin C powder if you have it and salt in a large glass or plastic mixing bowl.
- Once the psyllium gel has thickened well, whisk it into the preferment and oil (if you're using it) Add this wet mixture to the flours and use a spoon to combine the mixture. It will get to a stage where it looks like a scraggy scone dough – get in there with your hands and squelch it through until you have a hydrated, smooth-ish ball of dough. You could also use a stand mixer and a dough hook, but I find this easier and quicker.
- Place the dough onto a lightly floured dry benchtop to shape it as best you can. I have linked a clip of how I shape my loaves in the notes section.
- When the dough is shaped, lightly flour your banneton or bowl with white rice flour. Place the nice side of the dough (aka the side with no seams that you’ve chosen as the top of the loaf) down into the banneton. The base of the loaf (with all the seams) should be facing upwards.
- Cover the loaf (make it airtight or the dough will dry out) with a lightly oiled shower cap or the cling you used for the pre-ferment. Place the loaf in a plastic bag and place either in the fridge or on the bench to proof. See proofing section for your options. If you proof it on the bench, it will take anymore from 3-6 hours, weather dependent. It might even take more. If you use the fridge, you can leave it overnight.
To bake the loaf:
- Around 30 minutes before the loaf is proofed (knowing a good proof is an art you learn with practice, but see notes for tips) preheat your dutch oven at 300-350C/572-662F. Note that some dutch ovens can only go to 300C/572F, so make sure you know which sort yours is. Dough is properly proofed when you poke it and the indent bounces back partially, but not all the way.
- When the oven and loaf are both ready, take a rectangular piece of sturdy baking paper and lay it on a damp bench. It needs to be long enough that you can lower the loaf into the Dutch oven without burning your arms. In my experience, dropping the loaf into the Dutch oven results in a flat and gummy loaf.
- Invert the loaf onto the centre of the baking paper, leaving the edges for lowering handles. Use a lame (sharp scoring blade) or a sharp knife to make a reasonably deep incision in the loaf. Google ‘bread scoring’ for some pattern ideas, or just keep it simple.
- Get all your oven gear ready to work quickly for this next step. Carefully and quickly remove the super hot Dutch oven from the oven. Shut the oven door while you work. Take the lid off and quickly lower in the bread, before quickly replacing the loaf to trap steam.
- For a blonder crust, drop the heat back to 220C/428F and bake for an hour. For a darker crust, keep the oven at 300C/572F for 30 minutes, before lowering to 220C/428F for the next 30 minutes.
- Once the time is up, remove the lid and continue to bake your loaf for another 20 or so minutes, or until the crust sounds hollow when you knock on it. For a blonder crust, drop the heat back to 180C or 356F.
- Once cooked, remove the loaf from the oven and baking paper, placing it on a cooling rack. Allow to cool completely (3-4 hours, ideally overnight) before slicing into it, as you can compress all the air in the loaf and end up with extremely gummy bread.
- You can store the loaf in a bag or freeze it in slices.
This and your previous GF sourdough recipe have changed what I think of GF bread. THANK YOU. Lots of effort, but so worth it. To make this one in a loaf, rather than boule, shape, do I need a cast iron loaf-shaped pan? I’m relatively new to bread making and don’t have one …
Hi Jen! I’m so glad to hear that, thank you. In terms of baking a loaf instead of a boule – do you have any metal loaf tins? They don’t need to be bread tins per se, but metal is helpful because it conducts heat. You could also potentially try a silicone loaf pan if you have one (read this thread I found here – http://www.thefreshloaf.com/node/8792/silicone-bakeware) although you’d have to check if yours are suitable for a super high heat oven. I would recommend halving the dough into 2 tins if you have smaller ones. My bread tin is very big and the dough expanded quite significantly in proofing so it’s better to be safe than sorry. Good luck and happy baking!
Thank you for the tips. I do have a metal loaf pan; just wasn’t sure if it would hold the heat the way my tiny Le Creuset does (was a present; I can’t afford one, either!). I may try the metal loaf pan, if only for a new shape! Thanks, again, from the States!
Hi Jen, brilliant! A metal loaf pan should work a treat. I’ve updated the post but I wanted to make sure you got the memo – it’s helpful to add a baking dish of water to your oven when baking loaf style. It creates a steamy environment that helps give your loaf better oven spring – it basically emulates the conditions in a dutch oven. PS lucky you! Whoever gifted you a Le Creuset is a keeper 🙂
Hi!! When baking the recipe in a metal loaf pan, do you still recommend covering it for the first 60 minutes, the way you would in a Dutch oven? Maybe with tin foil? In your experience, how does bake time vary from the written recipe when making a loaf?
Hi Anya! There is a section on baking a loaf just above the recipe. I don’t recommend covering it in anything for the first 60 minutes – the steam from the water tin should help emulate dutch oven conditions as best as possible. You can cover the loaf very lightly with foil in the second half of baking if you think the crust is becoming too dark for your liking. As for the timing, mine cooked for the regular amount of time. However, this will depend on your oven and your loaf tin and how well they conduct heat 🙂
Can’t wait to try this! One question: you say this is a loaf, yet you mention the heating the dutch oven for baking. Should the loaf tin go inside the dutch oven? Thanks for all your wonderful recipes, just found your site today:-)
Hi Ally, I use the term loaf to describe a loaf of bread – just a general description. There’s a section just above the recipe on what to do if you want to make an actual loaf as opposed to a boule 🙂
Thank you! Somehow I missed that paragraph!
To be fair to you there are a lot of paragraphs haha. Happy baking 🙂
Wow what a loaf! I was out of millet so used 1/2 white rice and 1/2 buckwheat which subbed quite well. I also only had red sorghum so it is a bit darker that yours in the pictures. Due to timing i proofed after mixing the dough together in my tin for about 5 hours then refrigerated overnight, rested at room temp for maybe 45mins before popping in my cast iron pot. I didnt cook in a tin and it flattened into a batard. Beautiful texture and flavour, i am so proud! Thankyou for your wonderful work in developing this recipe.
Hey, I’m excited to try the recipe and am trying to go organic but I am having difficulty finding organic potato starch, do you have any suggestions for substitutes?
Hi Rebecca, I haven’t tried this recipe with any other flours so I don’t have a substitute. However, you can find my original sourdough recipe here and it contains no potato starch: https://georgeats.com/recipes/gluten-free-sourdough-bread-recipe-vegan-fodmap-friendly/
Great, thank you ?
good day! I am writing from Uruguay! I’m making your recipe and I have a question, an hour and a half of cooking? don’t you burn?
Hi Ignacio! Greetings from Australia 🙂 Yes, the loaf needs an hour and a half in the oven. This is because it contains a lot of water and we need to drive it out of the bread so it doesn’t end up gluggy or soggy. Make sure you cook it in a dutch oven or covered for the first 50 minutes – 1 hour. This will help ensure the bread cooks but doesn’t burn on top!
Indeed, I cooked it for 50 minutes (30 covered and 20 without the cover) and it did not remain raw but it remained very moist, still very good flavor, I made some modifications because I have neither millet nor sorghum, I added chickpea and oatmeal flour, I was surprised Today is still fluffy (I did it on Friday at noon).
I am going to try to bake it longer with the lid and when I uncover it, put a paper on top so it does not burn.
Thanks a lot!
Ohmigoodness! This revised recipe seems to be amazing. Haven’t tasted it yet (doing as told and not slicing it for several hours!) but the rise and the crust are incredible. My dinky oven doesn’t even go to the high temps you suggest, but I put it as high as possible, and so far so good!
Yay! I’m so glad to hear it has worked nicely for you Jen, keep me updated with the interior of the loaf when you cut into it!
The crumb and the density of the bread are perfect. A higher temp is great for the texture. But the temp was a bit high for me and my oven / pan. It burned a bit on the bottom. The taste — esp toasted with strawberry jam! — was very yummy. I think in my conversion from Australian teaspoons to American, there was too much salt. But that’s not your recipe issue. Can’t wait to do another one! And p.s., I just made your GF pizza dough for the second time. It’s really quite amazing. Husband and kid couldn’t tell it was GF. I will go rate that one, too, in case that helps you!
Hello! I really want to try this recipe, can I substitute potato starch with corn starch? I could not find potato starch at my local grocery store
Hi Diana, I can’t recommend cornflour as I have never used it in bread. I really don’t think it would work in the same way as potato starch, though. Potato starch is absolutely great for bread, so I’d recommend buying some online for future loaves, if you can. For now, I would probably suggest substituting the potato starch with half tapioca flour and half either millet or sorghum flour. I’d suggest using whichever one you didn’t use in the preferment, but either would probably work. Let me know how it goes!
Awesome recipe. Can I use flax seed powder instead of pysllum husk
Awesome recipe. Can I use flax seed powder in ace of psyllium husk
Hi Sirisha! Thank you. I have no experience using flax powder – I always use psyllium husk in my breads. You could definitely try using it but I’m afraid I don’t have any advice to give on how much to use and the resulting hydration percentage. If you try it, let me know how you go!
Hey! im about to attempt this but have a few questions. Ive already got my preferment ready – fed my starter yesterday at 2pm and then made preferment at 5pm and left it overnight. Its now 9.30am, do i make the loaf and then keep it in the fridge to proof until the next morning to bake? how long should it be proofing in the fridge? just afraid itll overproof.. still a newbie! or should i just proof on bench and then bake after the 3-6 hours? I used about 110g of starter and 100g of white rice instead for preferment
Hi Allysa, you can choose either of those options – I’ve given both so people can choose what best suits their schedule.
Because you have used less starter than specified, I don’t think it will overproof in the fridge. That said, proofing is hugely dependent on the climate in your kitchen (hot kitchens = faster proofing) so it’s not possible to say with any certainty.
Overproofing some loaves is part of the learning process and it’s pretty unavoidable. I still do it. But both of these options have produced beautiful loaves for me, so it’s really up to you how you’d prefer to do it
Best tasting bread so far for me but also my first flying crust! Does that mean I overproofed? Proofed on bench for about 4.5 hours
Also came out slightly gummy but toasting it does the trick. My oven only goes up to 250C so could be it, and also felt like it could’ve used more bake time. And I added about 40ml more water cause the dough was way too dry (not combining into one dough, still lots of dry flour peices that isnt combining with rest of dough) after water the dough seemed like the right consistency. should i have mixed it more instead? So afraid of over mixing. Also used white rice flour instead of sorghum
So far my favourite one! Will keep trying on this one ? Thanks George!!
So glad to hear that Ally! Because this loaf has a lot of starches in it, it’s easier to overproof (and yes, a flying crust is a sign of overproofing.) If you’re in a hot kitchen or climate you can reduce the starter to 100g, and proof in the fridge as insurance policy (just check your fridge isn’t too cold or it will take forever!)
As for the dryness – did you squelch the dough through your hands before adding water? It’s quite a high hydration dough so you might have added more water too quickly. At first it will look a bit like scone dough (with dry bits) but keep squelching and it becomes quite a wet ball of dough. If you did that, it might also be the absorbency differences between white rice flour and sorghum.
Gumminess can be caused by too much hydration (I also expect a little bit of gumminess in gf bread in general, just because of the psyllium husk). Try mixing the dough as it is next time (without extra hydration) and then adding extra only when you’ve really squelched it up and only if you feel like it still needs it.
Luckily, there’s no such thing as over-mixing this dough (unless you’re slapping it around for hours) so don’t worry about that! Unlike regular bread there’s no gluten to overwork so it doesn’t matter.
Let me know how you go with your next loaf!
thanks for the reply! yes i did try squelching the dough and it was just taking too long and hard to combine it. my arms got sore and tired lol. so i put it in a standmixer but it didnt quite combine as mush either… slowly added the water whil mixing until i felt was a right consistency. but ill try mixing it longer first without any additional water since it can handle it! just about to make my preferment! im still going to bench ferment it tomorrow.. would i still have to reduce starter to 100g or stick with 130g? i live in malaysia so yes warm and humid climate 🙂
I honestly think you’re better off using your hands with this recipe. I mixed up this loaf this morning and it did look dry (like scone dough) but was actually very wet.
In a humid, warm climate I would definitely reduce the starter to 100g. I would also cut down on the fermentation time, and maybe split it between the bench and the fridge.
For example: I made a buckwheat loaf this morning – my kitchen is 26C right now and the loaf is nearly fully proofed at 1 hour 30 minutes. I’m going to put it in the fridge to slow the fermentation while I preheat the oven. I find it helpful to finish fermenting in the fridge because it sets the loaf up a little which can help with rising upwards instead of outwards. It also just allows you a little more flexibility with timing 🙂
Hi, I’m about to make your recipe. I fed my starter yesterday around 5pm with 100 gram of sorghum and wait overnight. This morning it’s kind la flatted but I can see it was growing bcos it left sign the flour was reaching on top. So I fed it again this morning with 50grm of soy human 50grm of water, just to activate it a bit till noon ( I hope this is ok). My question is can I just proof the dough only for 3-6 hours, without proofing in the fridge?. And I don’t have Dutch Oven, can I just do it in normal pan that can goes to high heat like a pan for pie, because I saw somebody do this w/o Dutch Oven. I hope you can reply soon ?… thank you
Hi Sukma, it seems like you have fed your preferment twice, which will throw off the ratios of flour to starter and water. You might end up with a different result than the recipe.
You don’t need to re-feed a preferment because you’re feeding it when you mix it up into a loaf. So next time I would suggest only feeding it once as per the recipe.
You don’t need to proof in the fridge if you don’t want to. It can be helpful because this is a high starch loaf and it proofs quickly, but isn’t necessary.
You can cook bread without a dutch oven – I have used a preheated skillet and some foil before. Sometimes it helps with oven spring if you add a bit of boiling water to the base of your oven to create steam beforehand
Hi. Can you tell m precise how much exactly the amount of the starter ( preferment). Thank you
130g as per the recipe card, but this can be subject to experimentation, depending on the climate where you live. If it’s a hot humid climate, use less starter (ie 100g). If it’s a cool climate, use the specified amount (130g). There is a section on this in the post called ‘a note on how much starter to add.’ There’s no concrete answer because it depends on the factors specified in the post
I’m an avid non-GF baker (till now…) and I loooove sourdough! I’m gonna try this recipe tomorrow – I loved the fact it doesn’t have any eggs or other additives and the ingredients resemble a lot the normal wheat bread. Two questions: Is tapioca flour and starch the same? I have starch but not flour. Also, could I replace sorghum flour with any other? Eg. teff, buckwheat, rice flour?
Hi Mary! They are a little different but I often use tapioca flour and starch interchangeably. In this application it’s totally fine (I do it all the time.)
As for replacing the sorghum, that’s totally fine. I have been really enjoying light teff in sourdough bakes at the moment, but any you’ve listed would work well. Just don’t use any more starches (potato, tapioca etc) and you’ll be golden.
Let me know how it goes!
Thank you so much for the prompt reply, it turned out GREAT! Excellent texture and super tasty too! I think ginger is a bit off but I’ll fix that next time. Thanks again!!!
So glad you enjoyed it Mary! 🙂
Hi Georgia.. I’m so curious for this bread. I need some explanation for the active starter. So right now I have my starter in the fridge. The recipe says 130 gram active starter. How do I start the starter active from?. I take 130 gram straight from the fridge and feed with 100 gram of flour + 100 gram water or I take 50 gram from the fridge and feed it with 50 grams of flour + 50 grams of water and wait until its peak time and I feed it with 100 gram flour + 100 grams water. ?. I hope you can understand my problem. Thank you Georgia
Hi Sukma! I think I understand what you’re asking. Take the starter from the fridge and feed it (the whole starter) until it is nice and active. Then take 130g of the active starter to use in your bread.
The methods you have suggested could also work but they are less precise in terms of weight – it’s more of a guessing game. You also cannot guarantee that the starter will be up to strength straight out of the fridge, so you would have to keep feeding it, resulting in more starter than you need. Obviously, you could then just put the extra starter back into your main jar of starter, but it is easier to just take 130g from an active, ripe starter.
I hope that helps!
Hi Georgia, thank for your reply. So I assume that I just feed my starter from the fridge and wait until its peak and take 130 gram and mix with 100 gram of flour + 100 gram water to make the preferment. Hope this correct. Sorry to much asking, I’m new to this sourdough starter.
Hi Sukma, no apologies necessary! That is correct – 130g active starter with 100g flour and 100g water.
Let me know how you go with it 🙂
Thank you so much for your fast respond. I might do it soon and let you know the result. Thx again Georgia.
I’ve been making this recipe for some months (prompted by havinh 2 coeliacs in the family) and I’ve just had the best result ever, mainly due to the following changes:
1) my husband bought Psyllium husk powder by mistake and it’s all I had to work with
2) I am feeding my starter with sorghum.
I thought the psyllium husk powder was OK at first but I thought the resulting bread did not rise very much and tended to be gummy. So for the last loaf, I reduced the psyllium to 20g and left everythin else the same. I bake in a loaf tin with a tray of water underneath. My oven max temp is 240C so I bake for 30 minutes at 240C and then for another hour at 220C. I have to pur a piece of baking paper over the top for the last 30 minutes to prevent over-browning.
I have tried various mixes of flours but definitely the best result (and flavour) has been achieved using the original recipe. This one is definitely a winner!
I would love to turn this into a cinnamon raisin swirled loaf. My thought was to gently flatten the dough right before shaping, add soaked, drained raisins along with some cinnamon sugar, and then roll it to form the swirl. I’ll probably try to tuck the ends under but I’m not sure it really matters if I get any tension on the surface of the loaf – does it? There’s no gluten formation so I think it’s a moot point. Then I’d like to place it in a batard shaped banneton for a 10 hour cold proof before baking. How would you approach this? Am I missing something? Would you try a different method?
Hi Erin! Quite honestly I have not yet attempted anything of the sort so I have no guidance to give. I’m working on some sweet and savoury sourdough recipes though so I will update the post if and when I have more knowledge. Let me know how you go if you try it – sounds delicious!
PS I posted a pic on my IG page of the finished loaf and tagged you!
@erinbloys
I would love to see it Erin! Your account is private so I can’t see the tag at the moment. If you’d prefer you can send me a photo via DM and I can swoon over it that way 🙂
I can’t believe how wonderful this experiment turned out! I used your recipe above, however made just a couple of additions. As I mentioned in my earlier comment, I wanted to turn this into a cinnamon raisin swirl batard. So here’s what I did: I soaked 125 g of golden raisins overnight in hot water and put the bowl in the unlit oven sitting next to the bowl with my preferment. This morning I used the drained soaking liquid from the raisins in place of the water called for in the dough recipe. The dough came together exactly as you described in the recipe; it was such a pleasure to work with! Really nice to handle! I gently flattened the dough out into a rectangle about the length of my banneton and about twice the width of it. I then generously sprinkled the surface with cinnamon sugar and scattered the plumped raisins over the cinnamon sugar surface. I then rolled it up like a jelly roll, tightening it as I went along. I placed it in my rice floured banneton and then in a plastic ziplock bag. It proofed at room temperature (72F) for about 2 hours, and then cold proofed for another 8 hours. It baked in a covered dutch oven (I threw 2 ice cubes in with the loaf right before I put the lid on) at 450F fo 60 minutes and then at 400F for another 20 minutes until the interior reached 212F on my instant read Thermapen. I wish you could see how gorgeous this loaf is! The score marks opened beautifully with plump raisins poking through the score, and the loaf had such great oven spring that it’s hard to believe it’s not a gluten loaf! I am thrilled!! Thank you so much for sharing this fantastic and delicious recipe!
I’m so glad it worked for you Erin and thank you so much for sharing this info! It sounds like an incredible loaf <3
Hi Georgia, how long is your “overnight” proof? I imagine if I make the loaf at 9 am and proof overnight the results might be different than if I make it at 9 pm and proof overnight to bake the following morning. Should it be close to 24 hours or more like 12? Does it matter? Thanks!
Hi Chelsey! I have successfully used the fridge for an 18 or so hour proof for this recipe. Some readers use a 24 hour fridge proof. This depends on your starter and also the temperature of your fridge (it will proof quicker in a warmer fridge, slower in a really cold fridge). It does take a little experimentation depending on your environment so there’s no right answer.
I have also assembled the loaf at night – I generally assess it in the morning and leave it on the bench for a few hours if it needs a bit more proofing time.
Hope that helps!
Hi. I’m getting into GF sourdough baking but cannot have psyllium. It seems that every recipe uses it. Is there a replacement? Can I use an egg instead? Or anything else that will work?
Hi there! Sorry to hear you can’t have psyllium. Psyllium absorbs a lot of water so it’s difficult to replace or substitute in a purpose made recipe. Flax meal and chia seed meal are absorbent like psyllium husk so they could potentially be a replacement but I can’t say how much as I don’t generally use them. I would recommend searching for a recipe that uses them specifically for the best result.
Good luck and I hope you find a recipe that works for you!
I have a close friend whose daughter is allergic to wheat, rice, rye, AND oats. I have been searching for a long time to figure out how to bake for her. My first loaf turned out pretty good and the taste was great. Even for a wheat loving sourdough enthusiast 😉 Thank you so much! She can have sourdough bread again!!!
This looks like a great recipe. I want to do whatever I can towards having the mildest sourdough flavour possible so will be using white rice flour. You said ” If you prefer a less pronounced sourdough, you could probably use white rice flour. However, I’d recommend adjusting the water content to suit, as white rice is a thirstier flour than sorghum.” Any guidelines fo me regarding the adjusting of the water for the preferment? (Also, any other suggestions re getting a mild sourdough flavour – I think I read that a shorter proofing time can result in a milder sourdough flavour.)
Another amazing recipe! Any tips for loaves that are a bit burnt on the bottom when rest of exterior is perfect? Also, with overnight fridge proofing method, I get a lot of cracking on exterior even though boule is covered and stored in airtight plastic bag.. Any thoughts? Thanks!
Hi Anya! Are you using a dutch oven? I would suggest maybe putting it on a baking tray in the oven to protect the base a little more. Otherwise, maybe try lowering the oven temp a little, or placing a heatproof dish of boiling water in the base of the oven 10 minutes before baking. Steamy heat might be more gentle.
As for the cracking – I haven’t experienced this! Are you proofing it in a banneton? Is it just the base of the loaf (which is exposed to air) or the top of the loaf too?
I have had cracking on a baguette that I floured with tapioca. Are you using starch to shape the loaf? My only other thought is that you might try upping the hydration a little, or perhaps adding a tablespoon extra oil? The oil helps a bit with crust elasticity so it might help with cracking in the proofing stages.
Let me know how you go!
Best Sour Dough Bread!
This was the most outstanding bread! I was about to give up on my gf sour dough endeavor until I came across your site! Thank you and God bless!
I’ve been gifted a 50 pound bag of Cassava flour. Have you ever used this? I wonder if I can use this flour instead of the others listed?
Hi Debe! I have never worked with cassava flour so I can’t tell you for sure. I think you would need to find a recipe that specifically uses cassava flour (particularly if you are planning to use it as the only flour, which is how I have interpreted your comment). This is because most of my sourdough recipes take into account the different hydrations required for each different flour. I don’t know how thirsty cassava flour is, so this recipe might use too much or too little water for cassava.
You could try substituting cassava for the tapioca flour and adding water to suit, but I haven’t tried it.
I am intrigued by the idea so at some point I might try and source a bag. Let me know how it goes if you try it!
Help Georgia,
I have spent quite a while reading though your Gluten free starter for bread.It is so comprehensive with notes etc- that I did get frustrated and thought “I can’t do this-too much information”!!!
Is it possible to just have the recipe exactly as I should follow?
It’s the starter that I have difficulty getting my head around.
I certainly don’t mean this to be a criticism at all- just want straightforward instructions.
Hope you can help with my request
I’m a Melbourne girl too????
Kind regards Helen
Hi Helen,
If you click on the ‘jump to recipe’ button it should take you to the instructions for the starter. Hopefully they are straightforward enough for you to follow – it is easier than it sounds, I promise! Do let me know if you have any questions though 🙂
Hi Helen, just realised you commented on the white bread sourdough – the instructions for the starter are here:
https://georgeats.com/how-to/how-to-make-a-gluten-free-sourdough-starter-from-scratch/
Goodmorning from Perth
I have mixed my sourdough
But I used physlium powder by error
Do I keep going so start all over again
I have loaf proving as unsure .
Jaquie
Hi Jaquie,
Psyllium husk powder is just a bit more absorbent than husk, so you might find your loaf was a little drier or a bit gummy.
Other than that, it’s ok! You can always just use 5g or so less psyllium husk powder if that’s all you have.
How did your loaf go?
I love your recipe! I waited a month b4 using the starter. Boy, it’s sour for sure, but I love it! The 1st time I made it I was also fermenting sauerkraut and pickling refrigerator pickles and going to Zoom meetings and I missed the 2 starches! I still baked it, but it had a hole in the loaf and wasn’t cooked. So, the next time I wasn’t as busy and I did it right. So Good! Thank you, Georgia.
Oh! Your pancake recipe is great too. I did use it for them twice also.
Jeanie
What a great recipe you’ve created! Gluten free sourdough is a challenge, however, your step by step instructions made the process less daunting. I’ve managed to produce a couple of perfect loaves so far, with many more in my future.
Thank you so much!
I’m so glad you enjoyed it Paulla 🙂
I have made this several times. Absolutely amazing.
I leave the preferment for 48 hours for an extra sour flavour. I bench proof for 3 hours, then overnight in tbe fridge. I dampen it with water before baking and sprinkle sesame and flax seeds on the outside. It’s delicious. Thank you George.