
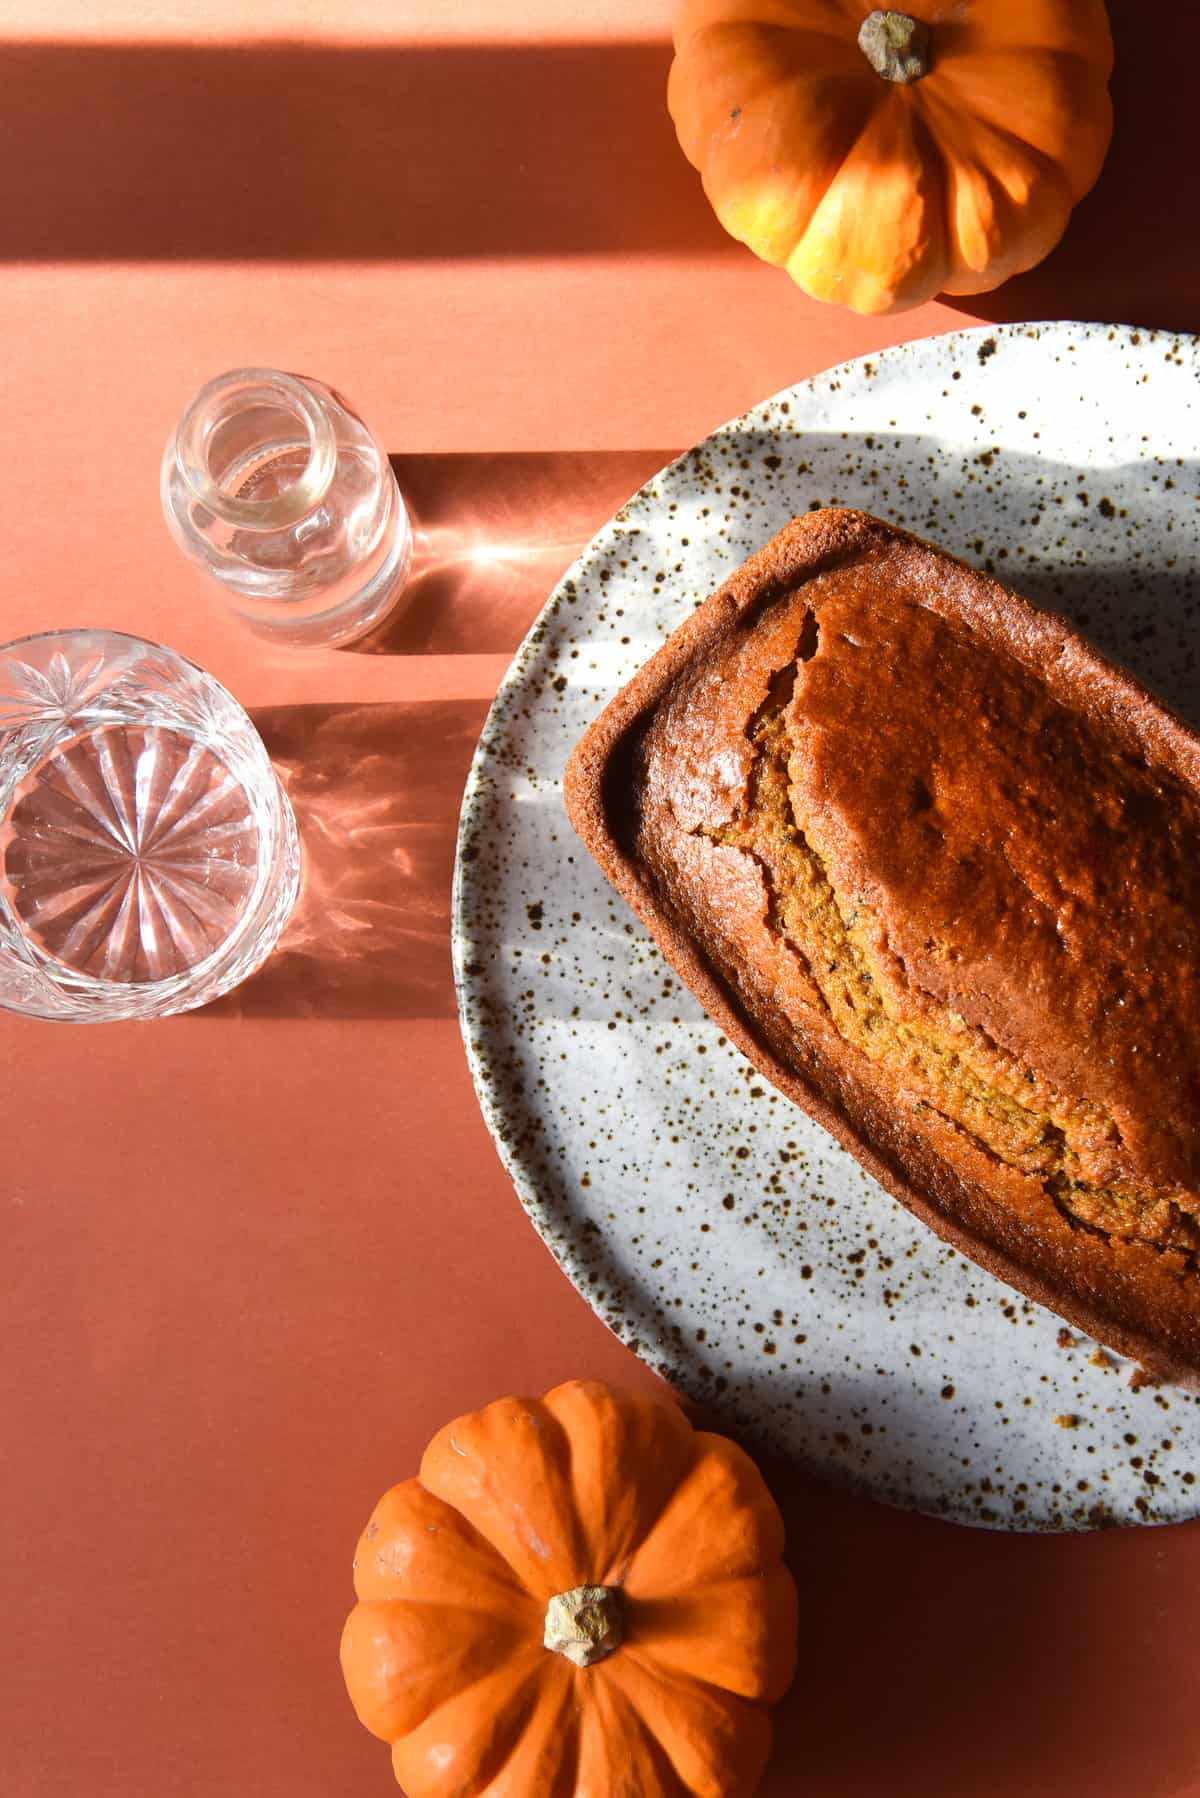
This gluten-free spiced pumpkin loaf came about because I follow a lot of American bloggers on Instagram. I’ve always admired the American ability to fully cherish each season, and to have exciting culinary traditions in that vein. Whether or not this merely a classic case of the grass being greener, I don’t feel Australia has as strong an attachment to seasons, particularly transitional ones.
Pumpkin spice, pumpkin loaf, pumpkin pie: these are all traditions I feel are worth embracing. Even if I’m going into Spring, while they are going into ‘fall’. This won’t be the last of my pumpkin based recipes, so fear not (or have fear, depending on your preferences.)
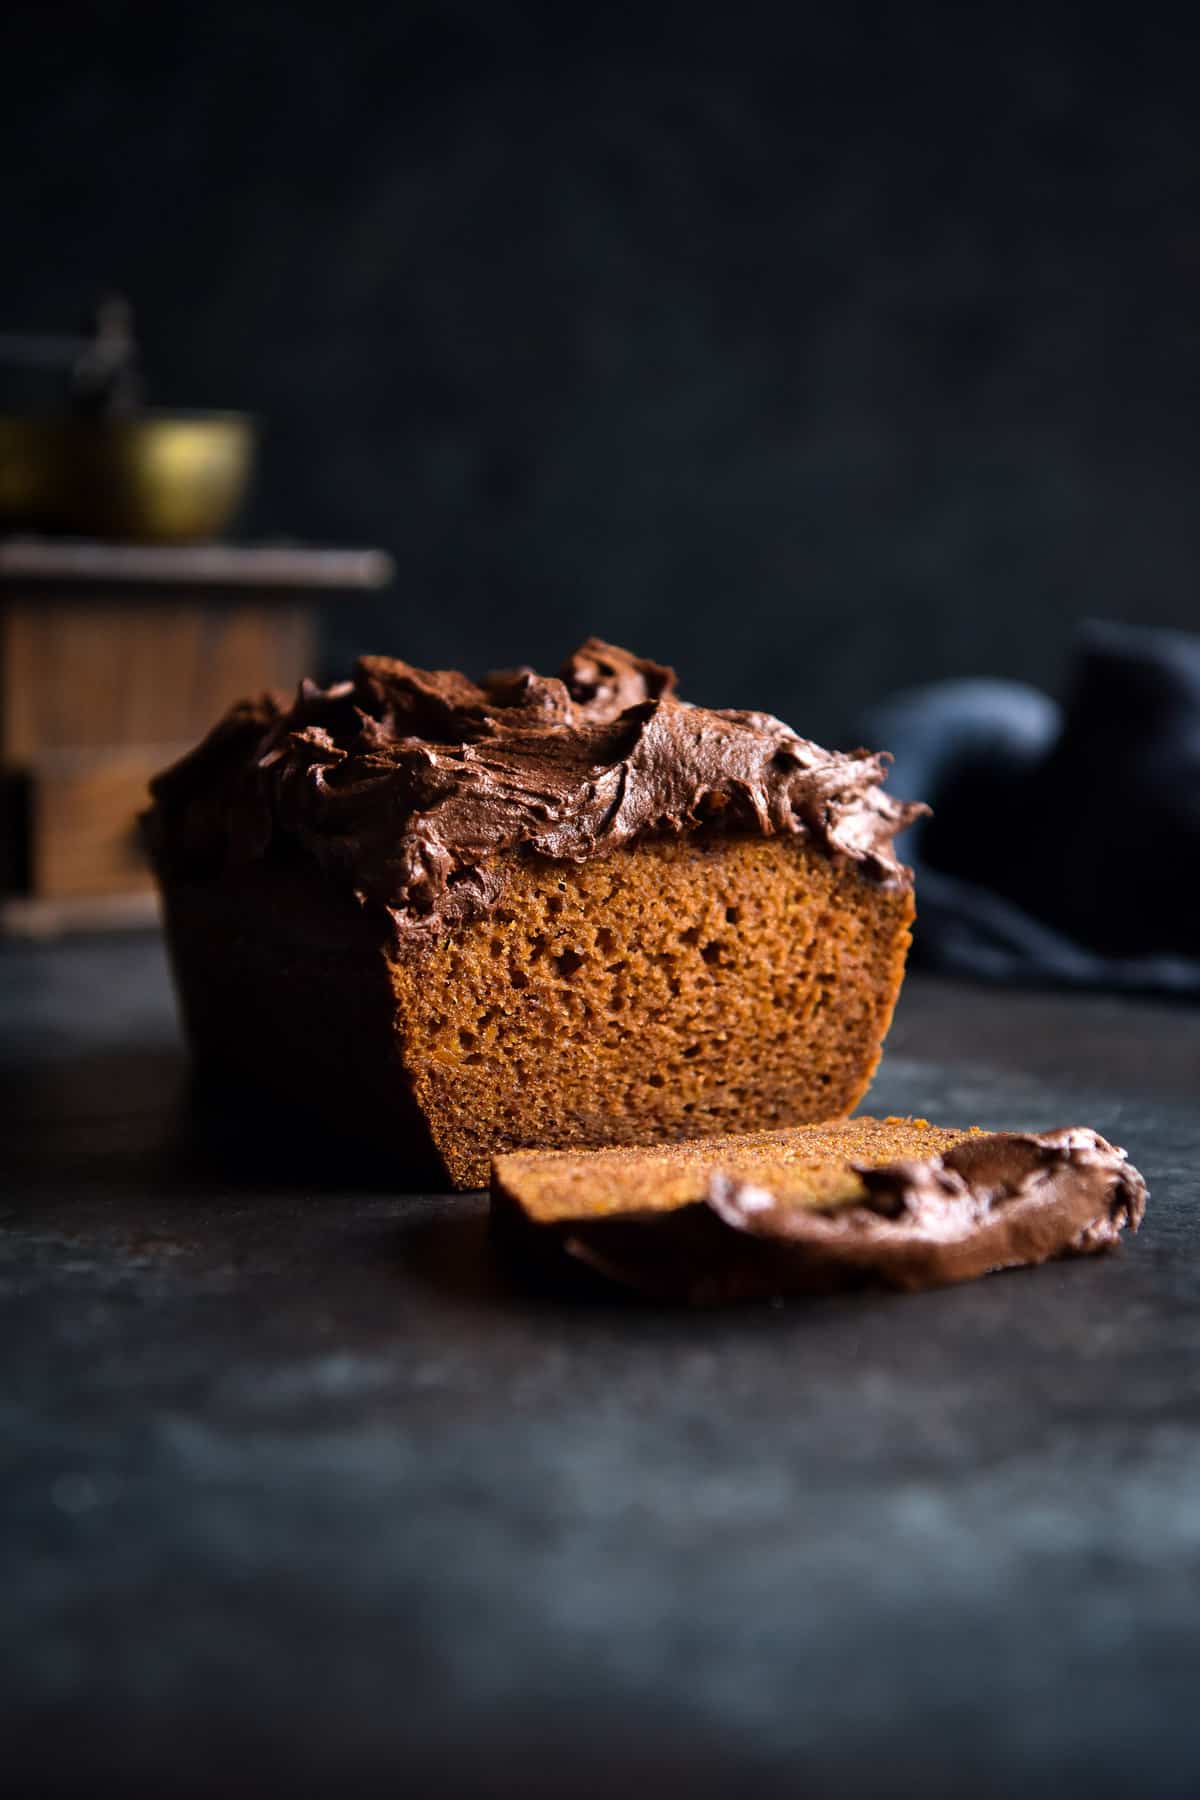
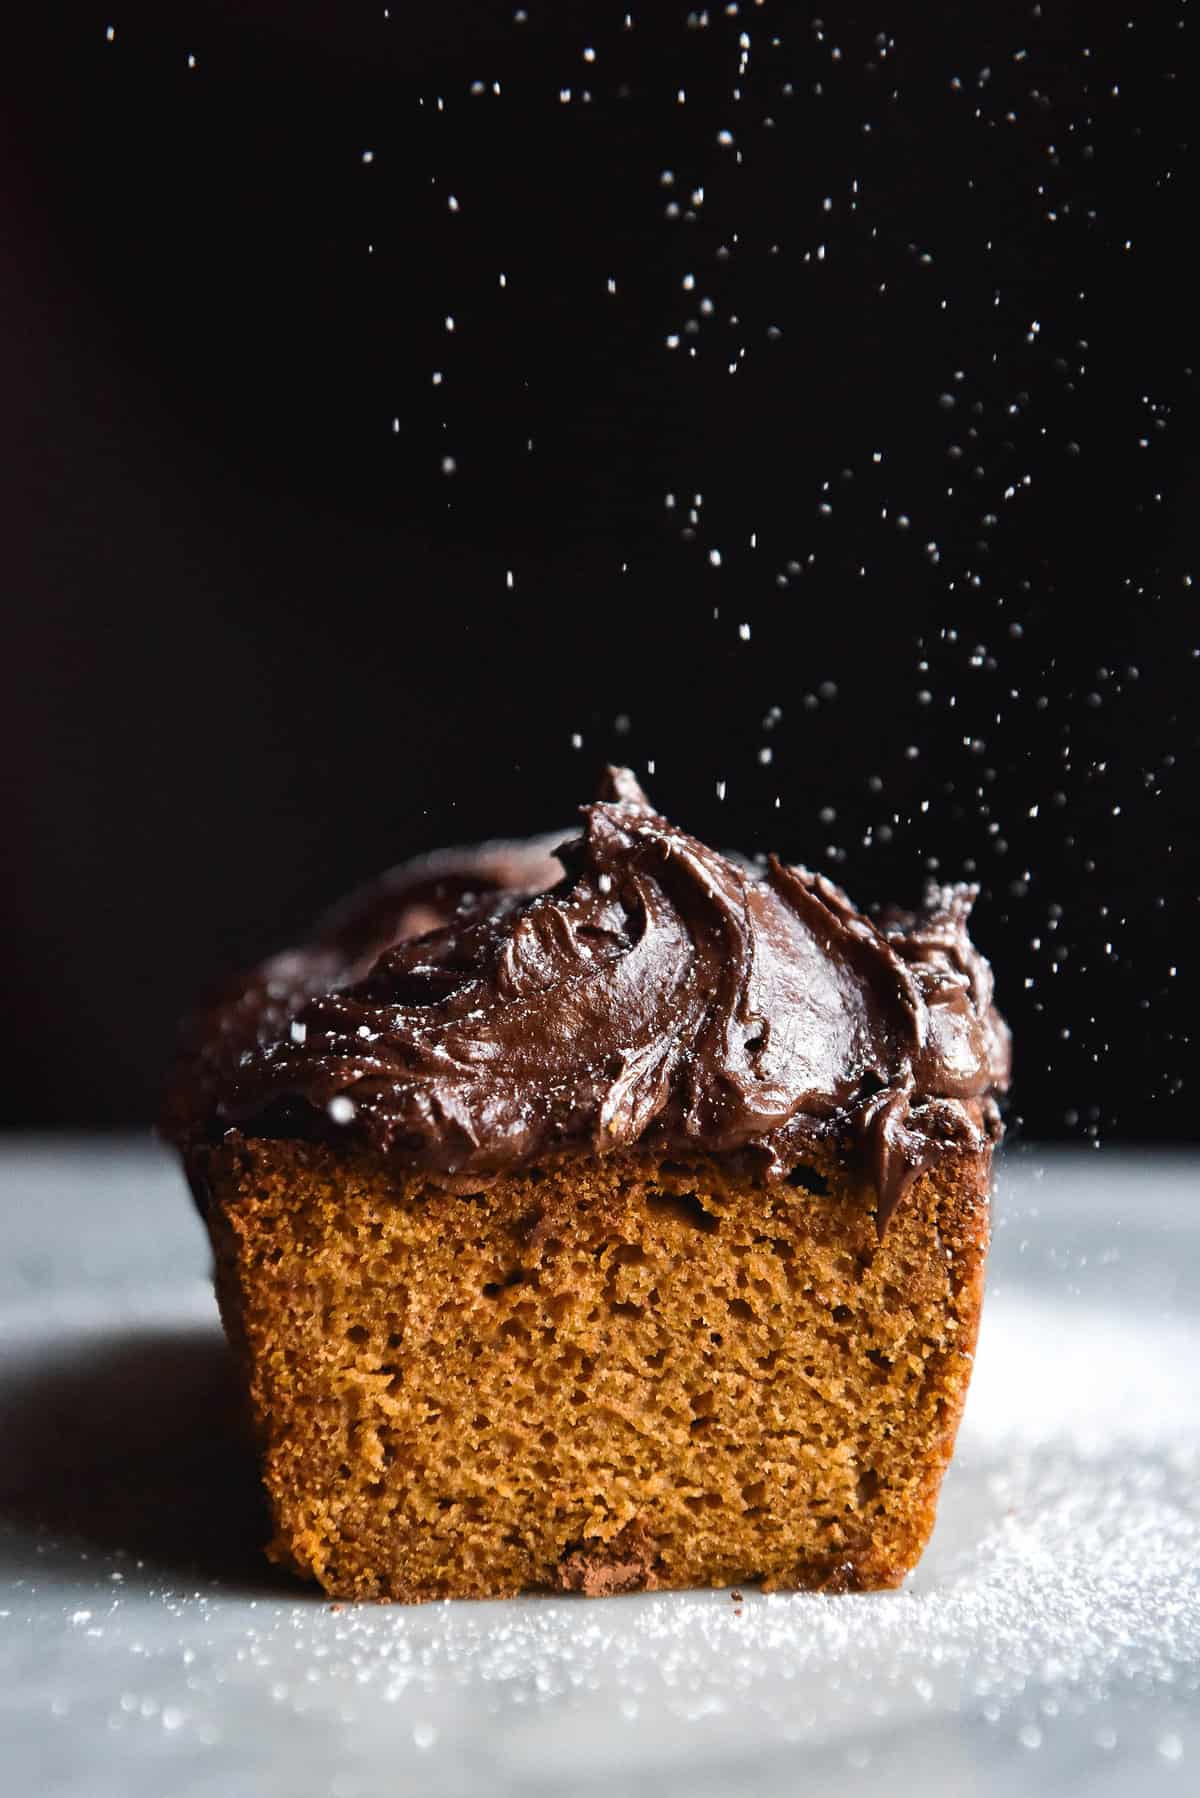
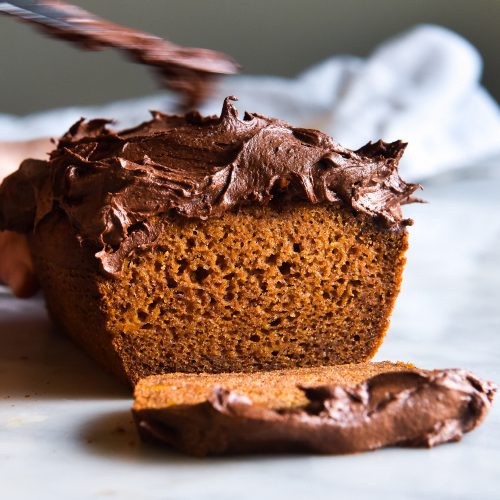
This loaf is gluten free, FODMAP friendly, and ridiculously easy to make. All it involves is mixing wet, dry, and then wet with dry. As for the chai spiced buttercream, well! It is a game changer, that’s for sure. Not only does it pair beautifully with the subtly spiced pumpkin loaf, but also the FODMAP friendly chocolate cake, the flourless chocolate cake, and the dairy free buttermilk banana muffins.
Recipe notes for the gluten free spiced pumpkin loaf
In Australia, it’s not super common to find canned pumpkin puree. As such, we have to make our own (which I prefer anyway as I have more control over it). See the section below on making your own pumpkin puree.
I always recommend buying your flours (but particularly rice flour) from a bulk food store or healthfood store, if you can. Supermarket rice flour has a tendency to be grittier. Further, it has a unique smell that translates into a unique taste. I find bulk food flours to be much finer, fresher and more subtle and nuanced in flavour. Truly.
I’m trying to come up with a brand I recommend for those without a healthfood store nearby. I used to recommend Lotus brand, but I’ve since discovered that their plastic packaging isn’t recyclable, even in soft plastic bins. As Simon Cowell says, it’s a no from me.
The spice blend I’ve used is one that I developed for optimal chai taste. That said, you don’t have to run out to the shops if you don’t have one of the spices. Hell, you could even omit the spices entirely for a simple pumpkin loaf.
I haven’t tried it, but I daresay this recipe would work as muffins or even a small cake. That said, I don’t have any cooking times because I haven’t tried it – you’ll have to figure those out. I generally recommend checking in 10 minute increments when you’re doing something experimental.
Make sure your pumpkin loaf is completely cool before you ice it. It would be a total travesty if your delicious, hard earned buttercream were to melt off the loaf upon contact.
Ingredient notes
- As I’ve mentioned elsewhere, I recommend using Japanese or Kent pumpkin. That said, this loaf makes 8-12 slices, so you should be OK either way. If you have access to canned pumpkin puree, you could also use that.
- You can either roast or steam your pumpkin. I prefer roasting because it brings out a sweeter flavour, but it is more time consuming. See the notes below for more information.
- Light brown sugar is a must for this recipe! It adds a caramel-like depth of flavour and complements the spices perfectly. I haven’t tried the loaf with any other variety of sugar.
- If you don’t have vanilla bean paste, you can use extract or simply omit.
- As mentioned elsewhere, don’t let a missing spice stop you from making the loaf. You can sub in other (chai) spices, use a chai blend, or even leave the spices out for a regular pumpkin loaf.
Making your pumpkin puree
You have two options for making your own pumpkin puree: roasting or steaming. This will depend on the amount of time you have, whether you can be bothered putting the oven on, and your personal tastes. I’ll go into each method below.
Roasting
Roasting is my personal favourite method, because I think it brings out the most flavour in the pumpkin. That said, it can be a lot more time consuming, so that’s something to keep in mind. To roast your pumpkin:
- You can cook the pumpkin with skin on or off, depending on what you want to do. Note that the skin will obviously effect the weight of the pumpkin, so you’ll need to account for this in the amount you cook. I always recommend cooking way more than you need. It’s easier to blend and it saves you from the nightmare of having to make more when you fall short. Plus, having roasted pumpkin in the fridge is never a bad idea. You can use it in salads, puree it and have it as ‘mash’, add it to a tart – any number of things.
- Preheat the oven to around 170C or 338F. Cut the pumpkin into large, equal chunks. Small cubes or pumpkin have a tendency to cook up chewy, and we don’t want chewy skins. Rub some oil into all sides of each piece of pumpkin – just enough to coat it and stop the outsides from going leathery.
- You can also add a little salt as an insurance policy – salt will draw out the moisture in the pumpkin, meaning it will be more difficult for the skin to crisp up. The low oven temperature helps, too.
- Roast the pumpkin pieces for around an hour or until a knife slides through the biggest piece of pumpkin easily. Needless to say, cooking time will depend on the size of your chunks.
- Allow them to cool before blending into a puree, particularly if you’re using a Nutribullet. Pick off any leathery bits, excess seeds or the skin, if you left it on. You can add all of these to a salad. Then, blend until smooth. You’re ready to make the gluten-free spiced pumpkin loaf!
Steaming
Steaming is a quicker process and it does the job. It doesn’t quite impart the same level of sweetness, but it does minimise oven time.
- Cut the pumpkin into small-medium, even sized chunks. In this instance, bigger pieces are a disadvantage because they take longer to steam.
- Place the pumpkin pieces in a steaming basket or metal colander over a medium-large pot of water over a medium heat. Pop the lid on and steam away! It’s worth noting here that I don’t recommend steaming them IN the water. While this would normally be fine, it can waterlog the pumpkin and change the consistency of the puree and thus the loaf. Gluten free baking is a delicate science, and adding additional water content to the mix could result in a soggy loaf. Nobody wants that.
- Once a knife slips through the biggest piece of pumpkin easily, remove from the heat and allow to cool. Once cooled, puree!
A note on the spices
I’m a big fan of spices, and I like my food to be spiced right up. I’ve tried to temper myself on the buttercream, but take note if you don’t want to spice up your life. If you only enjoy a lightly spiced baked good, taste and adjust as you go, using less spice if you really have to. Alternatively, use more! The more the merrier was never more applicable than it is to chai spiced buttercream.
FODMAP notes for the gluten free spiced pumpkin loaf
I mean, this section barely even deserves to exist, because there’s not much to chat about. The main ingredient with FODMAP potential is the pumpkin. I always recommend using Japanese or Kent pumpkin because of their lower GOS content. You can safely eat 75g of Japanese or Kent pumpkin per serving, whereas the safe limit for butternut is 45g.
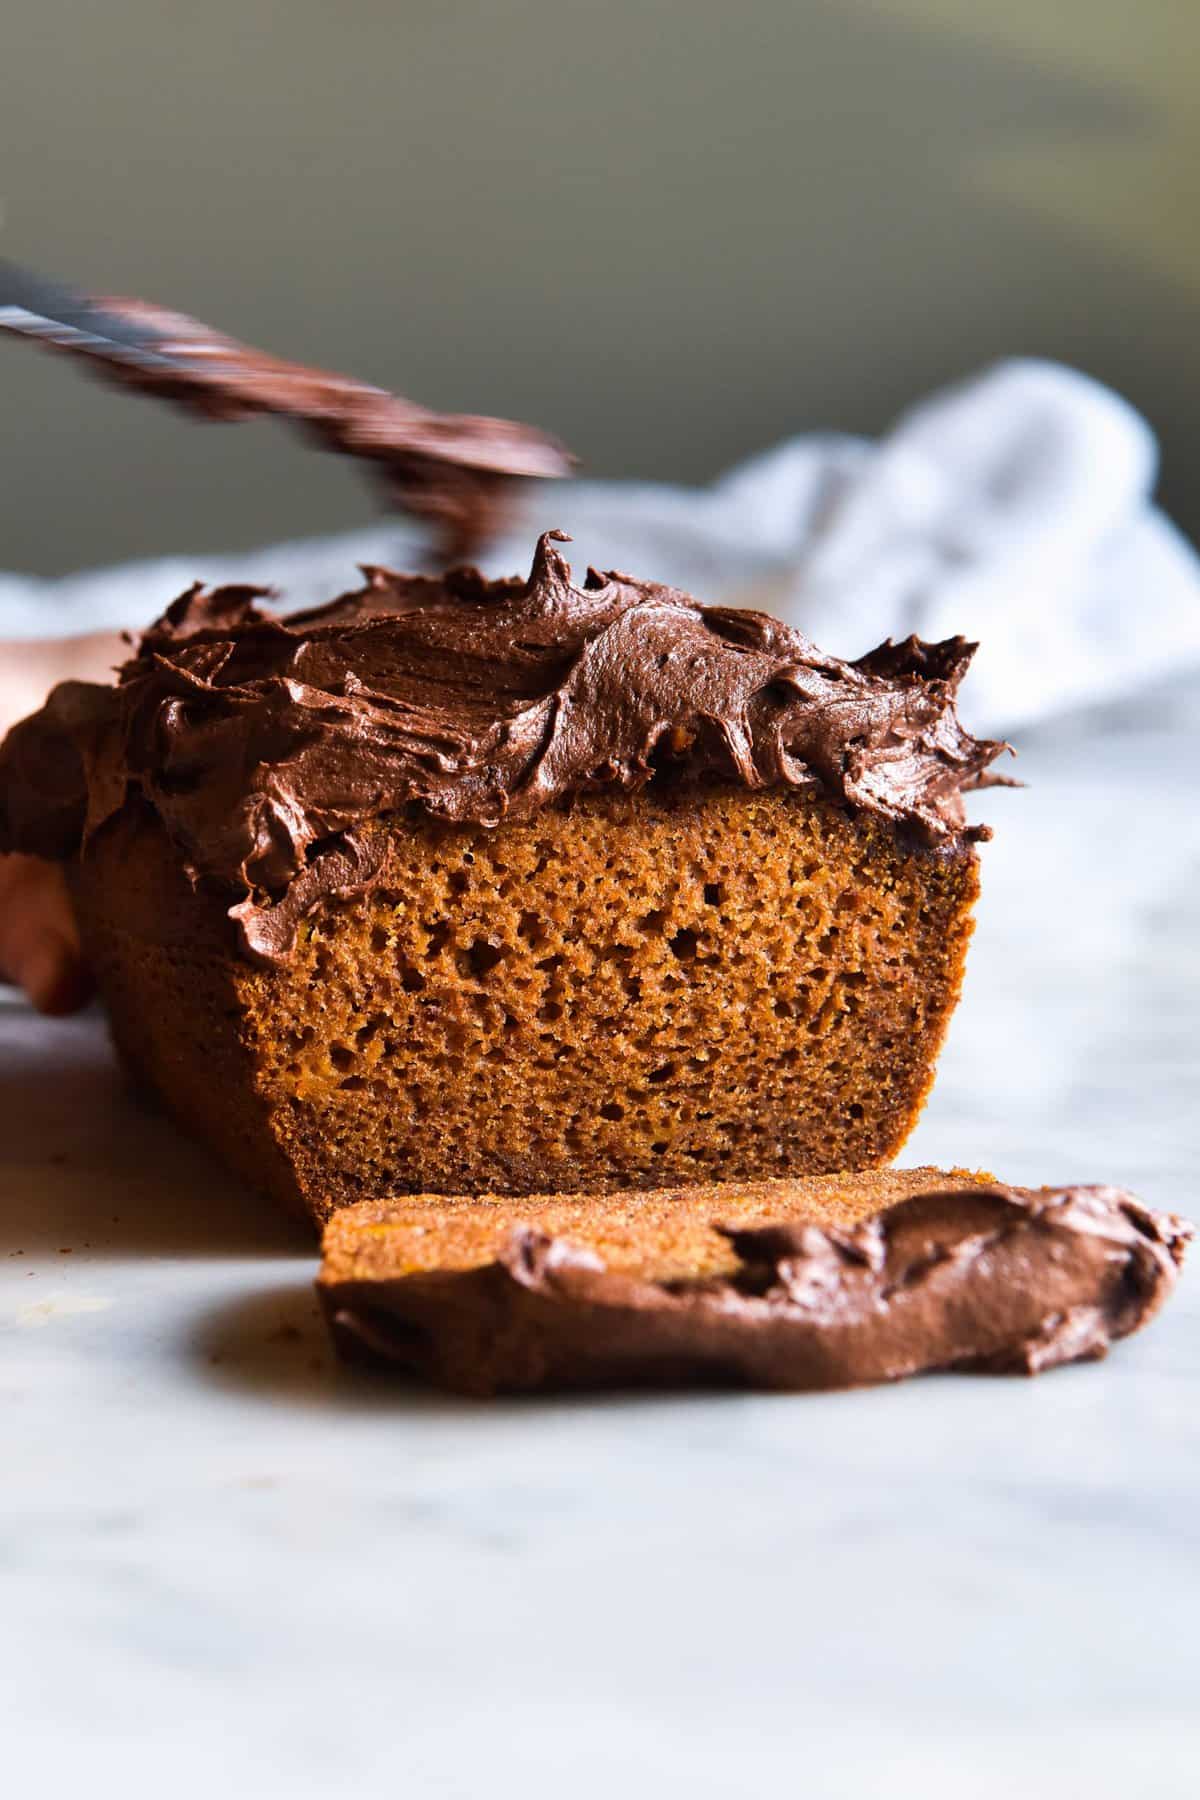
Bonus points for a delicious chocolate chai icing
There are two easy things you can do to make the icing for your gluten free pumpkin loaf extra special. Firstly: dry toast the spices. This is a super easy way to get extra flavour and fragrance out of the spices both in the loaf and in the icing.
Simply toast them in a dry frying pan (no oil or water) over a low-medium heat. Don’t walk away – they only take a minute or two to toast. You’ll know when they’re ready because they will smell extra fragrant.
Secondly: brown the butter for the chocolate chai icing. Browning butter has got to be the easiest way to add complexity to a dish. I use it in the icing on my easy chocolate cake, and it tastes INCREDIBLE.
To make brown butter icing, I recommend browning the butter the night before. This is because it needs to solidify again before use. I promise, though, it will take you five minutes! Do it before dinner, and then use the brown butter pan to cook dinner in. Life changing loaf.
Generally it’s easier to brown butter in a light bottomed pan so you can accurately judge the browning. That said, you’ll be able to smell it when it’s ready. It should smell nutty, toasty and like the best thing to ever hit your nostrils.
I like to go for dark brown in colour: dark brown specks in a golden liquid. Then, I pour the butter into a silicon loaf pan and pop it in the fridge. The next day I can easily pop it out, break it up and start on my buttercream. Even better? I can use said loaf pan (already greased!) for the pumpkin loaf itself.
More gluten free pumpkin recipes
- Low FODMAP pumpkin pasta
- Gluten free vegan pumpkin mug cake
- Roasted pumpkin quinoa salad
- Gluten free pumpkin pie with flaky pastry
- Gluten free pumpkin risotto
Gluten free spiced pumpkin loaf with chai buttercream
Ingredients
FOR THE PUMPKIN LOAF:
- 130 g (1 cup) fine white rice flour
- 50 g (1/2 cup) tapioca flour
- 1 teaspoon cinnamon and nutmeg add 1/2 extra of each if you like it well spiced
- 1/2 teaspoon ground clove
- 1 teaspoon baking powder
- 1 teaspoon baking soda
- 130 g (3/4 cup reasonably packed) brown sugar
- 1/2 cup plant based milk of choice
- 1 tablespoon vinegar apple cider vinegar or lemon juice
- 100 g pumpkin puree
- 2 eggs I always use extra large eggs
- 1/4 cup vegetable oil (you can also use olive)
- 1 teaspoon vanilla bean paste
FOR THE CHOCOLATE CHAI BUTTERCREAM:
- 100 g butter at room temperature (salted or unsalted are both fine)
- 1 1/2 cups icing sugar
- 1/2 cup cocoa
- 2 tablespoons plant based milk only use as much as necessary
- 1/2 teaspoon vanilla bean paste
CHAI SPICE MIX:
- 1 1/2 teaspoons cinnamon
- 1/2 teaspoon nutmeg
- 1 teaspoon ginger powder
- 8 large cardamom pods husks discarded and seeds into the mortar and pestle
- 1/4 teaspoon fennel seeds
- 1/2 teaspoon clove powder
- 1/4 – 1/2 teaspoon fine salt
- Freshly cracked pepper to taste
Instructions
METHOD FOR THE SPICED PUMPKIN LOAF:
- Preheat the oven to 180C or 365F.
- In a medium mixing bowl, combine the 1/2 cup plant milk for the loaf and the vinegar, and set aside to form a buttermilk. Don’t panic if it looks curdled and awful – that is the whole idea. It will create a light and fluffy loaf. Thanks buttermilk.
- In a large bowl, mix together all the dry ingredients – flours, spices, sugars and baking powder/soda.
- Back to the buttermilk: add the remaining wet ingredients – pumpkin puree, eggs and oil. Whisk until a batter has formed.
- Add the dry ingredients into the wet, and stir thoroughly to combine. The batter should be smooth, and look slightly aerated, thanks to the combination of ‘buttermilk’ and baking soda.
- Pour the batter into a silicon nonstick loaf pan. I like to give my silicon pans a little spray of oil first, even though you’re not really supposed to. Rule breaker etc etc.
- Bake the loaf from 45 minutes to an hour. Mine needed the whole hour, and I covered them with a bit of foil towards the end, because the top looked perfect at 45. Once it’s cooked, allow it to cool for 10 or so minutes before transferring to a wire rack to cool completely.
METHOD FOR THE CHOCOLATE CHAI BUTTERCREAM:
- Use a mortar and pestle to grind the cardamom seeds and fennel seeds into a powder. I PROMISE it’s worth the extra bit of work.
- Beat the butter until pale and creamy, before sifting in the icing sugar, cocoa, and spices. Add the milk, and continue to beat, starting on a low speed and building up. Continue to beat until incorporated and smooth, and adjust for your chai tastes.
oh my! that chocolate chai buttercream looks absolutely delicious. trying this recipe super soon!!!!
Thank you Sheenam! I hope you enjoy it <3
I can’t believe I just found your blog now! It’s absolutely amazing, and it’s so hard to not scroll through every single recipe. These photos are absolutely gorgeous.
Thank you Tiffany! That is really lovely of you to say 🙂
I am also a big fan of spices and this looks and sounds delicious!
Thank you Damaris! The more spices the merrier right? Haha
Hi! This recipe is really great and we have had the pleasure of baking a couple of these loafs already. Since they turn out so good, we want to bake this loaf without the sugar for some regular, not sweet breakfast bread. Cut out all the sugar and have more pumpkin puree? Or maybe more flour?
Hello! Thank you for letting me know, I’m glad you enjoyed it. I’m not sure how it would work without sugar (sugar gives a lot of structure) but I will be posting a bundle of gluten free bread recipes soon. I’ll try to test a pumpkin one for you!
This recipe is a winner! Thank you, Georgia. Made it for myself (I’m GF & low fodmap) and it’s been devoured by my (gluten eating) family. Kids requested it for their lunch boxes. I’ll be making this again for sure.
Hi Samantha! So happy to hear that – compliments from kids are compliments of the highest order! thank you 🙂