
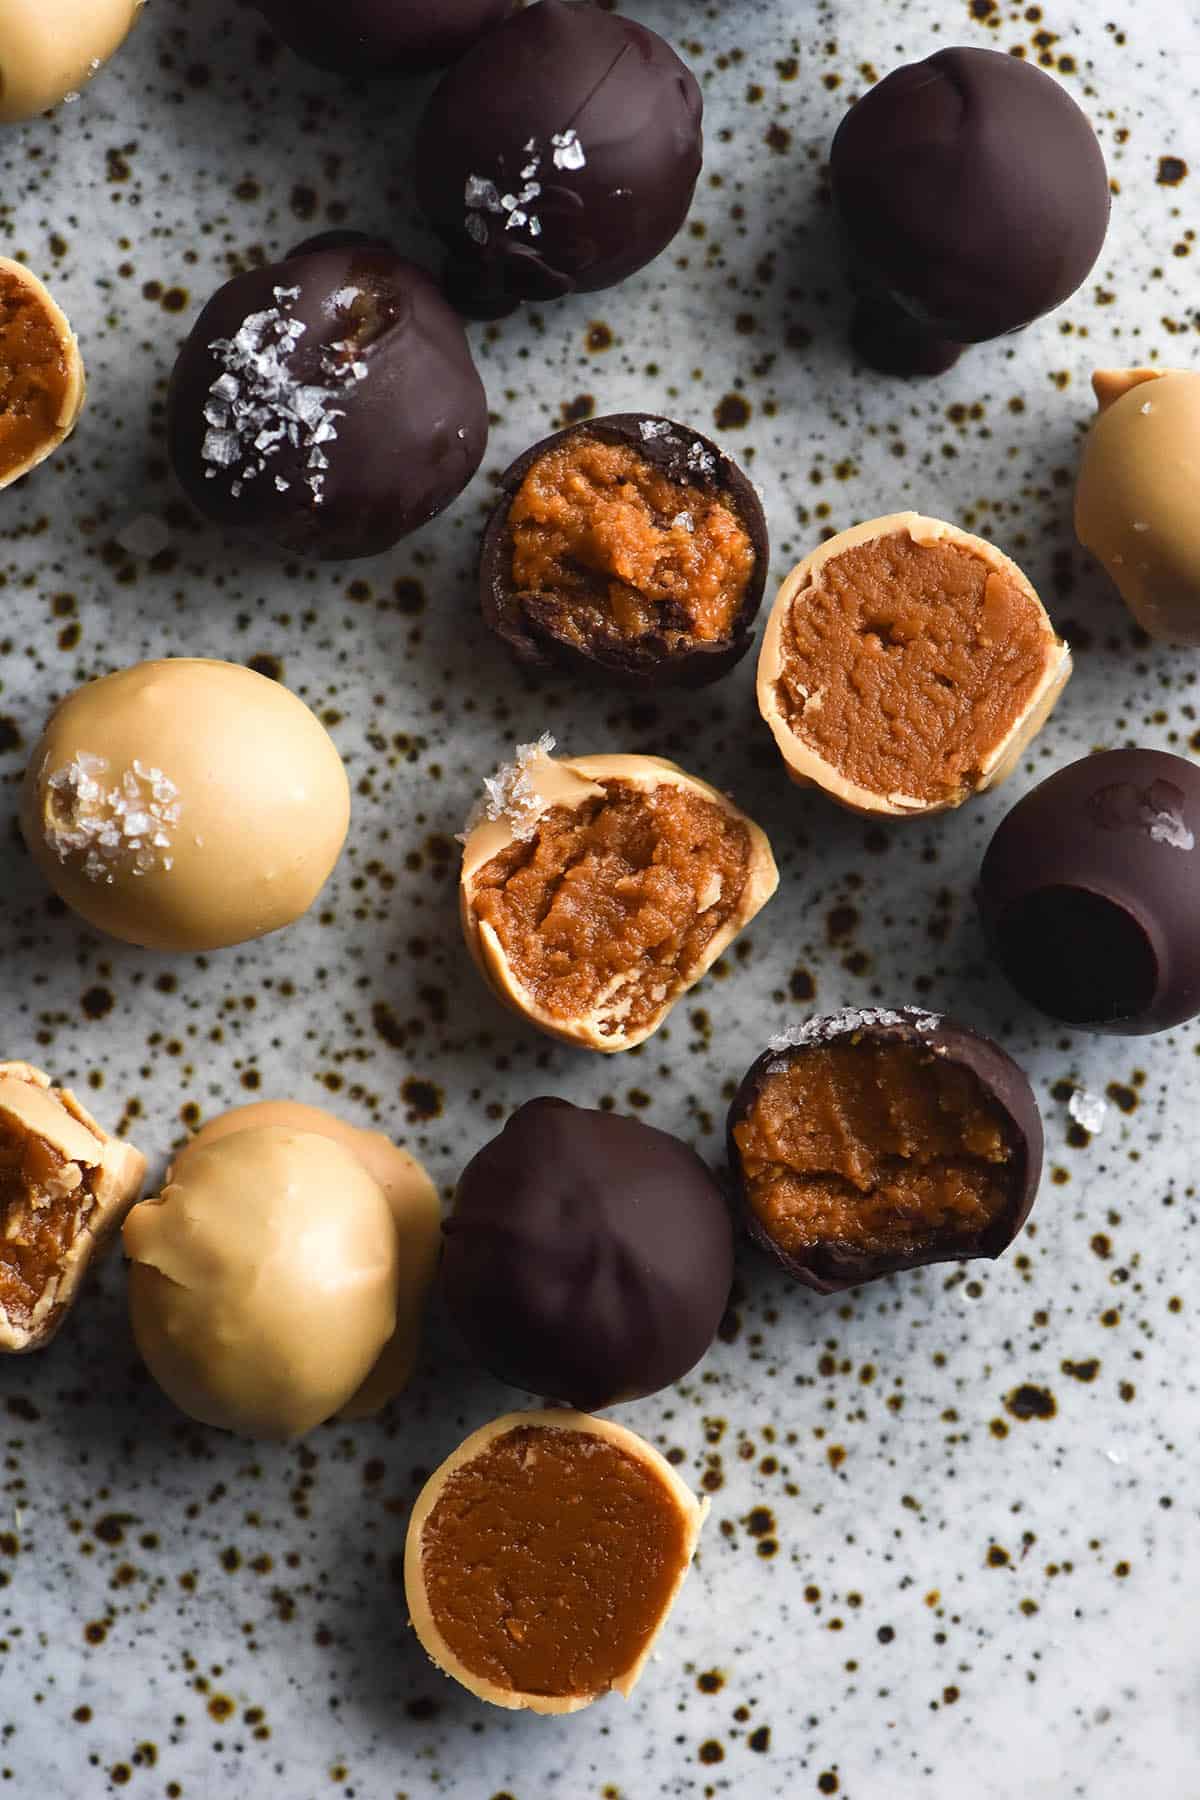
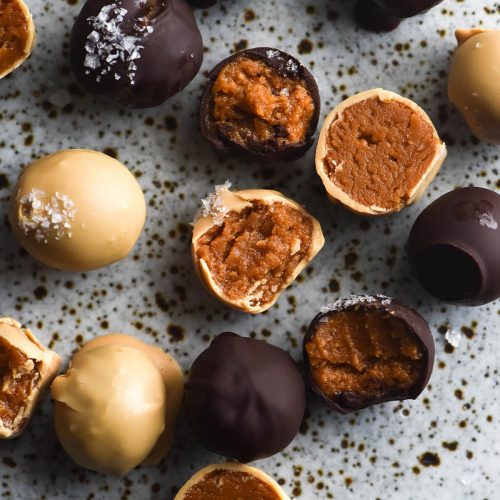
Peanut butter truffles: otherwise known as the cousin of these peanut butter bars. The second cousin of these peanut butter cookies, and distant cousin of tahini cookies. They are really a hybrid of two ideas: the ease of the cookies combined with the concept of the peanut butter bar. Because they’re encased in chocolate, they’re a portable(ish) and delicious snack to boot.
Peanut butter truffles (vegan, grain free)
These peanut butter truffles are vegan (chocolate dependent) FODMAP friendly and grain free. They use maple syrup to sweeten the innards. If you chose specialised chocolate (or make your own) they can be fully refined sugar free, if that’s your thing.
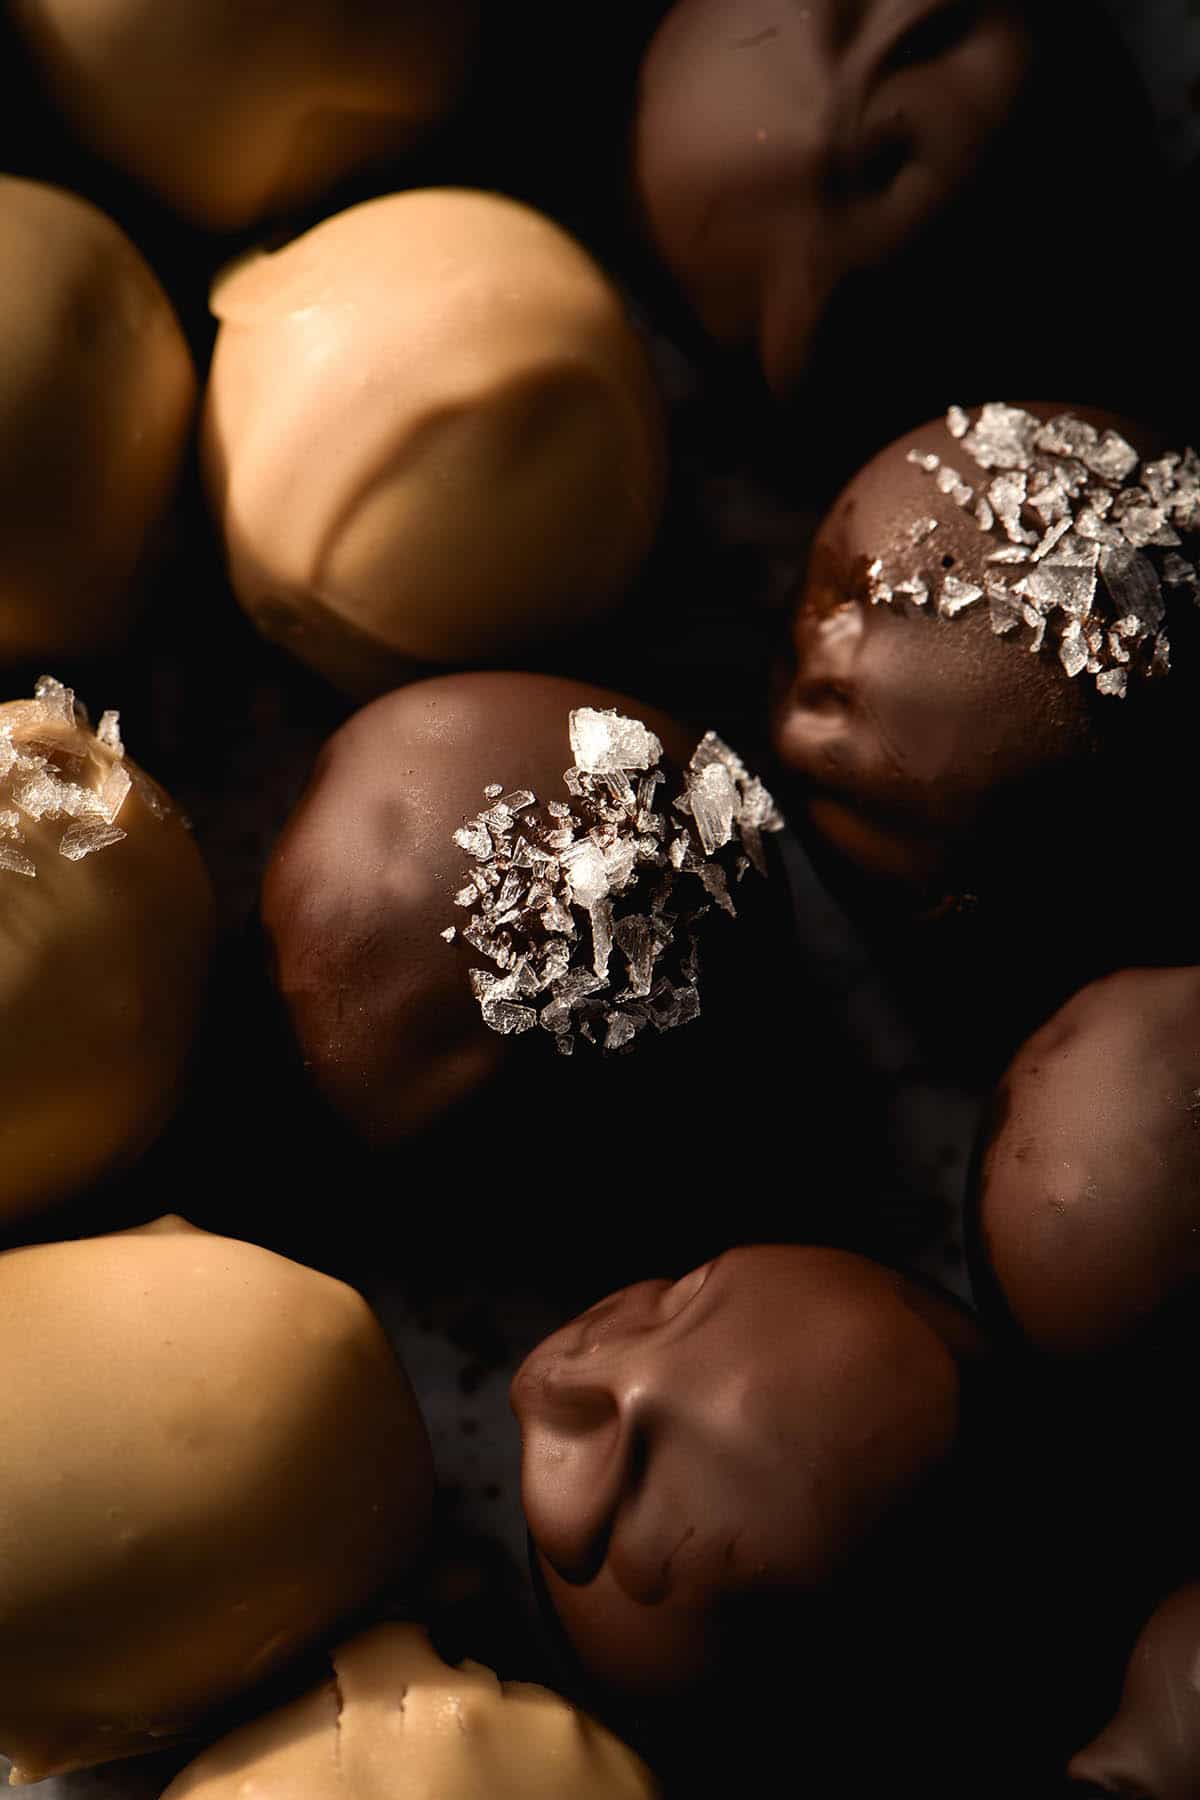
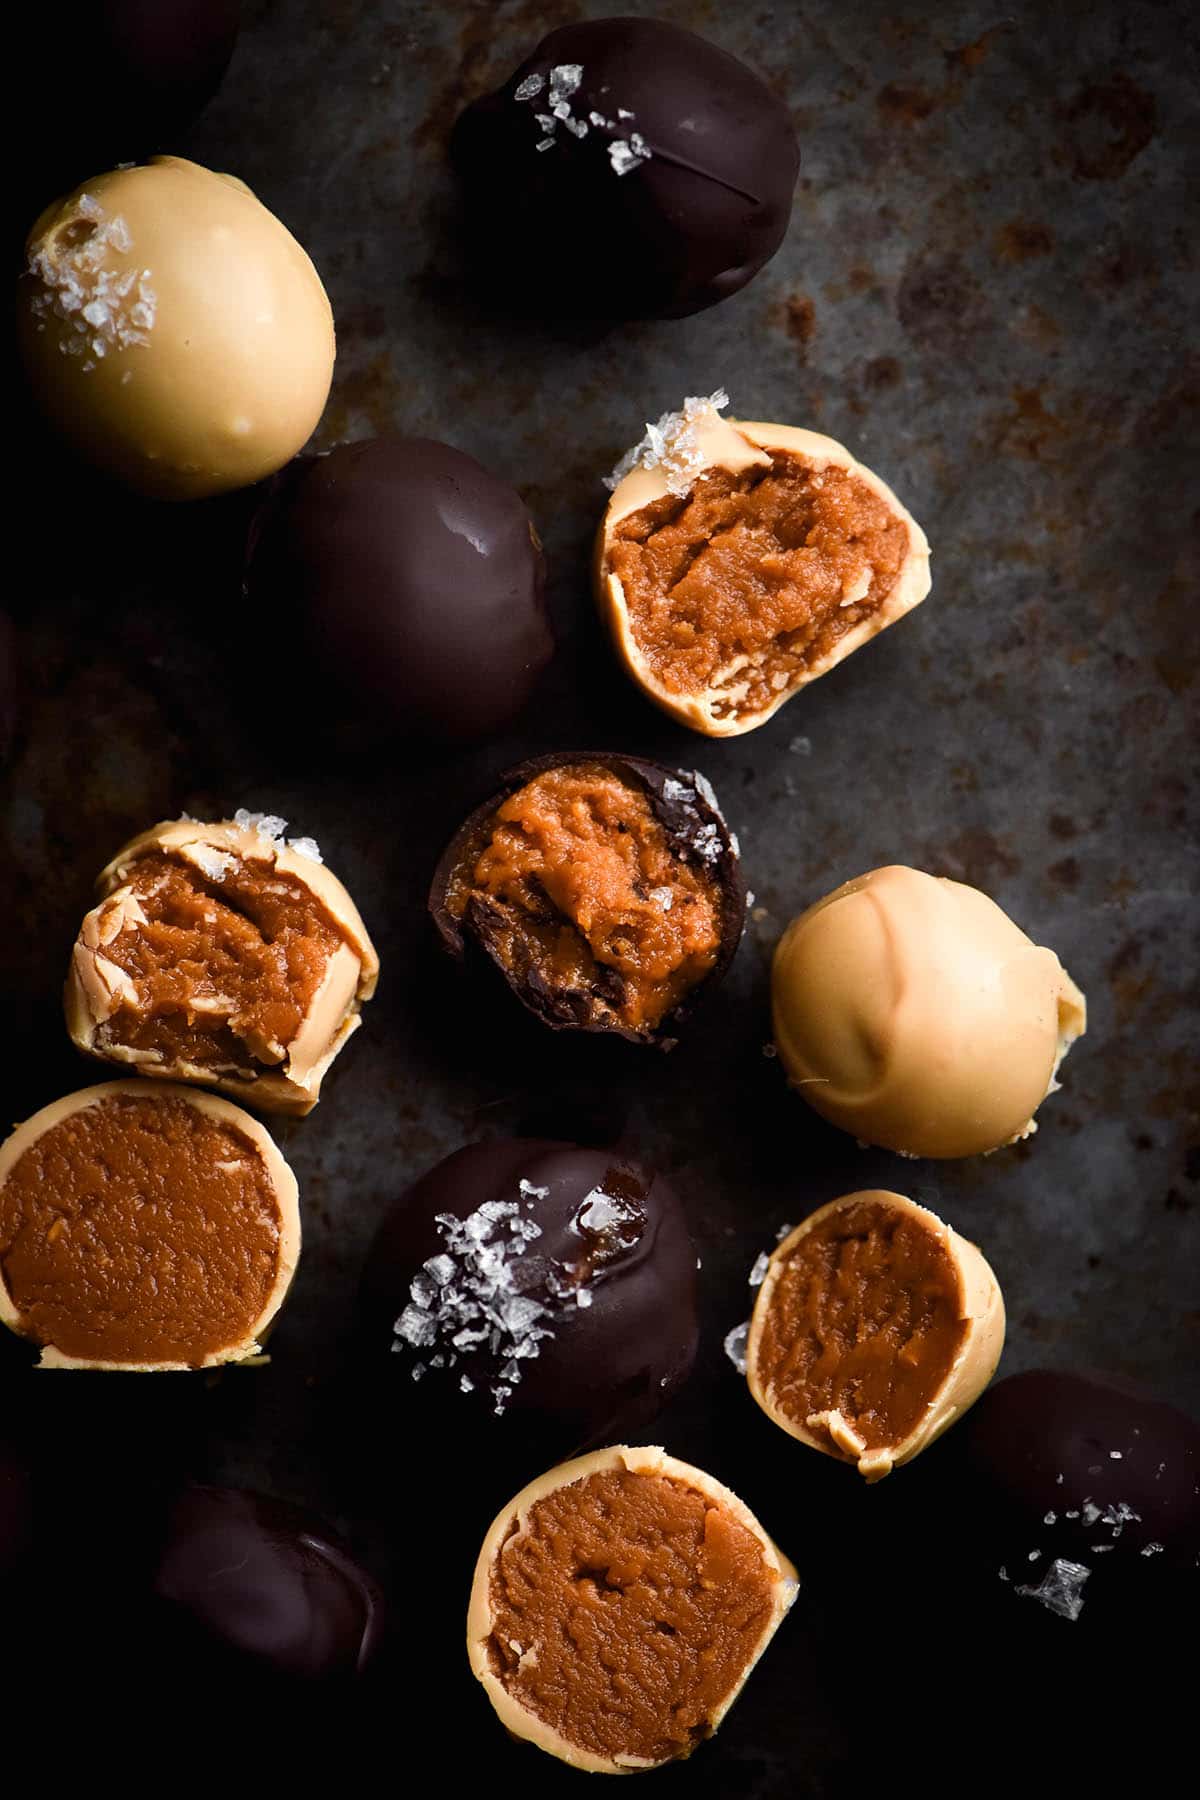
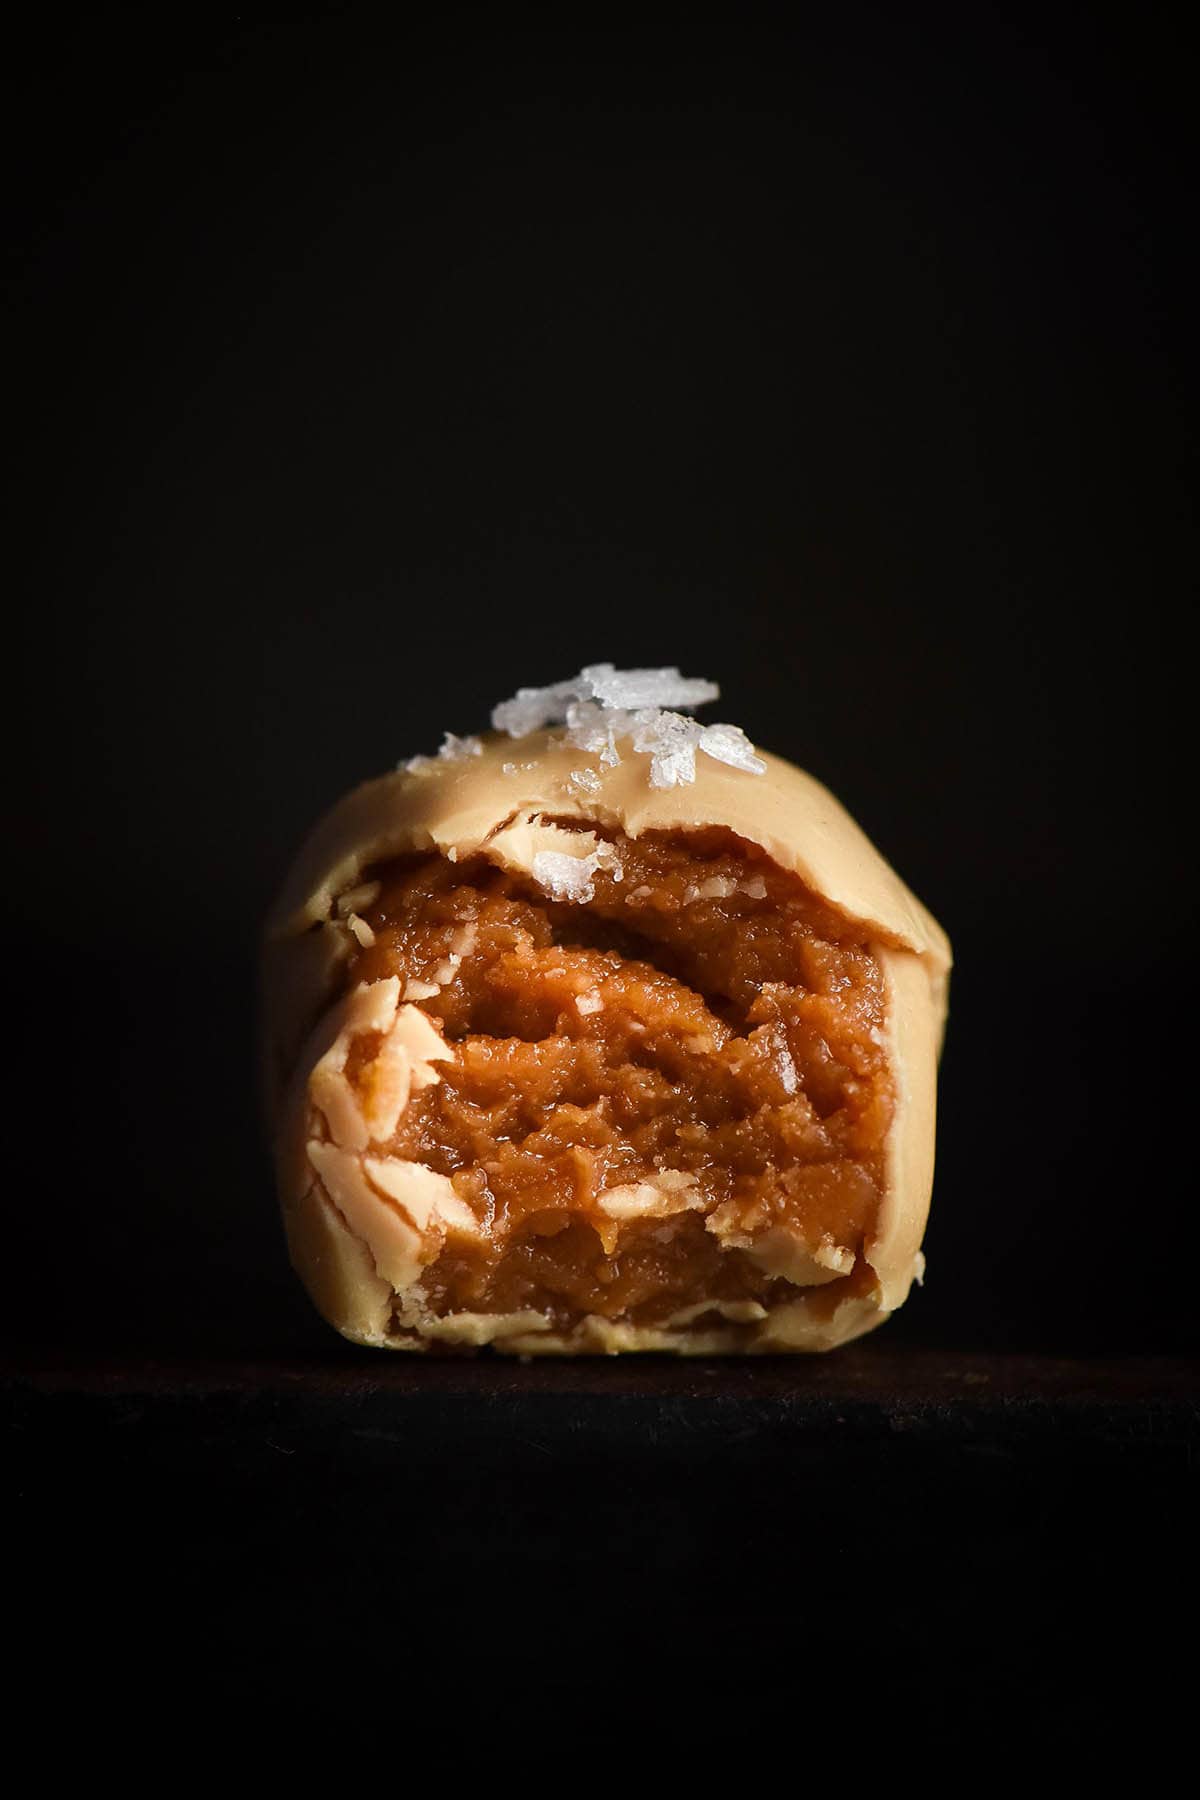
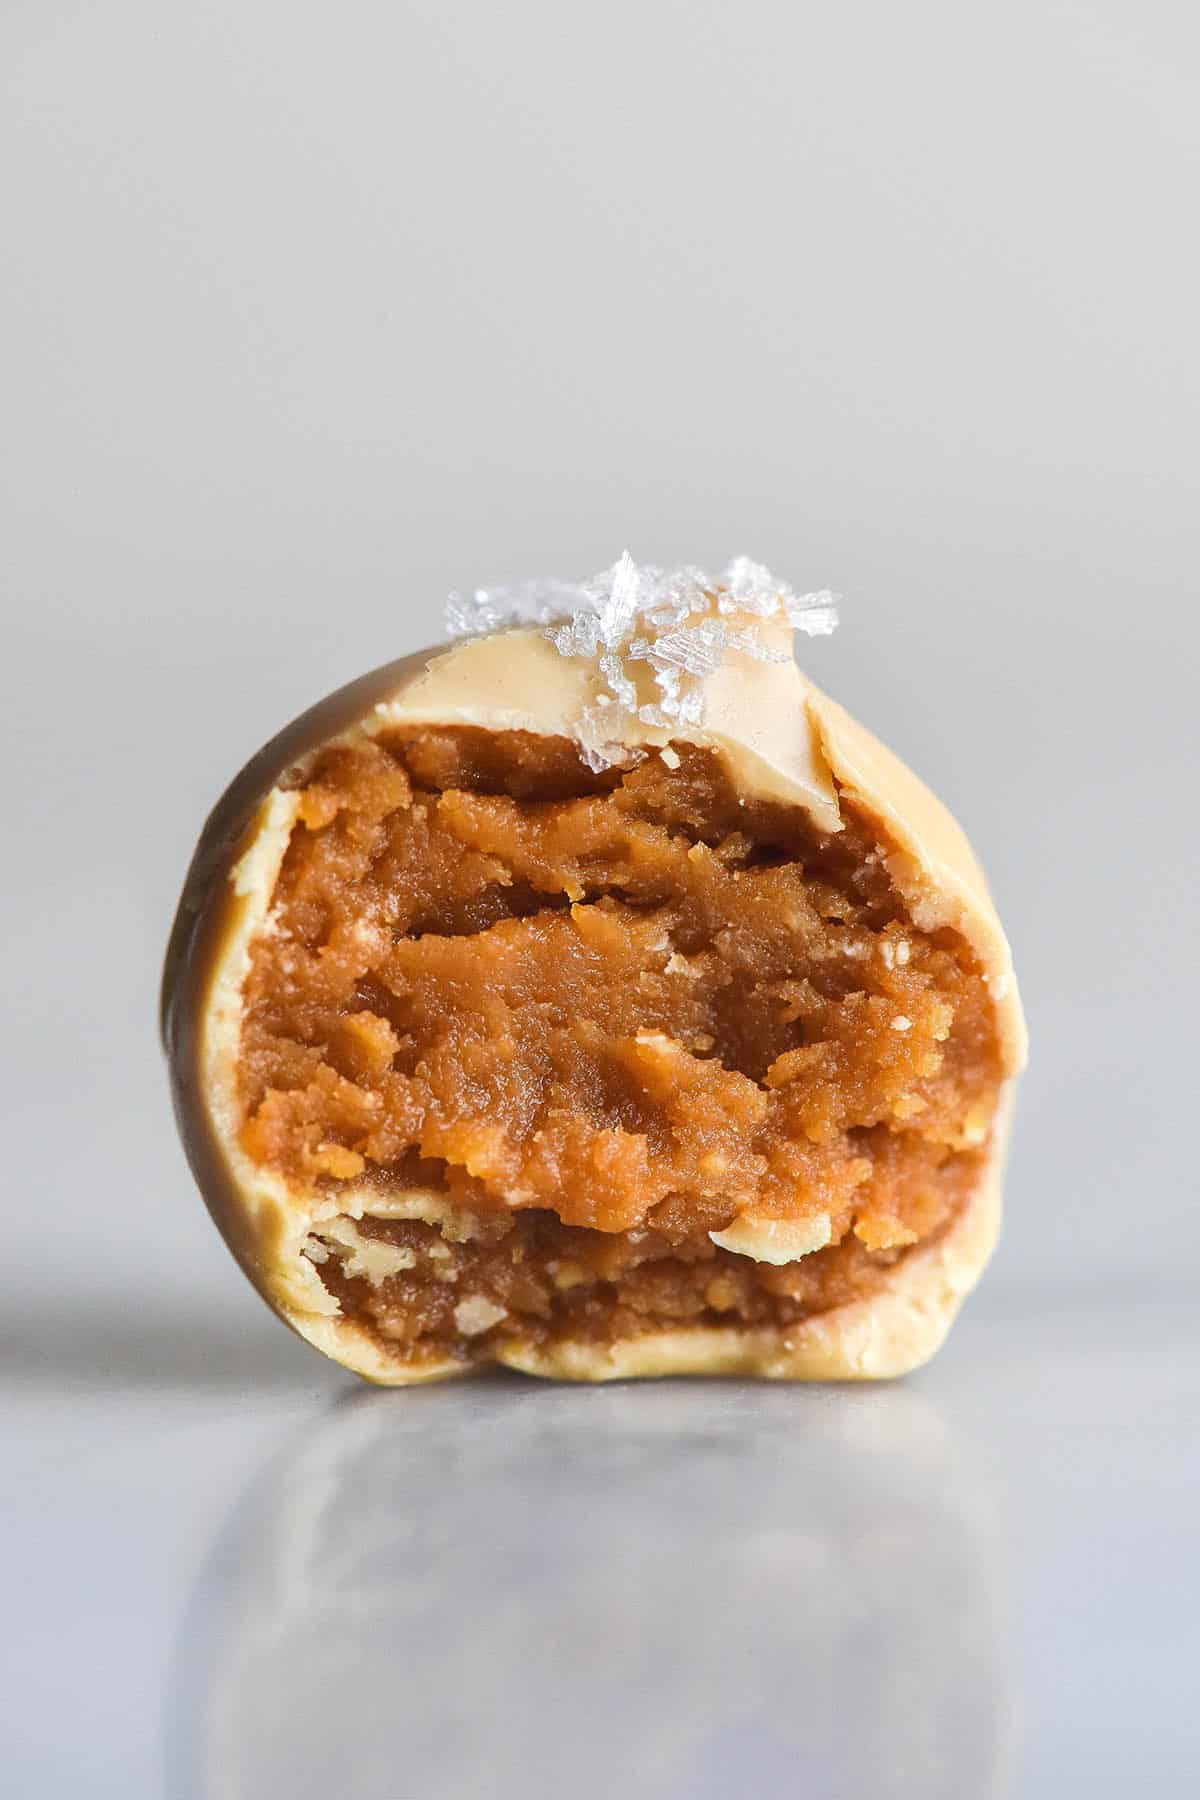
These peanut butter truffles are easy to make and a delicious little treat. The peanut butter pairs beautifully with dark chocolate, milk chocolate or even white chocolate (Caramilk included).
Ingredient notes for your peanut butter truffles
I always use natural peanut butter for any application. Mayvers Dark roast and Ridiculously Delicious peanut butter are two goodies in Australia. You can use either chunky or smooth here – I prefer smooth for a more truffle like interior, but you do you.
Personally, I think maple syrup is the best option for these truffles. You might be able to use rice malt syrup or honey, but I haven’t tried either. I think maple syrup pairs so nicely with peanut butter, so I have no intention of trying the other options. I also just hate how sticky rice malt syrup is (lazy? me?)
To keep these truffles vegan, I have used Lindt 70% dark chocolate. It is good quality, widely accessible in Australia, and not coconut oil based. Generally, I find coconut oil based chocolate tends to melt too quickly and leaves a greasy mouthfeel. I daresay you could use coconut oil chocolate, but as you can tell I’m not a fan.
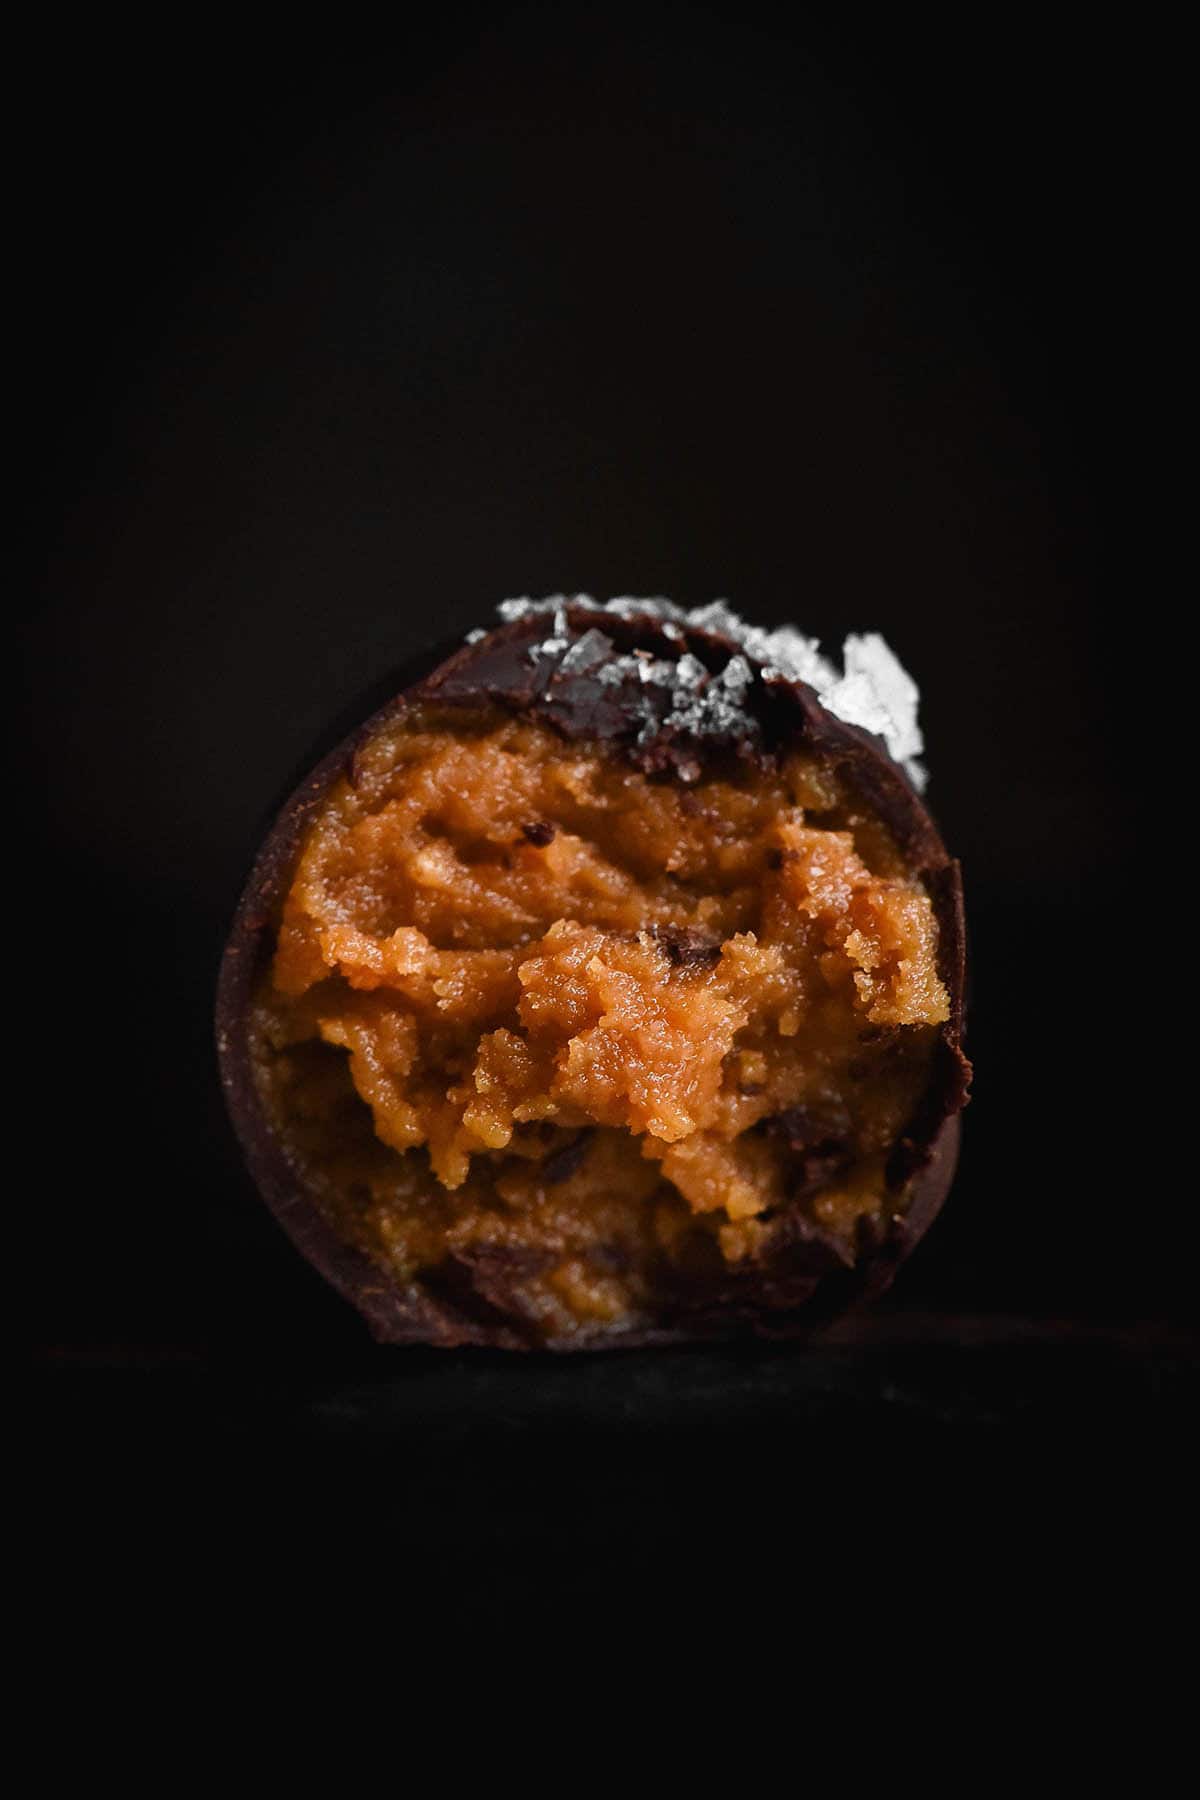
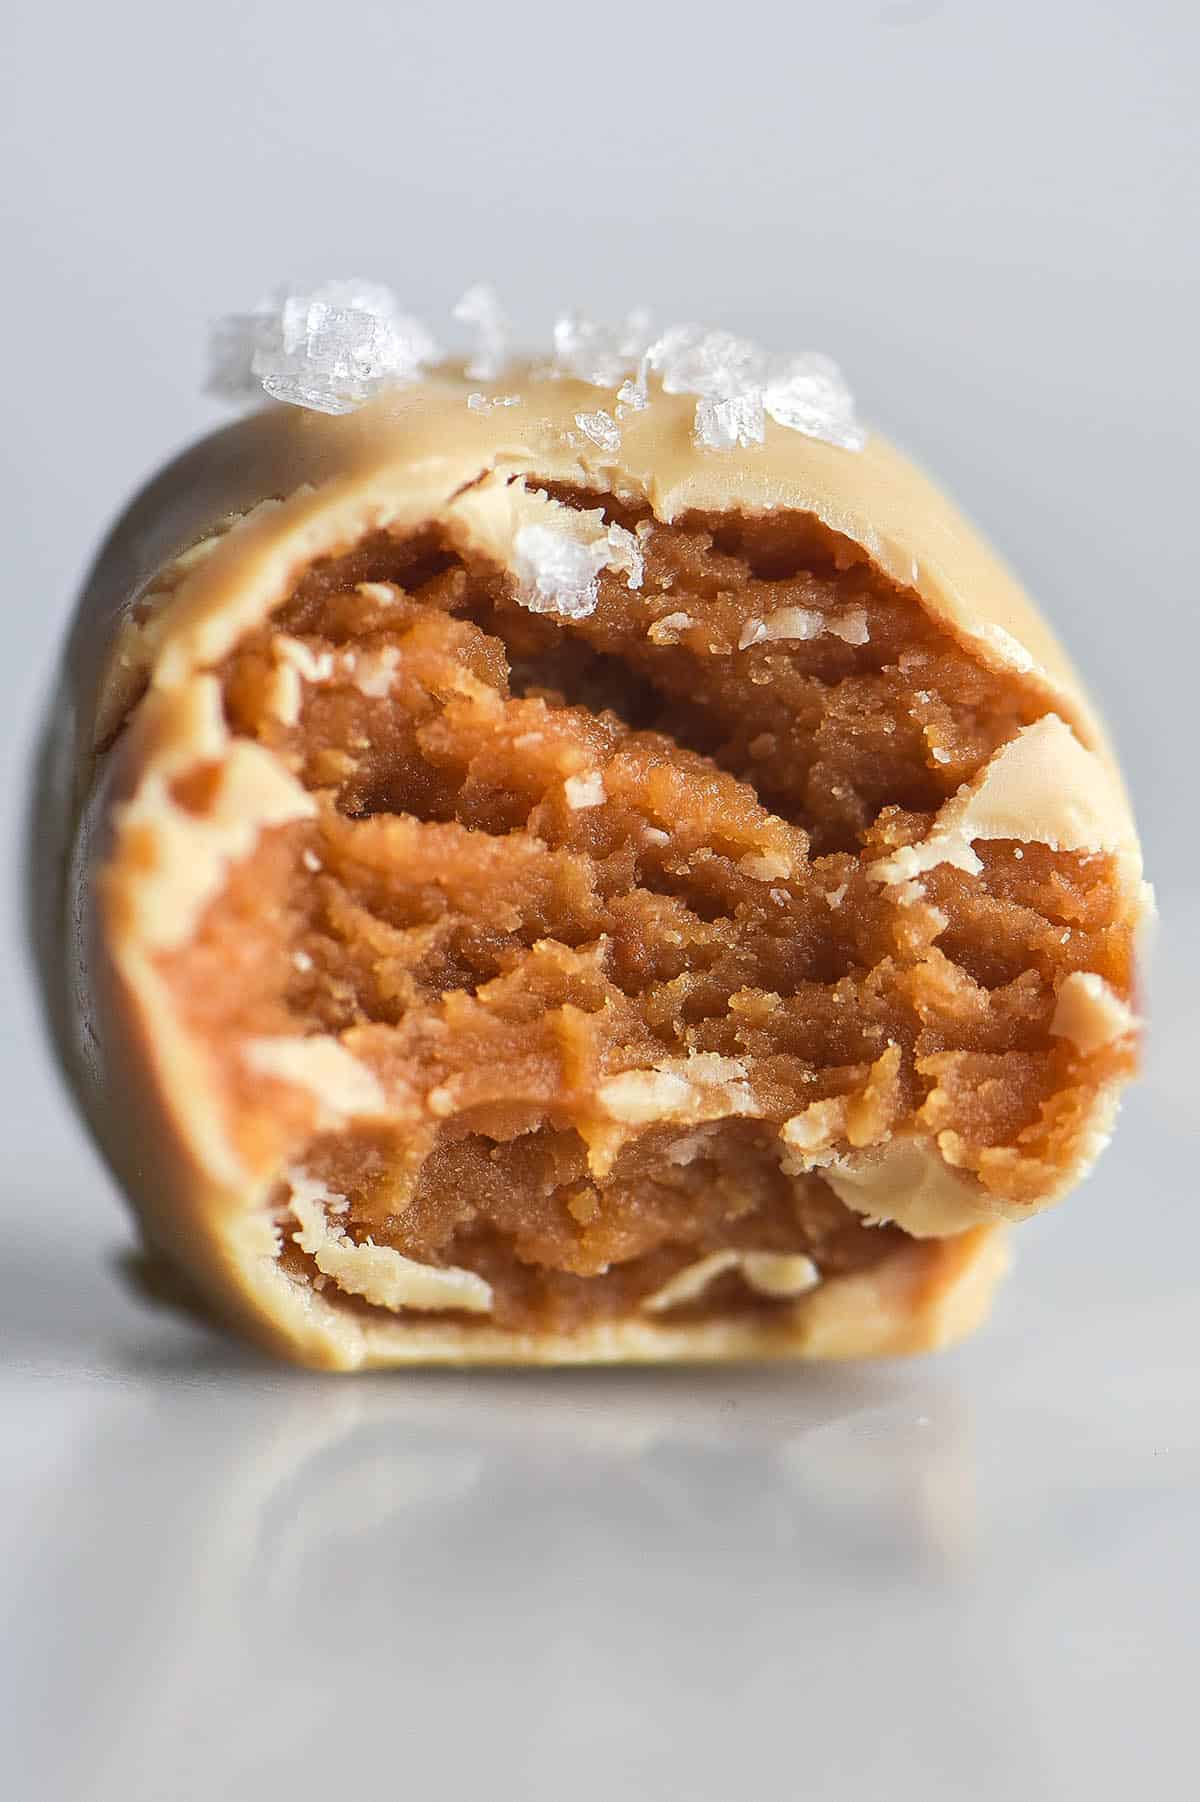
Yes, I said these are three ingredient, but there’s one more I love to add: flaky sea salt. It is such a delight to bite into a truffle and get that textural, salty hit. An optional addition, yes, but a lovely one.
Tips for your peanut butter truffles
First off: use store bought, natural peanut butter for these. A few people had issues with the tahini cookies and homemade tahini. I daresay commercial grinders are much more powerful and can extract more oil from the nut or seed.
On that note: I can’t guarantee that dry peanut butter will work. You know, that crusty old bit down the bottom of the jar. Proceed with that at your own risk.
Yes, this mixture will seize up to the point you can roll it in your hands. If yours hasn’t, keep mixing. It will get there. If it doesn’t, see above.
I promise you, as a peanut butter fiend, these are richer than you might think. Resist the urge to make them bigger.
Freezing the truffles before coating them in chocolate helps keep them firm and round. You can also reshape the frozen ones a little before coating them in chocolate. Rolling them after freezing creates a lovely smooth round ball. This means your truffle will have a bit more of a polished finish.
Either way, keep in the fridge after they’re made for best results.
Tips for dipping your peanut butter truffles into the chocolate
I tested a lot of different methods of dipping these truffles in chocolate. All lessons I was very happy to learn, what with a constant supply of them in the fridge. My suggestions are reflected in the post, but for any chocolate dipping pursuits, I found:
- Forks are better than spoons because they allow the chocolate to drain off. It is also easier to handle the truffles lightly with forks.
- The truffles got stuck to a draining rack. As a result, the bottoms got pulled off once they were firm. This is why I recommend draining them with a fork and then putting them on baking paper.
- Reusable baking paper is nice and flexible, so use that if you have some. It means the truffles detach very easily. It also means that you can pick off the excess chocolate and eat it.
- Using a small, narrow bowl for chocolate means you can submerge the truffle easily. This creates a smooth truffle surface and less chocolate waste. You have to roll the balls around in a larger bowl, which creates a ruddy truffle surface.
Additional flavour suggestions
Sea salt and vanilla bean paste are two easy ways to amp of the flavour of these peanut butter truffles. I put them both in every batch I make.
You can, of course, add some mix ins to these lil truffles. I’m thinking halva, maybe some toasted sesame seeds, or perhaps some freeze dried berries.
Another twist: I am a particular fan of is using white chocolate for the coating. You can use store bought regular (Caramilk, I’m looking at you) if you don’t need these to be low lactose or vegan. You can also buy vegan white chocolate in a lot of supermarkets these days (Pana Chocolate in Australia). Finally, you could go all out and make your own vegan white chocolate (this recipe looks really good).
Can I use a different nut butter?
You can! I have tested tahini and cashew butter for these truffles. Please note I have tested both with maple syrup – no other liquid sweeteners. I will update the post as I test more options.
Can I use a different chocolate?
Yes! I have used Caramilk (which is not vegan, obviously) and Lindt 70% (which is vegan). They both work well. I haven’t tried using any oil based chocolates. Because these peanut butter truffles need to be kept in the fridge, I can’t see oil based chocolate being an issue.
You can, as I mentioned, make your own vegan chocolate. Using cacao butter based chocolate will help keep the truffles solid at room temperature.
FODMAP notes for your peanut butter truffles
- Peanut butter is FODMAP friendly in 50g serves per person, according to Monash. This recipe uses 1/3 cup (Australian) which equates to 80g. You’d have to eat over half of them to be over the FODMAP limit. They’re also richer than they look, so I dare you to try.
- The chocolate is where you can mix things up a little, but it’s worth keeping tabs on the FODMAP contents.
- White chocolate is FODMAP friendly in 25g serves. If you eat 3 white chocolate balls in one sitting, you will consume 21.5g of white chocolate (as an estimate).
- Milk chocolate is FODMAP in 20g serves (who knew it had more lactose than white?!) You could consume 2 1/2 balls coated in milk chocolate.
- Dark chocolate containing dairy is FODMAP friendly in 30g serves. Monash doesn’t give an upper limit for a dairy free (cacao based) dark chocolate. Given the main issue with smaller portions is lactose, though (it seems to be fructans with large serves) I think this means you can eat a bit without issue. Always assess your own tolerance, though.
- Needless to say, this was designed as a vegan recipe. I LOVE Caramilk on mine, but it’s not necessary to create a delicious snack. See the notes on the chocolate section for some links to homemade white chocolate (and dark chocolate).
More gluten free chocolate recipes
- Easy gluten free chocolate cake
- Best ever chocolate brownies
- Super easy chocolate mug cake (which is also vegan)
More gluten free vegan desserts
- Try this vegan, gluten free Hedgehog slice
- These delicious gluten free vegan brownie cookies
- Gluten free, vegan choc chip cookies
Peanut butter truffles
Ingredients
- 1/3 cup natural peanut butter
- 2 tbsp maple syrup
- 100g chocolate of choice (see notes)
Optional
- Pinch sea salt flakes
- 1/2 tsp vanilla bean paste or extract
Instructions
- Combine the peanut butter and maple syrup in a bowl. If you're using them, add the sea salt flakes and vanilla. Stir the mixture until it is solid enough to form teaspoon size balls by rolling it between your hands. This will take anywhere from 2-5 minutes or more. I find it helps to take a break and come back – the mixture seems to firm up when left to it's own devices.If your mixture isn't firming, keep stirring – it will. If not, there's an issue with your peanut butter. I recommend natural, store bought peanut butter with a modest amount of oil, as the notes suggest.
- Once the mixture is about the consistency of a slightly loose cookie dough, take rough 1 teaspoon pieces and very gently roll them into a ball. Don't worry if it's not perfectly round as you will be able to shape them once they're solid. Repeat until you have used all the batter, then place the balls, spaced apart, on a baking paper lined plate. Freeze for 15-20 minutes, depending on the climate in your kitchen (freeze for longer in a hot kitchen or climate).
- After 15-20 minutes, take the balls out of the freezer. They should be quite solid now, so use this to roll them between your hands into small, perfectly round balls. Pop them back in the freezer while you melt the chocolate.
- Melt the chocolate using your preferred method. See notes below on different types of chocolate. Decant the chocolate into a small, narrow bowl. This makes it easier to cover each ball in chocolate. Get two forks ready.
- Pop a ball into the chocolate and use the first fork to gently turn it and cover it in chocolate. Transfer it to the second fork to drain of excess chocolate while you coat the next one. Once the ball is drained, place it back on the cold baking paper. Repeat until you have coated all the truffles. You can work quickly to sprinkle each with a bit of sea salt as the chocolate hardens, or leave them plain.
Notes
- I only recommend natural but store bought peanut butter here. It should have a smooth and slightly oily consistency. Some homemade nut butters aren’t nearly as oily, and this might impact your ability to roll the truffles.
- If you use white chocolate, I recommend adding 1/2-1 teaspoon of vegetable oil. White chocolate tends to congeal quite easily when heated, and oil helps avoid that. I also recommend heating white chocolate on a gentle heat.
- See the FODMAP section in terms of the FODMAP content of each chocolate. If you have lactose concerns, I recommend using dark chocolate or making your own vegan white chocolate.
- I use Lindt 70% dark chocolate here. It’s easily accessible, good quality and cacao butter (as opposed to coconut oil) based.
No Comments