I always start working on seasonal recipes a little too late. My ANZAC style cookies? A day or two before ANZAC day. My sourdough hot cross buns? A week AFTER Easter. This year I’m working around my chaotic self by getting it done a month in advance. And by it, I mean these vegan gluten-free hot cross buns.
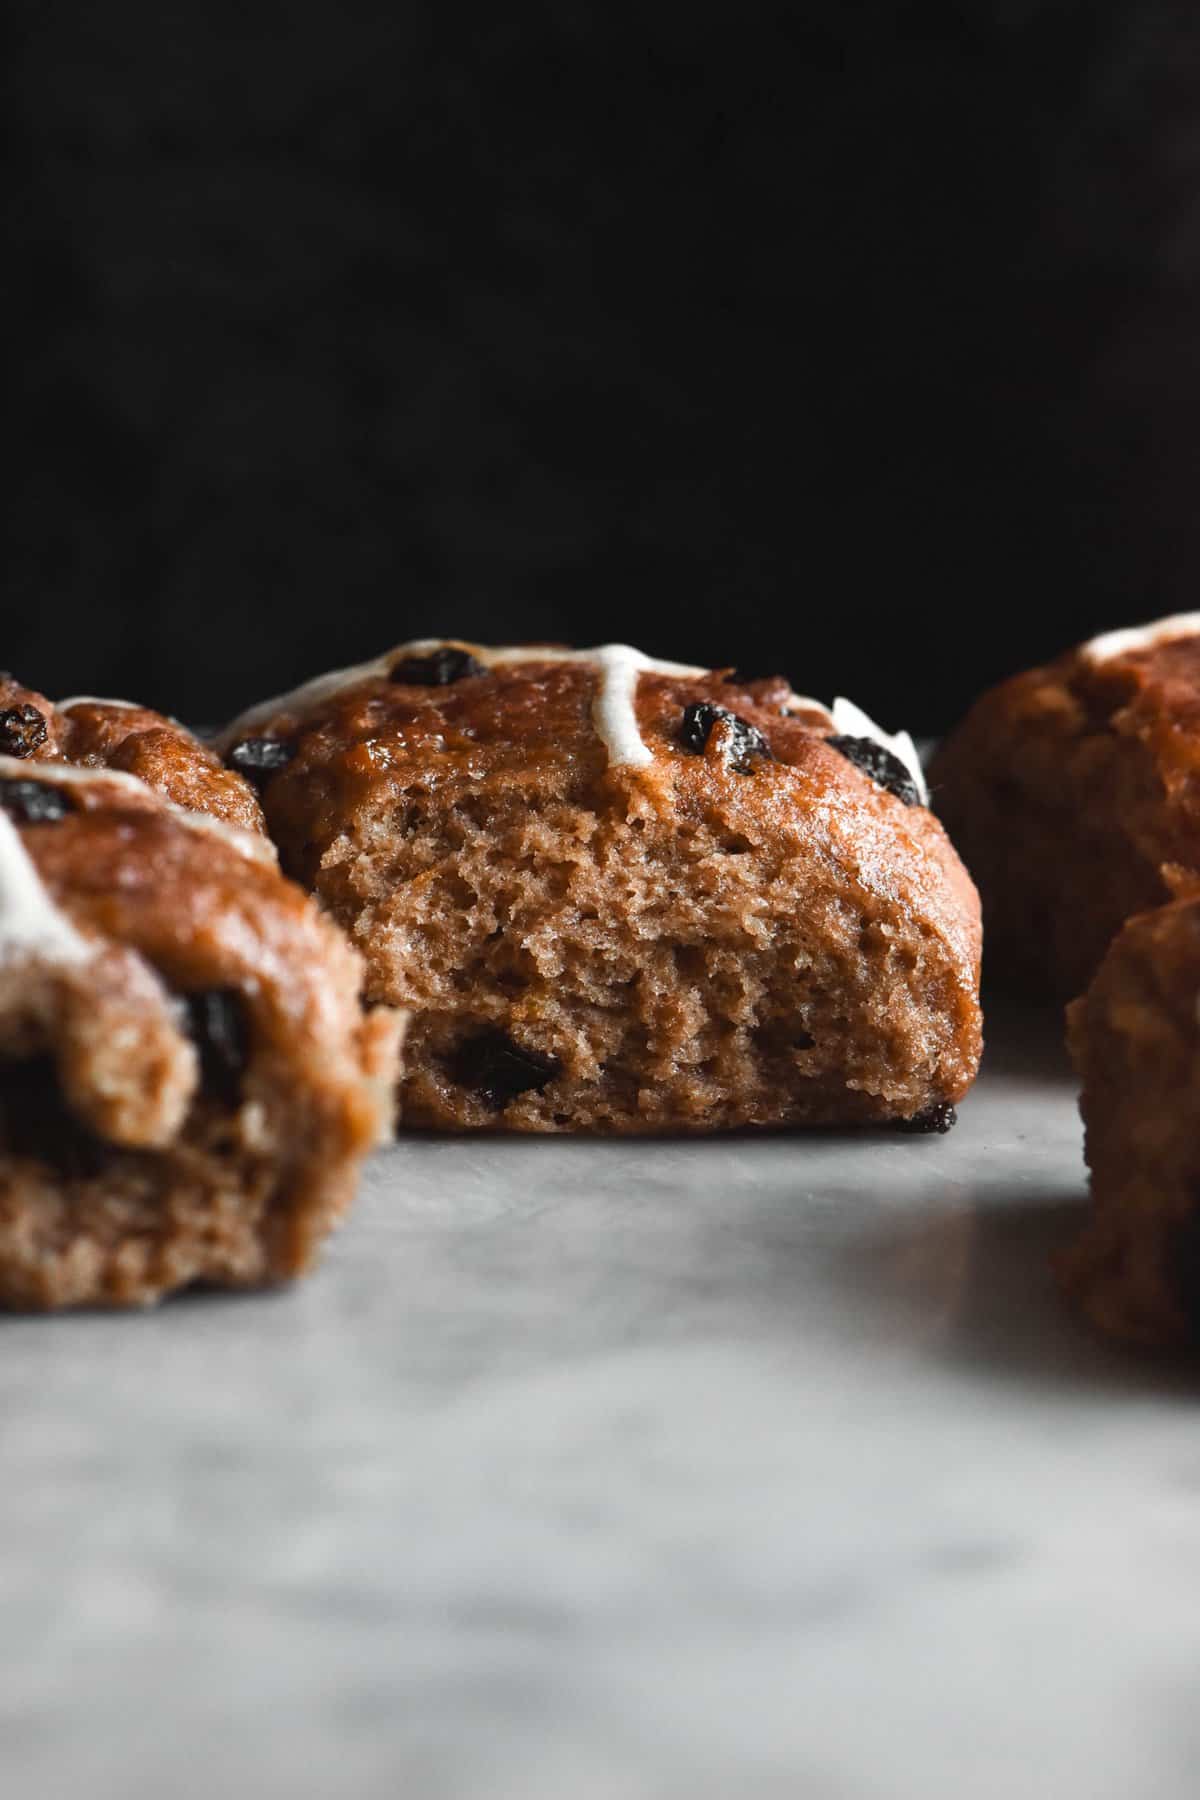
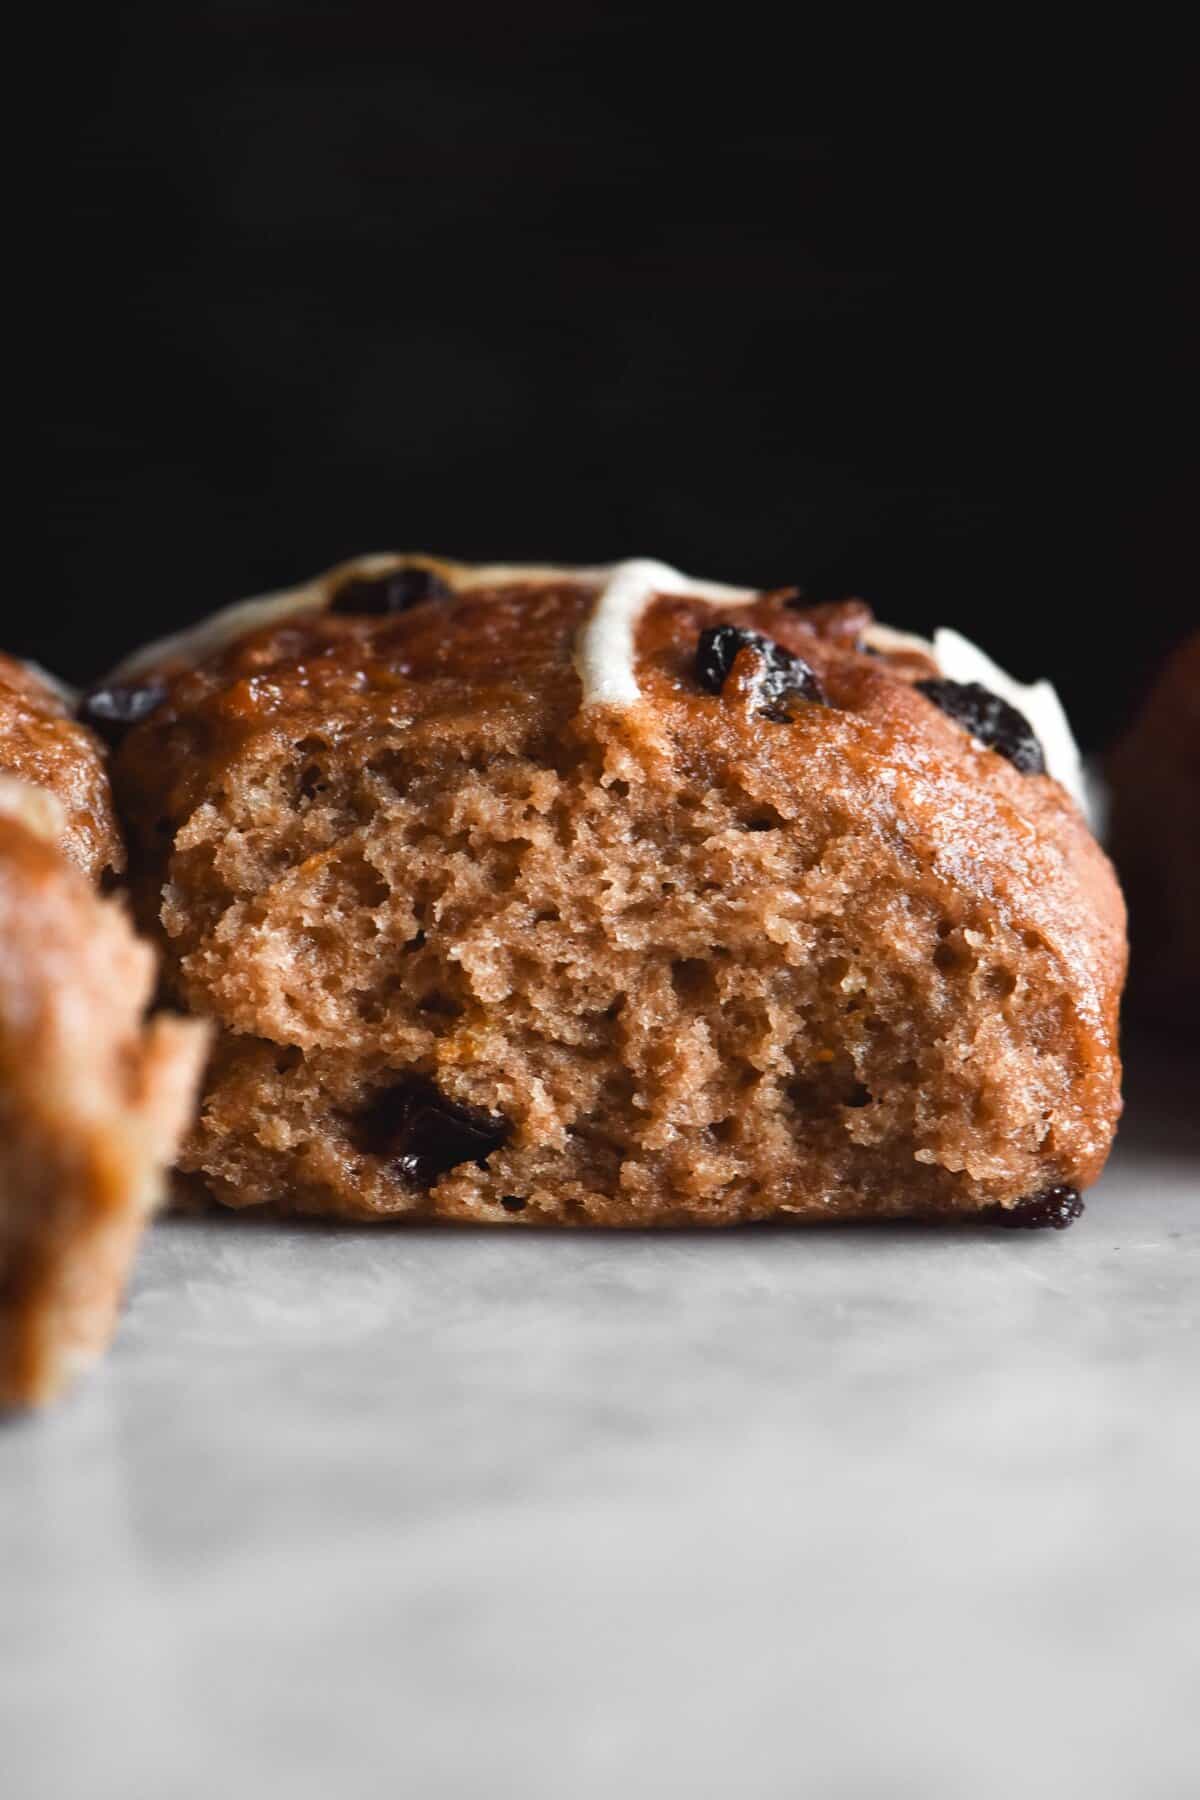
Hot cross buns that are soft and yet perky have plagued me for years. After perfecting my cinnamon scroll recipe, though, I have been adapting that dough for a multitude of purposes. The vegan cinnamon scrolls and vegan babka in my e-book for Intolerance Friendly Kitchen riff on that dough. And if it’s good enough for those recipes, it’s good enough for these HCBS.
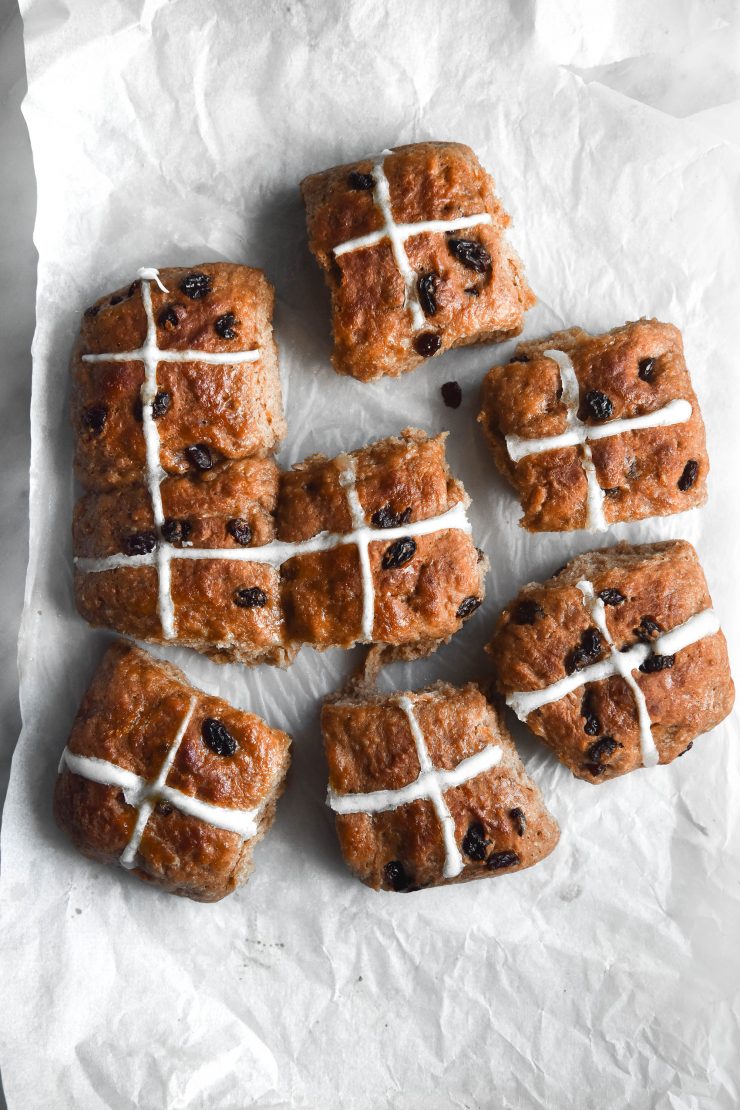
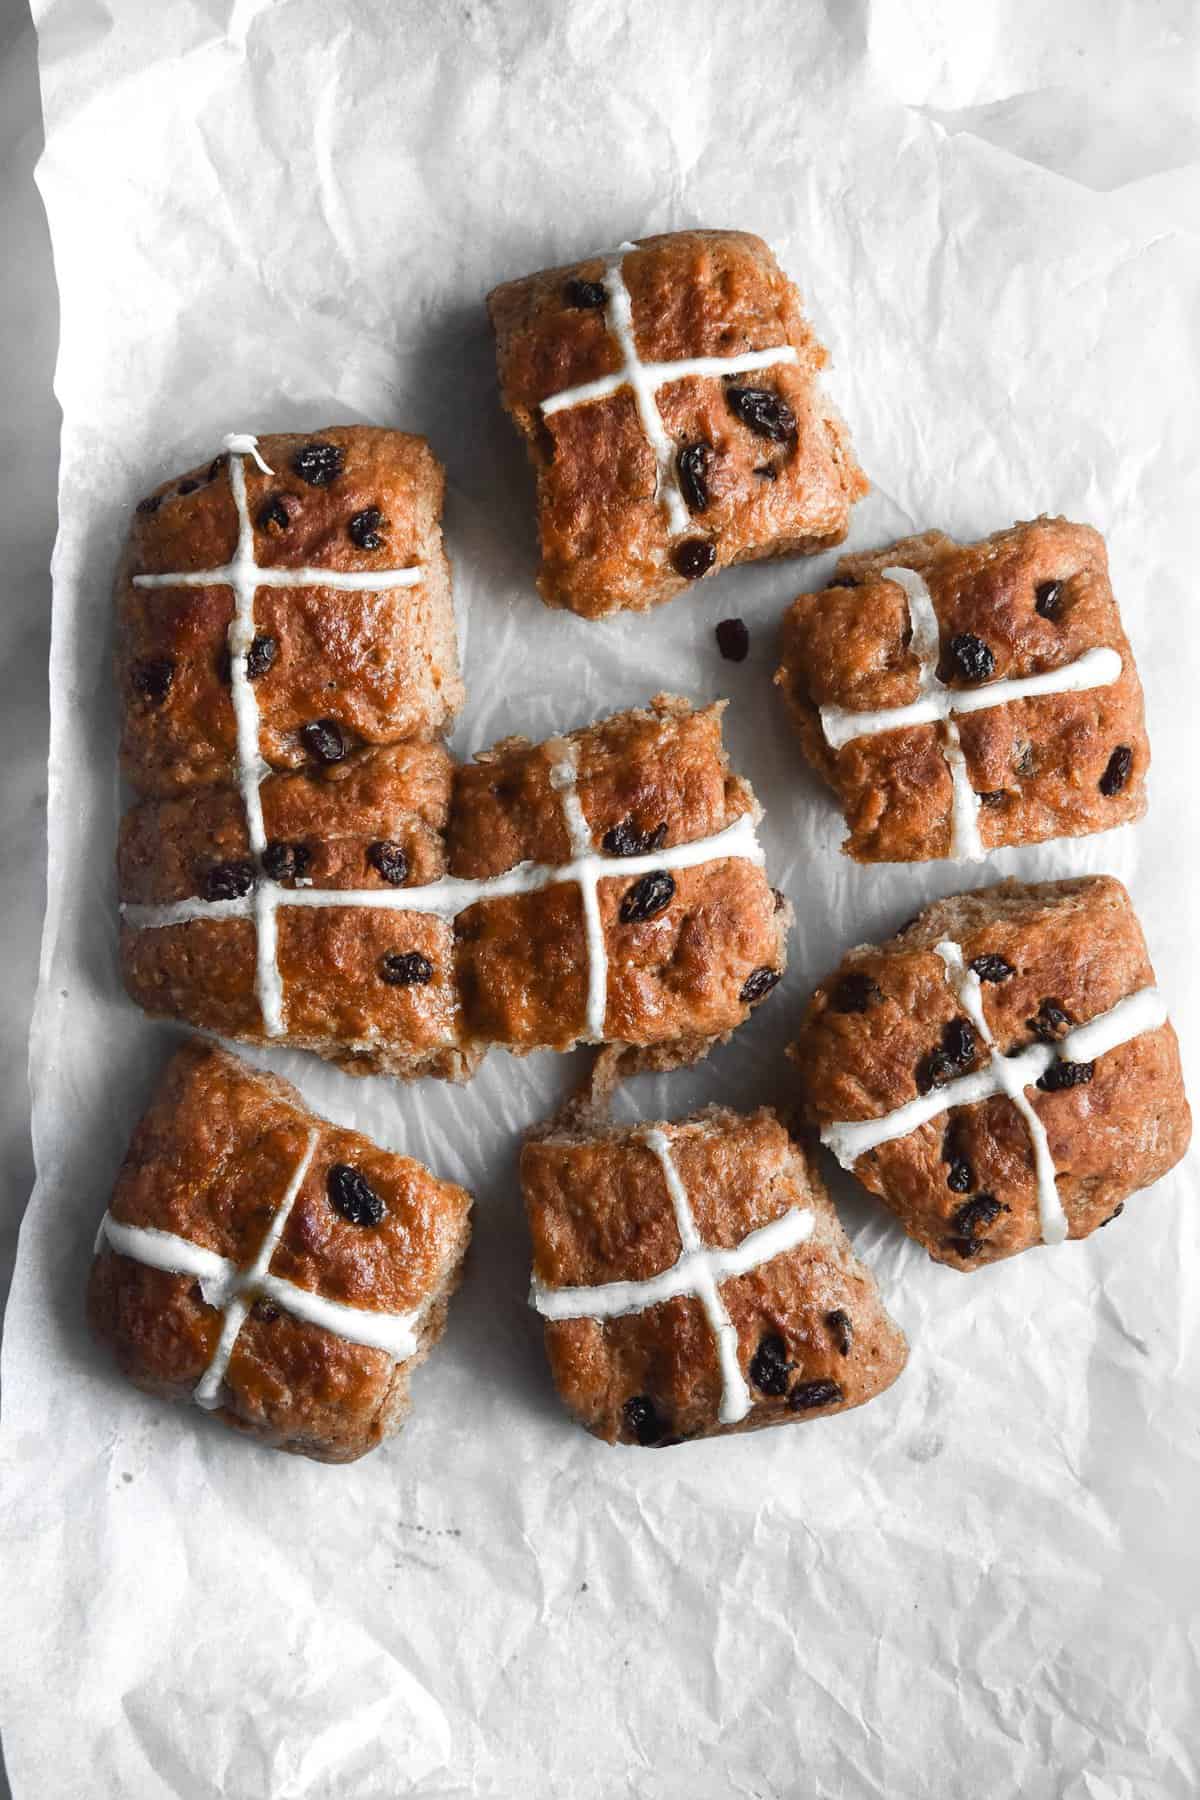
An interesting note: the fuller, fluffier hot cross bun photos were made with 2 cups (500ml) milk. The smaller, more compact ones were made with 1 3/4 cups milk. To an extent, high hydration means a fluffier, puffier HCB. It should be said, though: it was slightly colder the day I made the smaller buns, and yeast needs heat to rise).
Vegan, gluten free hot cross buns without xanthan gum
These hot cross buns are (obviously!) egg and dairy free, given that they are vegan. They are also nut free, xanthan gum free and fructose friendly.
The buns are fluffy, light and easy to make. There are loads of proofing options, too. Firstly, you can make, proof and bake them the same day. Secondly, you can proof them overnight as shaped buns. Finally, you can proof the dough in the bowl, shape them in the morning and set them out for a second rise. Which proofing option you choose is entirely up to you.
Ingredient notes for your gluten free and vegan hot cross buns
These buns use two gluten free flours: white rice flour and glutinous rice flour. White rice is the workhorse flour and glutinous rice flour lends elasticity, fluffiness and lightness. I have not tried these hot cross buns with any other flours, so you will need to experiment if you want to. I will update the post as I test more variations.
That said, I had success with the cinnamon scrolls (not vegan, admittedly) using tapioca flour instead of glutinous rice flour. I found that tapioca was less absorbent than glutinous rice flour, so you will need to use less milk. How much less, I don’t know yet. I will update the post as I go.
Note that white rice flour is one of the thirstier flours. If you intend to try a different wholegrain flour, keep the hydration in mind.
Psyllium husk powder is not optional here. It is the powerhouse of gluten free, xanthan gum free baking. More on that below.
Sugar isn’t critical to structure here like it is in, say, choc chip cookies. You could use rapadura/panela sugar in place of brown. Coconut sugar is high in fructose so I don’t recommend it unless you don’t have fructose issues.
If you only need these to be egg free, you can use regular milk and butter. I have found, interestingly enough, that you need far less regular milk and butter than the vegan alternatives. I found that I needed 1/2 cup less regular milk than I did vegan milk. This might change for you, depending on how thirsty your rice flour is.
A note on psyllium husk powder
- Think of psyllium husk as gluten. In this recipe and in general, it holds a lot of moisture (important for a soft loaf) and it creates structure. Without any structure or binding properties, your loaf would not be able to support itself as the sourdough produces gas and pushes upwards. You’d very likely have a flour soup as opposed to anything resembling bread. So yes, psyllium husk is necessary. No, I haven’t developed a recipe without it yet. Maybe one day!
- Psyllium husk can often (although less so these days, I find) be marketed as a bowel movement product. It is the main component of Metamucil. I suppose it’s precisely that absorbent ability that makes it so useful in bread making.
- Other ingredients in this family include chia seeds and flaxseeds, as well as xanthan gum as a sort of second cousin. I don’t use much flax or chia – in part because they seem to agree with my digestive system less, in part because they can be visually unappealing. Another thing I don’t use in these buns is xanthan gum.
- I use psyllium powder in this recipe, not husk like I usually do. They have very different absorbencies and should be treated as different products. However, you can grind psyllium husk flakes into powder using a spice grinder. This is generally what I do.

Flavour options for your hot cross buns
I have spent years eating chocolate or fruit peel based hot cross buns. My primary reasoning for this is that I generally end up eating more than one bun per sitting, which means I’m overdoing the raisins.
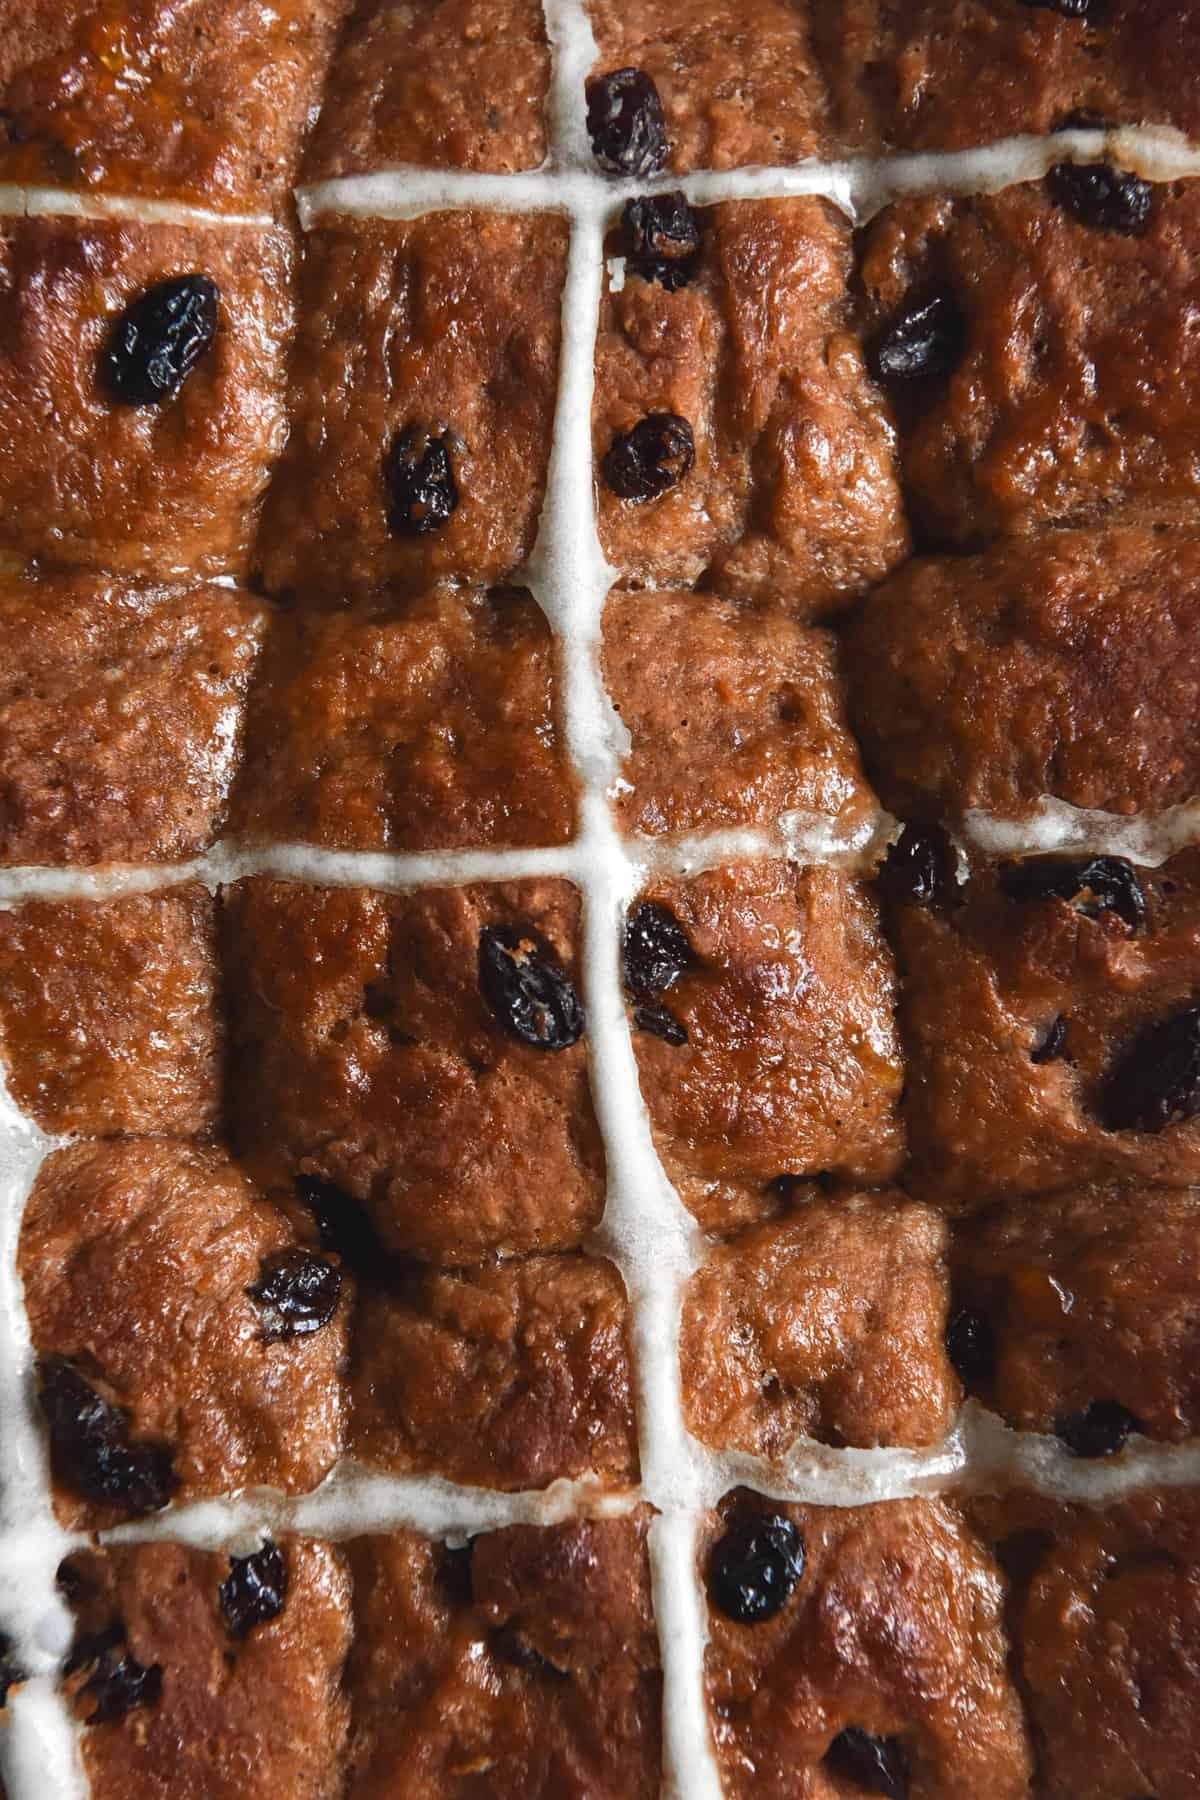
That all said, I have made a batch of these vegan, gluten-free with raisins and I loved the flavour. It was nostalgic and a real treat. Raisins are currently considered FODMAP friendly in 13g (or 1 tablespoon) servings per person. This recipe can contain up to 75g raisins and you can eat 1 1/2 buns in one go. Needless to say, if raisins aren’t an issue for you, you can use however many you like.
If you’d prefer not to go into dried fruit territory, you can use mixed peel or chocolate chips. You can also use my FODMAP friendly ‘fruit mince’ recipe, which was based on the fruitless Christmas pudding I love so much.
Proofing options for your vegan, gluten free hot cross buns
I’ve tested a bunch of different proofing options for these buns and they all work really nicely. Choose what works best for you. Whichever you choose, make sure you don’t pipe the crosses on until just before baking.
- Assemble and proof the buns on the same day. These buns have a slight tendency to spread while baking, so I recommend using a lesser amount of milk if your dough seems moist enough. The dough can be a little sticky, but oiled hands solve that problem. Simply mix, assemble and proof until doubled before baking.
- An overnight rise. As above, but make and shape the buns at night, cover them, and then pop in the fridge for an overnight rest. They can be baked straight from the fridge or left to rise on the counter.
- Overnight in the bowl. If you’d prefer to, you can simply pop the dough in the fridge as it is (ie, in the bowl). The next morning, remove the dough from the fridge, shape, and bake or allow to rise for another 30 minutes at room temperature. This dough is generally the easiest to handle, because it has had time to firm up in the fridge.
One last important note on hydration
We’ve discussed that different brands of rice flour, or rice flour in different countries, have varying degrees of thirstiness. What I think it is important to point out, though, is that in order to get fluffy buns, it is necessary to use the most amount of liquid you can. I found that buns with less liquid tended to be a little gluey, whereas buns with more liquid were fluffier. My thought is that the yeast likes more liquid, but I haven’t confirmed this.
So, I’d really recommend going with the full 500ml (2 cups) of milk. If your dough is harder to shape, simply pop it in the fridge (up to overnight) before trying again. This will also minimise the chance of super spready buns. Super spready buns are better than gluey ones, if you ask me.
More gluten free yeasted bread recipes
- Gluten free, xanthan gum free bagels
- The gluten free babka from Intolerance Friendly Kitchen
- Gluten free baguettes or batards
- My new favourite bread, this grain free white bread
- These gluten free yeasted flatbreads
- Gluten free pizza dough without xanthan gum
Vegan, gluten free hot cross buns
Ingredients
For the binder:
- 2 cups (500ml) hot plant based milk of choice (see notes)
- 75 g vegan butter melted
- 20 g psyllium husk powder
For the dough:
- 240 g (1 1/2 cups) fine white rice flour
- 120 g (1 cup) glutinous rice flour (also called sweet rice flour)
- 150 g caster sugar
- 1 tablespoon cinnamon
- 1 teaspoon nutmeg
- 1-2 teaspoons orange zest
- 7.5g (1 sachet) instant yeast
- 2 teaspoons gluten free baking powder
- 1/8 teaspoon baking soda for browning
- 50-75 g raisins or dark chocolate chips
- Extra plant based milk or vegan butter to brush the buns
For the crosses (optional):
- 1 tablespoon glutinous rice flour
- 1/2 tablespoon white rice flour
- 1 teaspoon plain oil I used vegetable oil
- Water to form a smooth but cohesive paste (2-3 teaspoons as a rough guide)
To finish:
- Maple syrup or marmalade for glazing the buns
Instructions
To make the dough:
- Line a 30 x 20cm baking dish with baking paper.
- Combine the hot milk and melted butter in a bowl. Add the psyllium husk and whisk vigorously until there are no lumps remaining. Set aside for 15 minutes to form a gel. Check on it half way through – the husk might have formed a layer on the top – whisk it through again if it has.
- In a large mixing bowl, whisk together the remaining ingredients.
- Once the gel is ready, pour it into the dry ingredient bowl. Use a spoon to combine most of the way, then get your hands in and squelch the dough through until all the flour has been picked off up the bottom of the bowl. Depending on how much milk you have added, it might look like a scone dough but feel moist to the touch, or it might look and feel moist. It should never feel dry – add a little extra milk if it does.
- Add the mix ins, if you are using them. Use your hands to distribute them through the dough.
- Wash and oil your hands, then divide the dough into 9 balls. Use pressure when rolling the dough between both hands (it will become a disk shape) to create a smooth surface for the top. Once you have the smooth top, fold the edges under to form a bun. Place each bun in the baking tray, then repeat until you have 9 buns.
- If there's plenty of space left in your baking dish, use something ovenproof (I use mini cake pans) to tuck the buns in. They will spread if left to their own devices. If you have a smaller baking dish than the one specified, feel free to use it. When they're all tucked in, you can cover the buns and proof them for an hour or two on the bench, or cover and place them in the fridge overnight.
- When the buns are nearly proofed, preheat the oven to 200C/400F. Place an oven proof pan at the base of the oven and fill it with boiling water. The steam will create light and fluffy buns. Once all the buns are in the tray, brush them with plant based milk or vegan butter.
To make the crosses:
- Combine all the ingredients in a small bowl and whisk to combine. Add water until you have a smooth but pipe-able consistency. If you overshoot it, add equal parts of each flour until you’re back in the game.
- Use a piping bag or small sandwich bag with the corner cut off to pipe crosses onto the buns. Place the buns in the oven for 20-30 minutes or until golden brown and firm to the touch. If you’ve added the higher amount of milk, cook them for at least 25 minutes.
- As soon as the buns come out of the oven, brush them with maple syrup or marmalade (ideally strained) so they have a glossy and delicious finish. Allow them to cool for 15-20 minutes at least before eating.
Hi Georgia, the recipe is missing the baking time. How long should we bake the buns for?
Hi Lyn, it is in the recipe under the ‘making the crosses’ section, but 20-30 minutes 🙂
I’ve just made these buns but the insides wouldn’t cook, despite cooking them for much, much longer than 30mins. The outsides are now almost crunchy but the insides are still raw and doughy. I used the full amount of milk and left in the fridge overnight. What did I do wrong?? Help!!!
Hi Melanie, sorry to hear!
Were you able to shape the dough into buns? Different bags of flour require different amounts of liquid but if you were able to shape them then it shouldn’t be a hydration issue.
Did you use psyllium husk powder? If you used flakes it might account for a wet dough.
Did your dough smell of yeast when you took it out of the fridge this morning? Were there bubbles in the dough? Did the dough look like it has risen in the fridge overnight?
If the yeast was inactive then the dough will be too wet. The buns also won’t rise or smell yeasty/like freshly baked bread.
Given that the insides were still raw after baking, I suspect the yeast.
If you’re working with older sachets (or honestly sometimes just luck of the draw) you can proof the yeast in 60ml (1/4 cup) warm milk and 1 teaspoon sugar. It should bloom and form a domed ball of bubbles on top. If not, discard it and start again. You can subtract the 1/4 cup milk from the binder to keep the liquid level even.
Thank you very much for your reply George. I ground the psyllium to a fine powder, I followed the recipe exactly. The dough had risen whilst in the fridge overnight and I was able to shape the dough into balls easily. Not sure about bubbles in it though or the smell – it just smelt like delicious hot cross buns! The yeast was a brand new sachet too but I will definitely proof the yeast as you suggest in future. At least they taste and smell nice and I’m sure they will be ok toasted!! Thanks again for all your help.