
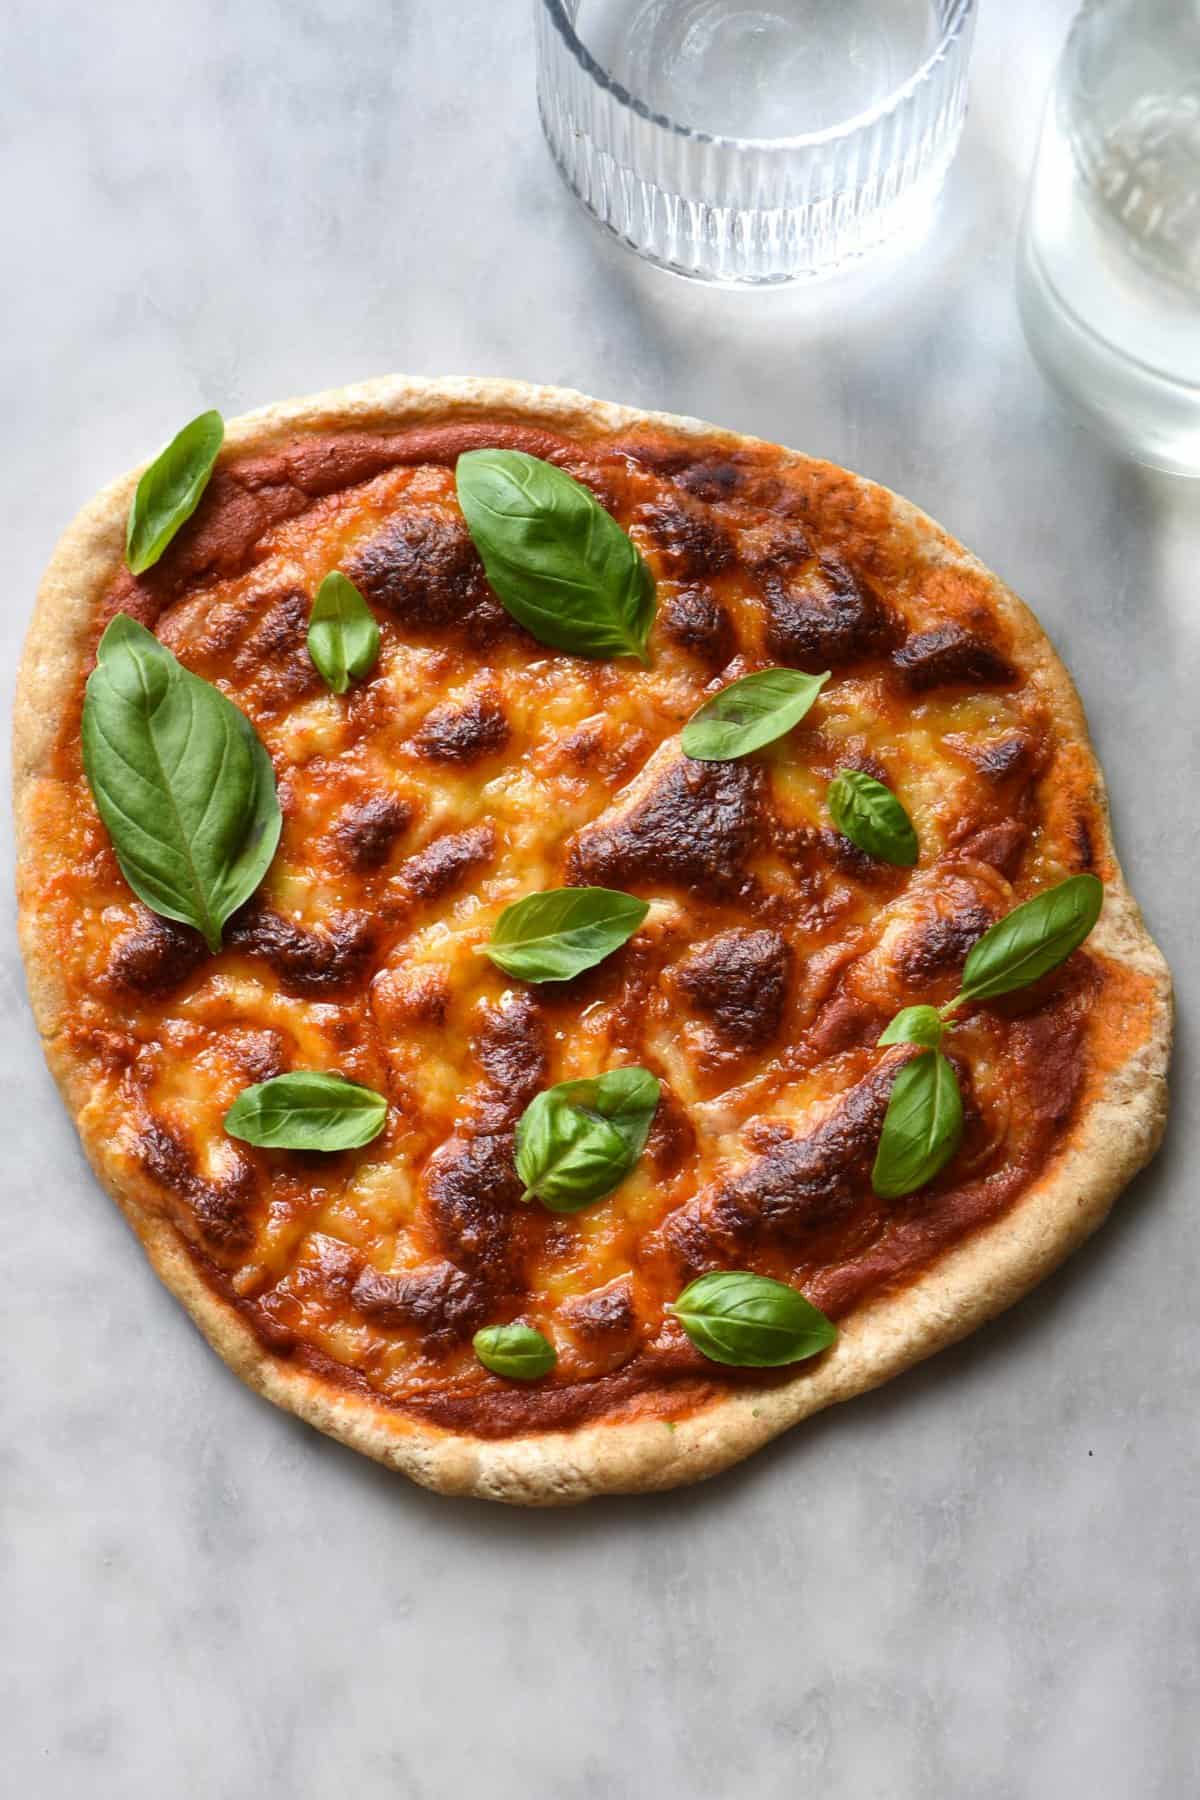
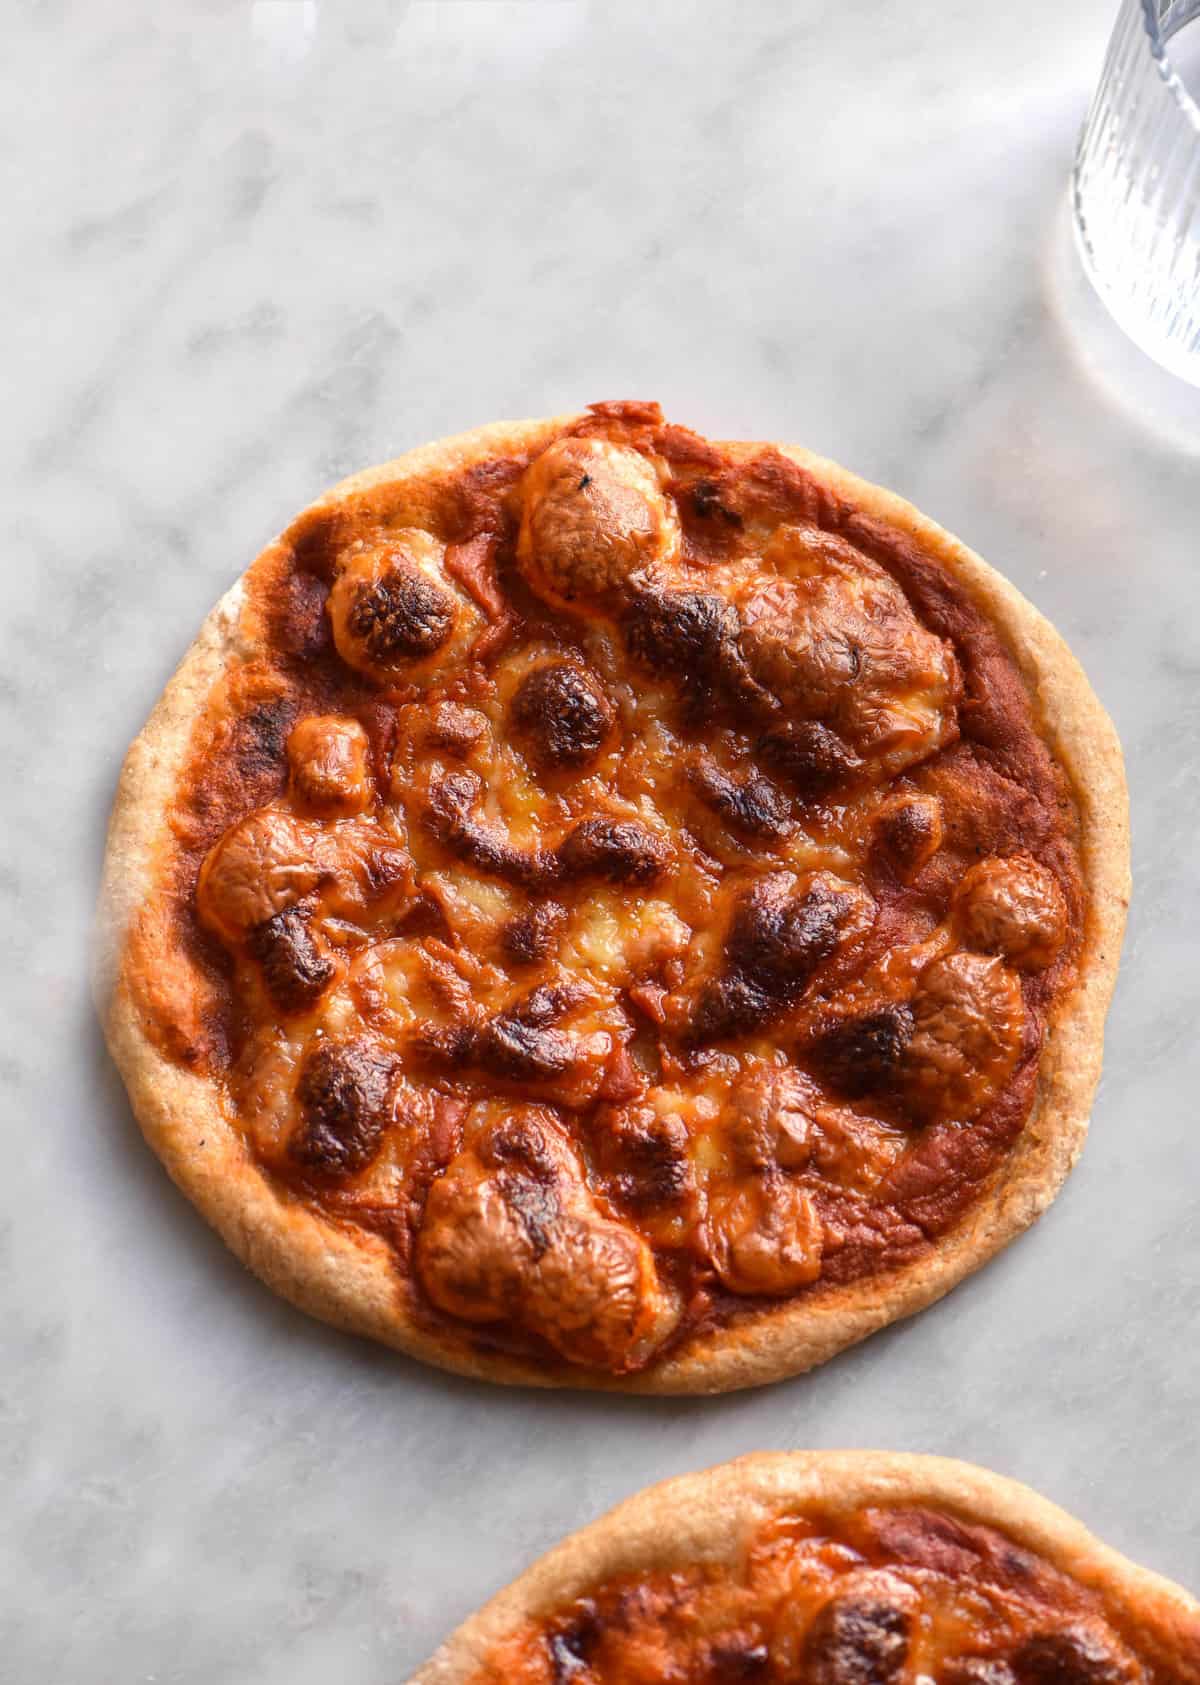
This recipe for gluten free pizza dough without xanthan gum has been in my rotation for a while now. Xanthan gum doesn’t really agree with me, so I try to develop recipes that are made without xanthan gum. This gluten free pizza dough recipe uses psyllium husk for binding as well as an easy and simple blend of gluten free flours. The pizza bases are naturally vegan and can be made without yeast, too.
Gluten free pizza dough without xanthan gum
This gluten free pizza dough recipe is a quick and easy way to make Italian style pizza at home. It’s naturally low FODMAP and I have plenty of FODMAP friendly recipes to accompany the dough itself (like this FODMAP friendly pizza sauce).
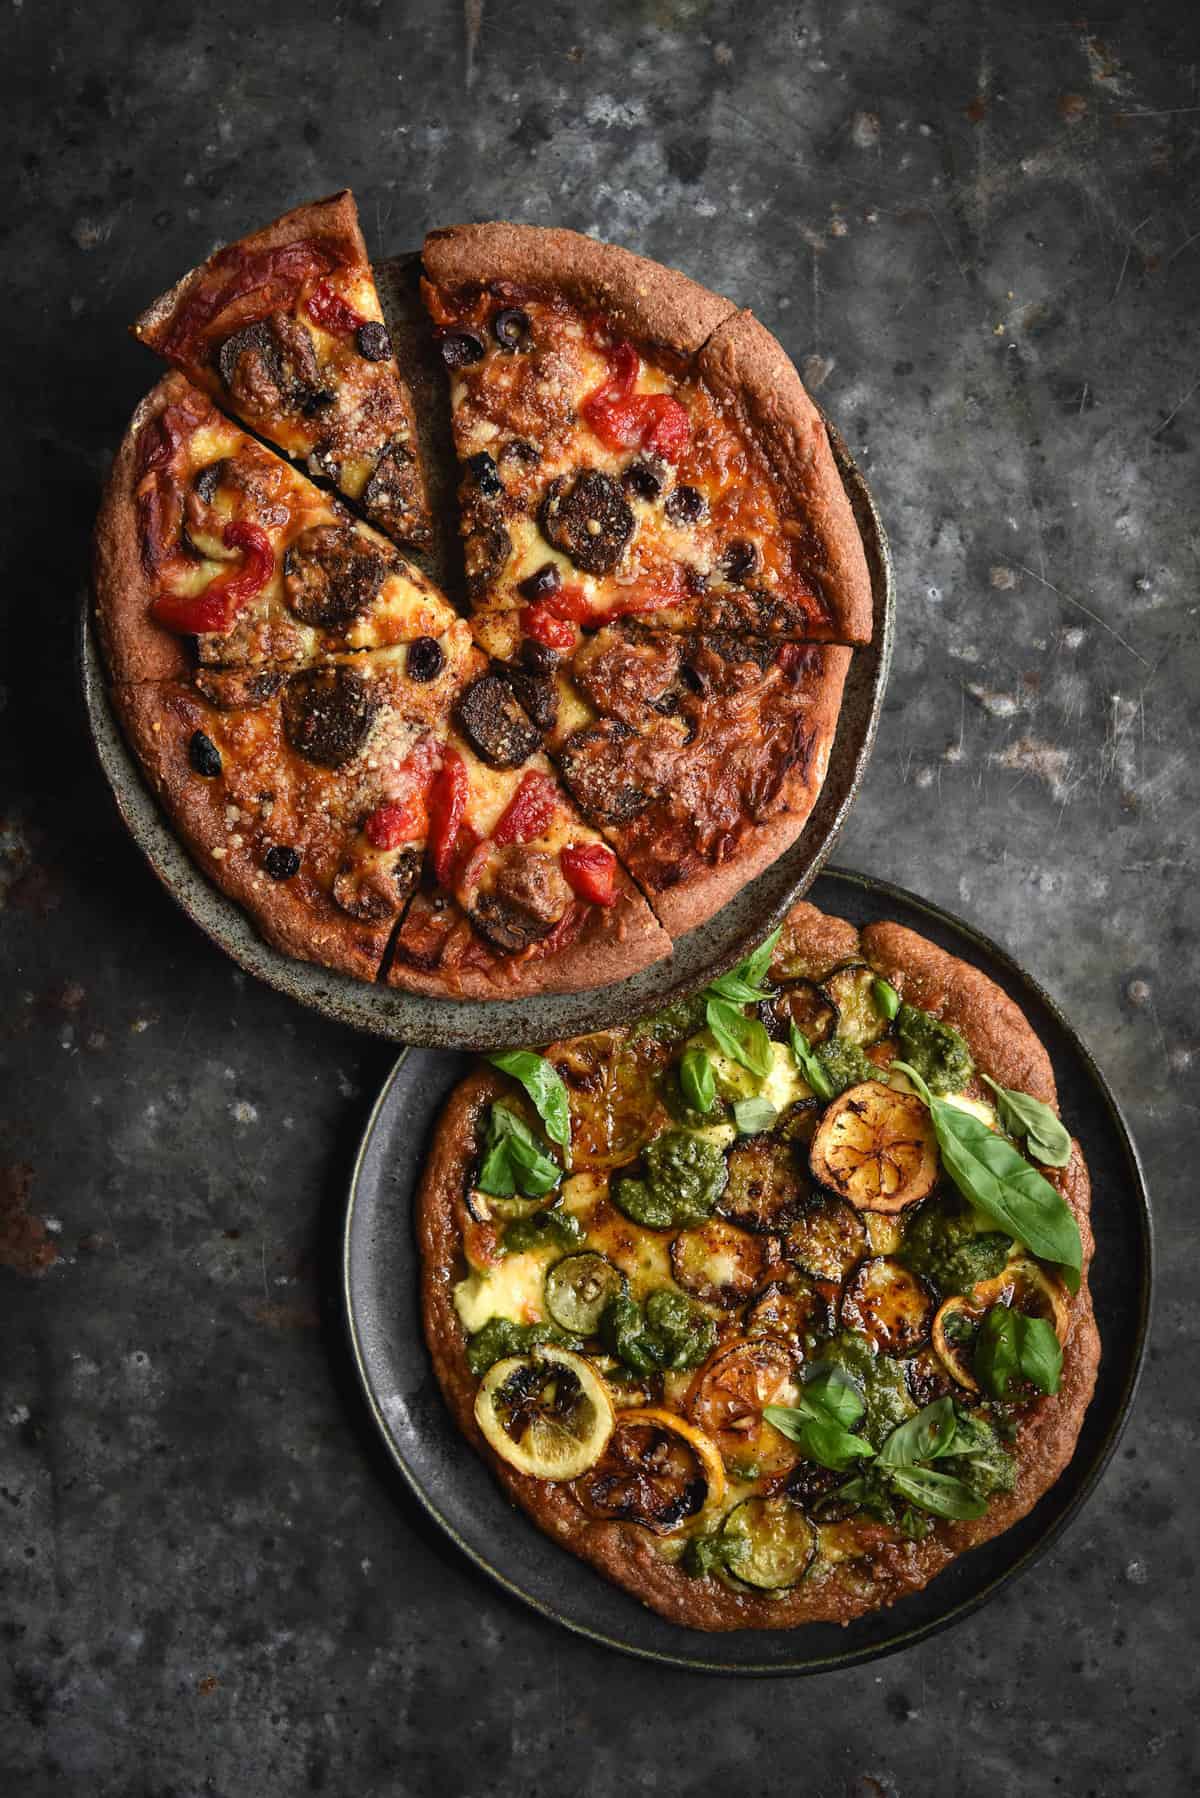
This dough recipe can be used to make a thin crust or regular crust pizza. It’s all in the way you roll it out. I haven’t tried using it to make a deep dish pizza, but after my recent trip to Chicago I might have to try.
As a rule, I try not to use xanthan gum where it’s not necessary. I don’t think xanthan gum is necessary in gluten free pizza dough, so this dough uses psyllium husk powder. Gluten free pizza dough is a highly hydrated dough that doesn’t need too much structure. Generously hydrating a dough with starch (like tapioca starch) makes the dough chewy regardless, so xanthan gum is not necessary for texture.
Why do you use psyllium husk powder in gluten free pizza dough?
Because this dough is gluten free and contains a lot of liquid, it needs an ingredient to A) give it structure and B) hold in all that liquid. This is where psyllium husk powder comes in.
Psyllium husk powder is the ground up form of psyllium husk flakes. It is mucilaginous, meaning that is absorbs a lot of liquid and subsequently forms a jelly like substance.
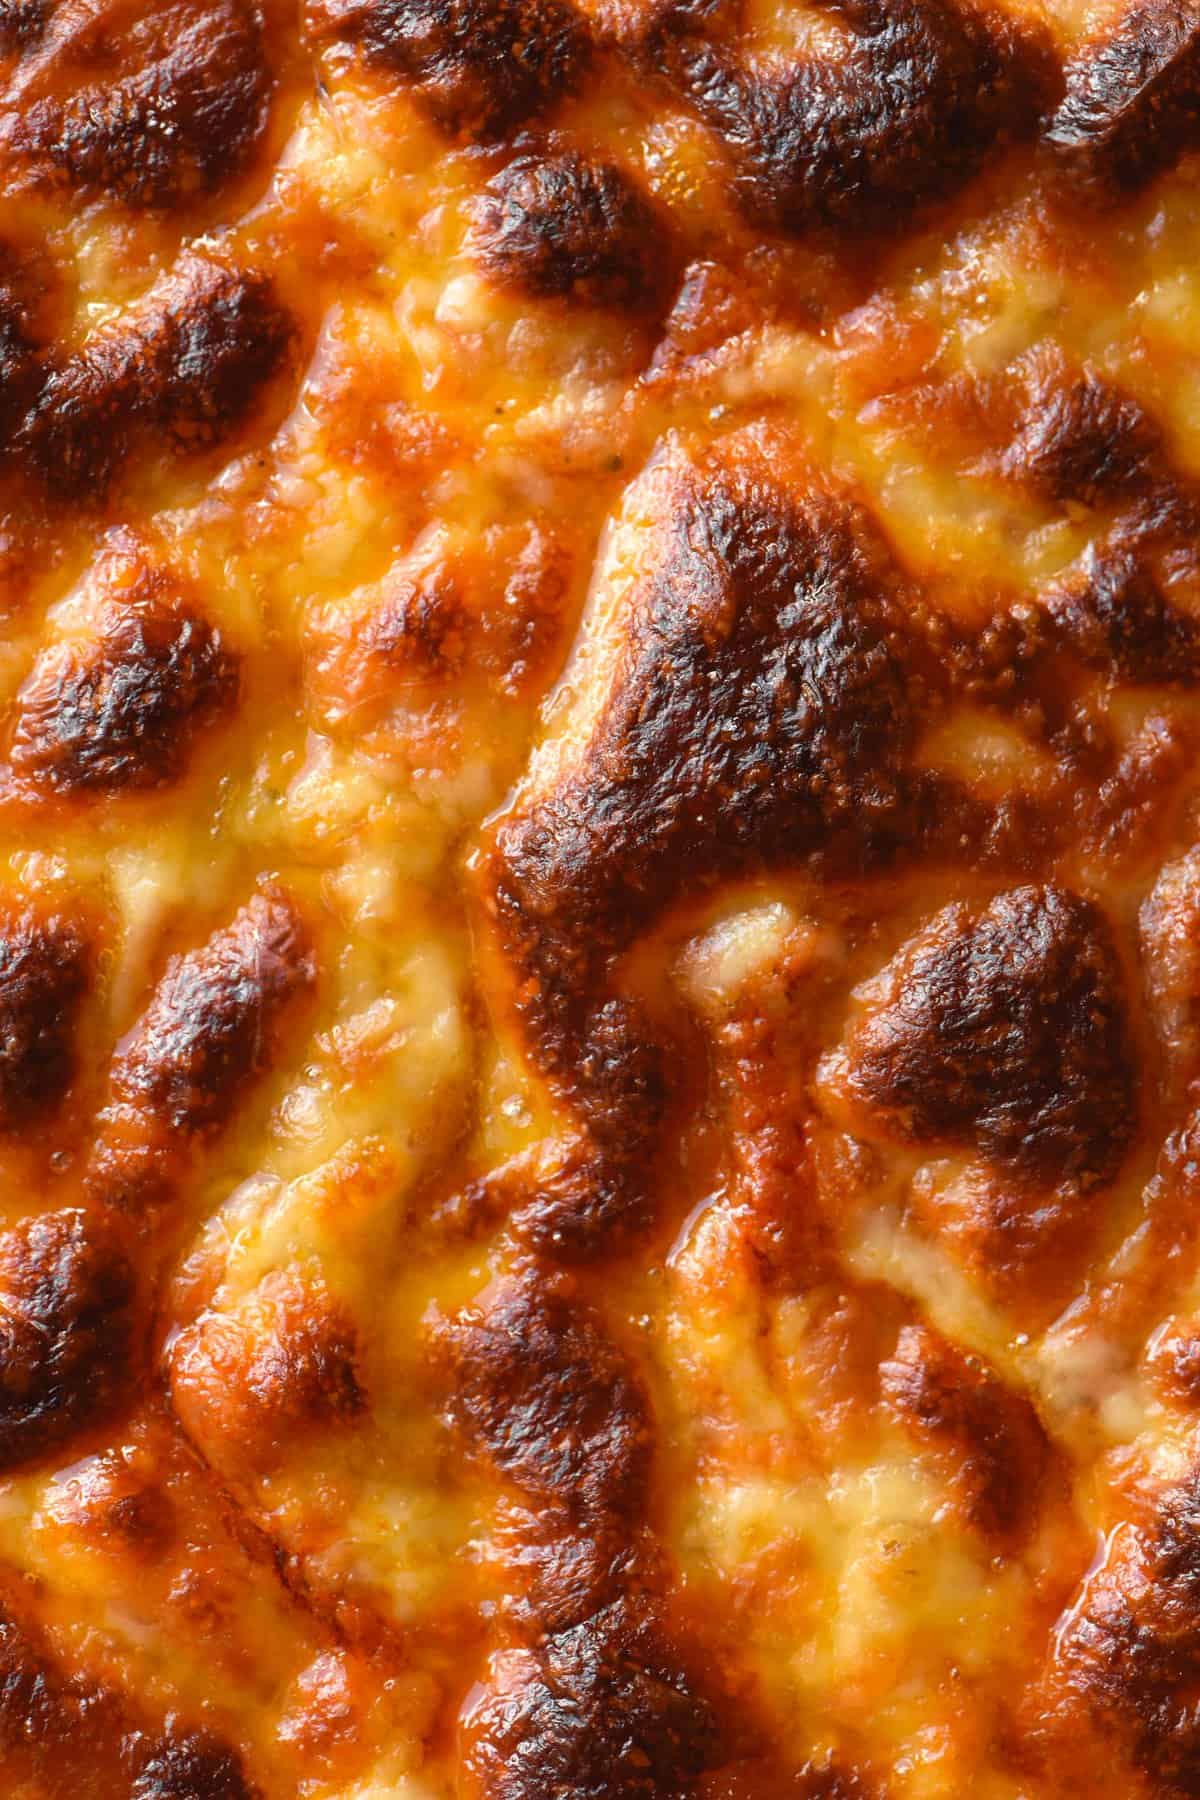
This is magic for a gluten free pizza dough because it allows you to add enough liquid to create a chewy, delicious crust. As an added bonus, also holds the crust together without gluten. The real MVP.
Ingredient notes
This pizza dough is fairly low maintenance. You can experiment with different flours and starches and see what works. I recommend making it as per the recipe card the first time, though, so you can see what the texture should be like.
One thing I would say is that starches are easy food for yeast and tend to ferment quicker. Don’t push the proportions too far in the starch direction, particularly if you live in a warm climate.
Psyllium husk powder is critical to success here. You can also use the whole flake form, but just use a little extra to compensate. You can also use a spice grinder to grind the whole flakes to powder (this is what I do). I don’t have a substitute for some form of psyllium husk.
I find that my gluten free sourdough pizza bases perform better without starches. If you want to make a wholegrain pizza, I would recommend that recipe.

Proofing options for your gluten free pizza dough
This dough is fairly low maintenance and holds up well in the fridge. You can proof it on the bench after mixing or pop it in the fridge to proof overnight. I find that the overnight pizza dough has more complexity of flavour but both are very viable options.
Proofing depends heavily on the climate you’re making pizza in. Yeasted pizza dough takes longer to proof in winter and requires less proofing time in summer. Be patient and allow your yeast to do it’s thing for the best end result.
- You can proof this dough on the bench for 1-2 hours until it has tangibly risen. The proofing time will depend on how warm it is in your kitchen.
- You can shape and bake the pizzas straight after proofing, or you can shape the pizzas and allow them to do a second rise before baking. They will need to be lightly covered as they proof a second time. Proofing the dough once shaped will provide a more airy and light crust. Baking after the first proof will result in a more chewy, dense crust.
- Finally, you can make the dough and proof it in the fridge overnight. I find that yeasted dough is best made after one night, but sourdough pizza dough can last two nights. After an overnight proof, you can choose to shape and baked immediately or shape and proof a second time.
Troubleshooting
Why didn’t my gluten free pizza dough rise?
Gluten free dough tends to rise less tangibly than regular dough. Often the rise on the dough will be subtle, but it should still smell yeasty. If there is no smell and absolutely no rise or bubbles, it could be one of two things. Firstly, if the yeast sachet was really old or expired, it will not provide any leavening. When you’re using old sachets of yeast, it’s a good idea to bloom them in some warm water with a little sugar first. This will establish if the yeast is active before adding it to your pizza dough.
Secondly, not adding enough water to sufficiently hydrate your pizza dough will mean that the yeast can’t do it’s work. Yeast needs a wet environment to properly rise so if you don’t add enough water the recipe will not work.
Prior to proofing, you should be able to pick up the dough with your hands but it should move through your fingers on its own. It should be smooth and each piece of dough you pull off the main dough should easily form a ball rather than a dry chunk.
Once proofed, the balls of dough should still be smooth without any dry bits of flour. You should be able to press and roll them into individual pizza bases without encountering any dry bits. In fact, you should need to flour the bench a little.
Why is my pizza dough wet or sticky?
Gluten free dough naturally needs more liquid than its regular counterpart. As you mix the dough, you might find that it looks wet and sticky. This is where the magic of psyllium husk comes in. After you cover the dough and allow it to rise, the psyllium husk will absorb some of the excess liquid to make the dough firmer and easier to handle. Be patient and allow the psyllium husk to do it’s work.
If you find the dough is still a little too wet after proofing, sprinkle it with rice flour and tapioca flour as you work it and roll it out. For dough that’s just a little too moist, this should course correct.
Different brands of gluten free flour made in different countries will have markedly different qualities. I live and bake in Australia, so the absorbency of my flours might be quite different to the ones you are using. I try different brands to ensure I am not only working with one brand of flour, but I can’t try every brand worldwide.
If your dough is still really wet at the end of proofing, consider adding less liquid next time. You can still bake a wet dough by pressing it out onto a lightly oiled sheet of baking paper.

Why was my pizza was crumbly?
If you have followed the recipe and paid attention to how the dough should look at each stage, it shouldn’t be crumbly. However, if you have substituted flours, this is the likely culprit for a crumbly pizza.
I found that using all wholegrain flours in this recipe resulted in a somewhat crumbly pizza dough the next day. Leftover pizza, when reheated, was fine, but in it’s cold form it crumbled more easily than I would have liked.
The lesson being: make sure you don’t tweak the recipe too much in the wholegrain direction. In that vein, ensure you add enough liquid to account for the thirstiness of the gluten free flours you decide to use.
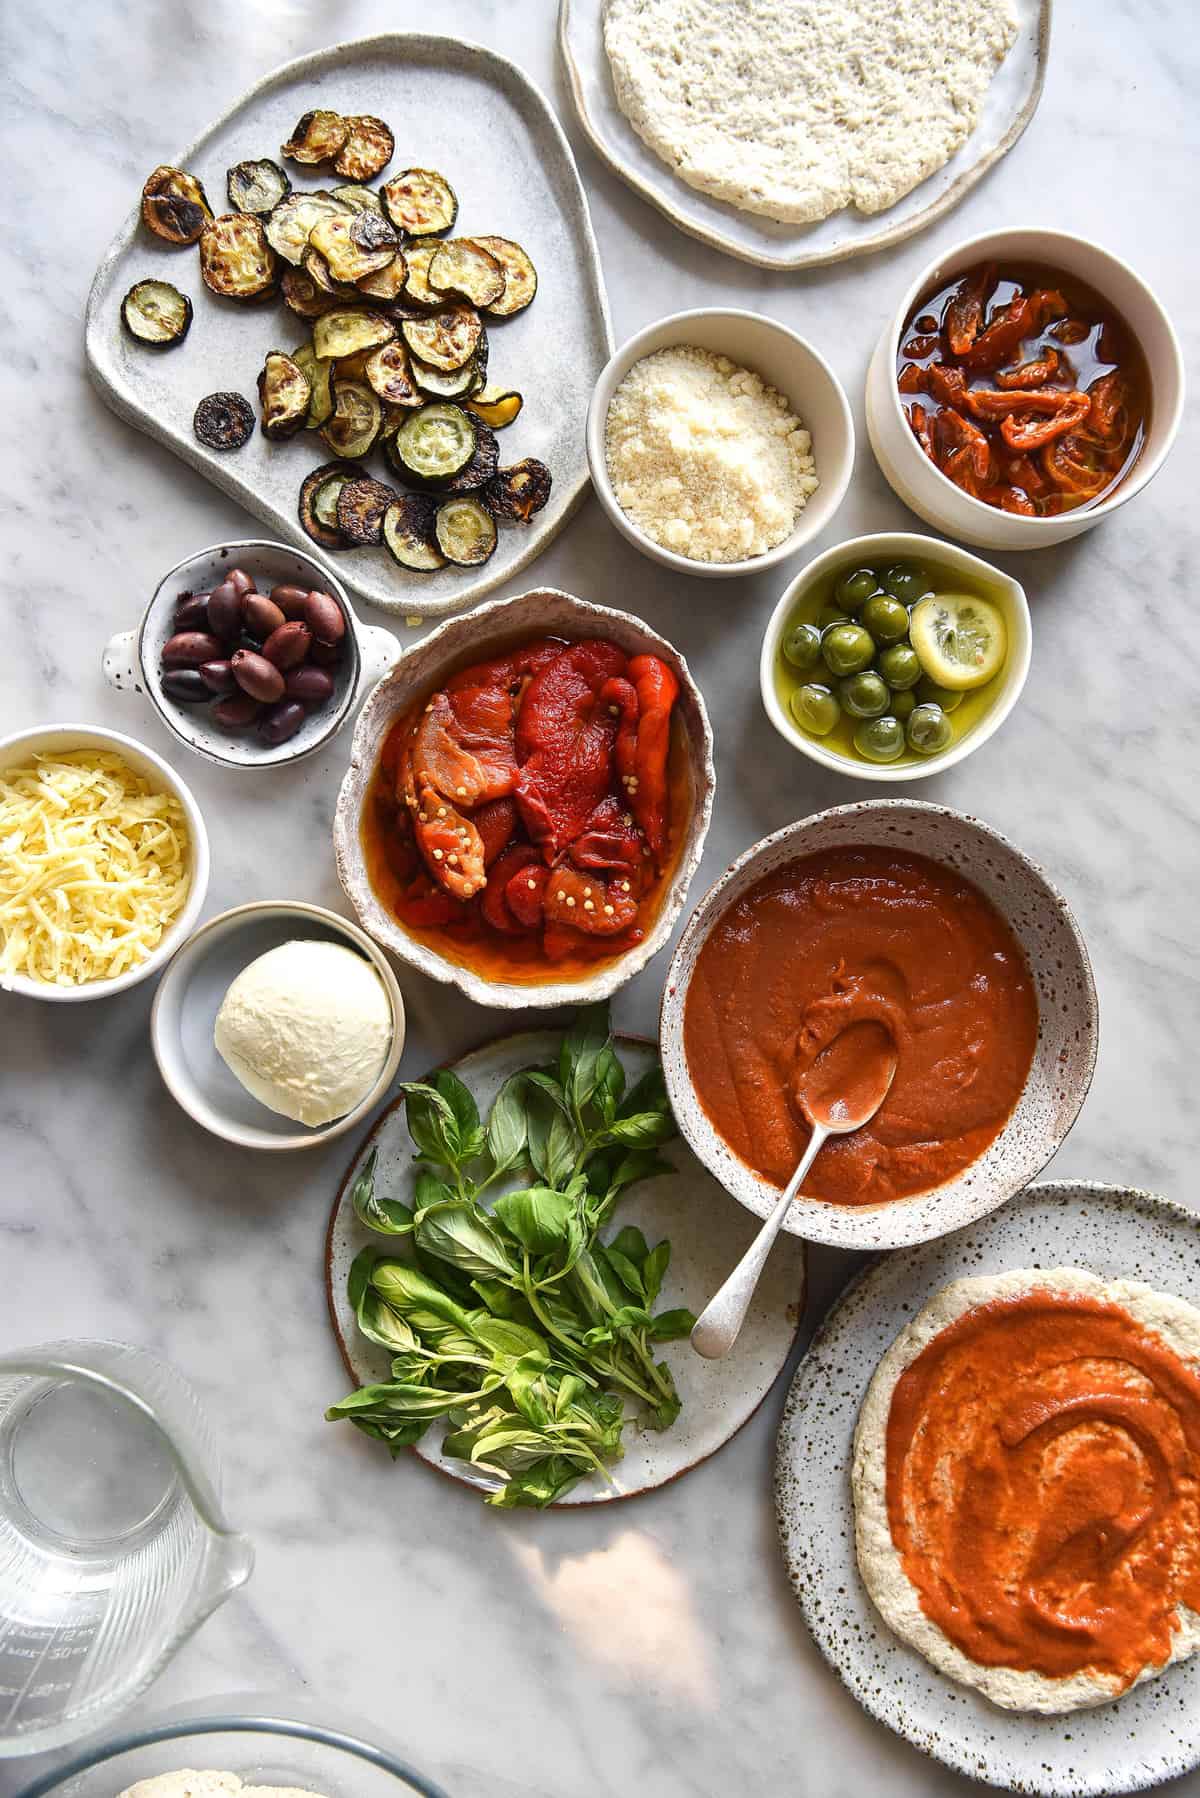
Recipes to accompany your gluten free pizza dough
- Low FODMAP pizza sauce (with a vegan option)
- Homemade lactose free ricotta
- FODMAP friendly pesto
- Homemade lactose free mascarpone
- And if you’re looking to branch out from packet yeast: my gluten free sourdough pizza bases
- For vegan pizzas, use my vegan low FODMAP mozzarella recipe

Gluten free pizza dough without xanthan gum
Ingredients
For the yeast mixture:
- 100 g warm water
- 2 teaspoons caster sugar
- 7.5 g (1 sachet) dried yeast
For the pizza bases:
- 120 g (¾ cup)* fine white or brown rice flour
- 60 g (½ cup)* tapioca or cassava flour
- 60 g (½ cup)* sorghum flour
- 1 – 1 ½ teaspoons fine salt
- pinch dried ginger powder (optional, see notes)
- 10 g psyllium husk powder or 15 g psyllium husk flakes
- 60 ml (¼ cup)* olive oil or vegetable oil
- 300 g warm water
Instructions
- To make the yeast mixture, combine 100 g warm water, the sugar and yeast in a small bowl. Set aside in a warm spot for 10–20 minutes. The top of the mixture should be slightly domed and very bubbly. If this doesn’t happen, discard the mixture and start again (as yeast is inactive).
- Meanwhile, combine flours, salt, ginger powder (if using) and psyllium in a large non-reactive bowl. Add the bloomed yeast, olive oil and 300 g warm water and use a spoon to stir thoroughly until no lumps remain. The dough should look a bit like thick porridge. Cover and set aside to rise in a warm, non-draughty place for 1 hour or until doubled in size.
- Preheat oven to 200°C. Line 2 baking trays with baking paper.
- Divide dough into 2 or 4 portions. Using thoroughly oiled hands, place one piece of dough on a prepared tray and use your hands to press it out into a circular pizza shape, about 20 cm in diameter for small pizzas or 30 cm for large. You can make the pizza thinner or thicker depending on how you like it but remember that this will affect cooking time. I like to leave
- the edges a little thicker than the body of the pizza to mimic a traditional pizza crust. Repeat with remaining dough.
- Bake pizzas one at a time for 15–20 minutes, thickness dependent. I like to put a small baking dish of boiling water in base of oven to give dough a bit of lift (the steam will help the dough puff up (but this is optional).
- Remove from oven – pizza is now ready to top with your favourite toppings.
Notes
- Dried ginger powder can help the yeast work to it’s full potential. It’s an optional but easy way to ensure pizza success. In Australia, you can easily buy dried ginger powder at the supermarket in the spice section.
First time going for this tonight! After par baking the pizza, then adding the ingredients, how long back in the oven, or is it “just keeping checking” sort of thing?
Hi Graham! If you have par-baked the base it’s more about browning the cheese and cooking the ingredients on top. So it is a bit variable and depends on what you have topped it with and how heavily you have topped it 🙂
This is great! We are corn free and gluten free so sometimes it’s a challenge to fi d recipes without corn (xanthum gum is derived from corn). This is great and delicious.
So glad to hear you enjoyed it Rebecca 🙂
Hi Georgia! I have tried making this recipe twice now, but each time the dough seems a bit too “runny”, and the end product is a raw looking pizza, it stays quite doughy despite baking it for over 30 minutes. Any idea what I could be doing wrong? Is it definitely 100gr of water with yeast plus an extra 300gr of water? Let me know!
Hi Francesca! The recipe as written is definitely correct 🙂 There are a few things:
Are you adding yeast, psyllium husk and all the other ingredients? Seems very unusual that it would be raw after 30 minutes of baking.
Are you substituting in any flours not listed in the recipe card?
Are you altitude baking?
As I’ve written in the troubleshooting section, gluten free flours can vary in their absorbency from bag to bag, country to country, brand to brand etc. If you are following the recipe as written with no changes, just decrease the amount of water you use. Your flour is likely less absorbent than mine. How much less depends on your dough.
Thanks! Yes I otherwise followed your recipe step by step, did not swap any of the ingredients. I’ll try it again using less water 🙂
I am also in Australia, what brand of fine rice flour do you use?
Ah there you go! Close to home. I jump around on rice flour but mostly try to get it from the bulk food store because it doesn’t have that musty taste and smell that bagged brands sometimes have.
In a pinch I have used Lotus Brand, Ceres Organics and even a 1kg bag of Pattu fine rice flour (in the international section at Coles).
I love Erawan rice flour but can’t get hold of it often! Generally my supermarkets only stock their tapioca and sometimes glutinous rice flour
Hi Georgia,I am planning to make your pizza over the next week and wondered if I could freeze half of it when ready to form into a pizza shape?
That way I will have one stashed away ready for next time i am yearning for a pizza.
I am so glad you use grams for accuracy so us here in the uk can enjoy your delicious gluten free recipes.
I will be trying your sourdough next:)
Hi Carolan! I normally recommend par baking the bases and then freezing them cooked.
That said, I did a quick google and apparently you can freeze raw dough! I have never tried it, but it seems to be possible.
My only qualm is that the articles (https://bakingsteel.com/blogs/recipes/the-art-of-freezing-pizza-dough among others) are for regular dough and not gluten free.
I will have to test it at some point but I haven’t thus far. You are welcome to try it if you’d like but I’d probably recommend erring on the side of caution and par baking it to freeze.
Hope you enjoy! 🙂
So excited to have found your cookbook! Any thoughts on whether this dough would work for pizza / savoury scrolls?
Hi Kate! I can’t say for sure as I have never tried, but I don’t see why it wouldn’t work. I do have a few savoury scroll recipes though:
https://georgeats.com/recipes/gluten-free-pesto-scrolls-gum-free-dairy-free-option/
https://georgeats.com/recipes/gluten-free-vegemite-scrolls-fodmap-friendly/
As well as the sourdough Vegemite scrolls in my cookbook 🙂
Thanks so much Georgia! I’ll be making the pesto scrolls this weekend ????
Loving your book – been baking for a while, but new to GF. Blown away by the thought and testing that has clearly gone into your recipes.
Hello Georgia! Really looking forward to making this! Can you please update the recipe with the quantity of ginger needed? Thanks!
Hi Nina, apologies! I must have missed that in the ingredients list. It’s just a pinch of dried ginger powder which is optional but can help the yeast work to it’s full potential. I will update the recipe card, thanks for letting me know!