
I am very excited for today’s recipe: gluten free choc-chip cookies. If you have followed me for a while, you might remember my vegan, gluten free choc-chip cookies. They took over 60 tests to perfect, during which time I learnt a lot about gluten free flour, and a lot about how many cookies you can eat before your pants no longer fit.
These lessons led me to create another gluten free choc-chip cookie recipe – one with brown butter but without eggs. I was still very much in the vegan mindset, and found that the cookies with egg tasted noticeably eggy, having worked with vegan ingredients for so long.
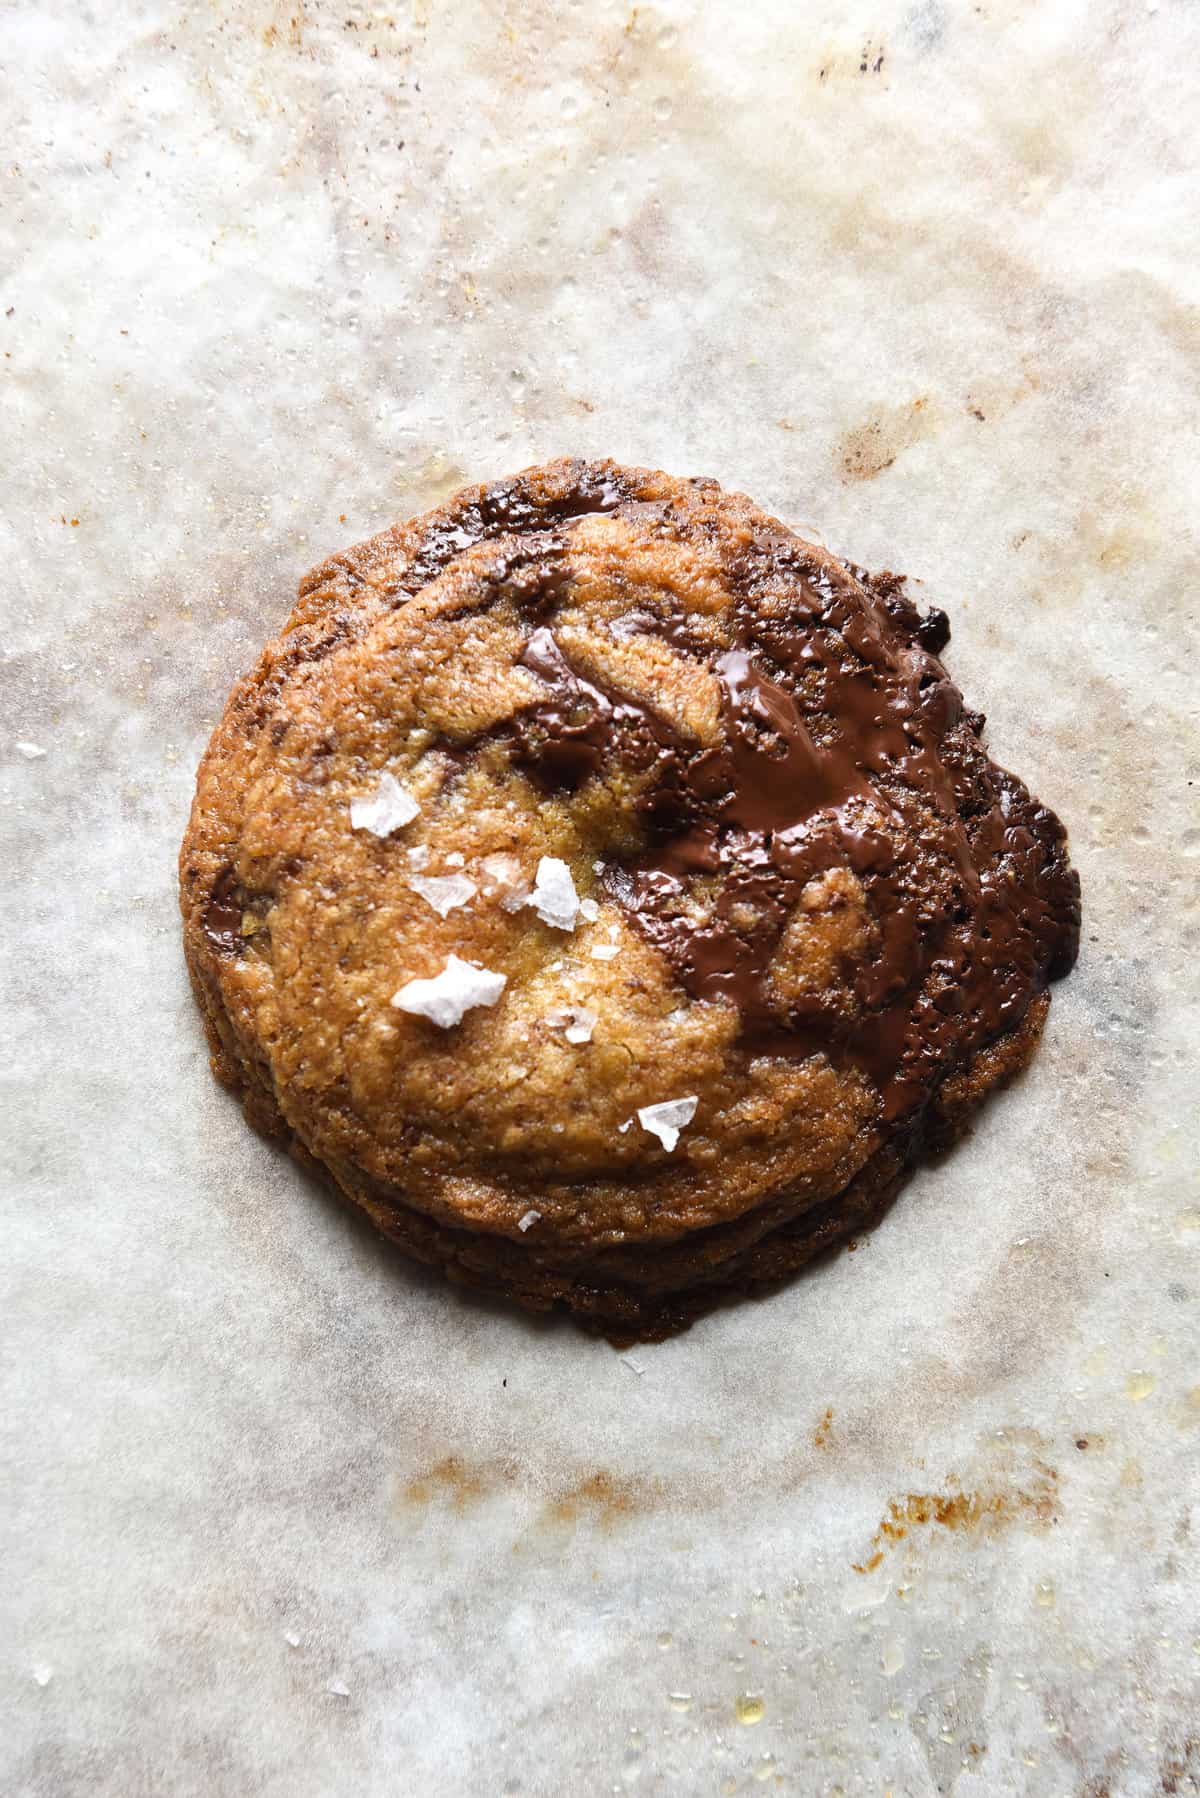
Needless to say, I’ve had sufficient distance from those cookies now. My body is ready. So, without further ado, my gluten free choc-chip cookies, made with brown butter, egg yolks, and all the sweetness your self isolating self could need.

Gluten free choc chip cookies without xanthan gum
These cookies are gluten free, nut free, FODMAP friendly and whipped up in 10 minutes. Making them the night before is compulsory in this case – it softens the edges of the gluten free flour and gives the whole thing a way better texture.
The cookies are made with a simple mix of rice flour and tapioca flour. They use both brown and white sugar to provide flavour but also the perfect amount of spread. The butter is browned to give the cookies another level of flavour. This also makes them even lower in lactose.
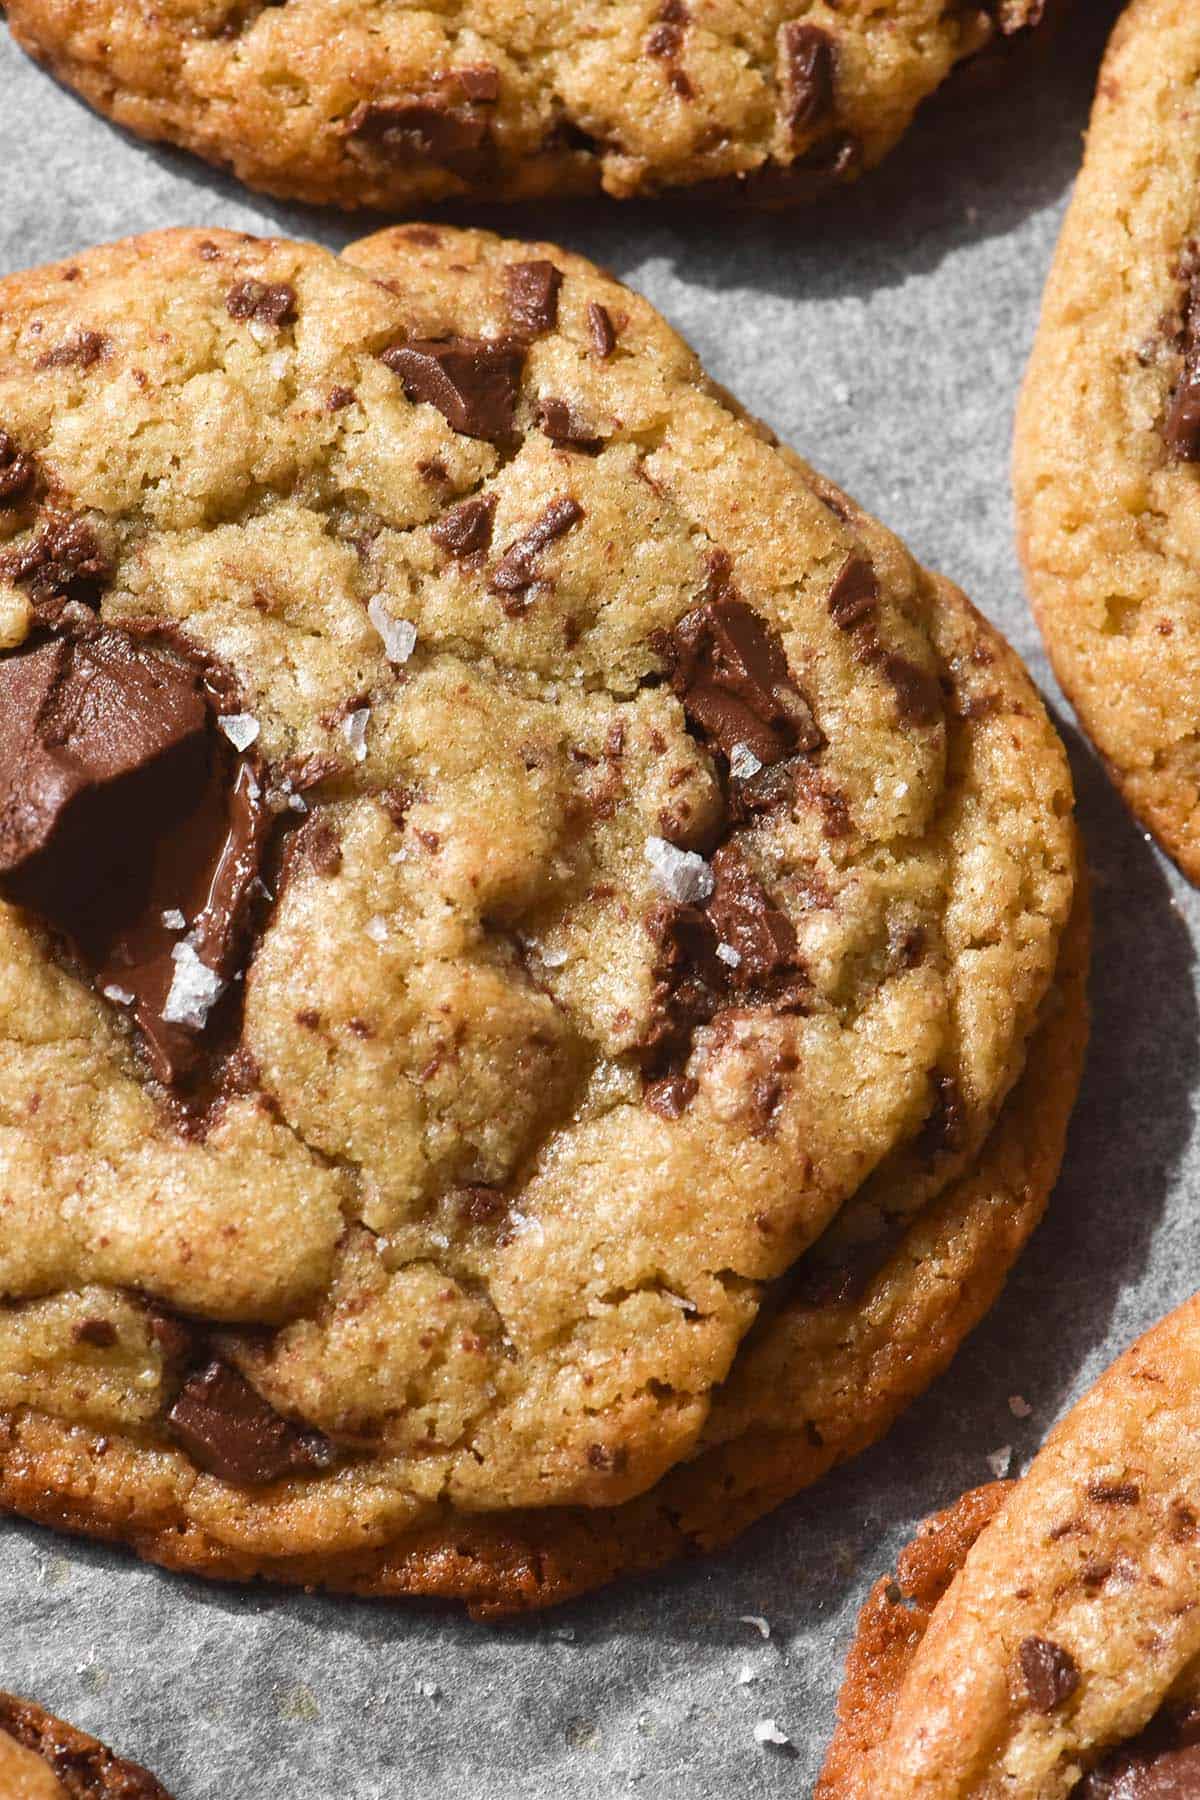
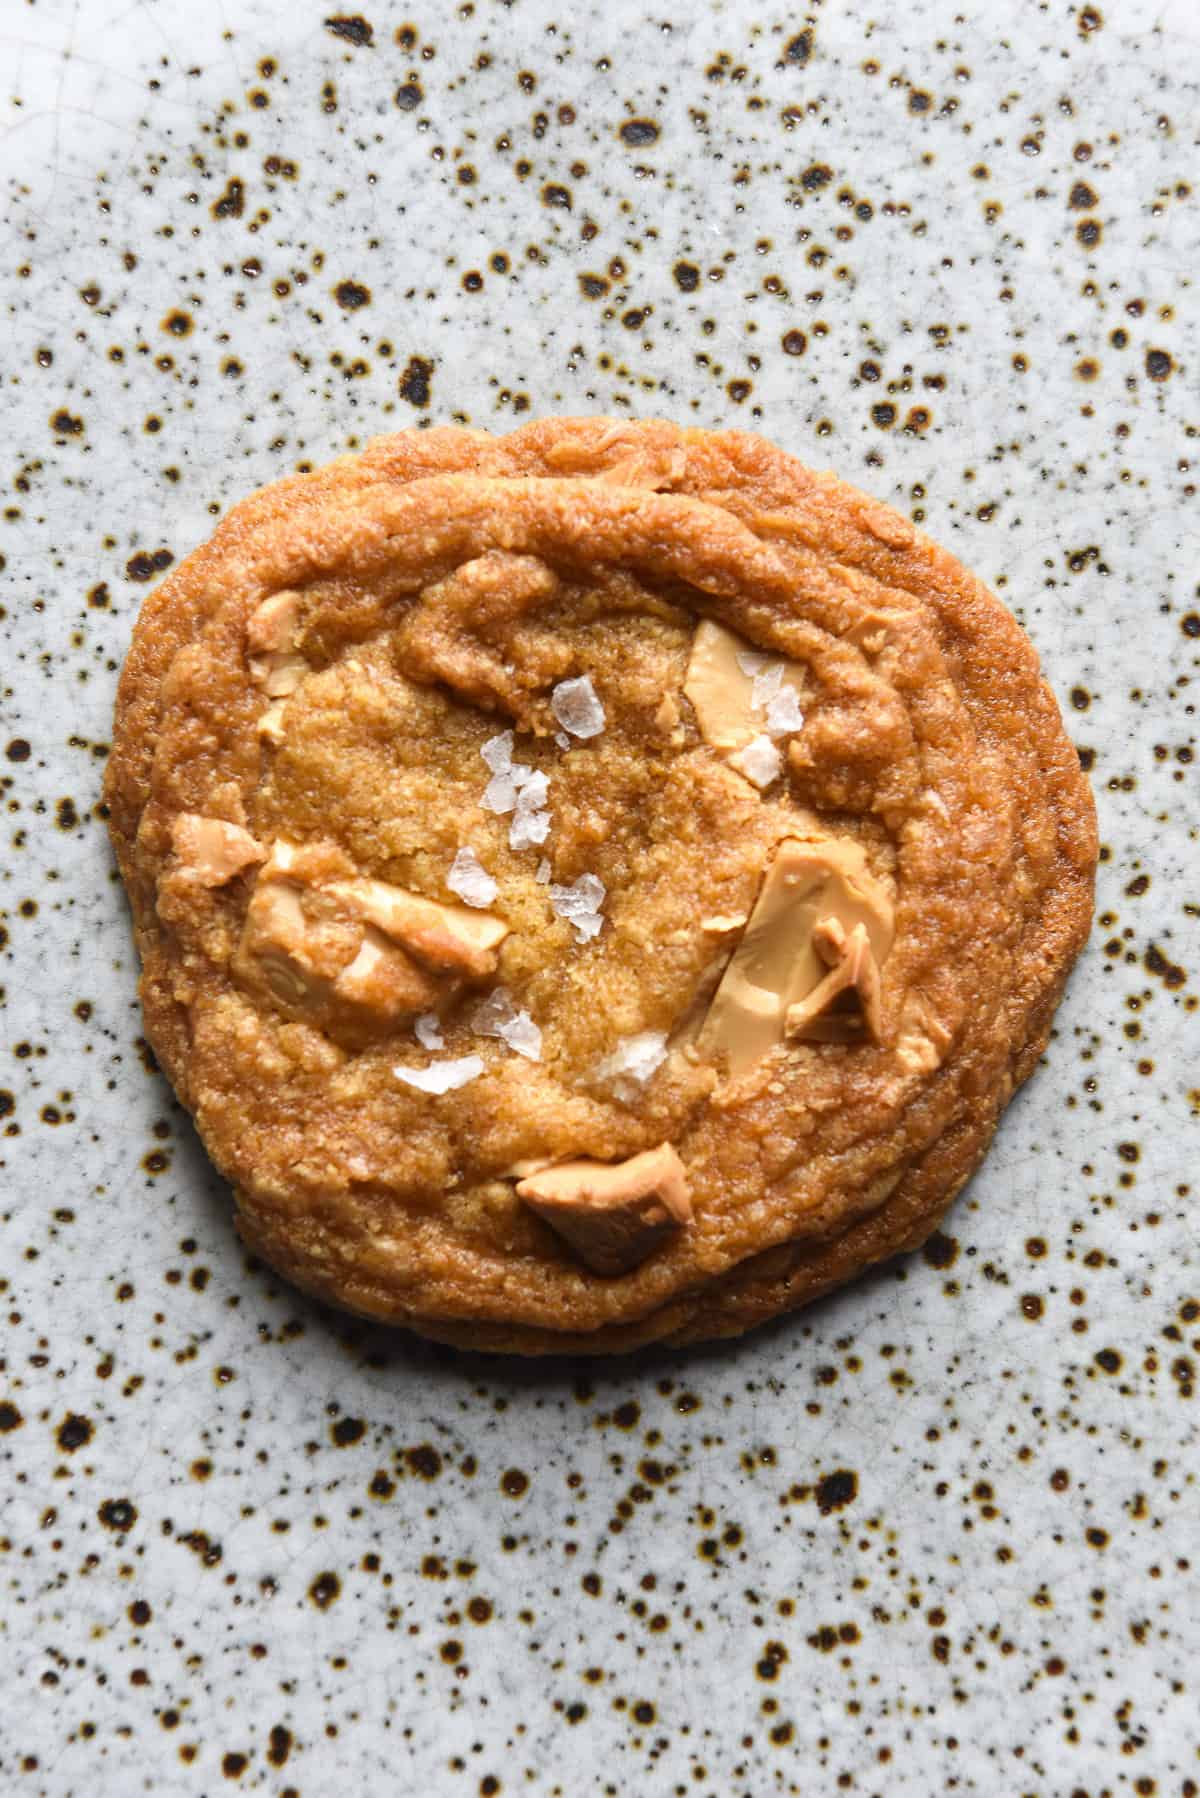
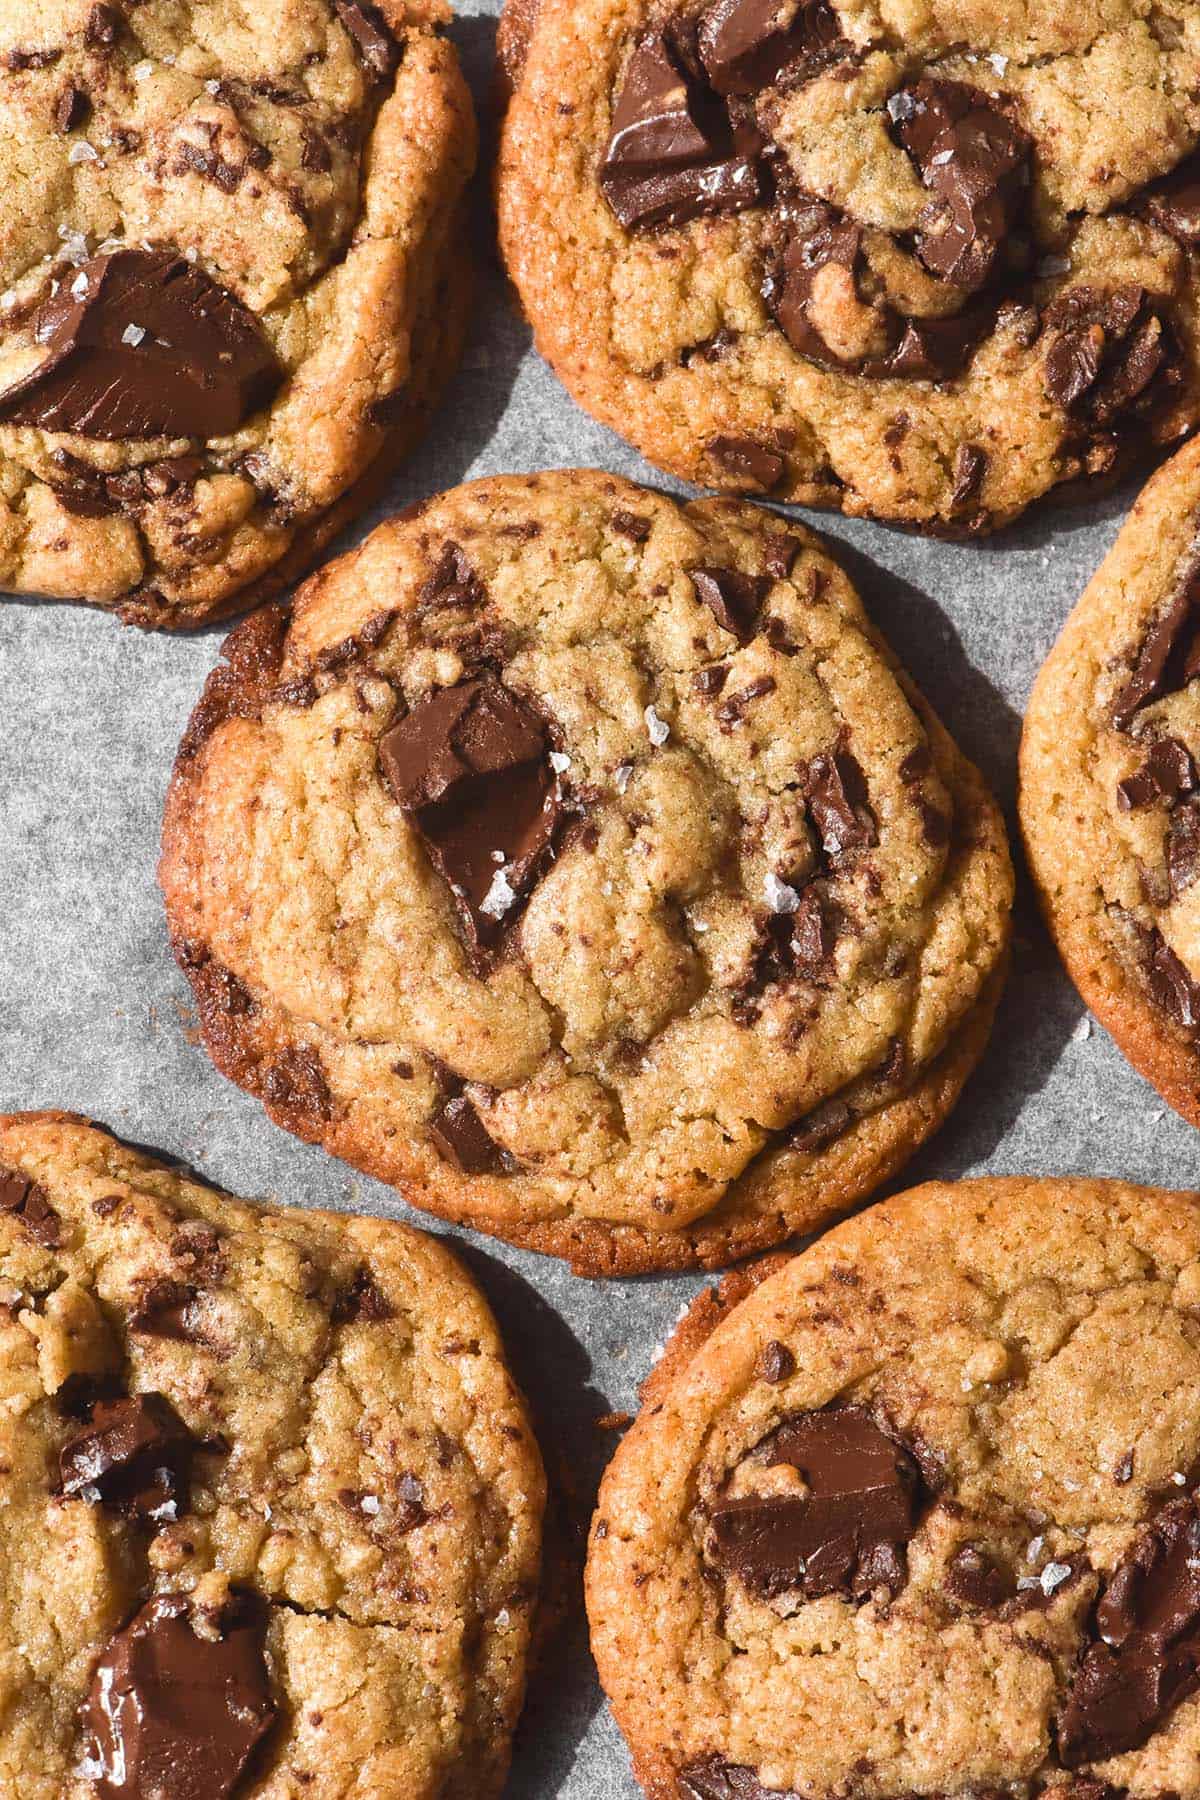
I’d like to get this out of the way, because I know different people enjoy different sorts of cookies. My preferred sort of cookie is rich, rippled and wrinkly. It’s crunchy on the outsides and almost batter-like on the inside. It’s almost caramel-like in flavour.
So, if that’s not your sort of cookie, this is not the recipe for you!
Gluten free choc chip cookie science
Light brown sugar is responsible for the puff and chewiness of a cookie. Caster sugar is responsible for the spread.
Eggs (whole) give the cookie both puff and a bit of chew. Egg yolks alone provide chew, but a good balance relative to other ingredients provides binding without a cakey texture.
Tapioca flour is a spready ingredient, whereas brown rice flour is sturdier and gives structure. Keep this in mind if you try to play around with the flours.
Baking soda is an important ingredient for spread and browning. Baking powder gives lift, but too much can result in a cake-like cookie.
I did a bit of a deep dive into cookie baking, and it seems that the tray you use can also have a huge effect on the end result. If you keep getting a cookie that’s not to your taste (cakey when it should be chewy, in this case) consider trying a different tray.
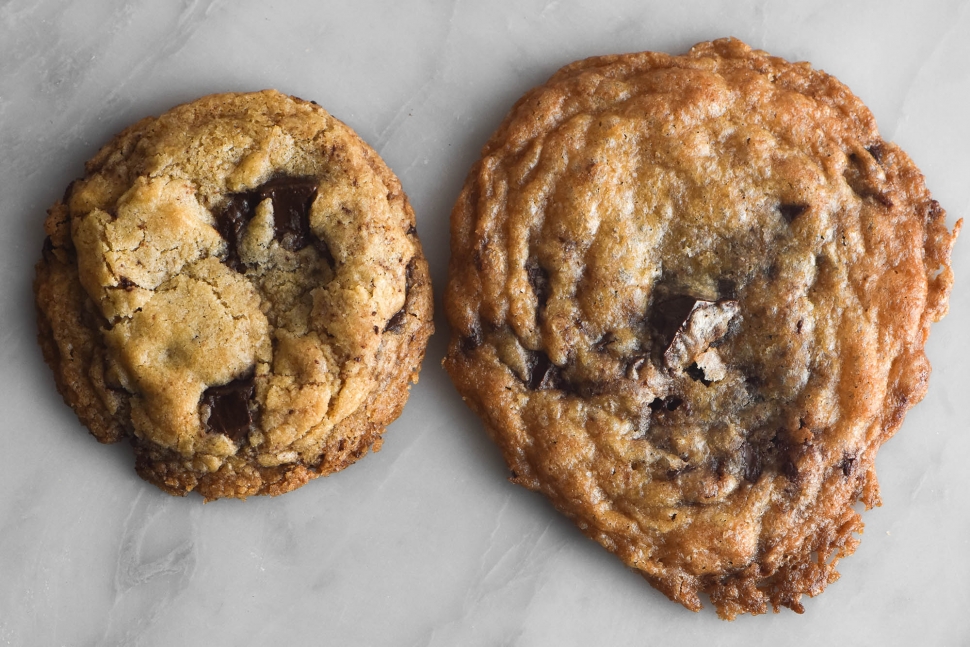
Another factor that has a big impact on the end result is oven temperature. Cookies baked at lower temperatures spread more because it takes longer for the edges to set, stemming the spread. Cookies baked at a higher temperature set quicker, spreading less.
As an extension of this, freezing the cookie dough balls for 10-15 minutes prior to baking can help create a thicker cookie that retains a crispy, non-cakey texture.
Recipe notes for your gluten free choc chip cookies
Refrigerating cookie dough is necessary. Just accept it. I have made these by refrigerating the dough for about two hours and also by refrigerating overnight. Overnight is far superior – the flours soak up the liquids and become less ‘gluten free’ tasting. I absolutely recommend overnight if you can.
Never put a cookie on a hot oven tray. Best practice is to use multiple lined baking trays, and alternate them in the oven.
I recommend cooking the first cookie alone, to check the consistency. If they’re a little flat or puffy, you can adjust the remaining mixture.
If your first cookie is just a little too thin, consider cooking them at a slightly higher temperature and flash freezing them prior to baking. This can sort out minor thickness issues.
Always let the cookies cool almost completely before handling. They are essentially molten sugar, and they will break apart.
Big cookies seem like a good idea, but with this recipe, you will probably end up with cookie puddles. Stick to the 10-12 dough balls suggestion for best results.

Ingredient notes for the gluten free choc chip cookies
I probably wouldn’t even bother making cookies without brown butter these days. It adds so much to the flavour and depth of the cookie, and it also lowers the (already negligible) lactose content.
Light brown sugar is necessary for adding a bit of structure and lift to this recipe. In the world of cookie mechanics, brown sugar puffs and white sugar spreads. Because tapioca flour is also a spready ingredient, we need the light brown sugar in this recipe to hold the cookies up. It is also responsible for a way better depth of flavour than white sugar can provide.
On that note, you can’t play around with the sugars here and expect a reliable result. Unlike a banana bread or something of that nature, the sugars you use are critical here – not optional. If you’d like an unrefined sugar cookie, see these almond butter choc-chips.
Don’t omit the salt! Salt is key for balancing out the sweetness of the sugar in cookies. Sugar, in turn, is responsible for much of the structure and spread, so just lessening the quantity is not an option. Salt, in combination with the brown butter and vanilla bean paste, create multiple flavour dimensions in these cookies. It is very necessary.
Weighing ingredients in the only way to go here. There is genuinely a huge difference between adding an extra 5g when it comes to cookies, so weighing is key. Scales are inexpensive, and even serious ones will only set you back a couple of hundred. Truly worth the investment.
Different gluten free flours have different densities and properties. The brown rice flour you buy at the bulk food store might have a different density than the one from the supermarket. Keep an open mind when making cookies, and be prepared to add 5g extra flour or a little extra liquid if necessary.
If you can’t find vanilla bean paste, use vanilla extract and maybe a little less milk. You could also use all milk, but I think the vanilla really adds a nice touch.
Notes on gluten free flours
I haven’t tried any substitutions for flours in these cookies. The combination of these two flours makes for an excellent spread to crunch ratio. I daresay you could try using white rice flour in place of brown. That said brown rice flour seems to be more commonplace in Australian supermarkets, which is part of why I selected it.
Personally, I find tapioca flour to be the most helpful starch in balancing out gluten free wholegrain flours. I have no substitution suggests here, although I will say that I have, in the past, used tapioca starch/flour interchangeably in baking recipes with no adverse effects.
In terms of wholegrain flour substitutions, you might be able to try millet or sorghum, but you’d be doing your own experimenting. Buckwheat requires more liquid than these flours, so if you’d like to try buckwheat, consider adding a little extra milk.
Note that this recipe has been tested over 15 times as is, so any amendments you make have the potential to alter the result.
Note on making gluten free choc chip cookies without xanthan gum
A lot of gluten free choc chip recipes use xanthan gum, and I can see why. Cookies are a delicate dance of ratios, and binding them without altering their texture is difficult.
As the title of this post suggests, however, I have chosen not to use xanthan gum. While undeniably helpful in gluten free baking, I can’t help but feel it is overused. I will absolutely use it when I need to (gluten free croissants, I’m looking at you) but I prefer to keep it out of recipes that can be successful without it.
What this means is that the cookies are more fragile than they would be with xanthan gum. Personally, I have found that this impact is most obvious if you attempt to pick up a hot cookie. It will probably break apart in your hands and feel crumbly yet cakey. However (as you should be doing anyway) if you leave it to cool for 15 minutes on the tray, the cookie should have hardened into shape. It should be crispy on the outside and barely cooked on the inside.
If you absolutely must use xanthan gum, you could try using 1/4 teaspoon. I’ve found that it creates a weirdly chewy, gummy texture which is particularly noticeable if you use too much.
Tips for making a thicker gluten free cookie
Bake the cookies at a higher temperature (200C/392F as opposed to 180C/356F).
Omit the milk. Omitting the milk will result in a slightly thicker cookie.
Leave the batter in the fridge longer. Cookie dough can be left in the fridge (covered) for up to a couple of days. I have found that the longer you leave the dough, the thicker the cookies are. It also has the added benefit of softening the edges of the flours, leaving them tasting less ‘gluten free’.
Ball the cookies up and flash freeze them for 10-15 minutes. This will mean they hit the oven at a much lower temperature, taking longer to spread.
NEVER place the cookie dough balls on a hot baking sheet. They will start spreading before they even hit the oven, resulting in thin cookies. I like to use 2-3 baking trays and rotate them through.
Personally, I find best practice is to batch cook your cookies, 2-3 on a tray, one tray at a time. Is it time consuming? Yes. Does it translate into consistent results? Also yes.
Tips for making a thinner gluten free cookie
Add the milk back in, obviously.
The lower the oven temperature, the longer the cookie edges take to set, which results in more spread. I wouldn’t recommend going lower than 180C/365F with this recipe, though. This is because the balance of spready vs puffy ingredients is already tilted towards spread. So, if you want a thinner cookie, I recommend baking at 180C/356F.
Utilise the pan banging method, as invented by Sara Kieffer.
I recommend an overnight rest of the cookie dough in the fridge, irrespective of what sort of cookie you prefer. It really makes all the difference.
More gluten free cookie recipes without xanthan gum
- Vegan, gluten free choc chip cookies
- Vegan brownie cookies
- Flourless brownie cookies
- Gluten free shortbreads
- Linzer cookies
- Buckwheat flour choc chip cookies (egg free) from my buckwheat e-book
Gluten free choc-chip cookies without xanthan gum
Ingredients
- 150 g butter deep browned (should weigh about 130g after browning)
- 100 g light brown sugar
- 50 g caster sugar
- 90 g tapioca flour
- 80 g brown rice flour
- 1/2 teaspoon baking powder
- 1/2 teaspoon baking soda
- 1/4 – 1/2 teaspoon fine salt
- 2 teaspoons milk of choice (I used soy) See notes about thick vs thin cookies
- 1 tsp vanilla bean paste (optional)
- 1 extra large egg
- 100-200 g chocolate, chopped (dark or white but note white chocolate is higher in lactose)
Instructions
TO MAKE THE COOKIE DOUGH:
- The night before, brown your butter in a small saucepan. It should be very golden brown in colour. Don’t be conservative – the dark brown gives the cookies tonnes of flavour and weight is important here. Weigh it once browned – it should weigh 130g or close to that. Any deviation of above a gram or two could have an unwanted effect on your cookie.
- Once browned and weighed, add the butter to the sugars in a small heatproof bowl. Stir to combine, and set aside to cool. Be careful – the bowl will get quite hot.
- Weigh out your flours and add the salt, baking powder and baking soda. Use a whisk to thoroughly combine.
- Once the butter mixture has cooled a little, add the milk and vanilla bean paste, stirring to combine. Finally, add the egg. Adding the egg after the milk will help ensure it doesn’t cook in the residual heat of the butter.
- Mix the dry ingredients into the wet. I like to start in the middle, and gradually mix in the edges of the bowl until all the flour is completely combined. Not a bit of flour should be left on the side of the bowl.
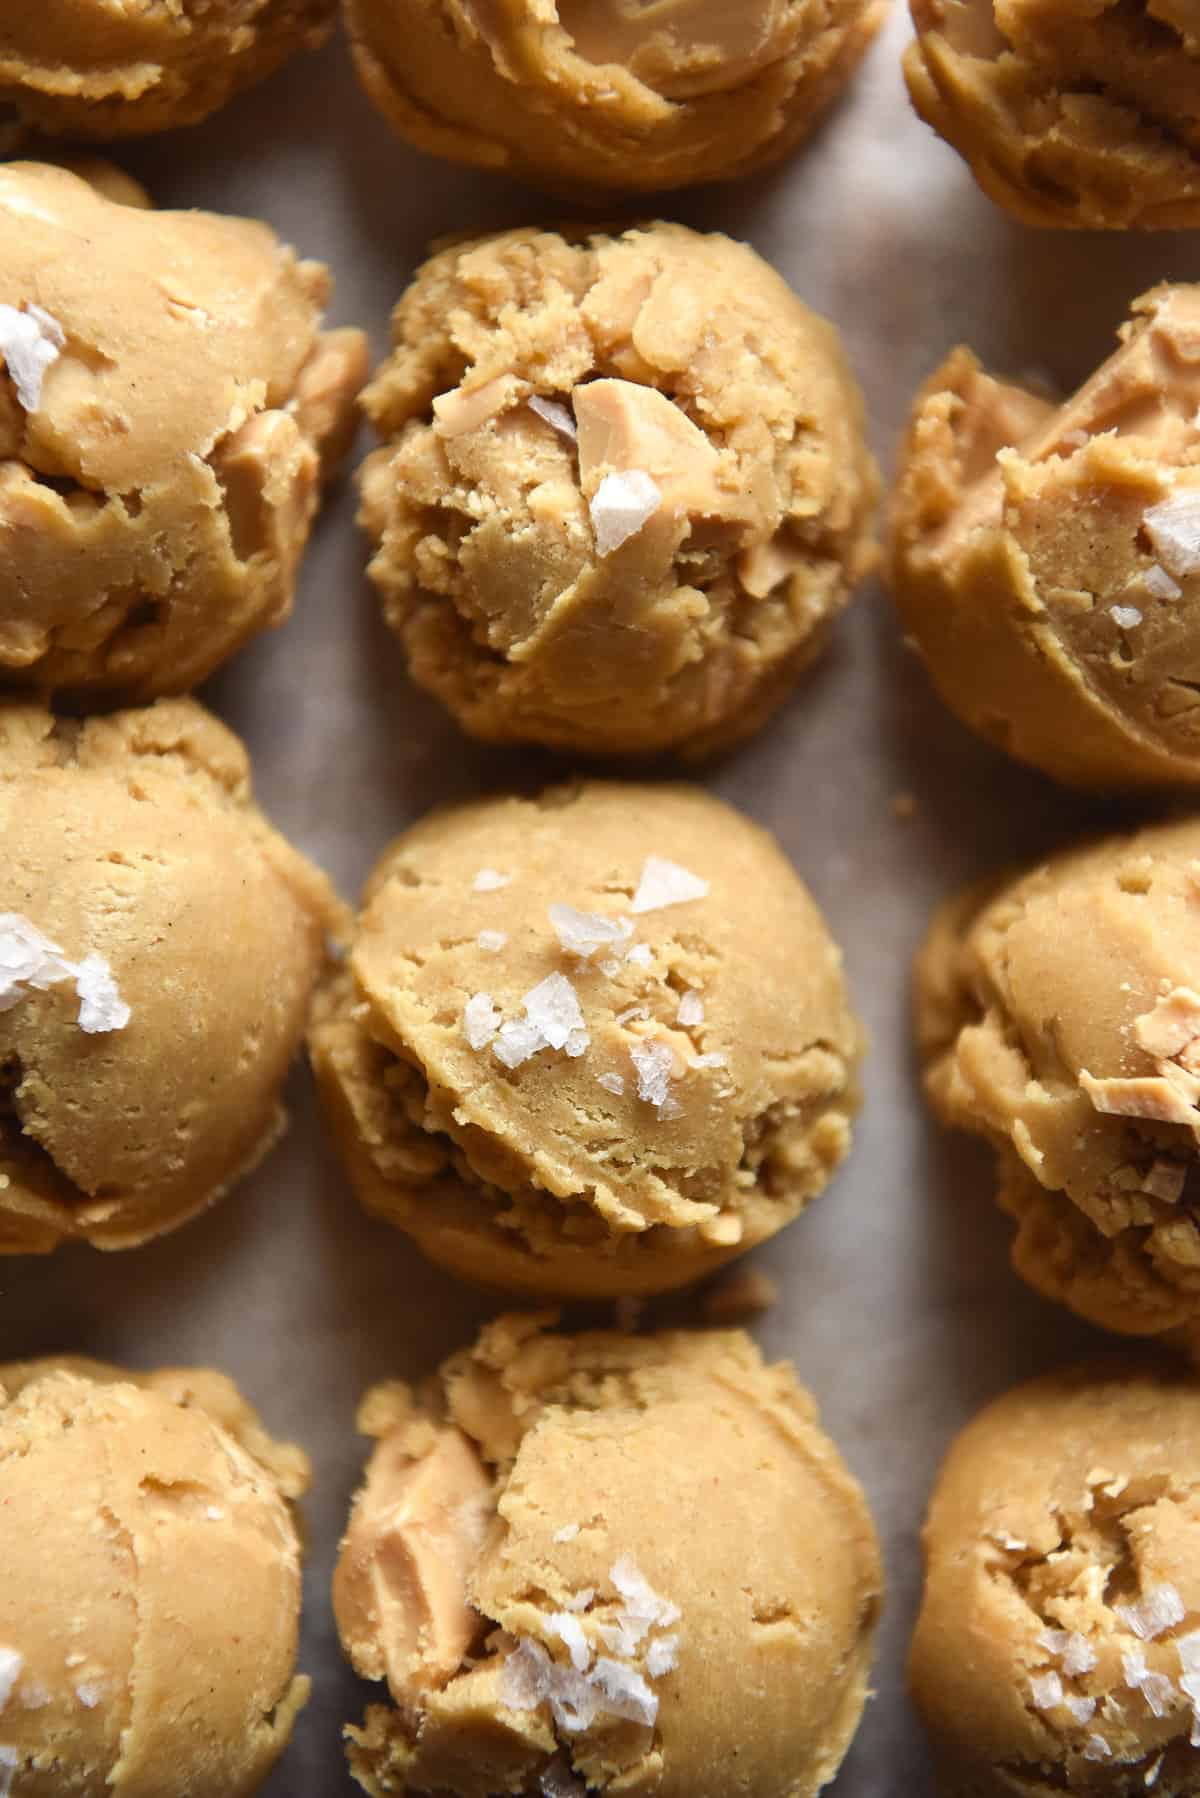
- The cookie dough should look wet, almost like a thick caramel in colour in texture. Cover it and place it in the fridge overnight.
TO BAKE THE COOKIES:
- The next day, preheat the oven to 180-200C/356-400F (see notes) and line 2-3 baking trays with baking paper.
- Use a spoon to scrape the cold cookie dough up from the sides of the bowl. Add your chopped chocolate, and use the spoon to combine as best you can.
- Then, use your hands to form into 8-10 balls, with an even dispersion of chocolate. If you like a taller cookie, make the ball more of an oblong, short side down on the tray so the cookie sits up taller than normal.
- I like to bake one or two first to check the consistency and spread before baking off the rest of the cookies. I also do one sheet at a time for best results. Whatever you do, keep the cookie dough balls cold while they await their turn – even with a flash freeze.
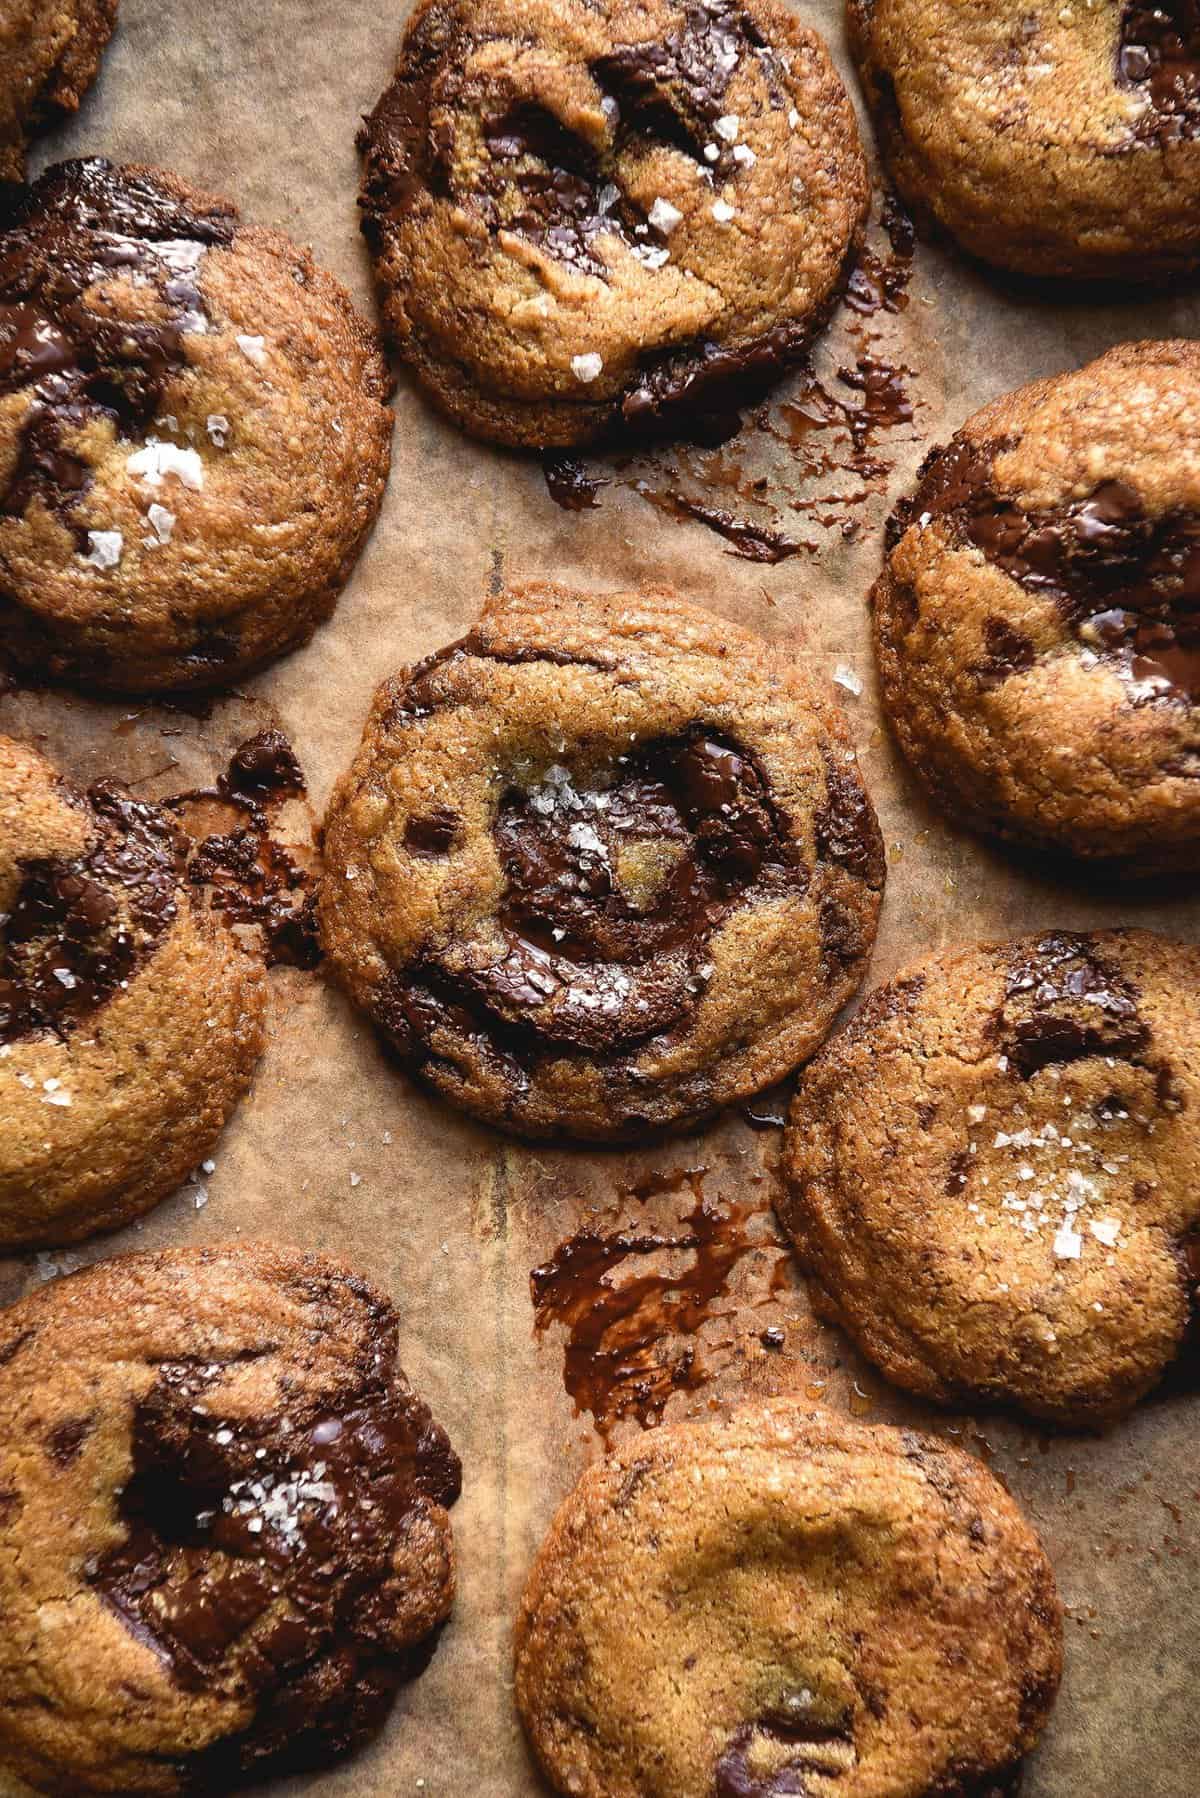
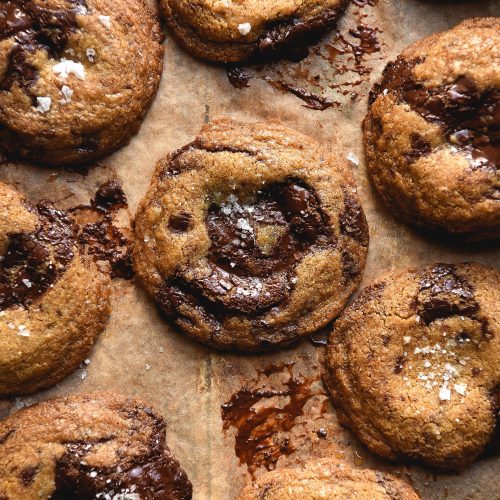
- Bake the cookies for 10-12 minutes or until wrinkly and golden. Allow them to cool completely before touching – they’re sensitive gals. Store in an airtight container to keep them from going soggy.
Hi. I have a problem that probably others don’t have. I cannot eat any rice at all in any form. So rice flour is out for me. Would you know what I could replace the rice flour with? I’ve noticed that it’s in a lot of your baked goods. I am gluten free and now on a fodmap diet as well. Thank you for any advice you might have. I have lots of different gluten free flours. But now I can’t eat most of the blends so I try to make my own. I do really like your recipes. They are so creative and fodmap safe.
Hi Alene! Sorry to hear that you can’t have rice flour, that must be really hard. I generally use it because it’s cheap, easily accessible to readers and bland, so it’s easy to disguise (when it’s fresh, anyway).
It’s hard to say whether a different flour will work in a recipe without testing it myself first. I’d love to say otherwise, but the nature of gf baking is that all the flours perform so differently, so it’s not easy to sub things directly.
Is there a particular baked good you’re looking at making?
I’m a bit confused by step 2–I’m guessing something is missing. It says “Once browned and weighed, add the butter to the sugars in a small heatproof bowl. Stir to combine, and set aside to cool. Be careful – the bowl will get quite hot.” Are you hearing the butter and sugar together in the microwave maybe? It says to brown the butter the night before, so in that case when you start the recipe it would be cold. Any reason not to brown the butter and use it when it gets to room temp, rather than having to brown it the day before?
Sorry, that should say “heating” the butter and sugar, not “hearing.” 😂
Hi Melanie! Sorry, I think the recipe plugin loaded ‘the night before’ as text rather than as a heading as was intended. All of the steps to make the dough are done the night before, so the dough has time to solidify overnight. So the brown butter should be hot, freshly browned, then the sugar added (hence the hot bowl!). The wording is definitely clunky so I will amend that – thank you for bringing it to my attention!
I saw someone had rated this recipe with 1 star thought wasn’t fair! I can tell you put a lot of effort into creating it. It was very tasty!!
Haha thank you Sarah! I’m pretty sure she accidentally combined two of my cookie recipes, but it felt like a blow nonetheless haha x
Hi! Unless I missed it, I don’t think you’ve listed the amount of vanilla bean paste that’s needed. Can’t wait to make these!
You’re dead right Megan, sorry! It is optional but if you choose to add it, it’s one teaspoon of vanilla bean paste. Thanks for picking that up, I have amended it 🙂
Also I’m sure you could mix mesquite flour with the brown butter at a 1/10 ratio. I do that with regular butter and it’s incredibly tasty.
I will definitely try this. Have you experimented with mesquite flour in this recipe? You could reduce the sugar by 1/3 if not more and it pairs wonderfully with chocolate.
Hi Georgia, I was hoping for a little clarification. In step 1 it says “Weigh it once browned – it should weigh 60g or close to that. ” and I was wondering if I only brown half the butter?
Hi Kat! Sorry, I’m migrating recipe plugins and in the process it seems to have inputted old info (from when I was making a half batch). You brown the full 150g butter, and it should become 130g once browned. Thanks for picking this up, I’ll change it now!
Thank you so much, I’ll let you know how these turn out for me!
Hi! It’s a little unclear – the ingredients say 1 egg, and the method says 1 egg yolk… do we use the white? Looks like a delish recipe, am part way through making it now! Thank you 🙂
Hi Margot, sorry! You’re right, it is unclear. You add the whole egg, white and all. Thanks for pointing it out, I will amend it now!