Today’s recipe is a FODMAP friendly take on gluten free ANZAC biscuits. I’ve tinkered with an ANZAC biscuits every year, a day or so before the event. Needless to say I never finish on time, and, stuffed with delicious failed ANZAC cookies, I tell myself I’ll do it next year.
This year is the year I finally finished the recipe. These gluten free ANZAC cookies use quinoa flakes to replace the oats, and a simple blend of gluten free flours. They use rice malt syrup as a low FODMAP alternative to golden syrup, and are xanthan gum free. I hope these ANZAC cookies are as close to the original recipe as they can possibly be with dietary restraints.
Lest we forget.
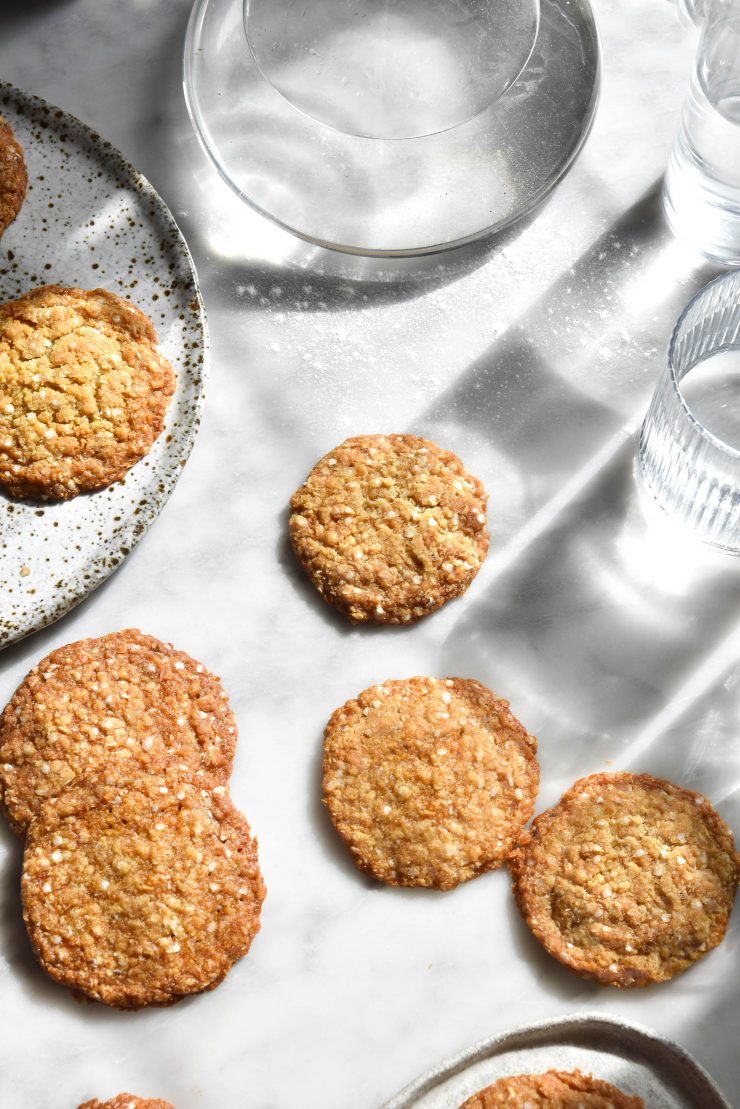
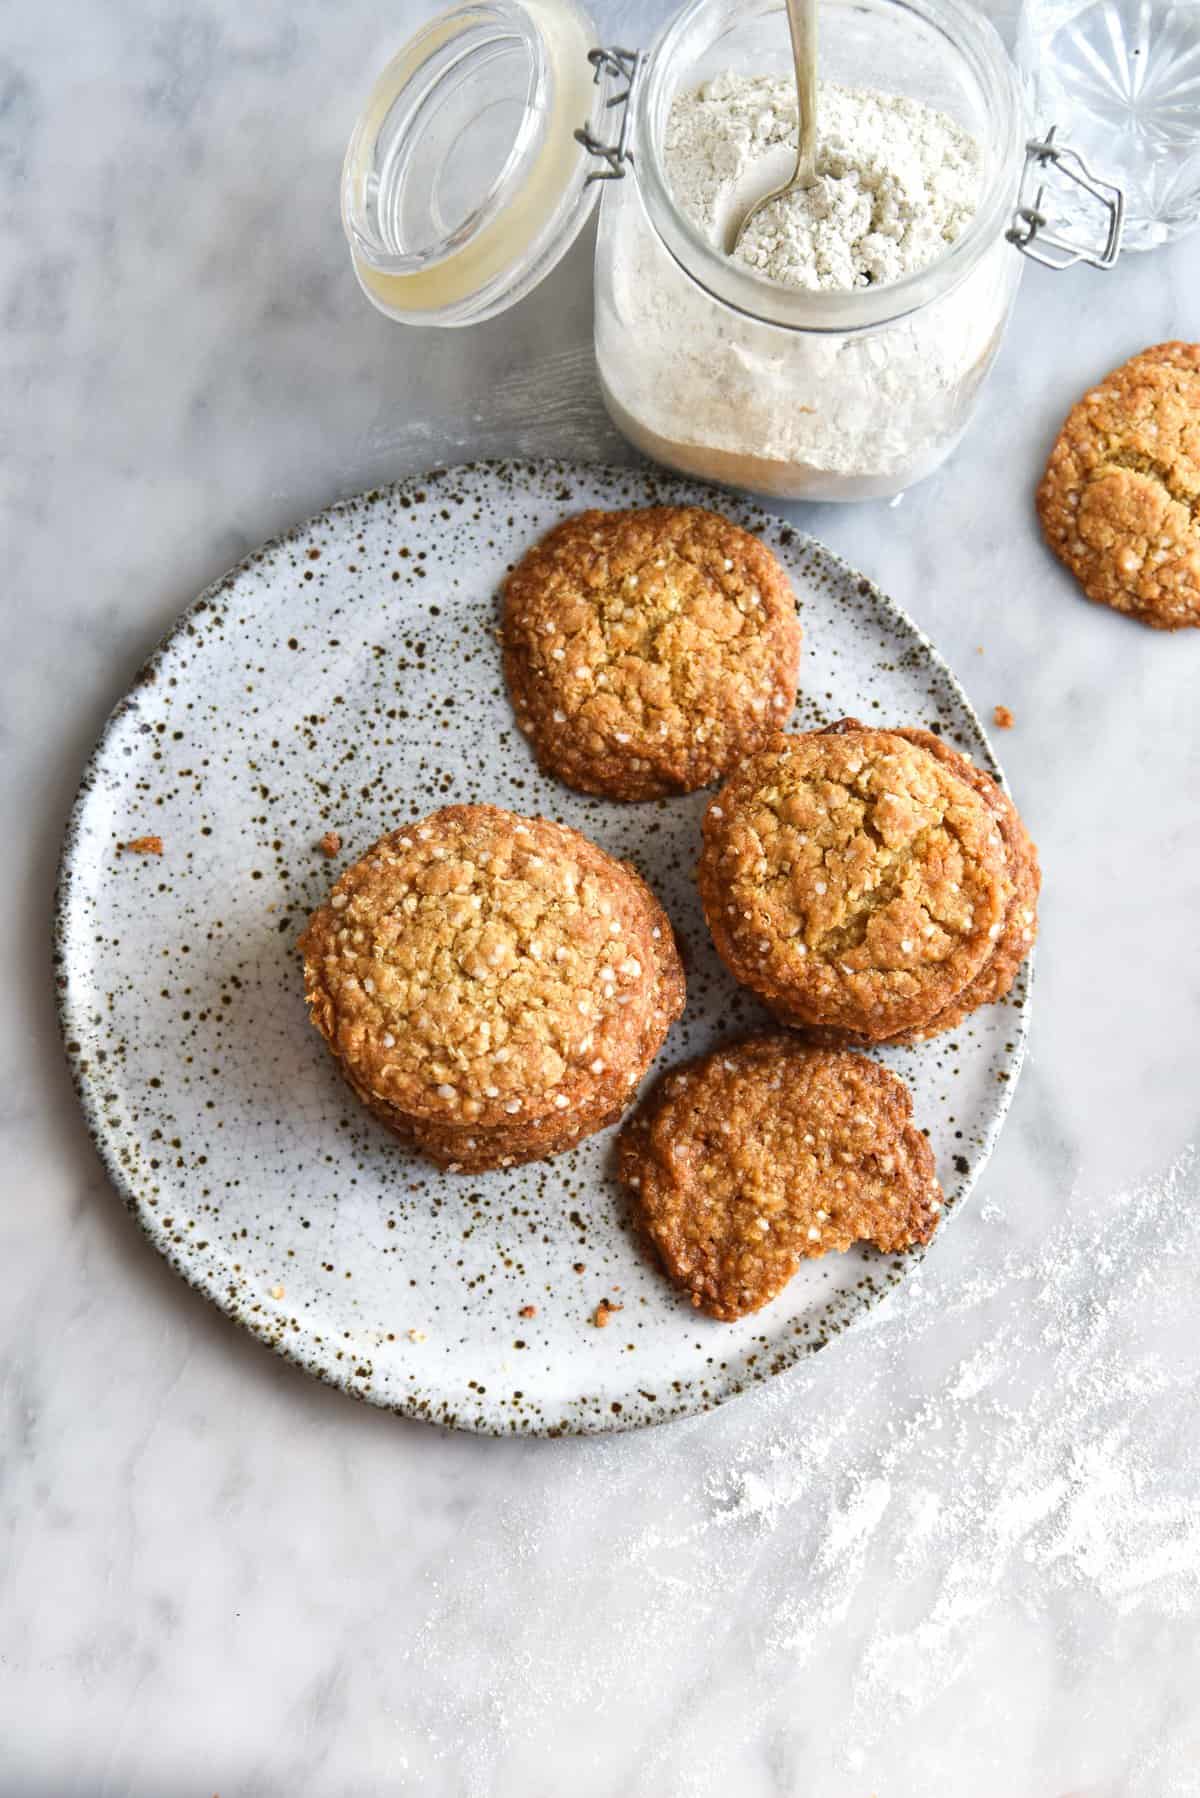
Gluten free ANZAC biscuits
I wanted to change as little as possible in terms of the taste and method of the recipe to honour the tradition of the recipe. I have tried to keep ingredients as similar as possible while still making the biscuits gluten free and FODMAP friendly.
These biscuits use quinoa flakes to replace the oats. Oats contain a protein very similar to gluten. Although some countries class them as gluten free (there used to be gluten free oats on the shelves here) Australia no longer does. Personally, I bloat like a whale when I even attempt oats, which is why I haven’t included them.
The recipe also uses rice malt syrup as a low FODMAP alternative to golden syrup.
Monash doesn’t have an entry for desiccated coconut on their app. However, shredded coconut is deemed FODMAP friendly in 30g serves per person, so the ANZAC biscuits are well within acceptable limits, using 50 grams. Just don’t eat all 10, alright?
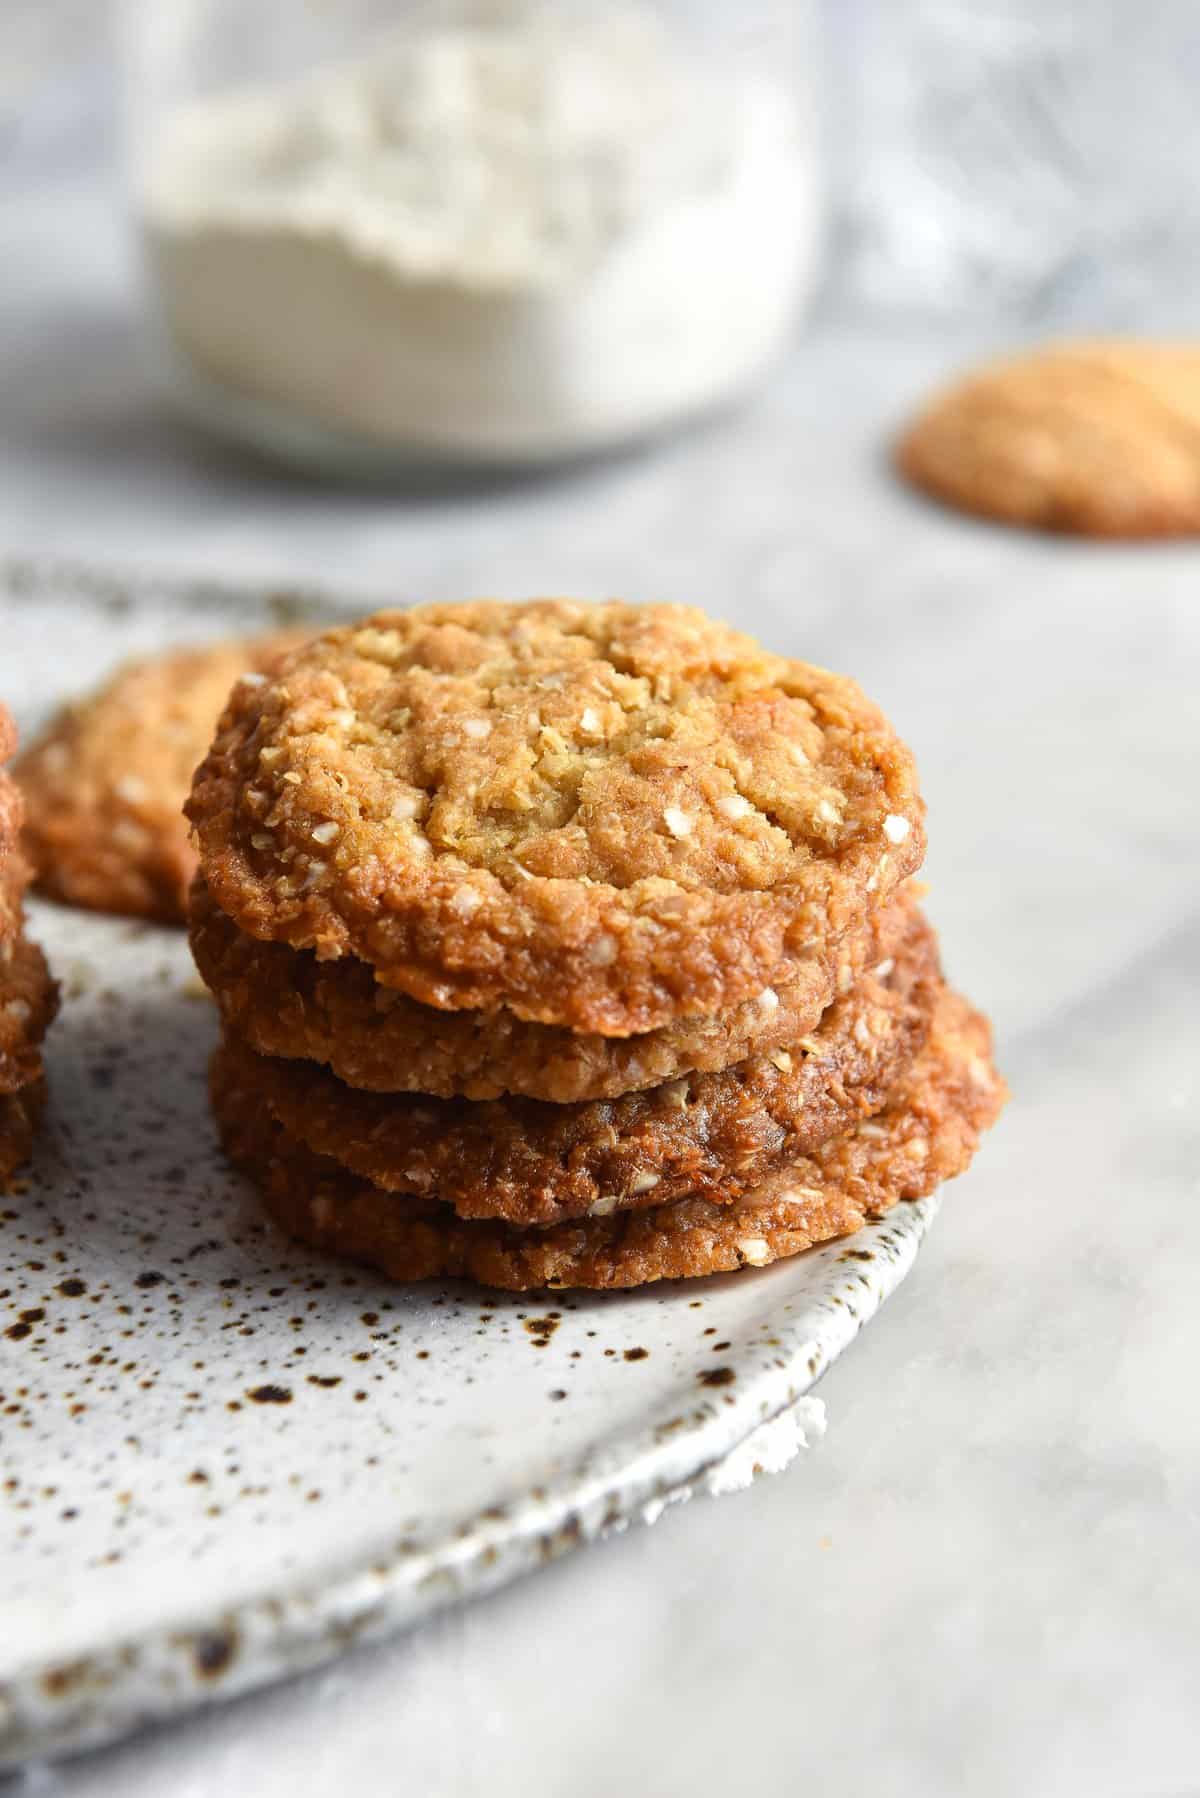
This recipe is for a chewier ANZAC biscuit. The extra chew is achieved by using a little extra butter, rice malt syrup and coconut than the normal ratio, Delicious tells me. If you prefer a crunchier biscuit, you could scale back on those ingredients a little bit. Alternatively, bake your biscuits a little longer.
How these gluten free ANZAC biscuits work
ANZAC biscuits, it would seem, are notoriously hard to perfect. I can’t even tell you how many attempts these took! Because they’re a finnicky biscuit, I have only included gram weights in this recipe. That way there’s as little margin for error as possible.
I wanted a chewy yet crispy biscuit. To do this, I have a slightly higher ratio of coconut and lower ratio of flour than ‘normal’ ANZACs do. I have also used both light brown and caster sugar to promote flavour and spread, as discussed in the science section. Finally, I cook the biscuits low and slow – 150 degrees Celsius (or 302F) for 13-15 minutes. This gives them a chance to spread gently and brown without burning.
Normally I love to google the science behind why a recipe works, but I found it very difficult to find any information on ANZAC biscuits. I don’t know why people use boiling water, but I personally found it made for soggier ANZACS, so I left it out. I also found that these ANZACs are best placed on a sheet of kitchen towel after they have completely cooled – the bottoms are a tiny bit oily when they’re first baked. Interestingly, this didn’t change despite me adjusting the ratio of melted butter. I couldn’t find any information to confirm whether this is an inherent trait of an ANZAC biscuit, either.

Recipe tips and tricks
Use as good a quality ingredients as you can. Of particular importance is the butter (preferably European but at least a name brand if possible). Also, fresh baking soda is ideal.
Slow and steady wins the race with ANZAC cookies. This gives the edges a chance to melt into a nice thick edge while still maintaining a chewy centre. As opposed to wafer thin burnt edges with a raw centre.
There’s a lot of evidence that the oven you tray you use has a big effect on the final cookie. If you’re having absolutely no luck, try using a different oven tray.
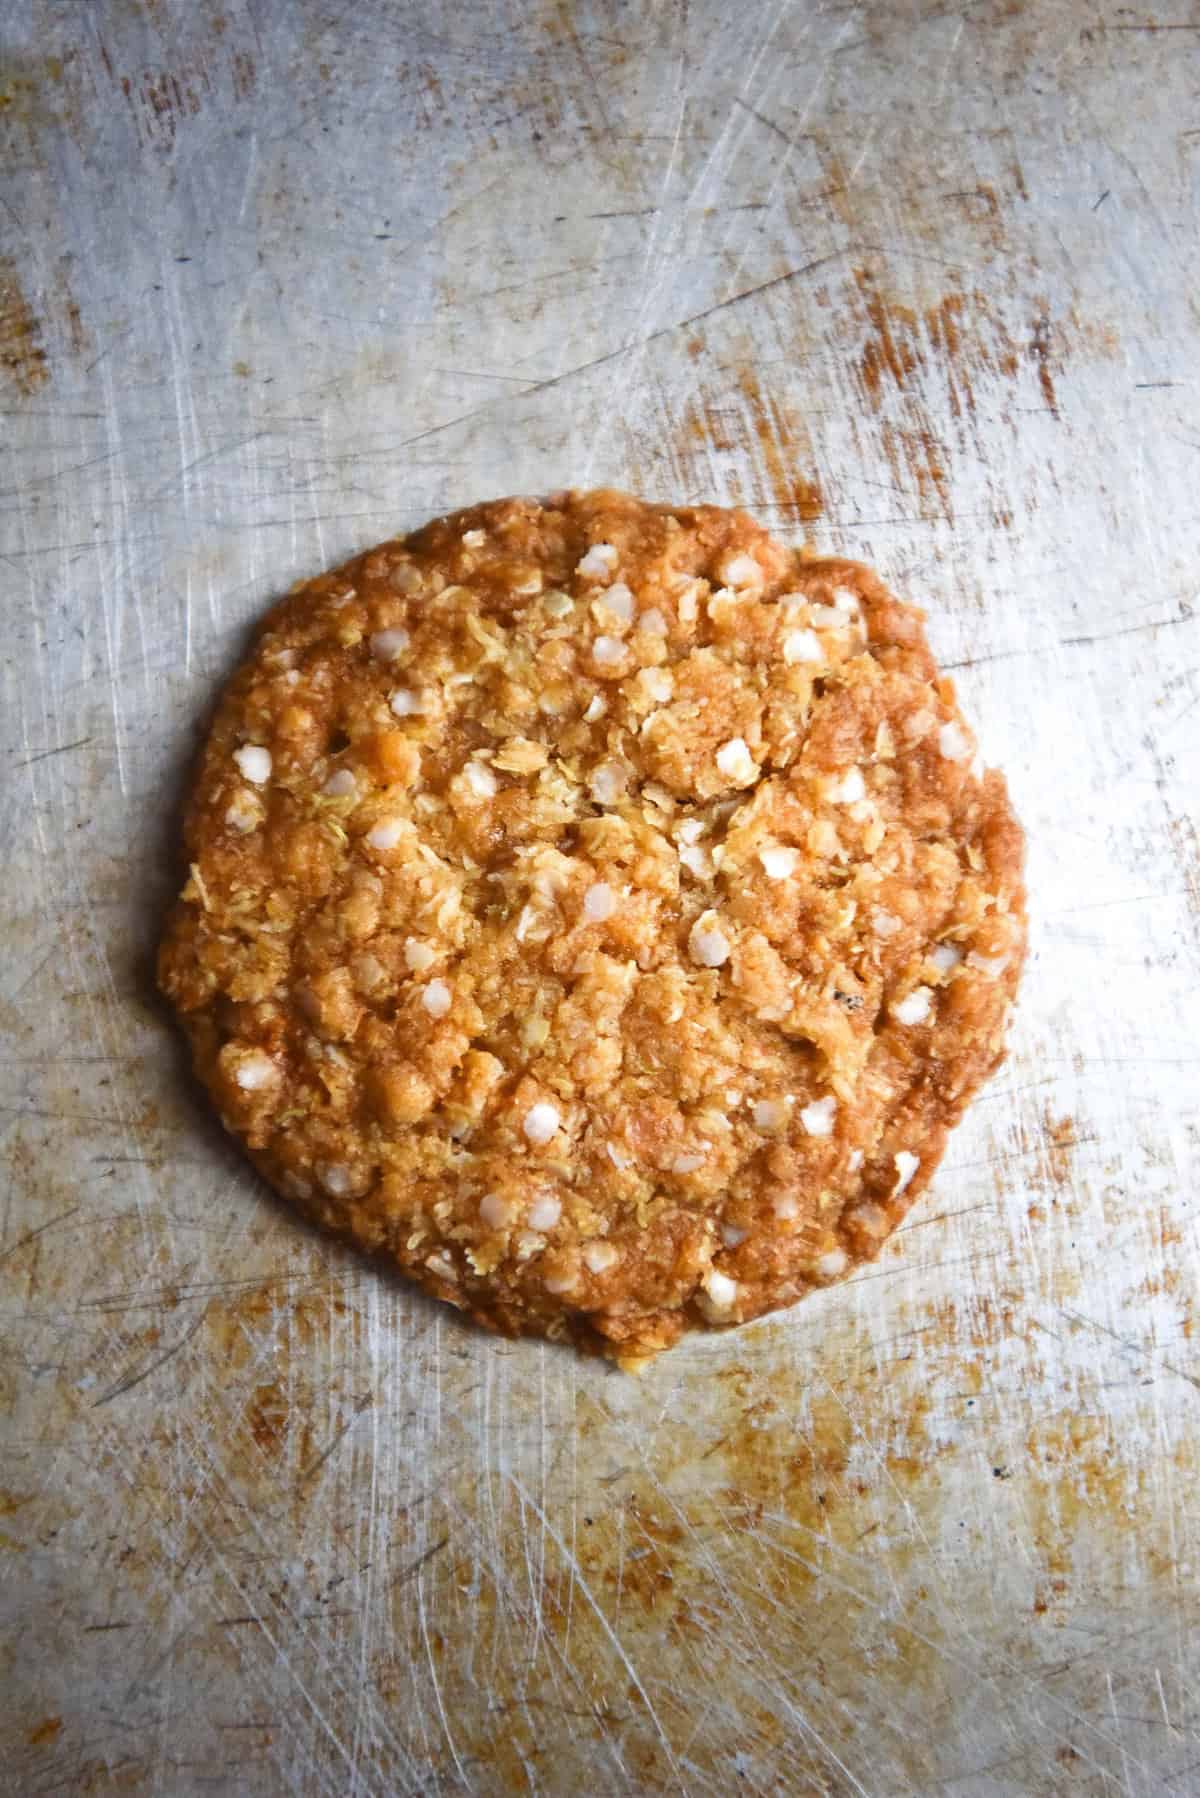
Use a bit of pressure to form the balls, and do so immediately. Otherwise they will dry up and be harder to form. If they’re looking crumbly, give them an extra squeeze to shore up.
When pressing the balls down, use your hand to patch up any rough edges that have resulted.
Finally, use a knife to correct any misshapen bits once the biscuits have come out of the oven. You can also lightly push down the tops if the biscuits are a little too puffy.
The science behind these ANZAC biscuits
I wanted to create a cookie with an even balance of spread, chewiness and crunchiness. As we learned in the chocolate chip cookie experiment, sugars perform different functions in baking. White sugar spreads whereas (light) brown sugar puffs. White sugar provides crispiness, brown sugar provides chewiness. This is why I have included a balance of both.
I have included tapioca flour to lighten the ANZAC biscuits, but also for a bit of spread. The fine white rice flour acts as the heavier flour to keep the cookies whole.
If you decide to experiment with your own flours and sweeteners, keep in mind their spread vs puff qualities, and what sort of cookie you’re looking to achieve.
More gluten free classics
- Gluten free shortbread without xanthan gum
- Lemon drizzle cake
- Chocolate cake
- Scones
- Lamingtons from Intolerance Friendly Kitchen

Gluten free ANZAC biscuits (FODMAP friendly)
Ingredients
- 75 g white rice flour
- 30 g tapioca flour
- 50 g (3/4 cup) desiccated coconut
- 60 g brown sugar
- 20 g caster sugar
- 65 g (1 cup) quinoa flakes
- 100 g butter
- 2 tablespoons rice malt syrup
- 3/4 teaspoon baking soda
Instructions
- Preheat the oven to 150C or 302F and line 2 baking sheets with baking paper.
- In a large mixing bowl, weigh out all the dry ingredients except for the baking soda. Get your hands in to break up all the brown sugar bits and create a uniform mixture.
- Melt the butter in a small saucepan over a low heat. Once it has completely melted, add the rice malt syrup and stir to combine. For accurate measurement, it can be helpful to very lightly grease your tablespoon measure to help the rice malt syrup slide off.
- Once the rice malt syrup has been added and the mixture is bubbling away, add the baking soda. It should slowly start to bubble up – leave it until it reaches a peak and then stays at the same height. It won’t explode over the pan, it will probably only reach halfway.
- Pour the bubbling mixture straight into the dry ingredients and stir to combine. You’ll probably get 3/4 of the way there with a spoon – then use your hands to finish the job. The mixture will look crumbly and not like a cookie dough. It might look a tiny bit dry and that’s OK.
- Use your hands to squish the mixture into 10 even size balls. You’ll need to use a bit of pressure to bring them together. If you absolutely can’t get them to form a ball, add a scant teaspoon of water and try again. Don’t just panic at the crumbly mixture and add water for the sake of it. I find this version of ANZAC biscuits get soggy quite quickly when water is added.
- You will need to form all the balls straight away, otherwise the mixture will dry up and it will be too difficult. Place them, with room for spread, on the lined oven trays. Use your hand to gently press each ball down about 1/3 of the way. Keep in mind that they’re easy to press down once cooked (but not so easy to build them back up) so it’s best to err on the side of caution here.
- Use your hands to coax the pushed down balls back into a circular shape, patching up any cracks around the edges.
- Place the trays in the oven for 6 or 7 minutes, before rotating to account for hotspots in your oven. By the halfway mark, the biscuits should have started to ‘melt’ while still looking a little bulbous.
- Continue to cook for 6 or 7 minutes or until golden brown and done to your liking.
- While the biscuits are hot, use your hands or a knife to gently perfect them into circles. You can also gently press down on the tops if they’re a little puffy.
- Allow the ANZAC biscuits to cool COMPLETELY on the tray. Otherwise they will break apart and have oily bottoms.
- Store in an airtight container to avoid the dreaded sog. Legend has it (obviously) that they will keep for months.

Excellent recipe! Easy and delicious. A keeper.
Amazing! Very clear instructions, easy to make and they taste absolutely delicious Georgia!
Delicious, and super easy recipe to follow with all the tips along the way. I used brown rice flour as my local was out of white rice flour
I have made these twice and they are just amazing. The first time exactly to the recipe, and the 2nd time I reduce brown sugar and caster sugar by 1/3 and it was still fine (cause the 1st round was too sweet). Thank you! The choc chip recipe is next!
Nutritional information would be good
Hi Angela! I don’t have the capability to calculate nutritional information right now. I might include the function at some point but for now there should be some online calculators you can plug the recipe into 🙂