This grain free white bread is probably one of my favourite recipes to date. You will notice I have been experimenting with cassava flour (it works so well in pancakes and grain free pastry) as well as this delicious, enriched grain free loaf.
Grain free white bread without xanthan gum or nuts
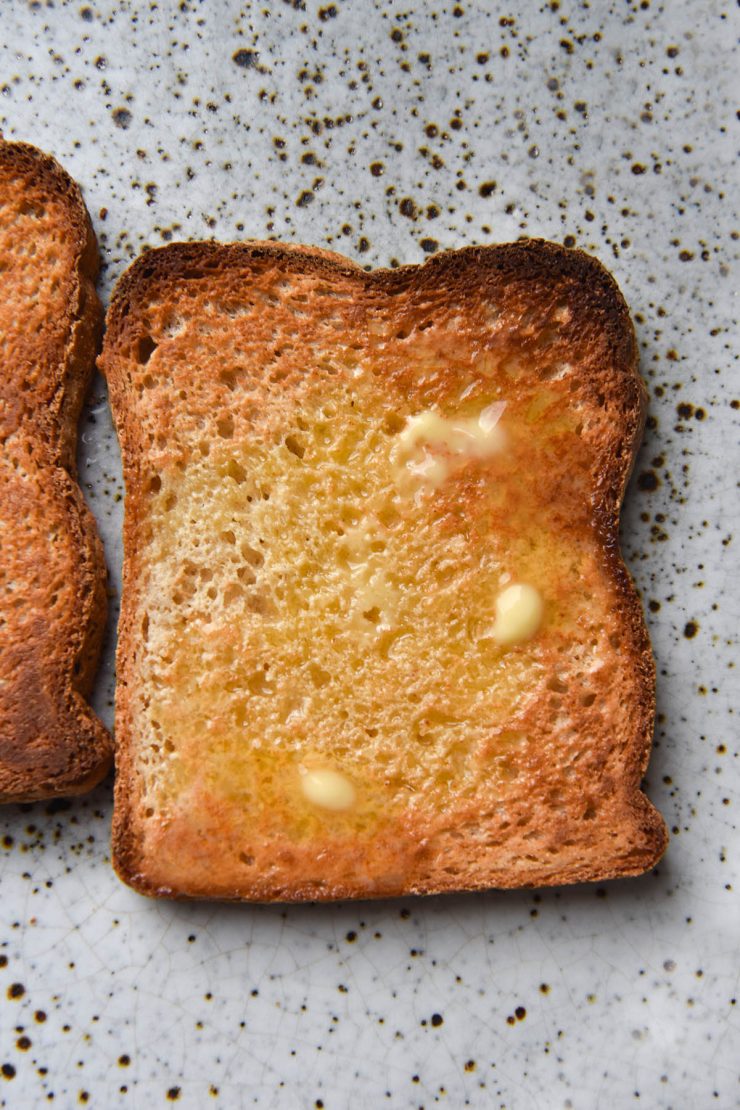
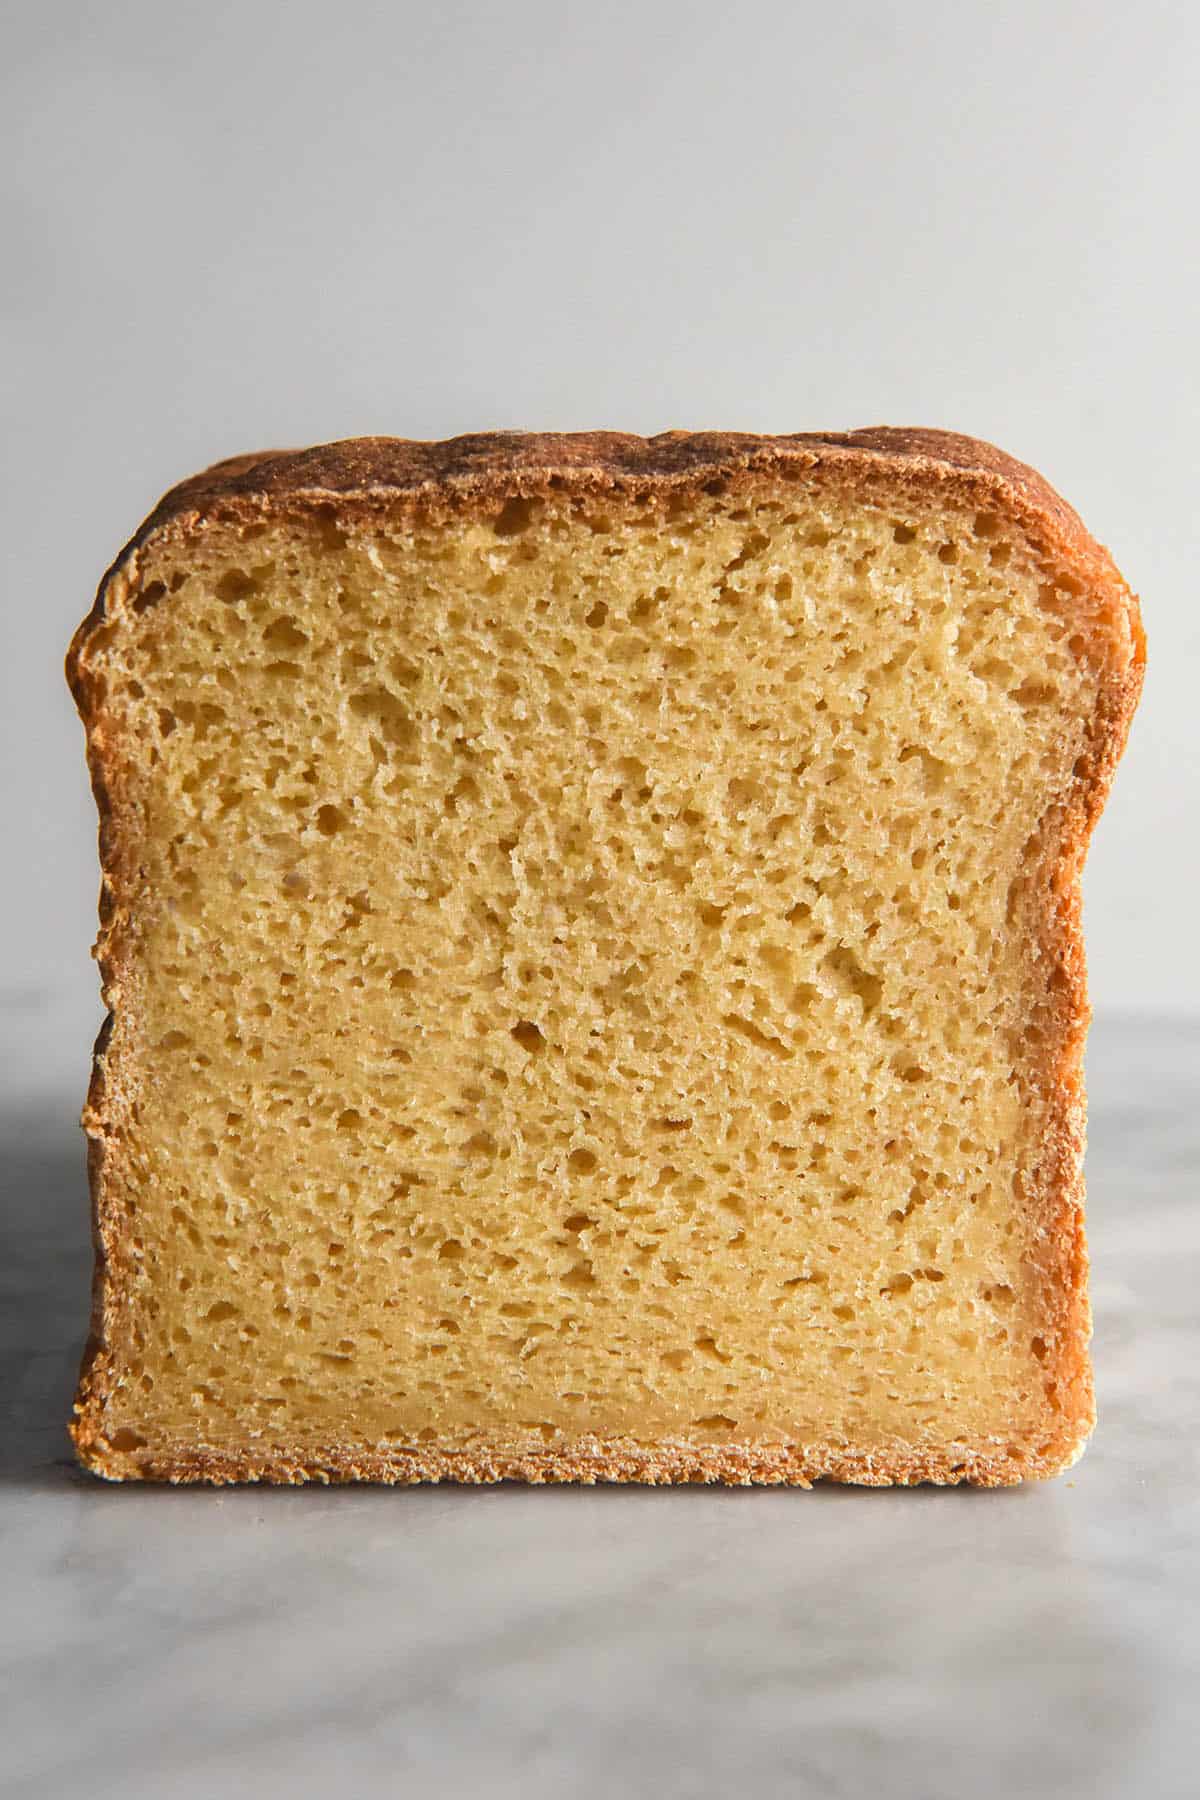
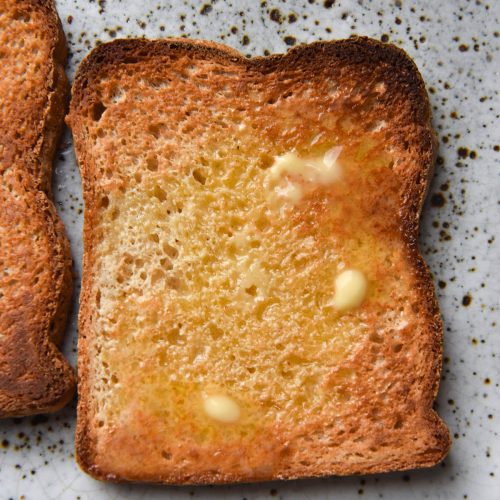
This grain free white bread is made without nuts or xanthan gum. It is entirely gluten free, too, and beats many of my gluten free breads in terms of its ‘white bread’ texture and flavour. Although I have a gluten free ‘white bread’ sourdough, this bread is more in line with what I remember white bread tasting like. It is fluffy, a little milky tasting and absolutely delicious.
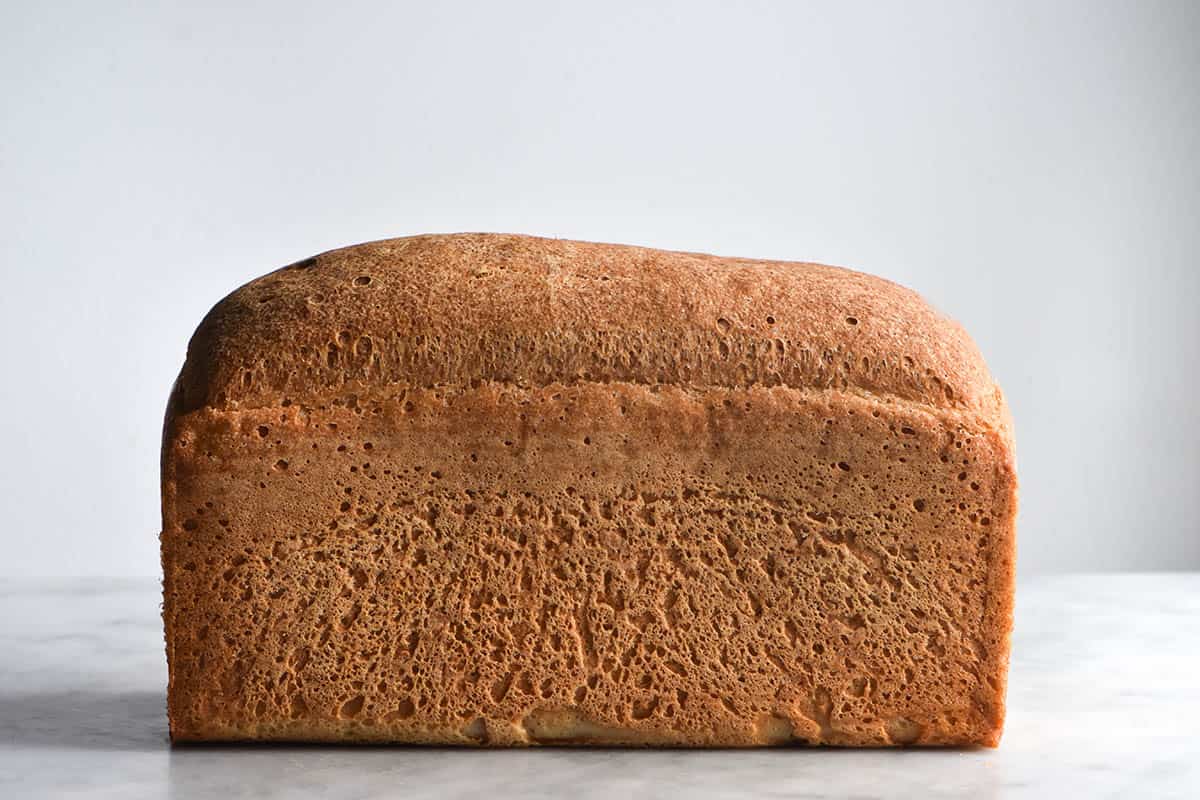
This grain free bread is also made without any nuts. It uses cassava flour as the backbone flour, which has a lot of stretch and elasticity while being a wholegrain flour. Tapioca flour and potato starch make up the remainder of the loaf, which is held together by psyllium husk and eggs. Butter and milk powder create a soft and milky crumb, while a tiny bit of sugar helps create flavour, height and a golden brown crust.
What is cassava flour?
Cassava flour is a wholegrain gluten and grain free flour made from the cassava root. Tapioca flour, it’s cousin, is made from the starch of the cassava root. Cassava flour, on the other hand, uses both the root and the starch component of the cassava. This means that it is basically a starch and a wholegrain flour rolled into one.
I absolutely love cassava flour. While I am relatively new to it, I am finding it to be a game changer for gluten free baked goods. It adds elasticity and structure, yet has a relatively bland, milky taste. I have used it in my cassava flour pancakes and added it as an option in the gluten free shortbread. There is also an amazing recipe for these grain free tortillas on the site.
Ingredient notes for your grain free bread
At this stage, I have no recipe substitution suggestions at all. It has taken me so many attempts to perfect this loaf. I have developed a vegan version which you can find here.
Cassava flour is absolutely critical to success here. It is the wholegrain and the stretch component of the flour. If you don’t have local access to cassava flour, you can buy it online.
I have gradually moved from using psyllium husk flakes to psyllium husk powder. I like it because it’s powerful and assimilates (visually) into baked goods without issue. If you don’t have access to the powder, you can buy the flakes and grind it into powder using a spice grinder. I actually prefer to do this because store bought powder often turns baked goods grey/purple.
The milk powder adds softness of texture and a white bread flavour. You can by lactose free milk powder online but it is more expensive. Stay tuned for a recipe to make your own.
I have no suggestions on an egg substitute currently. See the vegan version if you need an egg free loaf.

Important tips for your grain free bread
Again, I have no substitutions at this time. Experiment at your own risk.
A steel walled loaf pan is compulsory here. When I test a boule I will update the post.
The dough will look frighteningly thin as you first whisk it, but it will thicken dramatically after 5 minutes. Psyllium husk at work!
Use moistened hands to transfer the dough from the bowl to the lined Pullman pan. You should be able to pick it up at this stage (it should not be watery or thin).
If you are baking in a cool climate or kitchen, you might need to proof the bread longer.
Brushing the loaf with milk before baking helps make the top of the loaf look a little more presentable. It’s optional, but it does make the bread look nice.
How much liquid should I add to this grain free bread?
This is subject to a bit of experimentation. Cassava flour seems to be quite varied in it’s absorbency from brand to brand. This is fairly standard of gluten free flours. I have used 550g to 600g water with success.
In other recipes, I’ve noticed a difference between fermented cassava flour like Ottos and non-fermented cassava flour (which I get at the bulk food store). Fermented cassava flour seems to be considerably more thirsty when compared to non-fermented. Check which type you’re using and keep this in mind when you make the bread.
This grain free bread is a little wetter than you might expect when first sliced. It needs the liquid to hydrate the flours, but also to make the loaf rise. Yeast needs a wet environment to proof dough, so the bread will not rise without enough liquid.
Why do I need to proof this bread twice?
As I was developing this recipe, I struggled to stop the loaf sides from caving in and the dreaded gummy layer on the bottom of the loaf. Then I tried double proofing the loaf.
The loaf is proofed in the bowl for 1 hour, then moved into a lined Pullman tin. It proofs for a second hour in the tin before baking.
Whatever the mechanism behind this, double proofing helps ensure the sides of the loaf don’t cave in. It helps in removing the gummy layer of bread at the bottom, too.
Can I make this grain free bread recipe as a boule?
I have not tested this recipe as a boule yet. What I would say is that you’d need to experiment with adding less liquid to allow it to hold it’s shape without the Pullman pan holding it in. As I bake more of this grain free bread, I will test a boule and update the recipe.
Can I use a silicon loaf pan?
No. This bread really needs a tall Pullman loaf pan made of steel. This allows it to proof upwards instead of outwards as it rises. I use mine all the time – it is well worth the investment. I use the USA Pan Pullman loaf tin in size small – it is 10 x 10 x 23 cm.
Troubleshooting your grain free bread
The mixture should thicken up 5 minutes after you whisk it together. If it doesn’t: have you added the psyllium husk? Was it the powder as the recipe specifies? (flakes absorb less than powder).
Ensure your yeast is in date before you start. If you are concerned, use 60ml (1/4 Australian cup) of warm water and a teaspoon of sugar to bloom the yeast. If nothing happens after 5-20 minutes (weather dependent) start again. Be sure to subtract this extra liquid from the total added to the loaf in the following steps.
If the sides of your loaf cave in after you remove it from the oven, consider cooking the loaf longer next time. All ovens vary greatly in temperature, so yours might not be hot enough to fully cook the bread through.
If you have a gummy layer at the bottom of the loaf, cook it longer next time and add a little less water. It could be that your cassava flour is much less absorbent than mine, meaning your bread needs less water.
To reiterate: gluten free flours all over the world vary in absorbency. If your bread doesn’t work, adapt it to work with your flours. It’s a solid, airtight recipe.
If your loaf has little dents on the top as it cools, this is nothing to worry about. Mine often do, but the bread inside is fabulous.
A gummy, wet bread can often be caused by A) too much liquid for your flours but also B) cutting the bread too early. The crumb need time to gelatinise and set, and you risk disaster if you cut the loaf too early. Wait until the bread has cooled or even overnight. It stays moist for days, so no need to worry about staling.
More gluten free bread recipes
- My original sourdough recipe
- These gluten free bagels
- The white bread sourdough recipe
- These baguettes or batards
- The enriched sorghum sourdough in Intolerance Friendly Kitchen
Grain free bread without xanthan gum
Equipment
- 10 x 10 x 23 cm steel bread tin (I use USA pan Pullman tin in size small)
Ingredients
- 400 g cassava flour
- 100 g tapioca flour
- 100 g potato starch
- 30 g milk powder
- 20 g psyllium husk powder
- 20 g white sugar
- 7.5 g (1 Australian sachet) yeast
- 12-13 g salt
- 550-600 g water
- 50 g melted butter
- 2 extra large eggs (45-55g, weighed out of shell)
- 1 tablespoon (20ml) milk of choice to brush the loaf (optional)
Instructions
- Whisk the dry ingredients together in a large glass or plastic bowl.
- Add the wet ingredients and whisk until there are no lumps remaining. The batter will look very thin once whisked, but it will firm up considerably after 5 minutes.
- Cover the bowl and allow to proof for one hour.
- Very lightly grease and line 10 x 10 x 23 cm steel Pullman loaf pan. After one hour, gently punch down the dough and use moistened hands to transfer the dough into the lined Pullman pan. Use a wet hand to press down the dough and smooth out the top. Proof the dough for another hour or until it has reached the top of the loaf pan.
- While the loaf is proofing, thoroughly preheat the oven to 200C/400F. 10 minutes before baking, add a cake pan or oven safe container filled with boiling water to the bottom of the oven. A steamy environment will help with oven spring and keeping the loaf from getting too dry.
- If you like, brush the loaf lightly and gently with milk before placing it in the oven.
- Bake for 30 minutes. The top should be golden and lightly domed. Lightly tent the loaf with a piece of foil, then bake for an additional 50 minutes. The foil should just cover the top of the loaf while allowing air to circulate. It should not be tightly adhered to the loaf.
- Once baked, carefully remove from the Pullman pan and take the baking paper off the loaf. Allow to cool on a wire rack at least until the loaf is completely cool – ideally overnight.
Notes
- The body of this post is filled with all my tips and tricks for this grain free bread. I recommend you read them for best results.
- I have no substitutions for any of these ingredients at the moment. You can experiment with how much water your loaf needs. Every brand of flour will vary.
- Proofing bread in a cold kitchen or winter climate will take longer than a hot summer climate.
- If you don’t need to use the oven, you can leave the loaf in a turned off oven to cool. This can help set the sides and ensure the loaf is cooled. I recommend removing the dish of hot water and keeping the foil tent on the loaf.
Can I raise this loaf in my Brod and Taylor Dough Raiser. You do not cover the dough in this usually
Hi Kim! Yes, you can use your bread proofer (I have the same one, I love it!). I personally still cover the dough in my proofer but if not covering it will works for you then that’s fine 🙂
Hi Georgia, I made this Cassava bread recipe yesterday and the bread tasted fantastic and today it’s still flexible and doughy like actual bread, I can just make a sandwich without heating the bread up from the freezer ! I think I made the mistake of of a little to much water(600ml ) as it is a little bit sticky and heavy, it cooked well and held together great, toasted some this morning and it didn’t toast the best probably as I put to much water in, but it still tasted fantastic ! Like a crumpet 🙂 yum. Thanks so much for all your research and for sharing your recipe 🙂
Sorry I forgot to ask how to store this bread and can I freeze it ?
Many thanks 🙂
Hi Jules! So glad you enjoyed it.
Cassava is so finicky! It varies from brand to brand but also fermented vs non fermented (and it’s hard to tell which variety you have unless the package specifies).
If you plan to keep using the same brand, drop the water back and see how you go!
Yes, you can freeze the bread. I actually like to slice mine and keep it in the freezer to toast straight from frozen.
If you want to eat it untested, I recommend slicing it and keeping it in an airtight container in the fridge 🙂
Can I leave out the psyllium? to aggravate my stomach.
Thanks
Shanti
Unfortunately not Shanti! The bread needs the psyllium to hold the liquid in and create enough structure.
I’ll try and test a gf bread without psyllium at some point but I haven’t got a recipe at the moment
Hi! My son is allergic to gluten, corn, and dairy. Do I have to add the milk powder to this recipe for it to work ?
Hi Mikayla, I haven’t tested this recipe without milk powder but I do have a vegan version of this loaf which is dairy free: https://georgeats.com/recipes/grain-free-vegan-bread-without-xanthan-gum/ 🙂
OMG!!! Georgia this bread is awesome! I have real issues with grain, and while I tolerate spelt in small doses it can make me really ill. I loved the taste, texture and smell of this sooooo much. Made a pig of myself (without any consequences!) and I’ve had it toasted, warmed in the microwave to yummy hot freshness and naughty me I did cut it and scoff it while still warm. Love your notes, they helped my dough hydration beautifully. Have bought two of your books, and you are a hero!!
You are very kind Nic! So glad you enjoyed the bread. It’s so easy to eat a whole loaf haha (speaking from experience)
Thank you for the recipe! I was excited to try it out because of all the good clean ingredients.
I followed the recipe exactly and used Otto’s cassava flour. The dough was SO dry – not like the runny dough you described. I had to add more water. The bread turned out to be a grey color. It was still good, just different. I noticed in another comment you said Otto’s cassava flour is fermented, so perhaps that is why there was such a big difference. I’ll have to try a different brand of Cassava flour and/or change the amount of Otto’s Cassava flour I use next time I make the bread.
Thank you again! I’m glad I found your website. My son’s name is George, so I love the website name. ????
Hi Claire! I’m sorry it didn’t work out like my loaves. Yes, I definitely think Ottos needs a considerable amount of extra water and I think it’s because of the fermentation.
I generally get mine at the bulk food store and it’s not fermented, so definitely a key difference.
In terms of the grey colour, are you buying psyllium powder from the shops? I’m not entirely sure why but I have always found that psyllium in pre-powdered form turns my baked goods purple/grey. I buy whole psyllium husk and grind it to a powder to avoid it. I’ve never figured out why it happens but that might be why your loaf was grey?
Thank you! A great name 😉
Hi there 🙂
What brand whole psyllium do you buy in Australia? Having so much difficulty with this. Also do u purchase ur cassava from The Source? Thankyou
Sam
Hello! I chop and change but at the moment I am using Bonvit brand. I used to buy Coles brand but the last few bags have turned purple so I’ve moved on.
I buy my cassava from a local bulk foods (not Source). When I can I like to cross test my cassava recipes with Ottos brand because I find it absorbs water quite differently, but it can be tricky to find Ottos
Hi, Thanks for all the work your doing. Do you use an Australian brand of cassava flour? I tried AKN brand and found it grainy. I have to grind it to be fine. Do you recommend any brand please? Thanks.
Hi Maya! I get my cassava flour from my local bulk food store. I asked and they didn’t know the name of the brand sadly. I will ask again next time though because I really like it – it’s finely milled and quite sweet which I love.
Have you tried Otto’s? I haven’t but have heard good things. The only issue is that it’s fermented which I think makes it behave differently to the non-fermented sorts
I use Three Spades Cassava Flour in Australia.
What is the size of your pullman loaf pan? they have several different sizes on amazon (1 lb, 2 lb, extra long and narrow)
Hi Hannah! Mine is 23cm x 10cm x 10cm (I live in Australia so we use cm) but Google tells me that is 9 inches x 4 x 4 inches. It’s the small pan 🙂
Thank you!!