The inspiration for this gluten free yoghurt pastry came to me when I was making a pie recently. I had leftover gluten free puff pastry from a shoot for my cookbook, but I wanted to use up some random bits and bobs in my fridge. On offer: some fading spinach, an unused block of feta and a hell of a lot of yoghurt. With no ricotta on hand to make a spanakopita style pie, I figured I could try using the yoghurt. Success! Buoyed by said success, I decided to try using yoghurt in the pastry, too. I think you can guess how that turned out, or we wouldn’t be here.
For the astute reader, you’ll notice that this gluten free yoghurt pastry is remarkably similar to my sour cream pastry. My reason for publishing this version anew is simple: people generally have yoghurt in the fridge. Sour cream, on the other hand, generally requires a trip to the shops. The dairy based ingredients for a pie begin to pile up. I wanted this pastry to work in sync with the ingredients in your fridge, but also with the pie.

Gluten free yoghurt pastry without xanthan gum
This pastry uses yoghurt and butter to create a crumbly and delicious gluten free pastry. The flour blend is a simple mix of white rice flour and tapioca flour, which provides crispiness and a bit of elasticity. Instead of xanthan gum, the pastry uses psyllium husk powder or flakes. It can be made into a sweet pastry or a savoury pastry, depending on what you need it for.
Ingredients notes for your gluten free yoghurt pastry
I guess, first up, we should discuss yoghurt. I recommend a full fat, plain yoghurt, ideally pot set. You can make both sweet and savoury pastry with this recipe, but I suggest using plain yoghurt either way. You can control sweetness by adding sugar. Low fat or light yoghurts will result in a less flaky pastry and a more leaky filling. This is why I suggest full fat. In Australia, I like Jalna pot set yoghurt. They do a number of full fat, lactose free products, including a lactose free Greek Yoghurt. I love them!
The flours I have used in this recipe are fairly standard – white rice flour and tapioca flour. I generally use these because I know people have access to them. We will discuss more in the flour section below, where I will give some suggestions for substitutions.
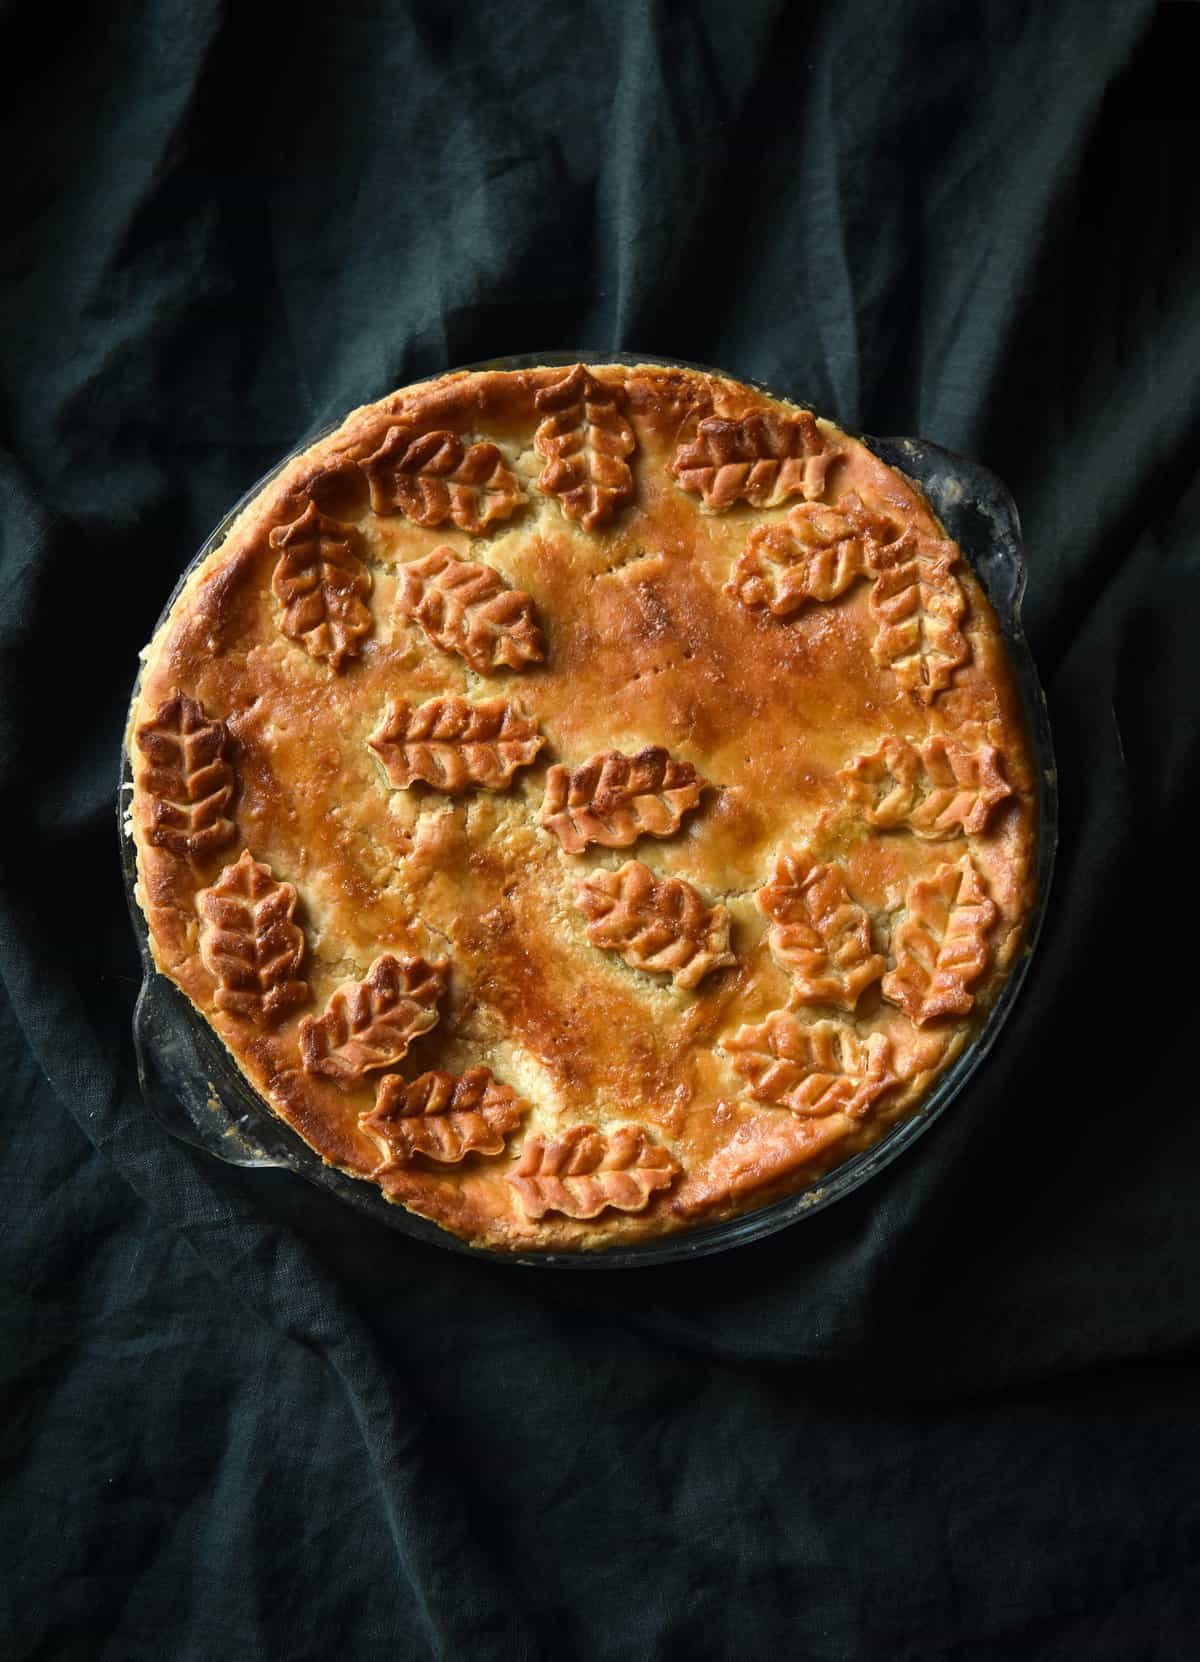
I have used psyllium husk powder for the binder in this recipe. Every gluten free baked good needs a binder – sometimes that is egg, banana or a gum, like xanthan. Binders hold everything together, as gluten normally does. Pastry can be a real pain to work with without a binder, particularly if you plan to do any decorative or lattice work. I have added some notes on using xanthan gum if you plan to do any intricate decor.

Flour notes
This recipe uses white rice flour and tapioca flour as the standard duo. They are easy to find for most people, and have a bland flavour and light colour akin to a regular glutenous baked good. That said, this recipe is very amenable to flour substitutions. I have used sorghum flour and toasted quinoa flour both to success. Keep in mind that different flours need different levels of hydration. Rice flours are generally the thirstiest of the lot, so you will probably need to use less yoghurt. Add it only as necessary.
It is also possible to use all wholegrain flours for a starch free pastry option. I highly recommend adding 1-2 teaspoons of extra psyllium husk powder to compensate for the lack of stretch in wholegrains when compared to starches. I also recommend pairing a lighter flour (like buckwheat or sorghum) with a heavier flour, white or brown rice. You can experiment and see what works for you. Keep in mind, again, that you will need to adjust the amount of yoghurt and the baking time to suit.

A note on blind baking
One of the things I like about this pastry and this tart is that you don’t need to blind bake the pastry. Because the filling is quite thick and the pastry sturdy, it doesn’t melt into a hot mess during baking. You couldn’t do the same with, say, a strawberry pie, but it works really well here.
The good thing about not needing to blind bake is the time it saves. Blind baking this pastry takes 40 minutes – 30 minutes with the pie weights in and an additional 10 minutes with the pie weights out. Tarts aren’t known for being a speedy meal, so the bonus is we’re saving time.
Is the pastry better blind baked? Yes, it is, but not really in a huge way in this case. The bottom, as well as the sides, will have a crispy, buttery taste if blind baked. If not, the bottom is more nondescript. Still holds the pie together without being stodgy, but just doesn’t taste quite as buttery. A trade I’m willing to make, given that the sides of the pastry will still have that buttery taste either way.

To blind bake:
On the off chance you fancy the extra labour of blind baking the crust:
- Prepare the pastry as per the instructions. Allow it to chill in the fridge while you preheat the oven to 180C/356F.
- Scrunch up a large piece of baking paper, open it up and place it on top of the pastry. Smooth it out so that the pie weights will fit flush up against the pastry. Add the pie weights and place in the oven for 30 minutes.
- Gently remove the pie weights and paper from the pie. Dock the pastry again if the holes have closed up. Brush the pastry base and sides with egg wash, then return to the oven for 10 minutes.
- You can fill the pastry while hot if you work quickly (as the egg will start to cook). Return the tart to the oven for 30 minutes or until the tart is cooked through. You might need to gently cover the crust tops with foil to stop them overcooking. You can also cook the tart for longer on a lower temperature to prevent this.

Working with gum free pastry
Gluten free pastry can be a challenge, and none more than the gum free variety. I find that the yoghurt seems to make this a particularly easy pastry to work with, but the psyllium husk plays a crucial role, too. Psyllium husk is a natural fibre binder in gluten free baking. It’s not included for fun – it helps hold the pastry together.
I have found that psyllium husk powder works best in this recipe. I generally buy psyllium husks and then grind them in my spice grinder as necessary. The husks work too, but I found the pastry was just a little more prone to cracking as I rolled it out.
I also found that rolling this pastry straight after making it worked better than chilling it first. It is more flexible fresh which makes it easier to manipulate. Chilling it in the pie dish allows it to be flaky but also nice and neat.
Tips for working with gluten free yoghurt pastry
- As discussed, roll and shape the pastry right after you make it. It’s at it’s flexibility peak, like me after a few wines.
- Use your rolling pin the press down on the lump of pastry to secure it and flatten it before rolling. I find this helps prevents cracks.
- Patch up as cracks with your fingers as they appear. The warmth from your hands will help bring it together.
- Make sure your paper and rolling pin are well floured to prevent sticking. Nothing worse than having to scrape the whole thing up and start again.
- Don’t expect it to have as much flexibility as glutenous pastry, or even pastry with xanthan gum. It needs a little more TLC, but the gum free result is worth it.

Places to use your gluten free yoghurt pastry
Sweet
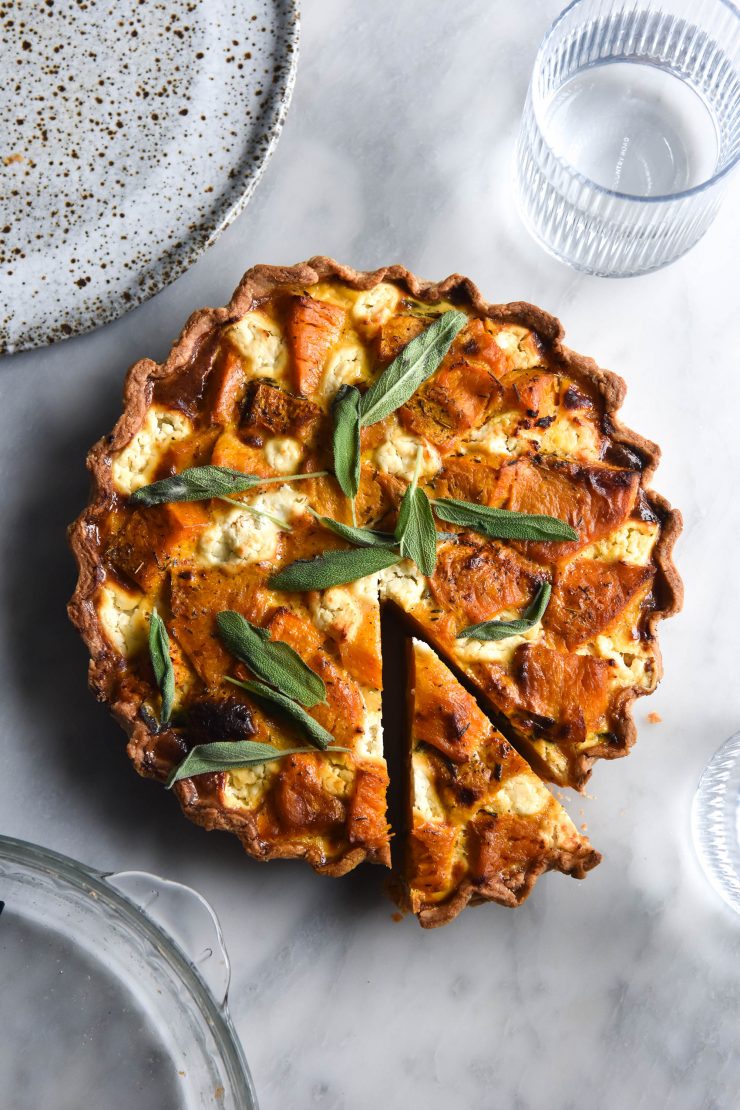
Gluten free pumpkin pie with a refined sugar free filling
Strawberry pie
Fruit free mince pies
Lime curd tart with Graham cracker crust
Savoury
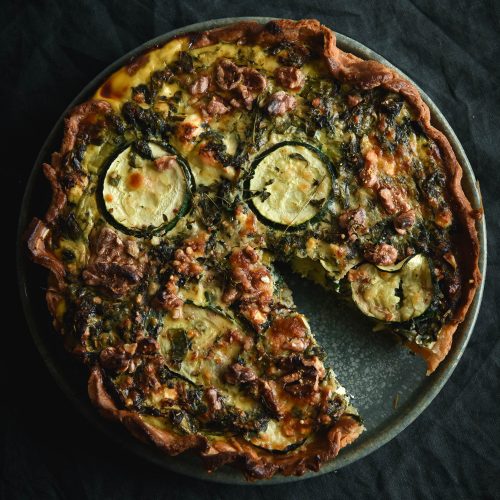
Zucchini, ricotta and herb swirl pie
Spanakopita style pie
Vegetarian sausage rolls (not a pie but uses pastry!)
Gluten free yoghurt pastry
Equipment
- 1 x 25cm (10 inch) pie dish
Ingredients
- 160 g (1 cup) fine white rice flour
- 60 g (1/2 cup) tapioca flour (see notes)
- 1 teaspoon fine salt or 3-4 tablespoons icing sugar
- 2 teaspoons psyllium husk powder or 1 tablespoon psyllium husks
- 125 g butter cold and cubed
- 75 g full fat Greek or plain lactose free yoghurt (see notes)
- Ice water to bring the dough together I needed 1/4 cup – 60ml
Instructions
- To make the pastry:
- Combine the flours, salt and psyllium husk in a large mixing bowl. Add the cold cubes of butter, and use your fingers to rub the butter into the flour until only small bits remain. It should resemble a course meal.
- Stir in the yoghurt, then get your hands in and distribute it evenly. Add the water – just enough to form a smooth dough with no dry bits on the bottom of the bowl. Use the least possible amount of water to achieve this – drier pastry equals crispy, flaky pastry. Bring the dough together into a ball.
- Lightly flour a sheet of baking paper with tapioca flour. Roll the dough out into a large rectangle – about 3-4 centimetres wider than the lip of the pie dish. Patch up any cracks as they appear. The dough should be about 1/2 centimetre thick.
- Place your pie dish in the centre of the dough. Slide one hand under the baking paper and into the centre of the dish. Use the other hand to hold the dish. Flip the dish over and let the pastry fall into it. Be generous in letting the hanging parts of pastry fall into the dish or it will break.
- Patch up any cracks and press the pastry firm up against the sides of the dish. Trim the overhanging edges with scissors and neaten them up or crimp them as you see fit. Use a fork to poke some air holes in the pie base and pop it in the fridge to chill.
- To blind bake the pastry: (optional, see the intro)
- Prepare the pastry as per the instructions. Allow it to chill in the fridge while you preheat the oven to 180C/356F.
- Scrunch up a large piece of baking paper, open it up and place it on top of the pastry. Smooth it out so that the pie weights will fit flush up against the pastry. Add the pie weights and place in the oven for 30 minutes.
- Gently remove the pie weights and paper from the pie. Dock the pastry again if the holes have closed up. Brush the pastry base and sides with egg wash, then return to the oven for 10 minutes.
- You can fill the pastry while hot depending on what you are baking. Any eggs in the filling will start to cook, so keep that in mind. Return the tart to the oven for 30 minutes or until the tart is cooked through. You might need to gently cover the crust tops with foil to stop them overcooking. You can also cook the tart for longer on a lower temperature to prevent this.
Hello, this looks amazing!!
I don’t have a problem with xantham gum, do you have any advice on how to use it in this recipe?
Thanks, Julia
Hi Julia,
I haven’t tried it in this recipe! It doesn’t work that well for me so I try to limit it in my day to day. There are some recipes that use xanthan gum in my cookbook, or this recipe does too: https://georgeats.com/recipes/easy-gluten-free-butter-pastry-sweet-or-savoury/