Before we begin chatting about this gluten free spanakopita tart, a caveat: this is not a traditional Greek spanakopita. There’s no gluten free phyllo here, because, try as I might, I have never managed to get phyllo to work in a way that didn’t take HOURS. Speaking from experience: individually rolling little sheets of phyllo like dough is not a fun time.
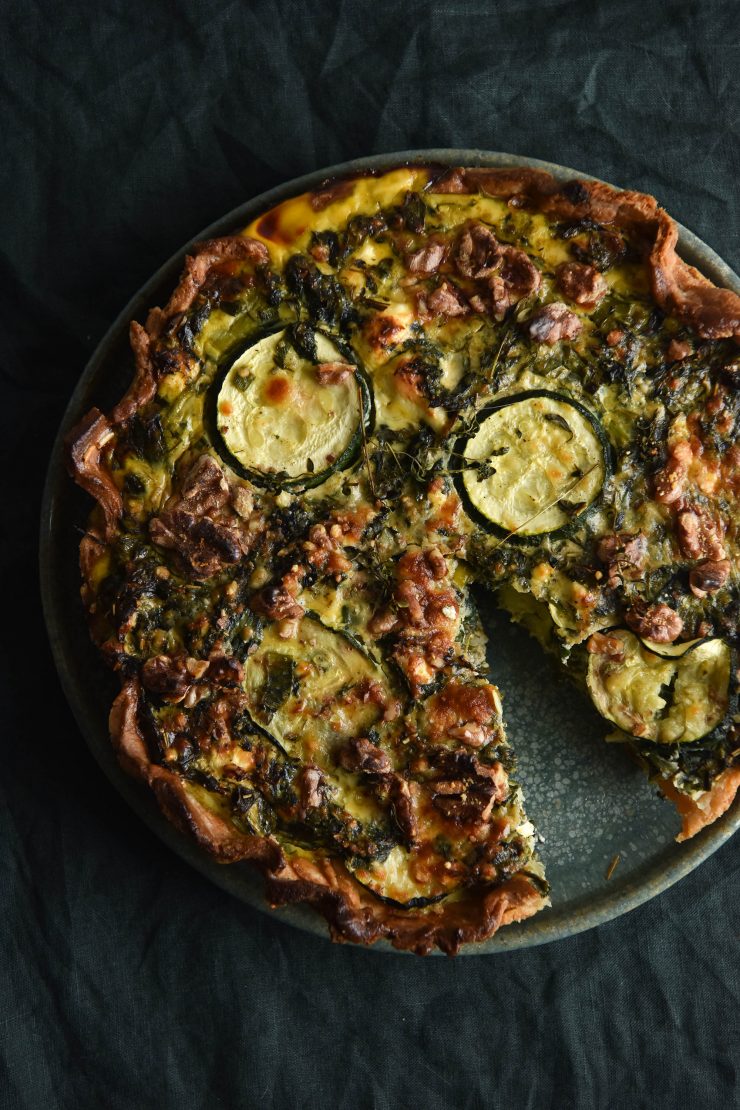
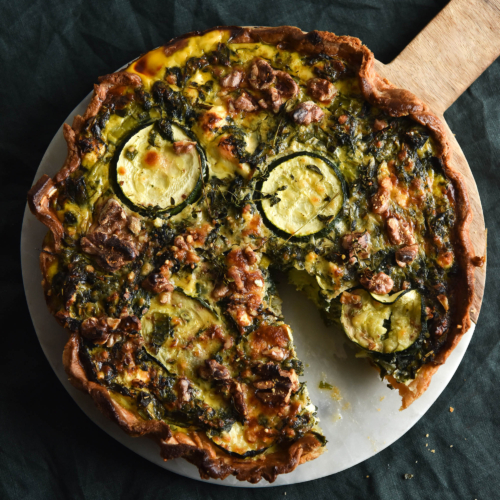
Gluten free tart Spanakopita tart
This gluten free spanakopita tart uses a Greek yoghurt and butter pastry with a more traditional spanakopita filling. I decided to call it a spanakopita tart because it’s as close as I have come to a gluten free version of spankopita, and I wanted to respect the original without ripping it off.
This tart is FODMAP friendly, gluten free and xanthan gum free. It can also be dairy free (use vegan butter and yoghurt) nut free (omit the optional walnut topping) and starch free (use 100% wholegrain in the pastry).

Substitution notes
Personally, I think dill is critical in this recipe. There’s no better herb here, in my very biased opinion.
Nutmeg is optional, but again I do think it really rounds of the tart. I recommend giving it a whirl, even if you don’t like it generally.
I have used Greek feta in all my tests of this tart. Because it is so firm, it stands up really well to the mixing and baking process, which leaves delicious chunks in the finished tart. You could try using Danish feta if that’s all you have, but it does tend to melt away into the filling as it bakes.
Currently, I have no suggestions for an egg free version.
Spring onion greens add a real spanakopita vibe to this dish and are totally FODMAP free according to Monash. If you’re catering to regular folk, feel free to add the whites in, too. You will probably need less in total if you use the whites as they are the most potent part of the onion.
I added a zucchini to the tart purely to get rid of a bunch of them I had on hand. They can very easily be omitted.
You can use store bought pastry if you prefer. The recipe is very easy, though, and uses yoghurt like the pie does.
On that note: any plain, non-sweetened yoghurt should work here. I highly recommend a full fat variety – light is generally more watery which will have an impact on both the crust and the filling. Nobody likes a soggy pie.
A note on blind baking
One of the things I like about this pastry and this tart is that you don’t need to blind bake the pastry. Because the filling is quite thick and the pastry sturdy, it doesn’t melt into a hot mess during baking. You couldn’t do the same with, say, a strawberry pie, but it works really well here.
The good thing about not needing to blind bake is the time it saves. Blind baking this pastry takes 40 minutes – 30 minutes with the pie weights in and an additional 10 minutes with the pie weights out. Tarts aren’t known for being a speedy meal, so the bonus is we’re saving time.
Is the pastry better blind baked? Yes, it is, but not really in a huge way in this case. The bottom, as well as the sides, will have a crispy, buttery taste if blind baked. If not, the bottom is more nondescript. Still holds the pie together without being stodgy, but just doesn’t taste quite as buttery. A trade I’m willing to make, given that the sides of the pastry will still have that buttery taste either way.

To blind bake your gluten free pie crust:
On the off chance you fancy the extra labour of blind baking the crust:
- Prepare the pastry as per the instructions. Allow it to chill in the fridge while you preheat the oven to 180C/356F.
- Scrunch up a large piece of baking paper, open it up and place it on top of the pastry. Smooth it out so that the pie weights will fit flush up against the pastry. Add the pie weights and place in the oven for 30 minutes.
- Gently remove the pie weights and paper from the pie. Dock the pastry again if the holes have closed up. Brush the pastry base and sides with egg wash, then return to the oven for 10 minutes.
- You can fill the pastry while hot if you work quickly (as the egg will start to cook). Return the tart to the oven for 30 minutes or until the tart is cooked through. You might need to gently cover the crust tops with foil to stop them overcooking. You can also cook the tart for longer on a lower temperature to prevent this.

Working with xanthan gum free pastry
Gluten free pastry can be a challenge, and none more than the gum free variety. I find that the yoghurt seems to make this a particularly easy pastry to work with, but the psyllium husk plays a crucial role, too. Psyllium husk is a natural fibre binder in gluten free baking. It’s not included for fun – it helps hold the pastry together.
I have found that psyllium husk powder works best in this recipe. I generally buy psyllium husks and then grind them in my spice grinder as necessary. The husks work too, but I found the pastry was just a little more prone to cracking as I rolled it out.
I also found that rolling this pastry straight after making it worked better than chilling it first. It is more flexible fresh which makes it easier to manipulate. Chilling it in the pie dish allows it to be flaky but also nice and neat.

Tips for your gluten free Spanakopita tart
As discussed, roll and shape the pastry right after you make it. It’s at it’s flexibility peak, like me after a few wines.
Use your rolling pin the press down on the lump of pastry to secure it and flatten it before rolling. I find this helps prevents cracks.
Patch up as cracks with your fingers as they appear. The warmth from your hands will help bring it together.
Make sure your paper and rolling pin are well floured to prevent sticking. Nothing worse than having to scrape the whole thing up and start again.
Don’t expect it to have as much flexibility as glutenous pastry, or even pastry with xanthan gum. It needs a little more TLC, but the gum free result is worth it.
More gluten free vegetarian recipes
- This pumpkin, sage and goat’s cheese tart that uses the same yoghurt pastry
- FODMAP friendly spinach feta rolls
- Gluten free vegetarian sausage rolls
- Gluten free Ukrainian potato, cheese and leek dumplings (Varenyky)
Gluten free spanakopita tart
Equipment
- 25cm (10 inch) pie dish (25cm top measurement, 20cm base measurement)
Ingredients
For the yoghurt pastry:
- 160 g (1 cup)* fine white rice flour
- 60 g (1/2 cup)* tapioca flour (see notes)
- 1 teaspoon fine salt
- 2 teaspoons psyllium husk powder or 1 tablespoon psyllium husks
- 125 g butter cold
- 75 g full fat Greek or plain lactose free yoghurt see notes
- Ice water to bring the dough together (I needed 1/4 cup (60ml)
For the spanakopita style filling:
- 50g spring onion greens only, chopped (see notes)
- 400 g fresh spinach chopped
- 100 g fresh dill chopped
- 4 extra large eggs
- 100 g full fat Greek or plain lactose free yoghurt
- Generous cracked black pepper
- 1/4 – 1/2 teaspoon fine salt according to your penchant for salt
- 1 teaspoon ground nutmeg use less for freshly grated
- Zest of 1/2 a lemon optional
- 1 small zucchini very finely sliced
- 200-250 g Greek feta according to your penchant for cheese
To finish the tart (optional)
- Handful of roughly chopped walnuts
- 25-50 g finely grated parmesan for the top
Instructions
To make the pastry:
- Combine the flours, salt and psyllium husk in a large mixing bowl. Add the cold cubes of butter, and use your fingers to rub the butter into the flour until only small bits remain. It should resemble a course meal.
- Stir in the yoghurt, then get your hands in and distribute it evenly. Add the water – just enough to form a smooth dough with no dry bits on the bottom of the bowl. Use the least possible amount of water to achieve this – drier pastry equals crispy, flaky pastry. Bring the dough together into a ball.
- Lightly flour a sheet of baking paper with tapioca flour. Roll the dough out into a large rectangle – about 3-4 centimetres wider than the lip of the pie dish. Patch up any cracks as they appear. The dough should be about 1/2 centimetre thick.
- Place your pie dish in the centre of the dough. Slide one hand under the baking paper and into the centre of the dish. Use the other hand to hold the dish. Flip the dish over and let the pastry fall into it. Be generous in letting the hanging parts of pastry fall into the dish or it will break.
- Patch up any cracks and press the pastry firm up against the sides of the dish. Trim the overhanging edges with scissors and neaten them up or crimp them as you see fit. Use a fork to poke some air holes in the pie base and pop it in the fridge to chill.
To make the filling:
- Heat the oil in a large skillet or pot. Add the spring onion greens and cook for a minute or so or until fragrant. Add the dill and spinach and cook until the greens are wilted but still verdant. Transfer to a colander over the sink and allow to cool.
- While the greens are cooling, preheat your oven to 200C/392F.
- Whisk your eggs, then add the yoghurt, seasoning, nutmeg and lemon zest, if you’re using it. Add 3/4 of your finely sliced zucchini and chunks of feta, stir and set aside.
- Once the greens are sufficiently cool, wring them out really well with your hands. This will take about 5 minutes, on and off. Make sure you really get in there or else the pie and pastry soggy. Once the spinach is very well wrung out, add it to the egg mixture. Mix to combine, then pour into your pie dish.
- Use your hands to flatten the mixture out nicely, pressing down to distribute the egg mixture. Press the remaining zucchini lightly into the mixture to secure. Add the parmesan and walnuts, if you’re using them.
- Transfer the pie to the oven for 30-40 minutes or until golden brown and cooked through.
- Serve warm or cold. Pie keeps really well in the fridge for a number of days.
Notes
- English spinach is low FODMAP in 75g serves. Monash doesn’t specify an upper limit.
- Baby spinach is low FODMAP in 75g serves. In 146g serves, it contains moderate amounts of fructans.
- Spring onion greens are low FODMAP in 75g serves. In 97g serves or more, they contain moderate amounts of fructose.
- Feta remains low FODMAP in serves of up to 500g.
I tweaked mine a little (had ricotta to use up so added that to the filling instead of yoghurt, and also added a tiny bit of mint and oregano). Pie crust was actually heavenly. Thank you so much!
What size is the pie dish? Apologies if I totally missed it in the recipe! Couldn’t seem to see it on reading twice!
Sorry Alex! I put it in the recipe card but it obviously hasn’t shown up, so thanks for alerting me. It is 25cm top measurement and 20cm base measurement 🙂