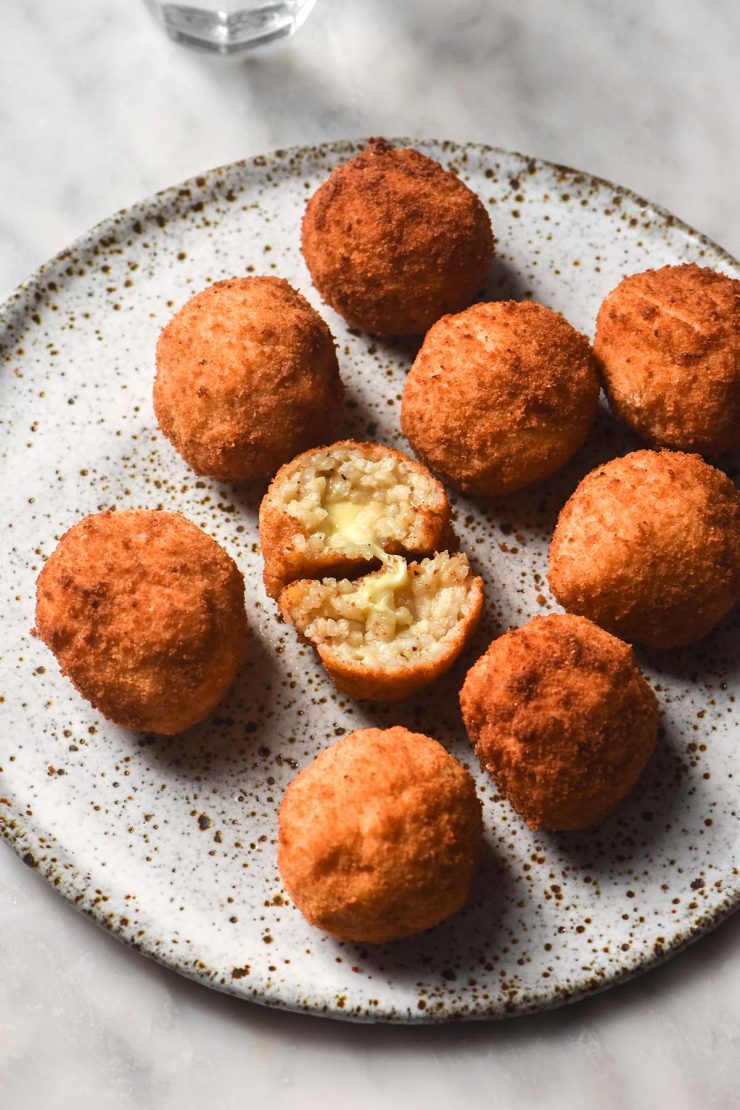
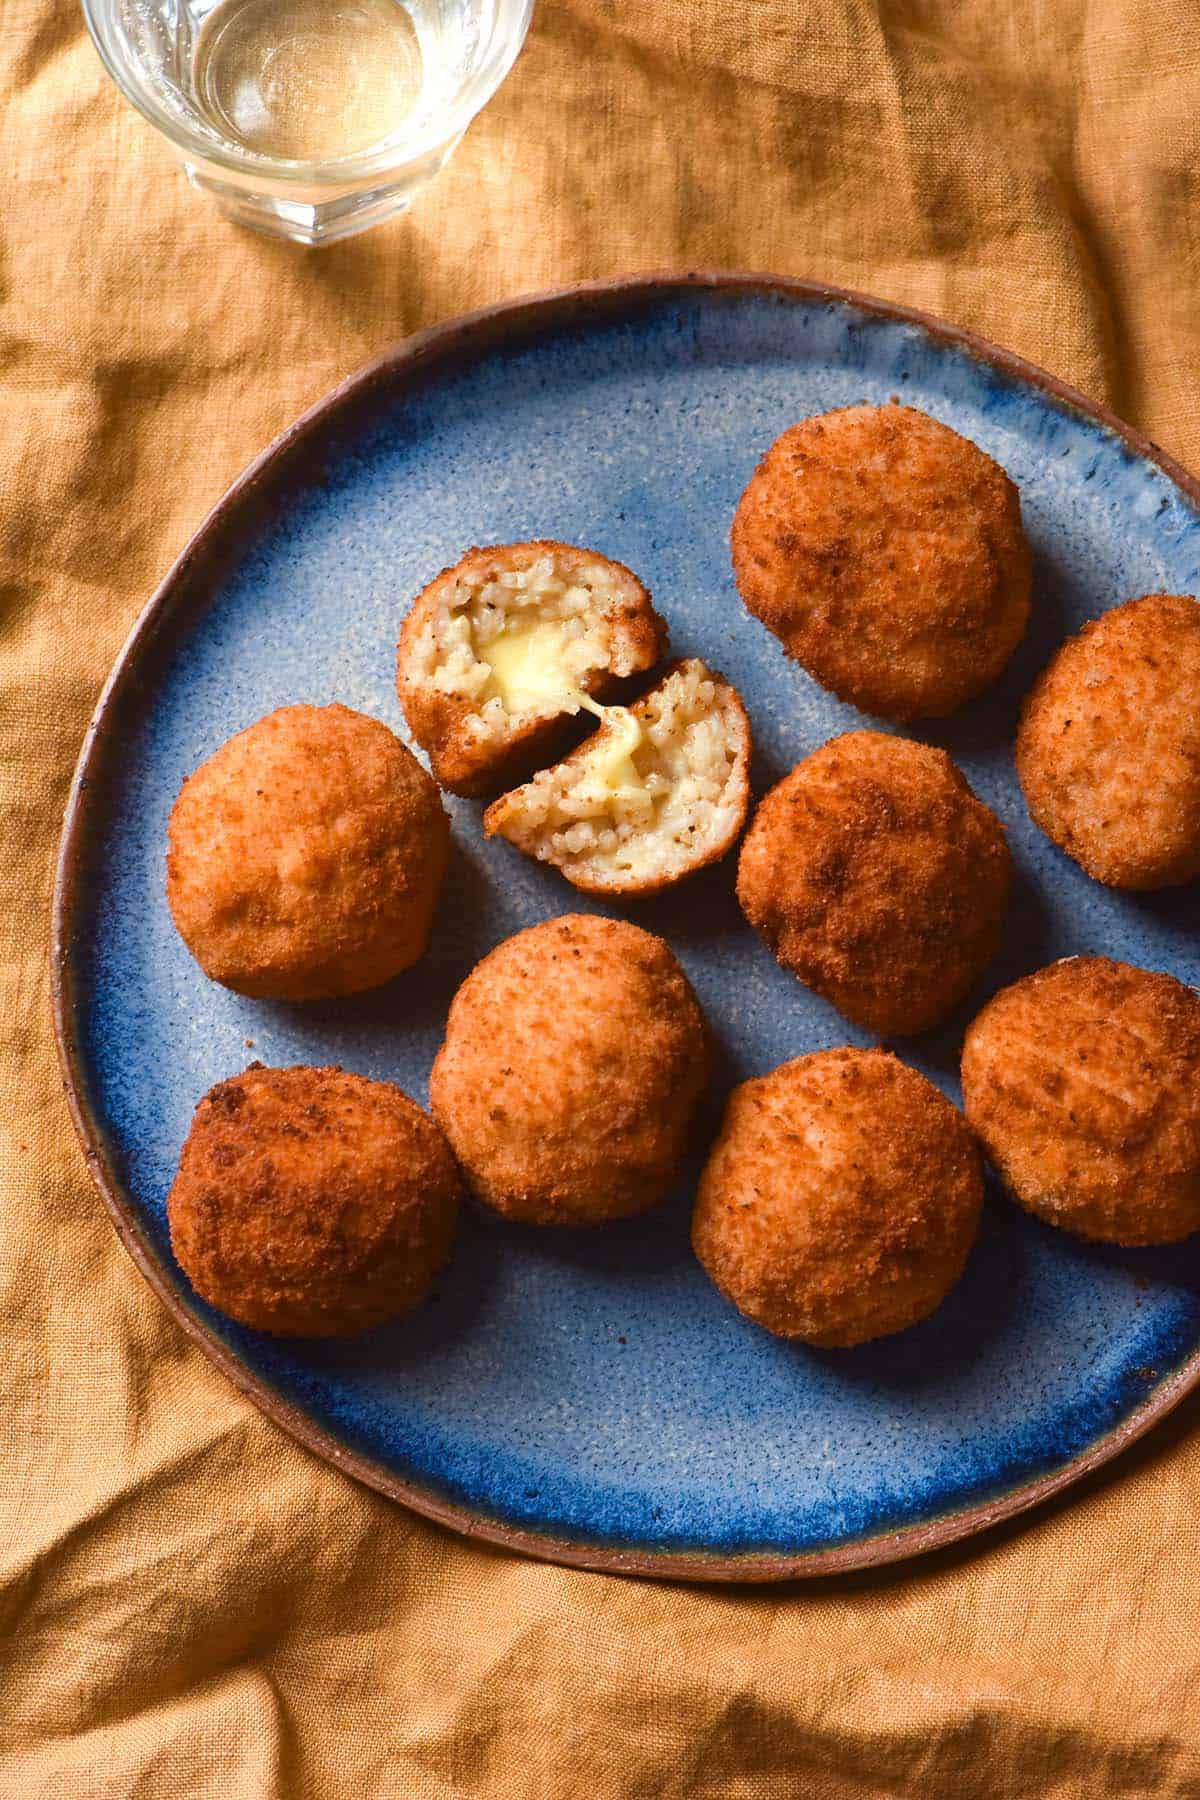
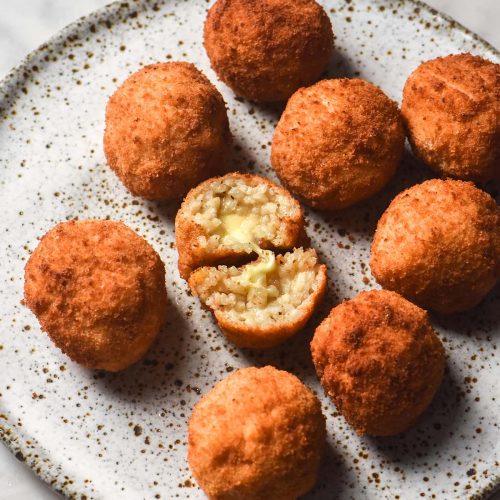
I have been craving arancini constantly since my recent trip to Sicily. They are an omnipresent street food all over the island, but unfortunately (for me) not normally gluten free. The solution? To develop my own recipe for gluten free arancini now that I’m home.
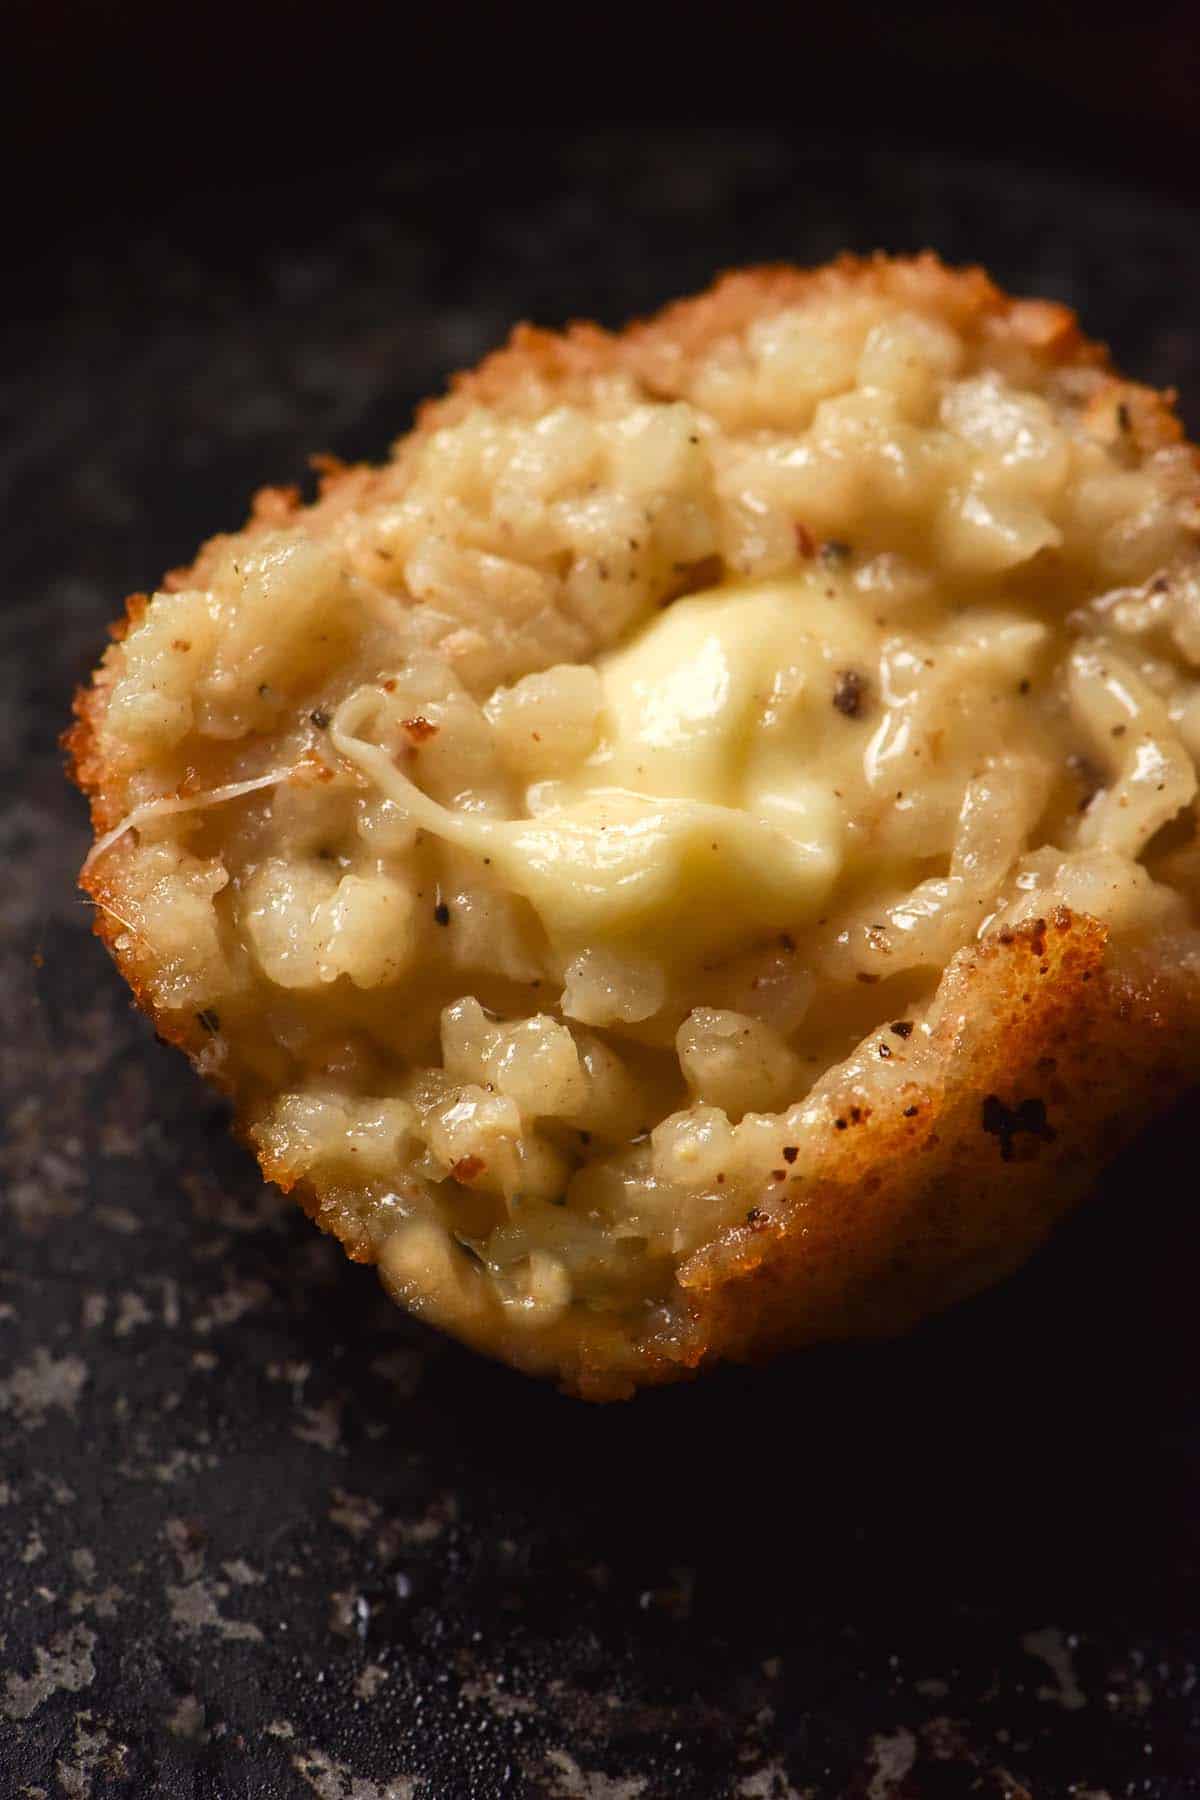
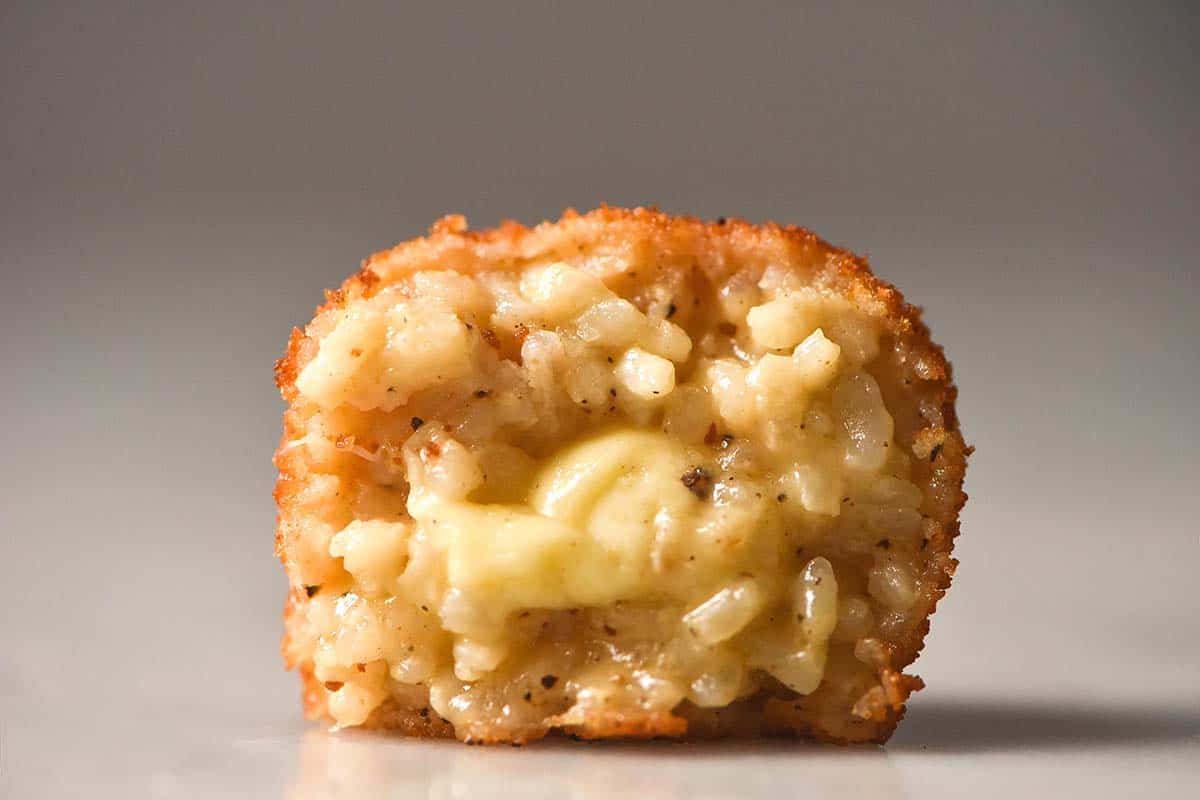
A safety warning, before we begin: freshly cooked arancini are generally molten inside. Be very careful about biting into one fresh out of the hot oil or oven!

Gluten free arancini (low FODMAP)
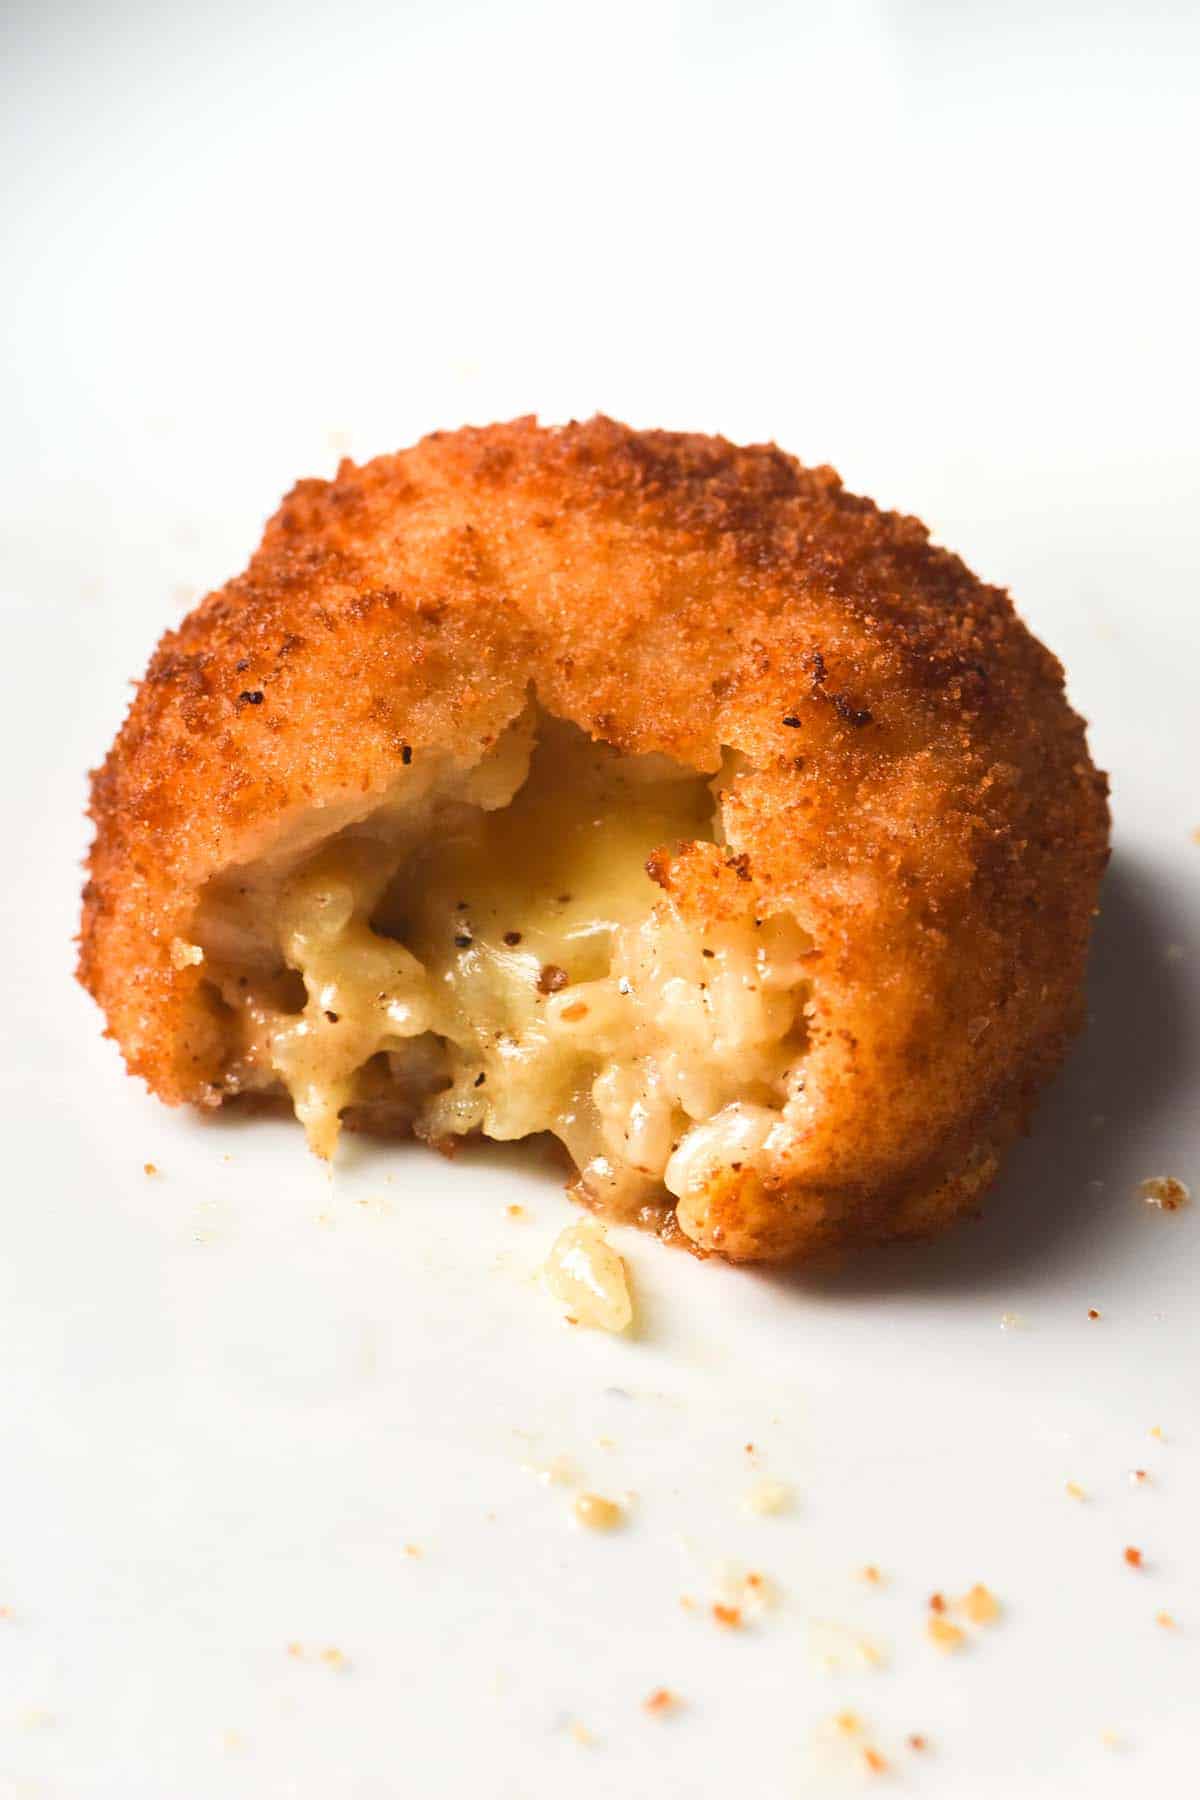
These gluten free arancini are made with my cacio e pepe risotto as the base. I find that the parmesan really helps glue the arancini together (and makes them delicious, too). Stay tuned for different flavours and different fillings though – I’m an arancini girl now.
These arancini are low FODMAP and egg free. Traditionally, arancini use eggs to crumb the arancini balls, but I don’t find them necessary. I’ve done a lot vegan crumbing in recent months (vegan fish fingers, vegan schnitzels) and find that seasoned milk works just as well.
These arancini use corn starch as the flour coat and gluten free breadcrumbs to finish. I generally use store bought gluten free breadcrumbs, but stay tuned for a homemade recipe.
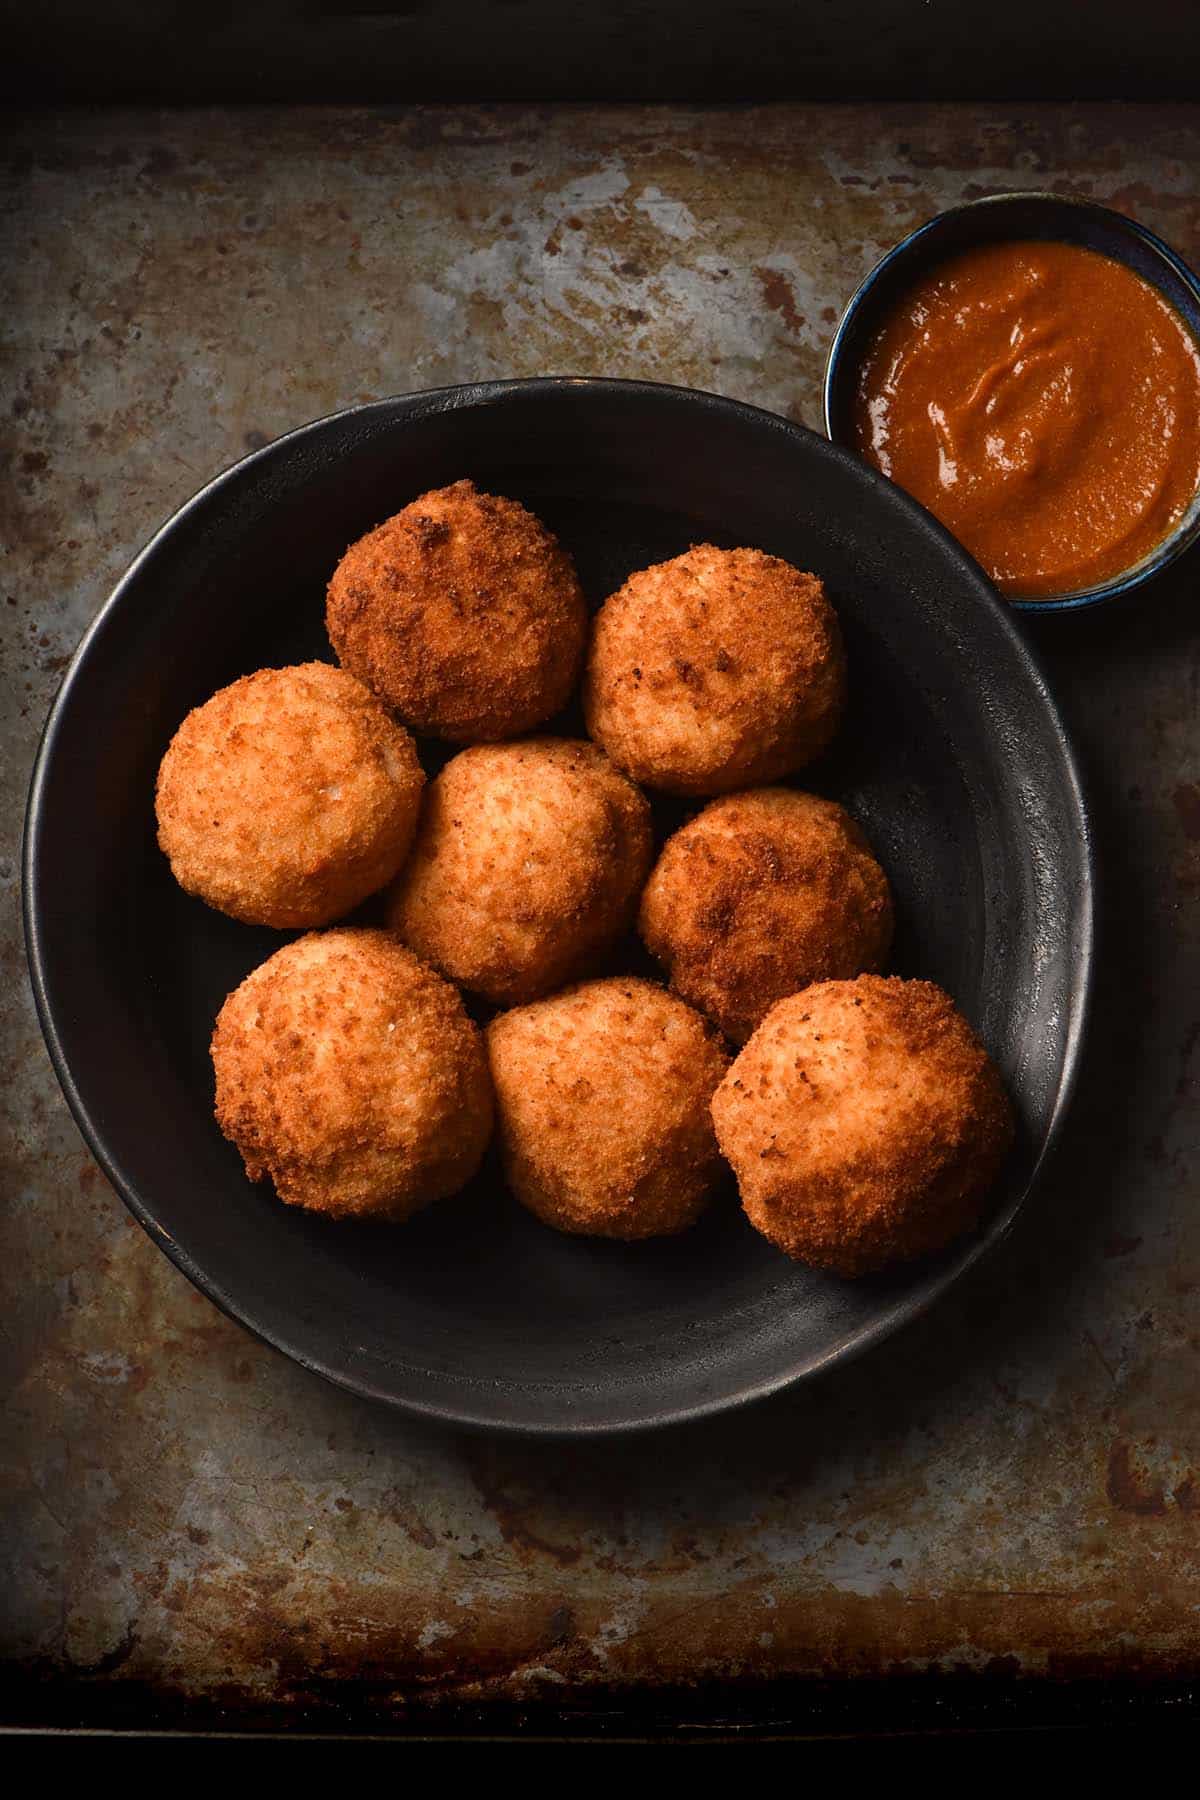
You can fry these arancini (which is my preferred method) but I have also given an option to bake them as well. They are the perfect little snack to have on hand and make a great freezer stash, too.
Ingredient notes
If you need these arancini to be vegetarian, use vegetarian parmesan. Yes, I know it shouldn’t technically exist. Yes, it still does exist. See my list of vegetarian Parmesan brands in Australia here, or Google brands available in your country if you’re not from Australia.
Gluten free breadcrumbs are generally found in the health food aisle at Australian supermarkets. None of them are great in my opinion, but they are better than nothing. I plan to develop a breadcrumb recipe soon.
As of yet I haven’t tested alternate crumbs like corn flakes or popped rice. I will update the post when I do.
Corn starch is great for creating an extra layer of crispiness for your arancini. If you can’t have corn, potato starch is a good alternative.
Tips for your gluten free arancini
The biggest tip I have is to save yourself the headache and make the risotto the night before. Fully chilled risotto has a firm, solid texture that can easily be formed into balls. Working with warm risotto would be near impossible and would likely result in using way too much flour or breadcrumb. Cold, pre-made risotto is the way to go here.
My second tip is to use a little less liquid in the risotto making than you could if you were making risotto to eat. This just helps to create that firm textured risotto that will be infinitely easier to roll into balls.
My final tip is for those who intend to deep fry them. Most people suggest 170C/340F is the ideal temperature for your oil. I have a Thermapen which I love and find very helpful. If you don’t, make sure a piece of bread sizzles away in the oil when you add it.
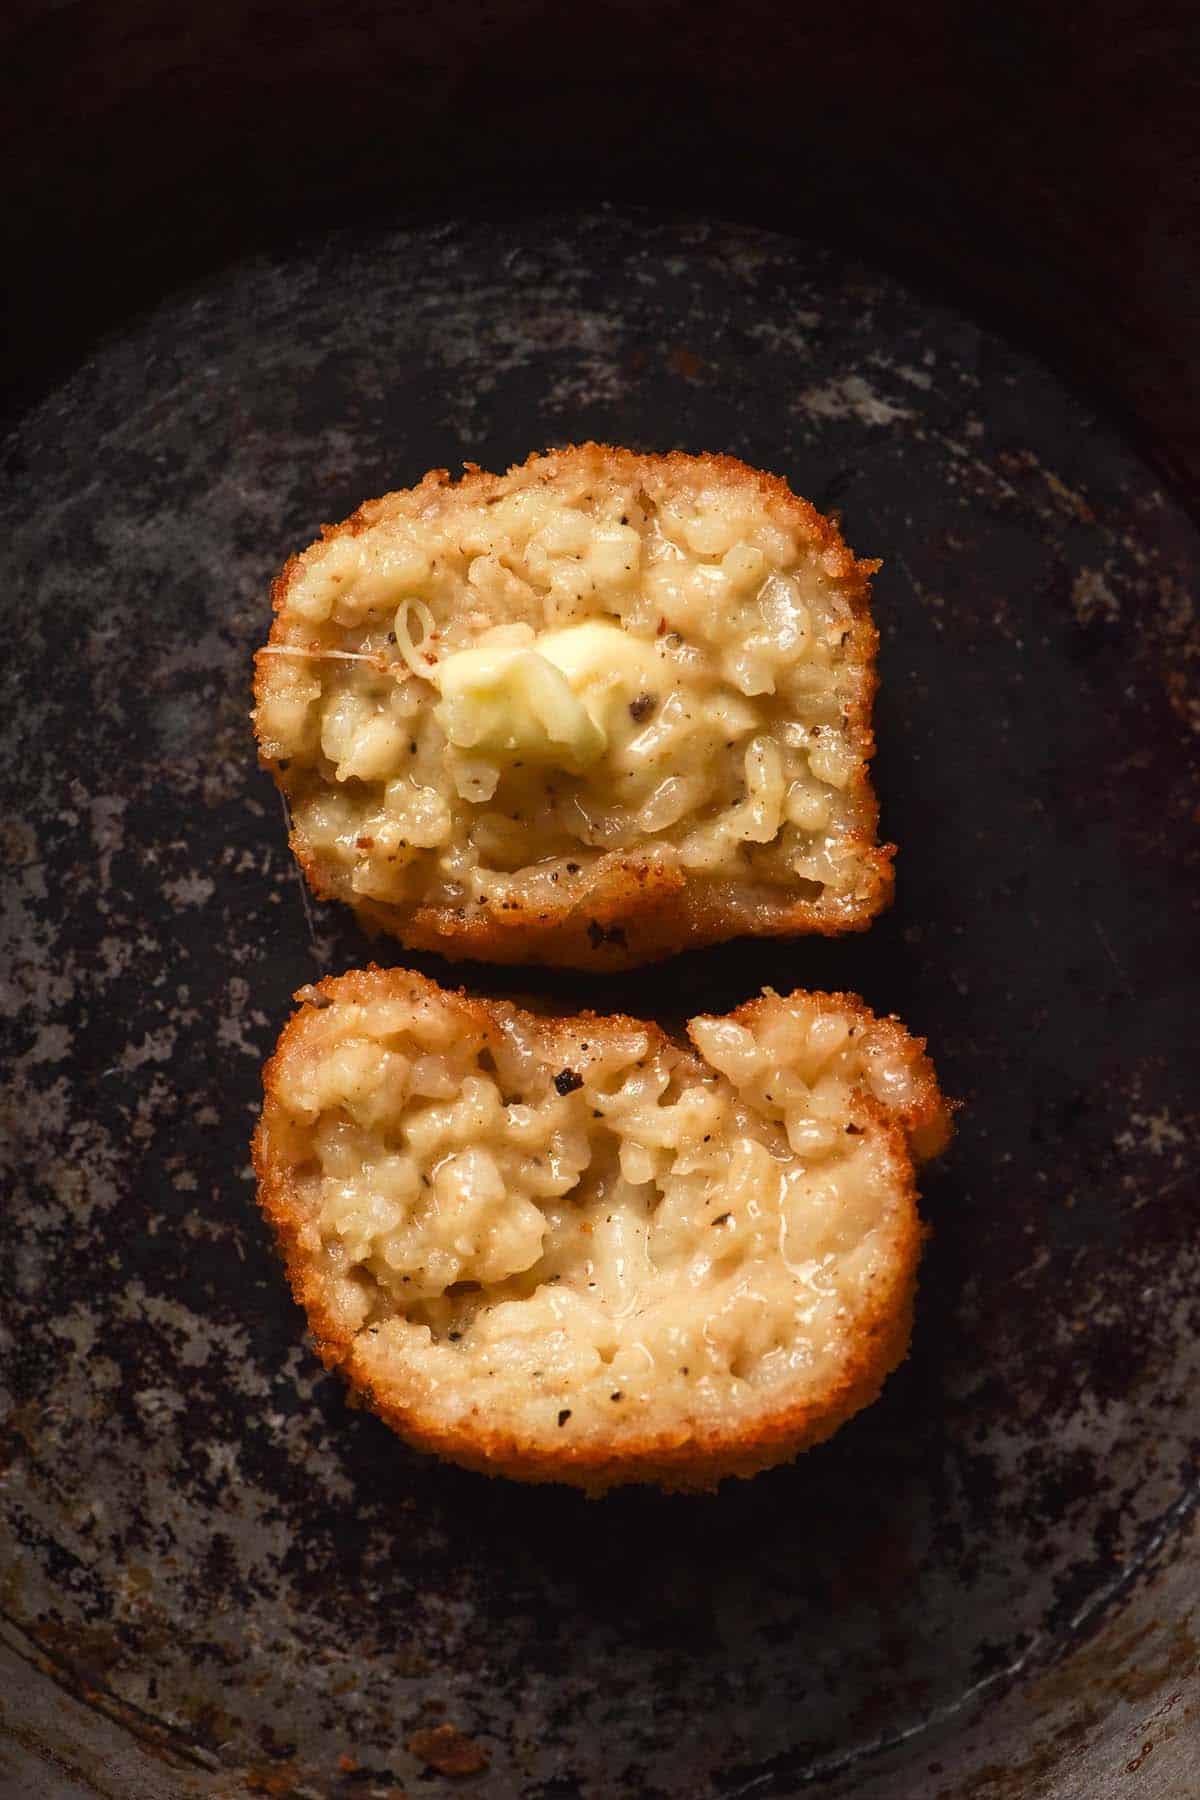
I will say that it’s important to keep an eye on the oil. At 170C/340F I found my arancini were cooking very quickly and the mozzarella didn’t have time to melt. My ideal temperature might be slightly lower than 170C when I make them next.
With that said, it’s still important for the oil to be hot. Adding foods to cooler oil actually ends up making them before greasy as they absorb oil instead of forming a crunchy crust as they hit hot oil. All this to say: the oil is a balancing act.
Frying your gluten free arancini
I have tested two methods of frying these arancini, and we’ll delve into both.
The first is deep frying your arancini, which is my favourite for crunch and taste. I like to deep fry in a small, deep pot. This allows for the least amount of oil used with the maximum depth of oil. This means that each arancino ball is completely submerged in the oil as it cooks, which helps with even browning.
When you use a small pot, I recommend cooking a single arancino ball at a time. They only take about a minute or two each (heat dependent) and they become deliciously crispy.
In my experience, it’s important to finish the arancini in a pre-heated oven. I found that the mozzarella inside didn’t melt in all my arancini if I ate them straight from frying. The oven will help keep them warm, melt the mozzarella and add even more crispiness.
The second option is to shallow fry your arancini. This is quite easy to do – simply shallow fry with a high smoke point oil like vegetable oil. My only gripe is that you have to stand around and rotate the arancini to brown every side. The arancini also inevitably end up with some spots browner than others. Small annoyances in the grand scheme of things.
Baking your gluten free arancini
As discussed, it is entirely possible to bake these gluten free arancini. I do have a few tips for doing so, however.
Firstly, shape the arancini in an oblong shape as opposed to round. The arancini will ‘melt’ a in the oven, so making them oblong will help correct this a little bit.
Secondly, don’t be tempted to bake the arancini on their sides – it’s very likely that the mozzarella will escape out of the base as it cooks.
Which brings me to my next tip: if you are baking your arancini, make sure the mozzarella is very thoroughly enclosed in the risotto. When arancini are fried, the hot oil seals the edges before anything has a chance to escape. When they are baked, they are not afforded that same privilege.
To bake your gluten free arancini:
- Preheat the oven to 220C/430F.
- Prepare your arancini balls as per the recipe card, but shape them in an oblong fashion.
- Line two baking trays with baking paper. Arrange the arancini bottom side down on the tray. Either use generous spray oil or paint 2-3 tablespoons (total) of vegetable oil (use as needed) onto each arancini with a pastry brush.
- Bake the arancini for 30 minutes or until golden brown. I bake them one tray at a time because my oven is small, but do what works best for you.
- You can serve them fresh from the oven or allow them to cool before storing in airtight containers. Leftovers can be frozen.
Can I freeze these gluten free arancini?
Yes, you can. You can freeze leftovers in an airtight container, and simply reheat them in the oven to serve.
You can also freeze unbaked arancini and cook them at a later date. If you intend to deep fry them, finishing them in the oven is integral to ensure they are warmed through fully.
More Low FODMAP risotto recipes
- Low FODMAP mushroom leek risotto
- Pumpkin sage risotto
- Low FODMAP risotto verde
- Low FODMAP risotto al limone
- Cacio e pepe risotto
Gluten free arancini
Ingredients
- 1 batch cacio e pepe risotto cooled overnight (see notes for link)
- 30-50 g cornstarch seasoned with salt and pepper
- 75-125 g gluten free breadcrumbs
- 125 m (1/2 cup)* milk, seasoned with salt and pepper
- 16 small pieces of mozzarella for centres
- Plenty of vegetable oil for deep frying (see body of post for oven baking and shallow frying instructions)
Instructions
To prepare the risotto:
- Prepare the risotto the night before making your arancini. Use as little liquid as possible without skimping – this will make the risotto easier to handle and shape. I generally use 750-1000ml. Allow to cool and then place in an airtight container in the fridge overnight.
To form the arancini:
- The next day, place your seasoned cornstarch in one shallow bowl, your breadcrumbs in another, then your milk in a final third bowl.
- Take approximately 1 1/2 tablespoons* (I use Australian tablespoons, so use 2 tablespoons if you are in USA, Britain or New Zealand) of risotto in your hand and spread it into a thick disk. Place the mozzarella in the centre, then enclose the mozzarella in the risotto to form a ball. Make sure the mozzarella is firmly enclosed and not sticking out.
- Place this arancino on a tray, then repeat with the remaining risotto until you have around 16 arancini.
- Place the first arancino in the corn starch and very lightly coat it with corn starch. Dust off any excess, then place the arancino into the milk mixture. Coat the entire arancino with the milk and then allow any excess milk to drip off. Finally, place the arancino in the breadcrumbs and coat completely on all sides – the arancino should no longer feel wet. Transfer the arancino onto a wire rack and repeat with the remaining arancini until they are all coated.
To cook the arancini:
- Preheat the oven to 170C/340F. This is optional, but will help keep the arancini warm as you cook the remainder and ensure that the mozzarella is cooked through and molten. It will also keep the arancini nice and crisp.
- To deep fry, preheat a small, deep saucepan 2/3 filled with vegetable oil. The temperature of the oil should be roughly 170C/340F. If you don’t have a thermometer, test the oil with a small piece of bread. The bread should sizzle enthusiastically on contact with the oil.
- Cook the arancini one at a time in the hot oil, turning them to ensure all sides are browned. Each arancini will take around 30-60 seconds, depending on the heat of oil. Turn the heat down if the arancini are browning too quickly.
- Place the cooked arancini either back onto your cake rack or into the preheated oven. Repeat this process with the remainder of the arancini.
- Serve the arancini while warm. Leftovers keep well in an airtight container in the fridge. You can freeze and defrost cooked arancini, although I recommend leaving them uncooked and baking them off fresh when you need them.
Notes
- For the cacio e pepe risotto recipe, see this link.
- See the body of the post for instructions on how to oven bake or shallow fry your arancini.
- Cooked arancini can be frozen and defrosted. You can also freeze uncooked arancini and cook them using your preferred method. Keep in mind that they will need to be finished in the oven to ensure the innards are sufficiently thawed.
No Comments