
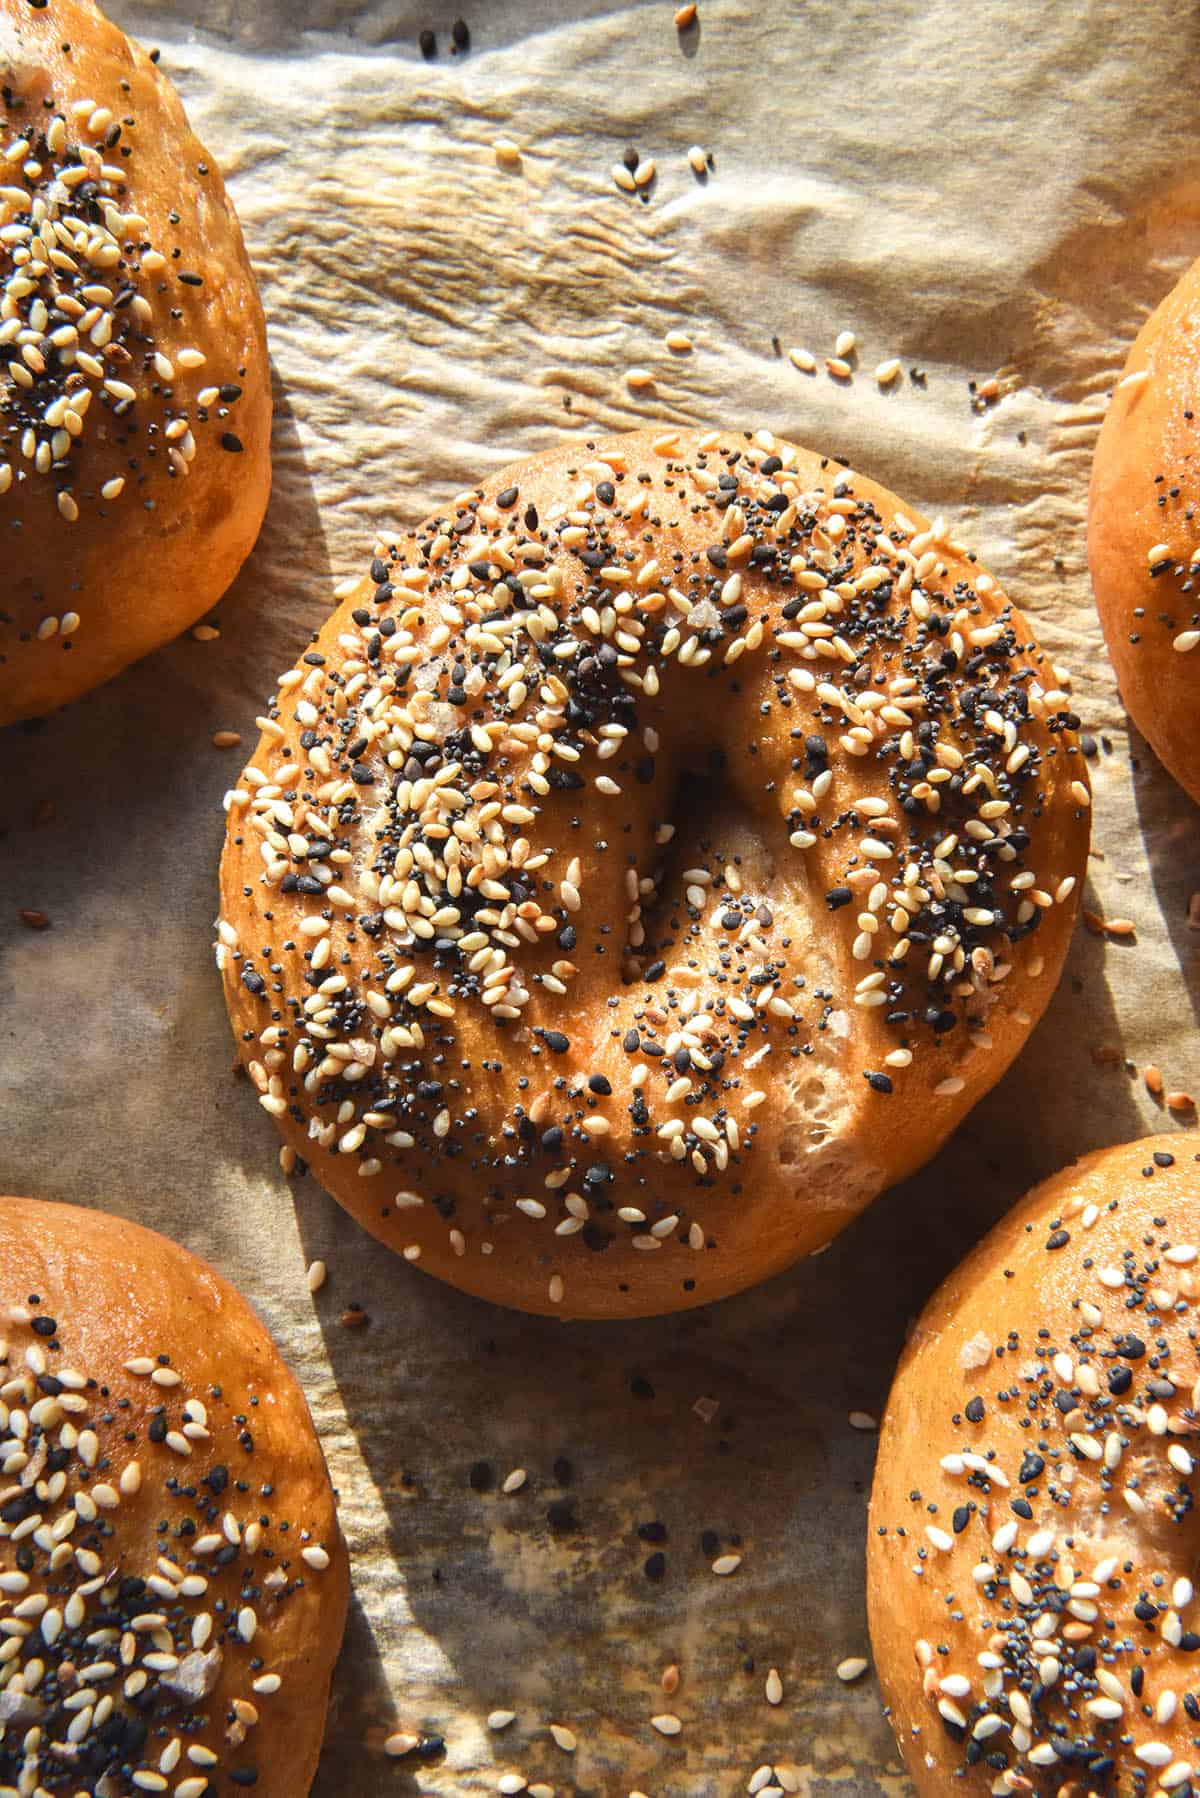
If these gluten free vegan bagels look familiar, they are. A very similar recipe to my gluten free bagels, sans the egg wash for obvious reasons. I’m posting this today because I think the vegan version deserves it’s own space (and because I’ve just discovered keyword research lol).
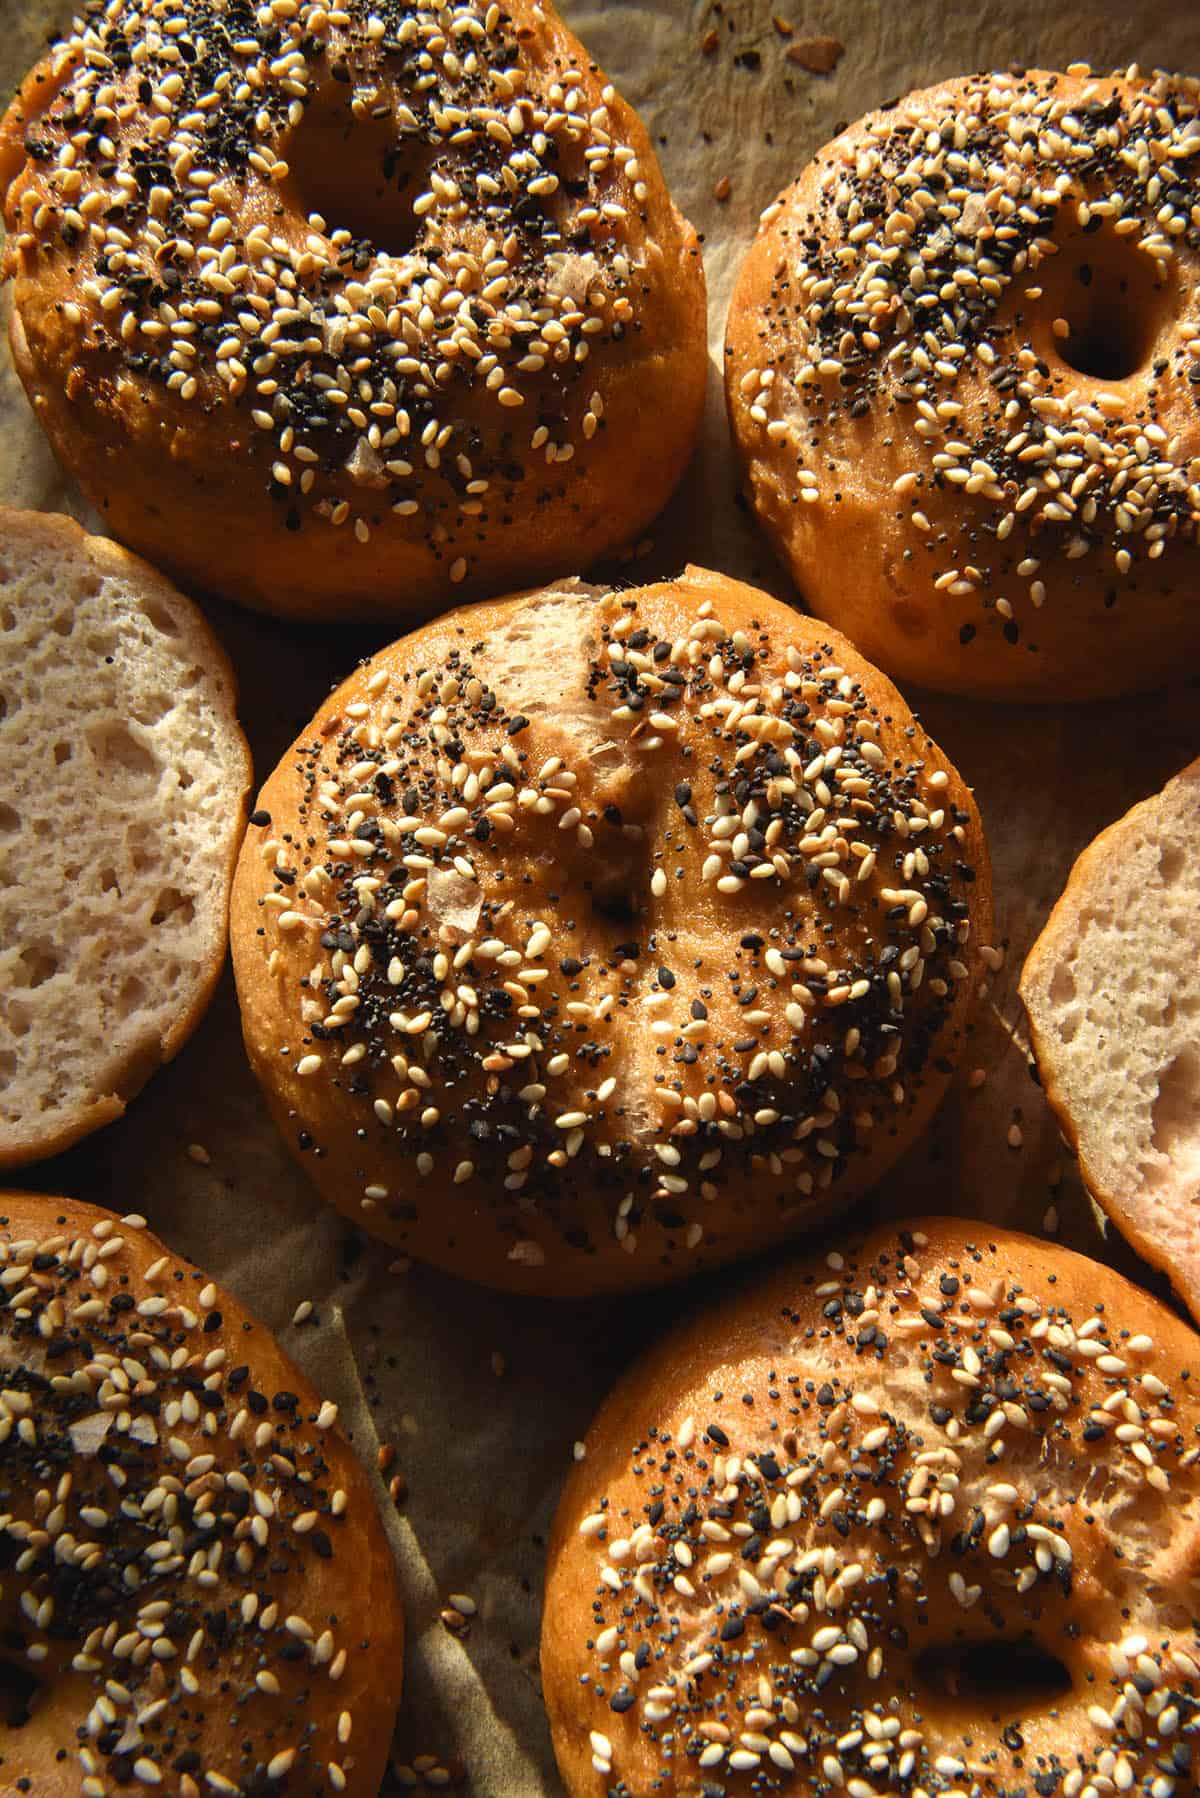
Gluten free vegan bagels without xanthan gum
These bagels are nut free, xanthan gum free, egg/dairy free and vegan. They contain no corn flour (another common allergen) and can be made sesame free if you use something else for the topping. I love using tajin, but poppyseeds are another obvious choice.
The bagels use a simple method of scalding the flour, forming the dough and boiling the bagels before baking. It sounds like a bit of work, but as we’ll get into below, the process is simple and not much more laborious than regular bagels. In fact, without the stretches an folds, I’d say they’re even LESS labour intensive.
What is a scald and what does it do for my gluten free vegan bagels?
Scalding flour is the process pouring boiling water over flour. It is used in all sorts of baking, but is particularly helpful in gluten free baking. Why? For a number of reasons.
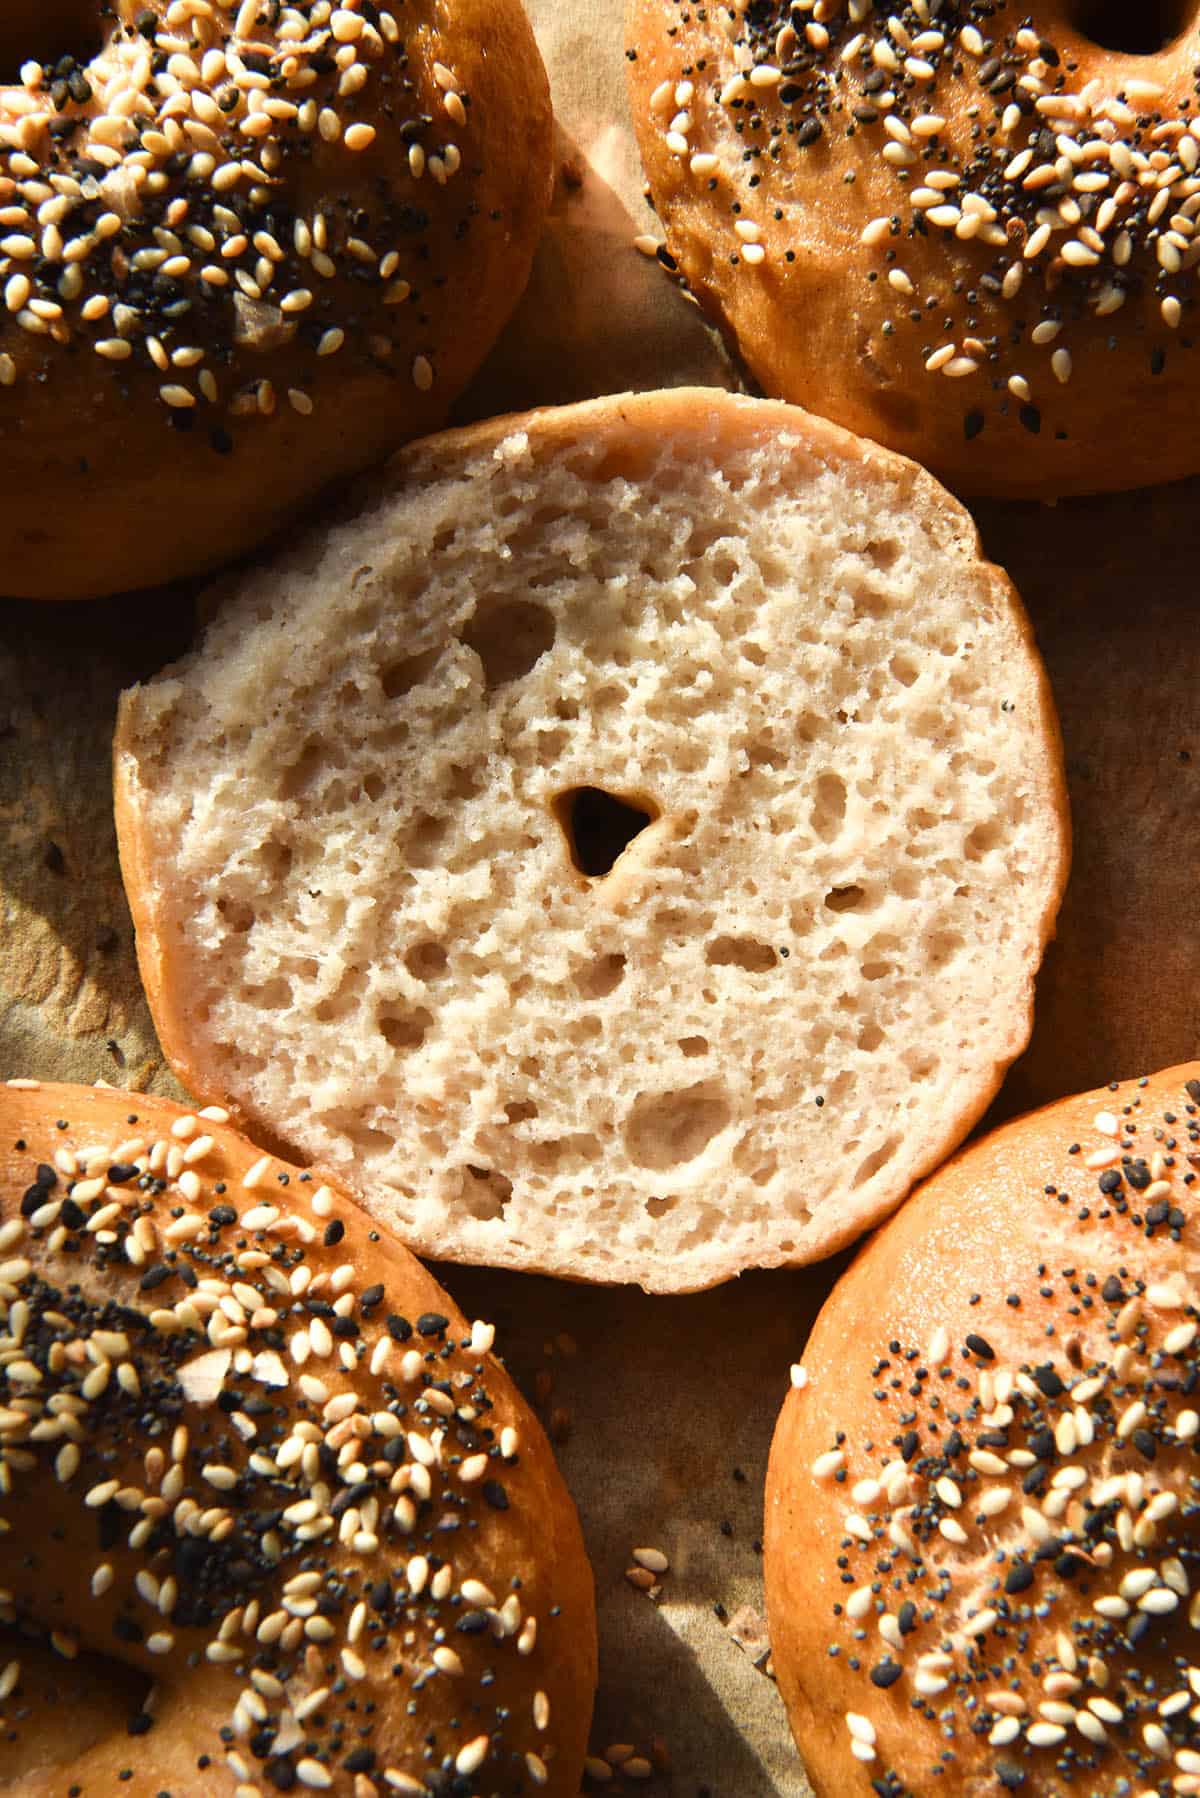
Firstly, scalding flour gelatinise the starches in the grain. This creates a stretchier, more elastic dough that is more pliable and smooth. Given that gluten free flours often have no elasticity of their own, this is obviously a huge help.
Secondly, scalding flour allows it to absorb more liquid. This is also important because it means that you can add enough liquid to the bagel dough to make them moist and chewy, but the dough remains workable. Because we need to shape bagels, it is hugely beneficial to have a dough that is moist but still solid enough to shape.
Finally, scalding the flour gives the yeast an excellent food source, and thus a head start. This means that we can boil the bagels straight after shaping, if we so desire. The bagels will still rise and become puffy yet still chewy.
Ingredient notes for gluten free vegan bagels
The scald is not optional in this recipe. It is an integral part of the recipe.
I use psyllium husk powder, not the whole flakes, for this recipe. Please use powder for best results – I grind my own from the flakes. The powder is more absorbent than the flakes, so it is not a direct substitution.
There is always confusion around yeast (I’m still confused). In Australia, the most common form of yeast is instant dried yeast which is sold in 7.5g sachets. It would seem that yeast can be sold in cannisters elsewhere (and here, too). Simply use 7.5g of yeast. If you are using sachets and they are 7g and opposed to 7.5g, just use one. .5g less yeast will not ruin your bagels.
I have not tested any flour combinations other than the one in the recipe card. If you’d like to do some experimenting, you are welcome to!
The sugar is added for flavour, browning and as food for the yeast. It’s a modest amount.
As noted above, you can add any flavour into the bagel dough that you fancy.
Any plain flavoured oil works here. The oil provides moisture and browning, extends the shelf life, and makes for a chewier crumb.
Important notes for your gluten free vegan bagels
Hydration is highly dependent on the flours you’re using. As we all know, this varies greatly from brand to brand, country to country. If your dough is excessively dry, add more water! Your flours are very likely different to mine. If your dough is getting to the stage of becoming a batter, stop adding water! You need to use your intuition in baking.
Ensuring your yeast is alive and fresh is critical. I don’t bloom my yeast in this recipe – it’s quicker and easier. That said, I develop recipes professionally, so I don’t have old sachets of yeast sitting at the back of my cupboard. If your yeast is a little dusty or you like the security of blooming yeast, use roughly 1/4 cup (60ml) of warm water and a teaspoon of sugar to do so. Subtract this liquid amount out of the quantity added to the dough. Add the bloomed yeast liquid as you add the liquid.
Proofing options for your gluten free bagels
There are a million and one proofing options for these bagels, depending on how light and airy you prefer them and how much time you have. The scald creates an easy food source for the yeast, so the dough proofs nicely every which way.
- Simply allow the dough to proof for 30 minutes in the fridge while it chills. It will continue to proof as you shape, boil and bake the bagels. This bagels will be the least fluffy inside.
- Allow the dough to proof for another 30 minutes in the fridge or on the bench after chilling.
- Shape the bagels, cover the surfaces with water (it helps stop cracking as the dough expands) and cover thoroughly (I use a floppy light plastic bag with a glass in the middle so it doesn’t touch them). Proof for one hour, then boil and bake. These bagels will be the most fluffy inside.
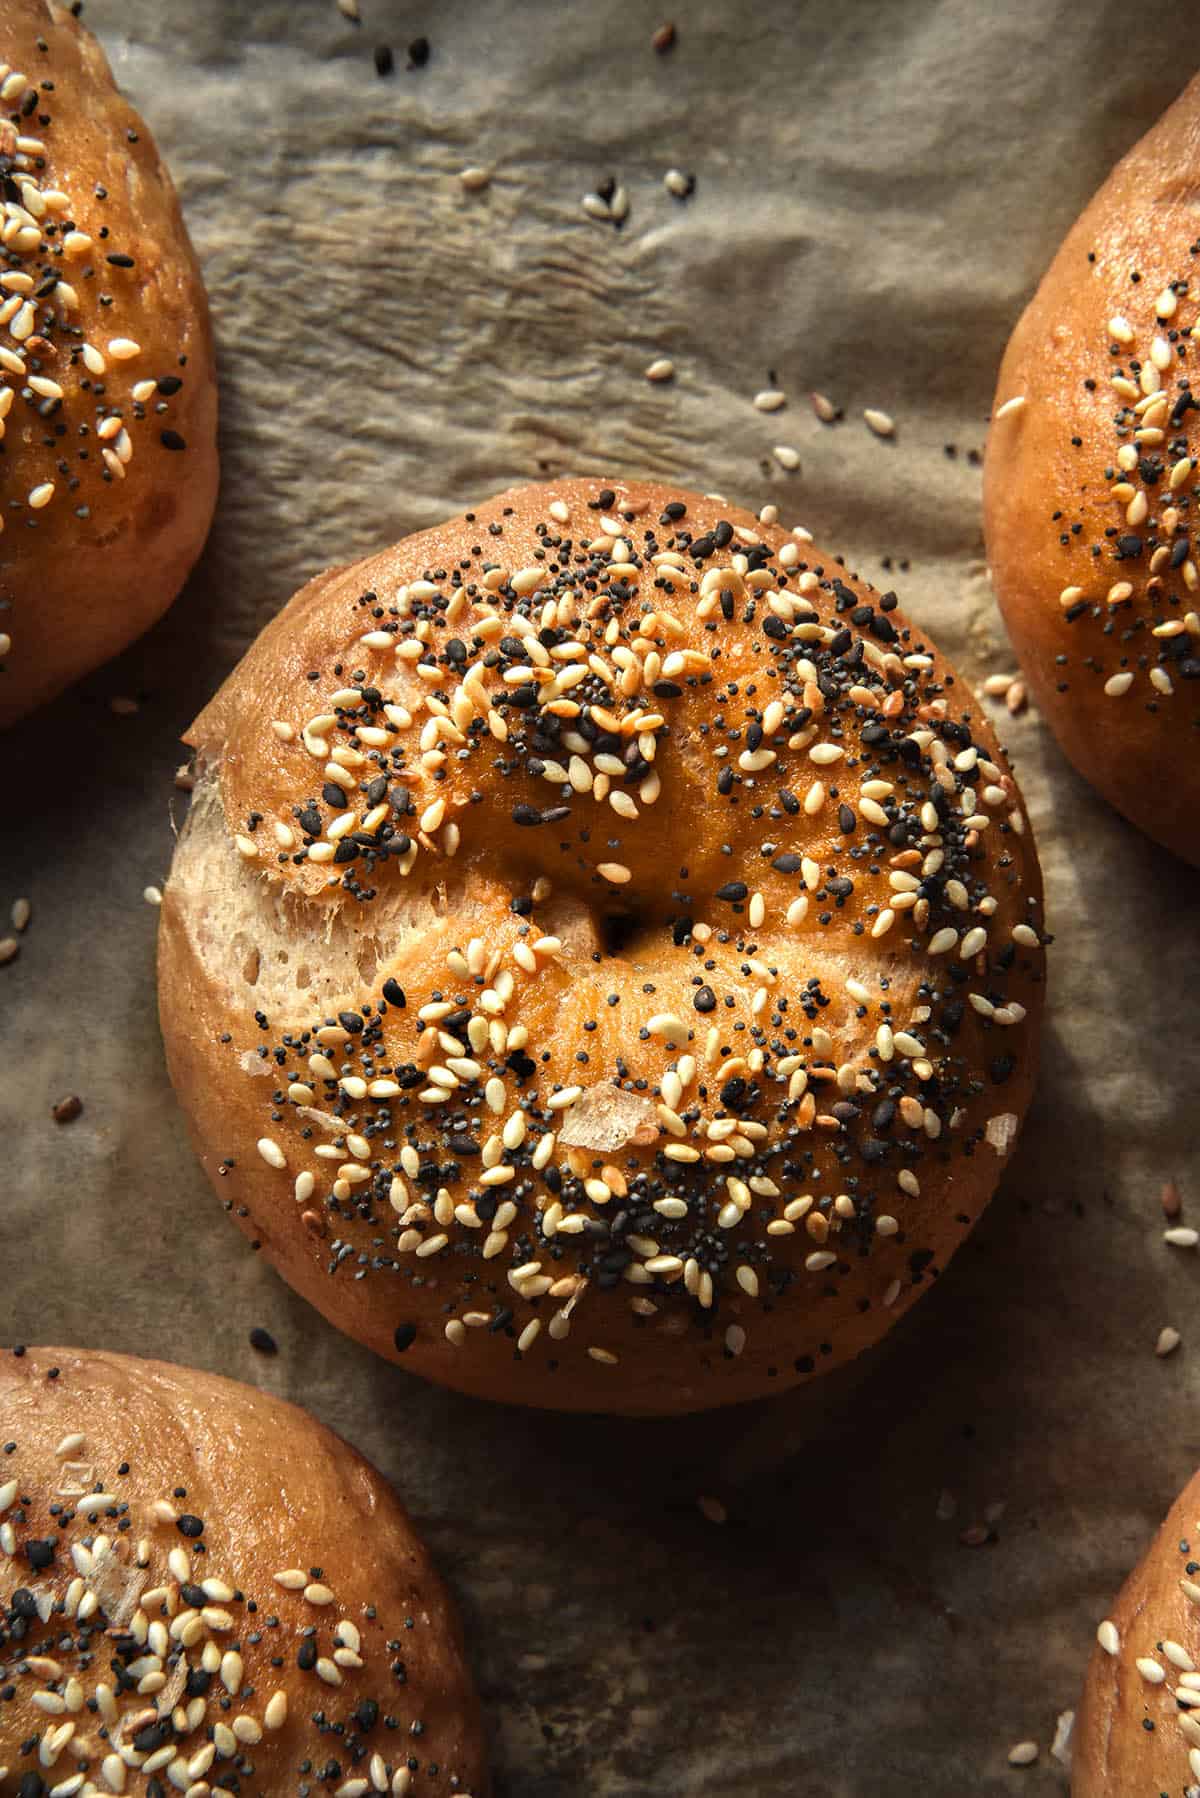
Tips for ensuring your vegan bagels brown in the oven
Because these bagels don’t contain any butter or milk, nor are they brushed with egg wash, they can have a harder time browning. So, here are some tips to ensure your bagels get a lovely golden brown colour.
- Use Molasses for the water bath and be generous with it. This gives your bagels a great head start in the browning department and it also gives them a flavour boost.
- You can also add a pinch of baking soda to the water, but make sure the pot has room for a temporary bubble up of ingredients.
- Use a sweetener in your vegan egg wash. Personally, I always use a 2:1 ratio of plant milk to maple syrup. I daresay you could also use rice malt syrup or agave, too. If you are really in a crunch, you could try dissolving a teaspoon or so of sugar in the milk before you brush it into the bagels. Sugar browns in the oven.
- Finally, crank the heat. A hot oven will help brown your bagels and give them a chewy, golden crust.

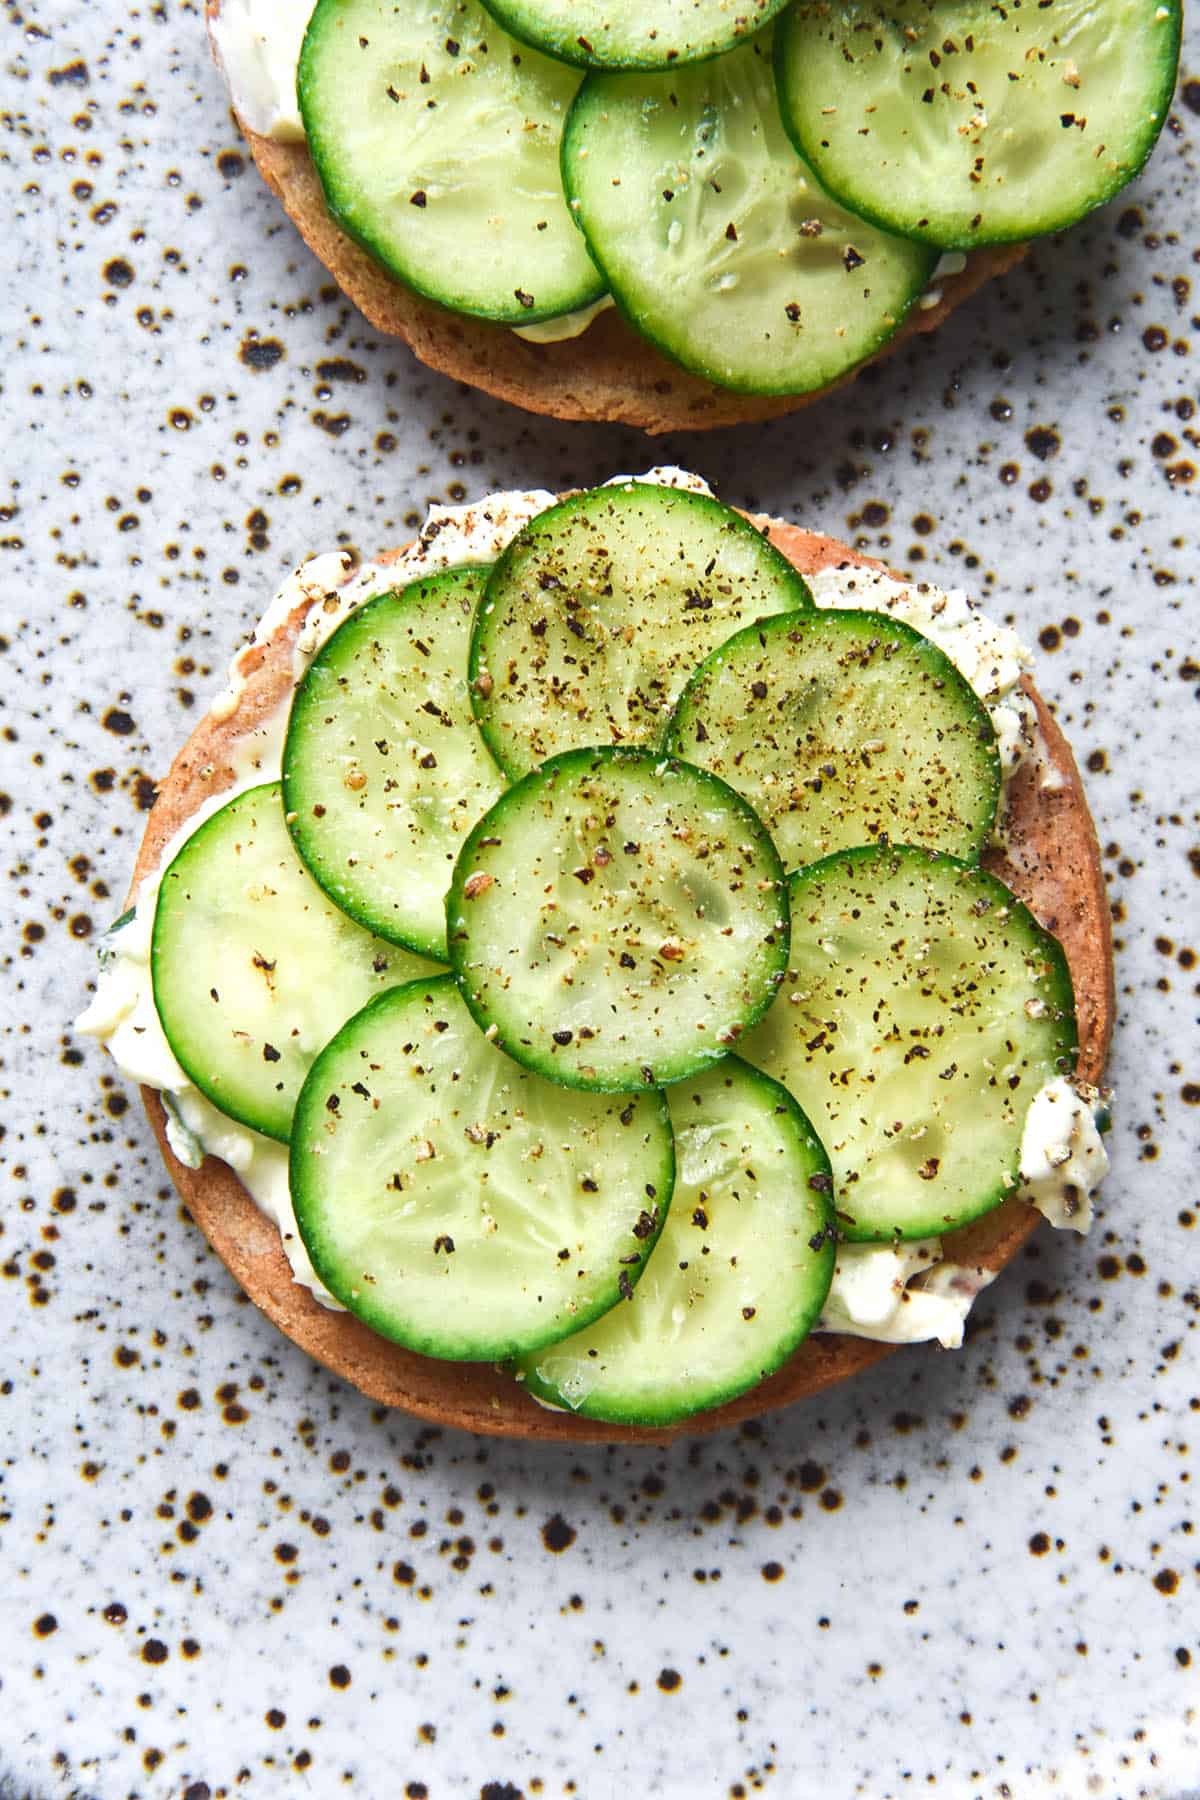
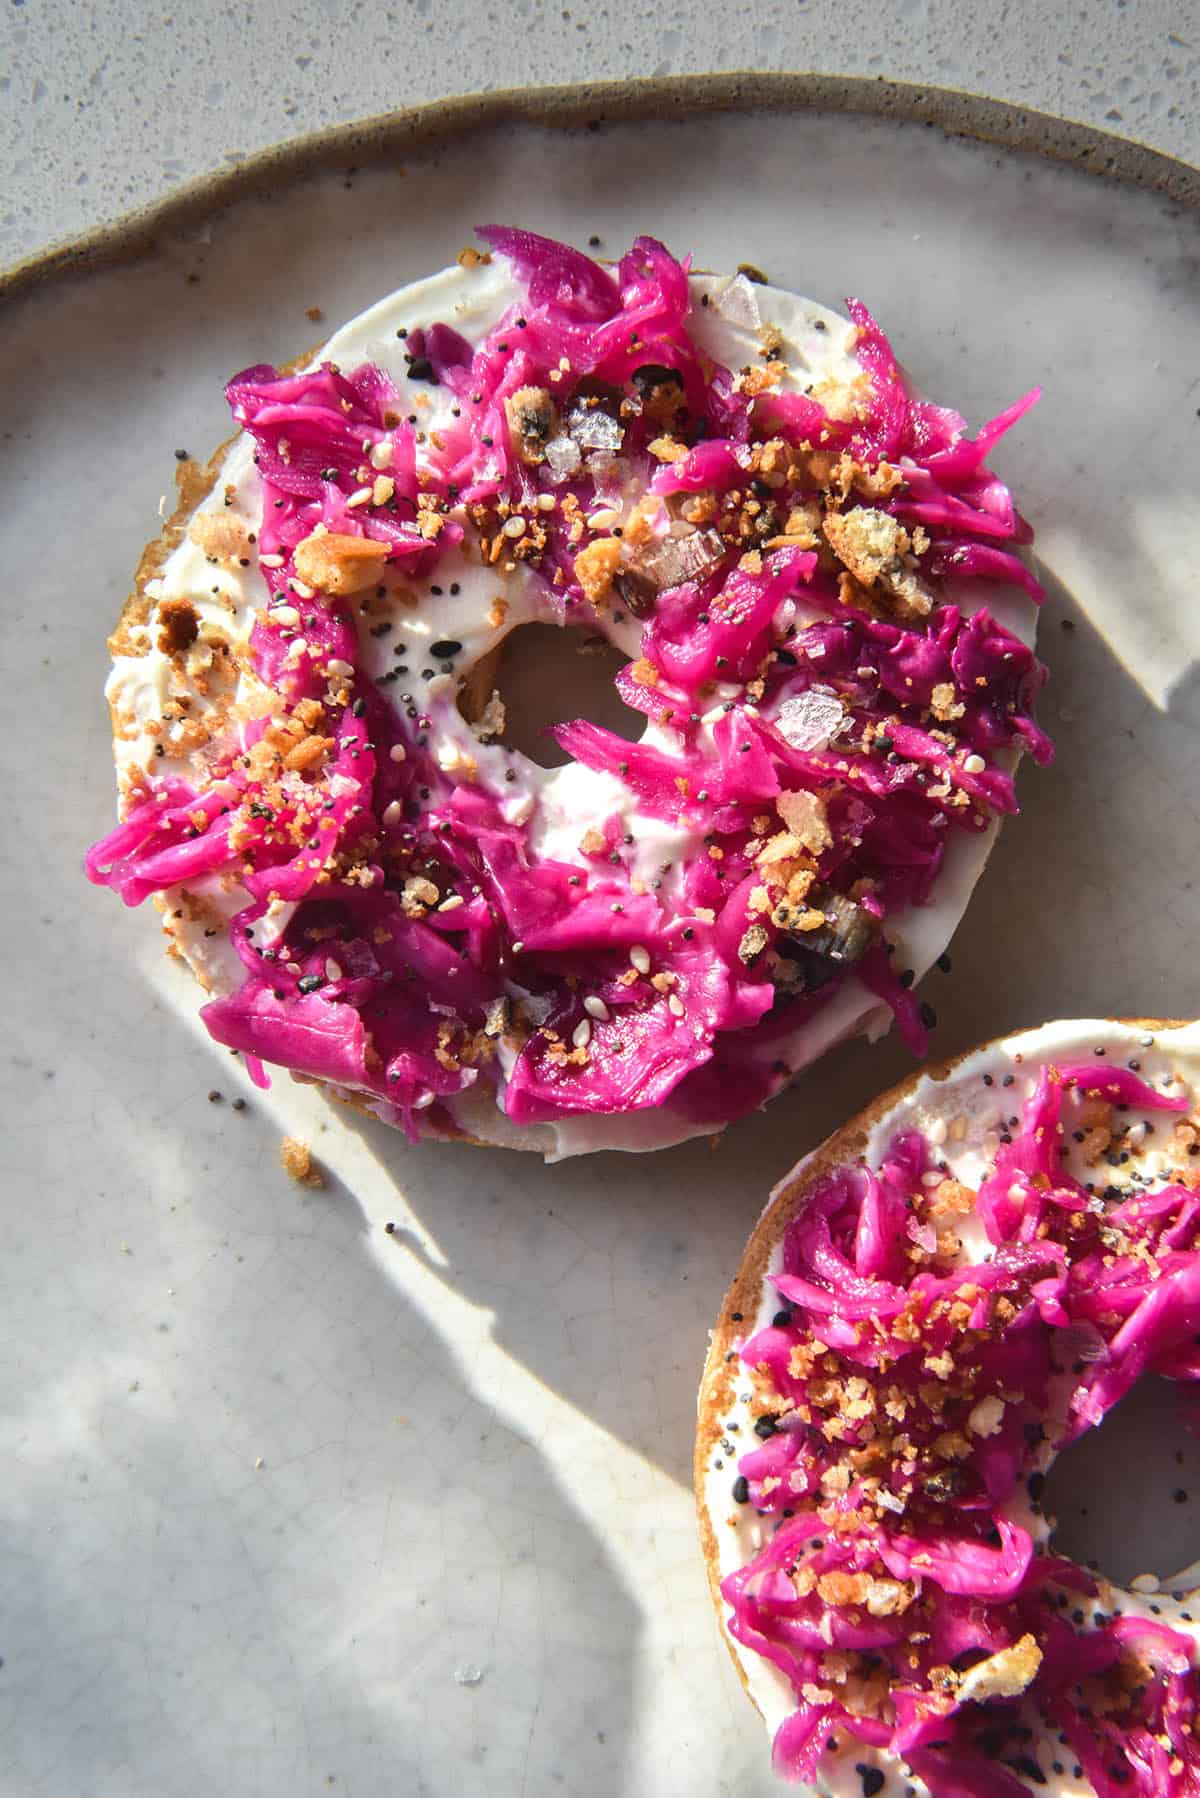
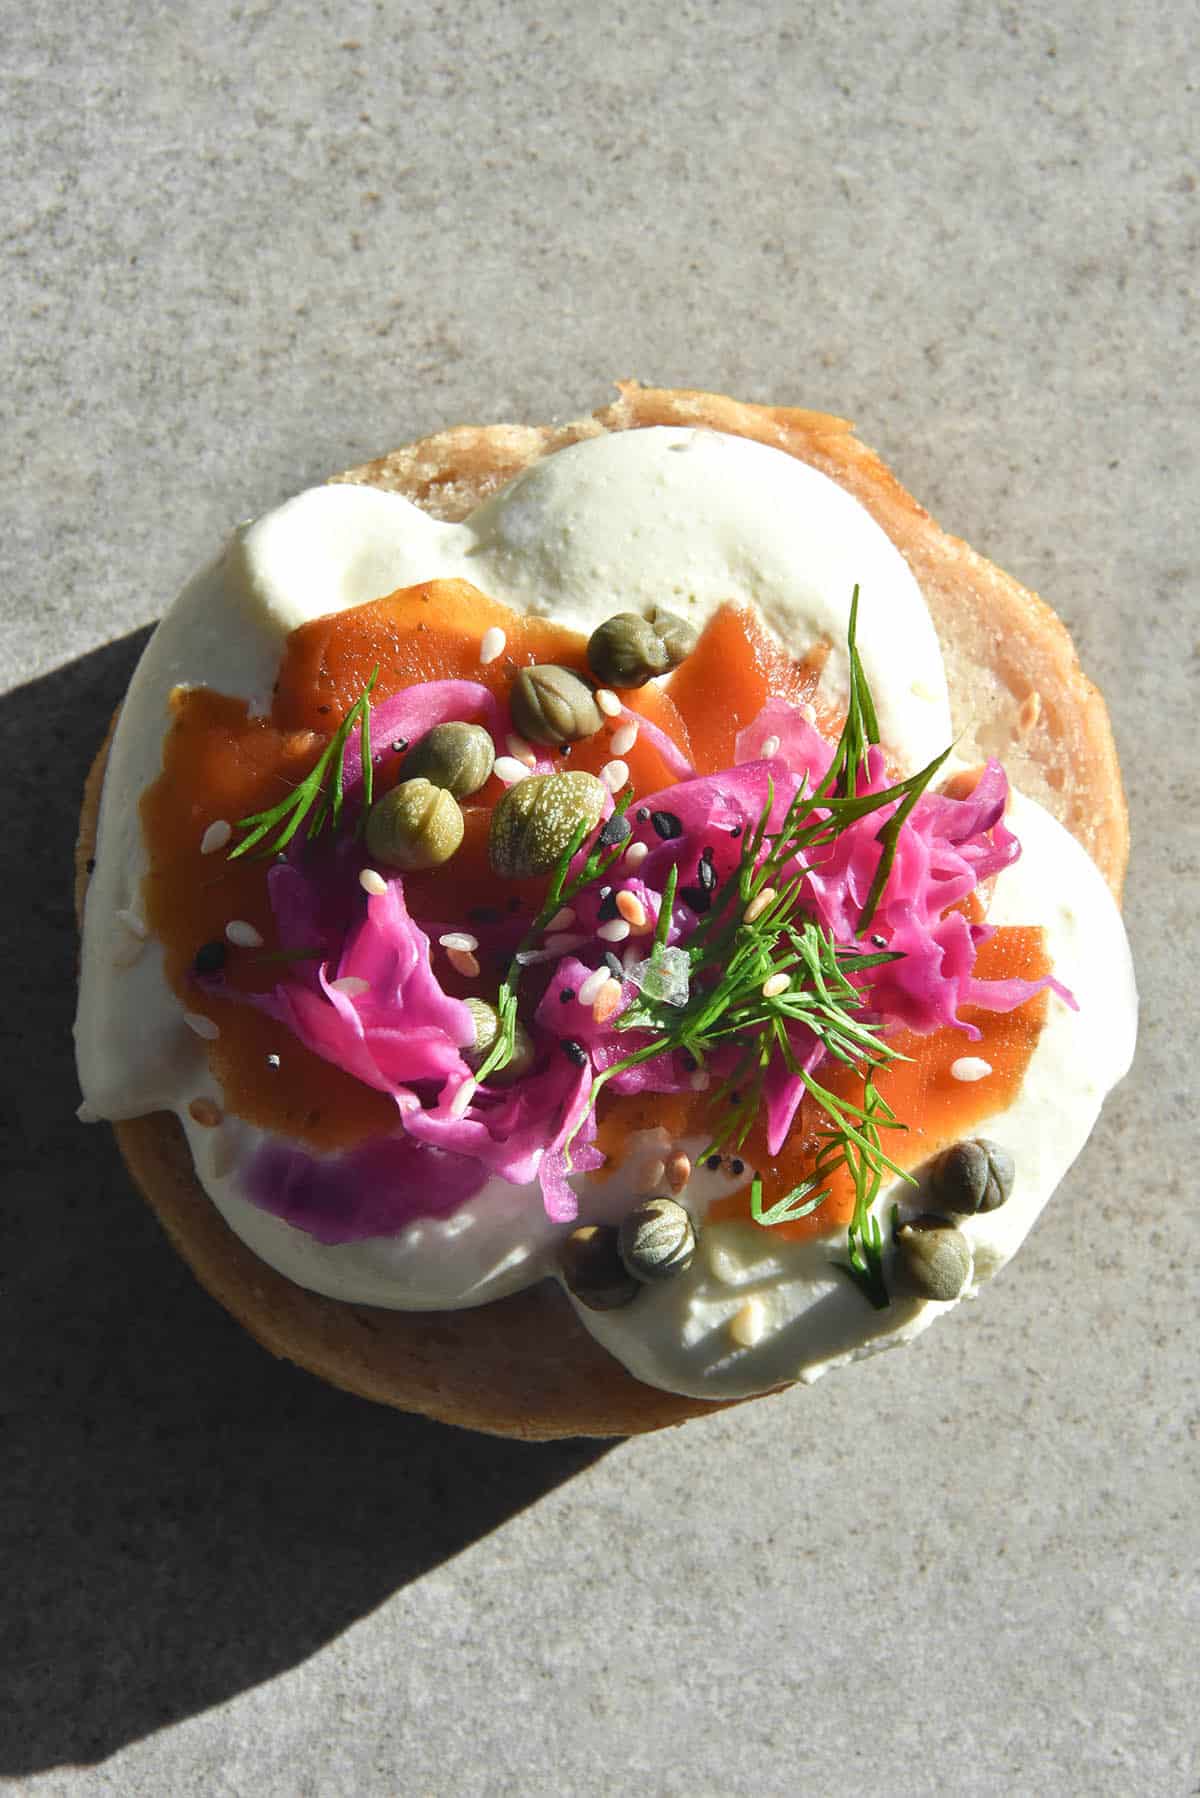
What to serve with your bagels
- Top them with my low FODMAP everything bagel seasoning
- Make some vegan, low FODMAP carrot lox
- Use up red cabbage with my low FODMAP ‘pickled red onion’
- A good quality vegan cream cheese
- Anything vegan that you like in your bagels!
More gluten free vegan bread recipes without xanthan gum
- Gluten free buckwheat bread
- Gluten free focaccia
- White bread sourdough (gluten free)
- Everyday seeded gluten free loaf from Intolerance Friendly Kitchen
- 100% buckwheat flour bagels from my buckwheat e-book
Gluten free vegan bagels
Ingredients
For the bagels:
- 220 g (1 1/2 cups)* white rice flour
- 80 g (1/2 cup)* sorghum flour
- 150-165 g boiling water
- 120 g (1 cup)* tapioca flour
- 15 g psyllium husk powder
- 7.5 g (1 sachet) instant yeast
- 1 – 1 1/2 teaspoons fine salt to your taste
- 10g (2 teaspoons) sugar
- 60ml (1/4 cup)* vegetable or plain oil
- 250-310 ml (1 – 1 1/4 cups)* warm water
To finish:
- 1 tablespoon molasses for water bath you can use whatever sort of water bath you like
- Salt for boiling water
- Vegan egg wash of choice see notes
- Everything bagel seasoning or your topping of choice see body of post or notes section for a link to a FODMAP friendly everything bagel recipe
Instructions
- Weigh the sorghum and rice flour in a medium sized mixing bowl and stir to combine. Measure 100g of that flour into another small bowl and set aside. This small bowl will form our scald.
- Pour 150-165g of boiling water evenly over the flour in the smaller bowl to make the scald. Have a whisk at the ready and vigorously whisk until a paste-like dough forms. It shouldn’t take more than 5-10 seconds. Set aside to cool a little.
- Add the tapioca flour, psyllium husk powder, yeast, salt and sugar to the larger, original bowl of flour. Whisk and set aside.
- Pour the contents of both bowls into your kitchen mixer with the paddle attachment.
- Process the dough on a low speed for 2-3 minutes until the scald has broken up completely in the dough. Drizzle in the oil, followed by the water, until a soft and pliable but not completely wet dough has formed. The higher hydration the more open the crumb, but it can come at the expense of a gummy bagel. Add the water by sight and add the lesser amount if it’s your first time baking these bagels.
- Cover the dough and place into the fridge for 30 minutes to firm up and proof a little. Read the proofing notes section and choose the style of proofing you’d prefer. For the recipe card, we’re assuming the bagels are not being proofed after shaping.
- While you wait, thoroughly preheat the oven. I like to preheat mine at 220C/430F to ensure it is at the right temperature for good oven spring.
- Fill a medium pot 3/4 of the way with water and add the molasses and salt. Set it over a medium heat and bring to a boil.
- Take the dough out of the fridge and divide it into six or eight balls.
- Depending on how hydrated the dough is, you may need to lightly flour the bench (I use tapioca flour) or you may not.
- To form bagels, you can either roll out each piece of dough into a log and then brings the ends firmly together (use water on the ends to ensure they seal together) or you can form bagel sized disks of dough and use an oiled finger to create the bagel hole. Visually, I prefer the first option, but the second option is a bit easier and more foolproof.
- When the water has boiled, place each bagel into the water for 30-45 seconds. Have a slotted spatula on hand to very gently encourage it off the bottom if necessary and flip each bagel about halfway through to ensure both sides are boiled. Gently shake the excess liquid off each bagel before transferring to the lined baking tray with room between each bagel.
- Once you have boiled all the bagels, brush each bagel with egg wash or an alternative and then sprinkle with your chosen topping. Place into the oven, adjust the heat to 200C/400F then bake for 25-35 minutes or until golden, puffy and firm.
- If you are using a high hydration, wait until the crumb sets to eat one or else your bagel will be gummy. Leftovers keep really well for a number of days and can be frozen (I like to slice them prior to freezing).
Notes
- This recipe makes 6 large or 8 medium bagels.
- You can use cassava flour in place of tapioca flour for a starch free option. I found that they needed a little extra water.
- Here is the link for the FODMAP friendly everything bagel seasoning mix.
- As always, the hydration is highly dependent on your flours. Brand to brand, country to country variation is huge, so you need to use your intuition.
Add the boiling water to your scald by sight. If all your flour is hydrated and has formed a paste at 150g of water, you can use 150g. If you think you need a bit more, add 165g. - Watch the main dough as you add the water. You should be able to pick the dough up in your hand (only just, if you use xanthan gum, because it gets sticky). The psyllium husk powder will absorb more liquid in the fridge but the dough shouldn’t be a batter. You will get a sense for this in time if you make more bagels.
- Things like coconut oil, aquafaba and plant milk are all good vegan egg washes. Personally, I like to using 20ml (1 Australian tablespoon – use 4 teaspoons for Canadian, US and New Zealand) mixed with 1-2 teaspoons maple syrup here. You can mix up double if you feel like you need more.
- Simply allow the dough to proof for 30 minutes in the fridge while it chills. It will continue to proof as you shape, boil and bake the bagels. This bagels will be the least fluffy inside (but still fluffy!).
- Allow the dough to proof for another 30 minutes in the fridge or on the bench after chilling.
- Shape the bagels, cover the surfaces with water (it helps stop cracking as the dough expands) and cover thoroughly (I use a floppy light plastic bag with a glass in the middle so it doesn’t touch them). Proof for one hour, then boil and bake. These bagels will be the most fluffy inside.
Hi, I was just wondering if the psyllium husk powder is really necessary, or is there is a replacement I could use?
Hi Priyanka, the psyllium husk is absolutely necessary and crucial to the recipe.
Unfortunately I haven’t tested any alternatives as I find psyllium to be the most efficient texture wise and appearance wise while still hitting all the dietaries I develop recipes around 🙂
Hi Georgia
Is there maybe a substitute for sorghum flour?
Would buckwheat flour be okay?
I haven’t tried any substitutions in this recipe unfortunately!
You’re welcome to try but I can’t say with any certainty whether the water content would need to change or how it would work.
I can’t see why it wouldn’t work on the whole, though.
Let me know how you go if you try it!
Instead of yeast(I am allergic)how would gf sourdough starter work?
I have never tried this so I can’t say unfortunately! I do intend to develop a sourdough bagel recipe but my starter died so it’s a while off sadly