
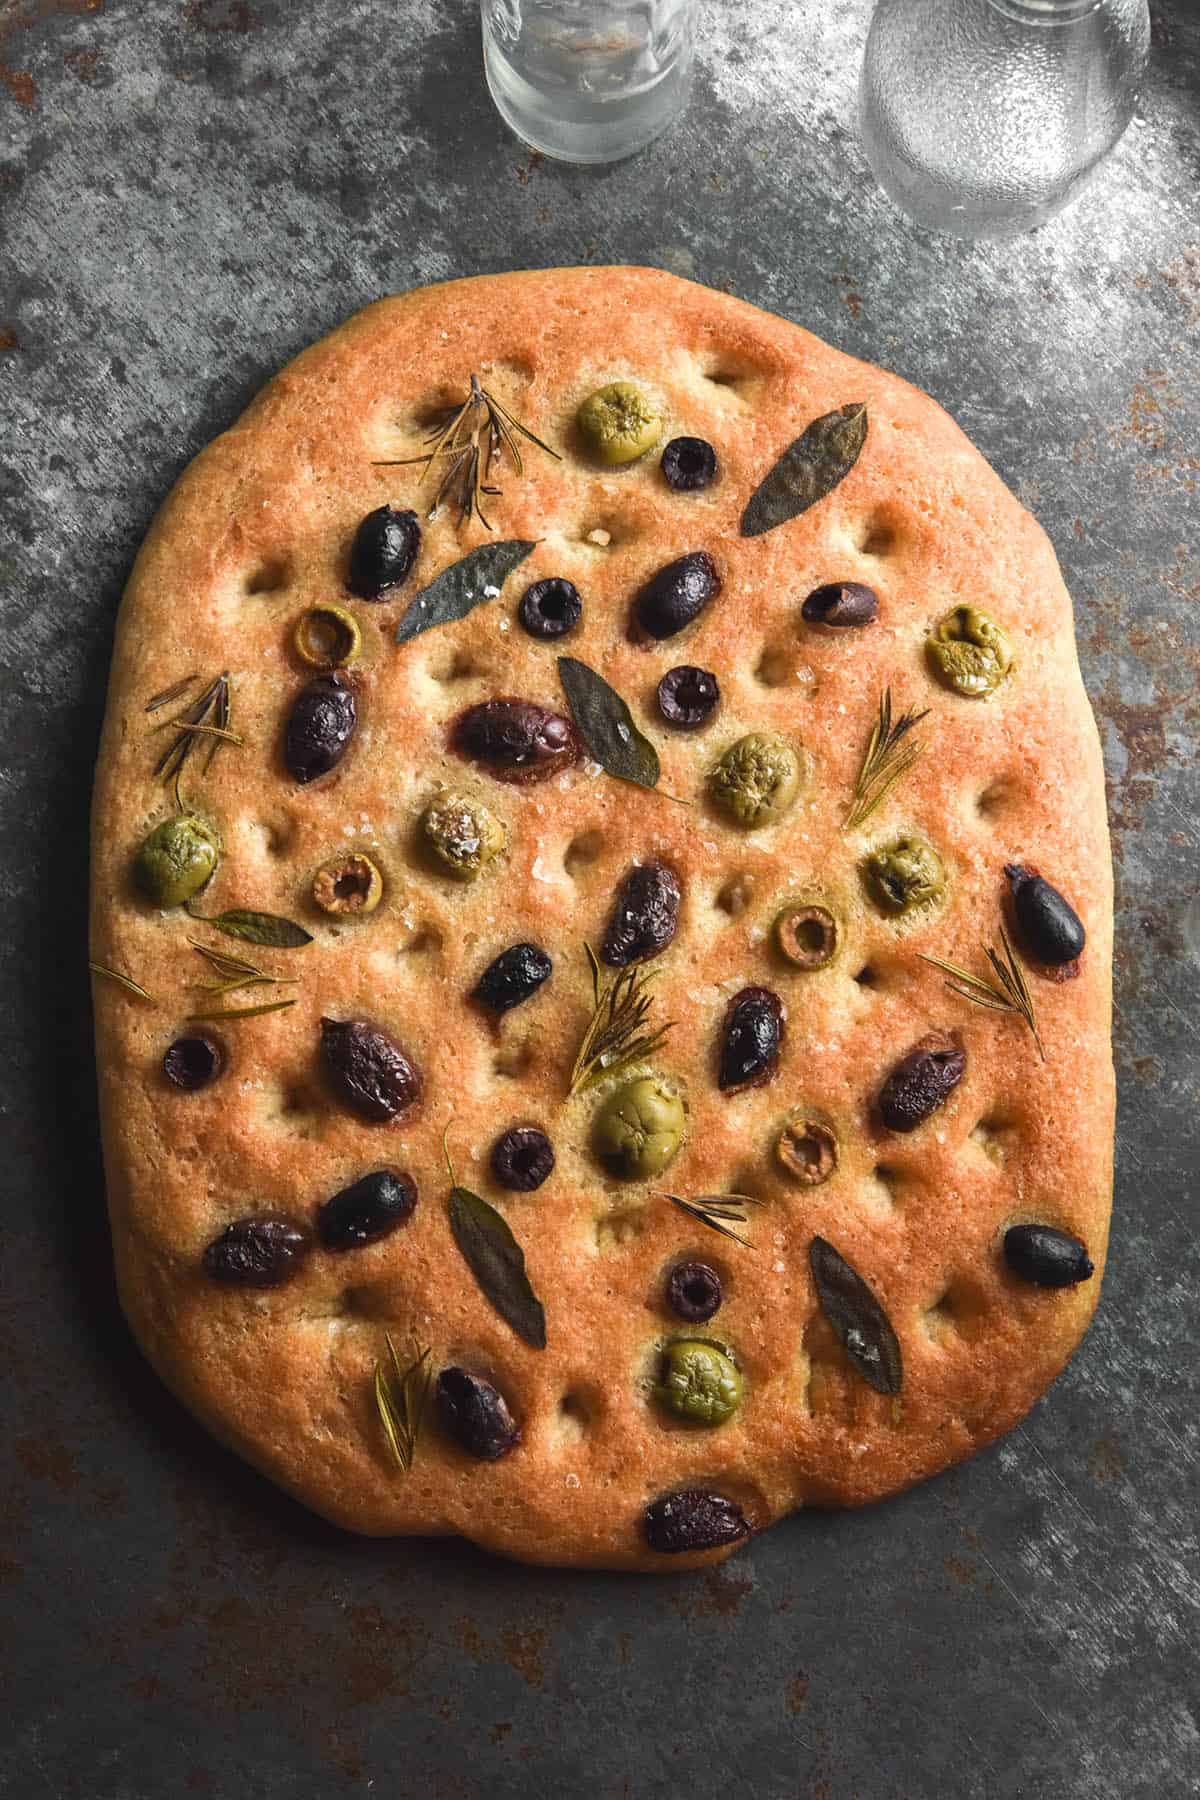
Gluten free focaccia is one of those holy grail recipes that we all strive to perfect. I love watching outrageously wobbly and bubbly focaccia dough on Instagram. While gluten free focaccia doesn’t quite get that same gorgeous wobble, it is equally delicious and also easy to make.
This gluten free focaccia is also vegan, xanthan gum free and made without nuts.
Gluten free focaccia that is vegan and xanthan gum free
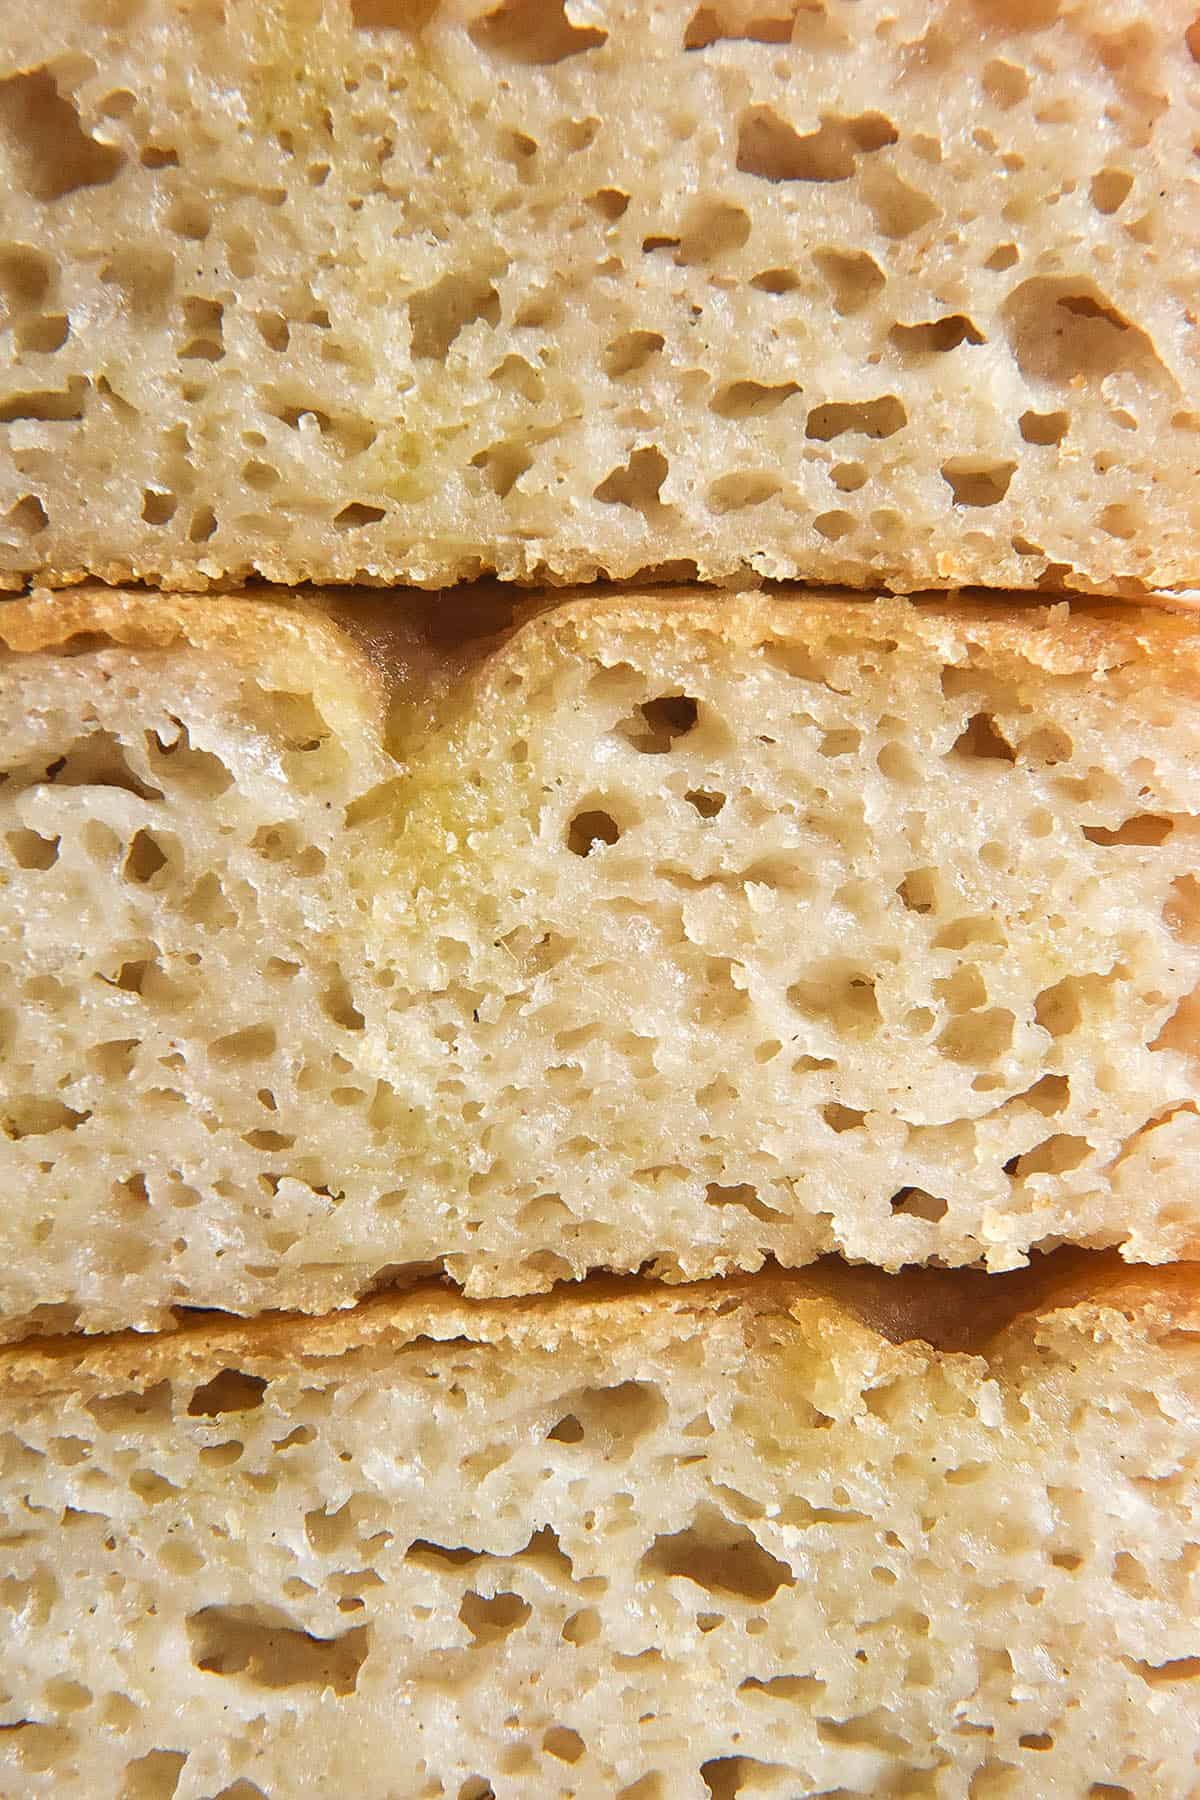
This gluten free vegan focaccia uses a simple mix of white rice flour, tapioca flour and potato starch. During the extensive testing process, I found this combination to be the absolute best for emulating that chewy yet light crumb focaccia is known for.
The focaccia is bound together by psyllium husk and an appropriate amount of water. Olive oil in the dough and on the focaccia develops flavour and aids in a crispy, golden crust. This gluten free focaccia can be topped with anything you like. It also makes a great sandwich. If you prefer a thinner style focaccia, you can bake this free-form on a baking sheet.

Notes for your gluten free focaccia
How much water you add is really dependent on how thirsty your flours are and will vary for everyone. After leaving the dough to sit for 10 minutes, you should be able to pick it up in one hand. I find that a wet dough tends to result in a dense and soggy focaccia.
Oil in and on top of the dough is critical for a browned, flavoursome crust.
I find that greasing the baking dish with both butter and oil is the only way it doesn’t stick to the dish. I don’t recommend skipping this step.
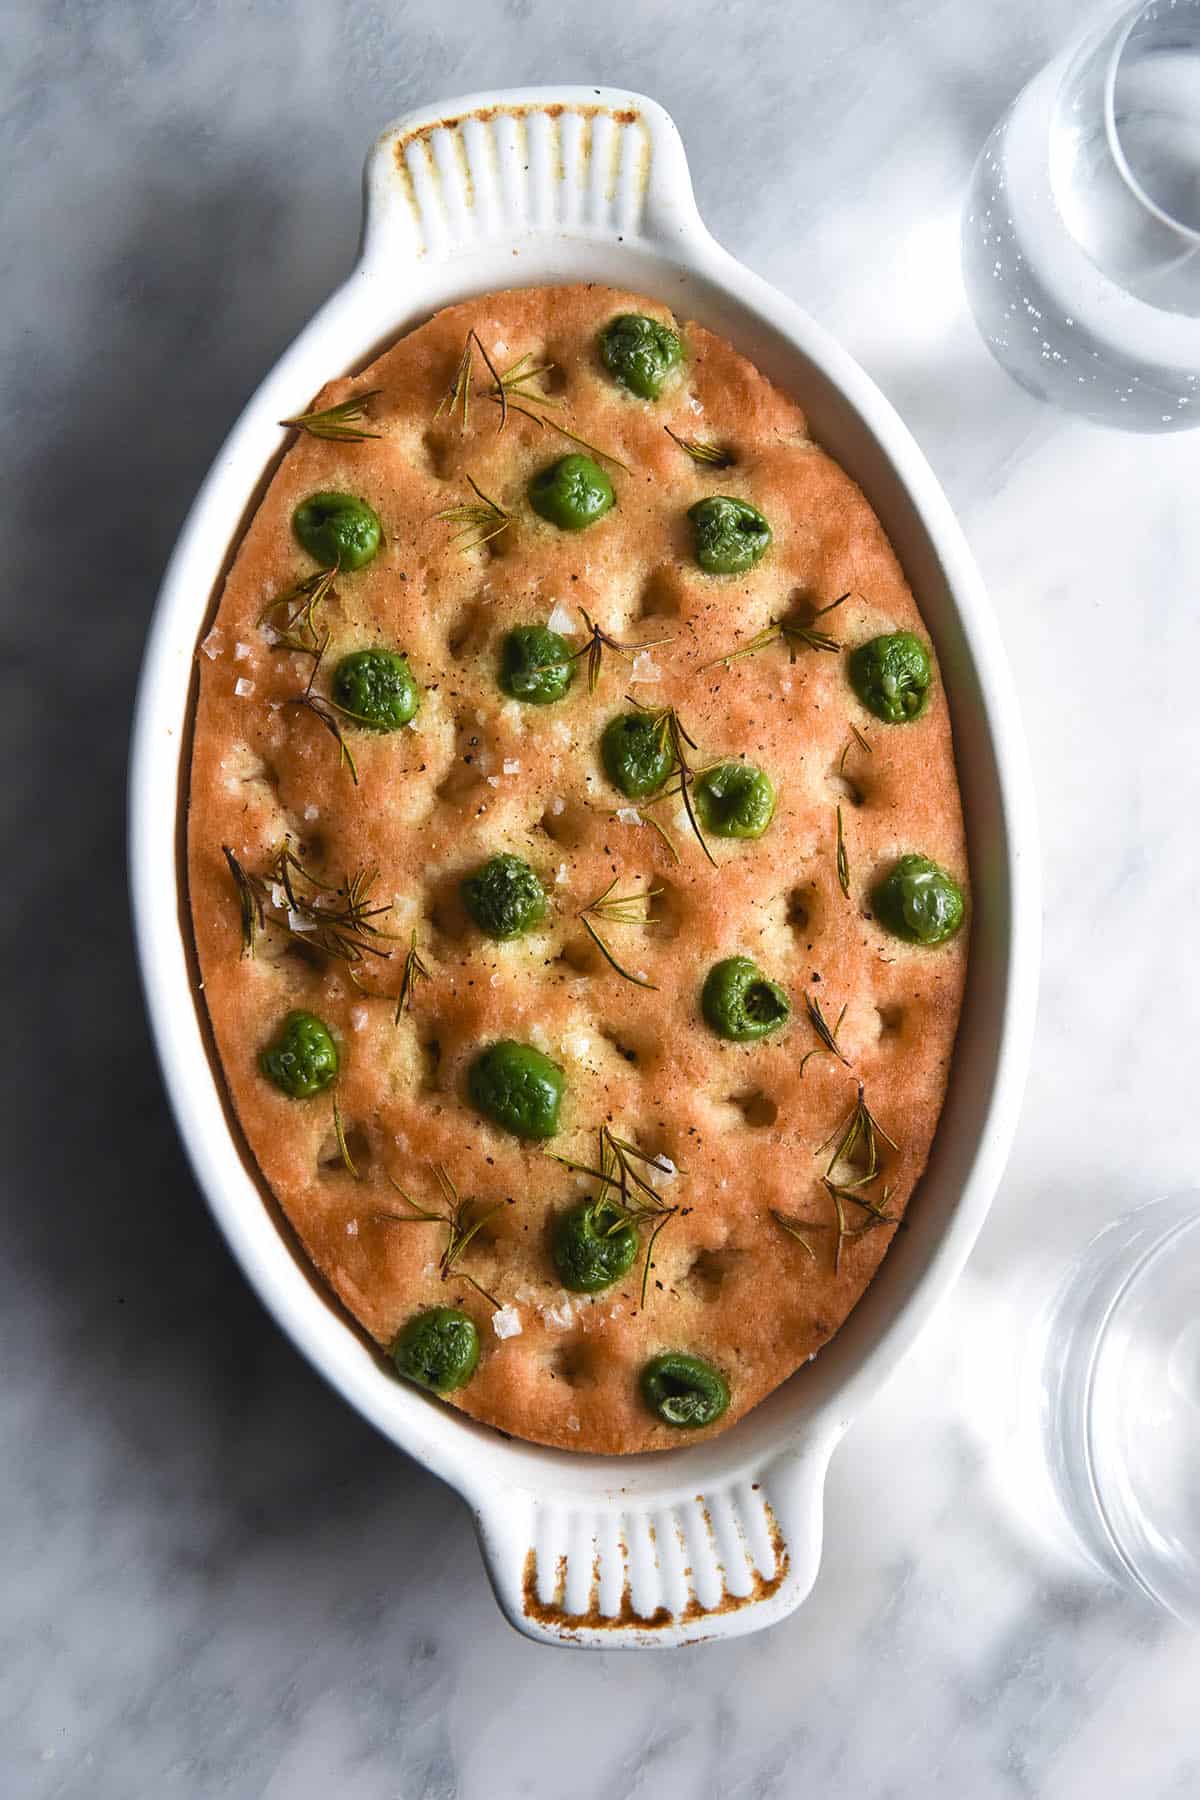
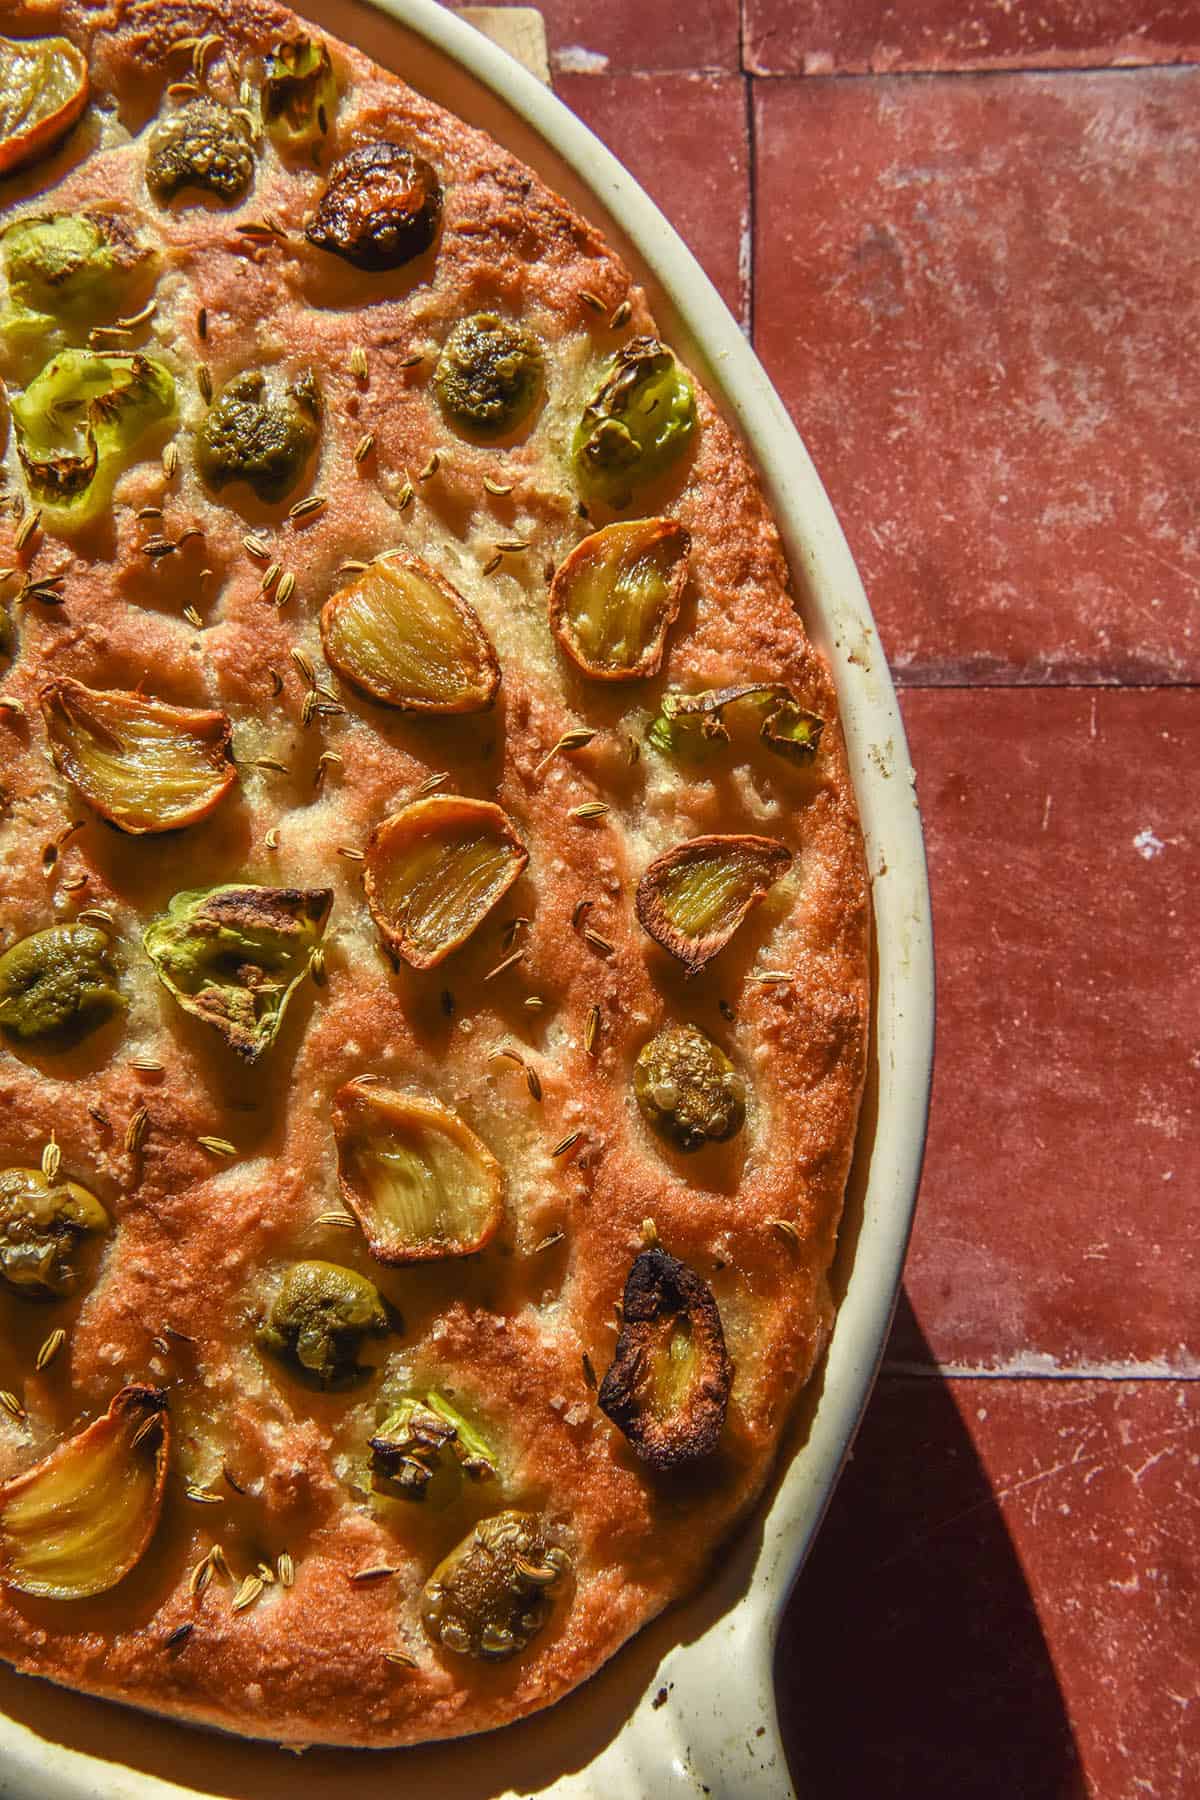
Generally, I use a 30 x 20cm oval shaped baking dish for this recipe. I find thicker dough results in a lighter crumb. You can also use a baking sheet – see ‘how to adjust the focaccia according to your preferences.’
You can proof this dough in the fridge overnight for a more developed flavour. The next day, simply assemble the focaccia and allow to proof for another 30 minutes on the bench before baking.
Tips and tricks for your gluten free focaccia
When poking the holes in your focaccia, grease the top first. This will ensure your finger doesn’t get stuck as you poke. I also like to grease my poking finger (?)
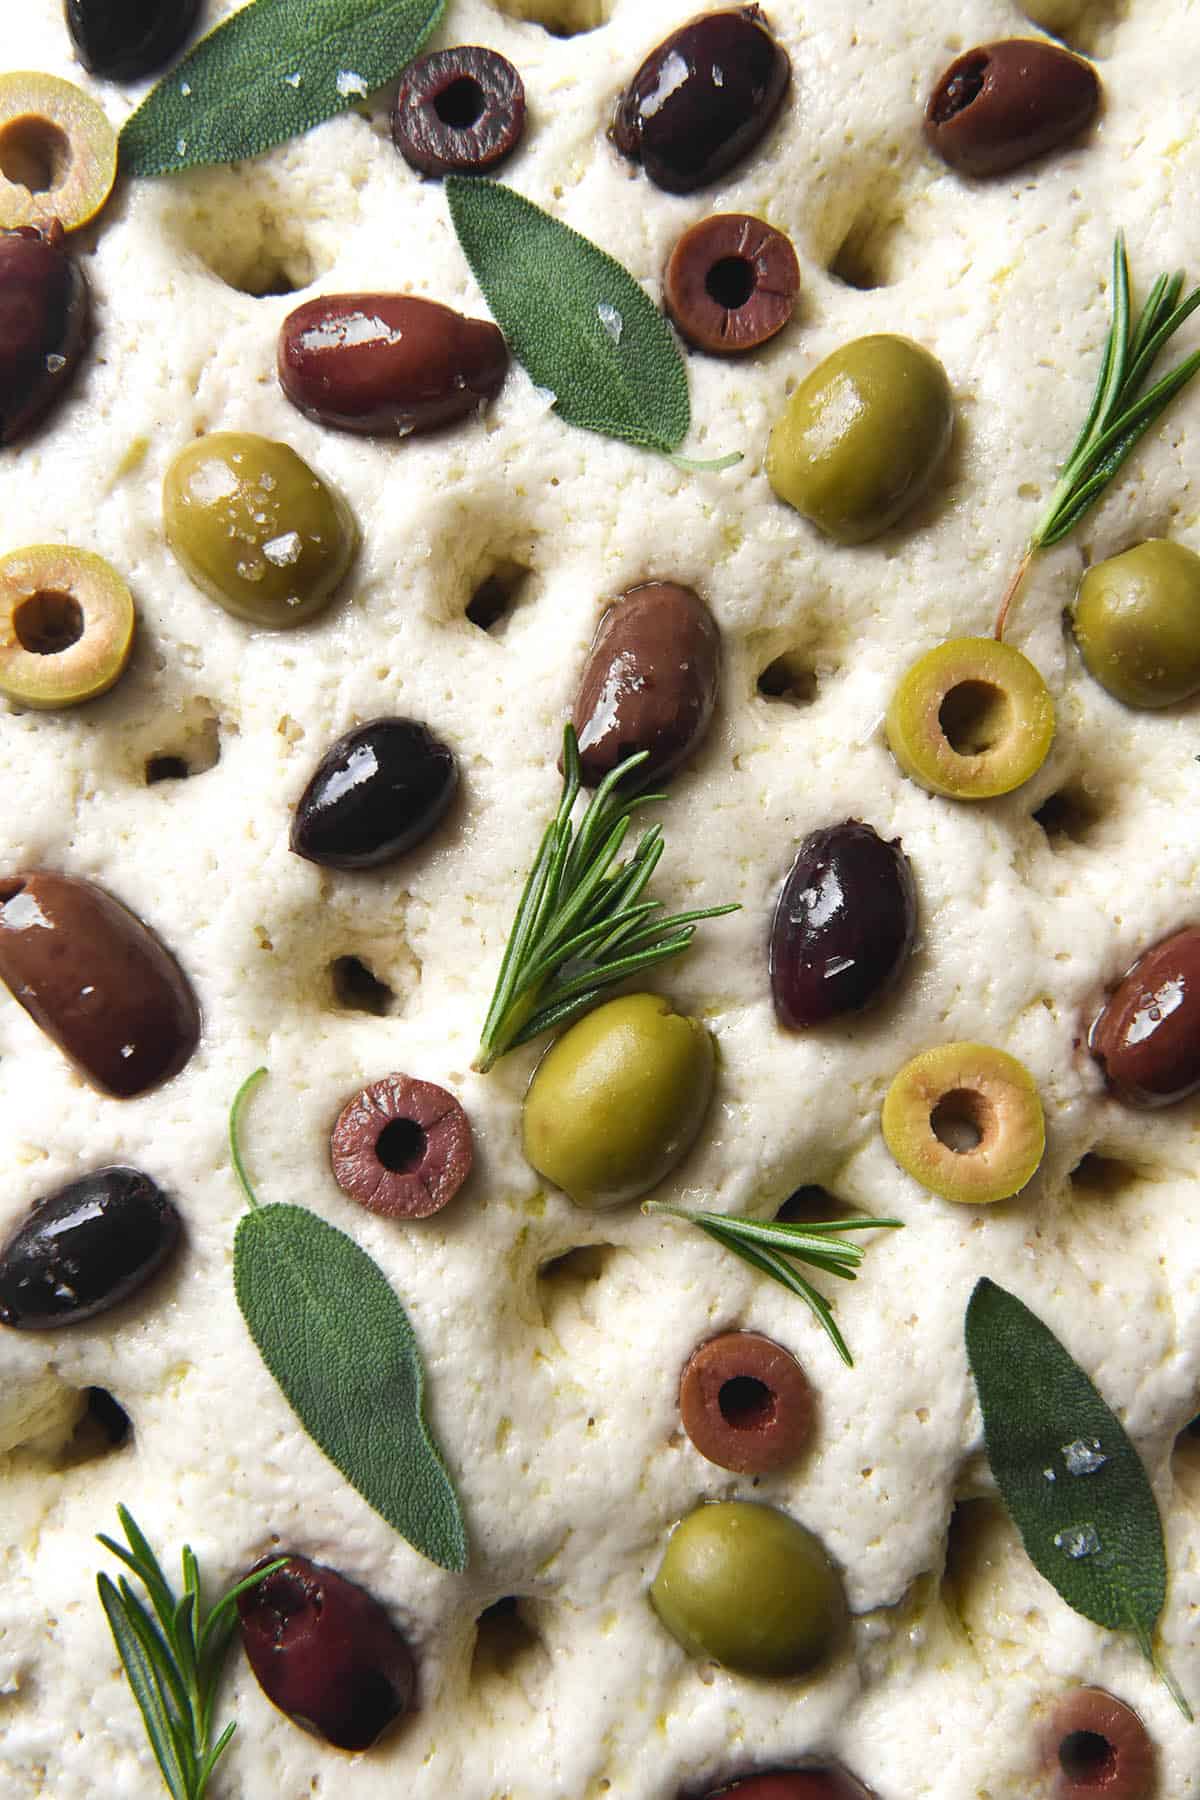
The holes in this focaccia tend to get swallowed up a little as the focaccia puffs up and bakes. I like to poke the hole, then swirl around to make it wider. This will help ensure the characteristic dimples remain after baking.
On that note: make sure you press your finger right the way down to the base of the baking dish. This will A) allow the olive oil to seep right the way through and B) ensure the dimples remain after baking.
Another dimple tip! Sorry, last one. Redo the dimples after the benchtop proof, right before baking.
A focaccia dough that has been rested in the fridge overnight develops more flavour.
Don’t panic that the dough looks quite wet to begin with. As you whisk, the psyllium husk will work to absorb excess moisture.
Substitution options
I did a lot of testing on this focaccia recipe and I settled on the combination in the recipe card for a few reason. There are a few substitution options, but not many. I will update the post if and when more options are tested.
- In testing, I found that the combination of tapioca starch and potato starch made for the best crumb. It’s light yet chewy and it browns and crisps up so nicely.
- I tried glutinous rice flour and it didn’t quite achieve the texture I wanted.
- White rice flour is bland and accessible which is why I chose it. I haven’t tested this focaccia with any other wholegrain flours thus far.
- Olive oil is traditional to focaccia. If you’re absolutely stuck without it, bland oil like vegetable will work in it’s place.
- Any sugar works here – maple, light brown, rapadura. They might change the colour of the dough a little, though. The sugar is added for flavour development, browning and as a little snack for the yeast.
- There is no substitute for psyllium husk powder. It binds the dough together, creates chewiness and absorbs sufficient water for a moist focaccia dough.
What to top your gluten free focaccia with
I mean, whatever you like! A few suggestions of ways I have made or used my focaccia:
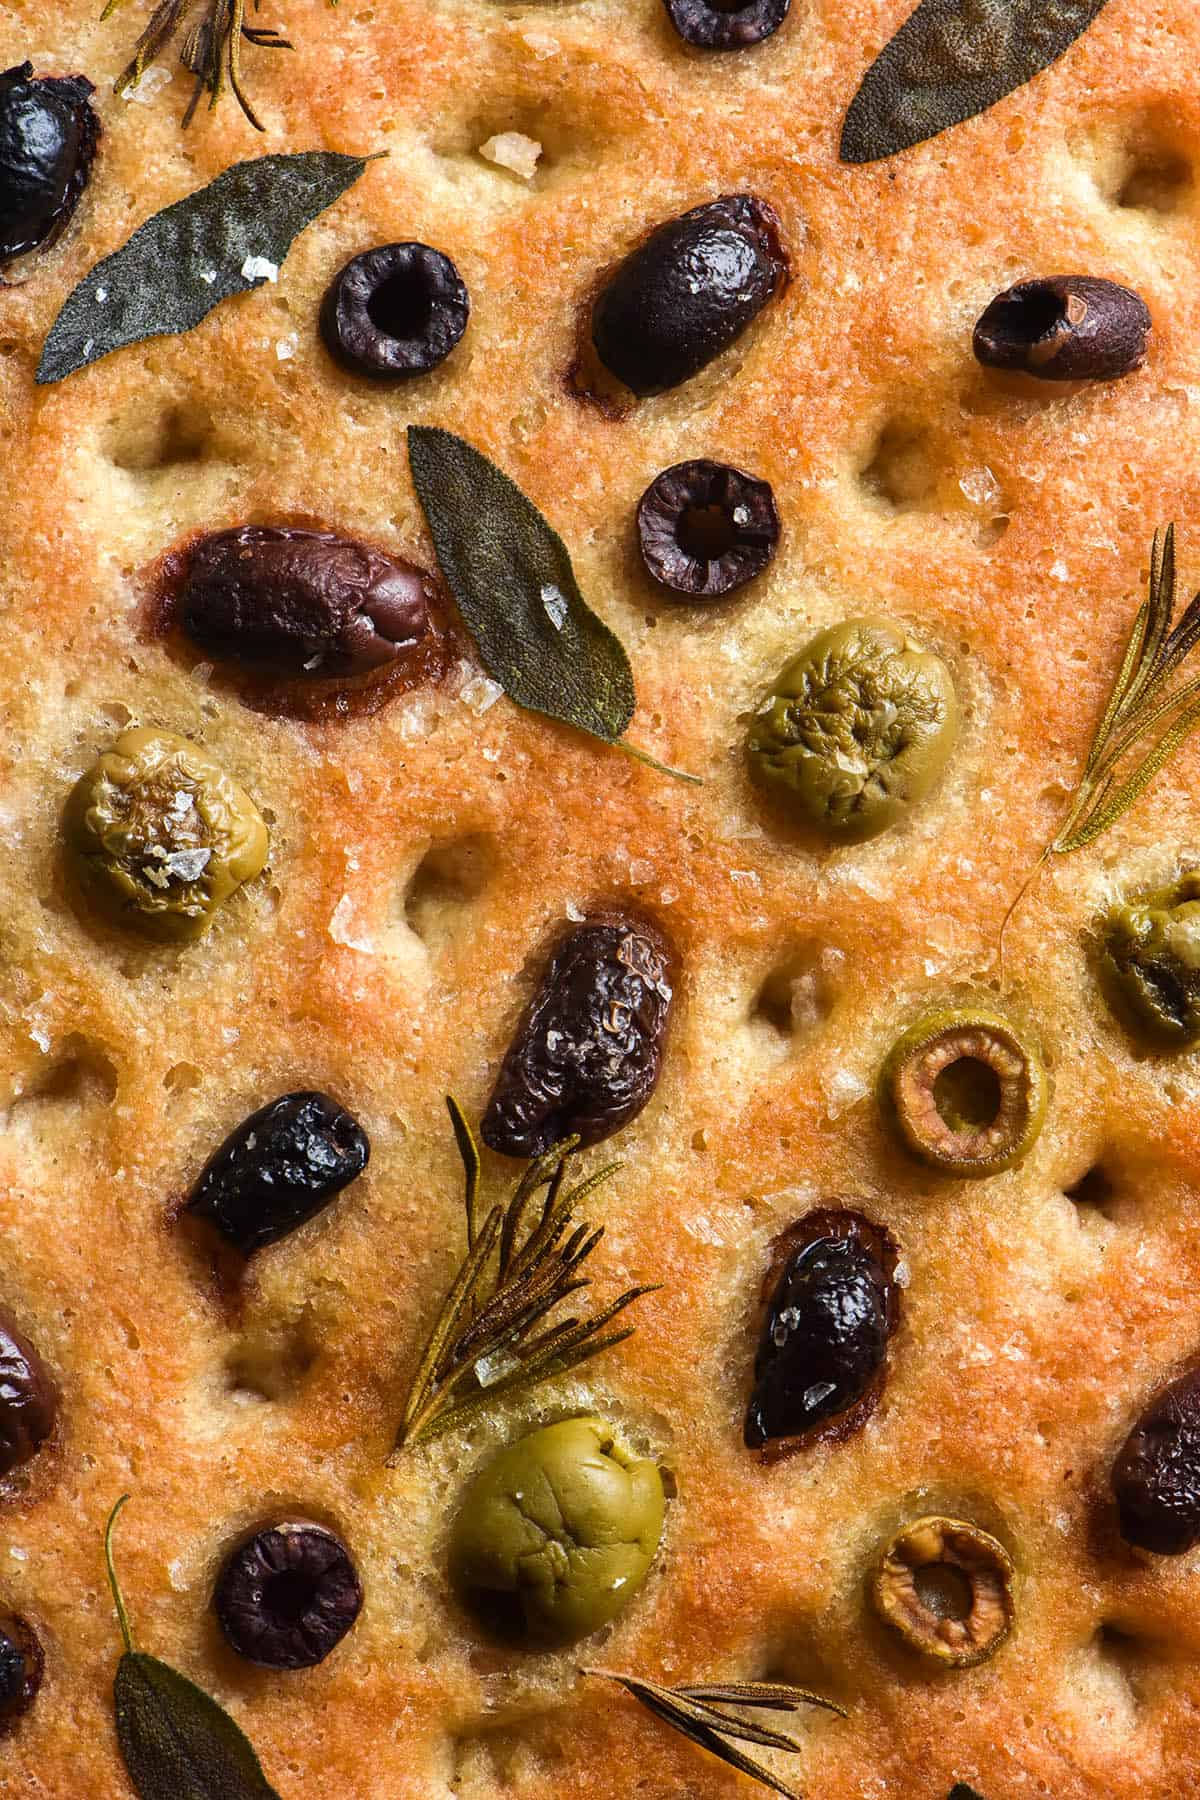
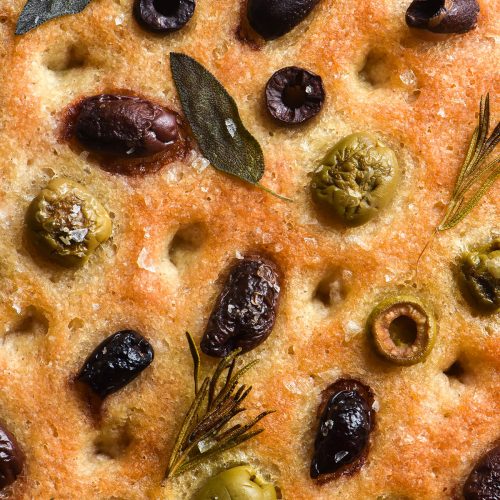
- Topped with pitted olives and rosemary
- Topped with low FODMAP pickled garlic – regular or roasted pickled garlic
- Topped with cherry tomatoes and low FODMAP pesto
- Dipped in garlic infused oil
- Topped with roasted vegetables
- As a sandwich – I like making a caprese sandwich with my vegan mozzarella
How to adjust the focaccia according to your preferences
If you want a focaccia for sandwiches, use a 30 x 20cm (roughly 12 inch X 8 inch) baking dish or thereabouts. A smaller baking dish will ensure your focaccia has height – it doesn’t rise much (if it all).
To make a thinner focaccia on a baking sheet, use 550g water (as opposed to adding more). Without walls, the focaccia will spread, so using less liquid helps prevent that. It also, however, makes for a finer crumb.
If you’re prioritising a big open crumb, proof the focaccia overnight and bake in the morning. You can skip the proofing in the bowl – just mix the dough up and decant it straight into a (well greased) baking dish. You can also add the higher amount of liquid if an open crumb is important to you. Cover the focaccia before popping it in the fridge. The next day, do a half hour bench proof before baking.
I find that the top of the focaccia is prettier with a same day proof (not sure why) but the innards are better with an overnight proof.
More gluten free bread recipes without xanthan gum
- My original gluten free sourdough recipe
- These gluten free bagels
- My forever favourite gluten free buckwheat bread
- This gluten free seeded bread
- The enriched sorghum sourdough in Intolerance Friendly Kitchen
- 100% buckwheat flour sourdough from my buckwheat e-book
Gluten free Focaccia (vegan, xanthan gum free)
Ingredients
For the dough:
- 320 g (2 cups)* white rice flour
- 90 g (3/4 cup)* potato starch
- 90 g (3/4 cup)* tapioca flour
- 13.5g (1 tablespoon)* psyllium husk powder
- 7.5 g (1 Australian sachet) instant yeast
- 13-15 g fine salt
- 20g (1 tablespoon)* white sugar or maple syrup
- 60ml (1/4 cup)* olive oil
- 525-550 g (up to 600g) water
To finish:
- Oil and butter to grease the dish (see notes)
- 40ml (2 tablespoons)* olive oil for the top of the dough
- Any toppings you fancy I like Sicilian olives, rosemary sprigs and sea salt flakes
Instructions
- Combine the dry ingredients in a large mixing bowl. Add the wet ingredients, then whisk thoroughly to completely combine. You should be left with a smooth, slightly wet dough that you can just pick up.
- Cover the bowl with a plate and leave for one hour to proof. Alternatively, cover and place into the fridge for 6 hours or up to overnight. While the dough is proofing, grease your baking dish thoroughly with a scant amount of butter and oil. Too much fat on the base can leave the focaccia with a soggy bottom.
- When the dough is proofed, it should be light, fluffy and cohesive. Use wet hands to press it into the greased baking dish. Grease your fingers with oil, then use them to poke holes in the dough, right down to the base of the dish. When you’re happy, cover the dough and leave for another 30 minutes to proof again.
- Preheat the oven to 200C/400F. When the focaccia is proofed, puffy and ready, cover it in the remaining olive oil and press in your toppings of choice. Finishing with sea salt flakes makes for an incredibly delicious top – I highly recommend it.
- Put your focaccia in the oven for 25-30 minutes or until the top is crispy and firm. Turn the heat to grill and continue cooking until the top of the focaccia is golden brown. This might take 10-15 minutes. When you’re happy, remove it from the oven and allow to cool for 30-40 minutes before slicing. Reheat leftovers in a steamy oven or in the microwave to restore them to their former glory.
Notes
• I find that greasing the baking dish with both butter and oil is the only way it doesn’t stick to the dish. I don’t recommend skipping this step. • I use a 30 x 20cm oval shaped baking dish for this recipe. This is roughly 12 inch X 8 inch. I find thicker dough results in a lighter crumb. You can also bake the focaccia on a sheet tray – see the body of the post for more information. • You can proof this dough in the fridge overnight for a more developed flavour. The next day, simply assemble the focaccia and allow to proof for another 30 minutes on the bench before baking. You can also proof the dough straight in the baking dish (make sure it’s still greased, though)
I am so happy to find such an easy and tasty focaccia recipe without any gums. This came out beautifully, nice and spongy with a crispy outer. I’m interested to experiment with other flours to see the consistency and taste. The rice flour is nice and light without being overbearing. Even my non-celiac family members loved this one! Thank you!
I’m so glad you enjoyed it Candice! Thanks for the lovely feedback 🙂
I’m keen to try this after being absolutely delighted with the sourdough from your book. I’ve been searching on your site to find out the difference between psyllium husk and psyllium powder as I notice you recommend husks in some recipes and powder in others. Do you have any recommended brands? I am struggling to find the powder.
Hi Emma! So glad to hear that 🙂
Psyllium husk powder is the ground version of the flakes. It absorbs more liquid per gram so it works a little differently.
If you can’t find the powder, you can grind the whole flakes into powder yourself with a spice grinder (this is what I often do). I haven’t tried using the whole flakes in this recipe, but you could try adding either less liquid or more psyllium flakes. I couldn’t say by how much, but if you don’t have a spice grinder this is probably the best place to start!
Focaccia is a pretty relaxed bread so it would be a good one to experiment with. If you find the dough too wet, bake it in a larger dish so it doesn’t stay wet or go spongy in the middle.
Good luck and let me know how you get on 🙂
Not sure why this came out more brown color all over vs. the whiteish color in your picture. Followed ingredients exactly. Thoughts?
If you followed the recipe exactly (and didn’t use brown rice flour instead of white rice) I daresay it will be the psyllium husk powder. I find some brands have a darker tinge than others
Thanks – even though the dough before baking was a very nice white color?
I read you suggested grinding your own psyllium husk?
Yes sometimes that happens! I find the store bought version tends to bake up a browny grey, which is why I generally grind my own. I’m not sure where you’re based but in Aus the flakes seem to be lighter.
I have read on a gf sourdough forum that some countries have darker psyllium husks. Do they look dark in the packet?
Do you have a photo of the focaccia? It would be interesting to see
Hello
My daughter is devouring this as we speak, but since she has intolerances and can only have rice twice a week, can I freeze the other half of the dough?
thank you
Hi Ashlie, do you mean freeze the cooked focaccia or uncooked focaccia dough?
I would recommend baking the whole focaccia and then freezing it cooked 🙂
What can I substitute for the potato starch?
Nothing, unfortunately! I tested a whole variety of starches in this recipe and potato was the only one that achieved the right texture
At some point in the future I will do some more experimenting but all the subs currently available are in the ‘substitution option’ section 🙂
This looks ridiculously good – the photos make me want to reach in to the screen and grab some.
I just wanted to clarify – do you recommend using white rice flour from the Asian grocery store (Erawan) for this recipe?
Hi Sally! Thank you, you are very kind.
I generally use bulk food store white rice flour but I have tried the Erawan brand in other recipes and really liked it.
I know there is occasionally some confusion around rice flour so just to clarify, the red bag of Erawan is suitable here, the green bag (glutinous rice flour) is not suitable.
Hope you enjoy 🙂
I tried this and loved it! So easy, and so tasty!
I didn’t have psyllium husks, but successful substituted 1TBS of chia seeds and 1TBS of flaxseed meal. My dough was quite moist, not quite what the recipe asked for, but the cooked product was light and fluffy and held together wonderfully. And it tasted like the best gluten free bread I’ve ever made!
Thank you for this recipe!
So glad you enjoyed it Sonja! And great to know that it worked with those subs 🙂