I love developing recipes and I only post the ones that I truly love. Some recipes, though, really stand out as absolute favourites. This gluten free microwave hot cross bun (with oven instructions too) is one of those recipes. It is a speedy, 10 minute, single serve delight that can be whipped up on a moment’s notice. Say goodbye to stale gluten free hot cross bun leftovers and hello to this instantaneous treat.
Gluten free microwave hot cross bun
This gluten free hot cross bun caters to SO MANY different dietary requirements. It’s gluten free and only uses wholegrain flours (white rice flour and buckwheat flour). The bun is xanthan gum free, yeast free, egg free and is nut free/soy free depending on the milk you use.
Based on my microwave cinnamon roll, the bun can be dairy free/vegan with the use of plant based dairy. You can play around with the additions and the dough is naturally low FODMAP. So, with the right mix-ins, you have a gluten free, low FODMAP hot cross bun without yeast, nuts or xanthan gum. Phew!
Gluten free hot cross bun recipes
If you came here hoping for a larger batch, fear not! I have lots of hot cross bun recipes.
- Gluten free vegan hot cross buns
- Gluten free vegan hot cross buns using 100% wholegrain flour
- Sourdough gluten free hot cross buns
- Gluten free vegan hot cross bun cinnamon swirl loaf
Recipe notes
This is a pretty straightforward recipe, but it does require a little intuition (as does all gluten free baking). Because we’re making a bun, the dough needs to be moist but able to hold its form in a bun shape.
How much milk you add depends on a wealth of factors, such as the brand, the country you live in, the humidity in your kitchen, etc. If your bun is too wet or dry the first time, adjust the milk content accordingly. I can only test recipes in the climate I’m based in, so you need to adjust your dough as necessary.
The only substitutions are in terms of the dairy and mix-ins. You can use your preferred milk and butter – whether they are plant based or regular. In terms of mix-ins, see what works for you! I suggest 1/2 – 1 tablespoon maximum of whatever you choose.
Keep in mind that Australian tablespoons are 20ml whereas many other countries (USA, UK, Canada and NZ) use 15ml tablespoons. I tried to find data on other countries measuring spoons but didn’t have much luck. Either way, this means that you need to use 4 teaspoons to equal 1 Australian tablespoon if you are from one of these countries.
FODMAP notes
If you need this bun to be low FODMAP, there are a few quick things to consider. Most of the ingredients (butter included) are naturally low FODMAP. However, the milk and the mix ins are two things that require consideration.
I always suggest using a milk that works for you and that you have on hand. Lactose free milk is a good option for those who have issues with lactose but enjoy regular milk. Of course, if you don’t have issues with lactose and are not in the elimination phase, use whatever you like.
In terms of plant based milk options, soy milk made from soy protein as opposed to soy beans and macadamia milk are low FODMAP milk options. Oat milk has a low FODMAP threshold, but isn’t considered gluten free in Australia. Also consider any allergies (to nuts, for example) when choosing a plant based milk.
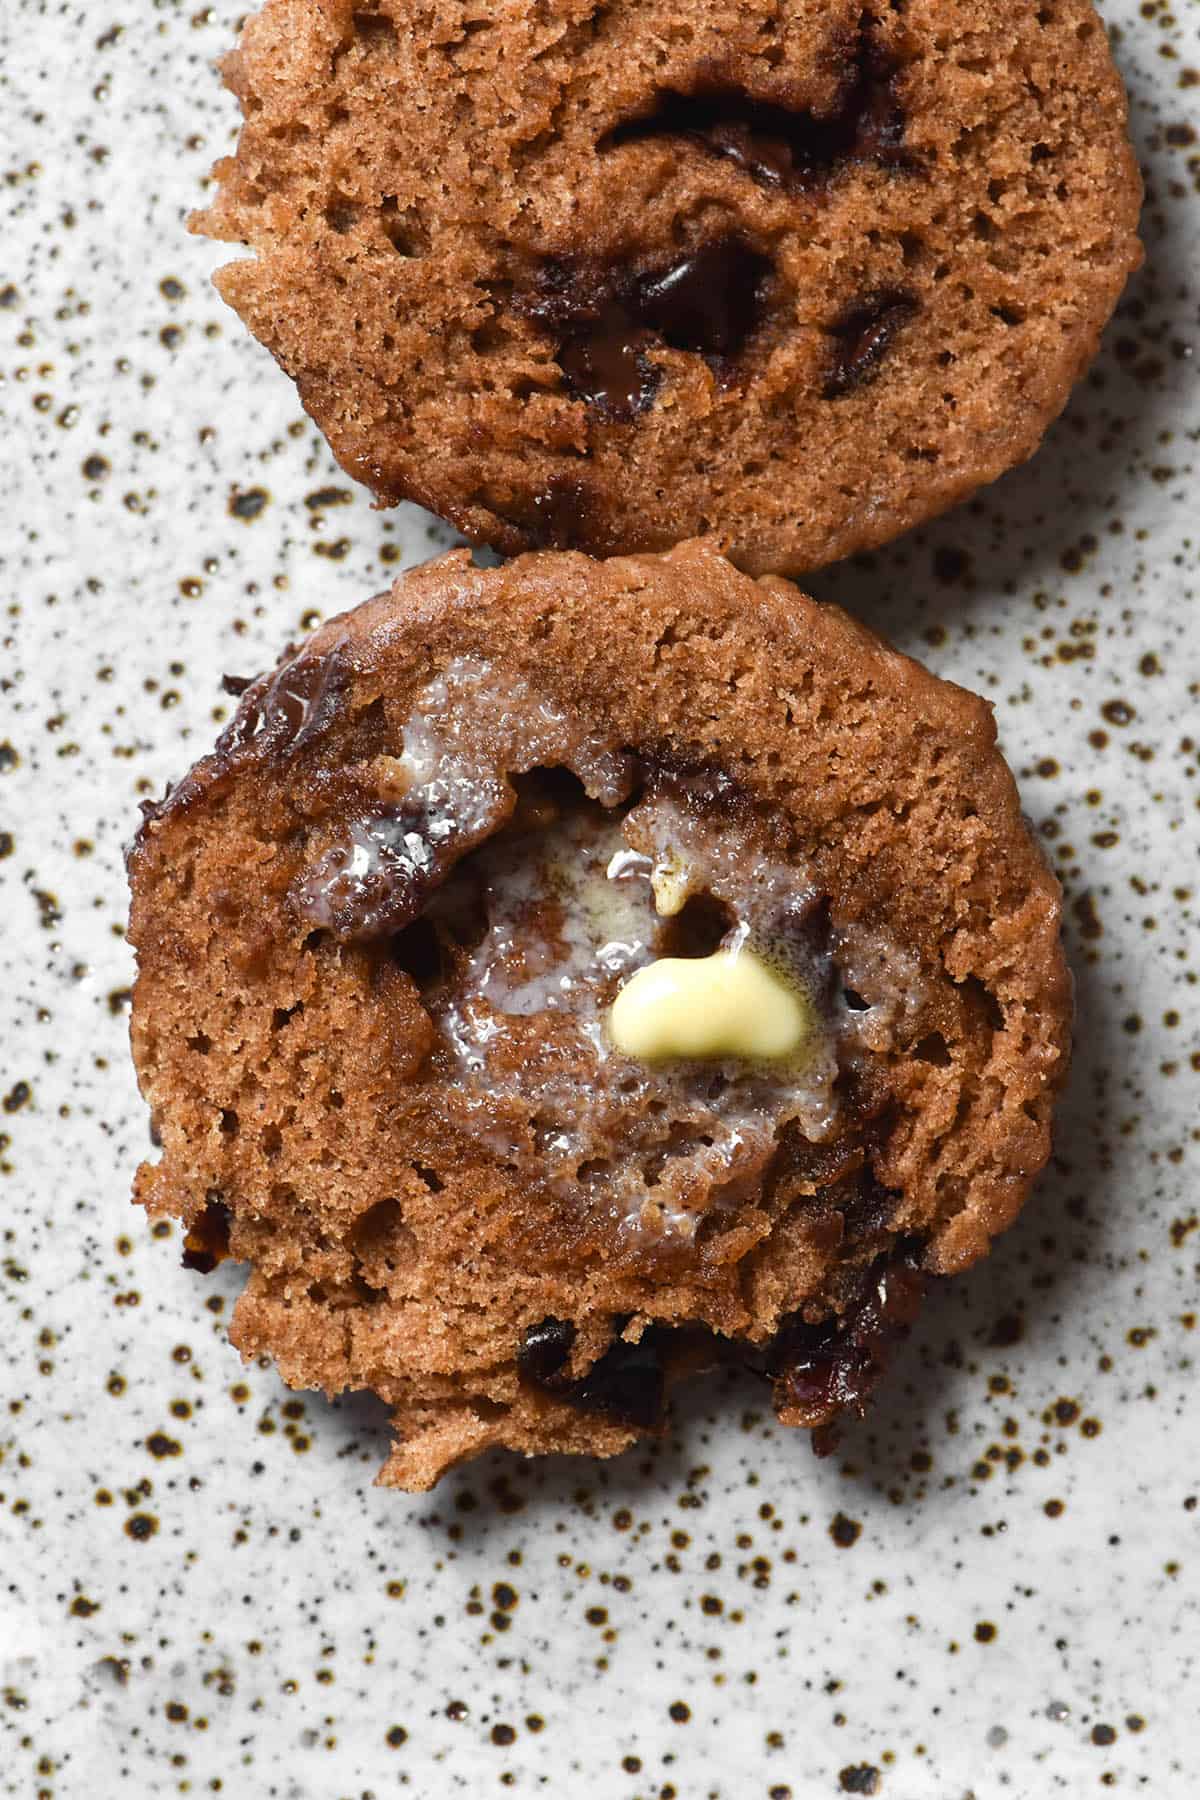
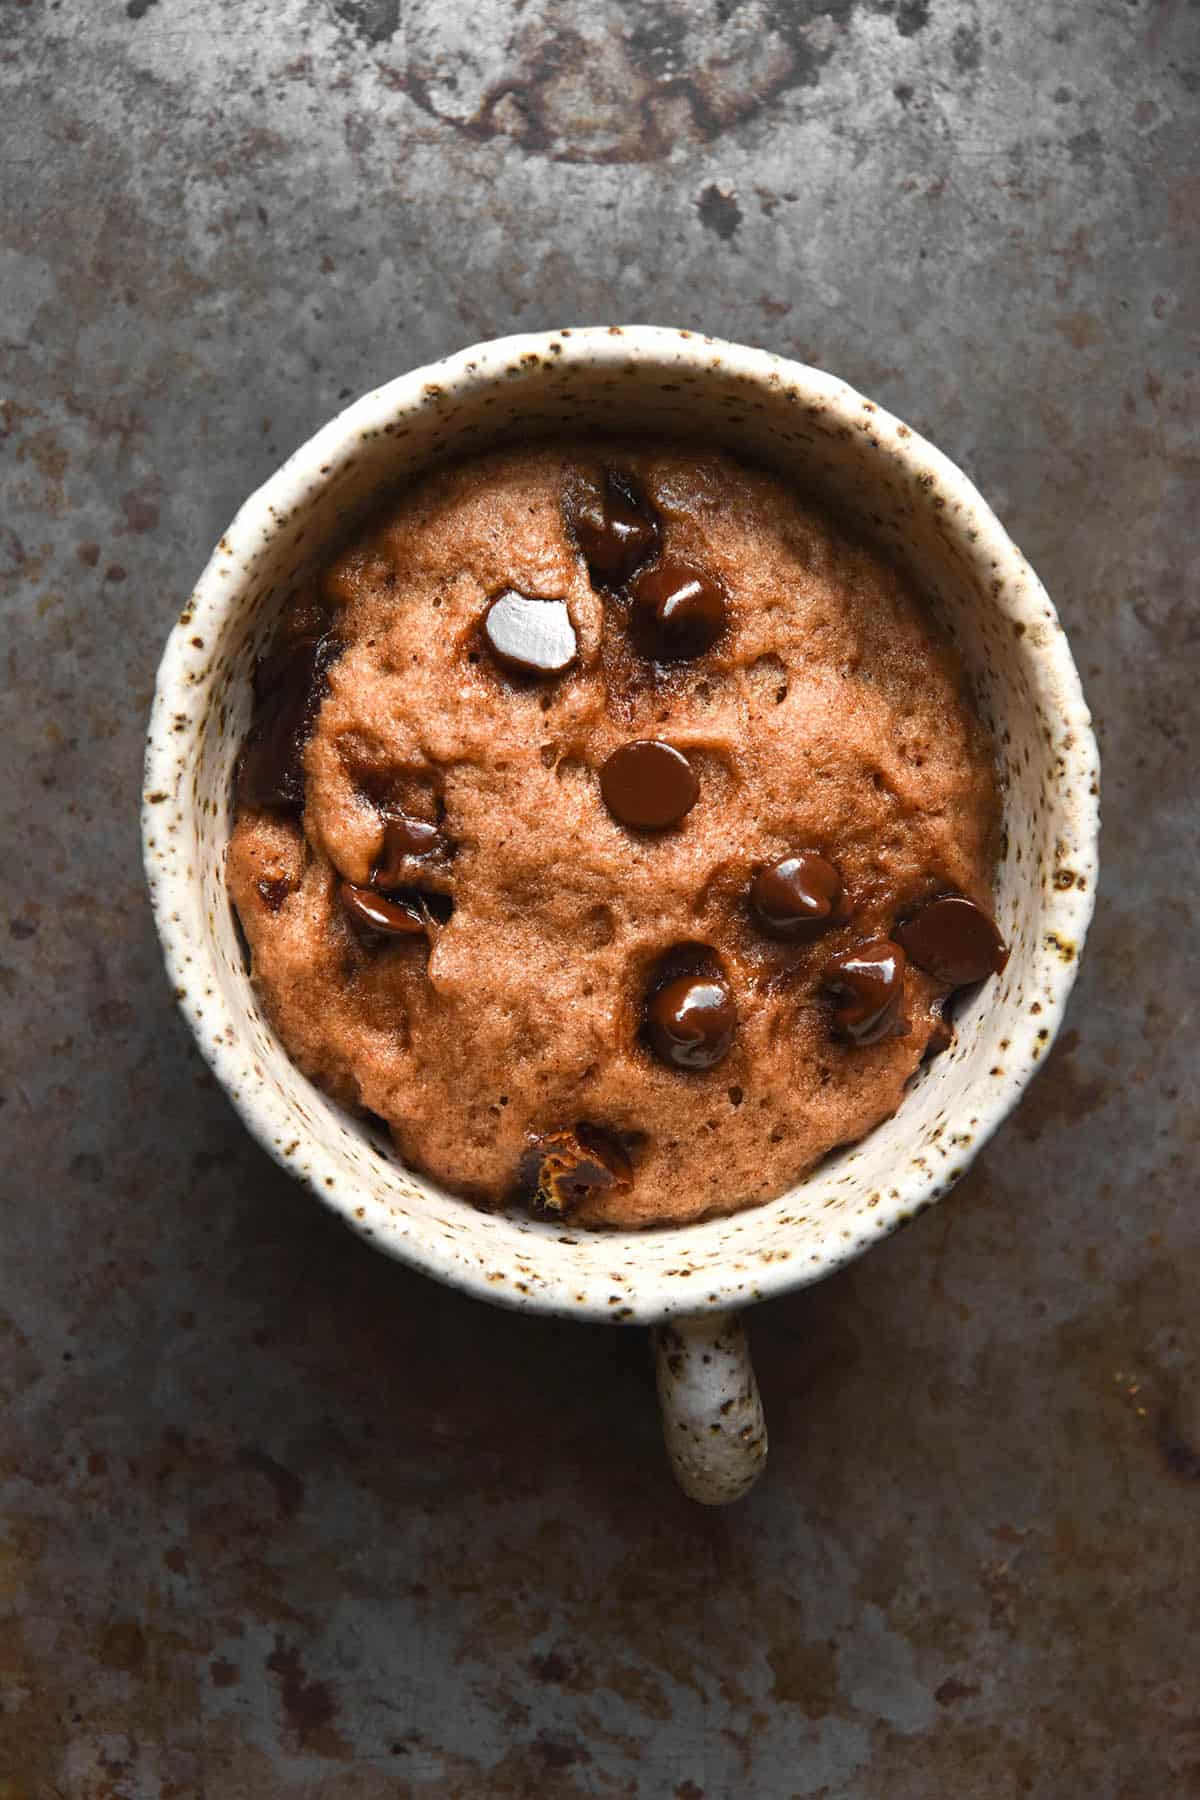
In terms of the mix-ins, I recommend chopped dark chocolate or choc chips (or plant based alternatives) for lactose intolerance.
As of June 2025, raisins are only low FODMAP in 4g serves. In 5g serves, they contain moderate amounts of fructose. Sultanas are low FODMAP in 7g serves. In 9g serves, they contain moderate fructose and fructans.
The best option for adding dried fruit, in my opinion, is regular dates. They are low FODMAP in 30g serves.
Recipe tips for your gluten free microwave hot cross bun
I recommend being generous with the spices. This is what makes a hot cross bun taste like a hot cross bun, to me. If you happen to have any orange zest lying around, that will add extra flavour too.
Particularly in the case of the microwave mug cake, I recommend being slightly more conservative with the milk. Microwave mug cakes get nice and steamed, which means they are more moist than oven baked goods.
As such, I would recommend using 60ml (1/4 Australian cup) milk in the microwave version and 80ml (1/3 Australian cup) in the oven version. Of course, this might be slightly different based on where you live, so take these figures as guides.
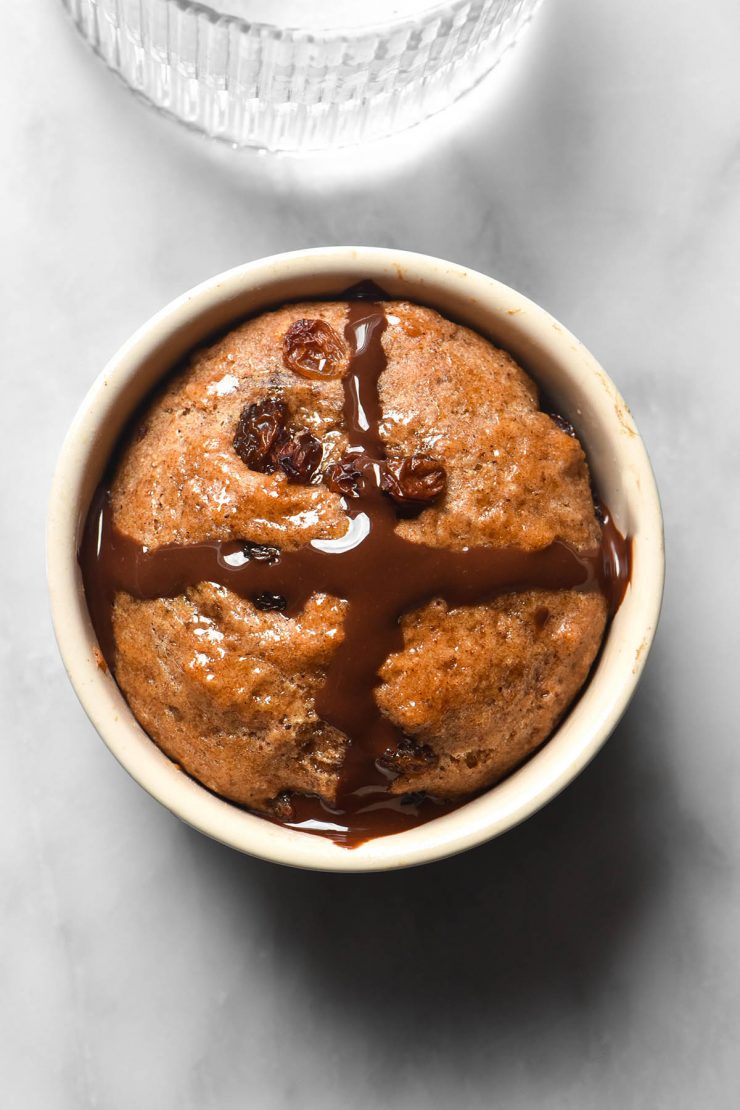
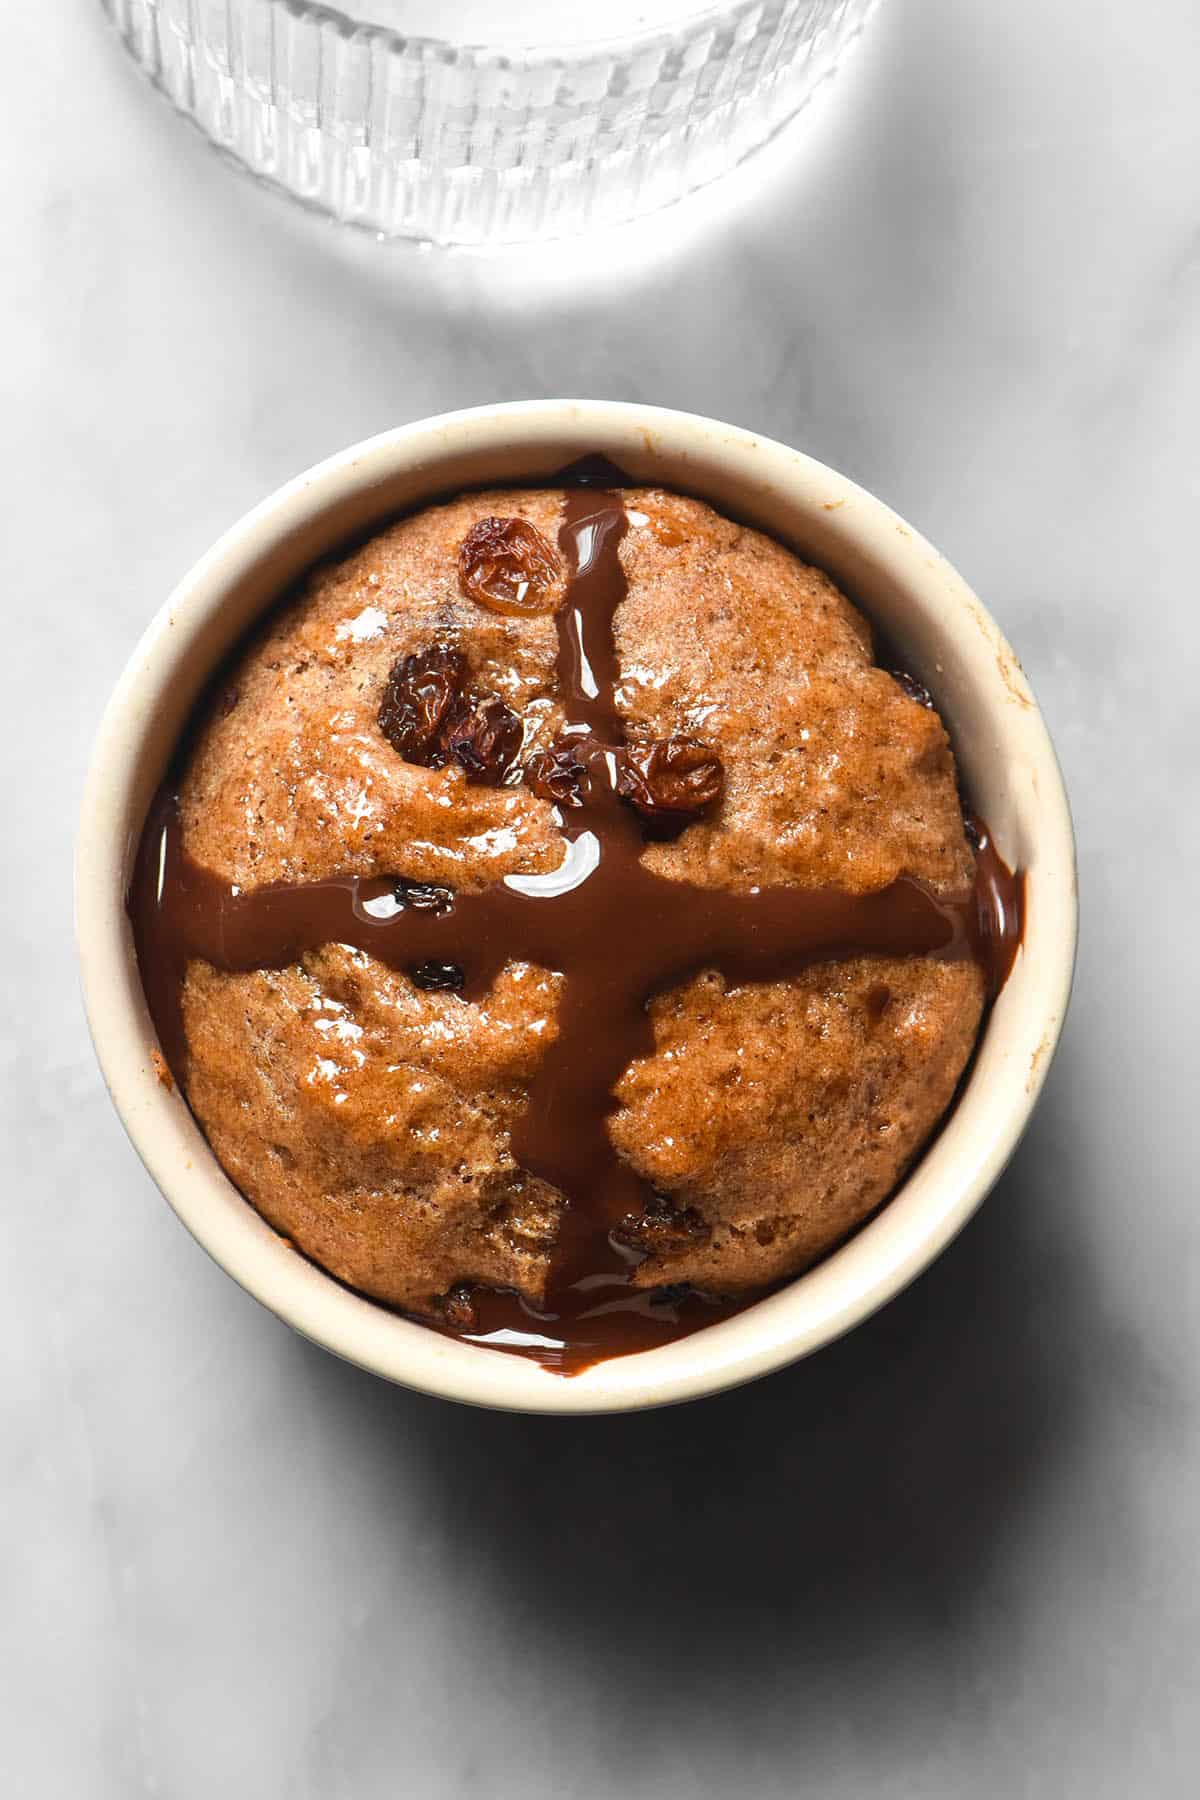
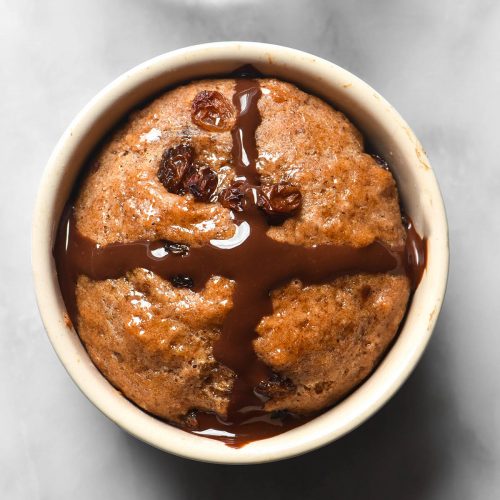
I haven’t included instructions for making a cross, because I think it over complicates an easy recipe. As you can see, I did use a chocolate cross for the photos. Otherwise it becomes a bit difficult to see what the recipe is just by the imagery. I recommend piping an easy little melted chocolate cross if you’d like one.
Can I make this gluten free microwave hot cross bun in the oven?
This is always my most commonly asked question on microwave recipes and the answer is yes! You can make this bun in the oven, if I may. To do so:
- Preheat the oven to 180C/356F.
- Make the dough as instructed, using a little extra liquid (I recommend 80ml as opposed to 60ml) and place it in an oven safe, lightly greased ramekin or mini pan. I recommend a small pan to hold the bun in its perky shape. Although I haven’t tested it, I daresay the bun would ‘melt’ in the oven if left to its own devices.
- Bake for 10-15 minutes until lightly puffed and slightly golden on top.
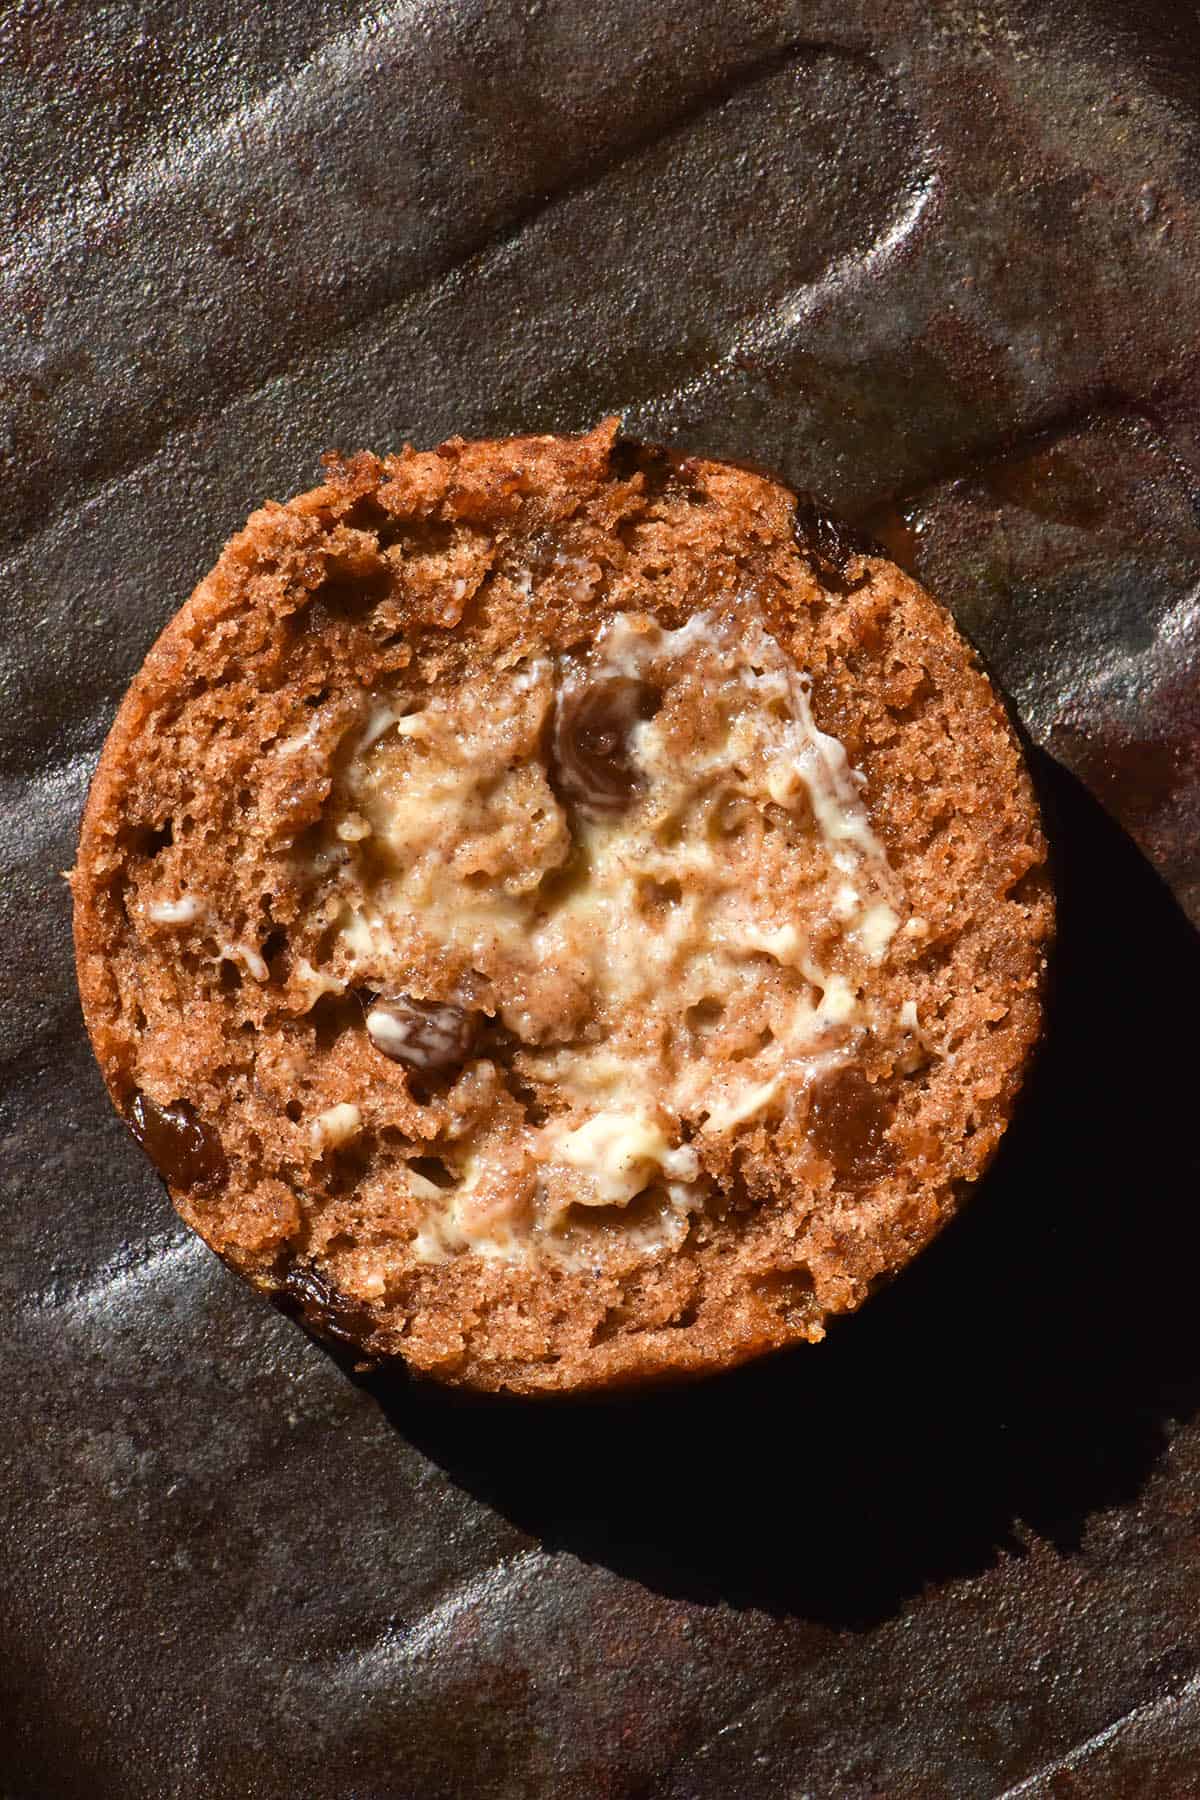
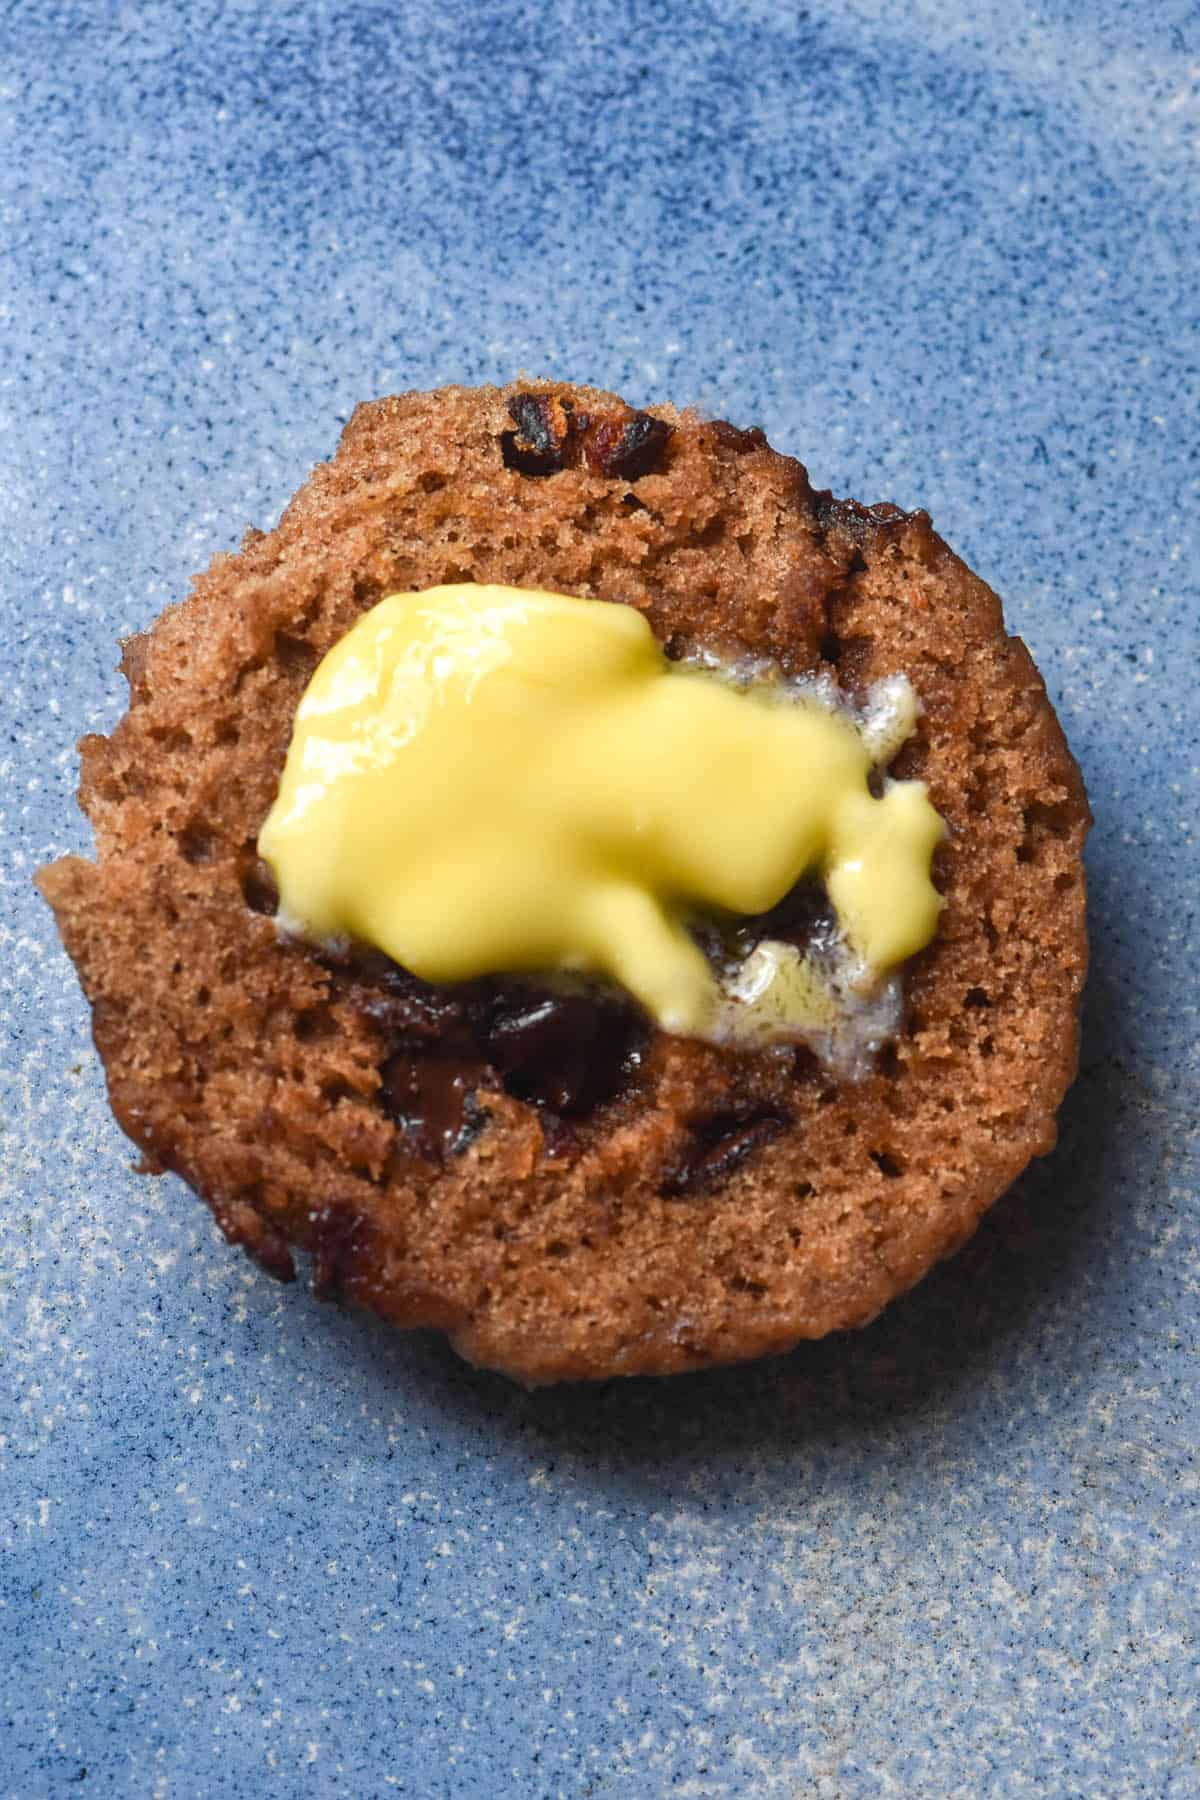
- Allow to cool for 5-10 minutes before removing from the ramekin. I like to slice mine in half and serve it with melted butter.
More easy gluten free desserts
- All the recipes in my gluten free mug cake e-book
- Low FODMAP date bark bites
- Single serve gluten free banana choc chip muffin
- Small batch gluten free vegan blueberry muffins
- Gluten free egg free carrot cake muffins
Gluten free microwave hot cross bun (single serve)
Ingredients
For the binder:
- 3.5g (1 teaspoon) psyllium husk powder (not flakes, see notes)
- 60-80ml (1/4 -1/3 cup)* milk of choice (see notes)
- 25g butter of choice (regular or plant based)
For the dry ingredients:
- 25g fine white rice flour
- 10g light buckwheat flour
- 20-25g light brown sugar
- 1/2 teaspoon baking powder
- 1/2 teaspoon ground cinnamon
- 1/4 – 1/2 teaspoon ground nutmeg (use to taste if grating it fresh)
Instructions
To make the binder:
- Weigh out the psyllium husk into a small bowl and set aside. Microwave or heat the milk and butter until the butter is melted and the milk hot.
- Whisk the mixture constantly and vigorously while you sprinkle over the psyllium husk powder. It will gel up straight away, hence the need to whisk with vigour. Big clumps of psyllium husk powder are not pleasant to eat and will not help bind your bun.
- Once thoroughly combined, set aside to thicken for five minutes. The longer it sits, the easier your buns will be to shape, but five minutes is the minimum.
- After the five minutes, your gel should look like a gel rather than a liquid. Depending on how much milk you've added it will either be soft jelly consistency or a firmer disk.
To make the hot cross bun:
- Add all the dry ingredients for the bun (except the mix-ins) to a small/medium mixing bowl and whisk to combine.
- Add the binder and mix as far as you can, then get your hands in and squelch the dough between your fingers. This will help remove any clumps of psyllium husk and combine the dough.
- Continue with this method until you have a moist, ropey ball of dough with no dry flour left in the bowl. It should hold form and not be too wet or moist. Add the mix-ins and combine them into the dough as best you can.
- Transfer the ball of dough, smooth side up, into a microwave safe 250ml+ capacity mug. Microwave for one minute or until the top is dry and cooked through. See the body of the post for instructions on cooking this in the oven.
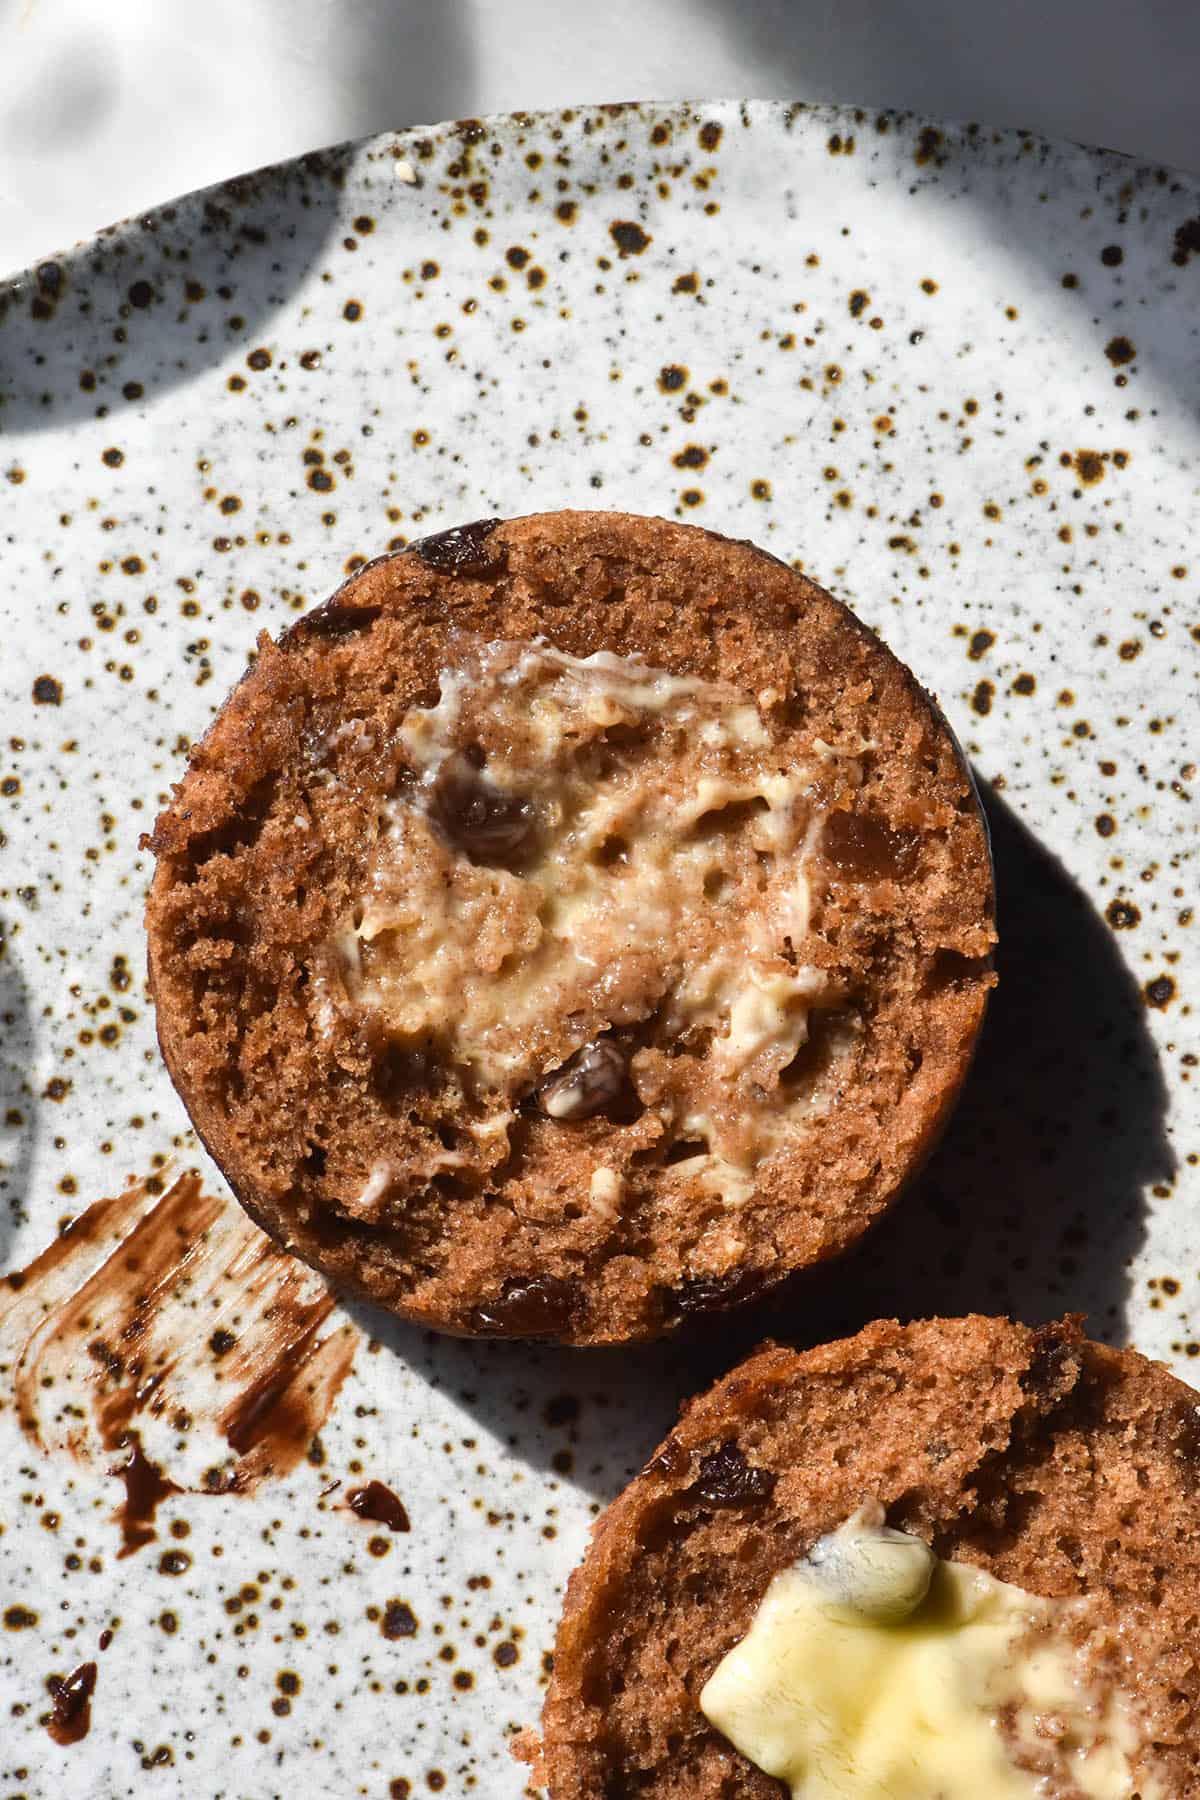
- Set aside for a minute or so. I like to turn my bun out onto a cooling rack then slice it in half and butter it while warm.
Notes
- I recommend using 60ml milk for the microwave version and 80ml milk for the oven version. I find the microwave needs less milk because it is a steamy environment. That said, this depends on your flours, the humidity where you live, etc, so it might vary. Use enough to form a dough that is moist and smooth but holds it’s own form.
- Read the body of the post for tips, recipe notes and hydration notes.
- Read the body of the post for instructions on baking this bun in the oven.
In spite of my subs and overcooking it, the bun turned out great! I used 15g millet flour + 10 brown rice flour instead of the white rice flour; erythritol in place of brown sugar; olive oil instead of butter. I was worried the dough might not be cooked through so I microwaved for three minutes. It turned out a bit dry and chewy, but I loved the hearty texture, it’s like proper bread! With melty pockets of dark chocolate and cinnamon streaks throughout, it was truly delicious. Look forward to trying your other recipes!
I have just tried this recipe with both Natvia and Truvia brown sugar stevia, and it worked a treat. So, anyone having issues with sugar can use stevia for this recipe and enjoy!!
It deserves six stars! This is one recipe that everyone should have on hand and use (lots)! I made it with only buckwheat flour as rice makes me sick, and went traditional with candied peel and sultanas. I also did 4 mugs worth too. My buddies that don’t like buckwheat and gluten free went wild for them (told them after the fact). We all agreed that this recipe makes the squidgiest, yummiest hot cross buns ever, and you now have three new converts. Happy Easter, and keep up the good work!