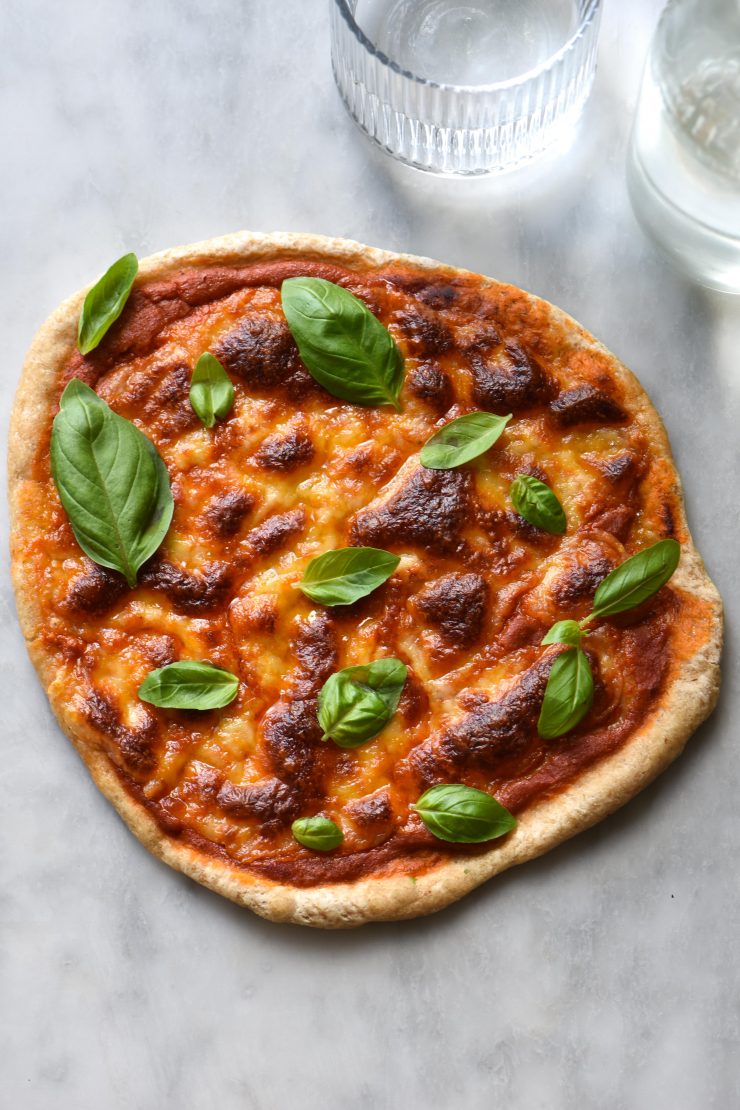
If you follow me on Instagram, you’d have seen me post a lot of pizzas to stories lately. Not only have been working on a FODMAP friendly pizza sauce, but also on these gluten-free sourdough pizza bases. This gluten free sourdough pizza recipe is simple, flexible and delicious and I’m so excited to share it with you.
Gluten free sourdough pizza bases without xanthan gum
Having worked on gluten free sourdough for a while now, I am honestly shocked by how simple sourdough pizza is in comparison. It is exceedingly low maintenance! Sourdough bread, much like an avocado, is ready one second and over-proofed the next. Gluten-free sourdough pizza bases, on the other hand, are the chilled out cabbages that can sit in your fridge for 1000 years (not quite but you get the drift). The dough can be left to it’s own devices not just overnight, but for the whole weekend! It can also be (very gently) punched down, forgotten about for a bit, or otherwise left to do it’s thing.
Before we begin, you’ll obviously need a gluten free sourdough starter. If you don’t have one yet, here is my guide to making a gluten free sourdough starter. Note that it really needs to be active and thick, like a thick, bubbly yoghurt. I wouldn’t recommend trying this recipe with a starter in it’s formative stages – the dough will end up too wet and unable to rise.
Ingredient notes for your gluten free sourdough pizza bases
I have only tried this particular blend of flours for these sourdough pizza bases. I will update the post as I make more pizza, but in the interim I have no substitution suggestions.
As with my loaves, I use psyllium husk (sometimes called flakes) as opposed to psyllium husk powder for all my recipes. I have not tried the powder so I can offer no guidance. Nor have I tried this recipe with any other binder.
As per all the other sourdough recipes, you’ll need an active, thick sourdough starter. You will need to use the starter after it has been fed and is on a rise. In Australian winter, I have been feeding mine at around 6 or 7pm, and then popping it in the oven WITH JUST THE LIGHT on to rev it up. I then use it, fluffy and delightful, just before I go to bed.
Making gluten free sourdough in different seasons
I cannot overstate how important I have discovered the seasons and temperature to be in sourdough making. The temperature in your kitchen will impact everything from the growth your starter to the proofing time necessary for sourdough. In discussion with readers, I also think the humidity of where you live will play a role in your proofing. So, needless to say, you should take indicated proofing times with a grain of salt.
I am working in a relatively warm kitchen in Australian winter. Come summer, my own specified proofing times will become obsolete for me personally. The yeast and bacteria in the starter thrive in heat, growing far more quickly than they do in the cold. In summer, when it becomes unbearably hot in my kitchen, I will probably need to proof this dough in the fridge overnight as opposed to the counter.
A lot of sourdough making is intuitive learning, so you need to read your own dough. Following instructions to the T won’t make for a better sourdough, because every temperature, climate and starter is different.
If you’re new to sourdough, I would actually recommend starting with pizza dough as opposed to a loaf. Pizza dough is a great entry level sourdough product that is essentially foolproof. You’ll learn a lot about the climate and the needs of your dough, which will put you in good stead for the more finnicky sourdough loaf.
Tips for your gluten free sourdough pizzas
Utilising the fridge for a cold ferment is a great way to develop flavour in your dough without over-proofing it. It’s also a handy way to proof if you live in a hot or humid climate and you’re concerned the dough will over-proof during the night. See the proofing notes section.
You can use the dough over the course of a weekend, if that’s your thing. Simply mix up the dough and cold ferment it in the fridge, pulling off pieces to shape and proof on the bench as you go. I would recommend keeping it for a max or two or so days in an airtight container in the fridge. Personally I push on if the dough starts smelling a little alcoholic (it just means that it’s getting hungry and it’s totally safe to eat) but you do what is best for you.
I haven’t tried freezing the dough, although I would suggest baking the bases and then freezing them, as opposed to freezing it raw. You might not be able to revive the rising qualities if you freeze raw dough.
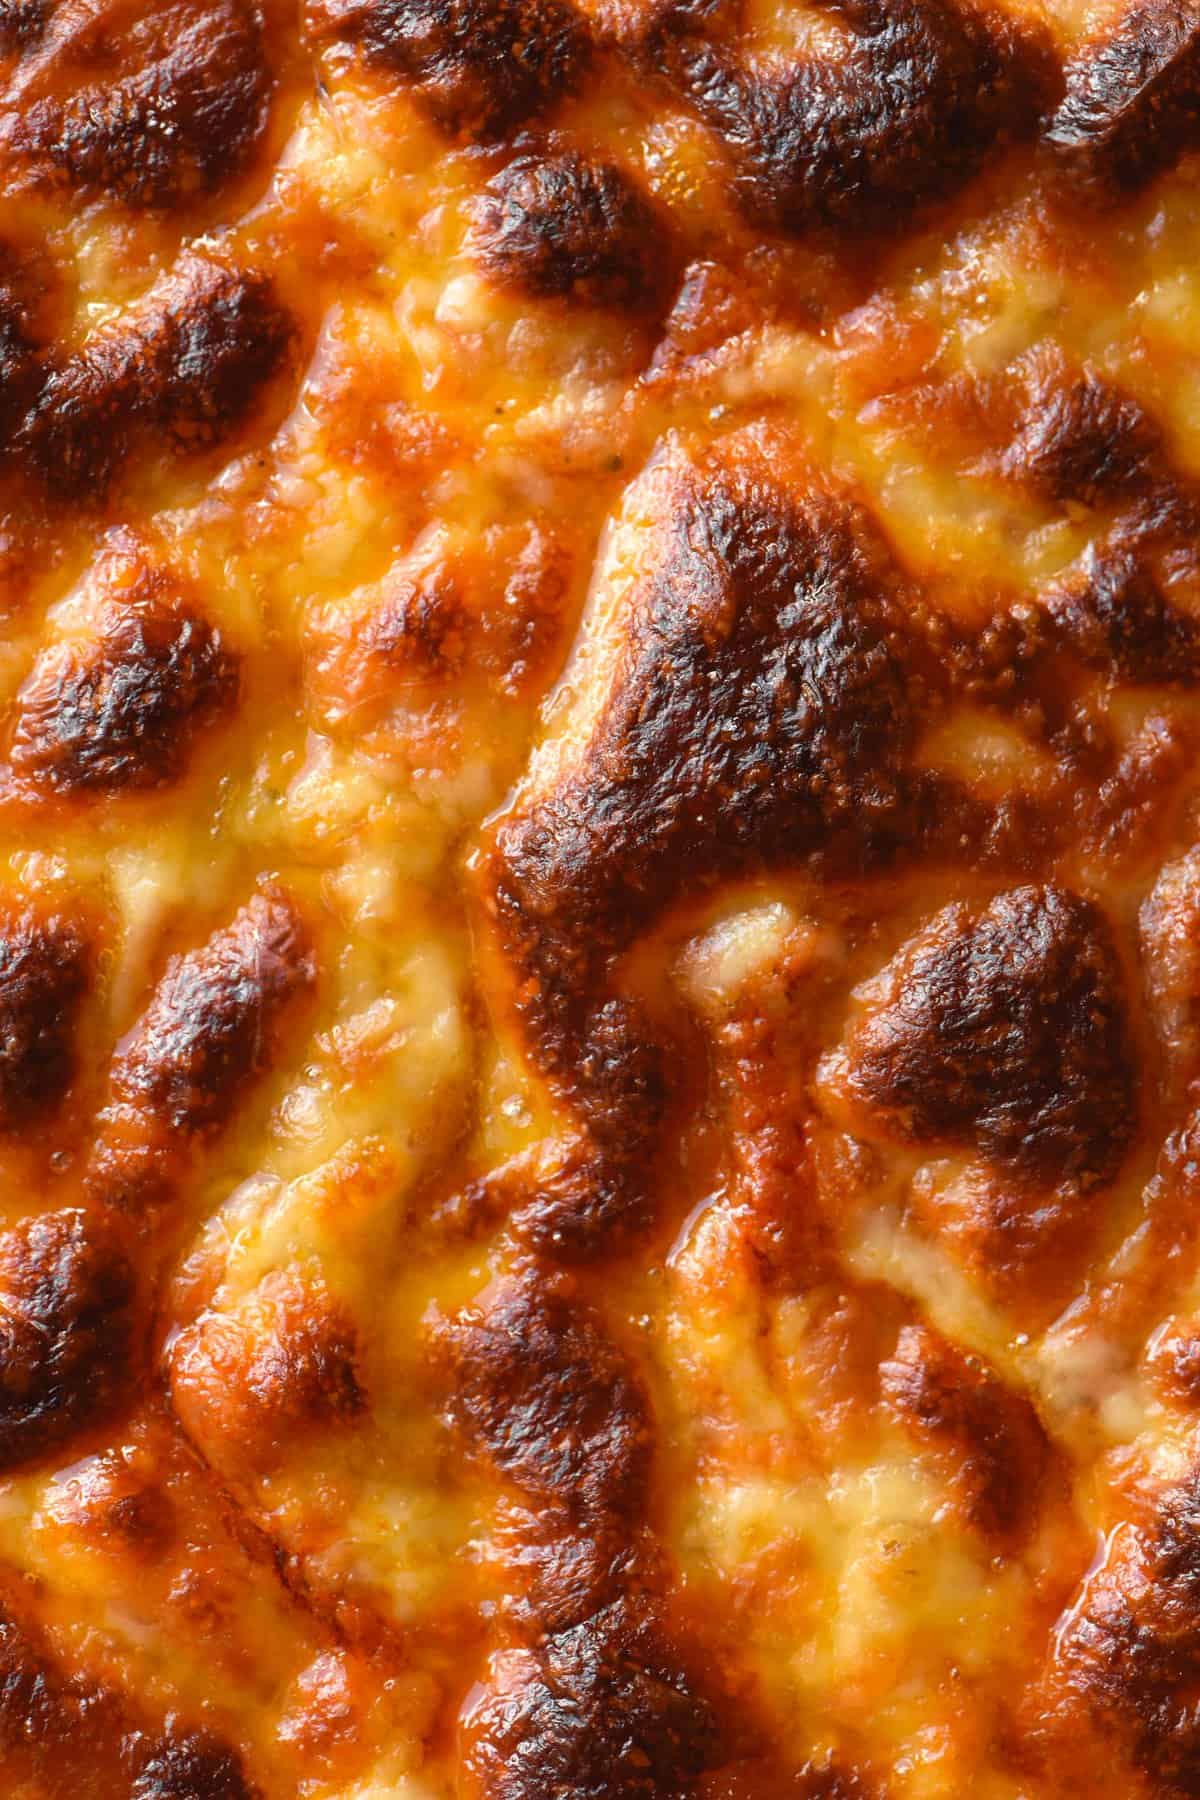
Spread the dough as thinly as you possibly can, because it puffs up significantly as it cooks. If you’re lazy with the spreading, you’ll end up with a huge mouthful of doughy crust.
Tips for baking gluten free pizza in an oven
- I don’t even bother trying to use a pizza peel – I put all my pizzas on a piece of baking paper. Gluten free pizza bases work differently to regular ones, and I don’t think they have the structural integrity to slide around. This could be a convenient excuse for my lack of skill, however.
- Thus far I’ve only baked these in an oven. I use my Lodge cast iron skillet and preheat it for 30+ minutes at the highest setting my oven has. Then, I turn the heat to grill, and cook the pizza on the grill setting. I’ve been told that a pizza stone isn’t worth getting if you own any cast iron cookware that you could use. It conducts heat very well.
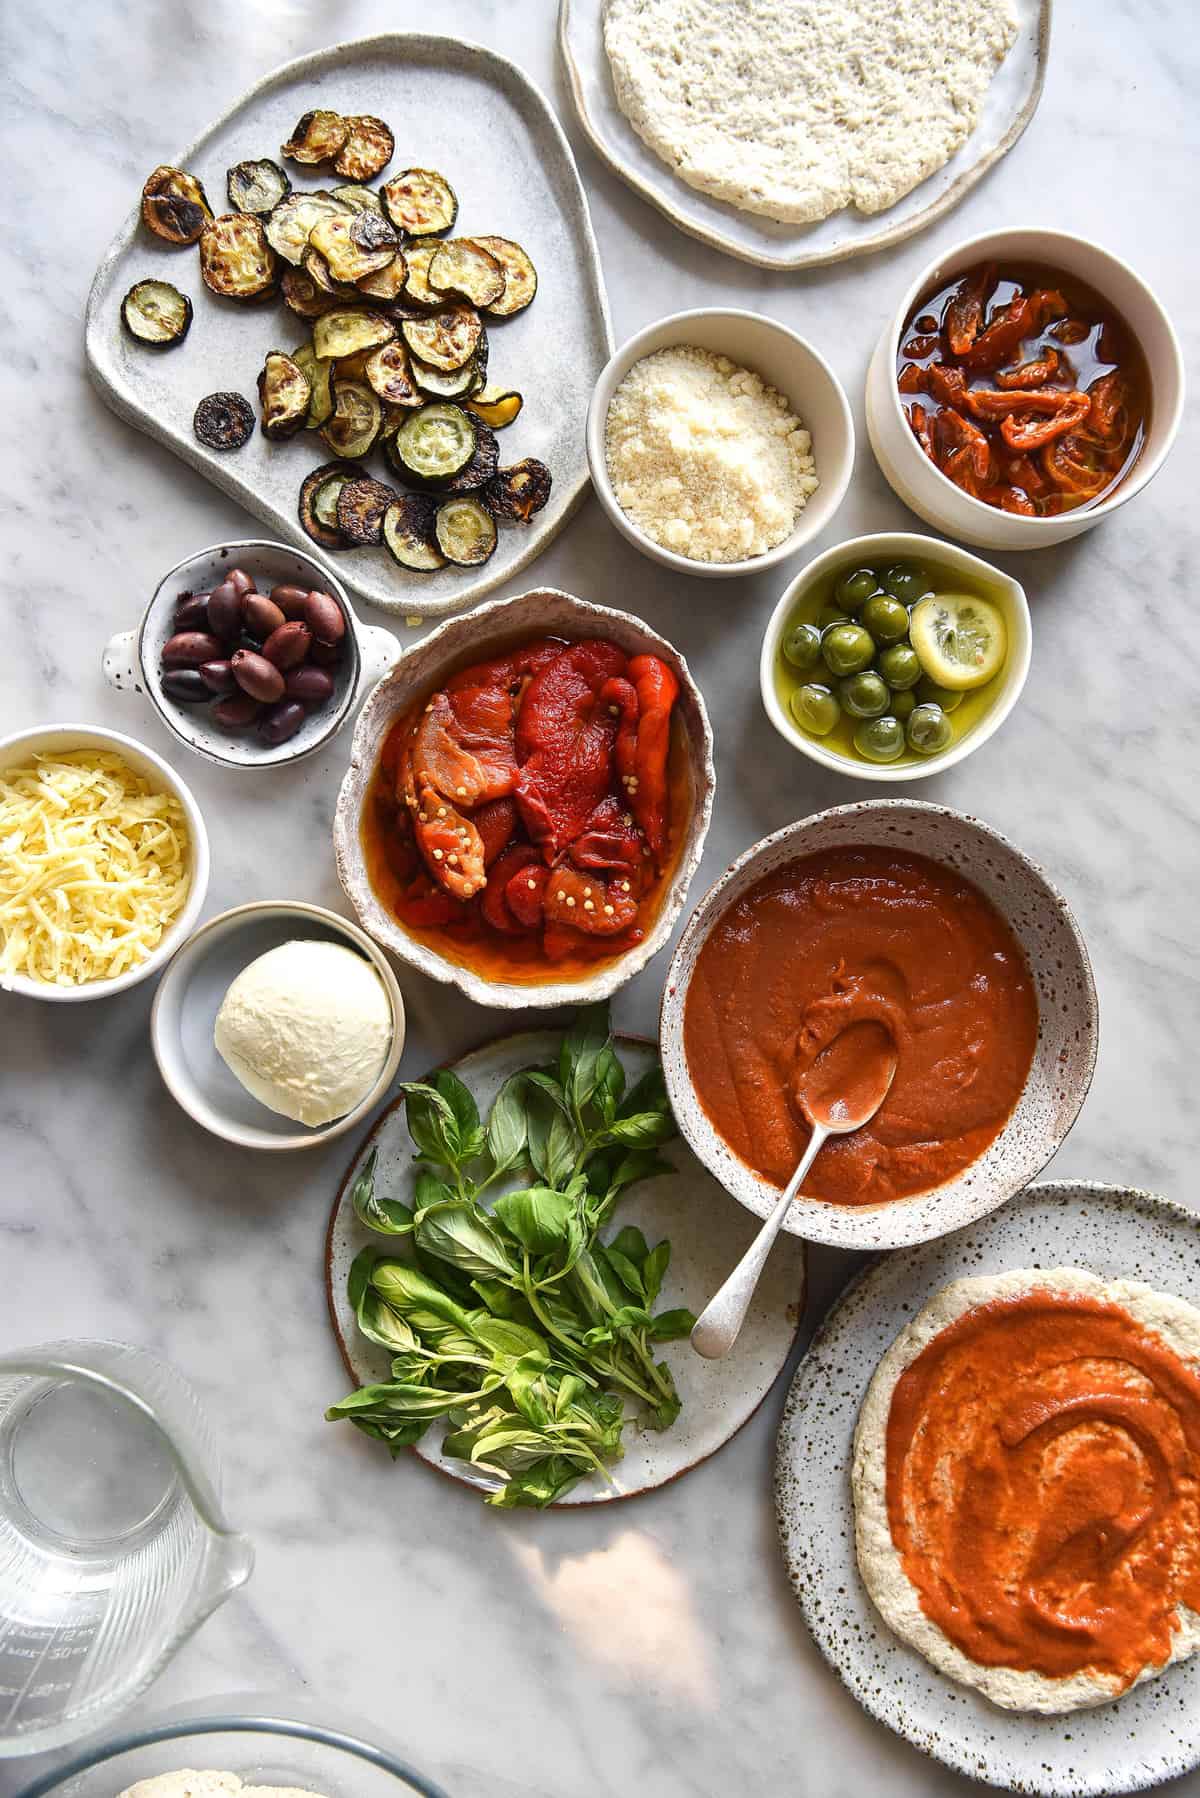
- You can par bake the pizza base alone or top it and place it straight in the oven. However, if you load your pizza up with a thick lot of sauce and toppings, it is more likely to have a soggy bottom. If you like a lot of things on your pizza, I recommend par baking the base alone first. This will eliminate the possibility of having undercooked dough in the middle.

Proofing options for your gluten free sourdough pizza bases
Honestly, pizza is one of the easiest things to make sourdough. Because it doesn’t need to be tall (like a loaf) it’s virtually impossible (although possible) to overproof. I have made this recipe all of the below ways, so choose the version that suits your climate and schedule best.
Overnight on the c0unter
Mix the dough before bed and leave it on the counter to proof. In the morning, you can either shape the dough and leave it to proof for a lunchtime pizza, or pop it in the fridge and leave to retard until dinner. This is best in a colder climate or kitchen because it gives the dough time to develop a lovely sour flavour overnight (which takes longer in the fridge). Sometimes (weather dependent) I’m lazy with this method and leave it on the bench for a good chunk of the day, too. It might smell a little alcohol-ly if you leave it too long, but it won’t impact the taste. That said, if you left the dough in a super hot or humid climate, it would likely over-ferment to the point of being inedible. Which brings us to:
Overnight in the fridge
Mix the dough before bed and proof it in the fridge. This method is best for hot or humid climates, as the dough would ferment too quickly if left out overnight. Whenever you’re ready to use it, simply pull it out, divide into portions and shape it. Turn the oven on to preheat, and by the time it is ready the bases should be too.
Same day on the counter
There’s one last option for hot or humid climates, which is to make the dough in the morning and leave it to ferment on the counter. The reason this method only really works for hot climates is that there is the requisite warmth to sufficiently proof the dough during the day. This method requires that your starter has been fed and is on a rise prior to starting, so it will be an early morning for you. It is an option, but time = flavour, so I recommend the first two options over this one.
Tips for making a gluten free, FODMAP friendly margherita pizza
- Use my recipe for FODMAP friendly pizza sauce as the red sauce base.
- If you’re in Australia, I highly recommend seeking out That’s Amore mozzarella, whether it’s fresh in the tub or dry in the packet. It’s so much tastier than the generic supermarket brands and it melts incredibly well. I find their dry packaged one is the easiest to use for me personally (I love the smoked one too)
- Generally I’m a grated cheese gal but in this case I find small 1-2cm cubes of mozzarella strewn evenly across the base creates the best melt.
More gluten free sourdough recipes
- This sourdough loaf that is rice flour free
- Banana bread that uses gluten free sourdough discard
- Crackers that use sourdough discard
- Brownie cookies
- My original sourdough loaf recipe
More gluten free, FODMAP friendly pizza adjacent recipes
- FODMAP friendly pizza sauce
- These xanthan gum free yeasted pizza bases
- The wholegrain sourdough pizza bases from Intolerance Friendly Kitchen
- This garlic infused oil, for drizzling over the pizza
- Vegan, low FODMAP mozzarella recipe

Gluten free sourdough pizza bases (FODMAP friendly, nut free, vegan)
Ingredients
Dry:
- 150 g sorghum flour
- 150 g tapioca flour
- 150 g brown rice flour
- 12-13 g 2 1/4 teaspoons salt
- 1/4 teaspoon ginger powder optional (ginger powder is coffee for yeast!)
- 20 g psyllium husk not psyllium husk powder
Wet:
- 130 g starter thick, active and fed 3-4 hours prior
- 570 g water
- 2 tablespoons olive oil
Instructions
The night before:
- Weigh out all the dry ingredients in a large glass or plastic bowl.
- In another mixing bowl, combine the starter and water, whisking to combine and loosen the starter. Pour this into the dry mixture, and follow with the olive oil.
- Whisk really well to combine. The mixture will look horribly runny – like it could never form a pizza dough. Fear not! Over the course of 10-15 minutes it will gradually thicken to the point where you could grab a ball of it. I promise.
- Once the dough has thickened, cover it and either pop it on the bench or in the fridge to ferment overnight. See the notes on proofing section for the best option in your climate.
The next day:
- If you left the dough on the bench, pop it in the fridge until you need to use it.
- When you’re ready to bake, take the dough from the bowl and divide it into 5 equal balls of dough. Lightly flour a sheet of baking paper, and use the palm of your hand to flatten each ball into a pizza base just smaller than a dinner plate. The dough rises as it cooks, so you can make the bases quite thin.
- If you fancy, fold just the edges of the pizza dough up onto the pizza and press to secure, creating a raised crust around the edges. Flip the pizza over so the seams are hidden and you have a lovely raised crust.
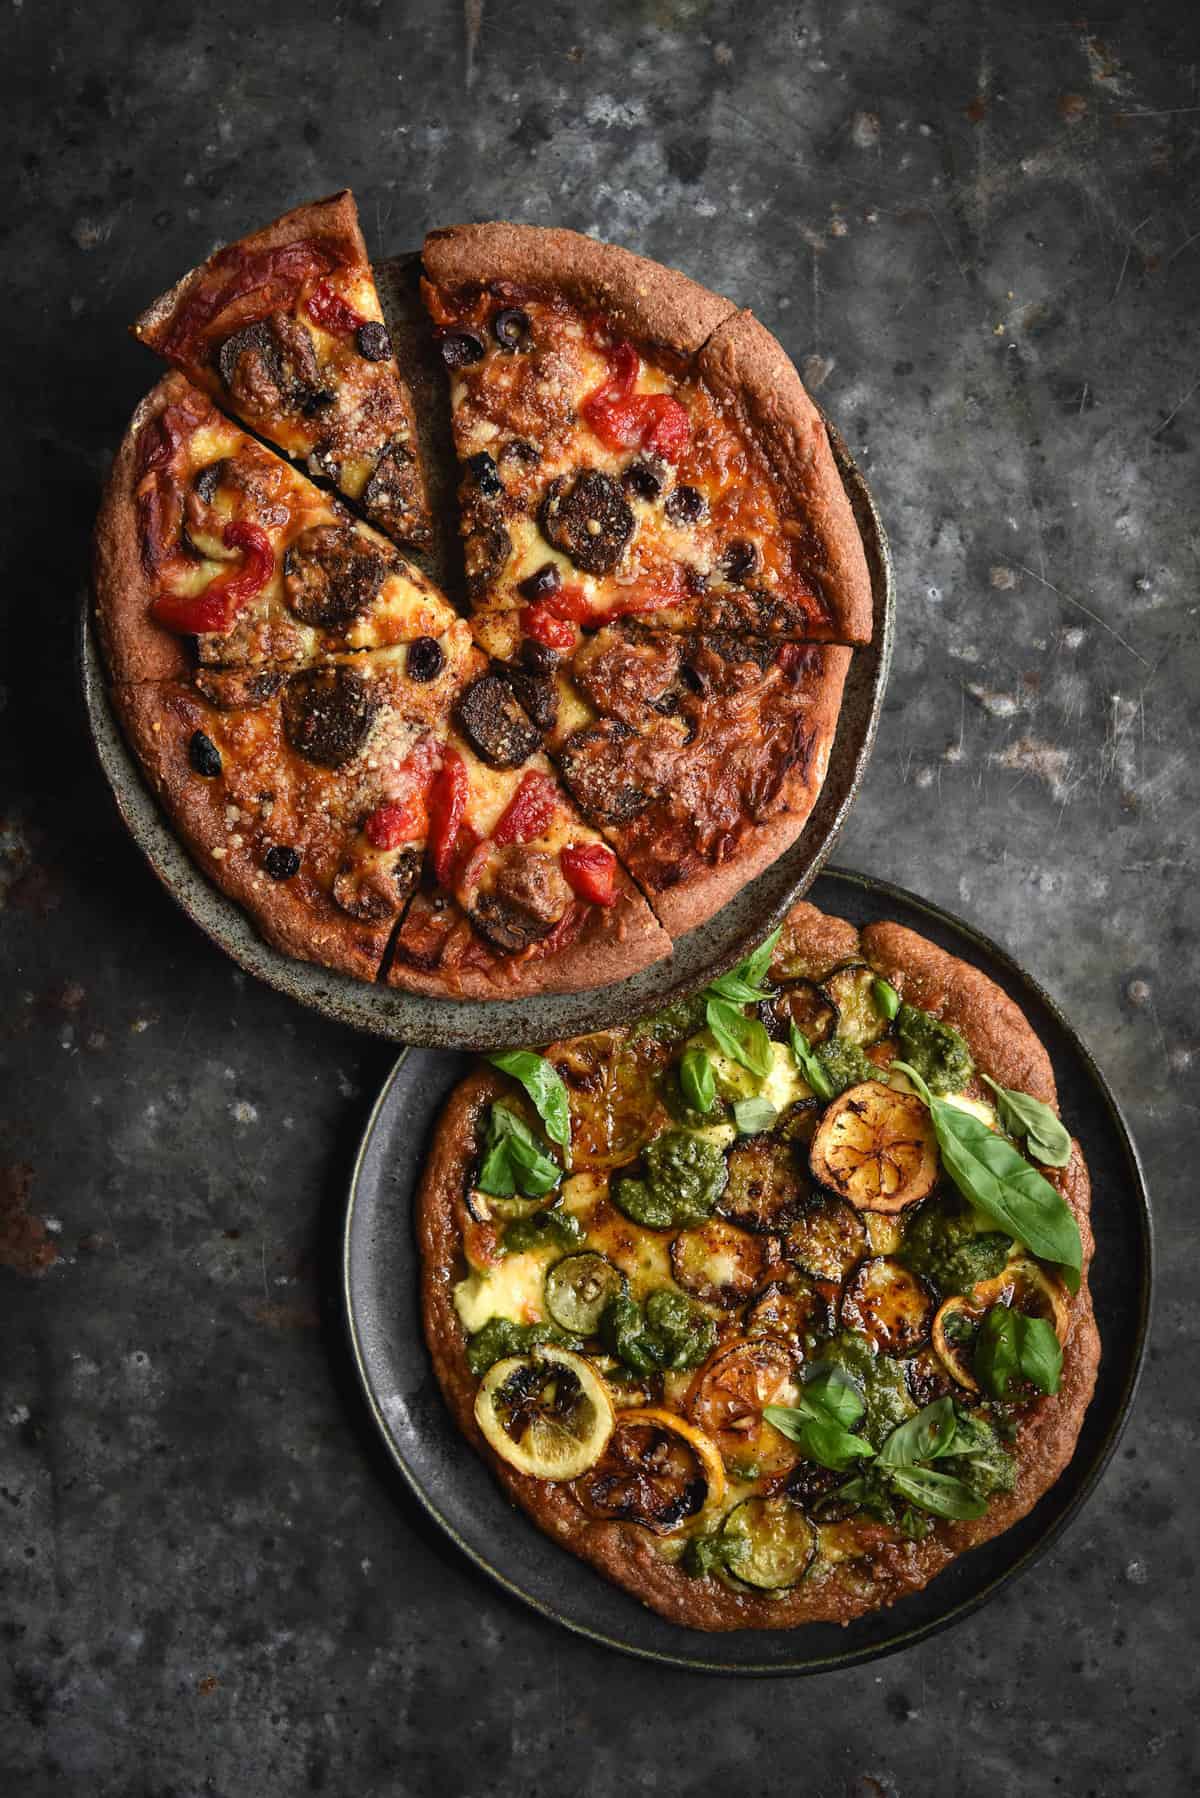
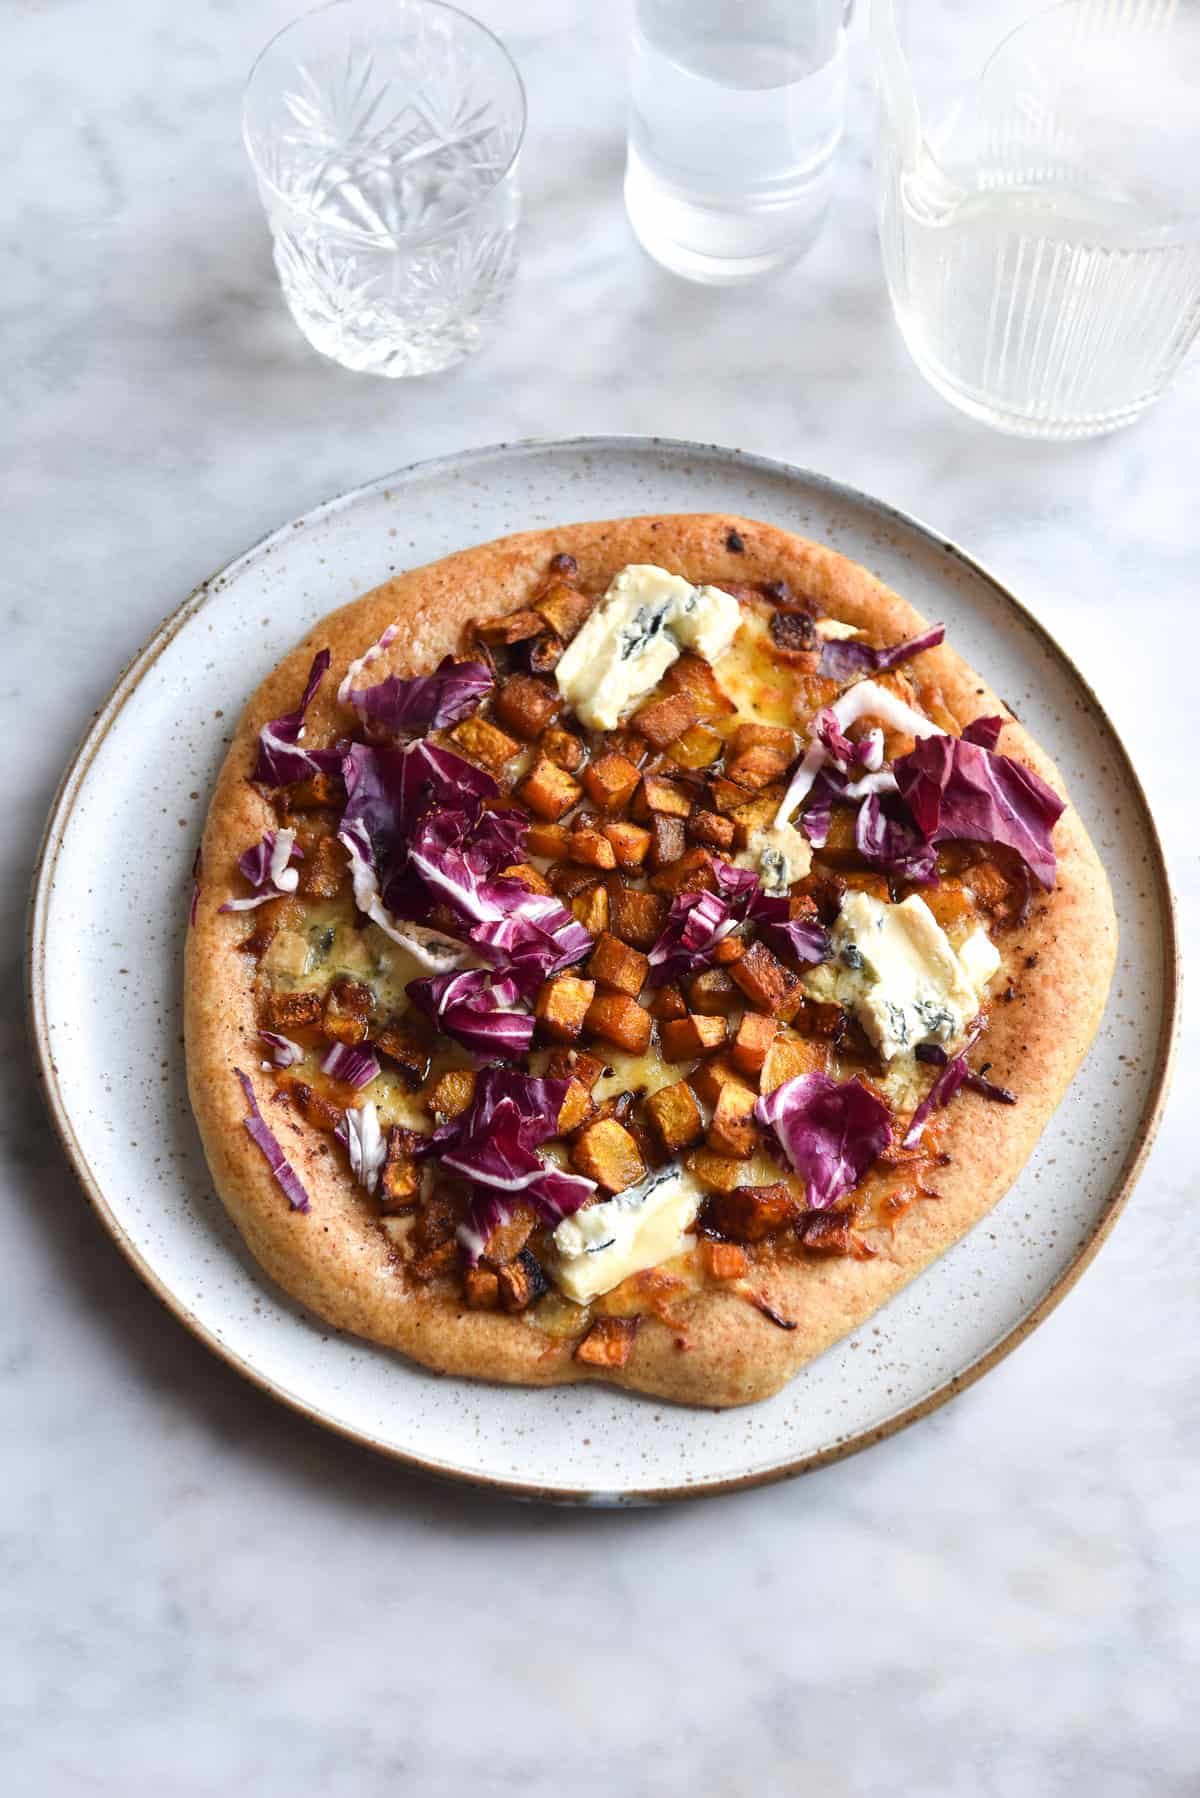
- You can top the dough raw or parbake it before topping. I usually top it raw, but I recommend par baking if you plan to use lots of heavy toppings which might leave the base uncooked.
To bake:
- Preheat your skillet, pizza stone or maybe even just a pizza tray (I haven’t tried this but it’s better than nothing) at the highest heat your oven can go for 30 minutes. Nothing with any plastic parts though, please.
- Either top your pizza base lightly raw or par-bake the dough first. Either way, turn the oven down to 200C/400F and place the pizza on the sheet of baking paper in the oven.
- Par-baking the dough will take around 10 minutes. Cooking the pizza raw with the toppings on will take around 15-20 minutes, more if your toppings need to cook too. 15-20 minutes works well for a margherita or something equally simple.
Thank you! I have made this for my family three times now and last time I successfully made it with no recipe. Everyone loves this and even the picky eaters. Thank you.
I’m so glad to hear that! Thank you for the feedback, it’s always so appreciated 🙂
Another fab recipe! I made this on a whim so proofed in the oven with the light on for about 4 hours-that did rather overproof it I think in terms of floofiness! However the final pizza was actually brilliant so the overproofing didn’t hurt in the end. My husband, who adores pizza, gave it a solid 8/10 and said it was easily the best GF pizza I have ever made so I’m well chuffed. Thank you!
I’m so glad you and husband enjoyed them Kate! Excellent feedback from a pizza fanatic haha. Thank you 🙂
I am starting to make the sourdough starter & can’t wait to try this pizza recipe! I do have a quick question, could i bake the pizza in a pizza oven? I have a Gozney roccbox and we cook all of our pizzas in this but this would be the first time trying out GF dough.
Hi Alisson! I really want to get a pizza oven so I can try this out. I daresay it would be fine (better, even) but I have no experience with it thus far. My only concern is that gluten free pizza bases can be quite floppy and I think it would be very difficult getting it off the peel in one piece. If you can cook it on something (the peel, a tray etc) then I imagine they would work incredibly well. I will update the post when I can get my hands on an oven (everyone seems to want one right now!)
A question, could i make this with a gluten sourdough starter? I have a wholemeal (gluten) starter and was wondering if it would work the same as a gluten free sourdough starter.
Wow! I am totally amazed how well this has worked! I have tried so many gf bases and this is by means the very best – I am so impressed. I have even attempted gf starters and have always failed – but not this time. I love your well written recipes with all your tips and recommendations. Thank you!
So excited to try this! I’m curious, is it possible to freeze the par-baked crust and use at a later time?
Hi Katie! I haven’t tried it because I always go hard on pizza night haha, but I don’t see any reason why you couldn’t. It works for other pizza recipes so it should work for this one too!
Best gluten free pizza base! I’m so glad I gave your GF recipe a try. I’d almost given up on trying anymore pizza base recipes but your ‘different’ ingredients caught my eye. So glad I gave it a whirl. Just love the texture and the flavour of the dough. I rolled the dough out thin on top of parchment paper using a rolling pin to cover 3 large pizza trays. It rolled beautifully! Par baked for 10 mins and a further 15 with toppings on as you suggested. Our pizzas were delicious and the bases were so good looking. Your GF pizza base recipe will be my go to from now on. No need to look any further. It’s a winner! Thank you so much for sharing!
150 g sorghum flour
150 g tapioca flour
150 g brown rice flour
Is there an equivalent to this if using a 1 for 1 GF flour? I don’t have all three separate flours and usually only use 1 for 1 GF flour in place? If I was to replace with 450g of flour not sure if this would work?
Hi Leah,
Apologies, I am on holiday in South Korea at the moment.
I don’t bake with 1 to 1 blends and particularly not for sourdough or yeasted products. Because 1 to 1 flour blends are normally very high in starch, they proof a lot quicker than wholegrain flours. This is because starch is easy food for the yeast. It can result in many things but namely that alcohol taste when a yeasted product has over proofed.
Blends also generally contain gums and I don’t have any experience with how gums and sourdough starter work together. It might be fine but I can’t say for sure.
Sorry I can’t be more helpful but I do recommend using a majority wholegrain mix when working with sourdough 🙂