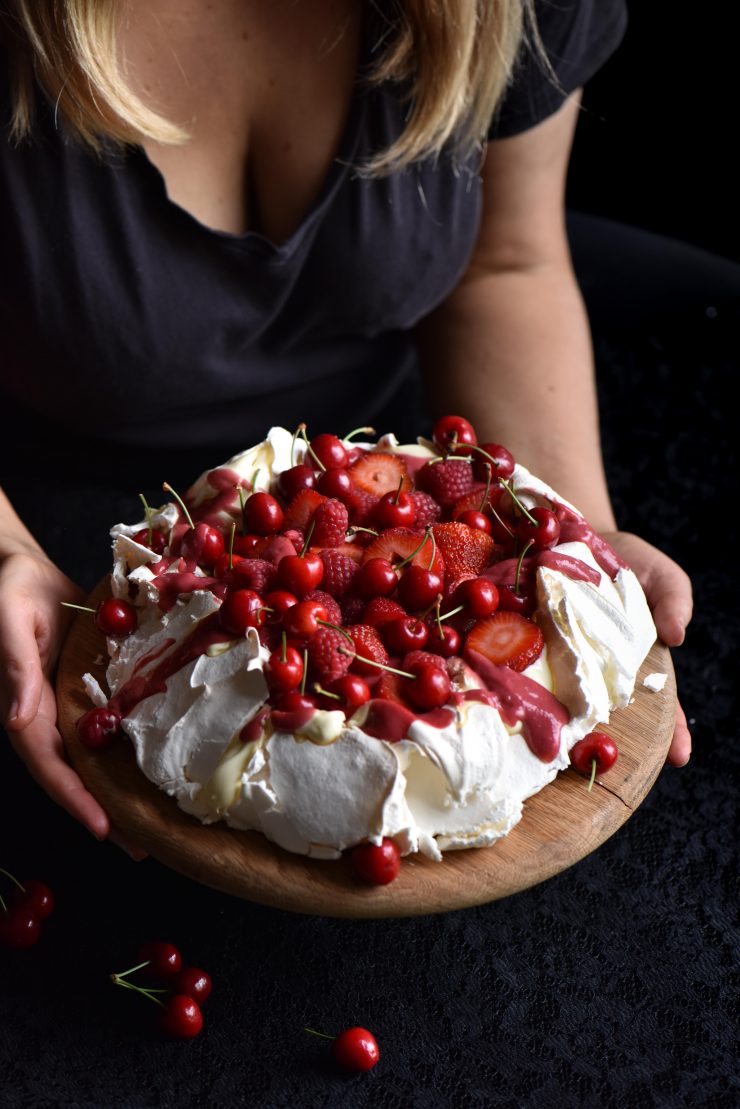
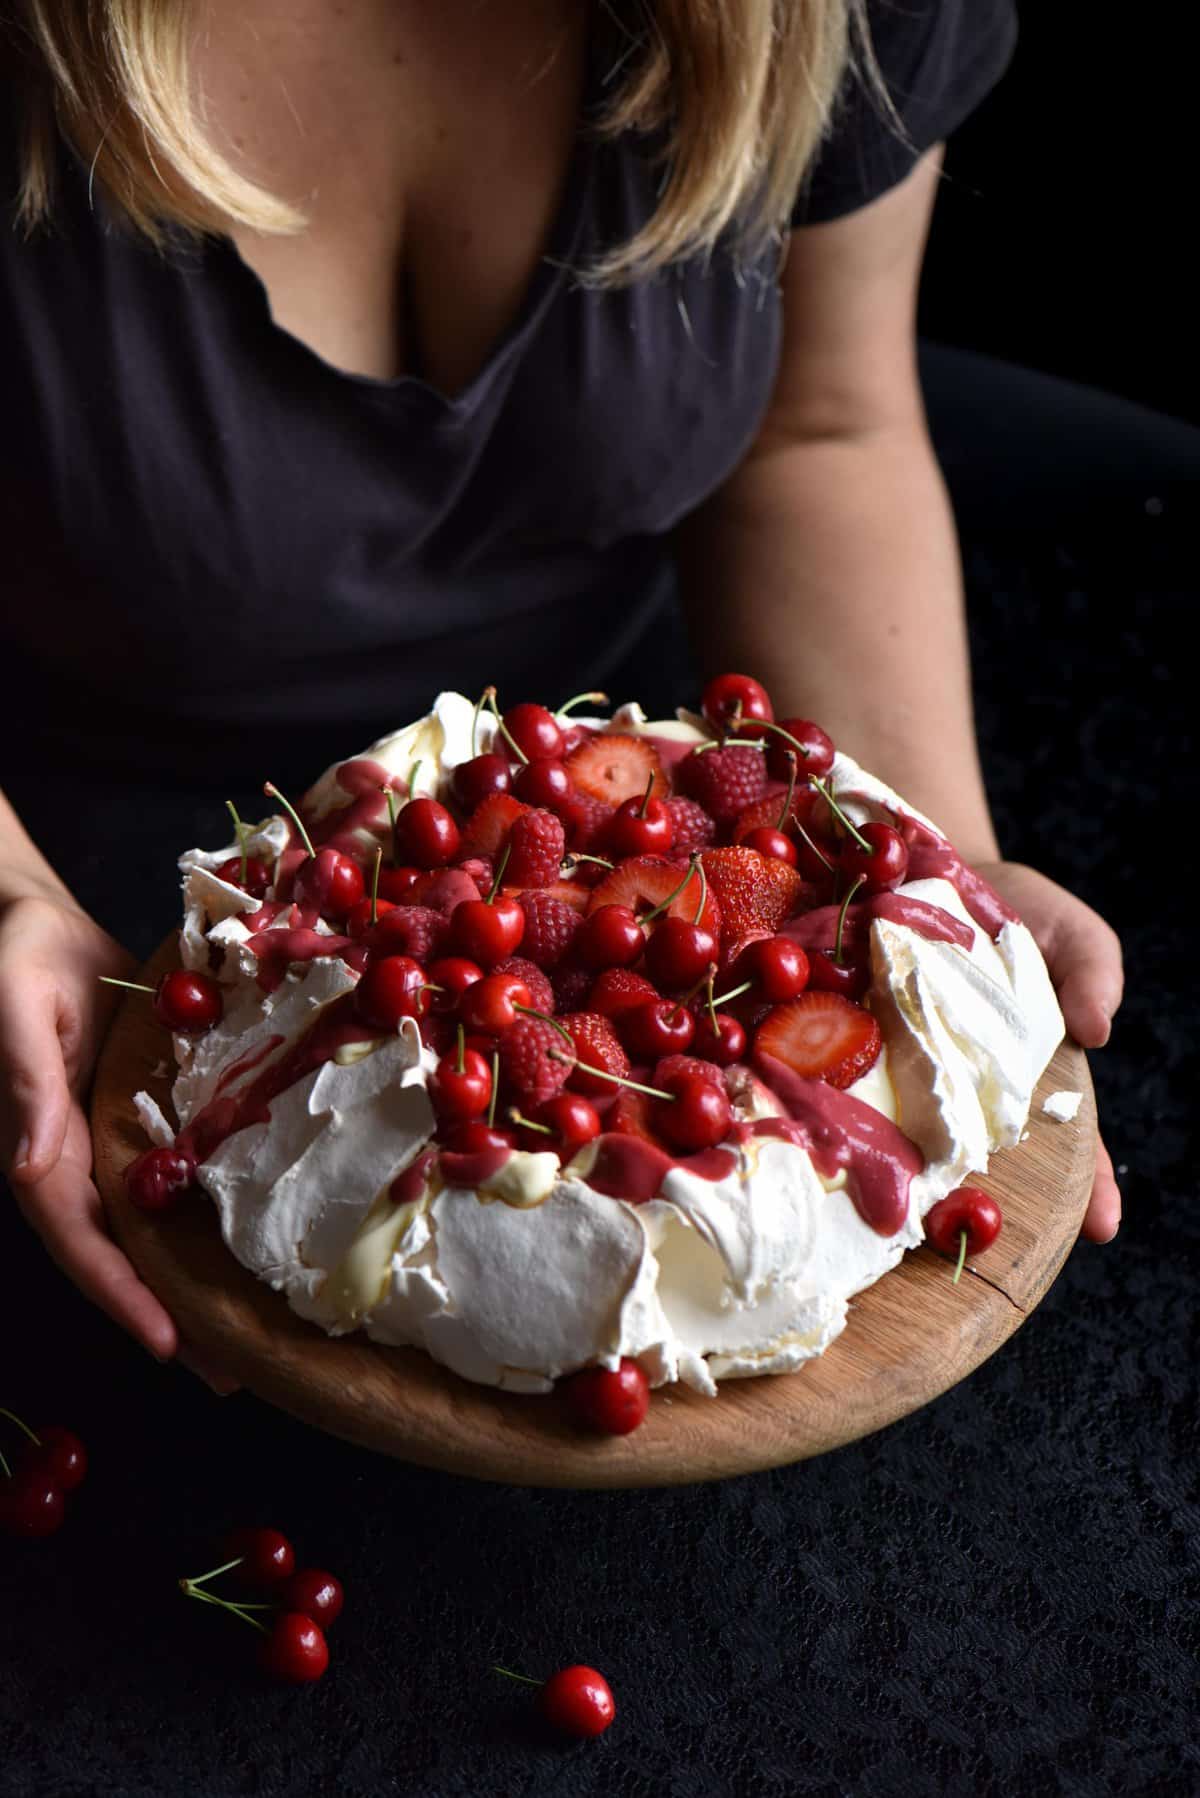
When it transpired that the tree on my balcony was full of cherries (and not ‘baby nectarine buds’ as I had believed) I knew this pavlova with lactose free raspberry curd was the order of the day. I’ve wanted to make a festive berry pavlova in time for Christmas for about 5 years in a row now. Turns out I’m as organised as I am knowledgeable about fruit frees (I knew this before the cherry incident, though.)
This pavlova is based on the one in my first cookbook, with a few tiny tweaks to switch things up. The curd is inspired by the dairy free lemon curd in the book, which in turn inspired my lime curd tart.
Speaking of curd: it is completely lactose free and waste free by design. I use coconut oil in all my curd recipes because it think it allows the clean acidity of the citrus and berries to shine through. It doesn’t remotely taste of coconut, just of a tangy, bright and flavourful curd.
Pavlova with lactose free raspberry curd
The thing that stops me from making pavlova more often is how many egg yolks I have lurking around my freezer at the end. As we all know, the freezer can often be where leftovers generally go to get forgotten and eventually binned. With that in mind, I decided to develop a curd recipe using the egg yolks from the pavlova. Using the yolks up means this is a no waste pavlova.
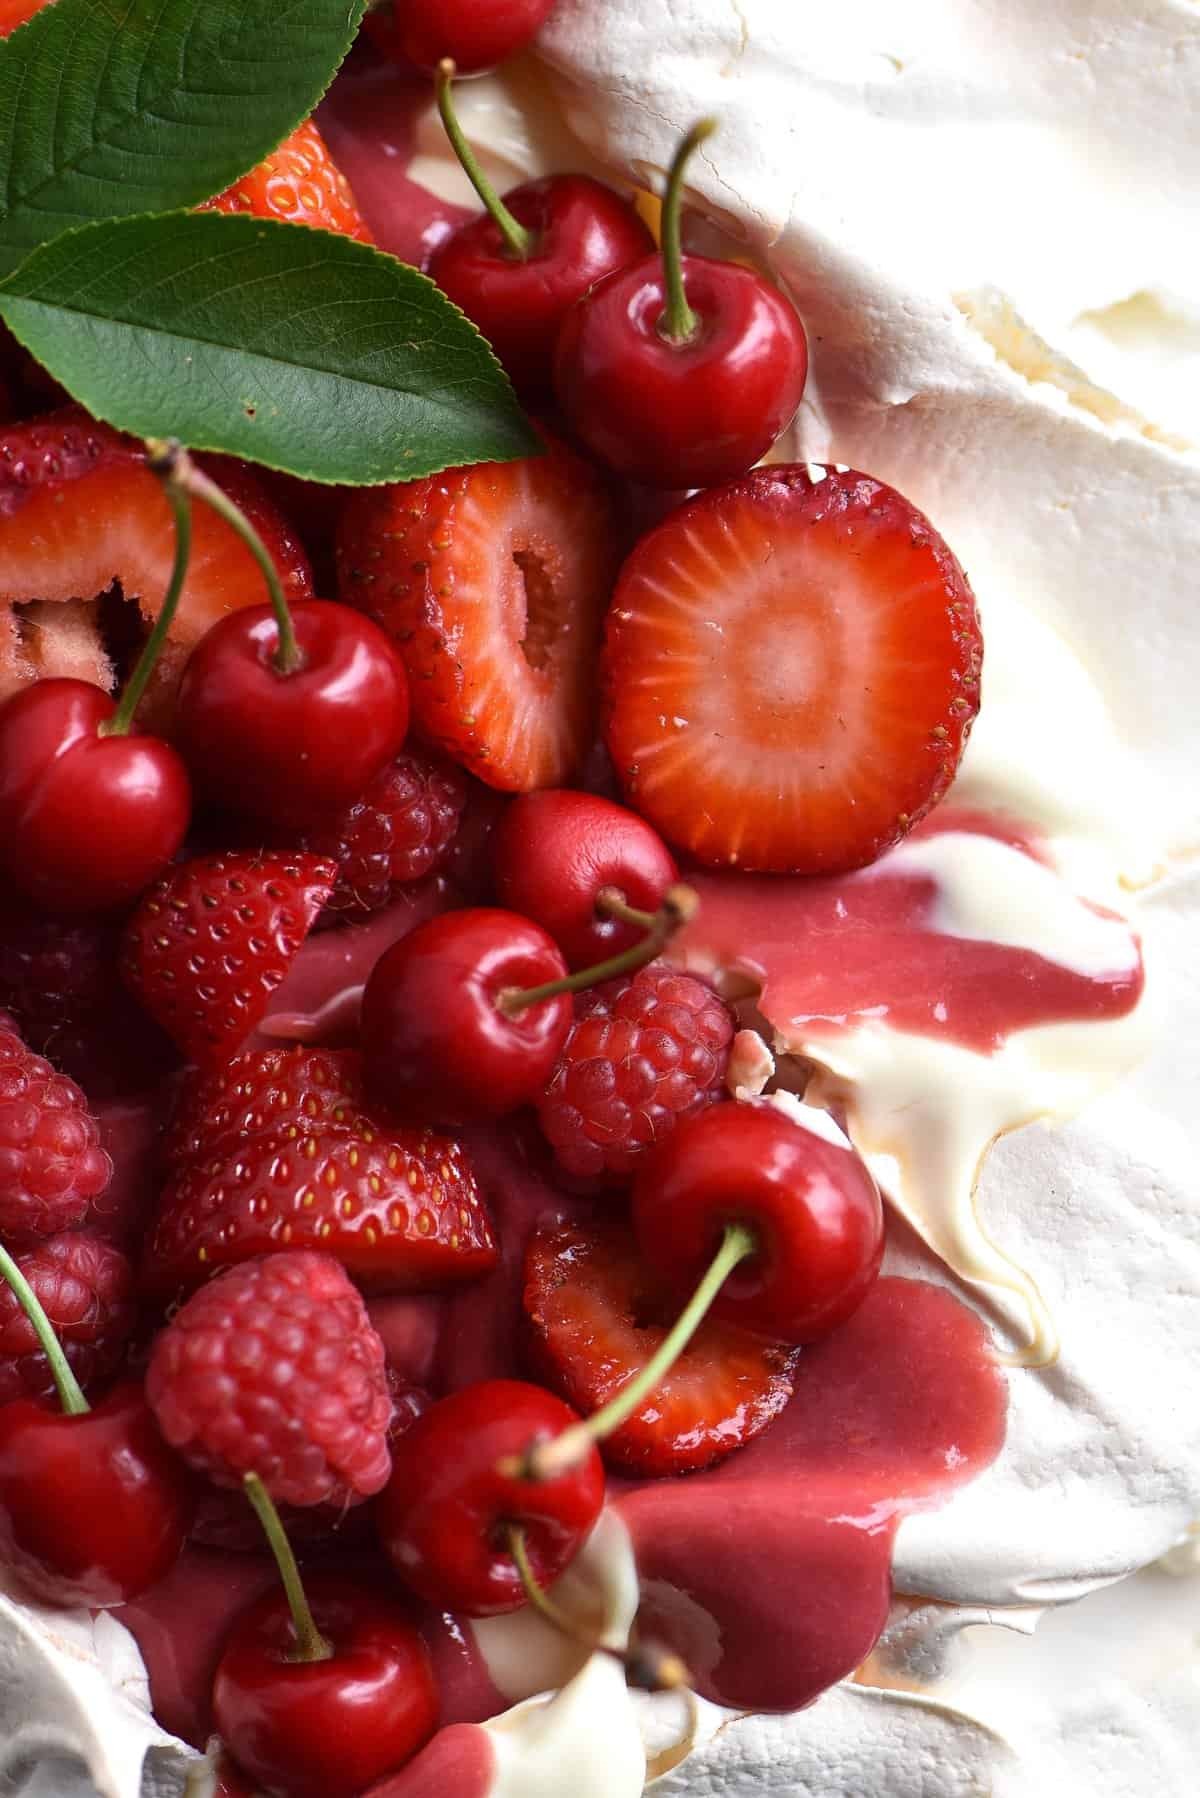
In keeping with the berry theme, I decided to make a raspberry yolk curd. It’s bright, flavourful and tangy without being overbearing. I wanted it to be sweet but tart in order to play off the sweetness of the pavlova.
Lactose free raspberry curd notes
You can use fresh or frozen raspberries for this curd. I didn’t cook or strain the frozen raspberries prior to use and I found the curds to be the practically the same consistency.
One thing I did notice in using fresh and frozen raspberries was that the frozen raspberry version had a deeper, nicer colour. I’m unsure if that was just the batch of raspberries or whether it’s something more, but I personally preferred the frozen raspberry version.
If you’re using frozen raspberries, don’t add the egg yolks until the raspberries have totally melted. They tend to solidify the coconut oil as they’re melting, and I daresay the temperature changes wouldn’t be ideal for the egg yolks. So, add them last.
You can sieve the raspberry seeds from the finished curd for a smooth finish, if you like. I have to say, I prefer the strained version here. That said, if you’re dedicated to the no waste side of this recipe, use the seeds in your smoothies for the next few days if you strain them.
Just a pinch of salt brings out flavour complexity and is well worth it, I promise.
Ideally, make the curd the night before (same with the pav, really). This gives it time to set up nice and firmly.
If you accidentally ruin an egg white, you can add that extra yolk to the curd with no ill effects.
Needless to say, you don’t need to make the pav to make the curd! It’s delicious on it’s on or with berries and fruit.
Ingredient notes for the raspberry curd
As we’ve discussed, you can use either fresh or frozen raspberries for this curd. I think frozen actually create a slightly nicer colour and taste, but both work.
Again, if you happen to mess up an egg, you can add that extra yolk into the curd with no ill effects. This doesn’t apply if you’ve broken like 4+ eggs, though. Just a sneaky extra (or maybe two).
Raspberries can vary in their tartness, it goes without saying. If you find your curd is too tart, add a little extra sugar and continue cooking it. If it is too sweet, add a little extra lemon juice.
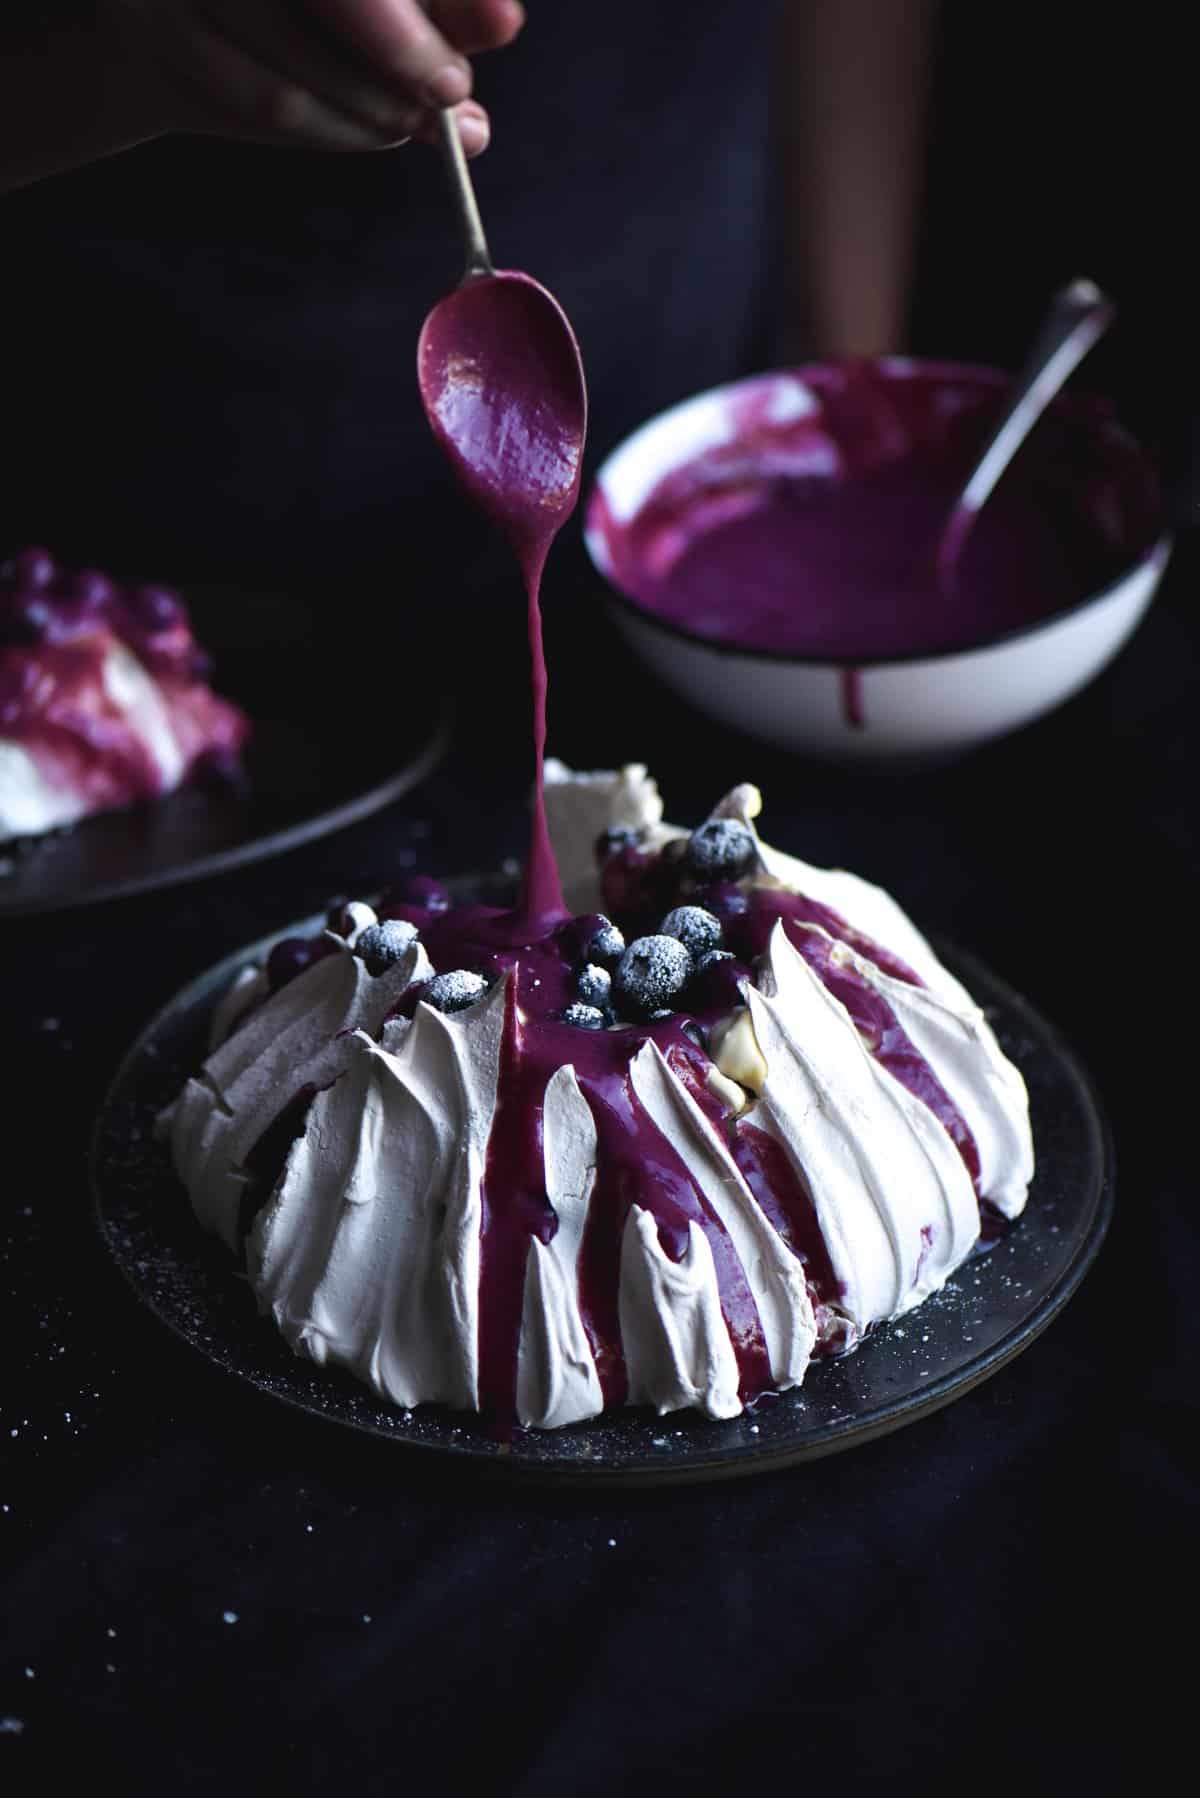
You can also use the same amount of blueberries to make this curd. I recommend using frozen and cooking them with the sugar and lemon juice (mashing as you go) before adding the coconut oil and egg yolks. They take a little longer to mash than the raspberries, but the brilliant purple colour is worth it. I also recommend adding an extra tablespoon of lemon juice, as blueberries are often sweeter than raspberries.
The curd is ready when it coats the back of a spoon. It might look runny to you (particularly the blueberry one) but it firms up to a thick custard consistency in the fridge. I promise.
You could use lime juice or grapefruit juice in place of the lemon if you prefer.
I don’t have a substitute for coconut oil. I promise you can’t taste it!
Ingredient notes for the pavlova
I generally use extra large eggs, but I recommend large eggs for pavlova purposes, and always at room temperature. I recommend getting them out of the fridge the night before, if that’s where you keep them.
It’s gotta be caster sugar for a pavlova. I was shocked to discover that other countries don’t always have easy access to caster sugar like we do in Australia. If you don’t, there are lots of resources on how to make your own caster sugar from granulated sugar on Google.
In the original recipe I used vanilla in this recipe, but I’ve excluded it from this one. That’s because I wanted the pavlova to be white in colour. If that doesn’t phase you, you can absolutely add a teaspoon or two or vanilla bean paste or extract.
I don’t have any substitutes for the white vinegar or gluten free cornflour. I won’t recommend any either, because I don’t think pav making is something you want to mess with. Neither ingredient is expensive.
You can add 1/4 cup extra caster sugar as a bit of an insurance policy, if you like.
Pavlova tips and tricks
I’ll shoot straight: pavlova can be finnicky. Working with egg whites, there are a few things you need to pay attention to in order to succeed. Before we begin, might I suggest you have a read of this post by The Flavour Bender? It contains everything you would ever need to know about making a successful pavlova. Very impressive.
Tips and tricks
Start with SQUEAKY CLEAN beaters, bowls and hands. Grease is the enemy of well whipped egg whites. You can run a slice of lemon over your well cleaned bowl (to get any last bits of grease) but make sure you wipe out any lemon liquid with a dry, clean tea towel afterwards.
A kitchen stand mixer will save your life (and your arms) here. The pavlova needs around 15-20 minutes of beating (on a low speed) to ensure all the sugar is incorporated.
On the 15-20 minute thing: don’t rush the process of beating in the sugar. I like to put my mixer on a low-medium speed (a 2-3 on a KitchenAid) and throw a spoon’s worth in every 20 seconds or so. I then continue to beat it until I can rub it between my fingers and not feel any sugar granules.
Cook the pavlova on a low and slow heat. I like to make mine the night before and allow it to cool completely in the oven. Cooling it slowly will minimise the risk of your pavlova cracking. I actually don’t mind the look of cracks, but anyway.
Humidity is the enemy of a pavlova. My kitchen is extremely humid, so I learnt this one the hard way. If yours is too, really think about when you make your pavlova.
Pav is done when it easily comes off the baking paper. If yours doesn’t, cook it a little longer.
piling berries and cream on top of something can hide all manner of sins!
Factors I have noticed make for a successful pavlova
This pavlova was supposed to be a one and done job, given I’ve made pavlova before. Needless to say, it was not so. The first three pavlovas, although beautiful, suffered weeping in various degrees. Weeping is really only a small issue and not the end of a pavlova, but I wanted to ensure this recipe was airtight.
- Pay attention to weights and ratios. According to the greats (and the internet) the average ratio for a pavlova is 1 large (not small or extra large or jumbo) egg white to 55g of sugar. This can vary a little between recipes. However, as sugar is the stabiliser in pavlova, it’s best not to go too far under this ratio. You can go over – more sugar creates a more stable meringue, to a point. That said, I don’t think it’s worth making a revoltingly sweet pavlova just for ease.
- Whisk on a low-medium speed, both during the egg whites and the sugar adding phase. I found that when I mixed on a lower speed than I felt comfortable with (my instinct is to crank the speed up) and when I stopped a little earlier than I thought I should, I came away with a pav that didn’t leak any sugar. I felt a little like I had under beaten the egg whites to begin with and I had to keep the mixer going for 10 minutes after adding the sugar, but it worked. So, low and slow.
- Anecdotally, I stood by my stand mixer with a timer and added a tablespoon of sugar every 20 seconds. I don’t think you need to be that rigid about it (although anything goes after 3 weeping pavs). That said, it’s a good indicator of the rough timing for adding the sugar in.
Helpful links
- First of all, this Kitchn guide to soft peaks is helpful in ensuring you get the right consistency to begin with.
- I found this article from Decadent Alternatives to be the most helpful I found in terms of comparative science. While a lot of articles just parrot off the traditional answers for poor meringue, this one goes in deeper.
- As I’ve said, the article by Flavour Bender has all the troubleshooting you could ever need.
Monash FODMAP update
Monash have introduced a threshold for strawberries, which is !rude! They used to be ‘eat according to appetite’ whereas now a FODMAP friendly serving is 65g. If you have previously eaten large quantities strawberries with no issues, then you don’t need to change anything. If they have given you issues, I recommend sticking to smaller quantities of strawberries and berries.
More lactose free desserts
- Lactose free, gluten free Tiramisu
- Lactose free creme caramel
- Vegan brownie cookies
- Lactose free cheesecake with a gluten free shortbread base
- This gluten free chocolate self saucing pudding is easily made lactose free
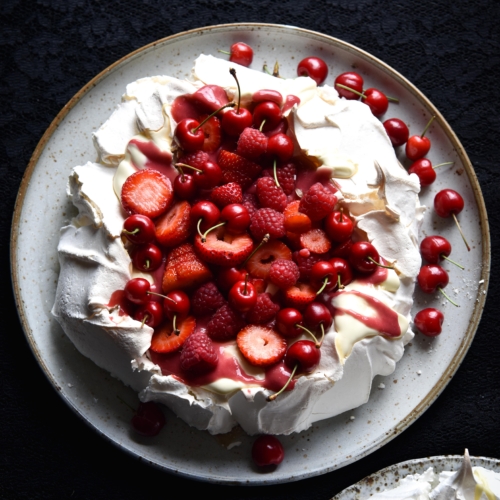
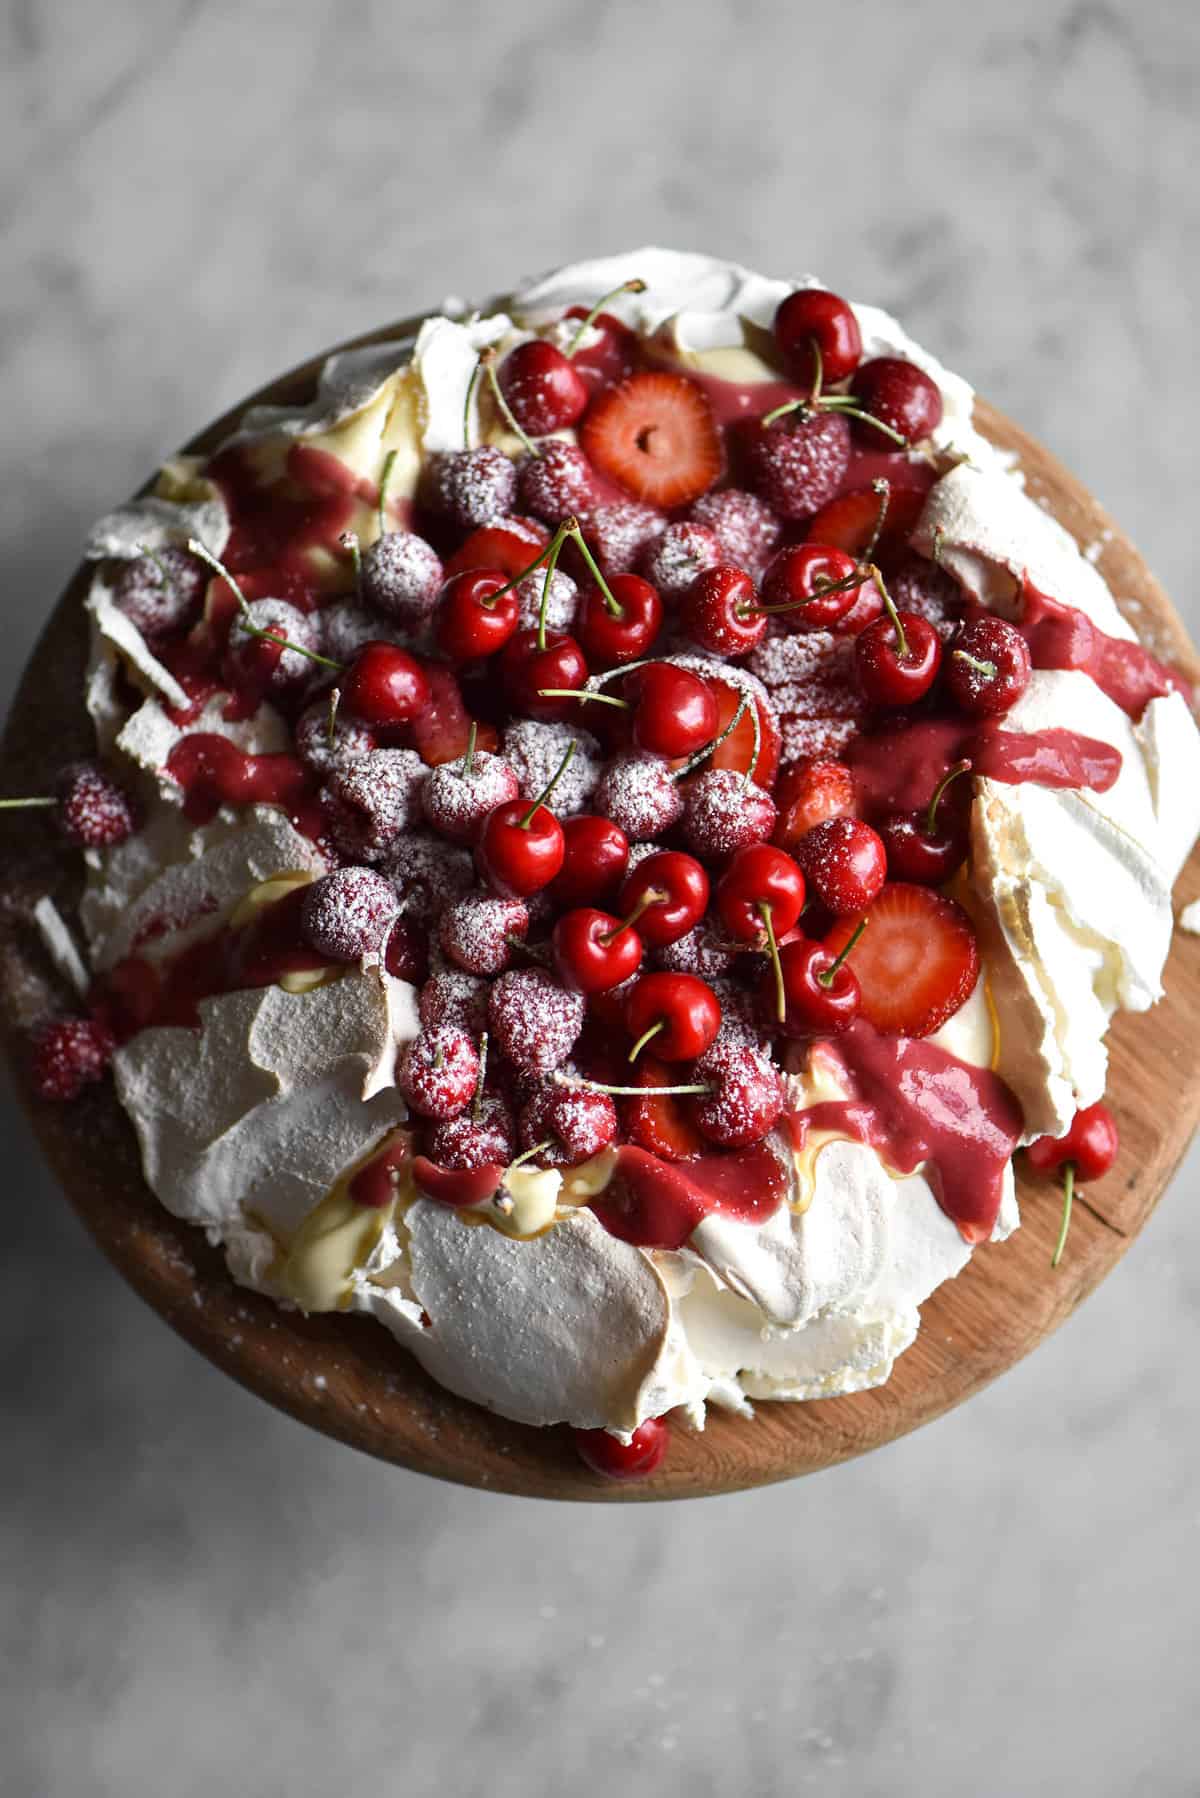
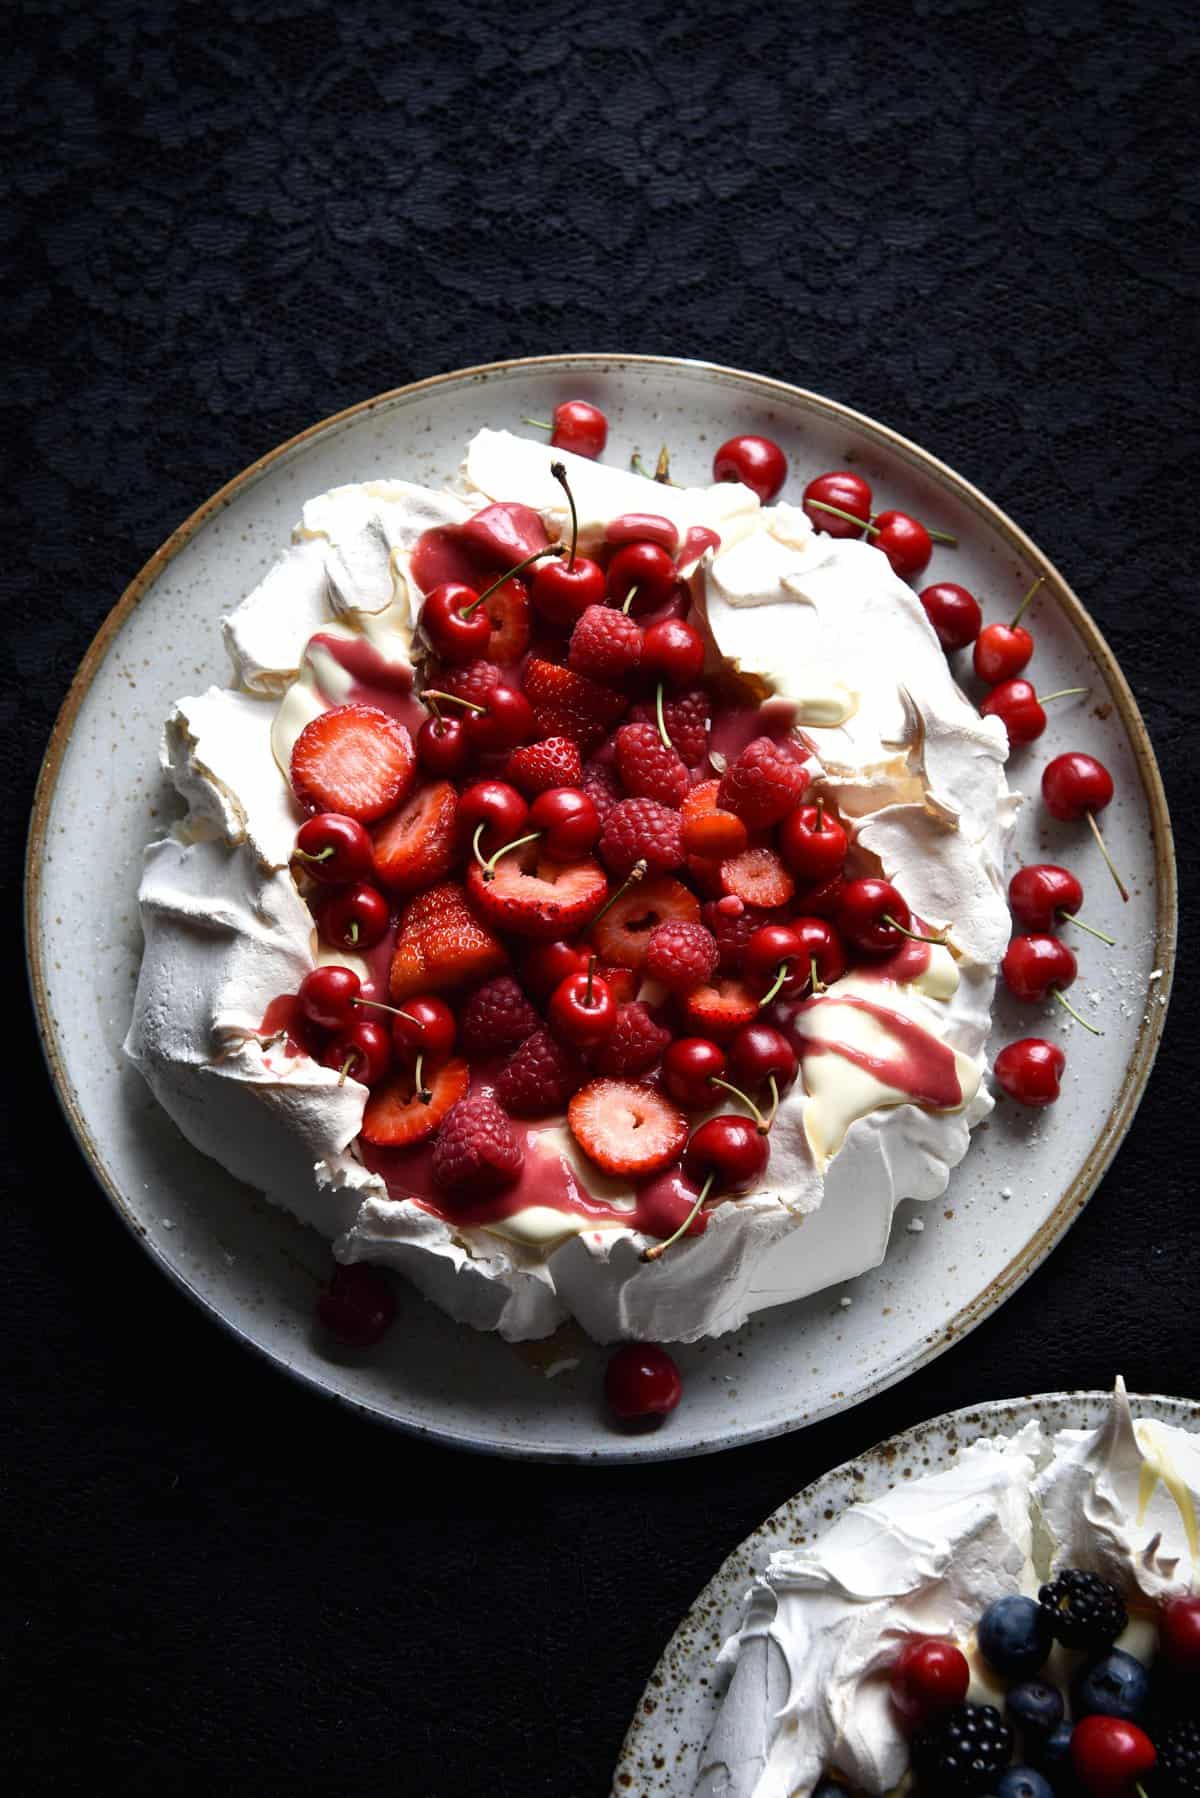
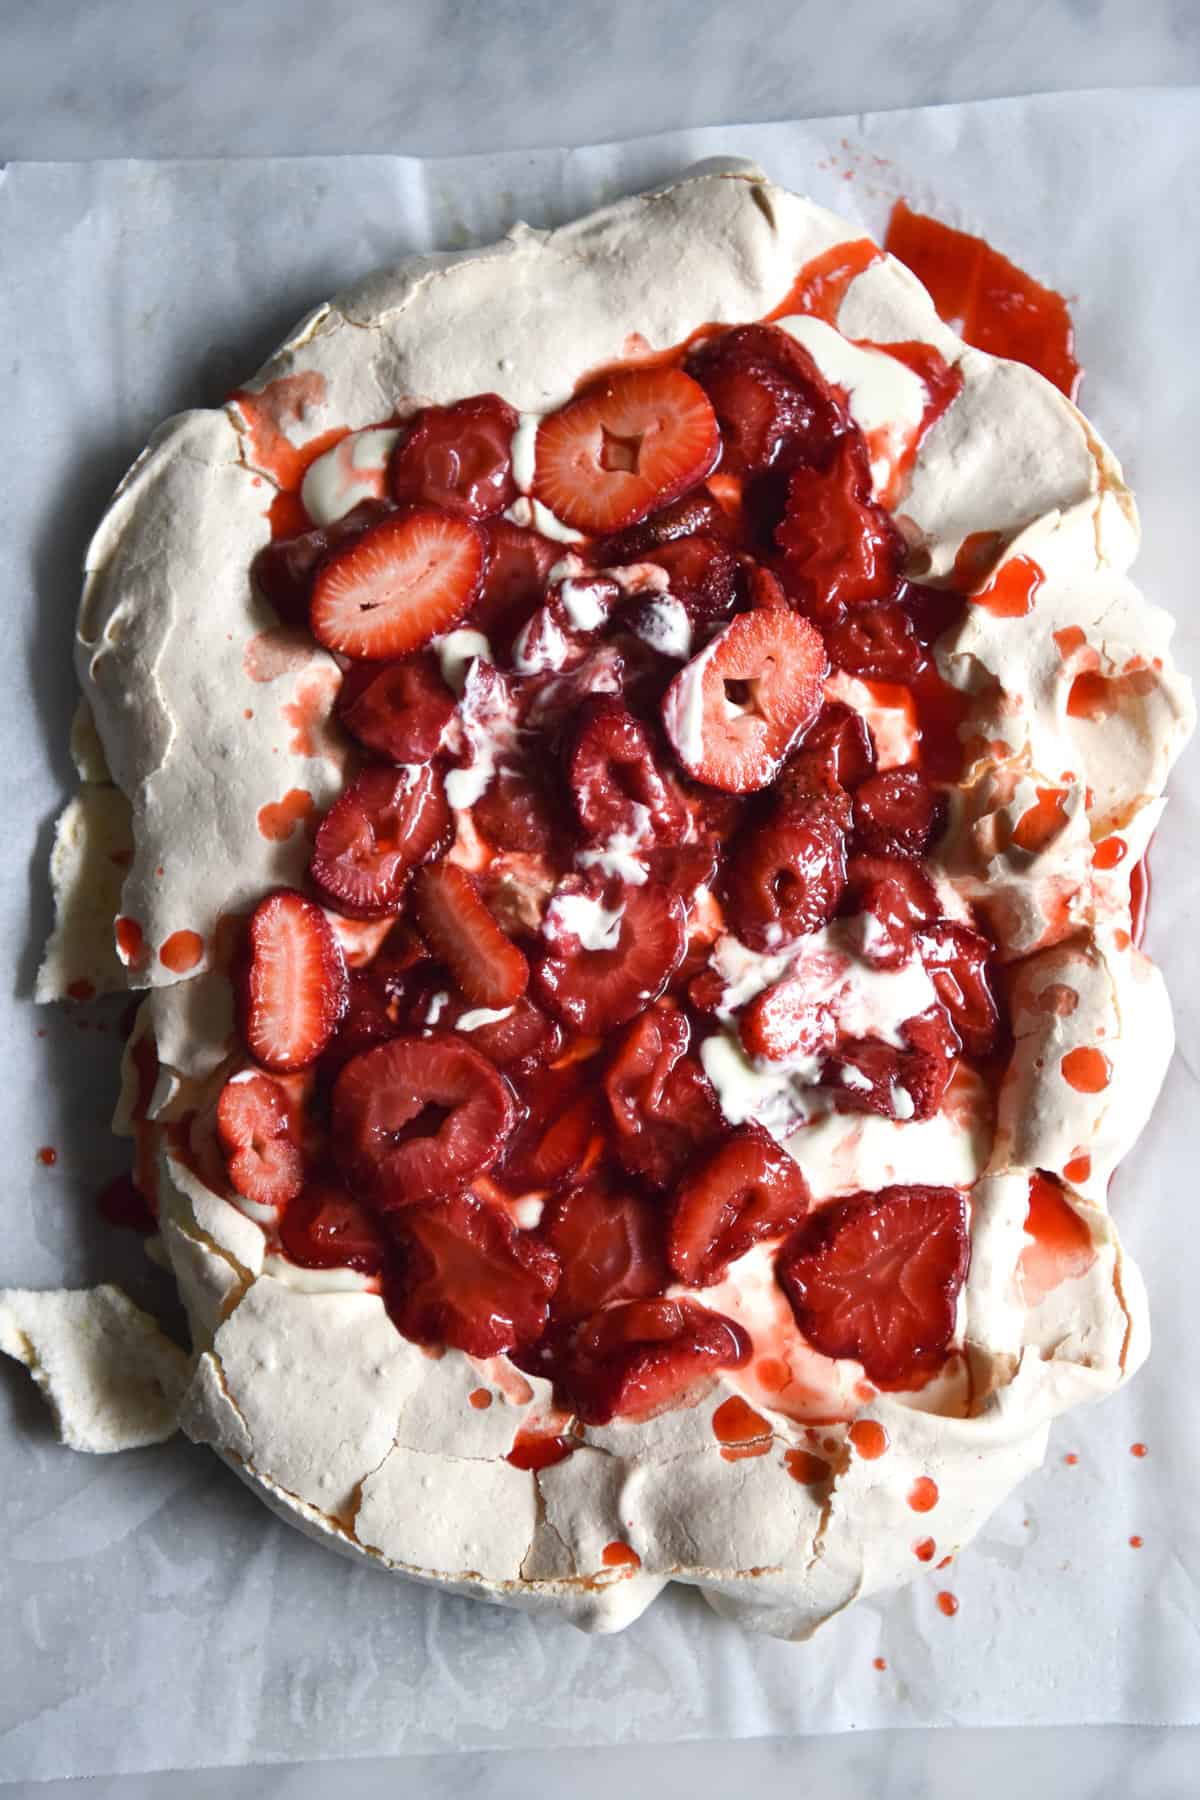
Pavlova with lactose free raspberry curd and berries
Ingredients
For the pavlova:
- 6 large egg whites
- 330 g caster sugar (1 1/2 cups Australian)
- 1/2 teaspoon lemon juice or white vinegar
- 1 tablespoon gluten free cornflour
For the raspberry curd:
- 6 large egg yolks (leftover from the pavlova)
- 200 g raspberries fresh or frozen (see notes)
- 125 ml 1/2 cup melted coconut oil (measured after melting)
- 1/2 cup (110g) caster sugar
- 4-5 tablespoons fresh lemon juice
- Pinch of fine salt
To finish:
- 250 ml lactose free full cream or coconut yoghurt
- Or really: whatever you want
- berries of your choice (FODMAP friendly servings if need be)
Instructions
To make the pavlova:
- Preheat the oven to 150C/300F. Lightly grease a round baking tray and line it with baking paper. The grease will stop the paper slipping around as you try to shape your pav.
- Clean all your utensils scrupulously with hot water and dish soap. Rinse them thoroughly to rid them of all soap residue. Either allow to dry on their own (not touching anything) or dry them thoroughly with a clean, dry tea towel.
- Separate the egg whites and yolks in two clean, dry bowls. Add each egg white straight into the mixer so you don’t accidentally contaminate it with egg yolk.
- Once you’ve got all your egg whites in the mixer, use the balloon whisk attachment to whisk them for 3 minutes on a medium speed (I use speed 3-4 on my KitchenAid). I found that if I stopped whisking the egg whites just before I thought they were at soft peaks, my meringue was less likely to leak sugar.
- So, just before soft peaks, start adding the caster sugar, one tablespoon at a time. I set a timer for 20 second intervals, but you don’t have to be that rigid.
- Tablespoon by tablespoon, incorporate all of the sugar. It should take you around 10 or so minutes. During this time, it should start to become shiny and thickened.
- Once you have incorporated all the sugar, continue beating on a low-medium speed until you can rub a bit of meringue between your fingers without feeling any sugar granules. For me, this took around 10-15 additional minutes, but it might take less for you.
- Once you can no longer feel any sugar granules, add your lemon juice or vinegar and beat just to combine. Then add the cornflour and do the same – just a few spins of the mixer to combine it all.
- Use a clean silicon or offset spatula to pour the mixture onto the baking sheet. Shape it however you fancy, keeping in mind that taller pavlovas are more prone to collapse (and have more chewiness in the centre).
- Place the pavlova into the oven and turn the heat down to 120C/250F. Cook for 1 hour and 30 minutes, or until the pav can be lifted off the baking paper with no issue. Once ready, allow it to cool in the oven with the door closed – the gentle cooling helps prevent it from cracking.
To make the raspberry curd:
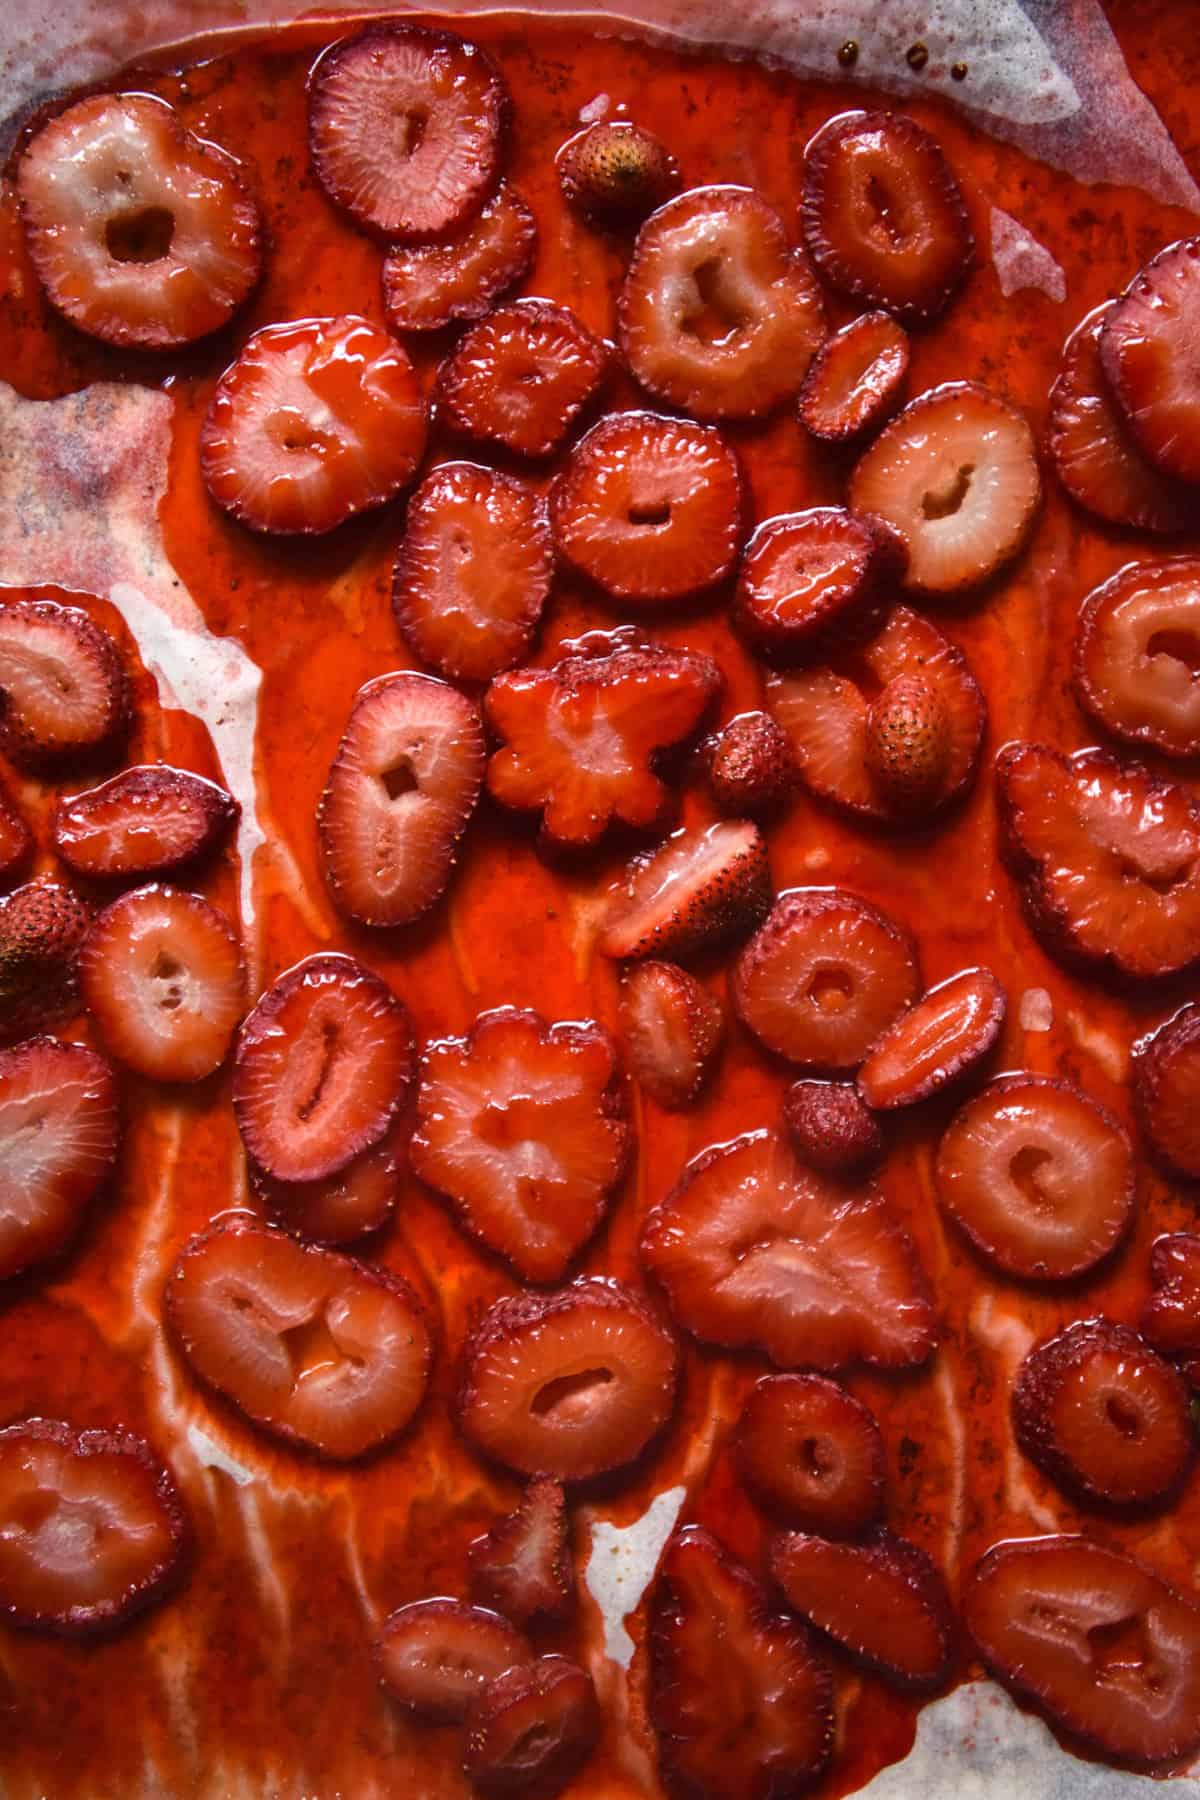
- Combine the ingredients for the curd in a small metal bowl over a small saucepan, 1/4 filled with water. Gently mix it with a fork over a gentle heat, squishing berries against the side as you mix. This will release their flavour and colour.
- Allow the curd to cook for around 10 minutes, or until it coats the back of a spoon. It might not be super thick, but it will thicken up in the fridge. As mentioned in the notes, this is best done the night before (as is the pavlova).
- Push the curd through a fine sieve to remove the raspberry seeds and store in an airtight container.
To finish the pavlova:
- Once the pavlova has cooled in the oven (ideally overnight) you’re ready to go. Immediately before serving, top it with cream or coconut yoghurt, the raspberry curd and whatever berries you fancy. Only top it immediately prior to serving, otherwise the wet ingredients will begin to dissolve the crunchy shell.
- Don’t make more than a day in advance and store it in an airtight container – not the fridge.
Made this today and it turned out great! I used granulated sugar by accident and it still worked out well. That said, I didn’t use your curd recipe because it doesn’t include sugar in the ingredients list, so you may want to update that. I used another similar curd recipe from a different site. Thanks for your beautiful recipes!