
This bread is grain free, vegan and made without xanthan gum or any gums. It is also nut free and made from a simple mix of flours. Personally, I think this is the best gluten free vegan bread I have made and it has the added bonus of being grain free (for those who need it).
The bread is made from a simple mix of cassava flour, tapioca flour and potato starch. It is held together with psyllium husk powder and water. A small amount of sugar (1 tablespoon) is added to aid in flavour development and browning, as well as providing a bit of a boost for the yeast.
The bread is very easy to make and requires no mixers or special equipment. All you need is a small steel Pullman and a bit of spare time (which is mostly hands off).
How much water should I add to this grain free vegan bread?
If you use my recipes often, you’ll know that I always mention that different flours (brand to brand, country to country) have different absorbencies. I work with flour constantly so this is something I really notice. If I bake a two loaves of the same bread with a different bag of rice flour, they are always different.
This means that you really need to use intuition when baking gluten free. Yeasted bread doughs need to be sufficiently moistened to allow the yeast to grow. If your bread dough is dry before you even start proofing, chances are you will end up with a dense, dry loaf.
This dough begins looking scarily thin and runny but almost immediately begins to firm up. After about a minute of mixing, you should be able to pick the dough up with your hands, even if it is a little sloppy. It should retain some of its shape. There should be no dry spots of flour in the bowl or on the surface of the dough. If your dough is a lot drier than this, you need to add more liquid.
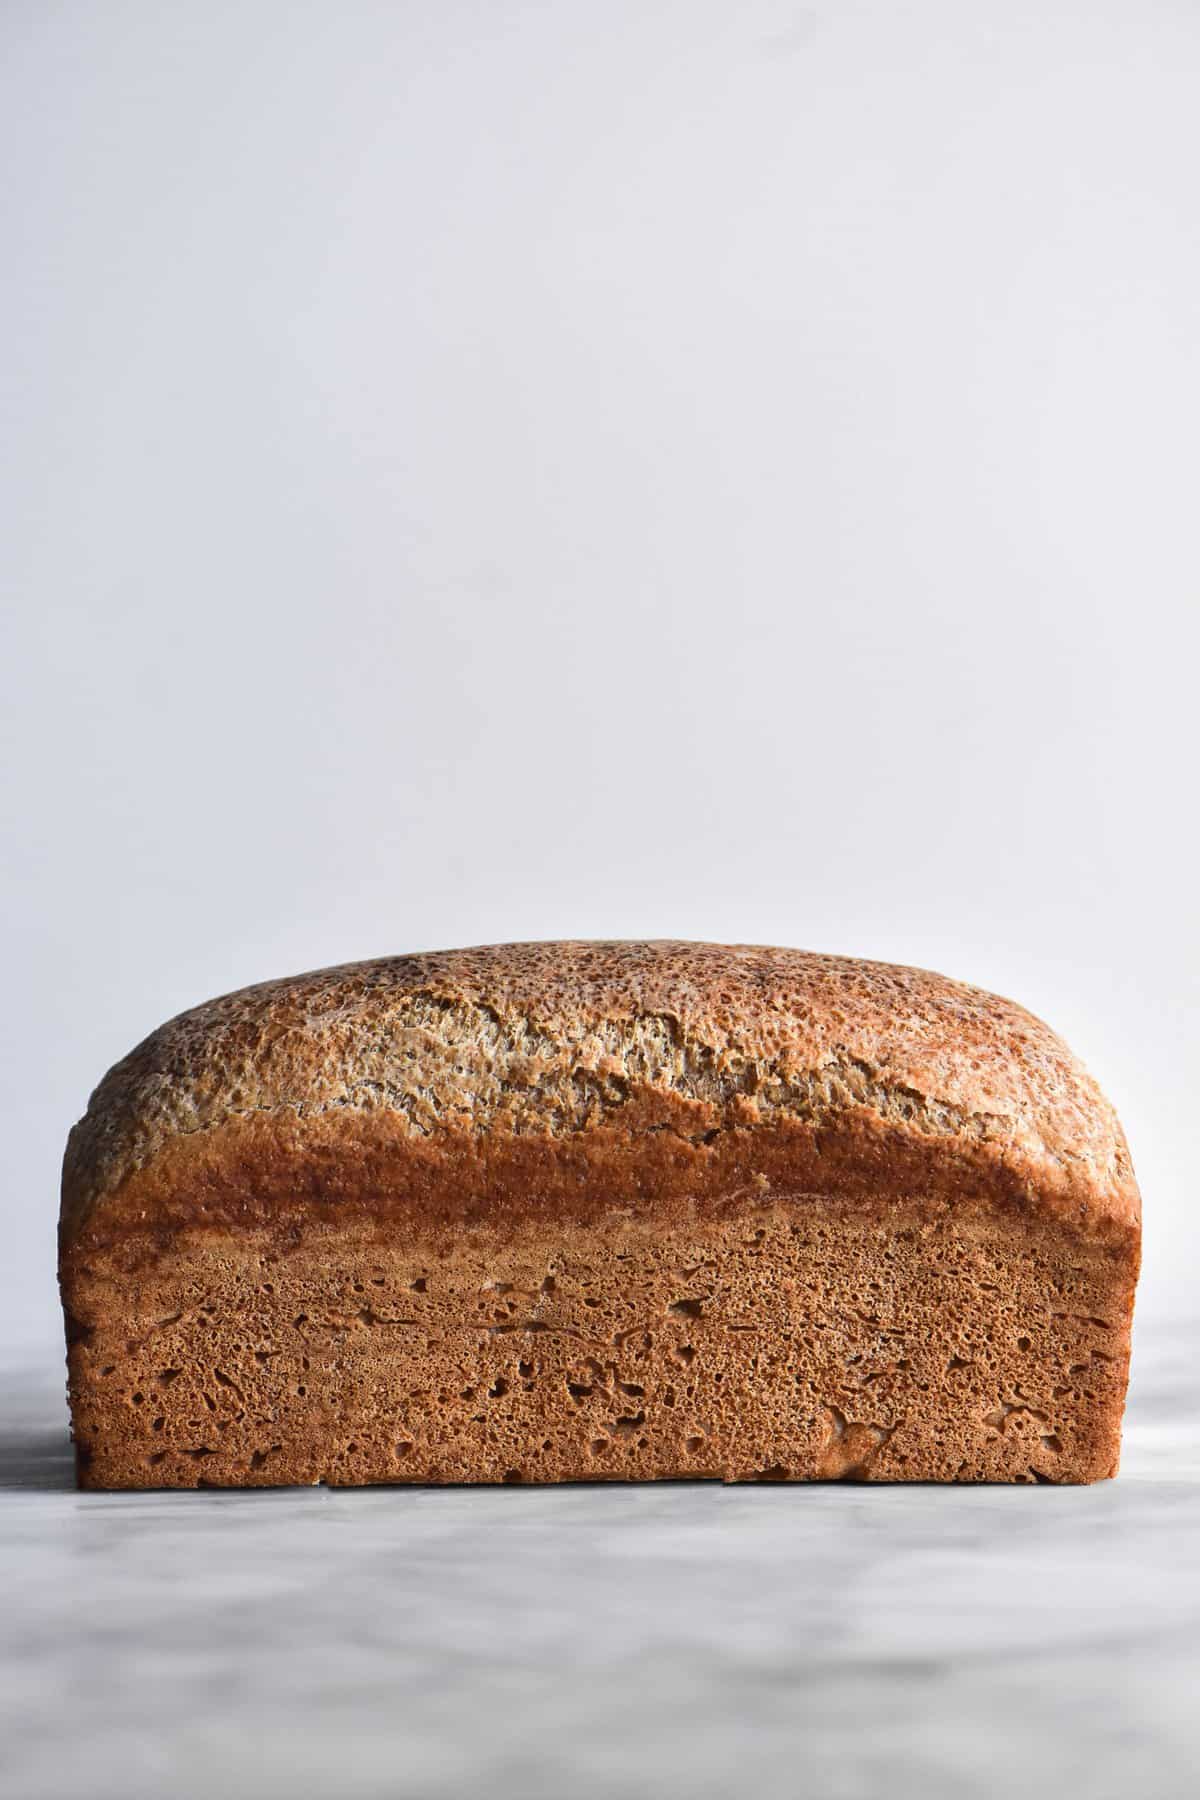
If your dough is a lot wetter than this (first: did you remember to add the psyllium husk?) don’t worry too much. I have found that this loaf tends to have a great crumb even when too much liquid is added. The top of the loaf falls dramatically after the loaf comes out of the oven, but the crumb is still great.
Hydration notes
A quick reiteration for those who don’t bake bread constantly for a living. The higher hydration a loaf (to an extent) the loftier and more open crumb it is likely to have. Loaves with more water (again, to an extent) will be taller. The downside with this bread, is that high hydration loaves often tend to fall in the centre as they cool. In my experience, this does not effect the crumb inside (meaning it won’t be a stodgy mess) but it does look a little funky. You can play around with a hydration that works for you, provided the loaf isn’t too dry.
If you are not using the oven after baking the loaf, you could try leaving the loaf in the oven as it cools. This can help set the crumb and avoid the temperature shock bread gets when removed from a hot oven. Just make sure you remove the dish of water from the base of the oven and keep an eye on the loaf to ensure it doesn’t get too brown.
Can I bake this loaf in a silicon loaf pan?
No, unfortunately you can’t. This loaf really needs a steel loaf pan to help guide it upwards instead of outwards. Because it has no gluten it has less strength to hold itself up. I use this small Pullman pan and it’s all I use for loaf making. The pan is great quality and stands nice and tall to help create a lovely lofty loaf of grain free vegan bread.
Troubleshooting your grain free vegan bread
The mixture should thicken up after you whisk it together. If it doesn’t: have you added the psyllium husk? Was it the powder as the recipe specifies? (flakes absorb less than powder).
Ensure your yeast is in date before you start. If you are concerned, use 1/4 cup (60ml) of warm water and a teaspoon of sugar to bloom the yeast. If nothing happens after 5-10 minutes (weather dependent) start again. Be sure to subtract this liquid from the recipe later.
If the sides of your loaf cave in after you remove it from the oven, consider cooking the loaf longer next time. All ovens vary greatly in temperature, so yours might not be hot enough to fully cook the bread through.
If you have a gummy layer at the bottom of the loaf, cook it longer next time and add a little less water. It could be that your cassava flour is much less absorbent than mine, meaning your bread needs less water.
To reiterate: gluten free flours all over the world vary in absorbency. If your bread doesn’t work, adapt it to work with your flours. It’s a solid, airtight recipe.
If your loaf has little dents on the top as it cools, this is nothing to worry about. Mine often do, but the bread inside is fabulous.
A gummy, wet bread can often be caused by A) too much liquid for your flours but also B) cutting the bread too early. The crumb need time to gelatinise and set, and you risk disaster if you cut the loaf too early. Wait until the bread has cooled or even overnight. It stays moist for days, so no need to worry about staling.

More gluten free bread recipes
- My original gluten free sourdough recipe
- These gluten free bagels
- The gluten free white bread sourdough recipe
- These gluten free baguettes or batards
- The enriched sorghum loaf in Intolerance Friendly Kitchen
Grain free vegan bread
Equipment
- 1 X small steel Pullman pan – 10.16 x 10.16 x 22.86 cm; 650 Grams
Ingredients
- 450 g cassava flour
- 100 g tapioca flour
- 100 g potato starch
- 7.5 g instant yeast (1 sachet in Australia)
- 15 g fine salt
- 15 g psyllium husk powder
- 20g (1 tablespoon) white sugar or any sort
- 20ml (1 tablespoon) oil of choice I used vegetable
- 650 g water see notes
Instructions
- Whisk the dry ingredients together in a large glass or plastic bowl.
- Add the wet ingredients and whisk until there are no lumps remaining. The batter will look thin initially, but it will firm up quickly.
- Cover the bowl and allow to proof for one hour.
- Very lightly grease and line a Pullman loaf pan. After one hour, gently punch down the dough and use moistened hands to transfer the dough into the lined Pullman pan. Use a wet hand to press down the dough and smooth out the top. Proof the dough for another hour or until it has domed and climbed considerably up the pan. How tall it is depends on how much liquid you add.
- While the loaf is proofing, thoroughly preheat the oven to 200C/400F. 10 minutes before baking, add a cake pan or oven safe container filled with boiling water to the bottom of the oven. A steamy environment will help with oven spring and keeping the loaf from getting too dry.
- If you like, brush the loaf lightly and gently with plant based milk before placing it in the oven. This will aid in developing a lovely brown crust (but it’s optional).
- Bake for 30 minutes. The top should be golden and lightly domed. Lightly tent the loaf with a piece of foil, then bake for an additional 50 minutes. The foil should just cover the top of the loaf while allowing air to circulate. It should not be tightly adhered to the loaf.
- Once the time is up, carefully remove the foil from the Pullman pan. If the top of the loaf is soft, allow it to cook for another 10-20 minutes until you can knock on the top of the loaf. This will help prevent the loaf falling as it cools. Remove from the oven and allow to cool on a wire rack until the loaf is completely cool – ideally overnight.
- Depending on how much liquid you add, the loaf might fall a little as it cools. This is nothing to worry about – in all my tests, the crumb was still great.
Notes
- Hydration is heavily dependent on the absorbency of the flours you’re using. This varies from brand to brand, country to country. I recommend reading the notes in the body of the post, and going by texture rather than strictly adhering to the weight.
- Keep in mind the dough will look very wet when you first add the liquid, but will quickly firm up as you whisk. If it’s your first time making the bread, you can add the water incrementally if that makes you more comfortable.
- If your yeast has been sitting in the back of the pantry for a while, I recommend blooming it first. Mix 1/4 cup (60ml) of warm water, a teaspoon of sugar and the yeast in a small bowl. Allow them to sit for 10-15 minutes. If the yeast doesn’t dome and bubble up in that time, throw it out and start again. If it does bloom, subtract this 60ml from the liquid content in the main dough.
- Make sure the top of your loaf is hard before taking it out of the oven. This will help ensure the top doesn’t sink as the loaf cools.
My first loaf I used 400g Ottos Flour with 692g water to make up for the sprouting but it was too much water – it was gummy.
My second load I used Ottos Cassava flour 300g and 100g of Bobs Red Mill Cassava Flour with 600g water and everything else was the same. It turned out great!
Hi! I’m in the US and I need help…please! This grain free, nut free, vegan bread recipe is exactly what I was looking for! I just need some assistance in converting to US measurements. Could you please clarify if I am able to use a scale in grams to measure out the dry ingredients listed here (450g cassava flour, 100g tapioca, etc.)? Also how much is 650g of water in milliliters (so I can convert to US cups)? The oil is noted as 20ml (which is 1 tablespoon in US according to the little measuring cup I have with both metric and imperial). I just cannot figure out the accurate water measurement. I tried making this recipe and I think I am waaaay off on my conversion calculations based on how the “dough” reacted after mixing (or trying to mix) because I had to use almost double the amount of water to even stir it. It looks like way too much dough to fit in the small loaf pan I purchased (which is the exact one you recommended). Thank you in advance for your help!
Hi Kristin! Yes, a scale with gram measurements is what I use for all my recipes.
An American tablespoon is 15ml (or 14.78ml which is close enough). Australian tablespoons are 20ml, which is 5ml (1 teaspoon) more.
Water is the same in gram and ml, so 650ml water. The water weight doesn’t change irrespective of where you’re making the loaf, so 650g should be what you are adding either way.
Did you use Ottos Cassava flour? I find it to be much more absorbent than a non fermented variety which may account for a dry dough. If it is super dry, add more water. A lot of gf flours have huge variances in brand brand, country to country, etc, so you need to add the amount that works for your dough (which can involve trial and error sadly!)
The dough will fill most of the tin and proof just above the top of the pan if you bought the small USA pan.
You can send me a photo on Instagram if you like and we can troubleshoot where necessary! 🙂
Hello – doesn’t look like my dough is rising..any ideas?
Hi Alex,
When bread doesn’t rise it’s generally one of three things (or a combination of the three).
First, was your yeast fresh? Second, did you add enough liquid? Yeast needs a wet, warm environment to grow, so it won’t rise well if your dough is dry. As stated in the recipe, it should look like liquid when you mix it up initially.
Thirdly, what’s the temperature like where you live? Because yeast needs a warm environment to thrive, it takes longer to proof in cold environments and kitchens.
Did you read through the notes in the post? There are extensive notes on hydration as well as general troubleshooting 🙂
Hi, I was wondering if there’s anything I can replace the potato starch with? I can’t have nightshades, so potatoes are out. I can have sweet potatoes, though, and can get sweet potato starch in the Chinese supermarket, so I’m wondering if that might work? I can’t have corn either, so cornflour/cornstarch is out too.
Hi Saskia! Unfortunately it took me forever to nail down this combination so I haven’t tested any substitution options.
I have never worked with sweet potato flour before so I can’t say if that would work.
Let me know if you try it and how it goes 🙂
Thanks for the recipe!
If I only had psyllium husks and not powder what amounts would I need to amend? Just less water?
I haven’t tested this so I can’t say with any certainty, sorry! My best guess would be to add a little extra psyllium husk than the recipe specifies but I couldn’t tell you how much
can you replace cassava flour with a white rice flour or something similar?
Hi Vee! This recipe has only been tested as a grain free version so I haven’t tried using rice flour. It works quite differently to cassava so I don’t think it would be a simple substitution.
I will test a recipe without cassava flour soon!