
It’s blood orange season here in Australia. Which is, of course, code for ‘I had no other choice but to develop a gluten-free upside-down orange cake. I recently nailed down an easy gluten free vanilla cake recipe with no nuts, starches or gums (you can find it here). So, to cater to the nut free crowd, I decided it would be perfect here, too.
Gluten-free upside down orange cake
This cake is gluten free, nut free, starch free and xanthan gum gum free. It uses a single flour – fine white rice flour, which makes it an incredibly easy cake to make. With the right fruit, it’s also a low fructose dessert, and with the right yoghurt and milk it is lactose free.

Recipe substitutions for your gluten-free upside-down orange cake
Needless to say, you can play around with using any fruit that is in season that you enjoy. I’d love to make a strawberry version next, followed by a rhubarb one while it’s still available. If you don’t have fructose concerns, you could also use pears, apples or maybe even stone fruit.
I have chosen fine white rice flour for it’s neutral taste and light colour. Because this is a single flour cake, I have no substitutions at the moment. Every other gluten free wholegrain flour has a tendency to impart a flavour or colour. Sorghum, my beloved non-rice flour, tends to perform poorly alone and results in a crumbly, bitter baked good.
Another thing I have not tried is using a different sugar. A liquid sugar will definitely not work – it will throw off the balance of moisture. I don’t know if an unrefined sugar will work, but I know it will alter the appearance of the cake.
This cake uses vegetable oil, simply because I have it on hand right now. Olive oil would work nicely here, but you could also use canola or maybe even avocado. I haven’t tried coconut but I think it would lend a distracting flavour to the cake.

Notes on the dairy in this gluten free vanilla cake
This cake contains yoghurt. I found that it really just gave it the extra ooompf it needed when compared to a version with only milk. I have used Greek yoghurt (I don’t have lactose concerns) lactose free Greek Yoghurt, and a plain, pot set lactose free yoghurt. All worked well. Make sure whatever you choose is full fat to avoid a watery and bland cake.
As you can see, I haven’t tried a plant based yoghurt in this recipe. I am yet to find one that isn’t full of starches and gums. I understand they’re necessary, but they’re no good for me personally. If you try this with a plant based yoghurt, please let me know!
The milk in this recipe can be any variety. I have used soy, regular and full fat lactose free, but you can use whatever works for you.

Recipe notes
Yes, the cake really does need that long to cook. The base of the cake will probably look very ready, and you might be tempted to pull it out. I was and I did! The result? A stunningly beautiful cake that sunk in the centre and had a raw middle. Trust me, it needs the time. You can lightly cover the cake with foil if you don’t want the base getting too brown.
The quick syrup gives the cake a glossy finish and the sweetness contrasts with the oranges. It also makes it a breeze to remove from the cake tin. I don’t recommend omitting it. If you don’t have enough oranges for juice, use water.
I have used a 20cm (8 inch) cake tin for this cake. I do not recommend using a bigger cake tin. It will throw out the cooking times, amount of oranges needed, cake to orange ratio, etc. 20cm cake tins are easily purchased at the supermarket and will serve you really well.
Yes, orange peel is edible. I think it looks gorgeous, and it adds a marmalade like element to the cake. If you prefer, trim the peel off the orange before arranging in the cake tin.

Tips and tricks for your gluten-free upside-down orange cake
Make sure you line the cake tin and grease it thoroughly but not excessively. Dense, oily cakes can often be traced back to excessive tin greasing. I use butter for this, but you could use plant based butter or oil.
Buy more oranges than you think you will need. In order to create a beautiful, glossy orange top, you need to completely patch up the base. If there are any holes in your pattern, cake batter will seep through and show up in the end result. I like to do 2-3 layers of orange slices, and trim small pieces to fit holes as I go.
To that end: make sure you slice the orange as thin as you possibly can. Not only are thick slices harder to arrange without gaps, they’re also less pleasant to eat. This is of particular importance if you plan to use oranges with the peel on. Nobody wants a giant mouth full of peel.
One more orange note: I found that bigger oranges were much easier to use. Smaller oranges were a bit of a logistical nightmare in that by the time I had layered them in, there was a mountain of pointy orange bits. Try to buy bigger ones but if not, just buy extra.
As we have previously discussed: make sure your cake is completely, utterly cooked through. If not, the centre will sink and all of your hard work will be in vein. I took the first cake out at 40 minutes with a clean skewer, only to find the centre had not cooked. If in doubt, cook it a little longer. The oranges make for a super moist cake which is hard to overcook. If the bottom of the cake is getting too much colour, lightly cover it with a piece of foil towards the end of baking time. Make sure you leave plenty of room for air to escape so you don’t end up steaming it.

Looking for classic cake ideas? Try:
My classic, single flour chocolate cake recipe
The easy vanilla cake recipe that this cake was based on
My single flour, gum free lemon drizzle cake
This gorgeous gum free carrot cake
A flourless AND nut free chocolate torte


Gluten free upside down orange cake
Equipment
- 1 x 20cm (8 inch) cake tin
Ingredients
For the orange layer:
- 55 g 1/4 cup caster sugar
- 2 tablespoons blood orange juice use the ends of the sliced oranges or any straggler pieces
- 4-5 medium blood oranges sliced as thinly as possible (peel on or off, both work)
For the cake:
- 175 g fine white rice flour
- 150 g caster sugar (see notes)
- 1/2 teaspoon baking powder
- 1/2 teaspoon baking soda
- heaped 1/4 teaspoon fine salt
- 175 g plain full fat yoghurt I have used Greek and lactose free pot set yoghurt, see notes
- 1/2 cup 125ml milk of choice (I have used regular, lactose free and soy)
- 2 teaspoons white vinegar or lemon juice
- 1/3 cup 80ml vegetable or sunflower oil
- 2 extra large eggs
- 1/4 teaspoon almond extract optional
- 1 teaspoon vanilla bean paste
Instructions
- Lay each orange down so the top and bottom of the orange (the parts with little nubs) are facing outwards. Cut each orange into thin slices. You can leave the peel on or very carefully slice it off beforehand.
- Mix the sugar and orange juice or water to form a slurry. Set aside.
- Preheat the oven to 180C/356F. Lightly grease and line a 20cm cake tin.
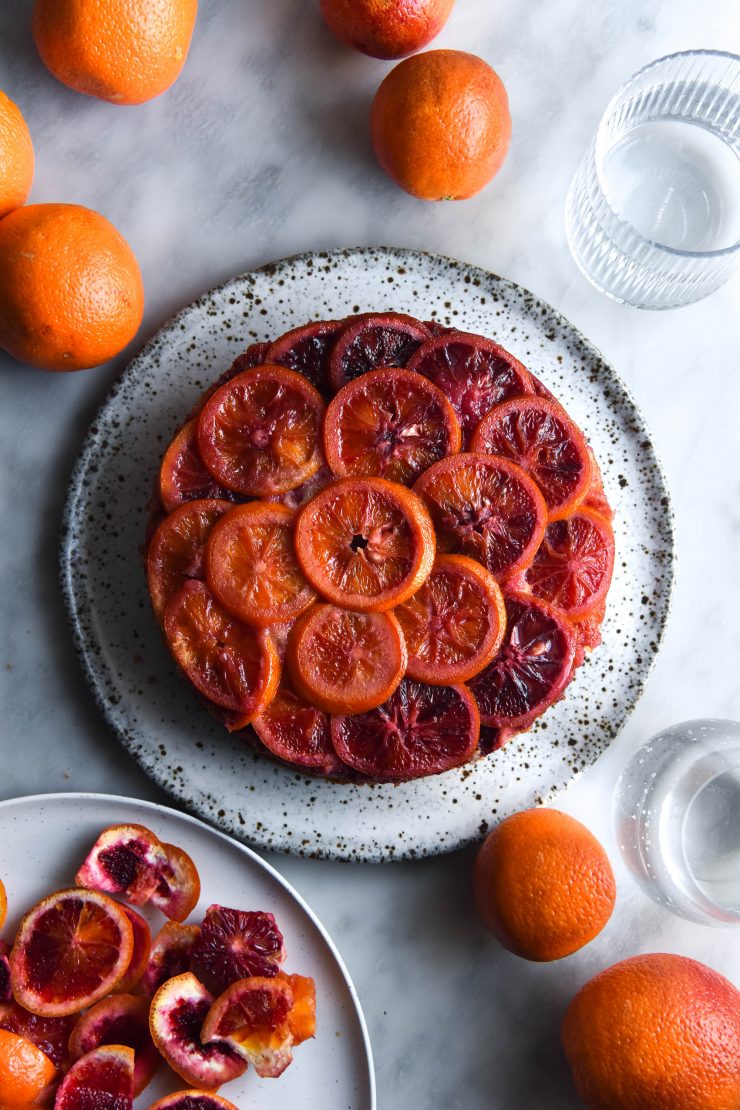
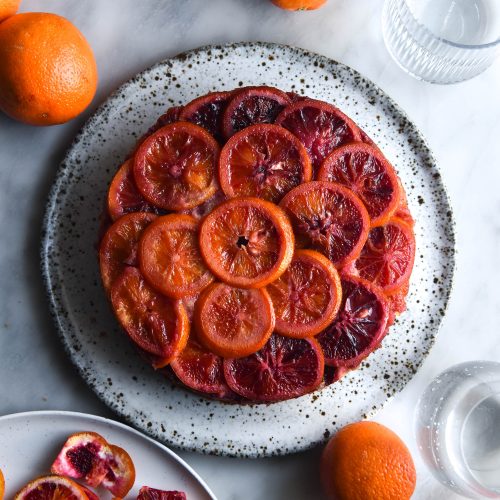
- Pour the slurry into the base of the cake tin, then arrange the slices of orange in the lined baking dish. Start with one piece in the centre, then arrange them overlapping in a swirl pattern around the first piece. See the pictures above for a visual explanation.
- Make sure the base is completely covered. I like to do 2-3 layers of orange and slice small pieces to fit in any gaps. This ensures no cake batter will leak through and ruin the aesthetic. Once you’re happy, set the cake tin aside.
- Combine the flour, sugar, baking powder, baking soda and salt in a large mixing bowl. Whisk to combine.
- In a smaller mixing bowl, whisk together the milk and yoghurt, then add the vinegar. The mixture should thicken almost straight away.
- Add the yoghurt mix, eggs and oil to the flour and whisk until completely smooth. Add the optional flavourings here, if you’re using them.
- Transfer the batter into the cake tin. Pour and spread it gently to avoid disrupting the oranges on the base. Bake for 50-60 minutes or until the base is golden brown, a skewer comes out clean and there is no wobble to the. cake. The centre middle is the last to cook, so make sure you check it is done or else it might sink on removal.
- Once cooked, allow to cool for 5-10 minutes before running a knife gently around the edges. Place a serving plate over the mouth of the cake tin, then flip to invert. Tap on the base of the cake tin to ensure everything has slid off. Pull away the cake tin gently, then the piece of baking paper. You should have a beautiful, glossy upside down orange cake.
- Serve warm or cool. The cake keeps well for 2-3 days in an airtight container.
Notes

This turned out beautifully! And the rice flour makes it so moist and cake-like without being sticky and dense. I used olive oil which enhanced the orange flavor. And I had to use a square brownie pan which worked great!
I’m so glad you enjoyed it Andri 🙂 Olive oil sounds divine!