
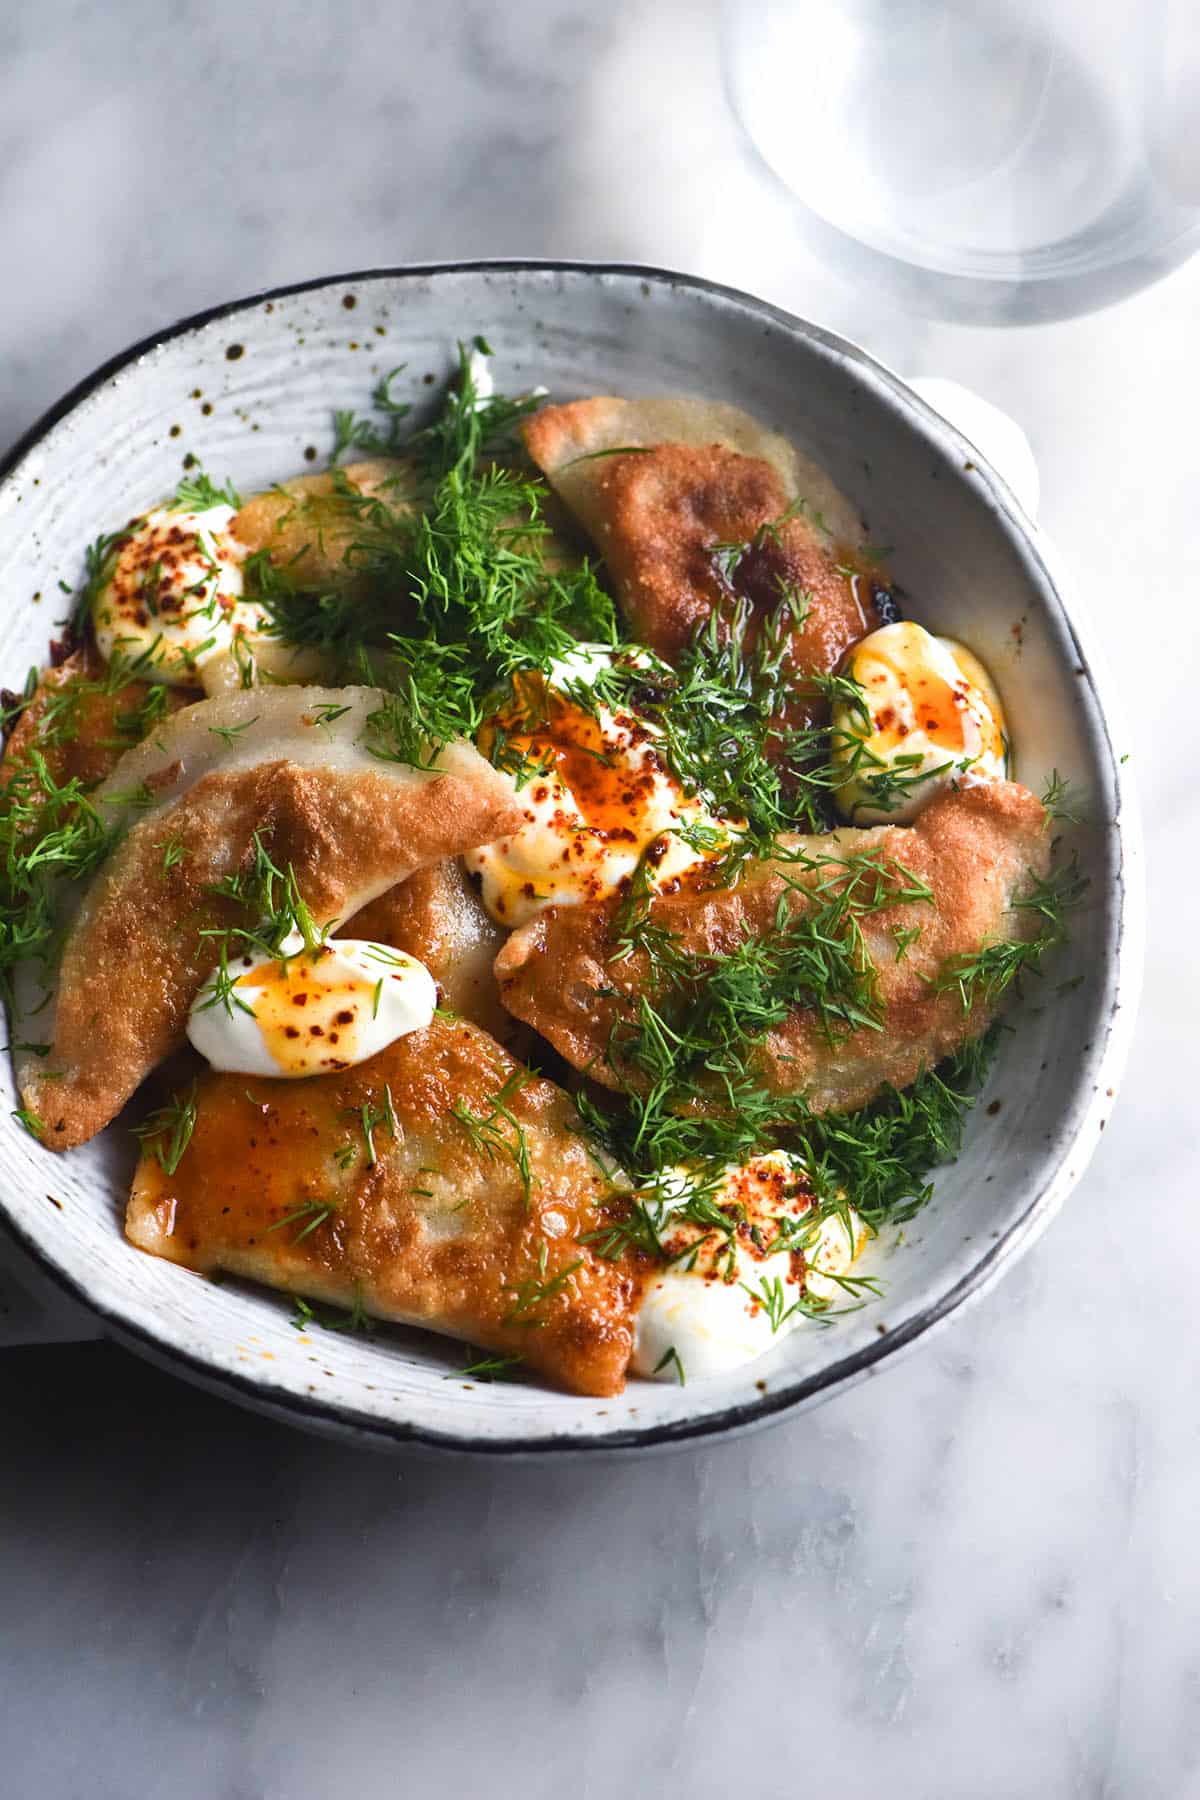
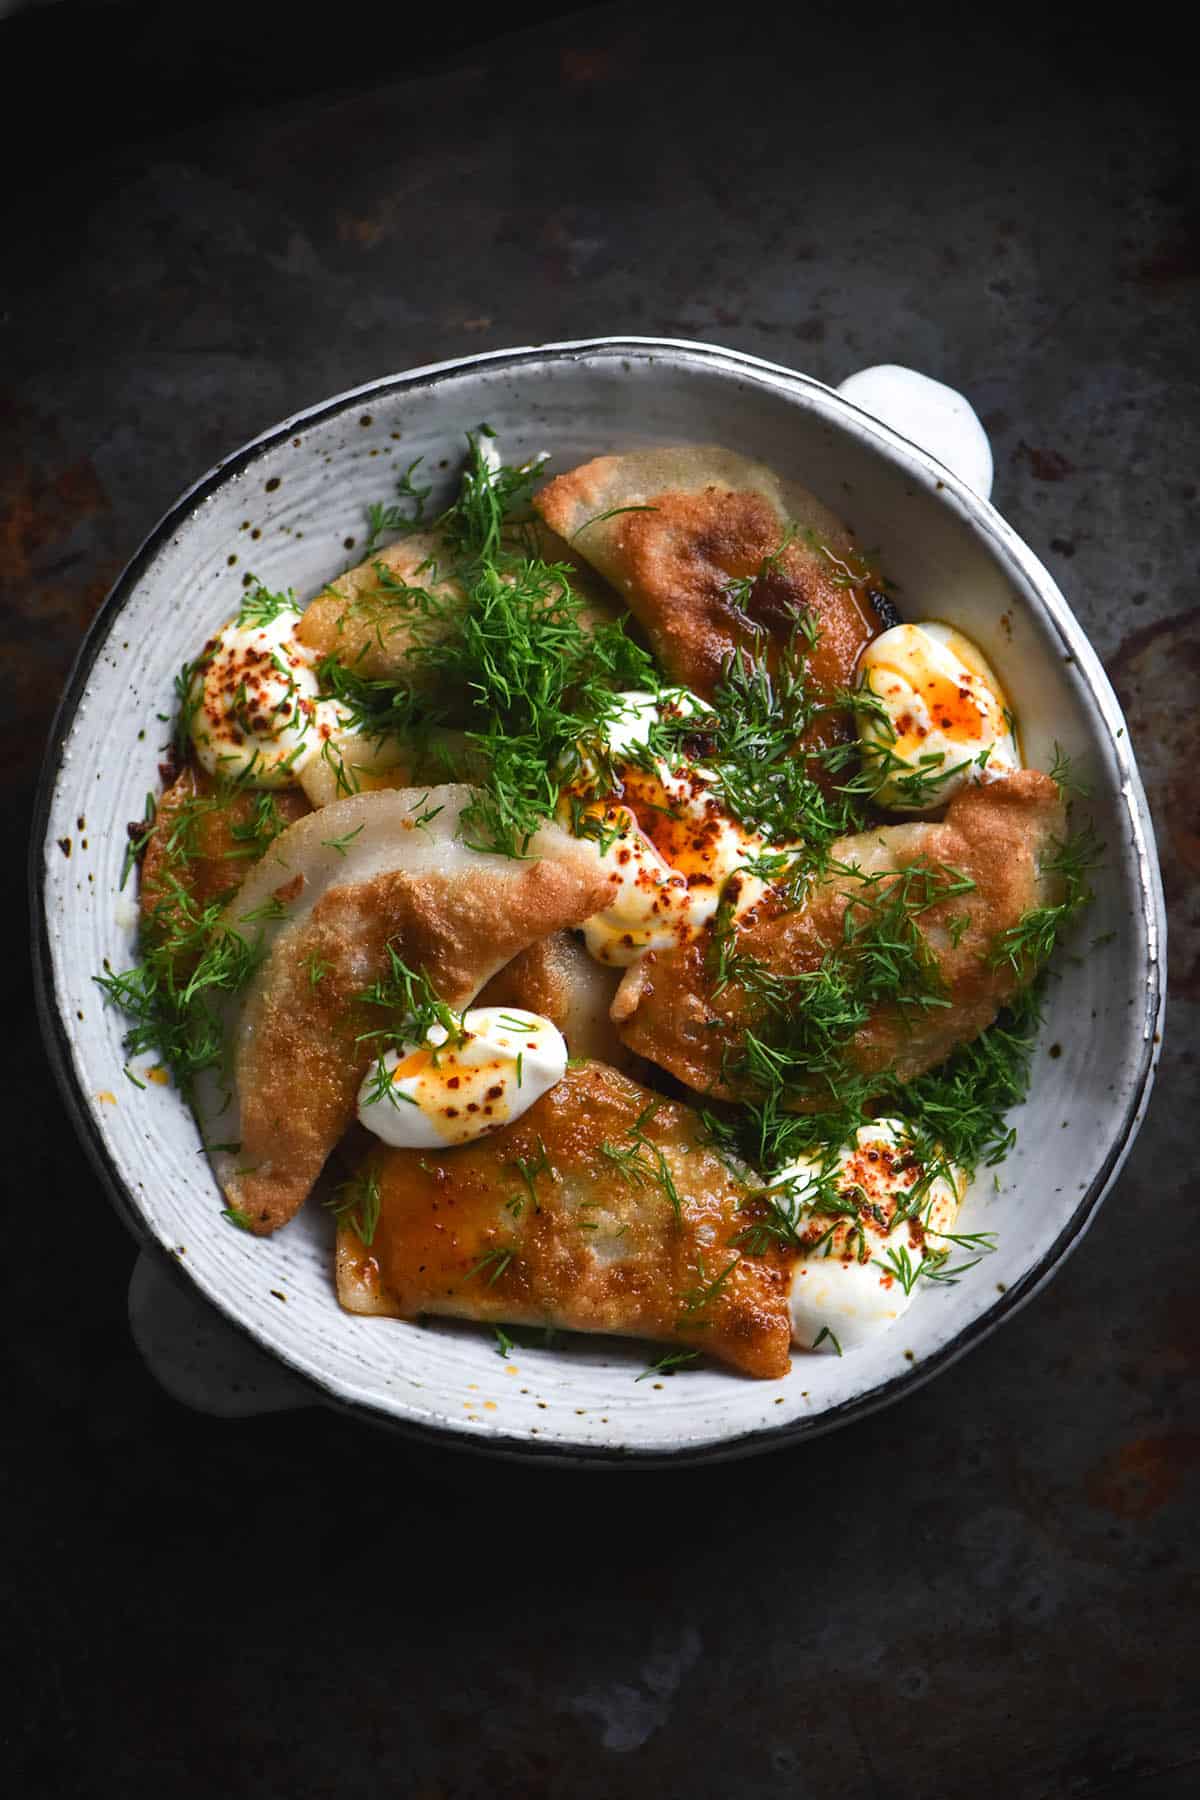
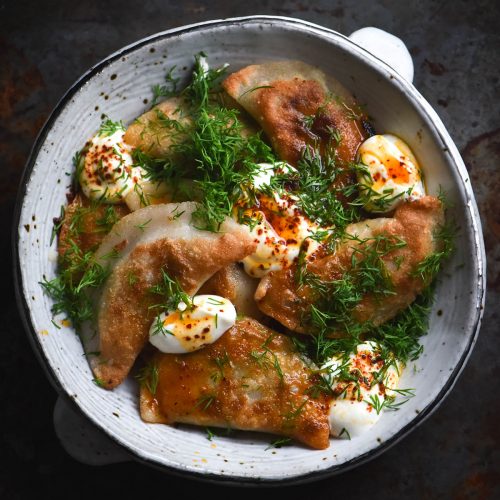
Inspired by Olia Hercules campaign #cookforukraine on Instagram, I decided to make some gluten free Varenyky. Varenyky are Ukrainian dumplings akin to the Polish Pierogi. My research tells me that Varenyky are often made with a potato filling so that’s what I decided to do.
Gluten free Varenyky
These gluten free Varenyky are a little different from the regular variety. For starters, the dough is made without eggs. This is because the dough utilises a scald – pouring boiling water over the flour. The result is a gluten free dough that is nice and elastic. Needless to say, though, that eggs don’t go play nicely with boiling water.
The dough also uses sour cream. This provides elasticity and flavour. I found some recipes that utilised sour cream in the dough and some that did not. All of the recipes agreed, however, that Ukrainians love sour cream. Twist my arm!
The filling is made with potatoes, a good quality cheddar cheese and cooked leek and spring onion greens.

Notes for your gluten free Varenyky
This dough is purposefully designed for a potato filling. I found that variations with a higher starch content were excessively starchy due to the potato. If you intend to use different fillings, you might want or need to play around with a higher starch content.
Psyllium husk powder has no substitute here. If you can’t find powder, you can grind the flakes to powder in a spice grinder or high-speed food processor.
These vareniki don’t have the golden hue that the regular ones do – this is because they are egg free. Scalding the flour here (aka pouring water on it) creates desperately needed elasticity and makes this dough very easy to work with. Eggs and boiling water, as you might have guessed, do not mix.
This recipe assumes you have finely milled, fresh white rice flour. It should not feel gritty between your fingers, nor should it smell floral or musty. Because the dough uses such a high proportion of rice flour, it needs to be fresh and fine to avoid a gritty, musty tasting end product.
Using sour cream in the dough adds flavour and lots of elasticity. You can use lactose free sour cream or regular. You might also be able to use yoghurt, but I haven’t tried that yet.
Traditional Varenyky recipes use onion, but we’re replacing it here with spring onion greens and leek greens for FODMAP purposes. Feel free to use onion if you don’t need them to be fructan friendly.
I have used all cheddar and a combination of cheddar and parmesan here. It’s not traditional, but I preferred the combination. That said, the all cheddar version had a smoother mouthfeel at the end. If you need the cheese to be vegetarian, see this list here.
Either way, freshly and finely grated cheese is a must here. Pre-grated cheese often contains fillers which prevent it from melting.
Tips, tricks and observations for your gluten free Varenyky
I highly recommend using a potato ricer here if you have one. As someone who is kitchen gadget wary, I can 100% attest to their worth. It makes this filling delightfully smooth and lovely.
There’s no two ways about it – making these vareniki takes time. Much like dumplings, you’ll need to settle in and enjoy!
I highly recommend having a plentiful stash of extra tapioca on hand for rolling these out. The dough needs to be nice and moist to be pliable, so you will need lots of flour to roll them out with ease.
The dumplings are a little gluey and sticky when they first come out of the boiling water. Handle them with care and know that this will disappear as the gelatinised starches in the flour begin to cool.
Broken dumplings can have a few causes. Firstly, you might have rolled your dough too thinly and/or overstuffed it. You might also have left the edges unsealed in a tiny spot, allowing water to seep in. Secondly, you might have been too rough with the dumplings before/during the cooking process. If the pot is overcrowded, they might also stick to each other and tear when you try to separate them. You might also have overcooked them, turning the dough mushy. Finally, the boiling water might have been on too rough of a boil. Make sure it is barely simmering to protect the integrity of the vareniki.
More gluten free vegetarian recipes
- The gluten free dumplings in my cookbook, Intolerance Friendly Kitchen
- These vegetarian sausage rolls with gluten free pastry
- FODMAP friendly vegetarian enchiladas
- Vegetarian, FODMAP friendly and gluten free Shepherd’s Pie
Gluten free Varenyky with potato cheese filling
Equipment
- 1 X 9.5cm circular cutter (3.5-4 inch)
Ingredients
For the potato and cheese filling:
- 1 kg all-rounder potatoes I used Sebago
- 150 g vintage sharp cheddar (vegetarian if it needs to be)
- 50 g butter or 40ml (2 tablespoons)* oil of choice
- Green leaves of 1-2 leeks thoroughly washed and finely chopped
- 50g (1 bunch) spring onion green chopped
- 1/2 teaspoon salt I used table salt
- 1/4 teaspoon ground nutmeg optional but delicious
For the dough:
- 320 g (2 cups)* fine white rice flour
- 60 g (1/2 cup)* tapioca flour
- 1 teaspoon fine salt I used table salt
- 15 g psyllium husk powder
- 20ml (1 tablespoon)* oil of choice I used vegetable
- 75 g lactose free or regular sour cream, see notes
- 375 ml (1 1/2 cups)* boiling water, see notes
To finish:
- Extra lactose free sour cream
- Dill chopped
Instructions
To make the potato and cheese filling:
- Boil the potatoes in a large pot of salted water until you can easily slide a knife straight through, about 15-20 minutes depending on the size of the potatoes. Set aside to cool slightly.
- While you’re waiting, heat a large skillet over a medium heat and add the butter or oil. Once warmed, add the leek and spring onion greens. Cook for 5 minutes or until the greens have softened a little, then add 250ml (1 cup)* of water and pop a lid on. Leek greens are tougher than leek whites, so they need to be steamed to make them nice and soft. After about 10 minutes or when the water has nearly evaporated, remove the lid and continue to cook until the water is gone and soft, dark greens are left. Remove from the heat and allow to cool.
- Carefully (they will still be hot) remove the skin from the potatoes and use a ricer or a masher to make them into mash. Add the cheese while the potatoes are hot so it melts into the mixture.
- Add the nutmeg, salt and pepper and wilted greens to the potato mixture and stir to combine. Taste and adjust for seasoning and set aside while you make the dough.
To make the dough:
- Combine flours, salt, psyllium husk powder, oil and sour cream in a large bowl. Stir, then add 250ml (1 cup)* of boiling water. Stir again to combine, then add the remaining 125ml (1/2 cup)* boiling water if you need it. I always add the full amount, but you might need less. If in doubt, err on the side of caution – you can always add more water later.
- Turn mixture out onto a clean, dry benchtop. Allow it to cool for a minute or two before beginning to knead with your hands. It will be hot, so be careful. Continue kneading until a smooth and pliable dough forms. If it doesn’t, add half a tablespoon of hot water at a time until you reach a good consistency. When the dough is juicy, moist and smooth, cover it with a plastic bag and allow it to sit for 10 minutes.
- Tear off a golf-ball-sized piece of dough and cover the remainder. Roll dough out on a well-floured surface until it is as thin as you want it, keeping in mind it swells a little during cooking. The amount that this recipe makes assumes you will roll your dough 2.5mm thick or less (it’s a very elastic dough).
- Use a medium-sized circular cookie cutter (or an upside-down glass) to cut out rounds of dough. Use a wet finger to moisten around the edge of each wrapper, then fill it with 1/2-1 tablespoon of filling, aligned to one side of the circle but with a gap to seal the dumpling. Once you have added the filling, fold one half of the wrapper onto the other and press thoroughly to seal the edges together. Watertight seals are important so that your vareniki innards don’t become soggy. Repeat with the remaining dough and filling, re-rolling any excess dough as you work. You might need to moisten trimmings with wet fingers to return it to its pliable glory.
- You can boil your vareniki or freeze them for a rainy day. To boil, bring a medium sized saucepan of salted water to a simmer. Add the vareniki, 5 or 6 at a time. Cook for 2 minutes (a little longer for frozen) then gently retrieve from the water and place in a sieve to drain. If you’re cooking lots, it can help to lightly oil the sieve to prevent them from sticking as they cool. It can also help to refresh the boiling water every now and again to prevent it from getting too starchy.
- To freeze the vareniki, arrange them on 1-2 large lined baking sheets or boards that will fit in your freezer. Once the individual dumplings are frozen, transfer them to a container or a zip lock bag. This will prevent them getting stuck to each other as you cook them from frozen.
- As an option, you can fry the boiled dumplings in some butter or oil to create crispy, browned edges and a decadent finish. Either way, serve with extra sour cream, chopped dill and maybe a squeeze of lemon.
Notes
- Read the notes in the body of the post before you begin for best results.
- I have a list of vegetarian vintage cheddar brands in Australia which I have linked here and in the body of the post.
No Comments