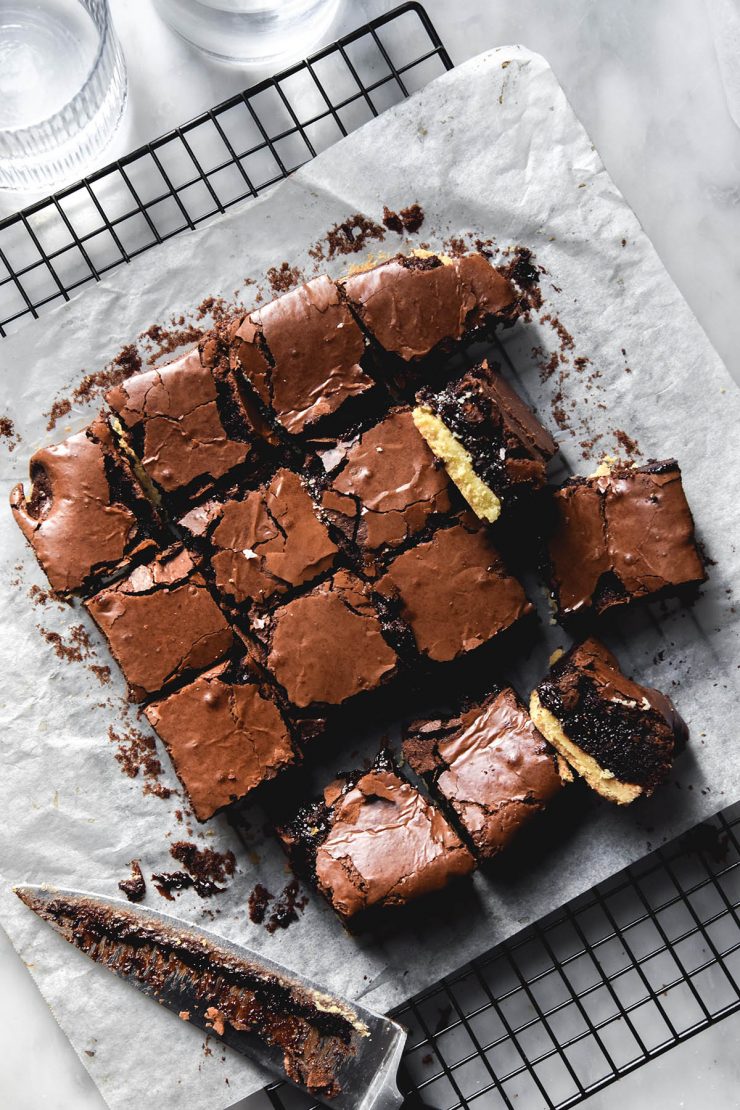
These gluten free shortbread brownies are the lovechild of two of my favourite desserts. Moreover, they’re the lovechild of two of my favourite dessert recipes on my website. Crumbly rich and buttery shortbread baked with rich, fudgy and chocolate-y brownies? Nothing better.
Gluten free shortbread brownies
These shortbread brownies are gluten free, xanthan gum free and low lactose. They have a nut free option on the brownie front, and a starchy flour free option on the shortbread front. See each individual post (shortbread and brownie) for those substitution options.
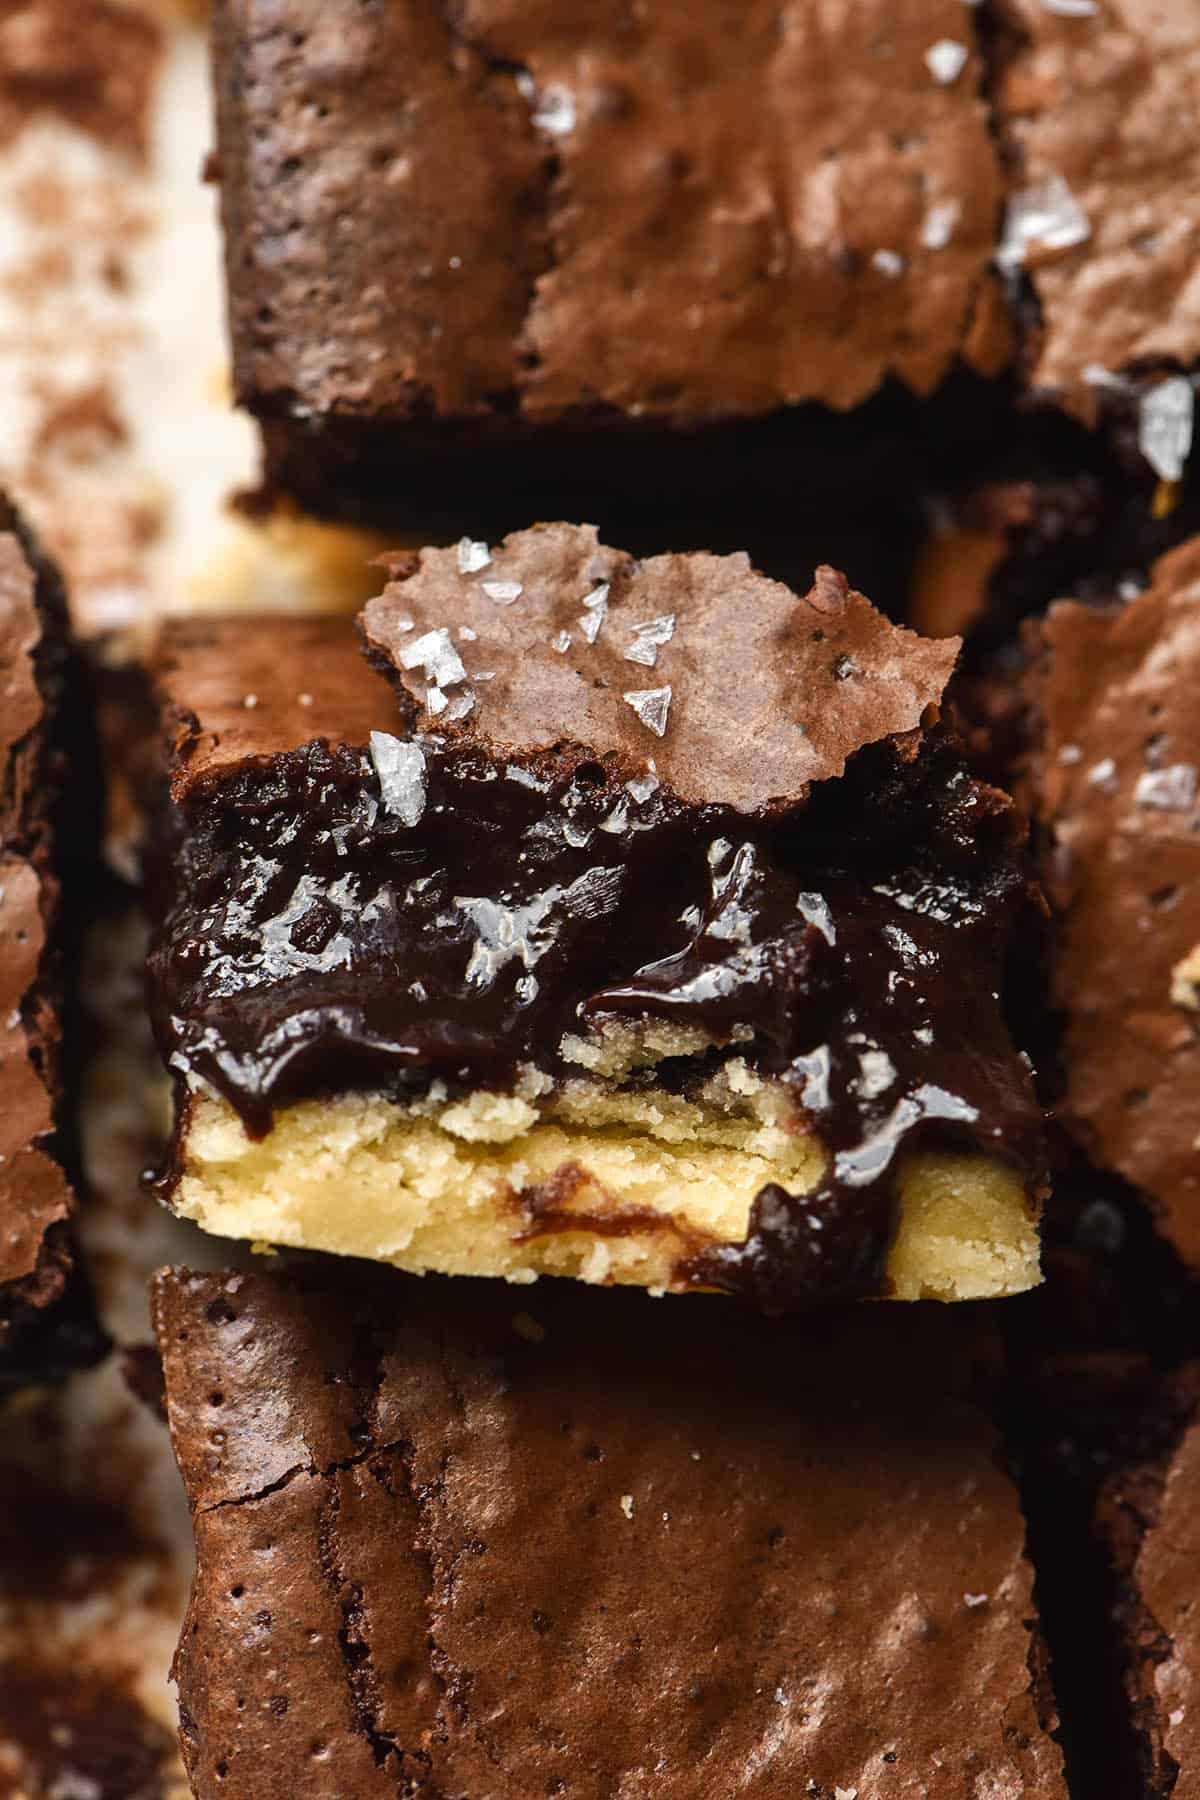
They combine the best of both worlds: rich and gooey chocolate with the crispy buttery shortbread. When I first made them, I thought they might be too rich. In fact, I think they balance each other out perfectly.

Tips for your gluten free chocolate brownies
This recipe is a combination of my grain free brownies and gluten free shortbreads. Each post has a wealth of tips and information for that particular element of the recipe. If you’re in search of tips for a particular aspect of the recipe, chances are you’ll find it in the corresponding post.
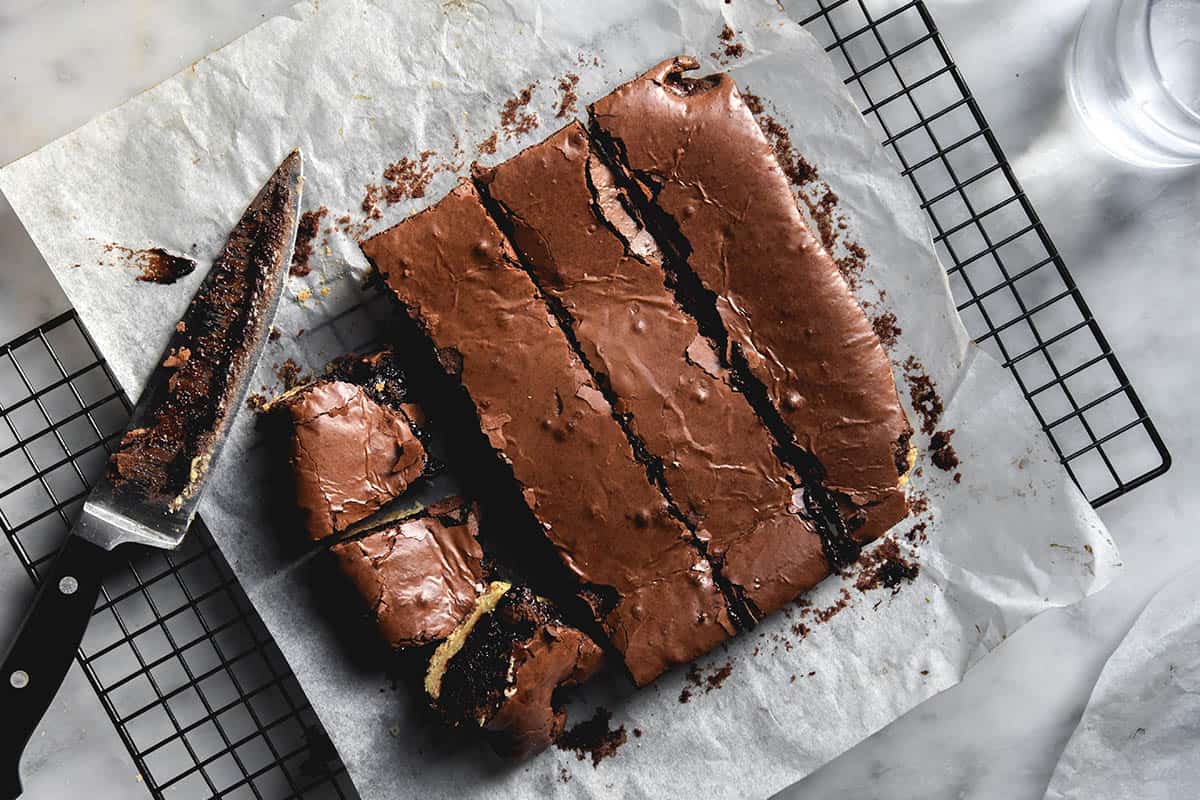
Keep in mind that the shortbread recipe is half of the original recipe. The brownie recipe remains the same as the original. We want majority brownie to shortbread ratio.
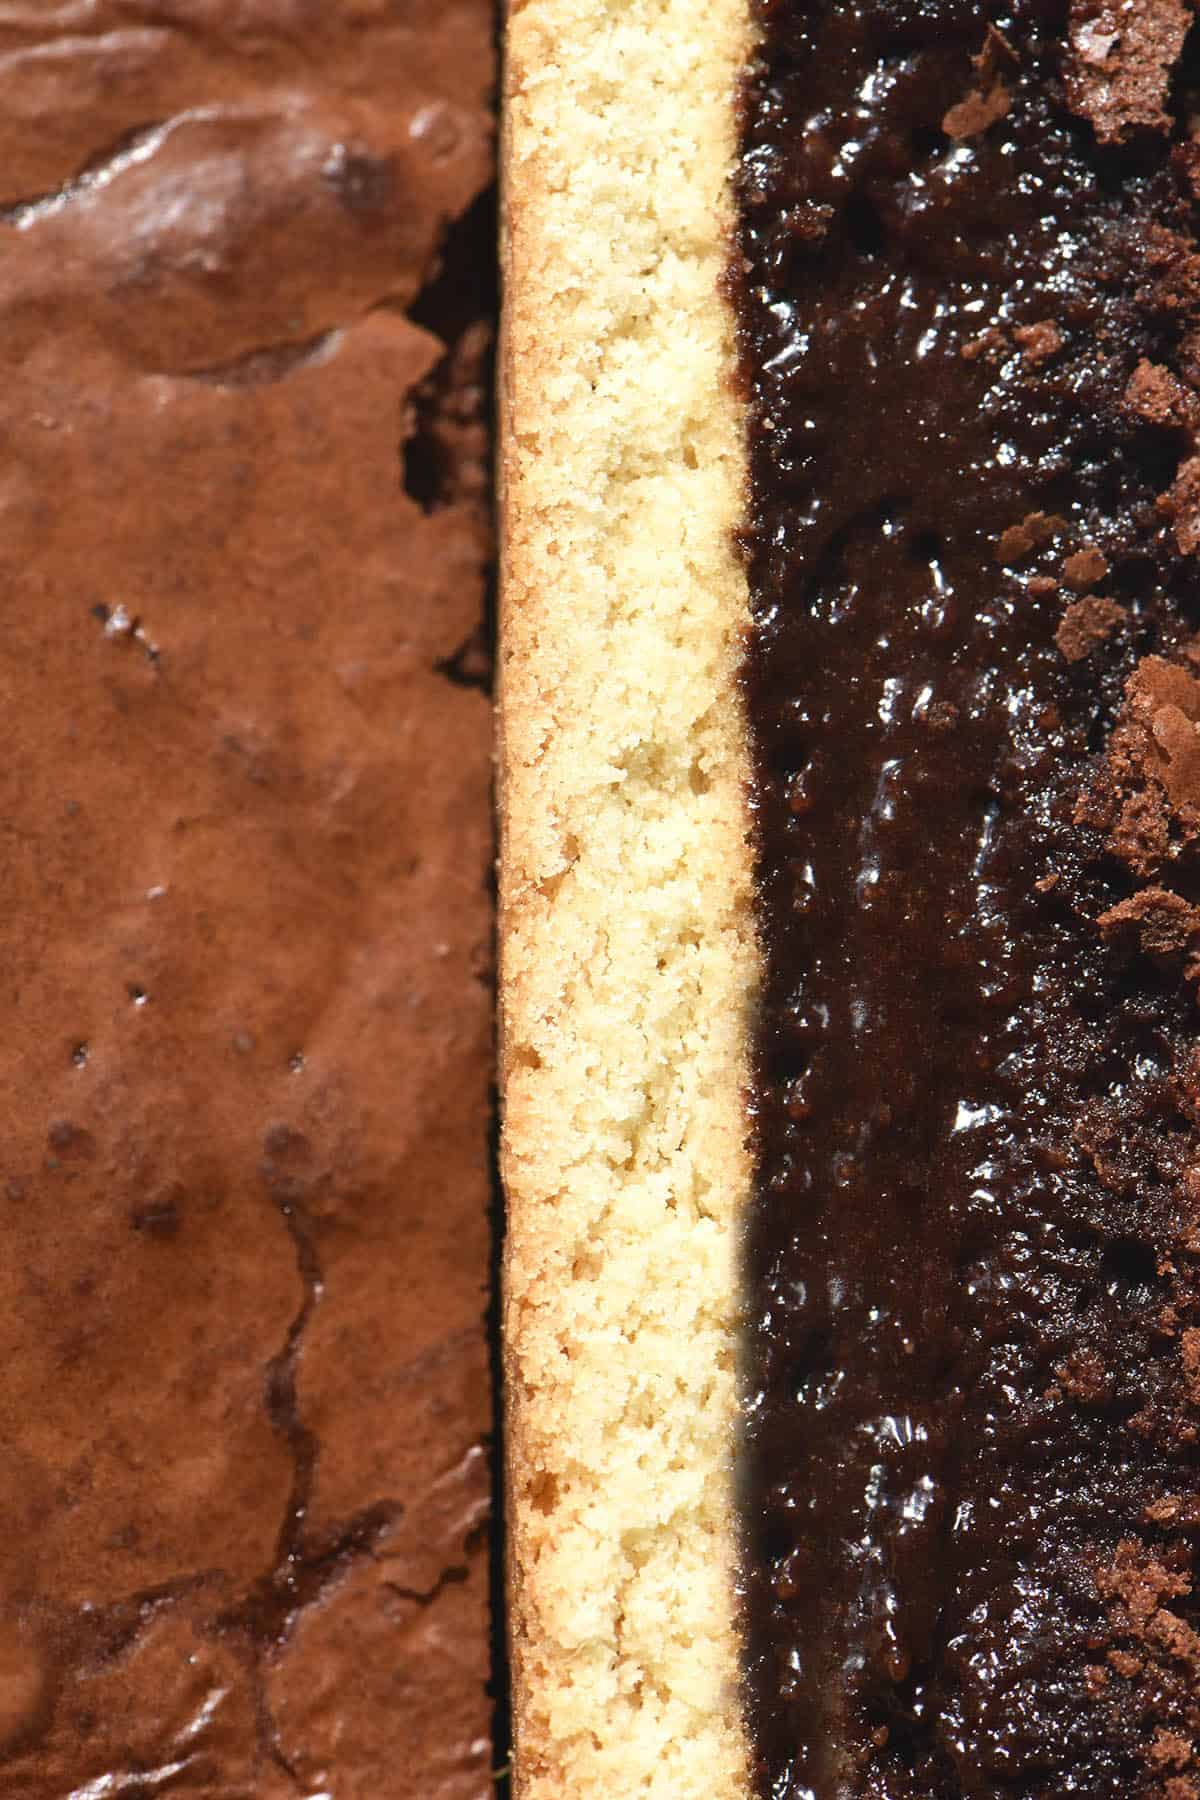
I have always found that starches tend to perform poorly when topped with some something thick and rich. During testing for my lactose free cheesecake, I found that using tapioca flour tended to create a stodgy white layer between the shortbread crumb and the cheesecake. That is why I recommend using cassava flour here.
Please don’t try to use a different sized baking dish unless you’re prepared to fail. The measurements for both components have been designed around this sized tin. If your tin is larger, you might not have enough shortbread or brownie, and the layers will be thinner. As a result, the brownie is more likely to overcook or burn.
Tips for the shortbread layer
There are a few quick and easy things you need to do to ensure the shortbread layer is firm and not crumbly or oily. First, ensure you cream the butter and sugar properly. Creamed butter and sugar is what creates air bubbles in the shortbread, making it light and crispy. Without those air bubbles, your shortbread won’t be very nice.
Properly creamed butter and sugar is pale, light and fluffy. If you run a spatula through the mixture it should glide right through without encountering any resistance or darker yellow coloured butter. This can take 3-5 minutes in a warm kitchen with warm butter, or 15-20 in a winter kitchen with cooler butter. Be patient or the shortbread layer will not work.
On the other end of the spectrum, make sure you press your shortbread layer down really firmly. This will help prevent it becoming crumbly when the brownie is cooked. I like to press it down once more (gently, so as not to crack it) after baking and before I add the brownie mixture.
The final tips have to do with the oven. A lower oven temperature allows the shortbread to cook through, twice, without burning. Placing the shortbread tin on a baking tray further stops the base of the shortbread from overcooking.
More gluten free chocolate dessert recipes
- Easy gluten free chocolate cake
- Gluten free pains au chocolat from Intolerance Friendly Kitchen
- Vegan, gluten free choc chip cookies
- Vegan, gluten free brownie cookies
- Egg free, gluten free self saucing chocolate pudding

Gluten free shortbread brownies
Equipment
- 1 20cm x 20cm square baking tin (mine is 20cm x 20cm measured at the lip and 18cm x 18cm measured at the base) (7-7.8 inch)
Ingredients
For the shortbread:
- 125 g softened butter salted or unsalted
- 70 g icing sugar
- 80 g (1/2 cup)* fine white rice flour
- 80 g (1/2 cup)* cassava flour (see shortbread post for alternatives)
For the brownie:
- 100 g almond meal
- 20 g (2 tablespoons)* cocoa (dutch processed or regular)
- 1/4 teaspoon fine salt
- 200 g chocolate 50%-70%, depending on your preferences
- 125 g butter salted or unsalted
- 3 extra large eggs (45-55g per egg weighed out of shell)
- 220 g caster sugar or 110g white sugar and 110g light brown sugar
Instructions
To make the shortbread base:
- Preheat the oven to 170C/338F.
- Line a 18-20cm square brownie pan with baking paper, leaving enough overhanging to remove the brownie from the tin.
- Place the butter and icing sugar in your stand mixer with the paddle attachment. Beat until light, fluffy and creamy. This can take 2-3 minutes in summer or as long as 15 minutes in winter. You should be able to run a spatula through the mixture without encountering any resistance from firm butter.
- Once well creamed, add the flours and process to combine. This mixture can be softer than regular shortbread, as we don’t need to roll it out. It should have formed a crumbly moist dough that would be tricky to roll out.
- Transfer the shortbread dough into the brownie tin. Use moistened hands to spread it out and press it down super firmly into an even thin layer, going right up to the edges of the tin.
- Place the baking tin on a baking tray to protect the base of the shortbread from excess heat. Pop it in the oven and bake for 10-15 minutes or until cooked and lightly golden.
To make the brownie:
- Mix the almond meal, cocoa and salt together in a small bowl and set aside.
- Melt the chocolate and butter in a heatproof bowl on top of a small pot of water on a medium heat. Make sure the bowl doesn’t touch the water – the goal is to heat gently. Once completely melted and combined, turn off the heat and set aside.
- Combine the sugar and eggs in your stand mixer with the whisk attachment. Beat on a medium high speed for 7-10 minutes or until pale and fluffy.
- Turn the mixer to low and pour the melted chocolate into the egg mixture. Allow it to combine completely.
- Add the almond meal cocoa mixture and allow to combine. Scrape down the bowl and process it once more.
- Pour the brownie mixture over the top of the shortbread base. Place the tin back onto the baking tray it was on before and place into the oven for 30 minutes. It should be a little wobbly in the middle but cooked on top.
- Allow the brownie to cool completely before removing it from the container. For best results, allow them to chill in the fridge or overnight. Leftovers keep well in the fridge for a number of days.
Hello Georgia, I have just found your website and now follow you on Instagram. I love the look of this recipe but wondering if you have one for Butterscotch self saucing pudding? This was my favourite when I was young and not GF yet (or didn’t know!).
Thanks Rachael
Hi Rachael!
I don’t have a butterscotch self saucing pudding recipe here yet. I have found gf self saucing pudding without gums and lots of starches to be really tricky to perfect!
I will definitely add it to my list of recipes to attempt though 🙂