I love a good seeded loaf, so it’s a surprise that this is my first gluten free seeded bread recipe on my site. I have one in my cookbook, Intolerance Friendly Kitchen, and a pumpkin seeded loaf in my second buckwheat e-book. However, this is my first recipe dedicated solely to the website and one of my new favourites.
Gluten free seeded bread (no xanthan gum)
This gluten free seeded bread is xanthan gum free, of course. However, it is also egg free, nut free, dairy free, vegan and soy free.
The loaf uses a simple mix of buckwheat flour, white rice flour and tapioca flour. For those who cannot tolerate rice, I have tested a rice free version as well (which we will discuss below).
To bind, the loaf uses psyllium husk powder. A small amount of oil and maple syrup add flavour and texture improvements, while water and yeast bring everything together.
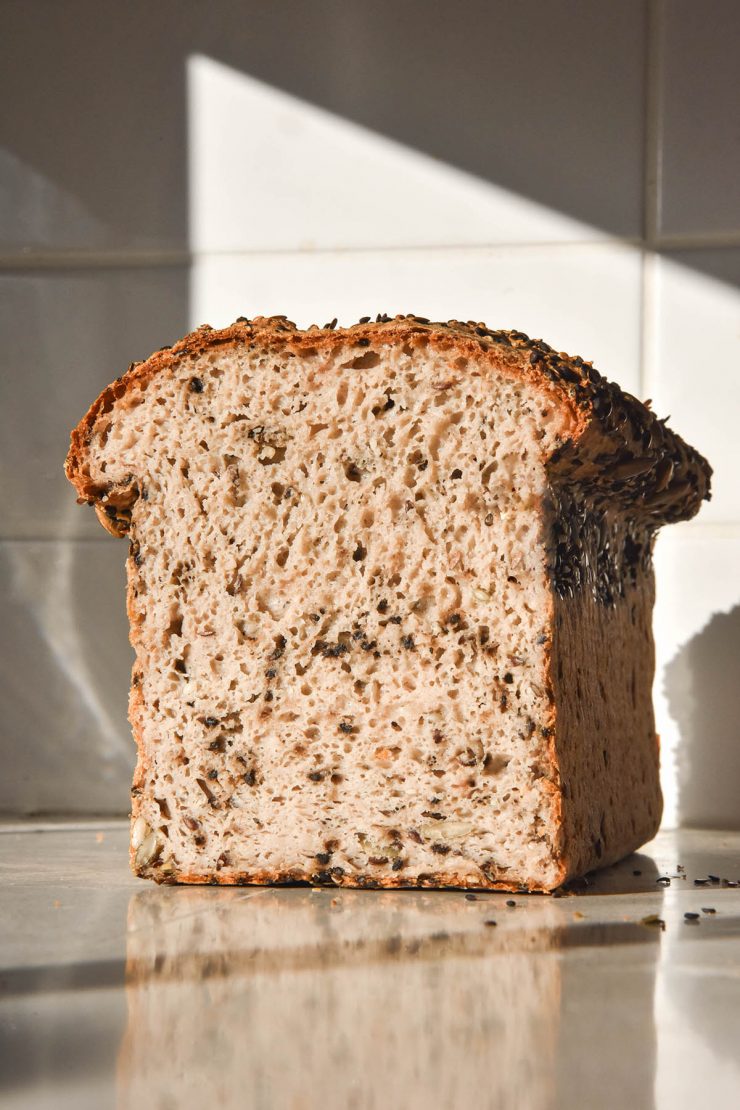
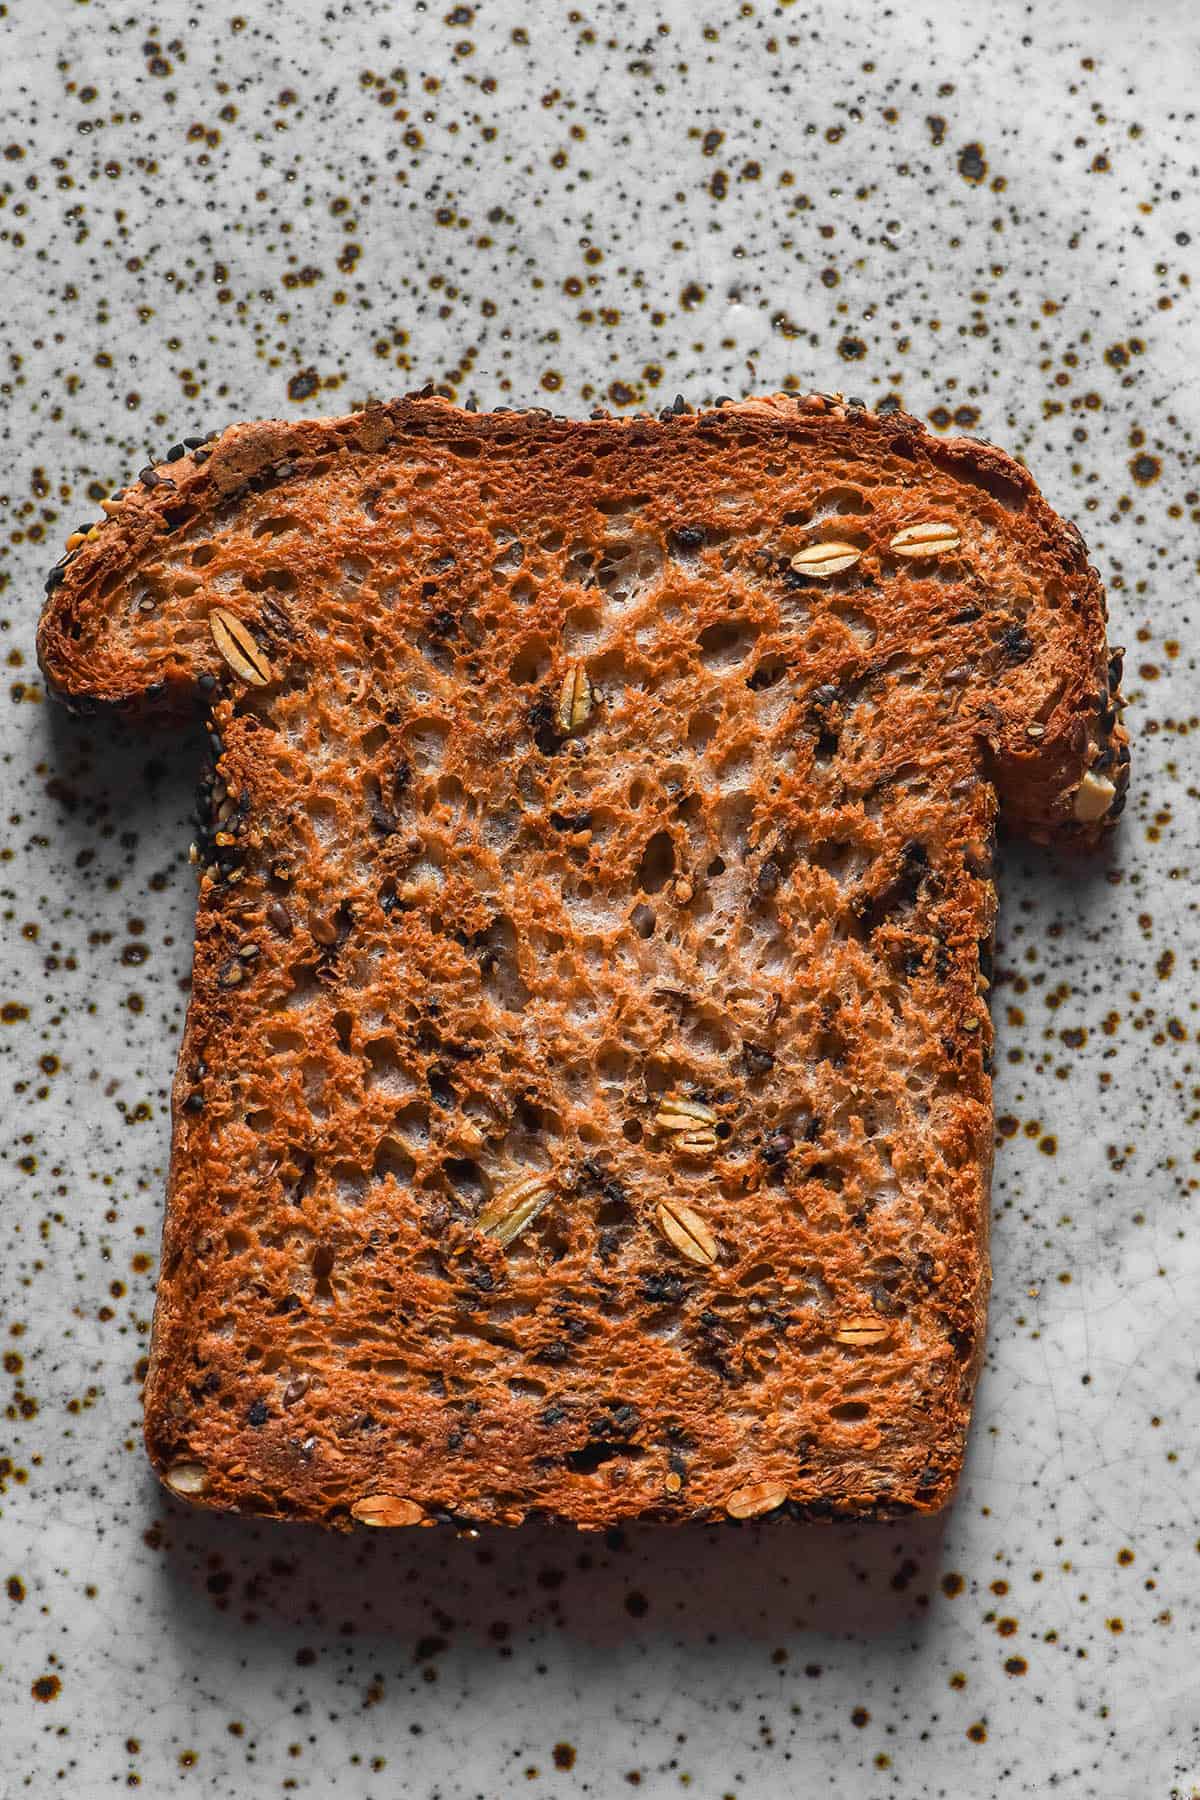
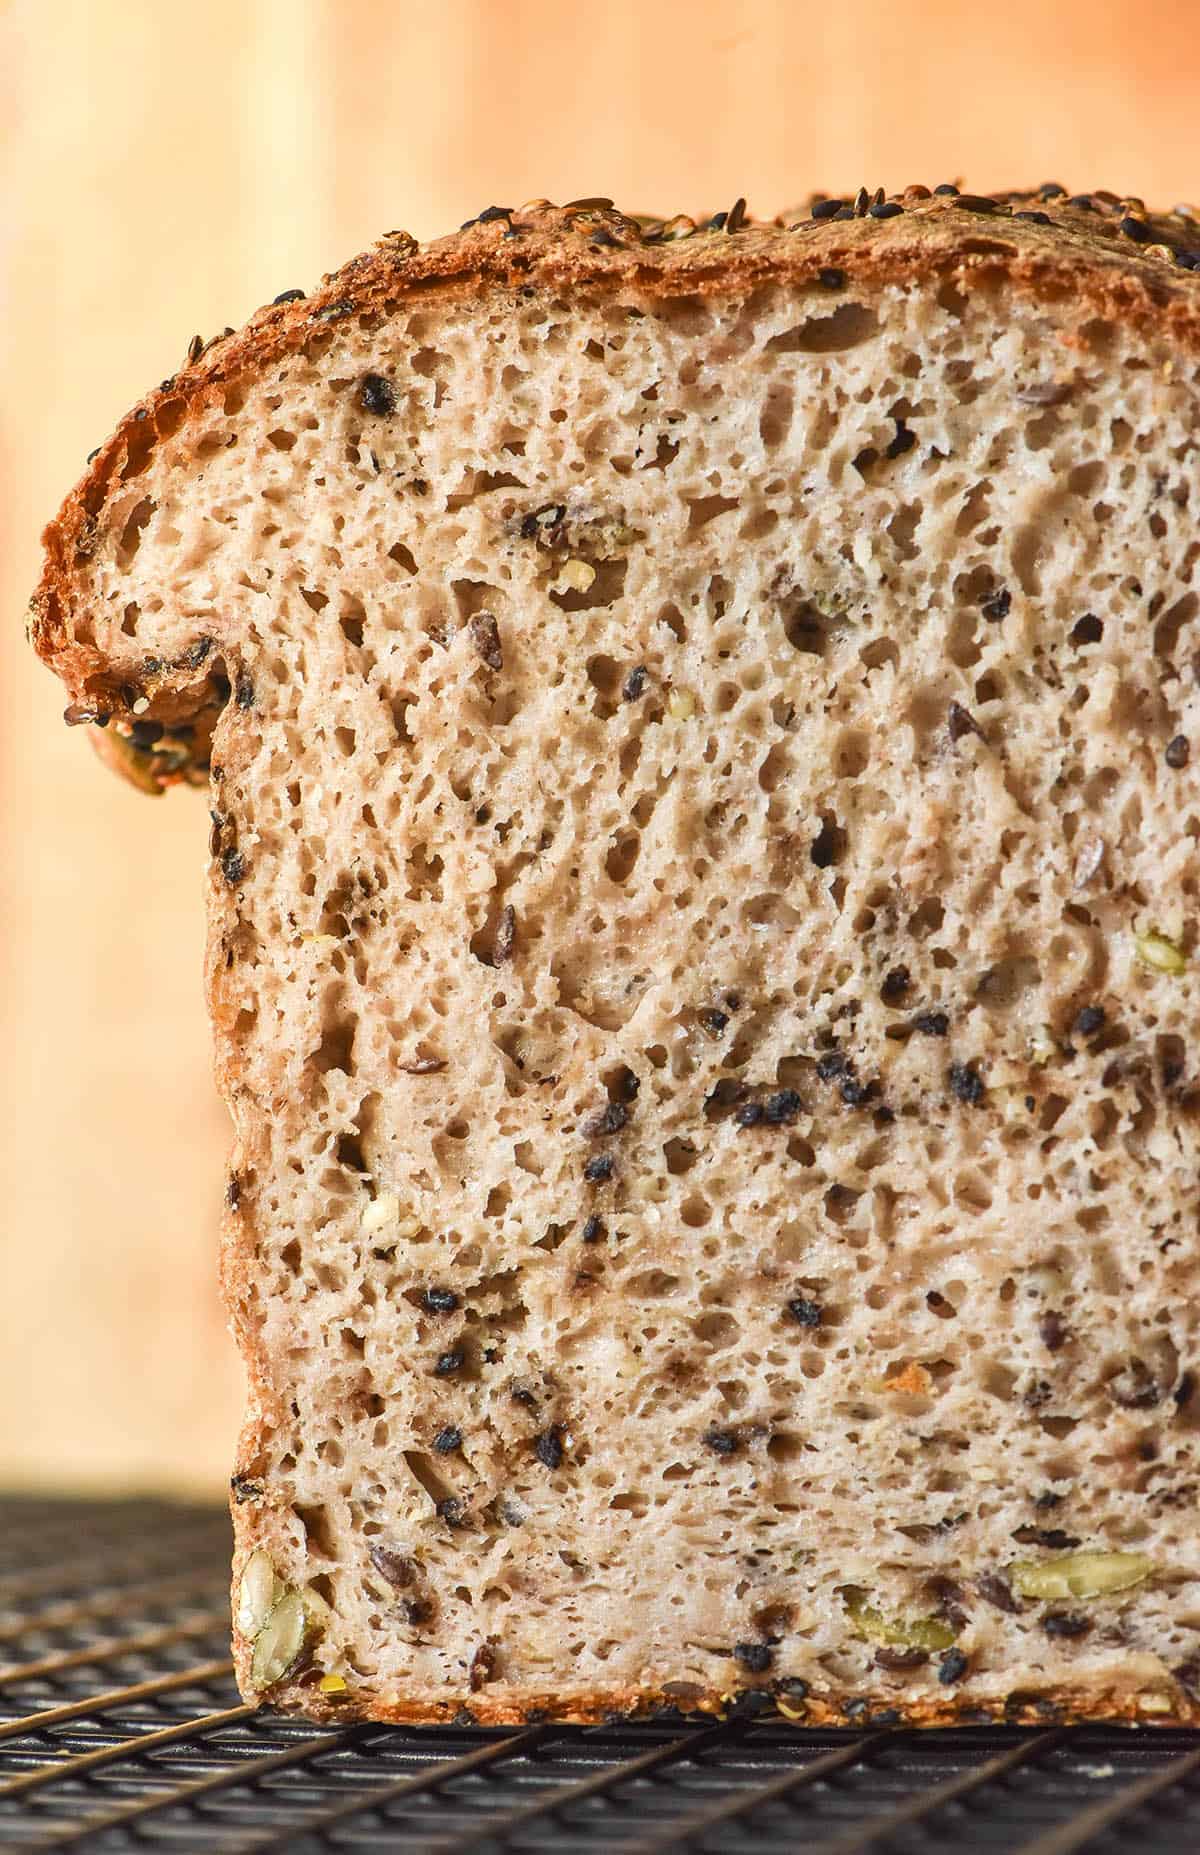
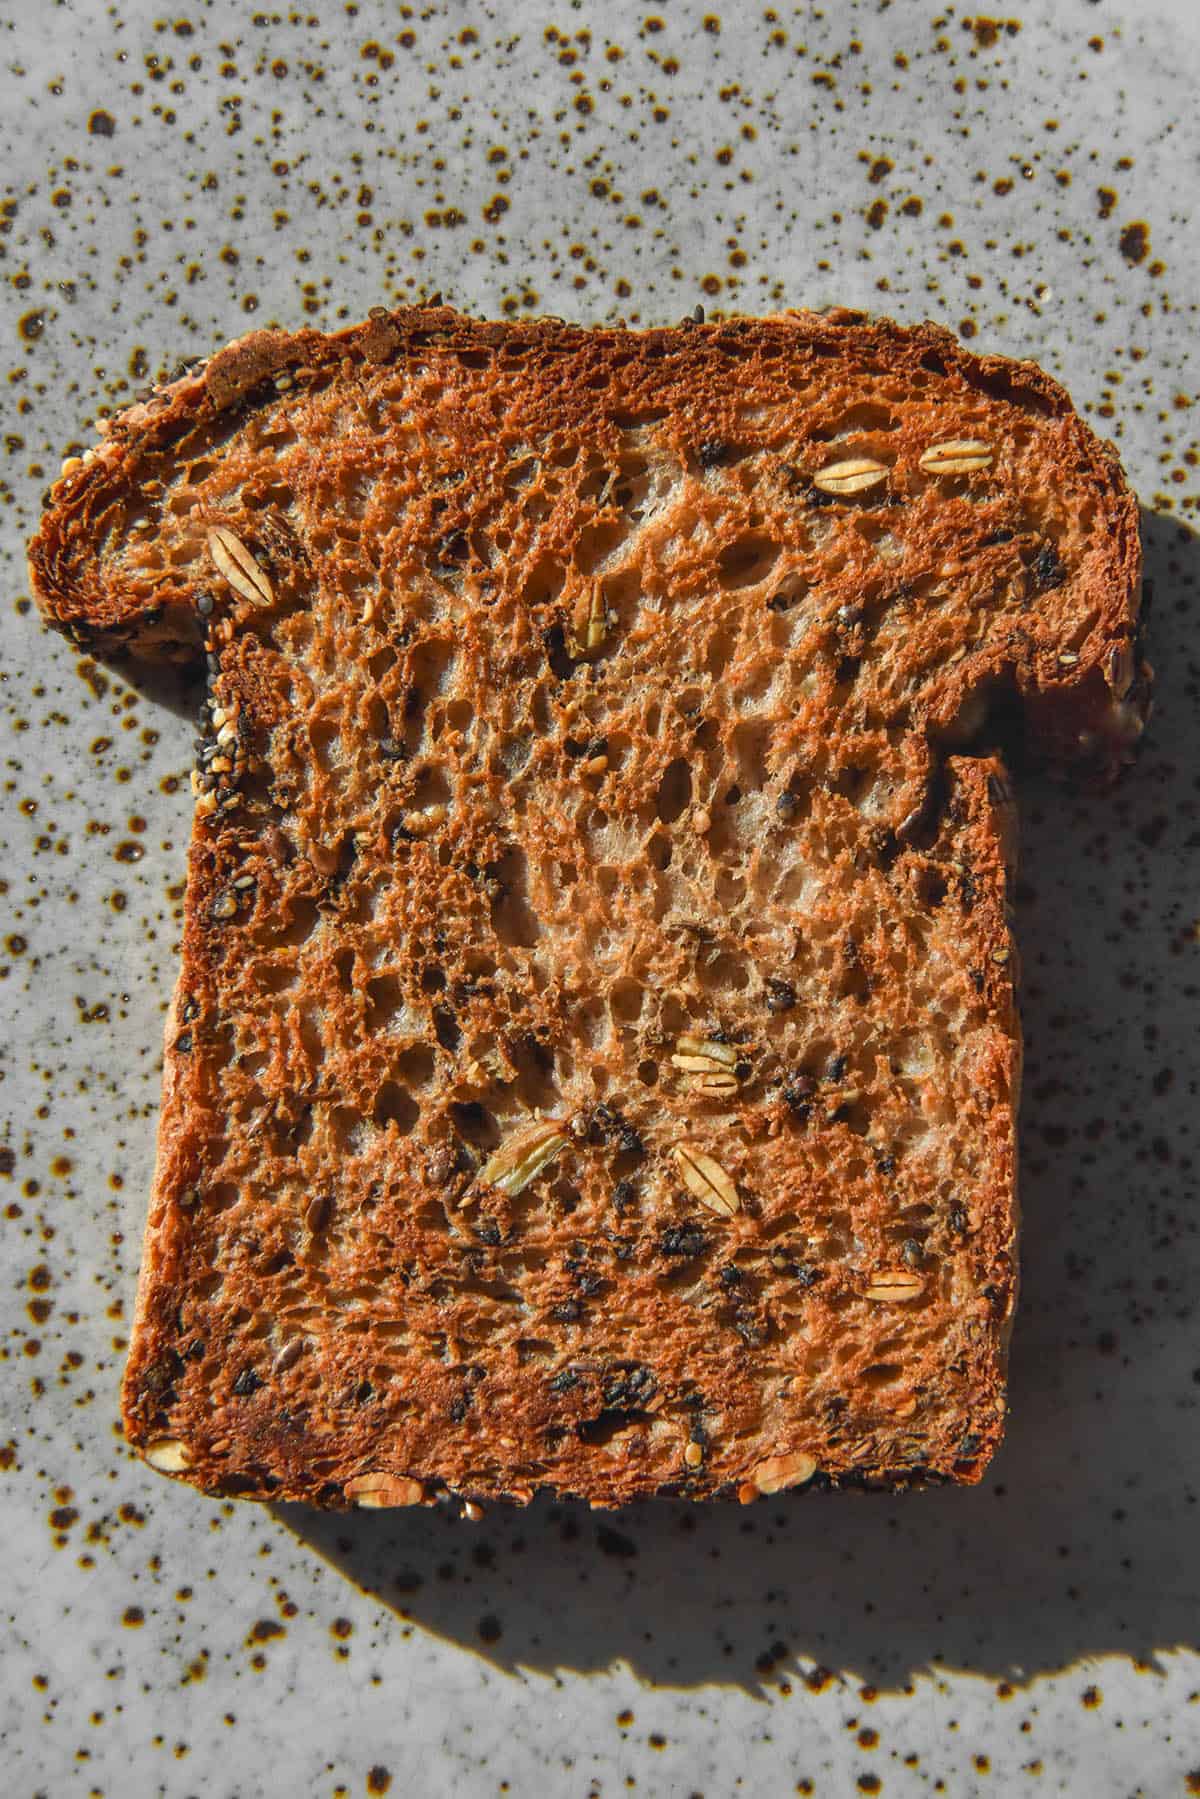
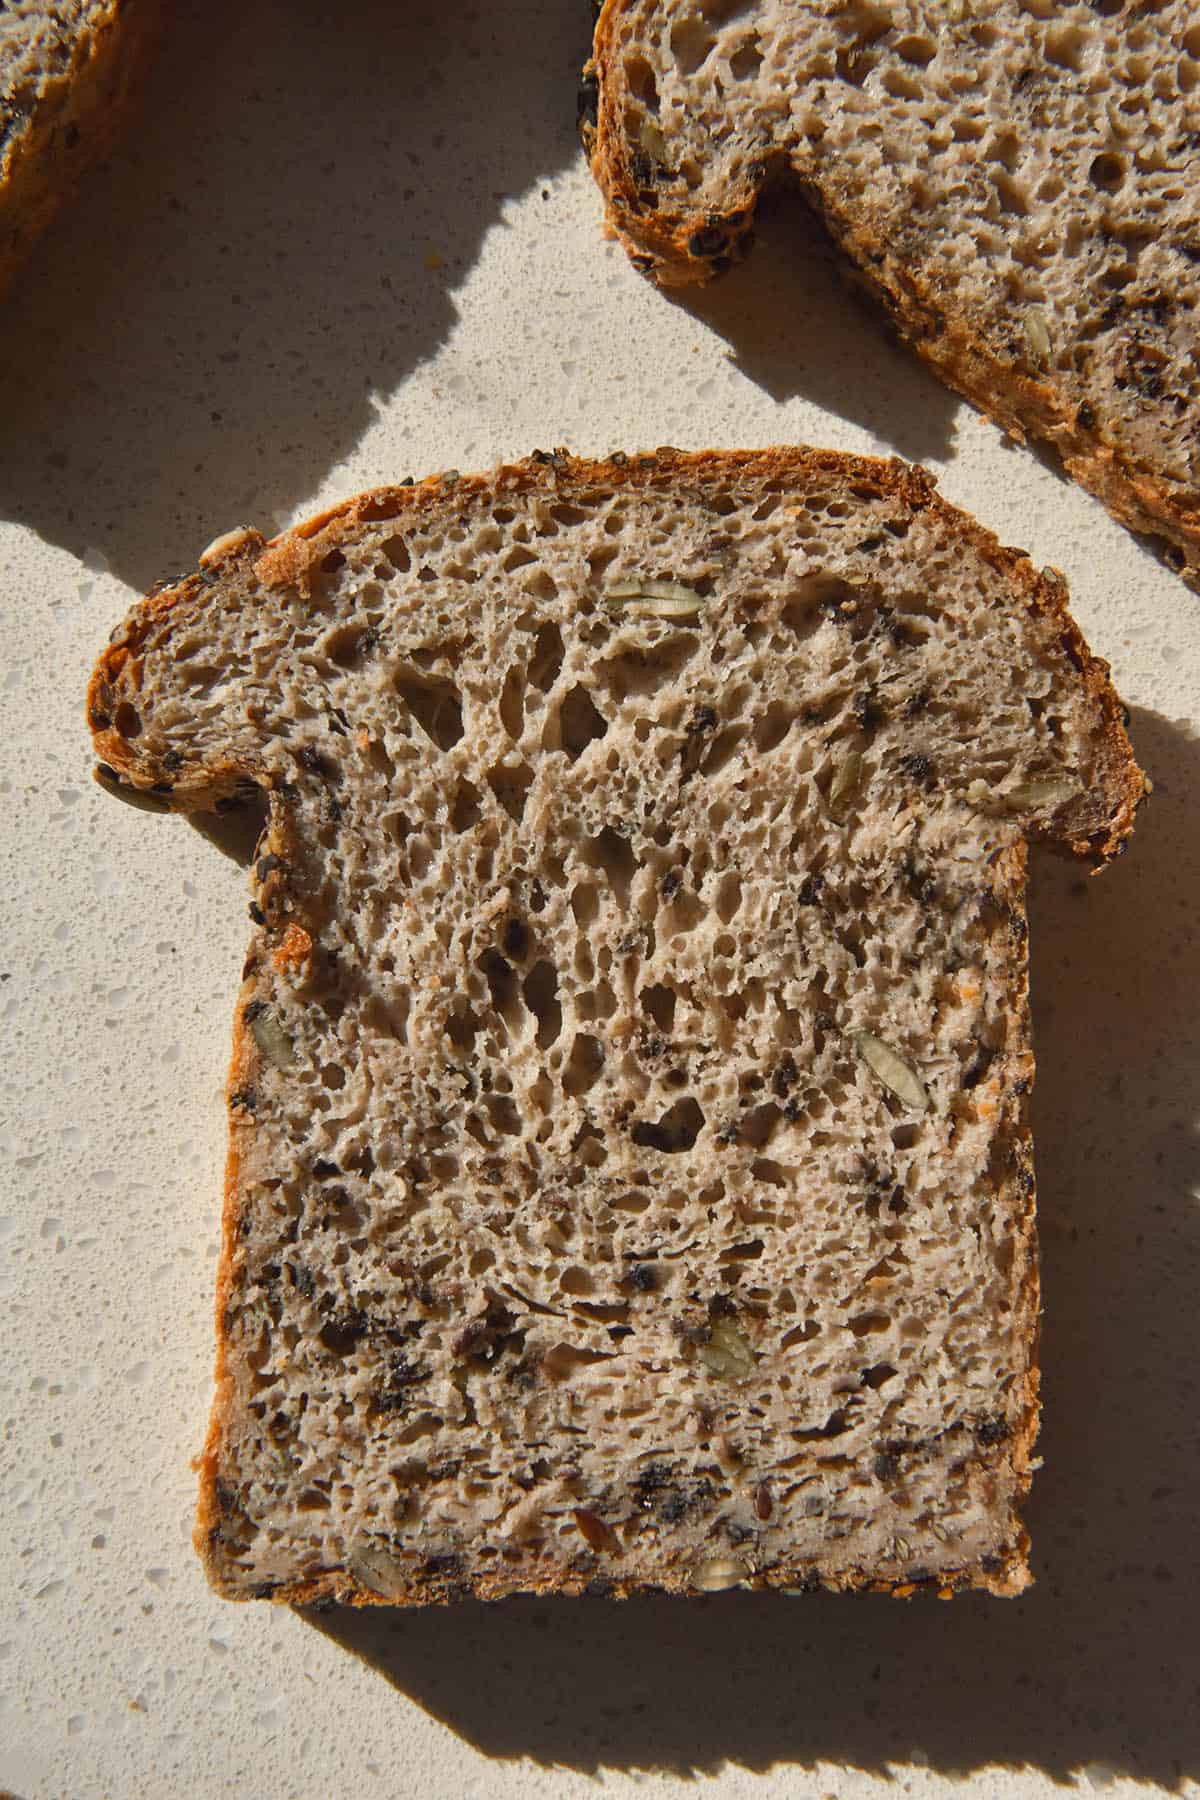
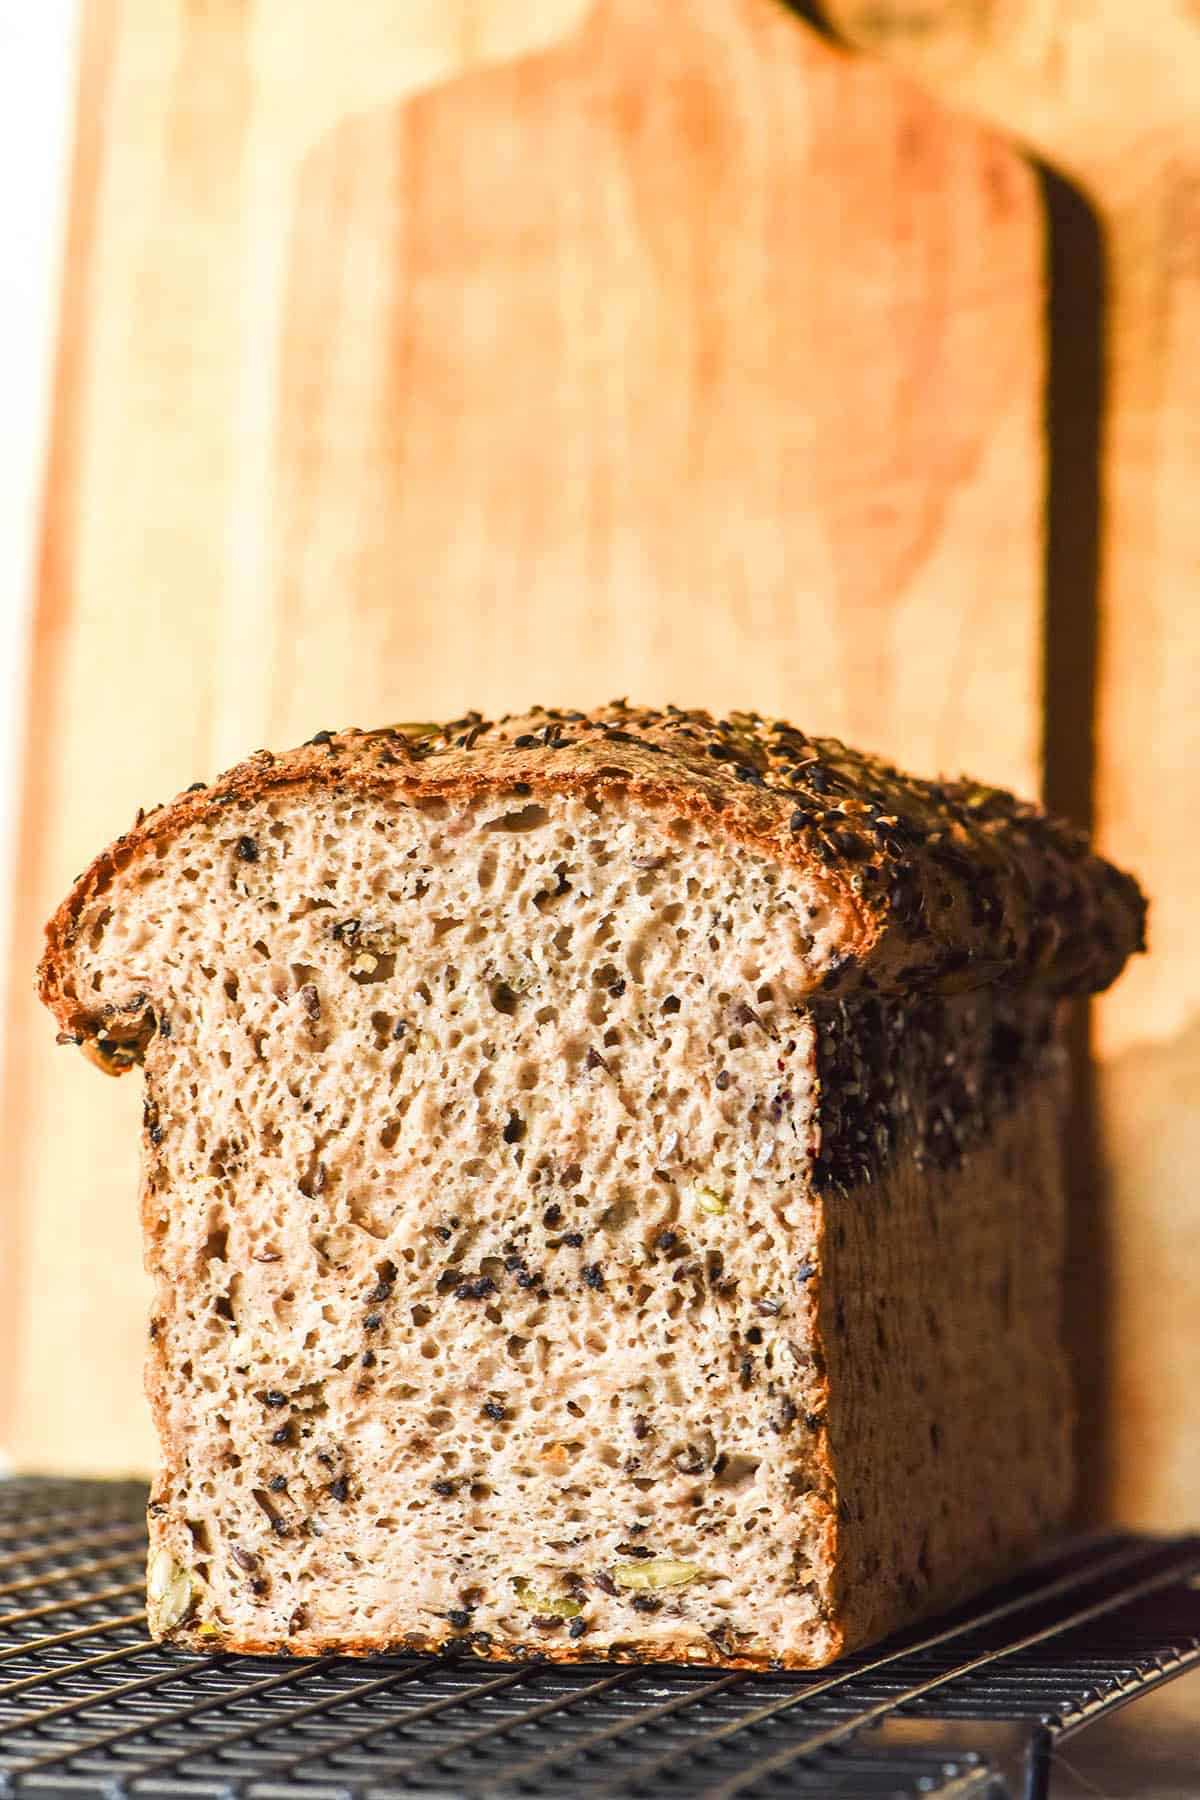
This is one of the tallest gluten free bread recipes I’ve made, so perfect for a good sandwich or slice of toast.
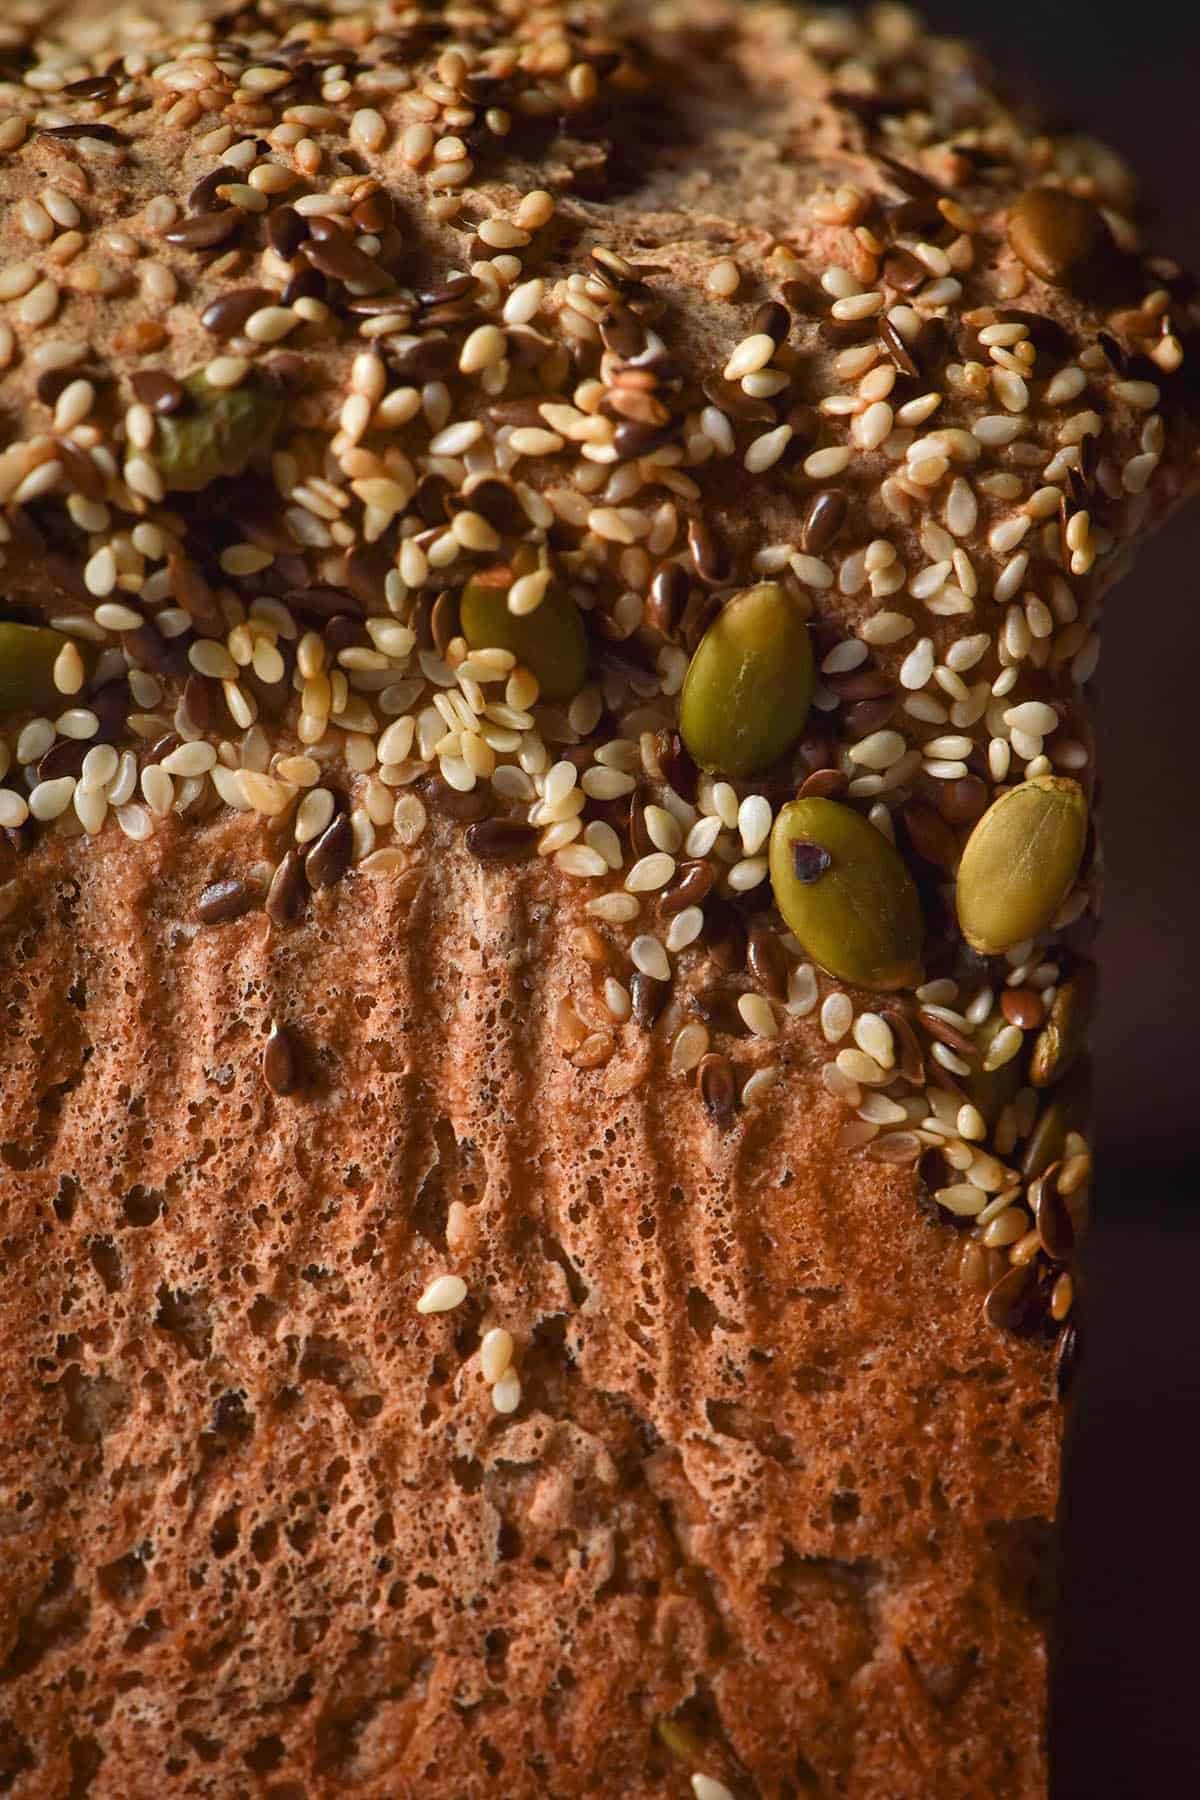
You can use seeds that work for you. I have made this loaf with a mix of pepitas, hemp seeds, sesame seeds and flax seeds.
Note on the seeds
As mentioned above, you can choose a mix of seeds that work for you. Personally, I find that a broad mix makes for the best tasting loaves. At the very least, I would recommend using half of one variety and half of another.
I would recommend using only 1/4 cup of flax seeds (or chia seeds, if that’s your thing). Because they absorb water, they have the potential to change up the loaf consistency if there are too many of them.
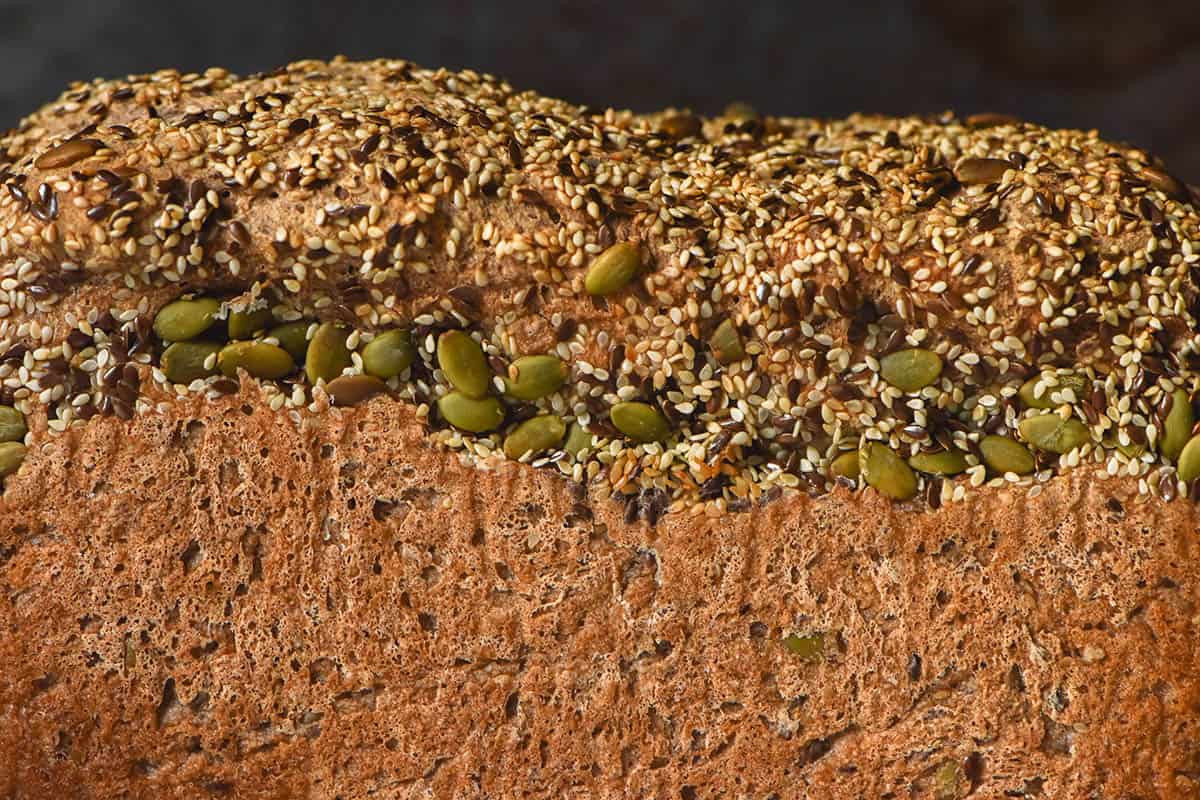
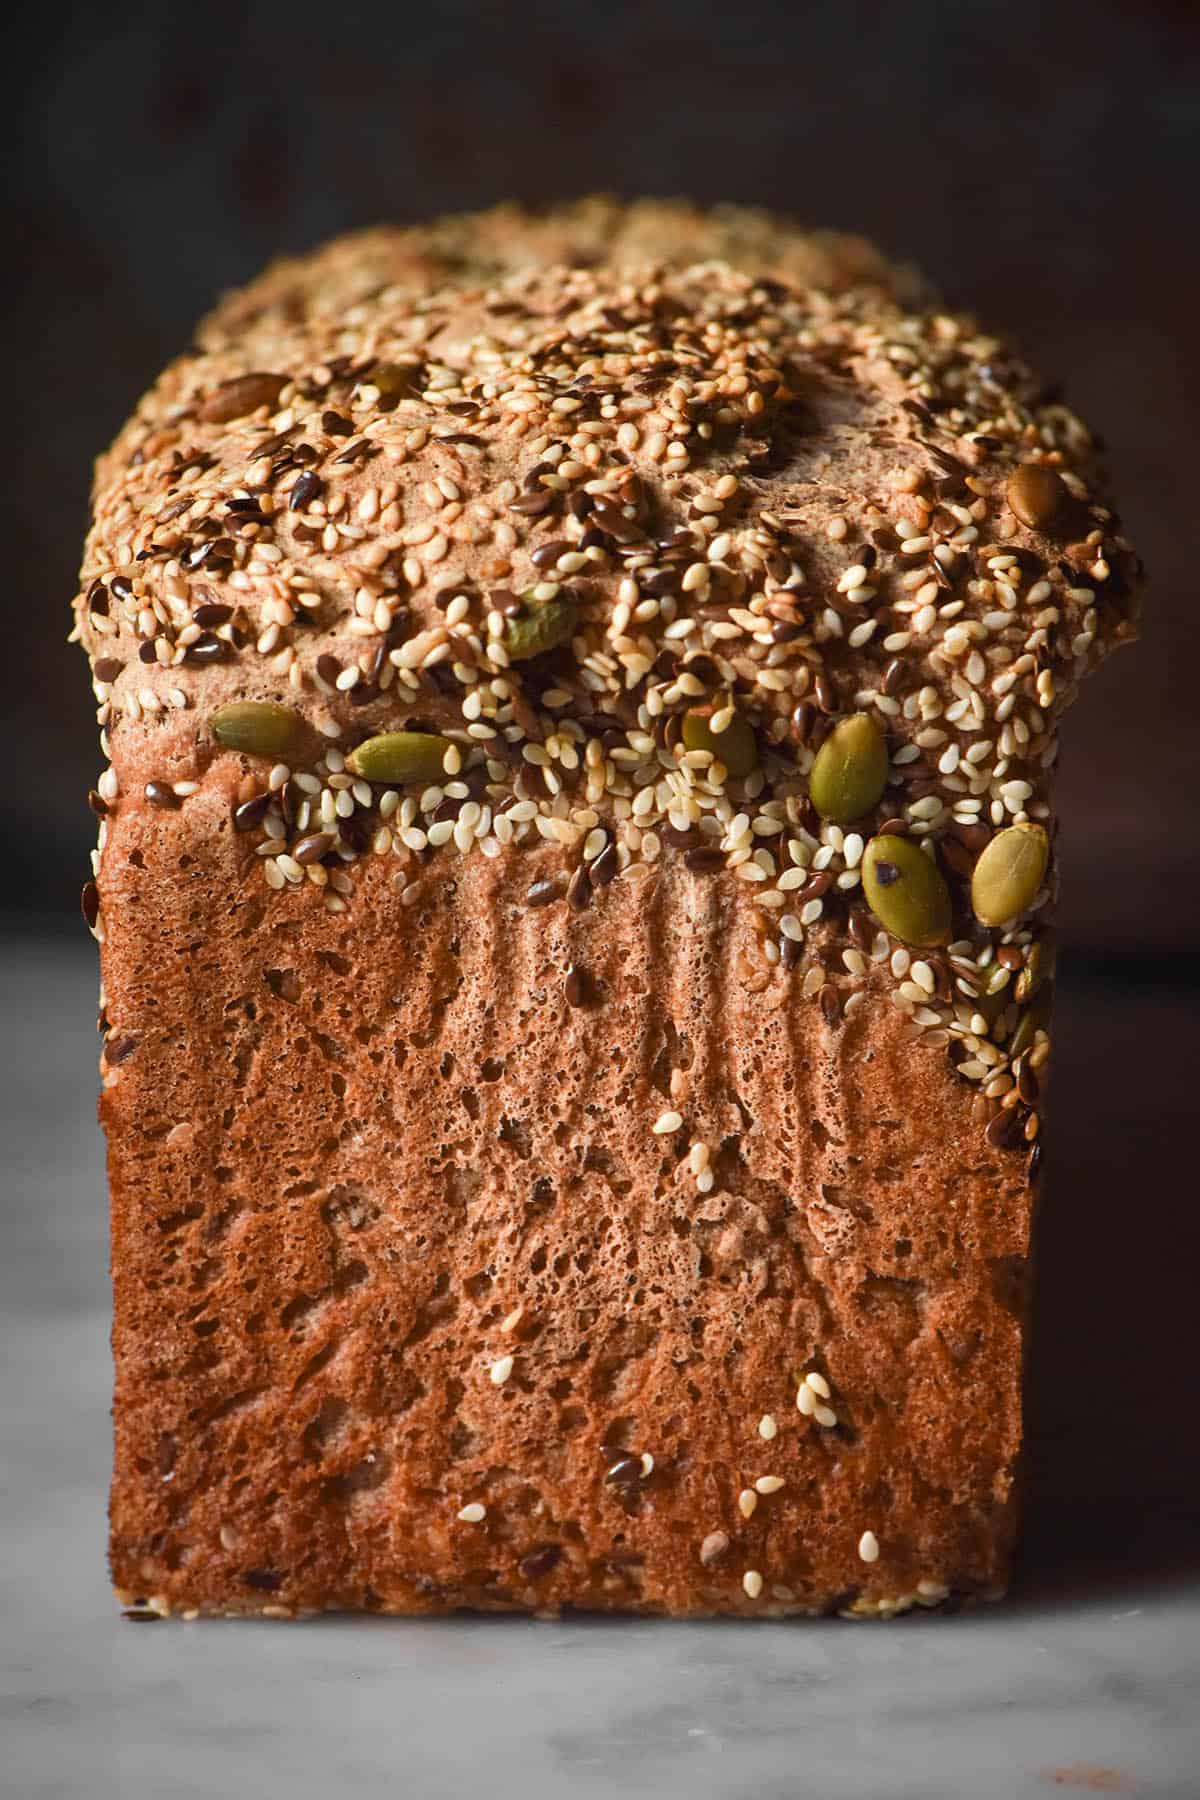
In terms of their placement, I like to aim for about 3/4+ in the loaf and the remainder on the outside of the loaf. My new favourite trick is to very lightly wet the base of the lined loaf pan and sprinkle some seeds over the base. These seeds will imprint into the base of the loaf and provide seedy goodness from all angles.
Keep in mind that seedy loaves generally always make a bit of a mess. Some of the seeds (despite our best intentions) will fall off. If you really don’t like this happening, you have a few options.
Firstly, you can experiment with adding all the seeds to the dough. I haven’t tried this and I wonder if the flax seeds would absorb some of the liquid in the dough. You are welcome to try – I would be inclined the make the dough on the moist side if you do.
Secondly, you can scale back the seeds to 1/2 – 2/3 cup and add them all to the dough. This will be in keeping with the quantity of seeds in the dough that I have tested.
Notes on the gluten free flours
I have purposely chosen light buckwheat flour, white rice flour and tapioca flour here. They are all relatively accessible in Australian supermarkets, which is important to me in the development of a loaf. They are all also relatively inexpensive, given that they are not niche.
I have only tested light buckwheat flour here because that’s all I have access to here in Australia. Dark buckwheat flour is made from whole unhulled buckwheat, whereas light buckwheat flour is made from hulled buckwheat. I daresay this difference will change the hydration required, but also perhaps the FODMAP content. If and when I get my hands on some dark buckwheat flour, I will experiment and update my buckwheat flour recipes.
If you don’t tolerate rice flour, though, fear not! I have successfully tested sorghum flour as a replacement. Because sorghum flour is far less absorbent than white rice flour, I recommend scaling back the liquid.
I have used 900g and 800g water in my tests with white rice flour. I would recommend the 750-800g range for a loaf that uses sorghum flour to account for this difference.
I have also recently tested white teff flour, which worked well. I used 850g of water for the loaf using white teff flour.
What should my dough look like before proofing?
One thing I find helpful to keep in mind when baking gluten free bread is that it will absolutely not look like regular bread. Because the psyllium husk powder soaks up liquid gradually, it will initially appear to be very wet. This is the case both with boules and loaves, but more so with loaves.
Why? Because a loaf has the support of a loaf tin as it bakes, you can add more water to the dough. You also don’t need to worry about shaping the loaf and it being too sticky.
The benefit of a high hydration loaf is that more liquid = a taller loaf (to an extent). Yeast thrives in a moist environment, so a wet dough is more likely to produce a tall and beautiful loaf.
As you first mix the dough, it should be so liquid that you worry it will never become bread. After a brief period of mixing, it should feel like the dough has thickened a little. Depending on how much water you have added, the dough might remain the consistency of a medium thickness yoghurt, or it might be slightly thicker than that. Either way, it should be more of a batter than a solid dough.
One thing it shouldn’t be? Dry. As we’ve discussed, a dry dough is not an environment in which yeast thrives. This means your loaf will not only be dry, but also short, squat and with a very solid consistency. No beautiful airy crumb 🙁
What should my dough look like after proofing?
This depends on how much liquid you have added. On the low end of hydration, the dough should have formed a little raised but completely smooth bun in the bowl. It should be filled with bubbles if you stir and you might be able to lift the dough up in spoons.
On the high end of hydration, the dough might still look wet and be easy to stir. It should still feel cohesive under your spoon (not like pure liquid) but it might be easier to pour than to spoon into the loaf pan.
Can I bake this loaf as a boule or in a silicon pan?
No. This recipe is very high hydration and the dough (being gluten free) does not have enough strength to support itself without the confines of a steel baking tin. Silicon will not hold the loaf in and will be way too small to hold all the dough.
The perfect tin for this recipe is the one I baked it in – a USA pan small Pullman tin. This is the pan I use for all my gluten free loaves, so if you make my recipes often it is a worthy investment.
The loaf tin is perfect because it is made of reinforced steel to keep the loaf proofing upwards. The small size is great for gluten free loaves, which are generally smaller than regular loaves. Because it’s small, you get get a nice tall loaf without the dough spreading too much.
Ingredient notes and substitution options
- These days, I buy psyllium husk flakes and grind them to a powder in a spice grinder. In my experience, store bought psyllium husk powder has a tendency to turn things grey or purple.
- Psyllium husk powder is more absorbent than the flakes and I haven’t tested the flakes in this recipe. They are not interchangeable here.
- As mentioned, I have only tested light buckwheat flour in this recipe.
- While I haven’t tested a different starch in this recipe, you are welcome to experiment. In my experience, glutinous rice flour is more absorbent than tapioca flour, should you choose to use it.
- You can use sorghum flour in place of white rice flour. Use 750-800g total water for the loaf to compensate the difference in absorbency between the two flours.
- You can also use white teff flour in place of the white rice flour. I used 850g water for this loaf.
- The combination of seeds is up to you. Use what works for your dietaries.
- Oil is there to soften the crumb and maple syrup to aid in flavour, browning and a boost for the yeast. I don’t recommend omitting either.
- You can use any sort of oil and replace the maple syrup with honey (if you don’t need the loaf to be vegan).
- I haven’t tested this bread without yeast. I’m working on a gluten free yeast free bread recipe, so stay tuned.
Loaf cheat sheet
- The dough should be essentially liquid as you mix it, and become a thin to medium consistency yoghurt consistency after whisking.
- After proofing, the dough should be aerated and bubbly but still way too thin to hold its shape.
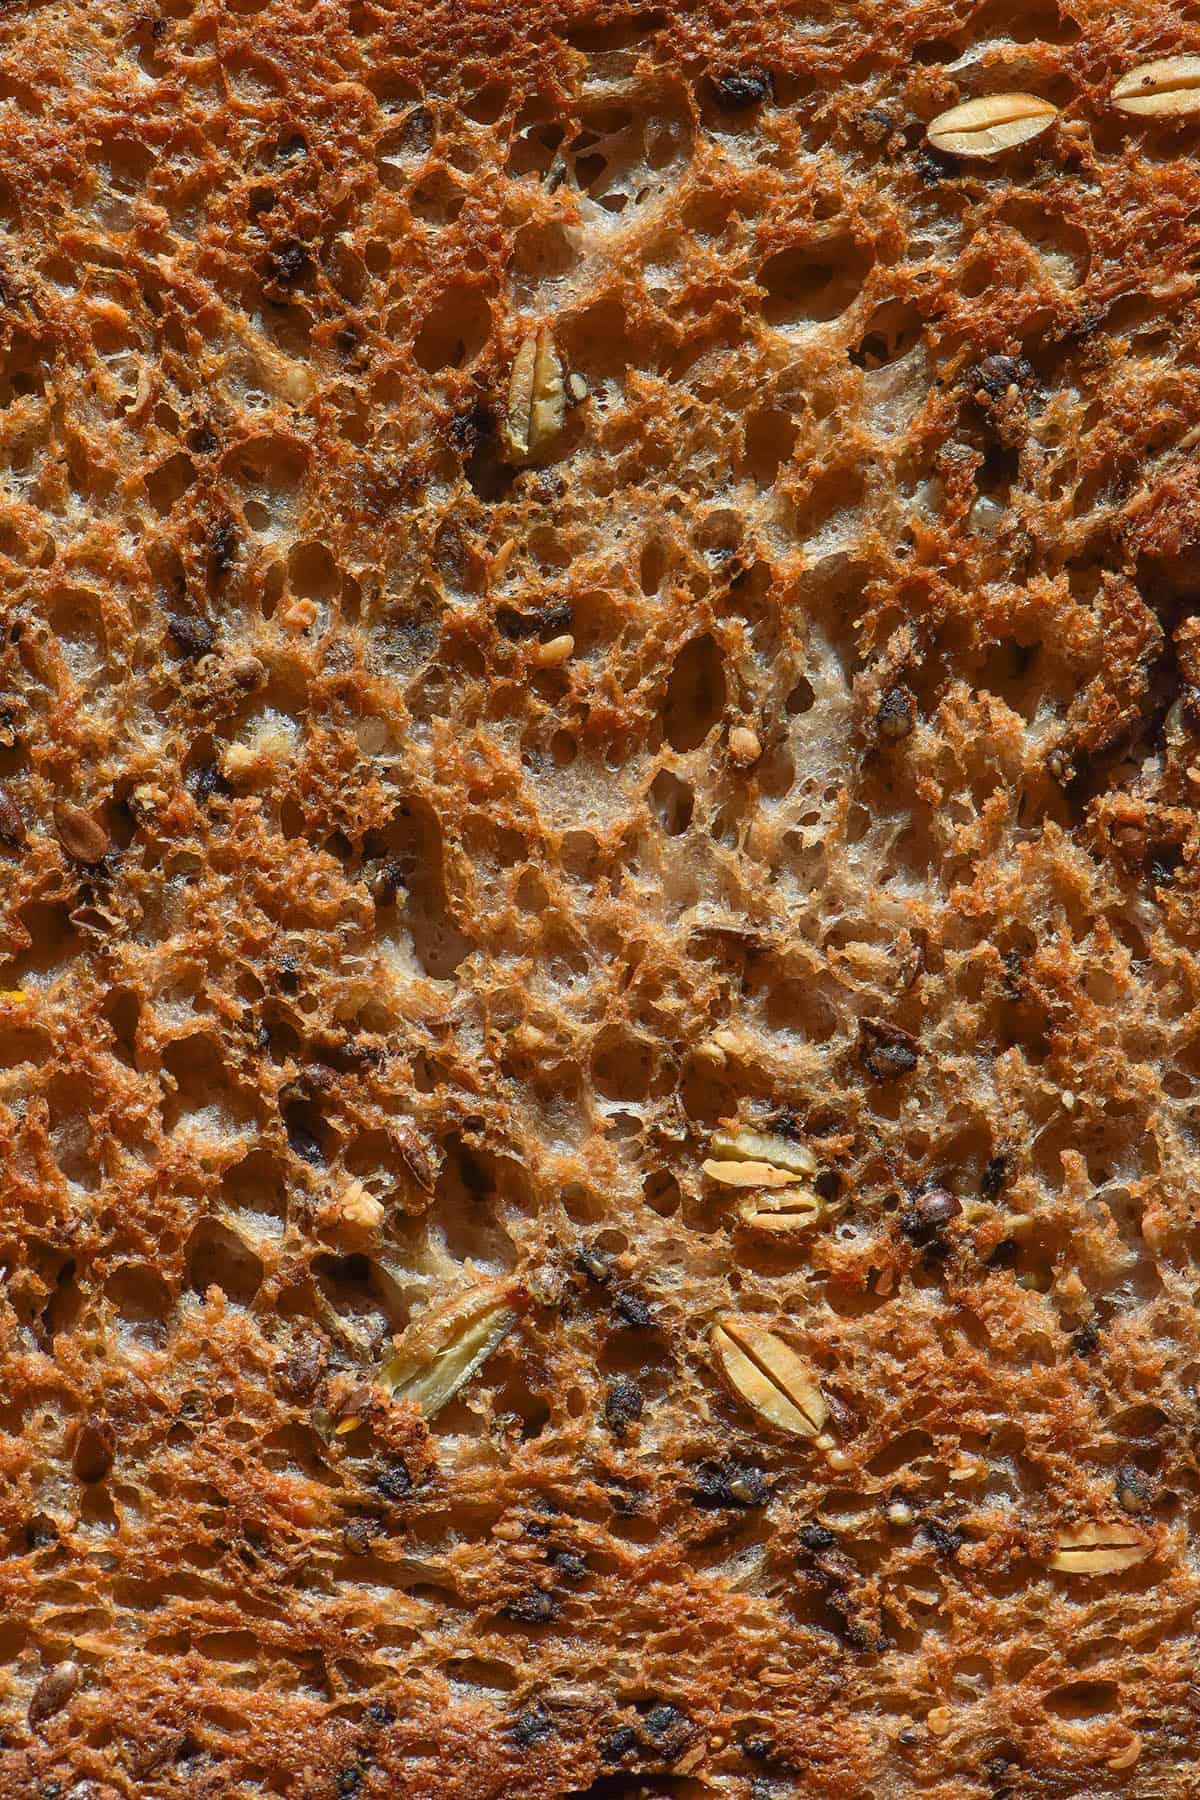
- To an extent, a wetter dough equals a moist and open crumb and a dry dough equals a short, finely knitted and dense crumb.
- I find adding seeds after the first proof to be the best time to add them in.
- How much water you need to add will vary. Different bags of flour have different absorbencies, as do varieties and brands around the world. The easiest way to add water (within the range) is by sight – watch for a dough that is as described in the recipe. If yours is drier than that, add more water. It is much easier to add more water later than it is to address an overly wet dough.
Troubleshooting your loaf
There are a few things that need to be considered when baking bread to ensure success. Firstly, ambient temperature plays a big role in proofing and needs to be considered. If you’re baking in a super hot or humid climate, your loaf will proof a lot faster and might be prone to over proofing. A classic sign of over proofing is the flying crust – a top crust that has detached from the loaf, leaving a big hole inside.
Similarly, frigid temperatures will make it difficult for the yeast to thrive. Baking in super cold kitchens or environments will mean the proofing stage will take considerably longer.
In terms of the flour, I cannot emphasise enough that every bag of flour will yield a different result. If you blindly follow the liquid volume outlined in the recipe without watching your dough, you might end up with a dry loaf or a wet mess. You need to use your intuition and add liquid according to your flours.
Using a silicon tin or tin larger than specified will result in either a mess all over your oven as the dough spills out (silicon loaf) or a short and squat loaf (larger loaf tin). I don’t make the rules!
Yeasted baked goods needs to be totally covered during proofing in order for them not to dry out as they bake. Keeping the dough covered prevents cool air from getting in and from things drying out, both of which will inhibit yeast growth. I (re)use a plastic bag that I wrap entirely around the bowl during the first proof. During the second proof, I use a smaller produce bag that fits snugly around my Pullman pan and extends into the air so that it doesn’t touch the loaf as it proofs.
My loaf is dense?
This can be one of three things (at least) and might be more than one combined. Firstly, a dense loaf is often one that didn’t have enough liquid added. Yeast needs a certain level of moisture to raise a dough, and if the dough is too dry it will not work as intended.
Secondly, cool climates and kitchens can contribute to a lacklustre proof. Yeast thrives in heat, so proofing in warmer weather or climates will always result in a speedier, more efficient proof. Combined with a lack of sufficient moisture, these two factors can work to create a very squat and disappointing bread.
Finally, if your bread shows no signs of yeast activity at all and has not proofed, your yeast might have been inactive. Make sure you use fresh packets of yeast to avoid this – not the two year old packets at the back of the cupboard.
My loaf is too wet?
If you have added water conservatively, gradually and as per the texture described in the recipe card, this shouldn’t be an issue. However, as discussed in regards to the absorbency of flours, some flours can take less liquid than others.
The solution is simple: add less water next time. Over time you’ll learn how much liquid your flours can absorb and this will become less common.
If you want to course correct a liquid dough after the first proof, I’d recommend using 1/2 cup flax seeds instead of 1/4. Because flax seeds absorb liquid, this MAY help in bringing the loaf back to better ratio.
One last thing to mention, because people sometimes ask. If your slices of bread are moist – that’s normal! A lovely open crumb can sometimes mean moist slices of bread. This is the simple payoff. However, it’s worth mentioning that they might be excessively moist if you cut the loaf before it has cooled. Steam and excess liquid are still in the process of drying out as the loaf cools. For best results, slice it completely cooled or even the next morning.
There’s a bright side to a moist loaf, aside from a lovely open crumb: the loaf will be stay fresher longer. With a high hydration version of this loaf, you can still eat it un-toasted for a day or two (or more) after baking.
My loaf over proofed?
This is a high hydration loaf with a starch component, so there is a risk it will over proof.
As discussed above, bread dough proofs faster in hot, humid climates or warm kitchens. It also proofs faster when it contains starch (as this is easy food for the yeast) and when it is high hydration.
First off: if your loaf has reached the top of the tin within 20 minutes, bake it! There is no set number for when a loaf will proof – the recipe is a guideline and was developed in a cold kitchen. It’s always important to watch your dough rather than simply setting a timer.
If you are finding all of your loaves are proofing too quickly, there are a few solutions. Firstly, drop back the water by 100g or so. Less liquid equals less volume, but it also means less of a moist environment. Yeast thrives in a moist environment which is why higher hydration loaves proof at a faster rate.
Secondly, proof your bread in a cool spot or in the fridge. Colder temperatures inhibit the yeast activity to slow it down.
Finally, as discussed above, bake it sooner. You can also experiment with doing a single rise in the tin as opposed to two rises, but I haven’t tried this. Whatever you choose, implement the above options and you should be in good stead.
More gluten free bread recipes without xanthan gum
- Gluten free buckwheat bread without xanthan gum
- Gluten free focaccia without xanthan gum
- Grain free vegan white bread without xanthan gum
- Gluten free bagels without xanthan gum
- Gluten free sourdough boule without xanthan gum

Gluten free seeded bread
Equipment
- 10 x 10 x 23 cm steel bread tin (I use the small USA pan Pullman pan) (4 x 4 x 9 inches)
Ingredients
For the loaf:
- 400 g light buckwheat flour
- 100 g white rice flour (see notes)
- 100 g tapioca flour
- 7.5g (1 sachet) instant yeast
- 20 g psyllium husk powder (not flakes)
- 12 g salt
- 20 ml oil of choice
- 20 ml maple syrup
- 750- 900 g water (see notes)
For the seed mix:
- 1 Australian cup seeds approximately 150g, see notes
Instructions
- Add the dry ingredients for the loaf into a large, non-reactive (glass or plastic) mixing bowl and whisk to combine. Add the wet ingredients and whisk again to combine. The dough should begin feeling completely liquid, then thicken slightly to a medium thinness yoghurt consistency. I recommend adding water conservatively and incrementally to reach this consistency. An overly wet dough will be harder to rectify than a gradually hydrated dough.
- Whisk until smooth, then cover the bowl and place in a draught free place for 1 hour.
- While your dough is proofing, lightly grease and line your 10 x 10 x 23 cm steel bread tin USA pan pullman loaf tin.
- Combine your seeds in a small bowl. I dedicate 3/4 of the seeds to be mixed into the loaf and the rest for the outside of the loaf.
- When the dough is proofed, mix 3/4 or so of the seeds into the dough.
- Wet the bottom of the loaf pan with a light splash of water, then sprinkle half of the remaining seeds into the base.
- Decant the dough into the tin and use a wet hand to smooth down and moisten the top of the loaf. Sprinkle the remaining seeds onto the loaf evenly, then use a hand to gently press and adhere them to the loaf.
- Cover with a plastic bag that will not touch the loaf (I use a plastic produce bag inverted over the tin) and proof for anywhere from 30 minutes to 1 hour. Important: temperature, season and hydration have huge impacts on how quickly a loaf proofs. If yours proofs in 20 minutes, that's fine – bake it. See the notes in 'my loaf is overproofed?' if you are struggling with over proofing.
- Preheat your oven to 200C/400F.
- When the loaf top is domed and reaching over the top of the loaf tin, it’s time to bake. Place the loaf in the oven for 20 minutes.
- After this time, turn the heat down to 180C/356F and cook for an additional 30-40 minutes. The loaf top should be golden brown and sound hollow if you knock on it.
- Remove the loaf from the oven and allow to cool in the tin for 15-20 minutes before gently using placing onto a cooling rack.
- The higher hydration iterations of this loaf stay fresh on the bench for a couple of days. After that they are best as toast.
Notes
- I have only tested light buckwheat flour as that’s all I have access to here in Australia. Personally, I don’t think this tastes like a buckwheat predominant loaf, just like a generic wholegrain bread.
- You can use sorghum flour in place of white rice flour. Use 700-800g total water for the loaf to compensate the difference in absorbency between the two flours (sorghum is less absorbent than white rice flour).
- You can also use white teff flour in place of the white rice flour. I used 850g of water – I find teff flour to be quite absorbent.
- Expect seeds to fall off the top of the loaf. That’s just how it goes! If you don’t fancy seeds all over your kitchen, I recommend putting them all into the loaf and on the base.
- The higher hydration your loaf is (ie the more water you add) the quicker your loaf will proof. Yeast thrives in a moist environment. Always keep an eye on your loaf and bake it as soon as it domes over the top of the Pullman pan, even if it hasn’t been proofing for 1 hour.
- The seed mix I used for half the photos is as follows: ¼ cup hemp seeds (35g) ¼ cup pepitas (40g) ¼ cup black sesame seeds (35g) and ¼ cup flax seeds (40g)
- For the other photos, I used 1/2 cup white sesame seeds, ¼ cup flax seeds and ¼ cup pepitas.
- See the body of the post for notes on the flours, seeds, troubleshooting and tips. I have written extensively on each topic to make this recipe as helpful as possible.
Hi, You mention yeast in the body of the post, but it doesn’t seem to be listed in the ingredients/method of the recipe.
I was wondering if yeast is included in this recipe, and if so, how much and when is it added?
Thank you for the clarification.
I’m so sorry Kirilly, in my excitement to publish this one I missed the yeast! Thanks for pointing that out, I have amended the recipe.
For ease, it’s 7.5g instant yeast (1 sachet in Aus) added to the dry mixture 🙂
Thank you very much for letting me know and updating the recipe, I am excited to give it a try!
Would you say the flax seeds must be included in the seed mix, due to the amount of liquid they absorb?
I wouldn’t say they are critical. I have made other loaves with roughly this hydration that aren’t seeded.
That said, I might be inclined to use 800-850g water instead of 900. See how your dough is after the first proof (it should never be dry) but if you’re worried and don’t want to include flax, this is an easy solution 🙂
Thanks for getting back to me. I made a loaf without flax, but I definitely added to much water despite you explaining the consistency to look for so well. Next time I’ll do better lol!
In your defence it can be tricky! So many variables in bread making, happens to me weekly haha
Hi Georgia. I am curious as to why you don’t use a steam tray in your seed bread but do in your buckwheat? I have made a few of your breads now and your recipes are at the top of the list when it comes to GF. Thankyou! Karen
Hi Karen! That is very kind of you, thank you 🙂
I didn’t use the steam tray for this loaf because it contains tapioca flour which is great food for the yeast.
It doesn’t need as much help as the buckwheat flour so I didn’t bother.
If you’d like to do a steam bake I’m sure it would result in a lovely loaf 🙂
Since I am new to baking, what rack position is best for this loaf?
Having the loaf in the middle of the oven is ideal!
I arrange my racks so the loaf has got a decent amount of space to grow upwards in the oven but isn’t right down the base of the oven 🙂
Your buckwheat flour loaf is amazing and have this in the oven now. Just wondering on 2 things- 1, have you ever experimented with adding apple cider vinegar to aid in rising (I’ve noticed lots of gf recipes using this lately), and 2, would brown rice flour make a huge difference with this?
Hi Steph,
You are very kind, thank you! I have used apple cider vinegar as a dough enhancer in my gf sourdough recipes. Personally I don’t think instant yeast needs as much help but you could always try it if you’re keen to.
Brown rice flour is generally thirstier than white rice flour so you might need to use more water. Texture wise, I’m not sure. I haven’t worked with brown rice flour in a while now but I daresay it should make a similar loaf if you get the hydration right 🙂
Hey! My dough overflowed the tin when I put it in the oven and didn’t rise in the initial 20min baking time – any tips?
Hi Amy, to clarify: it proofed so much that it overflowed the tin and then did not rise in the oven?
Did you pull or pour off the overflow dough? This might be responsible for a lack of proofing in the oven. Some of the dough ‘strength’ comes from the dough having that skin holding in the air bubbles beneath it, so if you pull it off it’s kind of like punching down the dough, which deflates it.
Did you use the size baking tin I specified in the recipe? This bread needs a Pullman pan (which has high sides) so that it holds the dough. The recipe is designed around that exact size tin and using a different one (particularly with shorter sides) will yield different results.
Your dough should rise slower in winter than in summer and I have never had this dough ovenproof the Pullman even in summer, so I’m guessing your tin size was too small. Correct me if I am wrong though?
As for not proofing in the oven: most of the proofing is done prior to baking so I generally don’t expect it to grow exponentially, perhaps a little boost.
However if the top has come off the loaf, that would explain the lack of proofing in the oven as we discussed above 🙂
Hey! Thanks for the info.
Yes exactly – proofed so much in the second proof (in the plastic bag) that it overflowed the tin.
I used the exact same tin you used (bought it through your Amazon link).
I didn’t pull or pour off the overflow – it just fell into the bag and then in the oven once I’d moved it. Do you use cold water in your recipe? I used room temp which I guess could’ve over activated the yeast?
It also didn’t come out with a crust which I’m assuming is more oven temperature related?
Hi Amy,
Interesting! Do you live in a warm or humid climate or have a warm kitchen? You didn’t play around with the starch or starch ratio?
Humid/moist air, higher starch % loaves and higher hydration loaves (like this one) are all prone to proofing faster. I’ve never had one proof over the tin, but maybe you live somewhere warmer than me.
I generally use room temperature so I wouldn’t say this would be enough to create such an active loaf.
The crust could either be oven temperature related (oven dials are notoriously inaccurate so your oven could have been quite a bit cooler than you anticipated) or because the taut loaf skin came off prior to baking. Overproofed dough often bakes up pale, so that might also be a contributing factor.
My suggestions for next time would be to proof for less time (and in the fridge if you live in a humid place) use 100g+ or so less water and crank your oven well in advance of baking the loaf.
Hopefully a less proofed, lower hydration dough should be the ticket!
Thanks so much for the suggestions.
Im NSW based so not humid atm and didn’t play around with the recipe or anything.
I’ll give it a go again, and let you know the outcome! Really appreciate it x
Great recipe. I made it today. Delicious and light! Thank you
Very glad you enjoyed it Vale!