
An update: Unfortunately for us all, Monash has recently (as of November 2024) updated their entry for Japanese/Kent pumpkin. It is low FODMAP in serves of 75g and up to 161g. In serves of 162g or more, it contains moderate amounts of fructans.
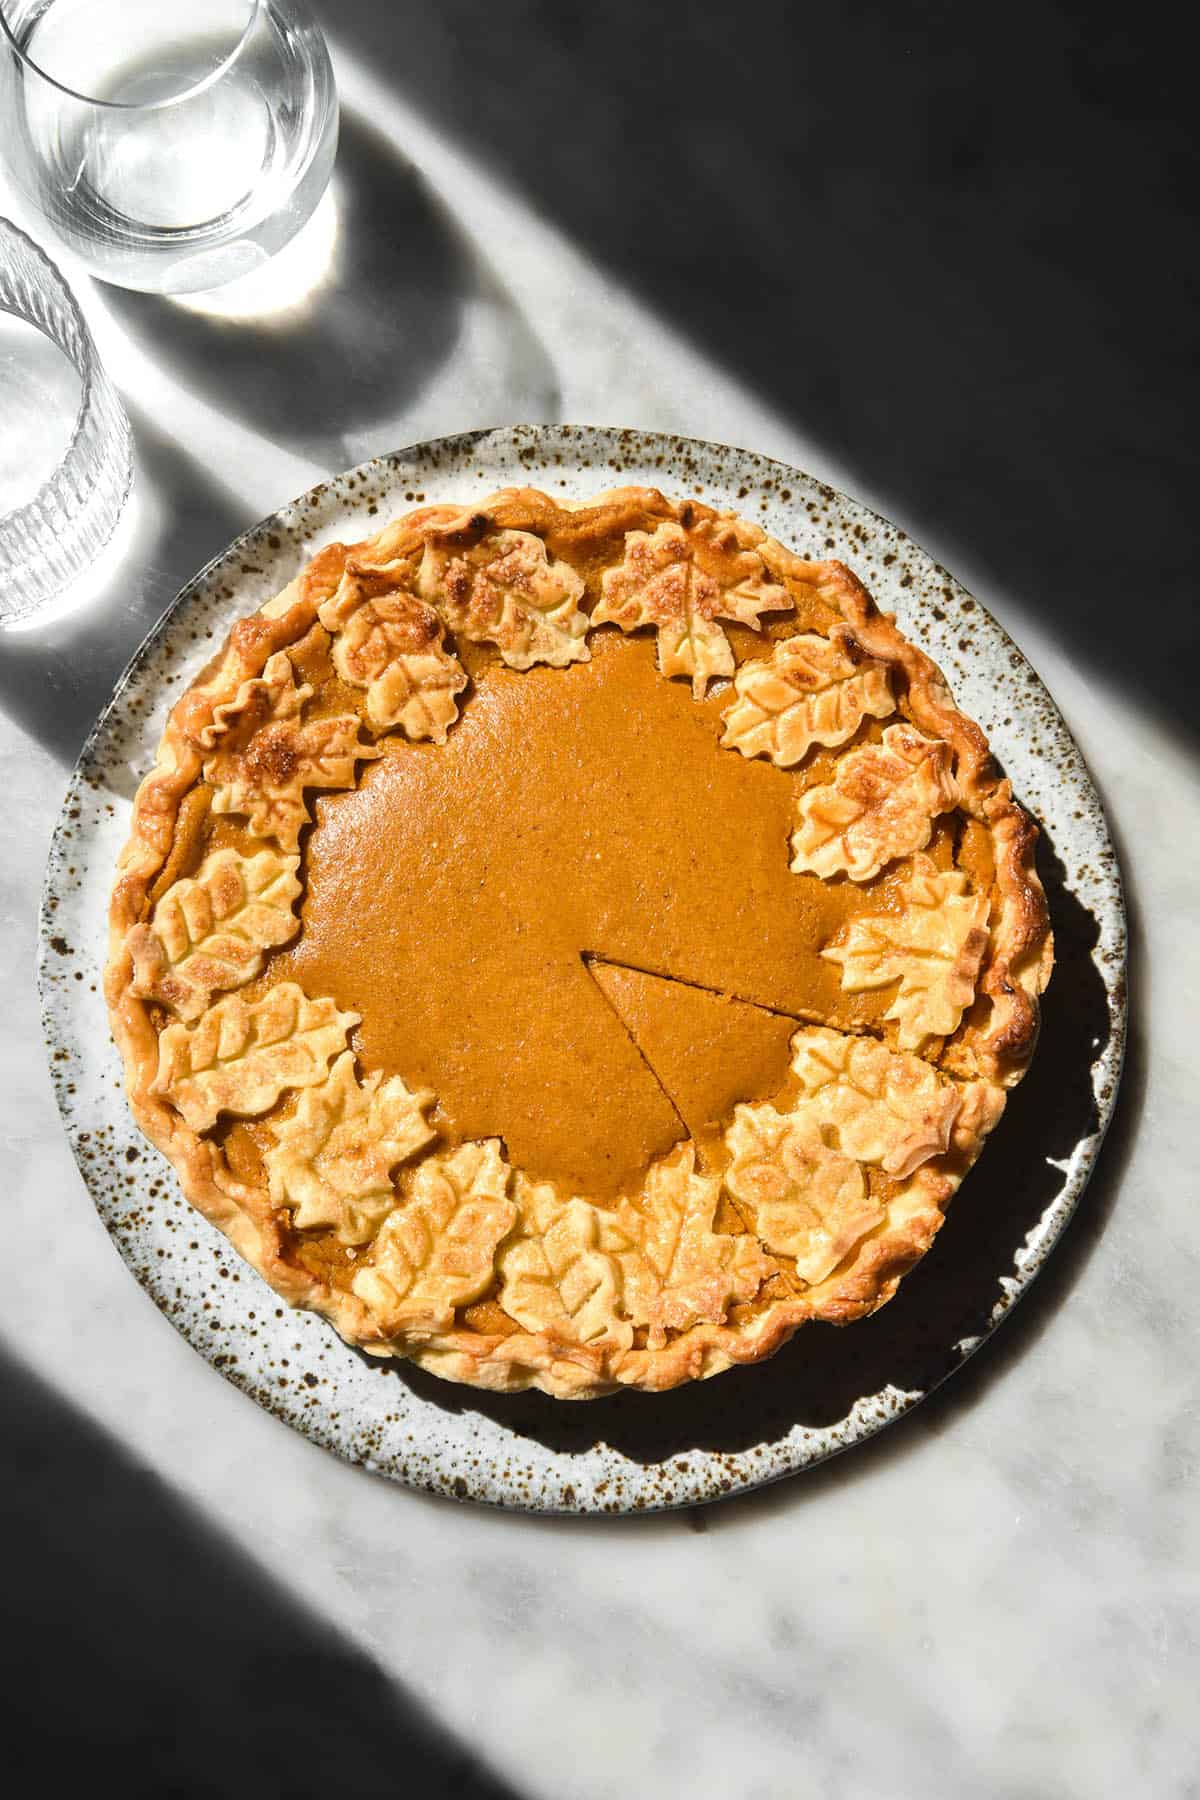
Although I am Australian, I have a soft spot for pumpkin and pumpkin baked goods. I also love how America really goes hard for a theme or event – Fall, Halloween, Christmas, etc. With that in mind, I wanted to share a low FODMAP pumpkin pie so that the digestively challenged amongst us can get into the theme too.
Low FODMAP pumpkin pie
This low FODMAP pumpkin pie is super customisable. As it stands, the pie is egg free, gluten free and nut free. However, it can also be made dairy free/vegan and/or xanthan gum free. Heck, there’s even a nut free, grain free pastry option.
While Australia doesn’t have many great plant based butter brands, you can make this pastry dairy free/vegan. For my North American friends, I hear many good things about Earth Balance butter sticks.
The pumpkin filling can be made with lactose free cream cheese, lactose free heavy cream or coconut cream. It can be made with the spices in the recipe or with your own pumpkin spice blend. All in all, It’s an incredibly delicious fall or Thanksgiving dessert that is undetectably FODMAP friendly.

Is pumpkin low FODMAP?
Yes, pumpkin has low FODMAP thresholds. However, the FODMAP limit for various varieties of pumpkins is quite varied. The lowest FODMAP pumpkin variety is Japanese/Kent, which can also be called kabocha squash.
Monash has semi-recently (as of November 2024) updated their entry for Japanese/Kent pumpkin. It is low FODMAP in serves of 75g and up to 161g. In serves of 162g or more, it contains moderate amounts of fructans. It was previously 500g per person.
The new threshold is still a larger serve than any other variety (as per the Monash app anyway). This still makes it the best option for dishes where you’re using a lot of pumpkin (like low FODMAP pumpkin soup).
Keep in mind that you don’t need to change anything if you have been eating pumpkin without issue.
Is pumpkin puree low FODMAP?
A 75g serve of canned pumpkin puree is deemed low FODMAP by Monash. At 105g, it becomes moderate for fructans. Monash don’t specify the brand they tested or the variety of pumpkin it was made from.
It stands to reason that either processing/manufacturing or the variety of pumpkin used are what make the FODMAP content slightly higher.
Notes on the pumpkin puree
The thresholds of canned pumpkin mean that there is a low FODMAP way to make pumpkin pie with fresh or canned pumpkin. However, using Japanese or Kent pumpkin to make your own puree means you can eat more slices of pie.
If you use canned pumpkin puree, you can safely have 1 slice (and a tiny bit extra). If you use homemade pumpkin puree, you could (considering pumpkin only) eat a third of the pie.
With this in mind, it’s all about weighing up what is more important to you. Canned pumpkin puree is very easy to use and is a firm favourite for Americans. Homemade pumpkin puree takes longer, but it means you will be able to eat more pie without issue. See below on making your own pumpkin puree in the microwave.
FODMAP notes
A quick TLDR of the FODMAPs in the pie.
- Monash says canned pumpkin puree is low FODMAP in 75g serves.
- See notes above for more information on Japanese/Kent pumpkin.
- Regular sugar is used in this pie – coconut sugar is high FODMAP and not a suitable replacement.
- Lactose free dairy keeps the dairy/FODMAP content down. Ensure you buy lactose free if you have lactose issues.
- If you use the coconut cream option, Monash says that regular fat coconut cream is low FODMAP in serves of up to 500g per person, which makes it a low FODMAP option here. Make sure your cream doesn’t contain inulin or any added fillers.
- Butter is essentially lactose free and is a very low FODMAP ingredient.
How do you make low FODMAP pumpkin puree?
- Remove the skin and seeds from your Japanese or Kent pumpkin and chop it into relatively small cubes, around 2cm x 2cm. For around 500g pumpkin puree, I like to use roughly 1kg pumpkin. Sometimes this will yield a lot, sometimes it will yield less. It depends on how watery the pumpkin is.
- Place the cubes in a tall microwave safe bowl. A tall bowl as opposed to a flat, open bowl will help trap steam and steam the pumpkin pieces instead of making the skin leathery.
- Microwave for 5 minutes. This will depend heavily on your microwave as they are all different wattage. Once you make it a few times you’ll get a sense of how long it needs to cook.
- After the 5 minutes, stir the pumpkin cubes up. Distribute the cubes that were on top to the bottom and vice versa. Return the bowl to the microwave and allow to sit in the steamy environment for around 5-10 minutes. This will also allow the bowl to cool a little to ensure it doesn’t get too hot.
- Repeat by cooking the pumpkin for another 5 minutes. Once the five minutes is up, stir and smash the pumpkin and return it to the steamy microwave. It should be easily mashable at this point. If there are pools of water in the dish, transfer the pumpkin to a fine mesh sieve to strain off excess liquid. I generally strain mine for around 15 minutes.
- Allow the pumpkin to cool a little before blending to a smooth consistency. If you’re using a blender without a steam valve (like a Nutribullet) allow it to cool completely before blending.
- You can pass the pumpkin puree through a sieve if you like. Store leftovers in an airtight container in the fridge and use within a few days. The puree can also be frozen and defrosted.
Substitution options
There are a wealth of substitution options which we will go into below. Because there are so many, I have divided them into pastry and filling.
Pastry
- I have previously tested this pastry recipe with psyllium husk instead of xanthan gum. It’s a bit trickier to handle, so I recommend this for intermediate or advanced bakers. Use 2 teaspoons of psyllium husk powder (which is stronger than flakes). If the pastry is cracking, I’d recommend laminating it. You can see visual instructions on doing there here.
- Another thing I have tested is using potato starch instead of tapioca, which worked well. It stands to reason that glutinous rice flour (which is 100% gluten free) would also substitute nicely in equal amounts as the tapioca in the recipe.
- Although I haven’t tried this, you could make the pastry with a good quality vegan stick butter.
- For a grain free option, see my grain free puff pastry recipe here.
- I have provided lesser amounts of butter for those who want them. It’s not much, but you can use slightly less than 200g.
- If you have a store bought brand that you’d prefer to use, feel free. To keep the pie low FODMAP, choose a gluten free brand and ensure it contains no high FODMAP ingredients. Common culprits in prepackaged pastry include soy flour, chickpea flour or inulin.
Pumpkin pie filling
- As we have discussed, you can use either store bought pumpkin puree (not pumpkin pie filling) or make your own. Making your own with Kent/Japanese/Kabocha pumpkin is a lower FODMAP option. However, you can safely have one slice of a pie made with canned pumpkin puree. Libby’s is the brand most people seem to recommend.
- You can use lactose free cream cheese, lactose free heavy cream or coconut cream in the filling. 225-250g is the amount for any of these ingredients. American cream cheese is in 225g (8oz) bricks, whereas Australian cream cheese comes in 250g (8.8oz) bricks.
- If you use coconut cream, I personally would use 150g brown sugar instead of 200g. The coconut cream makes it quite sweet and I thought 200g was a bit much sugar in this pie.
- I have tested both cornstarch and tapioca flour as the egg replacement in the filling. Both work well. Cornstarch gives a more matte finish pie, while tapioca starch gives a shinier finish.
Tips for your low FODMAP pumpkin pie
My most important tip is always that this recipe has been developed around the pie dish specified. Mine is a 1.2 litre capacity pie dish (24cm/9.5 inches inside the flared rim, 21cm/8 inches at the base). Using a larger or smaller pie dish will yield different results and might not work.
Too large of a dish and your pie will be short and potentially overcooked, as the pie filling has more space to fill and is thus thinner. Too small of a dish and you will have a thicker layer of pie filling (potentially too much pie filling) that will take longer to cook.
Par-baking the crust ensures a nice crisp pie that can be removed from the pie dish with ease (once cooled). I haven’t tested this recipe without par baking the crust and I don’t intend to.
My understanding of eggless pumpkin pie is that ‘centre wobble’ as an indicator of doneness is obsolete. This is because eggs continue to cook (and thus firm up the pie) as they cool, whereas an eggless pie does not. As such, you need to make sure the pie is cooked through before you remove it from the oven.
If you don’t need this pie to be egg free, use an egg wash to brush the pastry after blind baking. This creates a watertight seal on the pastry to ensure that the base won’t get soggy when the filling is added.
Notes on the cream cheese filling option
If you’re looking for the easiest pie and are not dairy free, choose the cream cheese pie. Because it contains a thick dairy it is hard to mess up, even if it’s slightly undercooked. It’s also just super creamy and delicious (my favourite!)
With that in mind though: the cream cheese needs to be soft – truly soft – before you use it. Anything less and small flecks of cream cheese will be visible in your pie. You can actually melt the cream cheese in the microwave or on the stove to make combining the ingredients simpler.
However, if you do find yourself with cream cheese flecks, don’t panic. Because the filling is eggless, you can submerge just the base of the bowl in warm or hot water to help disperse the cream cheese. You can also use hand beaters to combine the mixture.
More low FODMAP pumpkin recipes
- Gluten free egg free pumpkin muffins
- Low FODMAP pumpkin feta dip
- Low FODMAP pumpkin risotto
- Gluten free pumpkin mug cake
- Gluten free savoury pumpkin tart with sage and goat’s cheese
Low FODMAP pumpkin pie (gluten free)
Equipment
- 1 X 1.2 litre capacity pie dish (24cm inside the flared rim, 21cm at the base)
- OR 8.5 – 9 inch pie dish
Ingredients
For the pie dough:
- 160 g (1 cup)* fine white rice flour
- 60 g (1/2 cup)* tapioca flour or potato starch
- 30 – 50 g icing sugar powdered sugar
- Pinch of fine salt
- 5 g (1 teaspoon) xanthan gum see notes
- 175 – 200 g butter cold and cubed salted or unsalted
- 60 – 80 ml (1/4 – 1/3 Aus cup, 2oz – 2.7oz)* ice water to bring the dough together, as needed
- Lactose free milk or egg wash (if it doesn't need to be egg free) for brushing the pastry
For the pumpkin pie filling:
- 425 g (15oz) pumpkin puree (see notes)
- 225 g (8oz) lactose free cream cheese (see notes and body of post for alternatives)
- 200 g (7oz, 1 US cup) light brown sugar
- 30 g (3 Aus tablespoons, 4 US tablespoons) gluten free corn starch
- 1 teaspoon ground cinnamon
- 1/2 teaspoon ground nutmeg use less if it’s freshly ground
- 4-5 cracks of finely ground black pepper
- Grated fresh ginger to taste (you can also use powdered)
- Pinch of fine salt
- 60 ml (1/4 Aus cup or 2oz) lactose free milk, if needed (this is for the cream cheese option, omit for the heavy cream or coconut cream option)
Instructions
To make the pie dough:
- Start by ensuring that all your liquid ingredients are cold.
- Mix the flours, icing sugar, salt and xanthan gum together in a large mixing bowl. Add the cubes of cold butter and coat them with the flour mix. Use your fingertips to gently rub the butter into the flour mixture until it resembles wet sand.
- Add half the ice water and get your hands in there to gently incorporate the water and form a ball of dough. Add the remaining water if needed, and extra if required. The dough should just come together in a smooth ball without any dry bits on the bottom of the bowl.
- Tightly wrap the dough in a beeswax wrap or cling film and place in the fridge for 30 minutes (longer in hot climates). Your pastry is then ready to roll out and use.
To bake the pie dough:
- Preheat the oven to 180C/356F. Place one oven rack near the bottom of the oven and one right at the top. This top rack will house a piece of foil to stop the pastry from over baking.
- Take the block of pastry and place it on a liberally floured sheet of baking paper. I use tapioca flour. It should be soft enough to feel slightly malleable, but firm enough that there is no melting butter.
- Gently roll the dough out with a rolling pin, stopping every couple of rolls to flour both sides of the dough. ‘Turn’ the dough regularly (pick it up and flip it over) to prevent it from sticking. If at any point the dough becomes soft and difficult to work with, place it flat in the fridge or freezer for a few minutes.
- Once you have rolled it out to a couple of sizes larger than the pie plate, invert the pie plate gently in the centre of the pastry dough in whatever position maximises pastry overhang.
- Use one hand to pull a corner of the baking paper towards you, and slide the other underneath the baking paper directly in the centre of the pie dish. Flip the dish, letting the pastry fall into it.
- Don’t stretch the pastry into the dish – be generous with letting it fall into the dish. Patch up any tears as necessary and then trim any overhang, redistributing it to places that may have none.
- Once you’re happy with how the pie dough is sitting, fold the tops of the pastry over themselves (outwards towards the pie dish) to create a smooth pie edge. This will create a flat and even pie edge, which is helpful when you’re putting the pastry lid on. It also just looks neater. Use your fingers to crimp the pastry edge (there’s a link to a YouTube video on how to do this in the notes).
- Scrunch up a piece of large baking paper and place it into the pie dish. Ideally, some paper will hang over the edges – this will protect them from over browning during the blind baking time.
- Gently fill the pie with your pie weights. I really recommend using enough weights to go right up the edges of the pastry – this pastry easily buckles in. I use dried chickpeas and rice for my pie weights and they go right up to the edge of the pie dish.
- Place a large piece of foil flat on the top rack of the oven, then place the pie in the oven on the bottom rack. Bake for 30 minutes. Take the pie out of the oven and very gently remove the pie weights and baking paper, noting that they will be extremely hot (don’t put them in something ceramic, and don’t handle whatever you put them in while they cool).
- Gently brush the pie crust (sides, base and top) with milk or egg wash and return to the oven for 10 minutes.
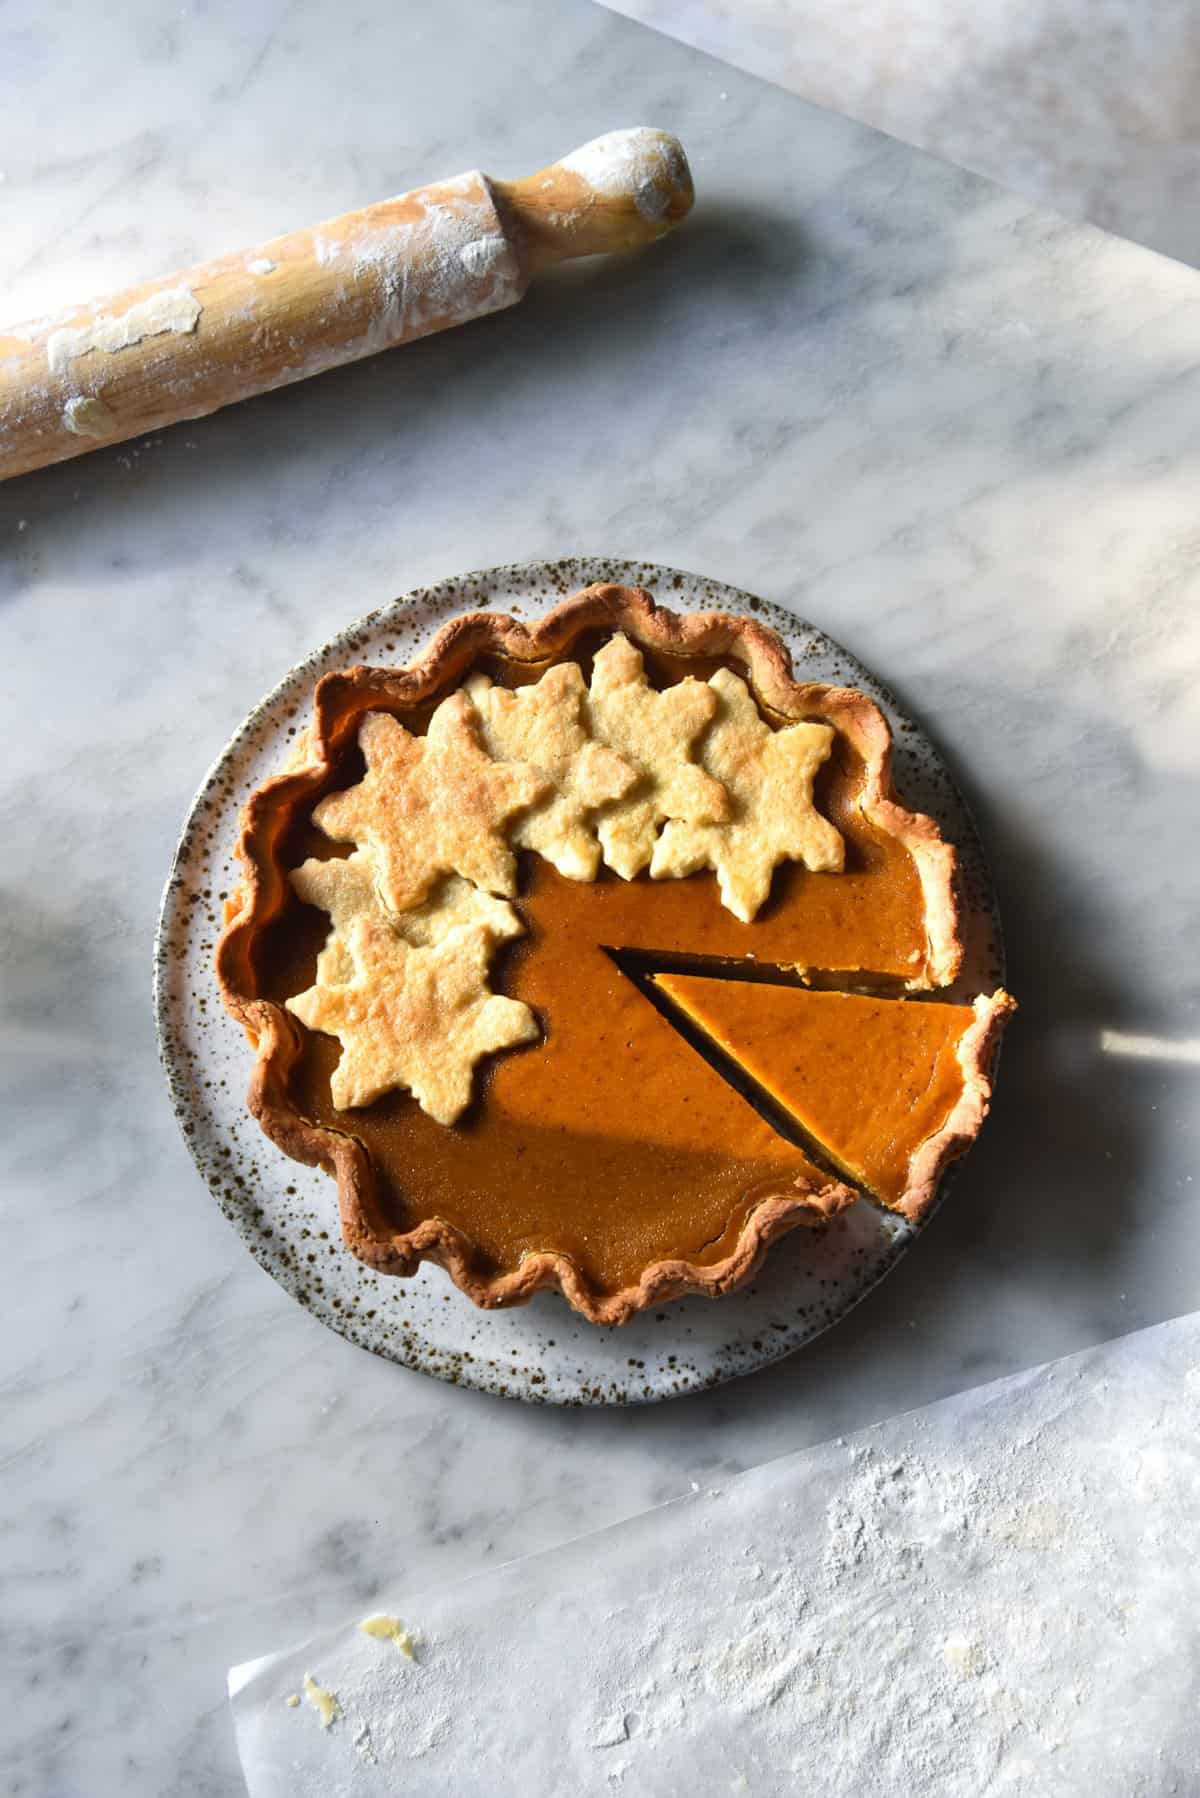
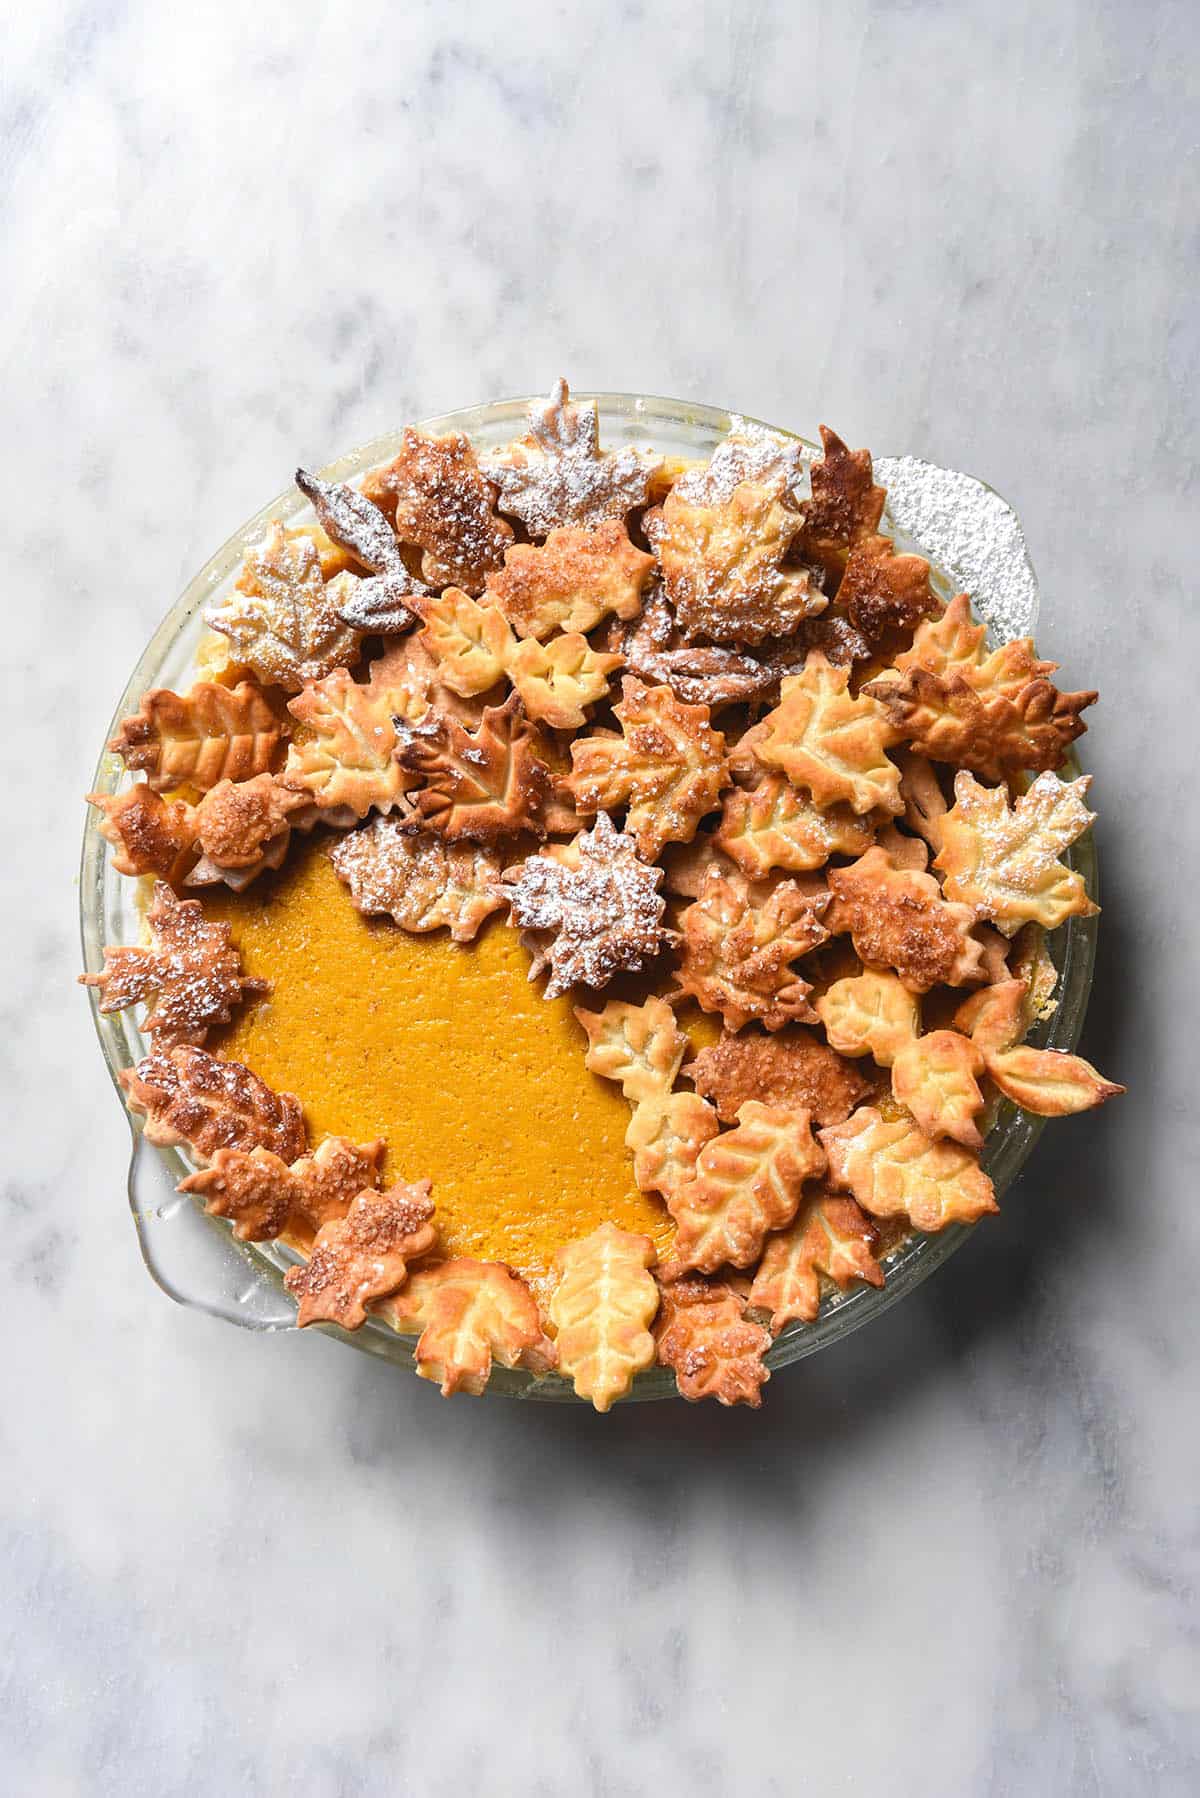
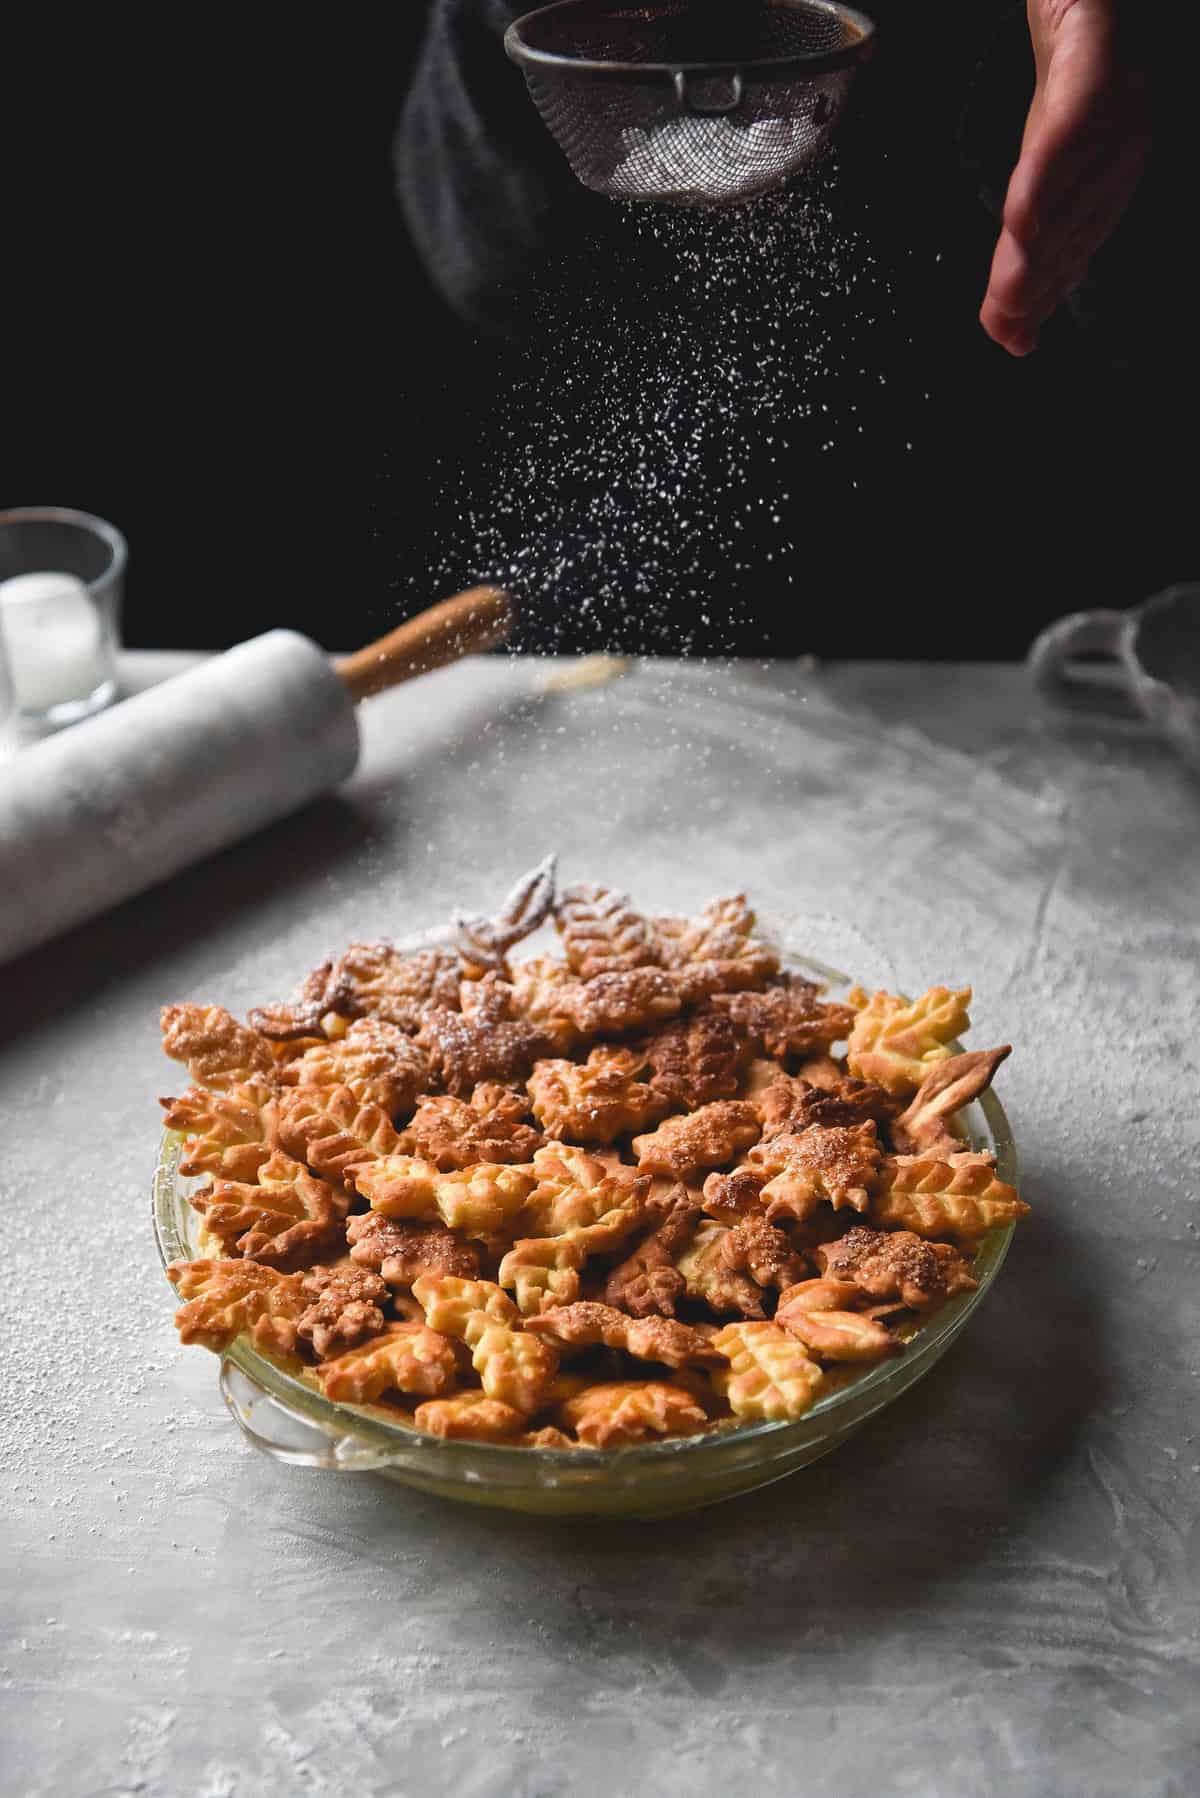
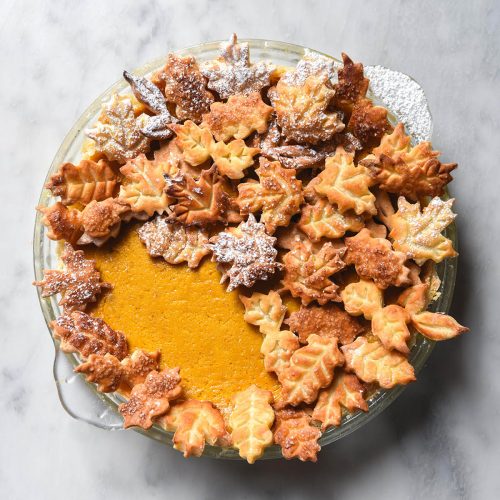
- If you want to use the leftover pastry to decorate the pie, roll and slice the pieces while you wait for the base to bake.
To make the pumpkin filling and assemble:
- Combine the ingredients for the pumpkin filling in a bowl. Taste and adjust for spices and whisk to ensure the mixture is smooth.
- Once the pumpkin pie base is cooked, remove it from the oven. Pour the pumpkin pie filling into the pastry and decorate with pastry decorations if you are using them. Brush them with milk or egg wash prior to placing them on the pie.
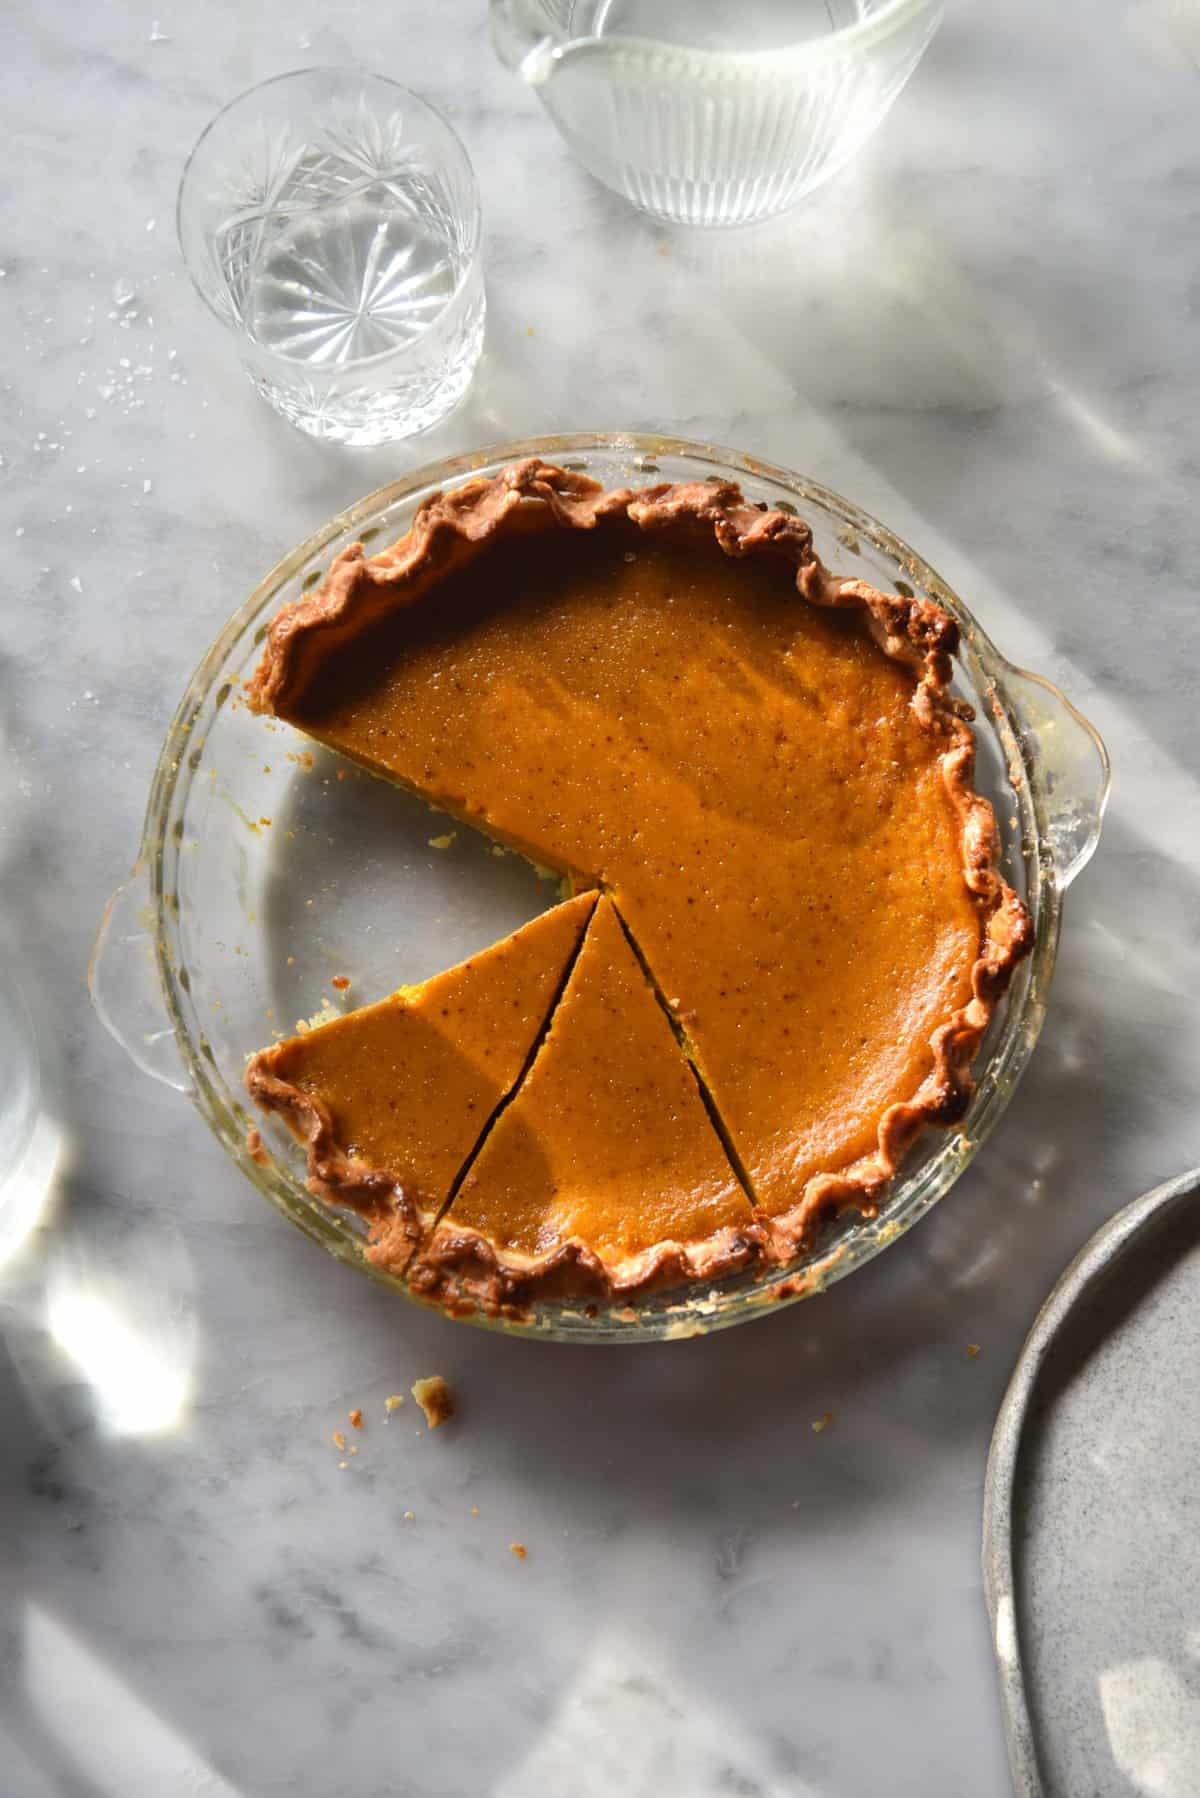
- Return the pie to the oven and bake for 50 minutes to 1 hour, depending on how firm you like your filling and what dairy you have used (see notes). Allow the pie to cool for 4-5 hours before serving. I find it is best when made the day before and refrigerated overnight.
- Leftovers can be sliced into pieces and frozen. Keeps well in the fridge for 3-4 days.
Notes
- I have covered FODMAP notes in the body of the post.
- Monash has semi-recently (as of November 2024) updated their entry for Japanese/Kent pumpkin. It is low FODMAP in serves of 75g and up to 161g. In serves of 162g or more, it contains moderate amounts of fructans. It was previously 500g per person.
- This pie uses 425g pumpkin puree. You can safely eat 1/3 of the pie and remain under the low-moderate threshold if you use homemade pumpkin puree made from Japanese/Kent pumpkin.
- See the body of the post for a xanthan gum free option.
- Both canned pumpkin puree (not pumpkin pie filling) and homemade puree are suitable here. See the body of the post for FODMAP notes and an easy method for making your own puree.
- Lactose free heavy cream and coconut cream are suitable replacements for the cream cheese. Use 225g (8oz) of either ingredient and weigh it to ensure accuracy.
- I found that pies made with either of these liquid creamy ingredients took longer to bake. Pies made with these ingredients also really benefit from being in the fridge overnight, so I recommend making them the day before.
- Coconut cream is needed for this recipe, not coconut milk and not a light option.
- If you use the coconut cream option, I recommend adding 50g (1.7oz) less sugar to the filling. Coconut cream has natural sweetness.
- See this video here for visual instructions to crimping your pie crust.
No Comments