
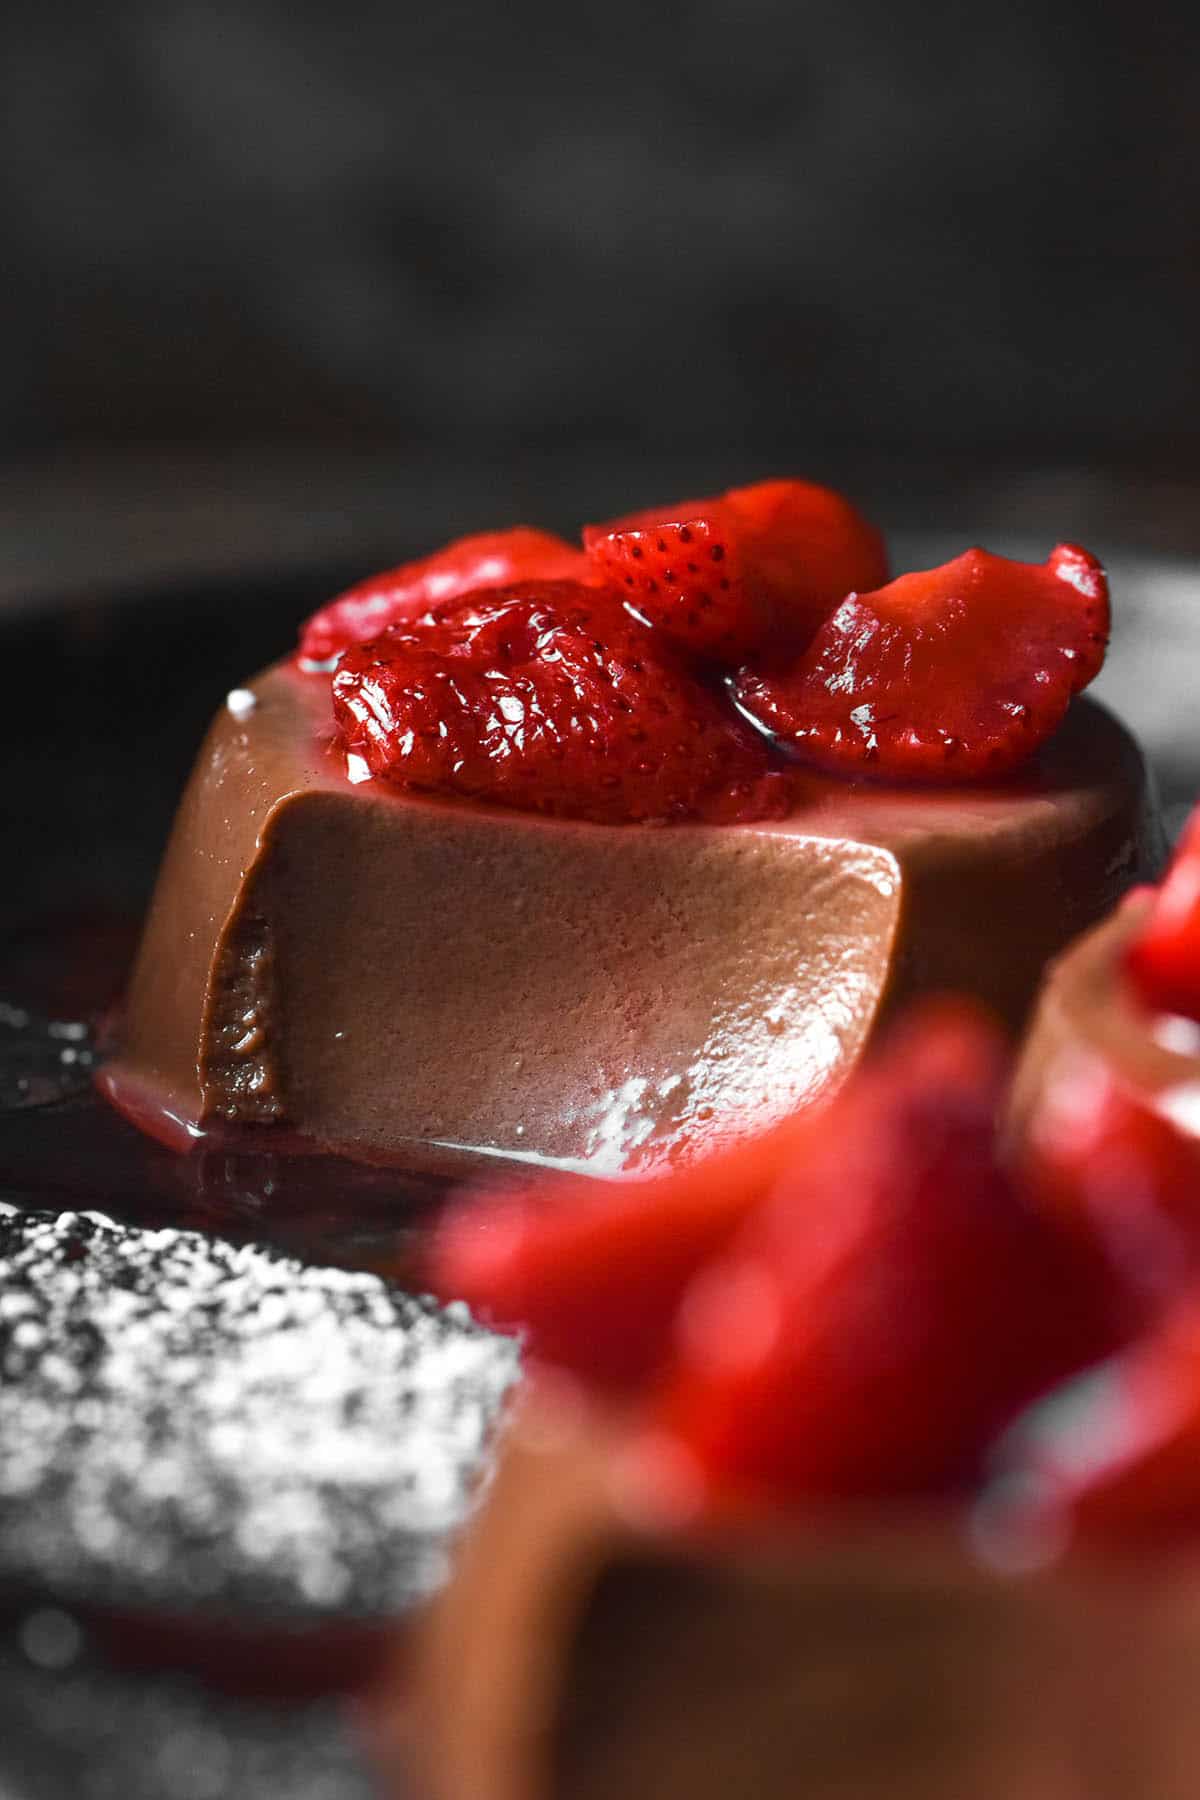
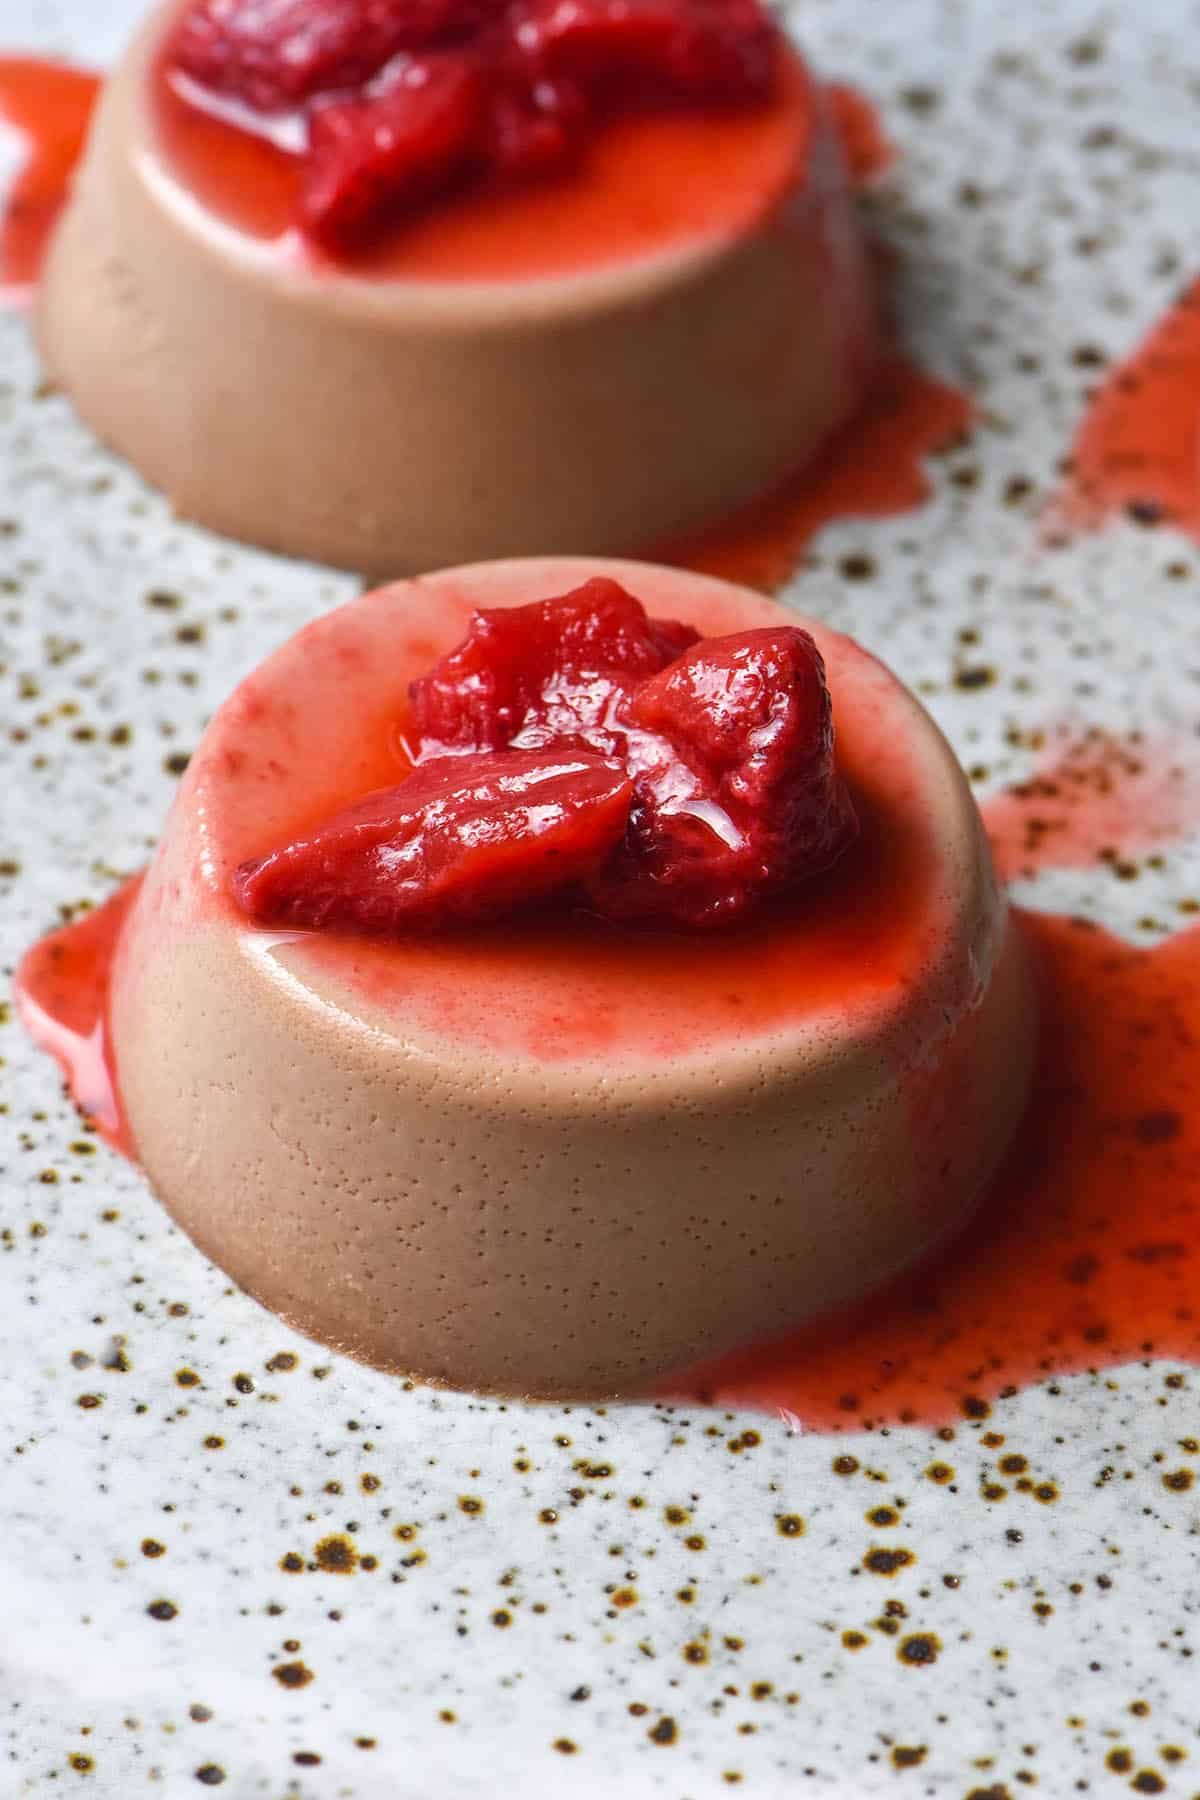
I am well and truly on a panna cotta bender at the moment. My first vegetarian panna cotta recipe was so satisfying that I made a white chocolate version. Adding chocolate was so addictive that I developed this chocolate panna cotta.
Chocolate panna cotta with agar agar
As the name suggests, these panna cotta are made with agar agar. Agar agar is a vegetarian gelatin alternative derived from seaweed. It works a little bit differently to gelatin, but I have plenty of tips and tricks for how to get the best out of it.
The panna cotta uses milk, cream and chocolate for a rich and delicious finish. There is a peppermint extract option which adds a delicious twist to the dessert. I am forever and always a choc-mint girl, so this dessert is heaven to me either way.
Ingredient notes for your chocolate panna cotta
This recipe uses agar agar powder. There are other types – strips and flakes – but these are not interchangeable and vary greatly in gelling ability. I have only tested this recipe with agar agar powder and have no recommendations for the other varieties of agar.
As with my white chocolate panna cotta recipe, I recommend a chocolate that uses cocoa butter as opposed to vegetable fat (or a combination of the two). Vegetable fat based chocolate in the white chocolate version made for a pasty and floury tasting panna cotta. Cream and chocolate aren’t cheap, so I’m not wasting ingredients to test that theory again.
With this in mind, I don’t recommend any coconut oil based chocolates. Nor have I tried any sugar free or dairy free alternatives, sorry. Only so much panna cotta a girl can eat (and I’ve eaten A LOT).
Again, as with the white chocolate version, I recommend half cream and half milk here. In the all milk version I tried, the white chocolate formed a crisp layer at the base of the panna cotta. I suspect the fat in the cream helps emulsify the liquids to prevent them splitting and/or overcooking. I also recommend full fat dairy for this reason.
Should I use dark chocolate or milk chocolate?
I have tested this recipe with both varieties and they both work. I would say that dark chocolate produced a more adult panna cotta, while milk chocolate produced a sweeter, creamier panna cotta.
I daresay the style of chocolate you prefer to eat would be the style you would prefer here.
A couple of things to note, though: make sure you choose a variety of chocolate that uses cocoa butter as opposed to vegetable fat. The vegetable fat version produced a floury and pasty panna cotta in my white chocolate recipe, and we don’t want that.
Because dark chocolate generally contains less sugar, I recommend adding extra sugar to the panna cotta mix as necessary. I tested a 50% dark chocolate, which contains more sugar when compared to darker counterparts. I felt even my 50% dark chocolate Panna cotta would have benefitted from some extra sugar.
Another thing I recommend is cooking the mixture until the chocolate has melted, then adding extra sugar to taste as necessary. If you add the sugar before the chocolate has melted, you won’t get an accurate idea of what the end product will taste like.
Tips for working with agar agar
- Agar agar powder needs to be added to cold ingredients so it doesn’t clump up when it hits the liquid. Whisk it in thoroughly before turning the heat on.
- It is really beneficial to allow the agar sufficient time to gel up on the heat. I found that allowing this panna cotta mixture to come to the boil over a low-medium heat was the best method to get it to gel.
- Agar that has not had enough liquid added tends to taste a bit gritty.
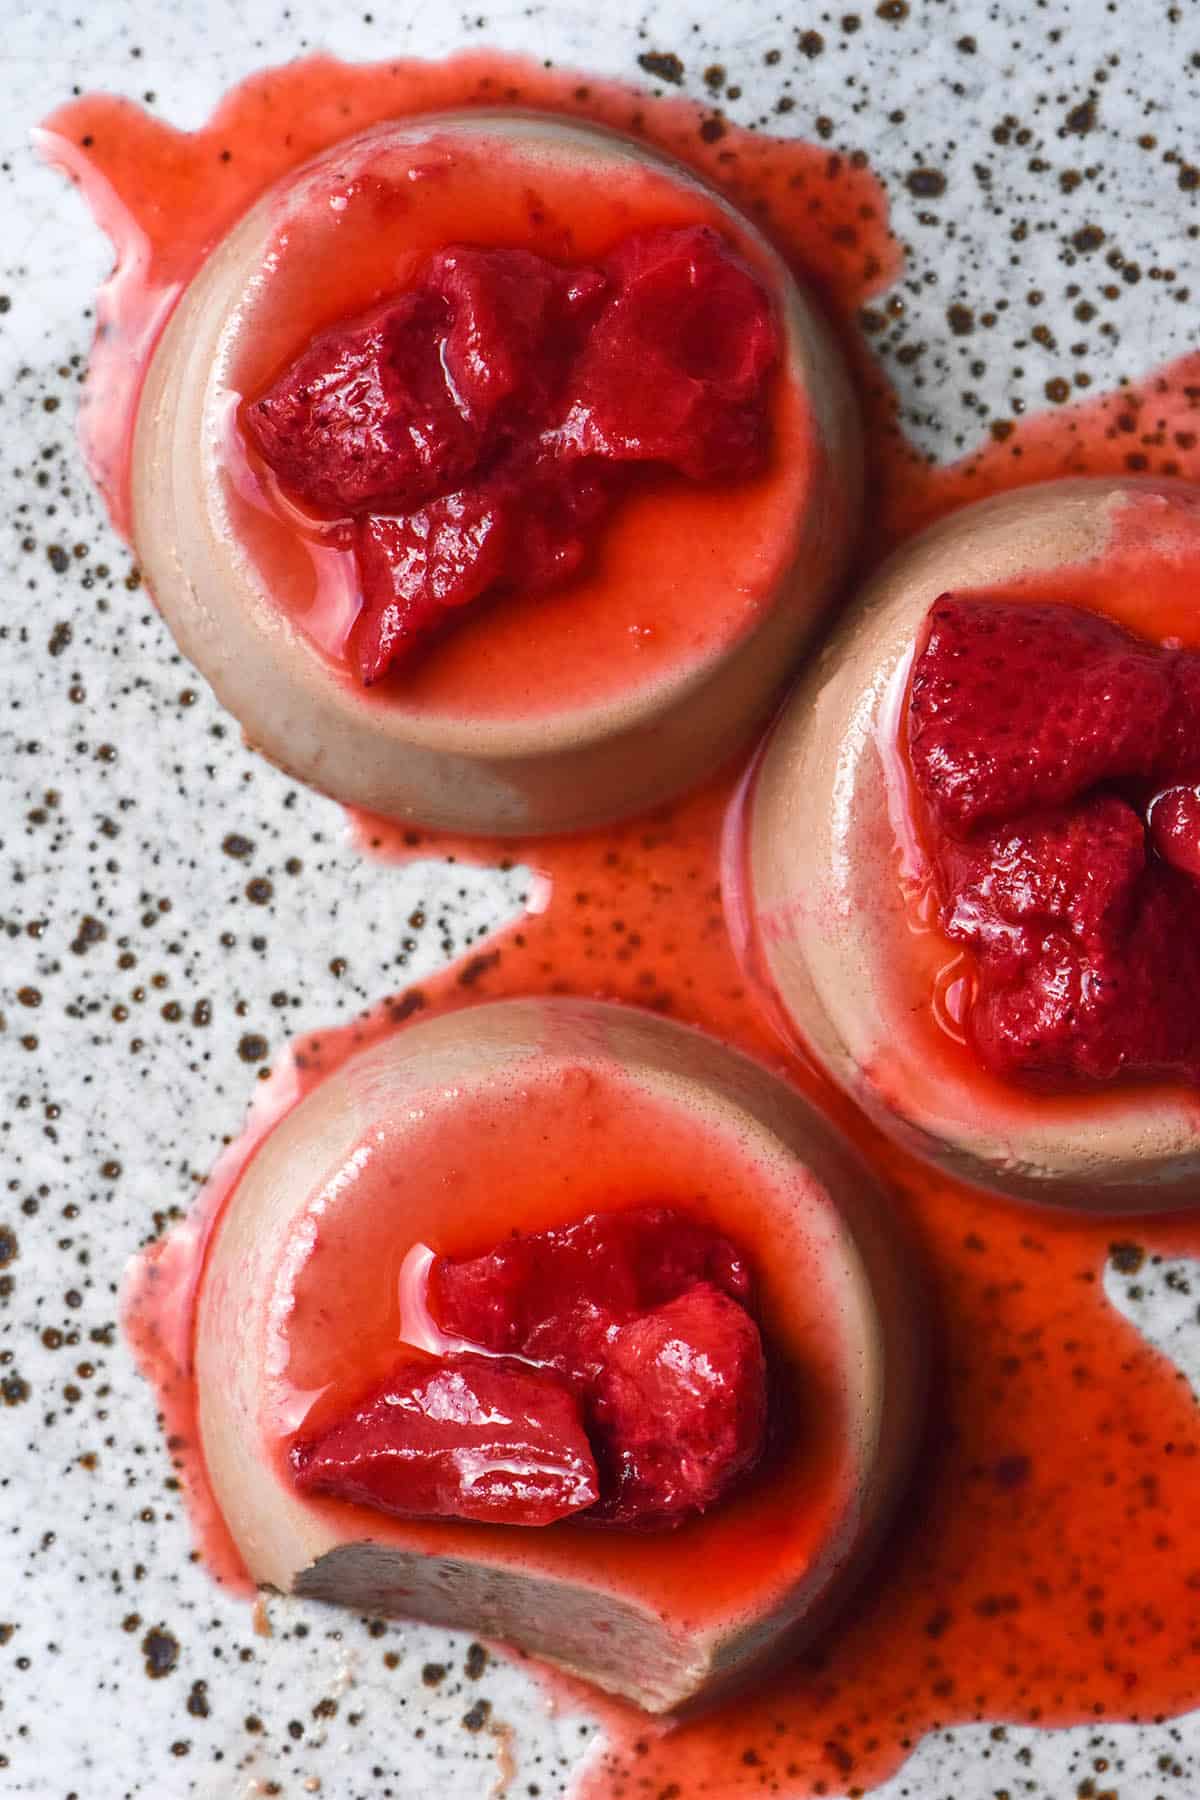
- Lots of recipes online tend to use quite a bit of agar agar compared to my recipe. I find that less is more when it comes to agar agar. Using more results in quite a firm set panna cotta that doesn’t melt in your mouth like the original does.
- Because we’re using less agar agar, we need to be patient. Allow it to cook over a low medium heat until boiling for best results.
- The tricky part about using agar agar is that there aren’t too many obvious signs that the mixture is ready to set. My best advice is to slowly get it to boiling point and then keep it there for a minute or so.
- The best part about agar agar is that you can boil it again if something is amiss. In one test, my panna cotta had not set in the fridge after 3 hours. I simply reboiled the liquid and returned it to the silicone muffin tin and it set up almost instantly.
Recipe tips and tricks
I don’t write extensive ingredient notes for fun or to fill up space 🙂 Make sure you read the body of the post, particularly if you haven’t worked with agar agar before. It works differently to gelatin.
In my experience, chocolate panna cotta requires more constant stirring. It helps make sure the chocolate is 100% melted and stops a skin from forming.
Make sure you cook the mixture on a really low and slow temperature. This has two benefits: first, it ensures the chocolate melts without overcooking and forming clumps. Second, it ensures the agar agar is thoroughly cooked through and activated. This is what will firm up the panna cotta, so rushing the process is only to your own detriment.
I haven’t tested this recipe with vegan options, but I do have a vegan panna cotta here. I daresay you could use some Lindt 70% chocolate in that recipe and have success.
Troubleshooting your chocolate panna cotta
The main two things that can go wrong with this recipe. The first is that the mixture doesn’t gel up sufficiently, which is an easy fix. All this means is that you haven’t cooked the panna cotta mixture long enough to activate the agar agar. Luckily, agar agar is very amenable to being recooked, so you can simply return the mixture to the pot and cook it until it is simmering again.
The second is that the chocolate can be lumpy or form a skin on top of the panna cotta base. Cooking the mixture on a low and slow temperature without overcooking it should overcome both of these issues.
To make a choc-mint panna cotta
I am a fervent lover of choc-mint anything, so you best believe I tested a choc mint panna cotta. I used 5ml (1 teaspoon) of peppermint extract from the supermarket. The supermarket version is generally mixed with vegetable oil, meaning it is significantly less potent than any pure oils.
If you are using a pure oil, add it in drops and to taste. I recommend cooking the panna cotta mixture as per the instructions in the recipe card, then adding the extract after the chocolate has fully melted. This will allow you to taste the mixture as it will be once cooked. Side note: this is also helpful in determining if you need to add more sugar or a pinch of salt.
More gluten free dessert recipes
- Lactose free creme caramel
- Gluten free sticky date pudding (egg free)
- Easiest ever gluten free chocolate cake (no xanthan gum)
- My gluten free mug cake recipe e-book
- Low FODMAP gluten free apple pie
Chocolate panna cotta with agar agar
Ingredients
For the panna cotta:
- 175 g dark or milk chocolate that uses cocoa butter not vegetable fat (see notes)
- 250 ml full fat cream
- 250 ml full fat milk
- 20 g caster sugar to your tastes, see notes
- Pinch of fine salt
- 1.5-2 g agar agar powder not flakes or strips, see notes
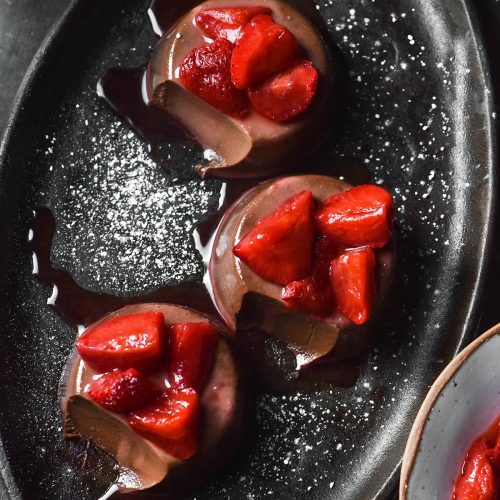
For the strawberries (optional):
- 250 g strawberries hulled and quartered
- 2-3 teaspoons white sugar to your tastes
- 2-3 teaspoons lemon juice to your tastes and the acidity (or lack thereof) of the strawberries
- 1-2 tablespoons water to create the beautiful sauce (optional)
Instructions
For the panna cotta:
- Very lightly grease the moulds you’ll be using for your panna cotta.
- Combine all the ingredients in a medium pot. Stir to combine, then place on the smallest hob/burner over a low heat.
- Stir very regularly and continue to cook your cream mixture. You want it to reach a boiling point (vigorous small bubbles on the surface) without burning the mixture or heating it too quickly. Because of the chocolate, you will need to bring it up to temperature slowly. I find 15 or so minutes to be the sweet spot with this recipe. I find stirring very regularly helps the chocolate disperse evenly without any little grainy bits.
- If the mixture has not reached this point after 10 minutes, turn the heat up a little.
- Once the mixture reaches a small bubble boil, keep it there for another minute or two.
- Remove the mixture from the heat and carefully decant into a pouring jug. You can pass it through a sieve if any milk skins have formed.
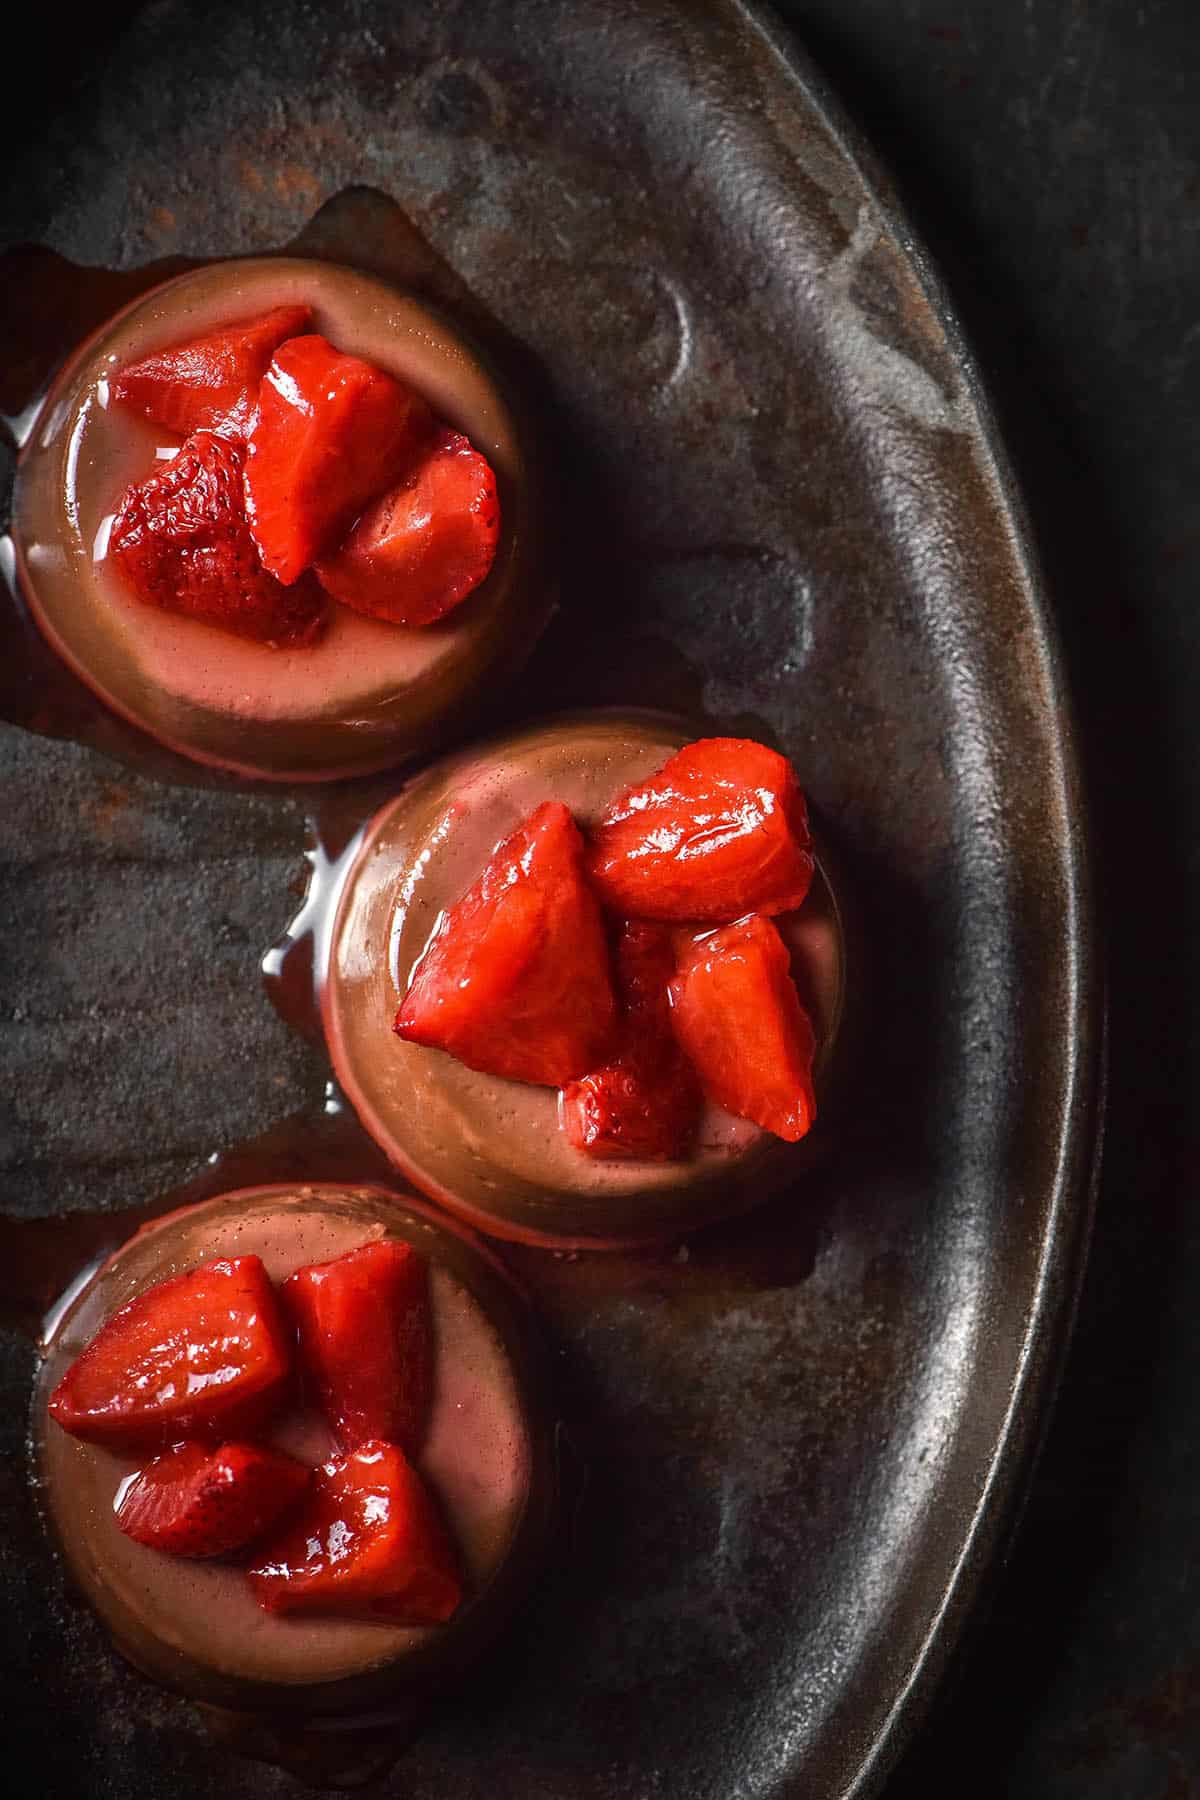
- Pour the mixture into your prepared moulds and allow them to cool for 10 or so minutes before transferring them to the fridge. Every batch is different, but allow 2-4 hours to cool and set. I recommend making them the night before so you can correct any issues that come up (see the notes below).
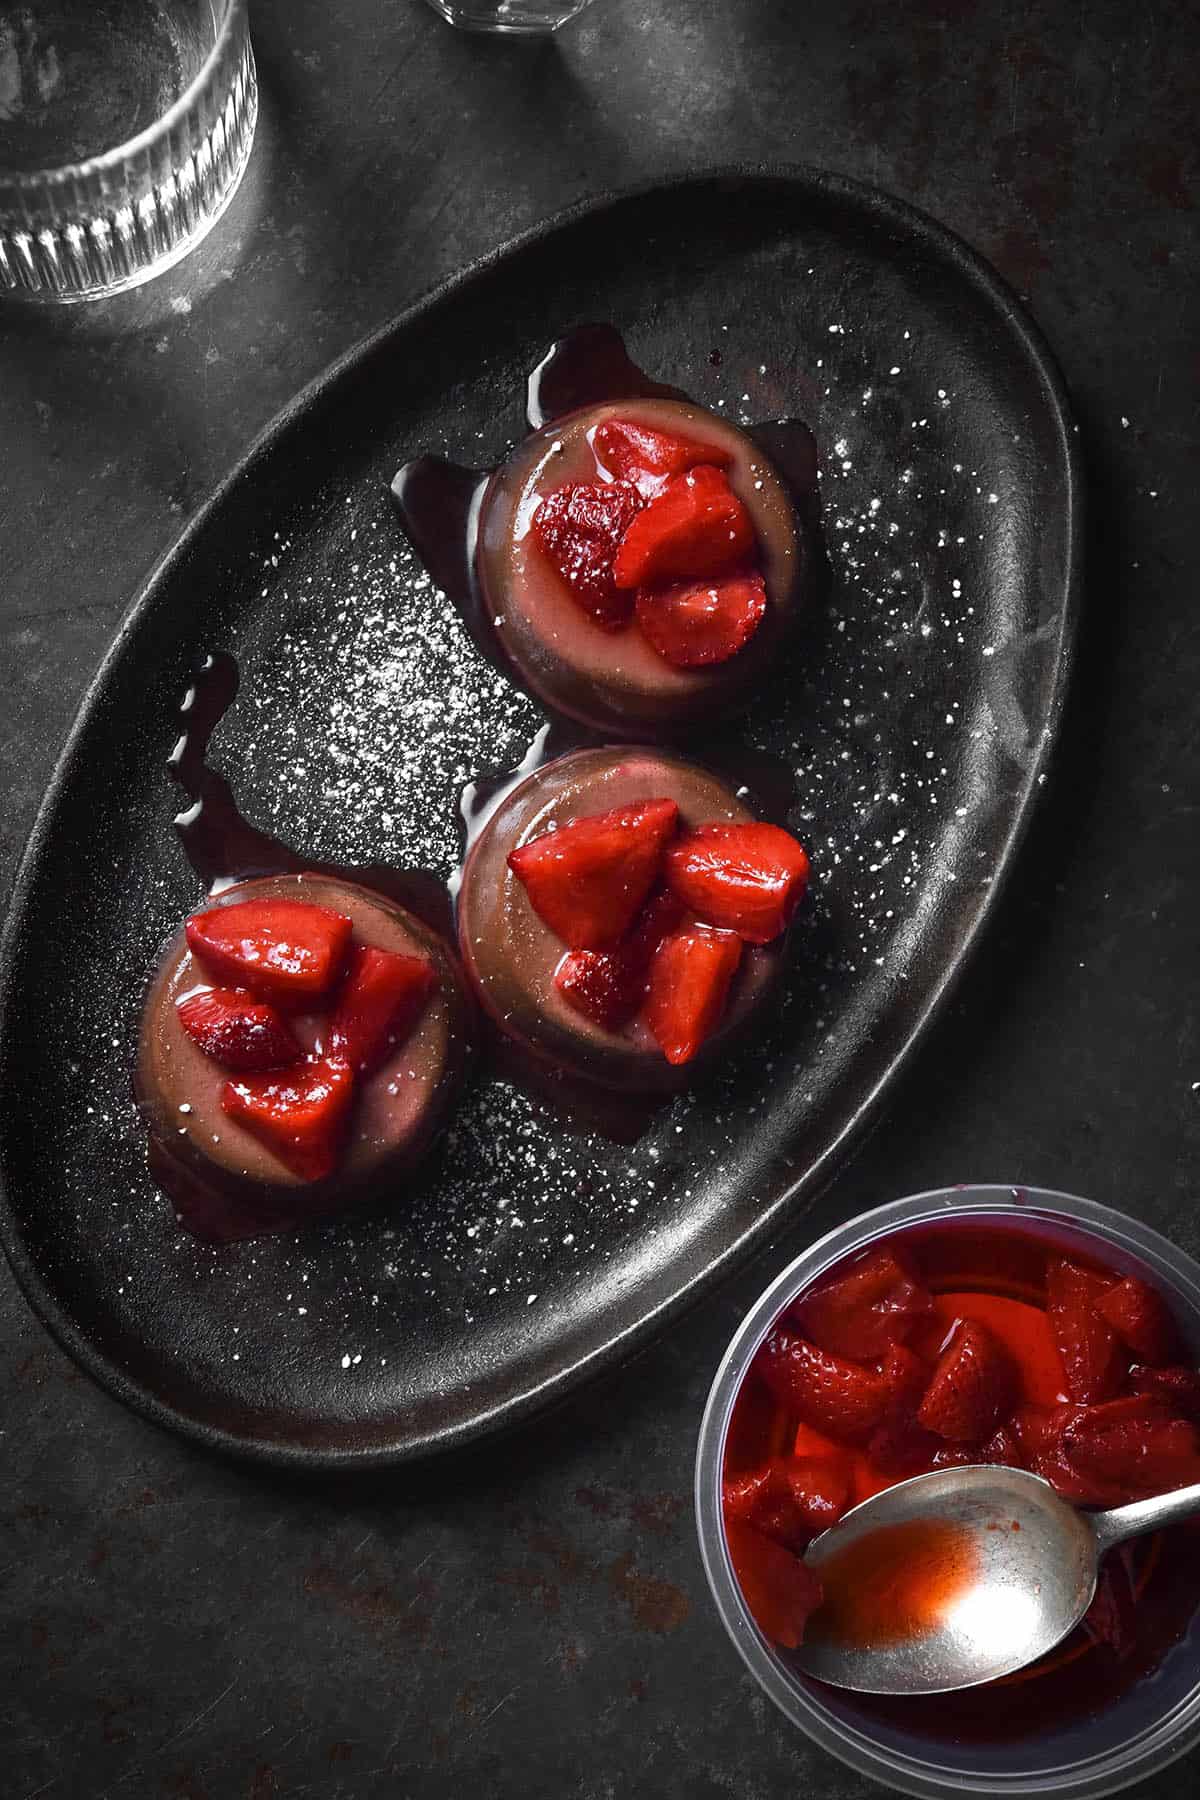
- Serve with the strawberry sauce below, sauce of your choosing or plain. Best eaten within a few days.
For the strawberries:
- Cook the ingredients in a small pot on a low heat until the sugar has dissolved, strawberries are softened and the mixture has a beautiful red colour. Taste and adjust as necessary, then set aside to top the panna cotta.
Notes
- Some thickened creams contain gelatine, but I am starting to see more vegetarian varieties available. If you can’t find one, use pouring cream or any cream without thickener. I would recommend using the 2.5g of agar agar if you go this route, to compensate for the lack of other thickeners. This is optional if you don’t want to use any gelatine.
- Add sugar according to your sweet tooth and what you’re topping the panna cotta with. Note that lactose free milk and cream are sweeter than normal versions, so you might add less sugar if you’re using these.
- I have tested dark chocolate (50% cocoa) and milk chocolate. Both work. I found that the dark chocolate version could have done with a bit of extra sugar.
- I recommend tasting the mixture once the chocolate is fully melted. This will give you an idea as to whether you need to add more sugar.
- Agar agar comes in a variety of different forms that are not interchangeable. This recipe uses powder and I have not tested other versions.
- See the body of the post for tips on working with agar agar.
- If your panna cottas have not set after 4 hours in the fridge (or if they have gritty agar agar bits in the bottom) decant them back into the pot and bring to the boil again. Agar agar is very receptive to being re-cooked if needed. It is likely that you didn’t sufficiently boil the mixture in the beginning.
No Comments