Bread baking is an art at the best of times, but doubly tricky when you’re new to baking gluten free. With 12+ years of experience under my belt, I’m finally confident enough in my bread making abilities to share a post on how to make the best gluten free bread. Tips, tricks and plenty of gluten free bread recipes (all without xanthan gum) as well.
How to make the best gluten free bread
My hope for this post is to give you the tools you need to be able to get the best out of gluten free bread recipes (in particular, my own). All the tips, tricks and indicators I use to adapt my loaves to the flours I’m using, the weather and everything in between.
After we’ve gone through best practice, I have a list of my favourite gluten free bread recipes on my website. There, you can put everything you have learned into practice and hopefully make your best gluten free bread yet.
How is gluten free bread different to regular bread?
First and foremost, gluten free bread is made without gluten. Gluten is a protein found in a number of flours, including wheat flour. Kneading a glutenous flour dough results in the gluten developing strength and structure. Gluten free flours, on the other hand, rarely have any inherent strength or structure. With a few exceptions (namely, starches and buckwheat flour) they provide no elasticity or chew to a bread dough.
What does this mean in practical terms? Firstly, it means that you will generally need to use more than one gluten free flour to take the best qualities of each flour. We will get into the exceptions below, but for the most part you will need at least two (or more) different flours to create a lovely loaf.
Secondly, it means that even with your combination of flours, gluten free dough will lack strength and structure. Strength and structure need to be added into the dough in the form of psyllium husk powder or another binder.
There are a number of binders to choose from, but a water absorbing binder like psyllium husk serves two purposes. Firstly, it provides the aforementioned strength and structure to your dough. Secondly, it absorbs a lot of water, creating a soft and plush loaf.
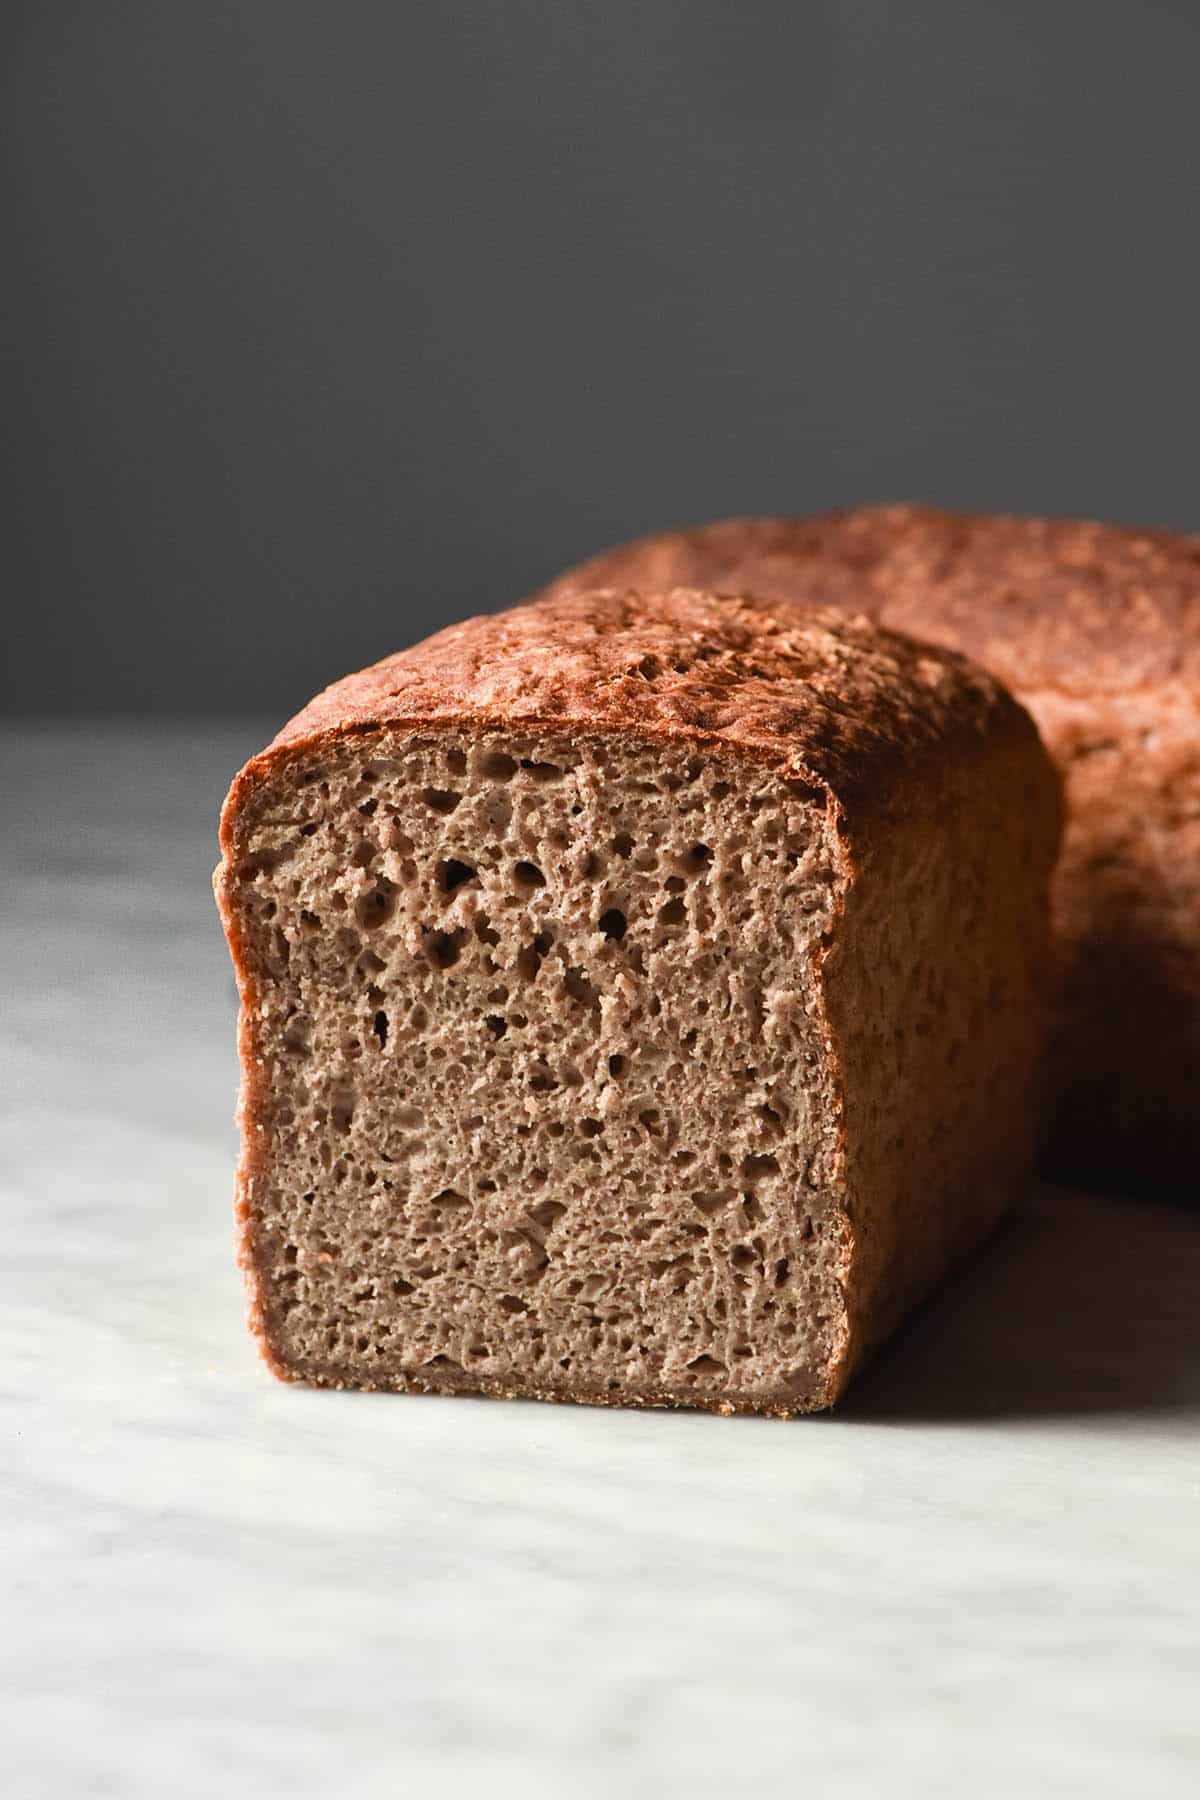
Gluten free products have a reputation for being dry and crumbly. It is true; gluten free baking requires a lot more liquid than regular baking to achieve a soft and moist result. Therein lies the magic of psyllium husk in gluten free bread dough: it provides structure and simultaneously allows you to add enough water for soft bread.
Choosing your gluten free flours for bread
As we have discussed, gluten free bread requires a few flours at once to achieve a plush result. My experience with baking gluten free bread has led me to favour some gluten free starches and flours over others.
Buckwheat flour is an excellent flour to include in your gluten free loaves. It has a distinctly nutty flavour and adds a wholegrain like depth to your loaves. More importantly, though, it has some inherent elasticity. Just to be clear here: buckwheat flour has no relation to wheat and is 100% gluten free. It is a grain closely related to rhubarb.
Rice flour is a great backbone flour to use for a neutral flavoured, white bread style loaf. It has a neutral colour and flavour and is fairly predictable in a bread. For FODMAP reasons, I prefer white rice flour over brown rice flour (but that’s just me).
My starch of choice for gluten free bread is generally tapioca flour. In Australia, it is widely available in supermarkets and inexpensive. Tapioca flour lends lightness and elasticity to your gluten free bread.
Other gluten free wholegrain options include sorghum, millet, teff and amaranth. I find sorghum, millet and teff to be a little bitter in large quantities so I always recommend they be used in conjunction with another gluten free wholegrain.
Other starch options include glutinous rice flour (which is sticky, not gluten containing) potato starch and cassava flour (which is both a starch and a wholegrain combined). I personally don’t use corn starch in any of my bread recipes.
Keep in mind when choosing your flours and/or recipe
- I find it best to combine two wholegrain flours and one starch.
- Most flours, including rice, sorghum, millet and dark teff, really benefit from a secondary wholegrain flour in addition to the starch. Adding a second wholegrain flour balances out any bitterness and the lack of elasticity in the flours.
- There are exceptions and ways to get around this, but adding a third flour does add an extra dimension to a bread.
- I highly favour adding buckwheat as your secondary wholegrain flour, even if you don’t want the loaf to taste of buckwheat. It’s a very helpful gluten free flour in bread baking, so even using it as a background flour is ideal.
- Loaves with too much starch tend to become gummy. Think of the texture of mochi (which is made from glutinous rice flour).
- Starch based flours are incredibly easy food for your yeast. As such, loaves with lots of starch proof a lot faster than loaves without starch or with a small amount of starch.
- This can become an issue in summer. A high starch loaf combined with a hot or humid climate is a recipe for trouble. Add in high hydration? Oh boy! (More on this in the baking through the seasons section).
- Mostly wholegrain loaves proof a lot slower than loaves with starch. This can be an issue in winter when the loaf naturally proofs a lot slower. Proofing a low starch loaf in winter can take a lot longer than your recipe specifies.
Hydration notes
Hydration (in bread baking) simply means how much liquid is added to your dough.
The purpose of hydration is both to add enough liquid to make a soft crumb and also to create an environment for the yeast to thrive. Yeast needs a moist environment to grow, which means that proper hydration is key for a lovely soft and tall bread. As this very eloquent answer on The Fresh Loaf says: ‘water provides a way for the living cells (yeast) to migrate through the dough and replicate. Flour is their food, water is their transportation.’
A dough without sufficient liquid will not proof well. The yeast, in a dry environment, will not thrive as it would in a wet dough. On the other hand, a dough with too much liquid can produce a gummy and wet bread. So, getting dough hydration right is key to a good gluten free loaf.
Hydration is a moving target in gluten free baking. Different flours (buckwheat to rice, for example) absorb differing amounts of liquid to begin with. Then, different brands are milled in different ways, resulting in a more or less absorbent product. Humid climates vs cold ones change absorbency again. As such, nearly every loaf will have a different ‘ideal’ hydration, and it’s really up to the maker to guess.
Below, we will quickly discuss my tips for adjusting your hydration to suit the dough before you.
Hydration tips
My best tips for hydration free bread are as follows:
- Always be open to adjusting the hydration if you can see that your dough is too dry or too wet. Recipes are guidelines only.
- Substituting flours means you will need to watch your hydration carefully. A recipe is generally developed around the flours used, so changing the flours will require changing the hydration.
- If you’re new to gluten free bread making, know that it is not uncommon for your dough to be completely liquid when you first mix it. That is nothing to be afraid of! Psyllium husk powder takes a bit of time to absorb. If you check on it 15 minutes after whisking the ingredients together, it should have thickened considerably.
- A higher hydration equals a taller loaf and a more open crumb (to an extent). If you are struggling with short loaves and densely knitted crumbs, try adding more water.
- Conversely, a gummy or wet loaf can mean (among other things) that you have added too much water. Scale it back a little for your next loaf.
- Yeast requires moisture to thrive, which is why bread needs to be covered as it proofs. If you leave a proofing bread uncovered on the bench, the crust will dry up, harden and prevent the loaf from proofing upward any further. Always keep loaves fully covered! When using my Pullman pan, I like to invert a produce bag over the tin. They are the perfect size to ensure little air is getting in. Some people also use shower caps.
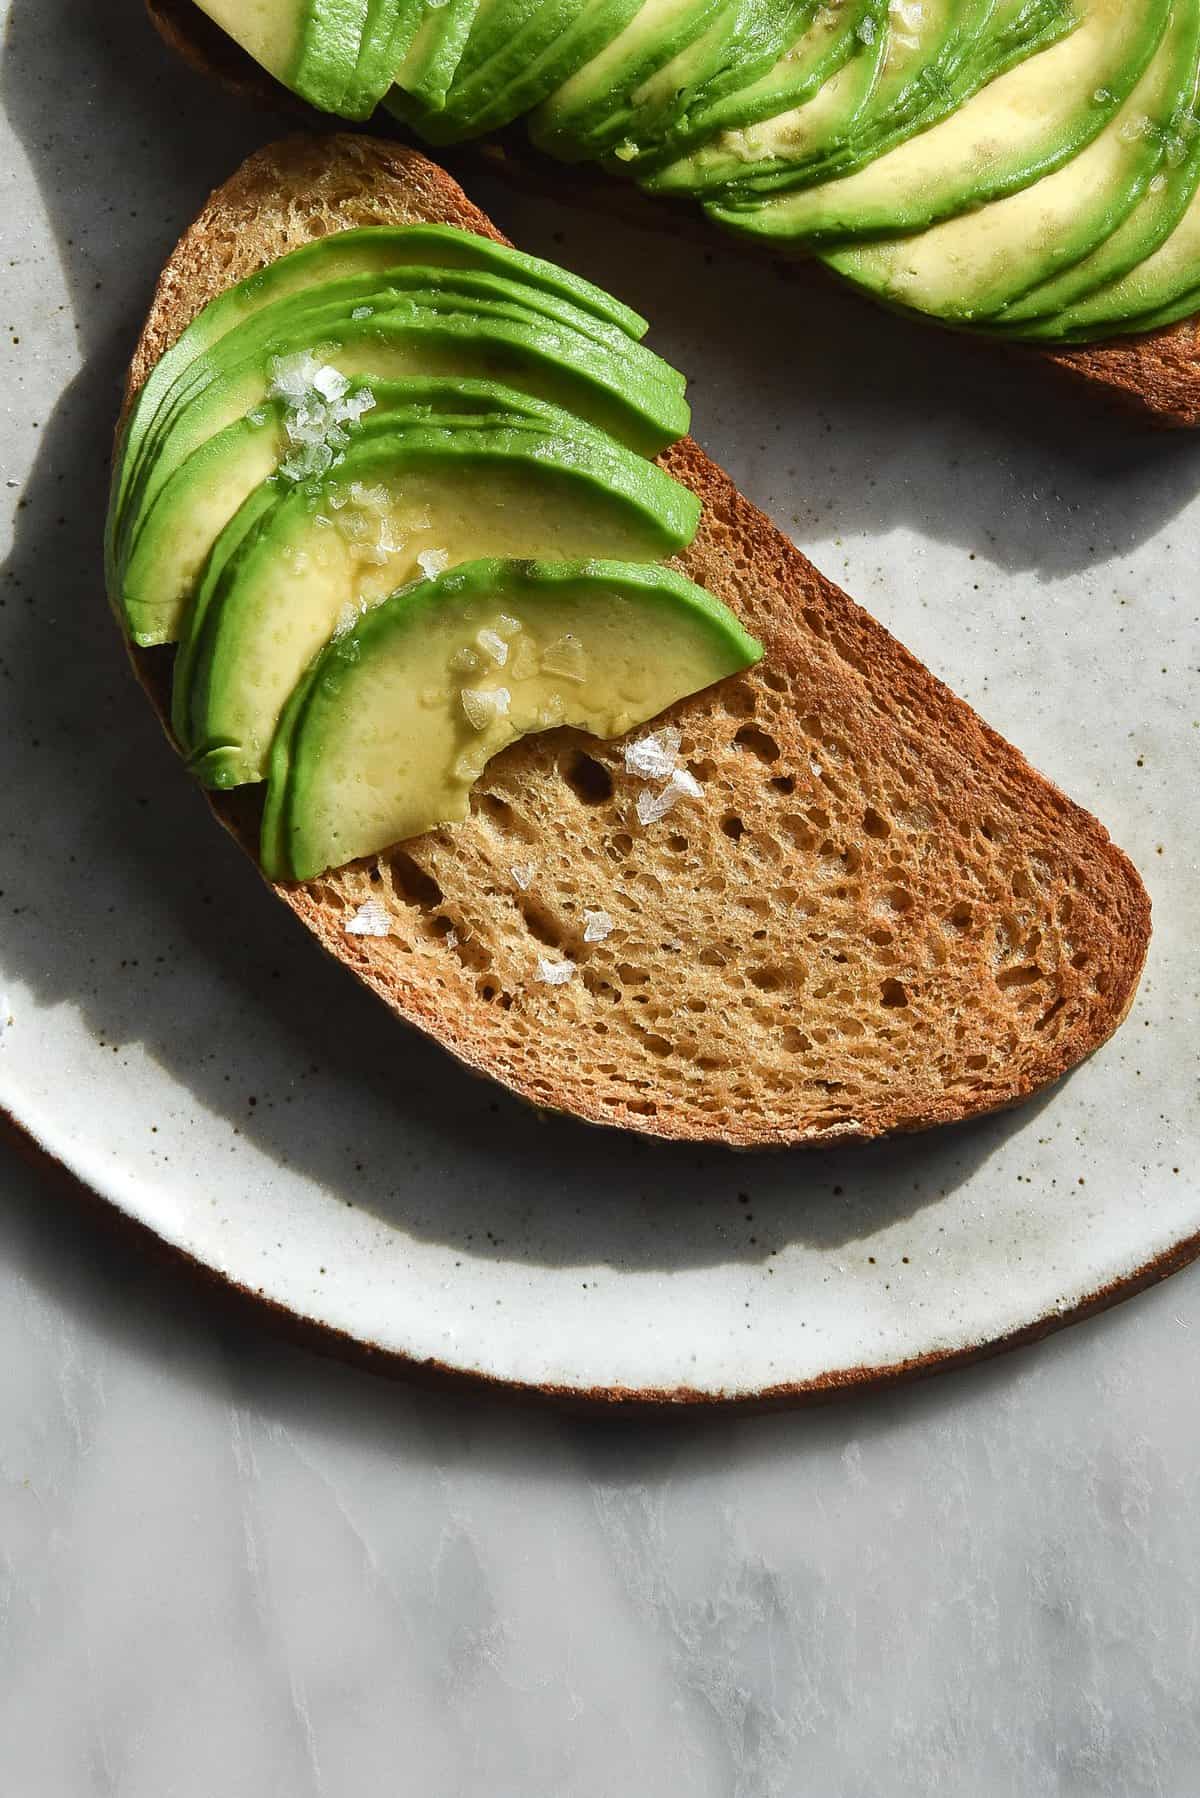
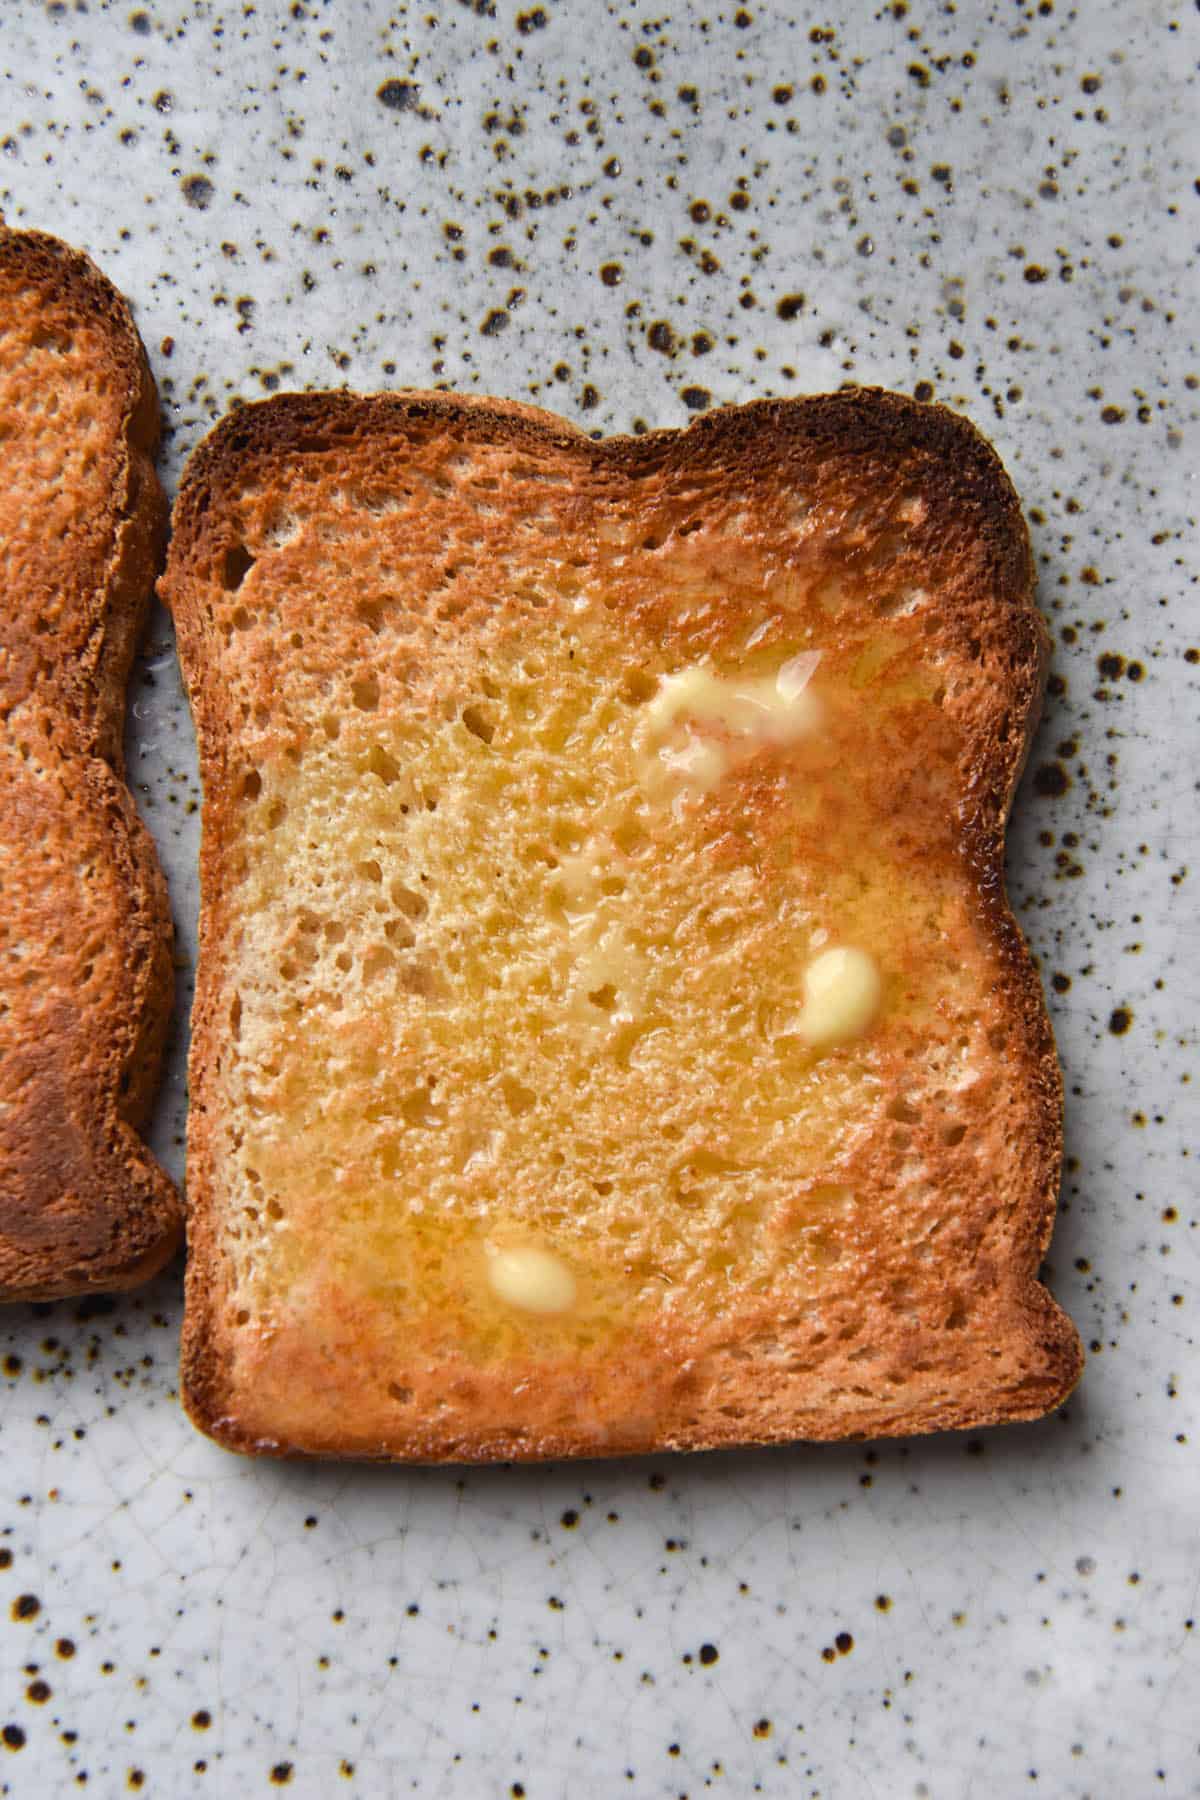
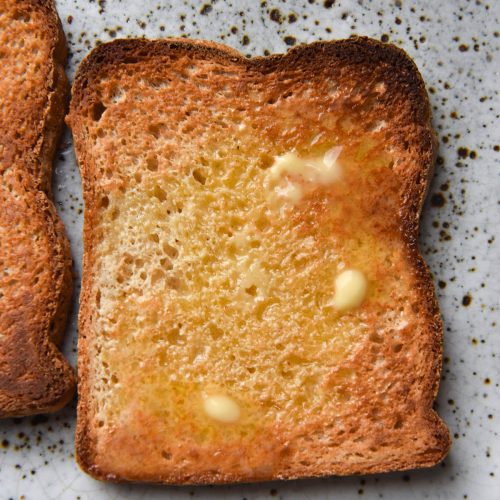
- Because gluten free breads are often high hydration, they need plenty of time to cool after baking. Your crumb will be wet and sticky fresh out of the oven – it needs time to cool and set. If you cut into a freshly baked high hydration loaf, the crumb will be sticky and gummy.
- One last tip: expect a high hydration bread to be a bit ‘wetter’ once cooled. I don’t mind moist bread, but I have seen people ask why. A higher hydration loaf will equal a ‘wetter’ feeling bread, even when cooled.
Different types of gluten free bread
Bread can be made as a loaf or a boule. There are also bagels, focaccia and friends, but we’re talking bread specifically here.
Because gluten free bread has less strength to hold itself together, you need to consider what sort of bread you want to make before choosing a recipe. For best results, of course, use a recipe specific to the style of bread you are baking. A boule recipe for a boule, a loaf recipe for a loaf. They are designed to suit the specific style of bread.
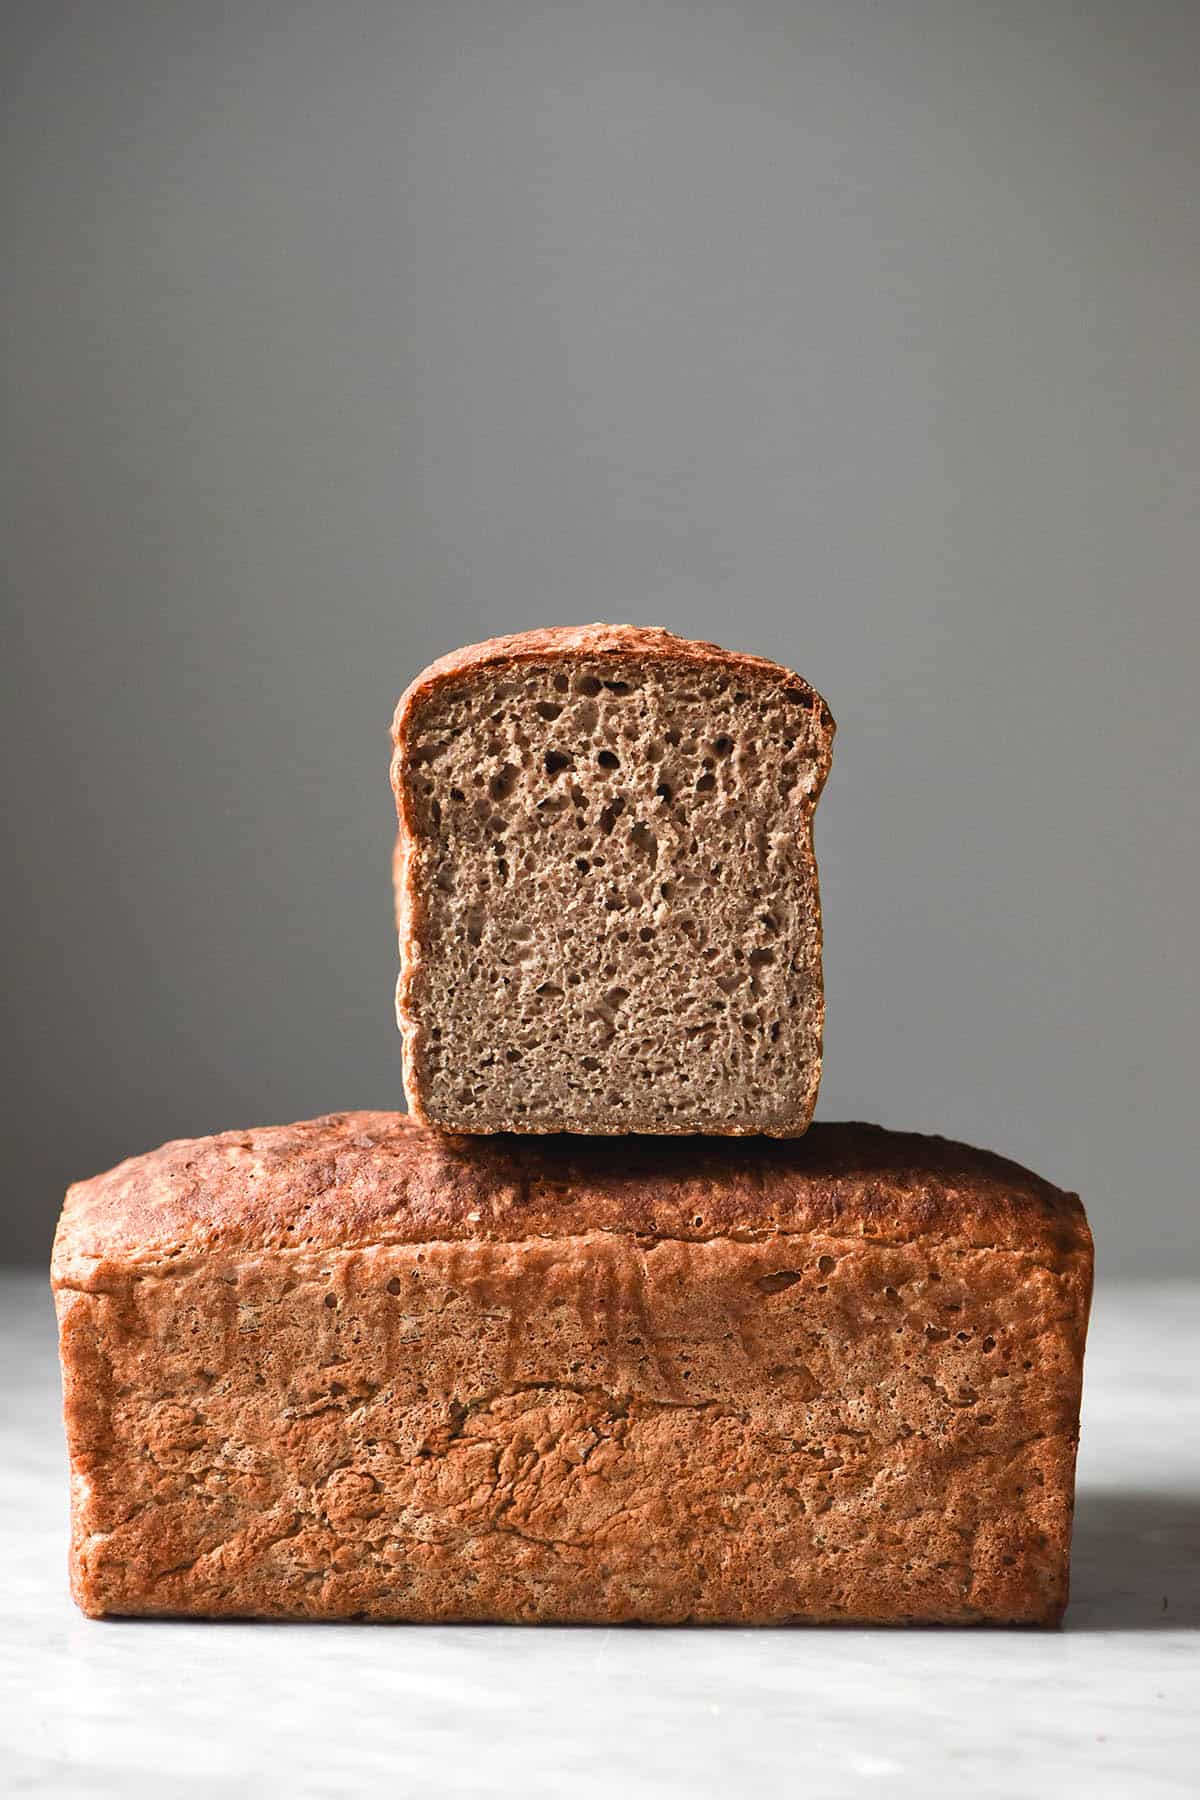
High hydration loaves are best as loaves made in tall Pullman loaf pans. This is because a dough with a lot of water will easily lose its shape and spill out into a blob. A dough with less liquid is more able to hold itself together in a boule shape throughout proofing and baking.
I make a lot more loaf recipes than I do boules these days. That is because it’s easier and because I like a soft sandwich style loaf. For all my loaves, I use USA Pan Pullman pan steel loaf in size small. This is the perfect size for a gluten free loaf, which is generally a little smaller than a regular loaf.
Silicon pans or short pans will not work for gluten free loaves. They need tall, solid sides (like steel) to hold the bread in. This way it can proof upwards to create a tall loaf instead of just becoming a wide blob.
Baking through the seasons
Baking through the seasons is kind of how I imagine driving a manual car. Instead of passively following a recipe, it requires engagement with the process and an understanding of the factors behind the scenes.
Yeast loves warmth, as we have discussed. It is much easier for yeast to multiply and thrive in hot or humid climates, so bread takes less time to proof in the summer than in the winter.
In cold climates, however, yeast takes a lot longer to thrive and grow. This is one of the reasons why loaves made in winter can be shorter and have a finer knitted crumb.
This, combined with the fact that starches and high hydration loaves ferment more quickly, has implications for seasonal baking.
A high starch, high hydration loaf might be a bit of a pain to make in the summer, when it will proof more quickly. You can counteract this a little bit by proofing it in the fridge, but the fact remains that it will still have a tendency to overproof easily.
On the contrary, a completely wholegrain, lower hydration loaf will take a long time to proof in winter. You can see that certain recipes are best made in certain seasons.
TLDR:
- Starchier, higher hydration loaves are prone to overproofing in hot climates. Proof your bread in the fridge to slow the proofing process (and develop flavour in the process).
- Consider saving extremely starchy recipes for cooler days in summer or for cooler seasons.
- Starch free, completely wholegrain loaves will proof a lot slower in winter. They might take significantly longer to proof than they would in any other season.
- If you want to bake a starch free loaf in a cold season or kitchen, allow plenty of extra time for proofing.
A note on your baking tin of choice
I know that it can be annoying when a recipe specifies a certain tin for baking. However, it is never without reason. I always surprised at the amount of people who think that you can use a 24cm cake tin when a recipe specifies a 20cm cake.
Using a bigger tin or different tin than specified will always alter the result. In the cake tin example: 20cm worth of cake batter needs to spread across a 24cm cake tin. This will inevitably lead to a much shorter, flatter cake. Because the cake is flatter, it will burn and become dry in the cooking time specified for the 20cm cake tin.
The same goes with bread recipes. If the recipe specifies a certain tin, using something else will likely not achieve the result you want. This is just the way it is.
My loaf recipes all use my USA Pullman pan in size small, which is 10.16 x 10.16 x 22.86 cm or 9 x 4 x 4 inches. It is the perfect size for a gluten free loaf, which tends to be smaller than regular loaves. It also has the necessary strong sides to hold a high hydration gluten free bread as it proofs upwards.
If you were to use the large Pullman, the bread would spread sideways instead of just upwards, filling the extra space in the tin. The end result would be a shorter loaf and the cooking times specified might over or under cook the bread.
My best advice: I know it’s irritating, but use the tin your recipe specifies. I promise I will never change my loaf pan from this one so you’ll only ever have to buy one tin.
Formula for gluten free bread
- At least one (and ideally two) gluten free wholegrain flours (like buckwheat flour, white rice flour, sorghum flour or millet flour)
- At least one (with some exceptions) starch for elasticity and a chewy crumb
- A binder (my preferred is always psyllium husk powder)
- Yeast (instant or gluten free sourdough starter)
- Salt, a small amount of sugar and oil for flavour and crumb
- Water (a considerable amount more than you would expect) to bring everything together. Once you get a sense of the absorbency of flours, it will become easier to nail the right hydration for a loaf.
Quick tips for your best gluten free bread yet
- Take the water listed in a recipe lightly. All flours have different absorbency levels and what works for me might not work for you. I always recommend adding water conservatively to start and adding more if need be.
- Gluten free bread dough can be as wet as a liquid batter before proofing. Psyllium husk powder will absorb the liquid, so don’t panic. I also find it firms up and becomes more easily handled after proofing.
- If your dough looks dry and crumbly, you haven’t added enough liquid. The dough, particularly prior to proofing but at any stage, should never look dry nor crumbly. If anything, it should look too wet.
- Psyllium husk is key! It absorbs enough liquid into the dough and provides it with structure. It is not something you can omit.
- Proofing takes longer in winter and less time in summer. Yeast thrives in warm conditions. A loaf you make in the depth of winter might take at least another hour or two to proof.
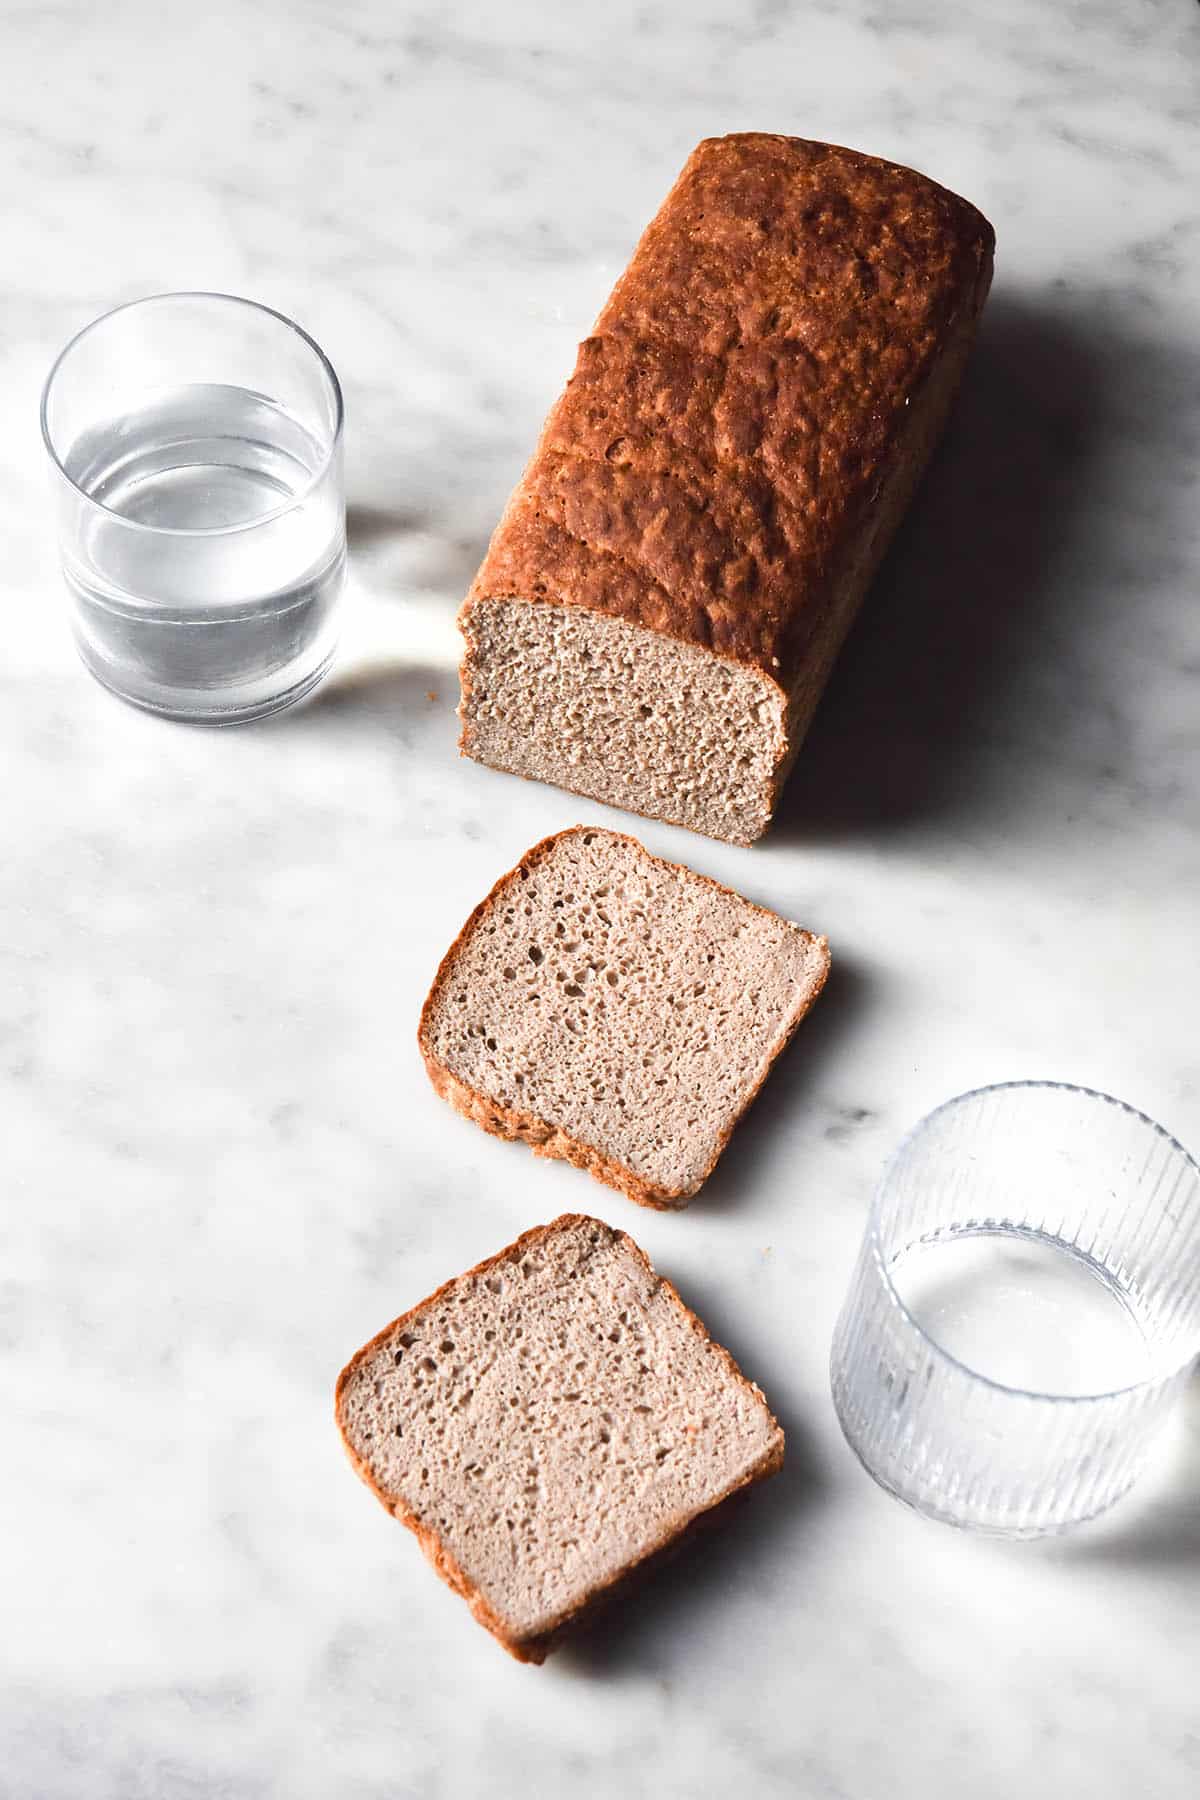
- A loaf made in a Pullman pan is ready to be baked when it domes over the top of the tin. It doesn’t matter if you have only proofed it for 20 minutes – the loaf is ready when it is ready. Similarly, a loaf that is super slow to proof (as long as your yeast isn’t dead) needs to be given time to finish proofing. It will get there, I promise.
- Temperature is more important than people realise. Read the seasonal notes to adjust your loaf according to the seasons.
Troubleshooting your gluten free bread
This section is dedicated to the most common issues and queries I get on my gluten free bread recipes. If you have a specific question, feel free to ask! I really enjoy discussing the science of gluten free bread making.
My gluten free bread isn’t proofing?
It is worth mentioning, before we dive in, that gluten free bread generally doesn’t proof as dramatically as regular bread. It’s quite difficult to achieve that beautiful, hole filled crumb in gluten free baking as the dough lacks the same strength.
With that said, there are a few reasons your dough might not be proofing. Firstly, it’s important that your yeast is in date. I bake professionally and am using a lot of yeast, so I am confident my yeast is in date. If you are not, I recommend blooming your yeast before use. Simply place 60ml/g of warm water in a small bowl with 1 teaspoon of fine sugar and the yeast. Stir to combine, then allow it to bubble up before adding it to the recipe (subtract 60ml/g of water from your main dough). If your yeast never bubbles up, discard it and start again.
Secondly (and most critically in my experience) is a lack of hydration. If you have added the amount of water the recipe specifies and your dough is crumbly, firm or dry, add more! Flours will vary hugely in their absorbency and this will impact how much water you need to add. 15 minutes after mixing, your dough should have the consistency of yoghurt (depending on the recipe). If your dough is rock solid after this time, this is generally a good indicator that you need to add more water. Your dough should never be dry or firm prior to proofing. If anything, it should be worryingly wet.
Proofed dough should have the consistency of a medium thick to thick Greek yoghurt (if yoghurt were fluffy) depending on the recipe. Some of my recipes are even thinner than this after proofing.
Thirdly, of course, is temperature. The ideal temperature for yeast to proof is around 27C/80F. In winter your kitchen is likely to be much cooler than this, which means your loaf will take a lot longer to proof. Oftentimes it’s not that the loaf didn’t proof, it’s that you didn’t give it enough time to finish proofing.
My gluten free bread didn’t grow much in the oven?
As we have discussed, gluten free bread doesn’t rise as dramatically as regular bread in the oven. However, there are some reasons as to why you might end up with a squat loaf.
Firstly, we’re coming back to hydration (sorry). An under hydrated loaf will not proof as well as one with sufficient water. This means it will not grow upwards to become the tallest loaf it can possibly be.
No matter how long you proof an under-hydrated loaf, it will never reach the ideal height for the bread. So it really all comes back to hydration. Occasionally, a well hydrated loaf hasn’t been given enough time to proof before going into the oven, but generally it is more to do with hydration.
Another issue can be oven temperature. Oven temperature gauges are notoriously inaccurate, which means you might not really know how hot your oven is.
Good oven spring (your bread growing in the oven) depends on the bread entering a really hot environment. This is because oven spring occurs in the first 15 or so minutes before the heat starts the set the top of the bread. Make sure your oven is thoroughly preheated for best results.
This also applies to pre-heating a dutch oven if you are making a boule. I have seen regular bread bakers say you don’t need a dutch oven to bake good bread, but that hasn’t been my experience with gluten free boules.
My gluten free bread is dense?
I’ll answer this quickly, for a change. If you are using one of my recipes and your bread is dense with a tight crumb, it’s one of two things. Firstly, you haven’t added enough liquid. Secondly, you haven’t proofed it for long enough. Always take the recipe itself as a guide and adjust hydration and proofing times as necessary. Over time you will learn what the ideal dough consistency is for where you live, which will make it easier to adjust your dough as needed.
My gluten free bread is over proofed?
As we have discussed earlier in the post, recipe and seasons have a big impact on the results. A very high starch bread recipe will proof a lot quicker because starch is easy food for your yeast. This can catch people off guard.
Similarly, high hydration loaves proof faster than low hydration loaves. Bread proofs faster in hot conditions and slower in cool conditions.
It can be tricky to know how to adjust a recipe based on the seasons as recipes don’t specify the climate the recipe was developed in. A bread that I have developed in Australian winter will proof a lot differently when you are baking it in a humid American summer, for example.
My basic advice is go through a checklist before baking. Is it a high hydration loaf (you might not be able to tell this from the recipe, but still). Does it contain a lot of starches? (tapioca flour, potato starch, glutinous rice flour and to a lesser extent, cassava flour). Am I baking in a hot or humid kitchen or climate? If you answer yes to any of these questions, preheat the oven ahead of time and watch your loaf closely.
It is easier to tell when a loaf is proofed (in a Pullman pan) because it will dome over the top of the tin. The minute it does – bake it. It doesn’t matter if it has only proofed for 20 or 30 minutes.
Boules can be a bit trickier to determine. Your best bet is to be guided by the visual explanation of the recipe that you are following.
My gluten free bread collapsed?
Sometimes, a loaf has been left to proof for too long. The yeast can no longer hold the weight of the flour and it shrinks. Another key indicator of a loaf that has over proofed is an alcohol like smell or flavour.
Over proofing can be prevented by watching the bread closely as well as controlling the other factors above. A lower starch loaf is less likely to ovenproof, as is a lower hydration loaf or bread made in a cold kitchen.
My gluten free bread has a gummy layer at the base of the loaf?
This annoying little gummy layer at the bottom of your bread most commonly arises when you have added too much water. It can sometimes have a little bit to do with proofing and also with too much added starch (or starch type). In my experience, however, it can be mostly resolved by adding a little less water.
If the gummy layer doesn’t resolve after adding 100g less water, consider that it might also be under or over proofing.
And if you have controlled for all those variables? Try adding 5g less psyllium husk. Sometimes a high hydration loaf combined with psyllium husk can create a gummy layer.
My best gluten free bread recipes
To put everything into practice, I thought I’d share my favourite gluten free bread recipes I have developed. They are all xanthan gum free and either vegan or with a vegan option.
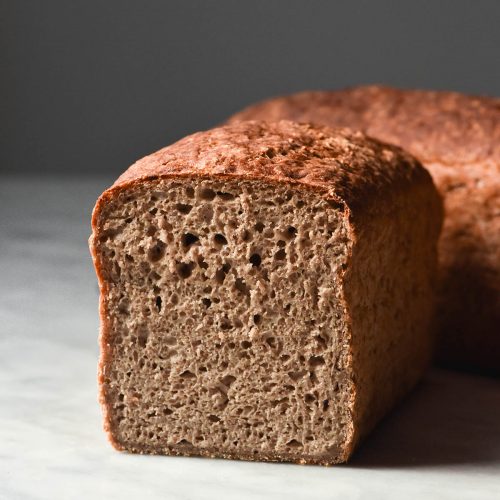
Gluten free buckwheat bread
The OG recipe that got me into developing 100% buckwheat flour recipes, this loaf is one of the most popular on my site. It is for the buckwheat lovers and makes a delicious and really straightforward bread.
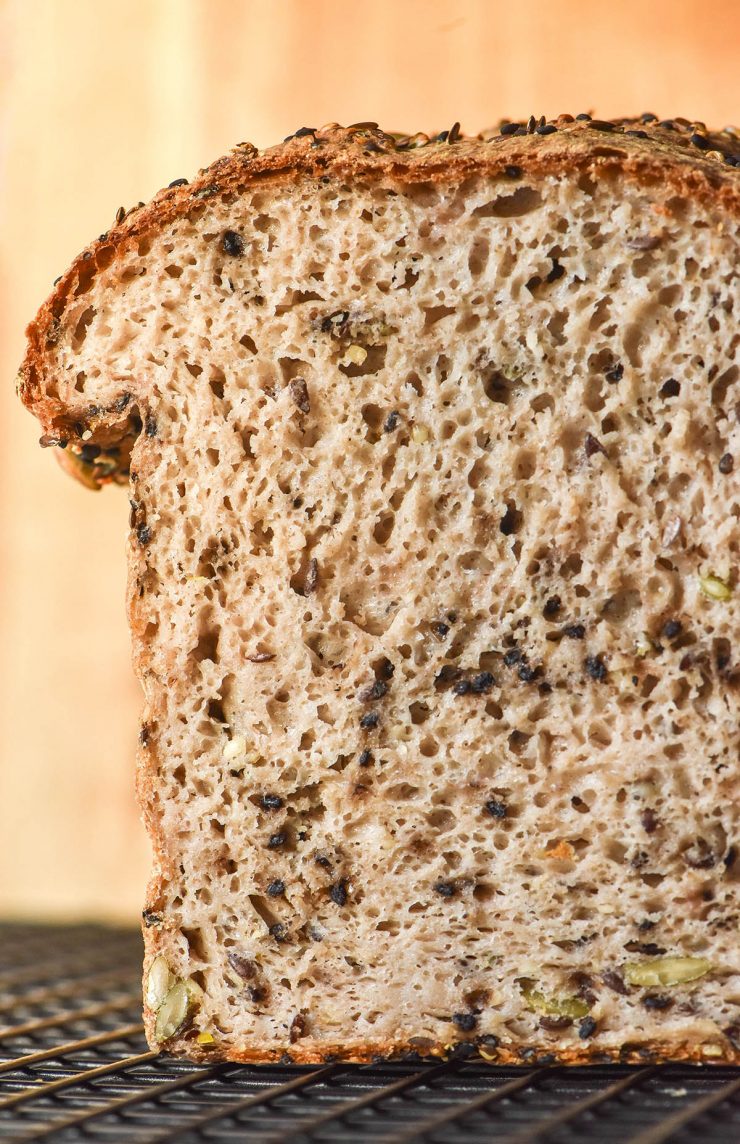
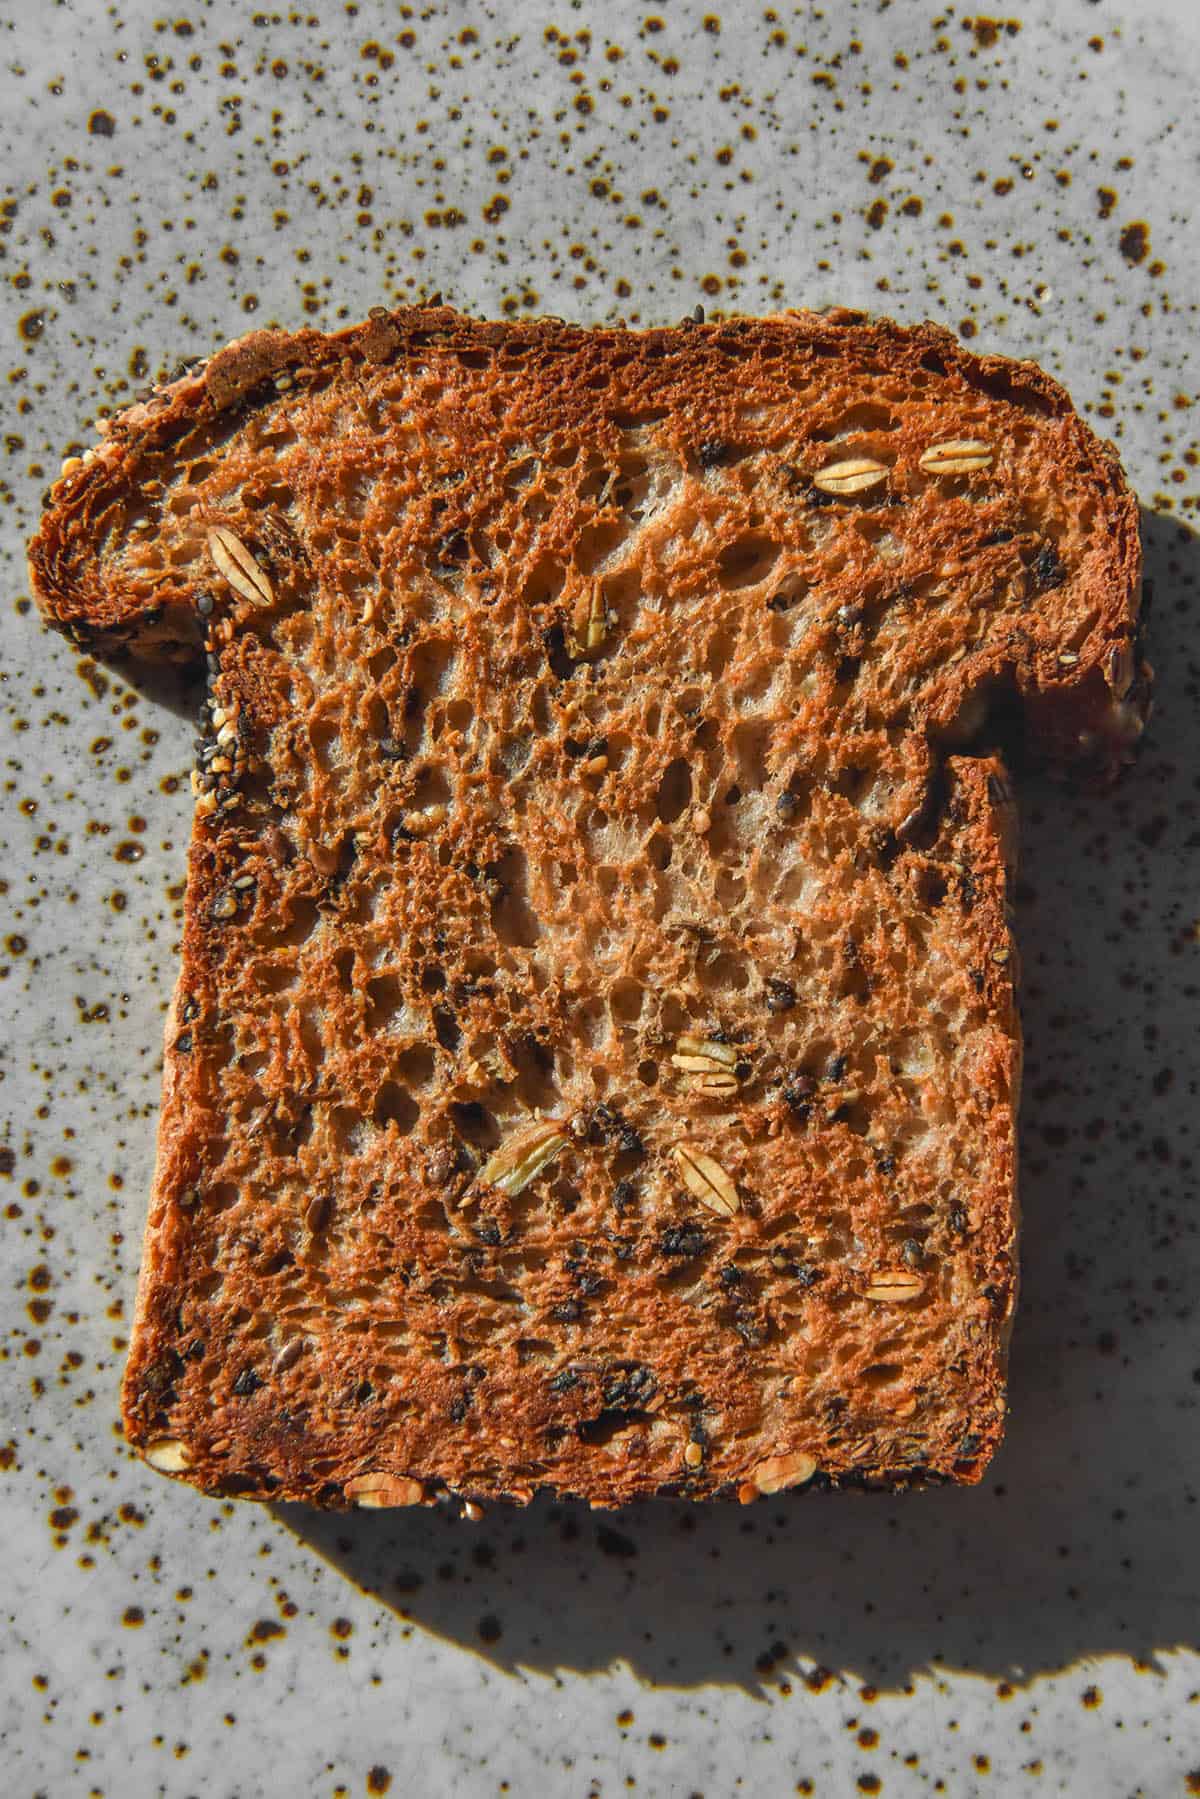
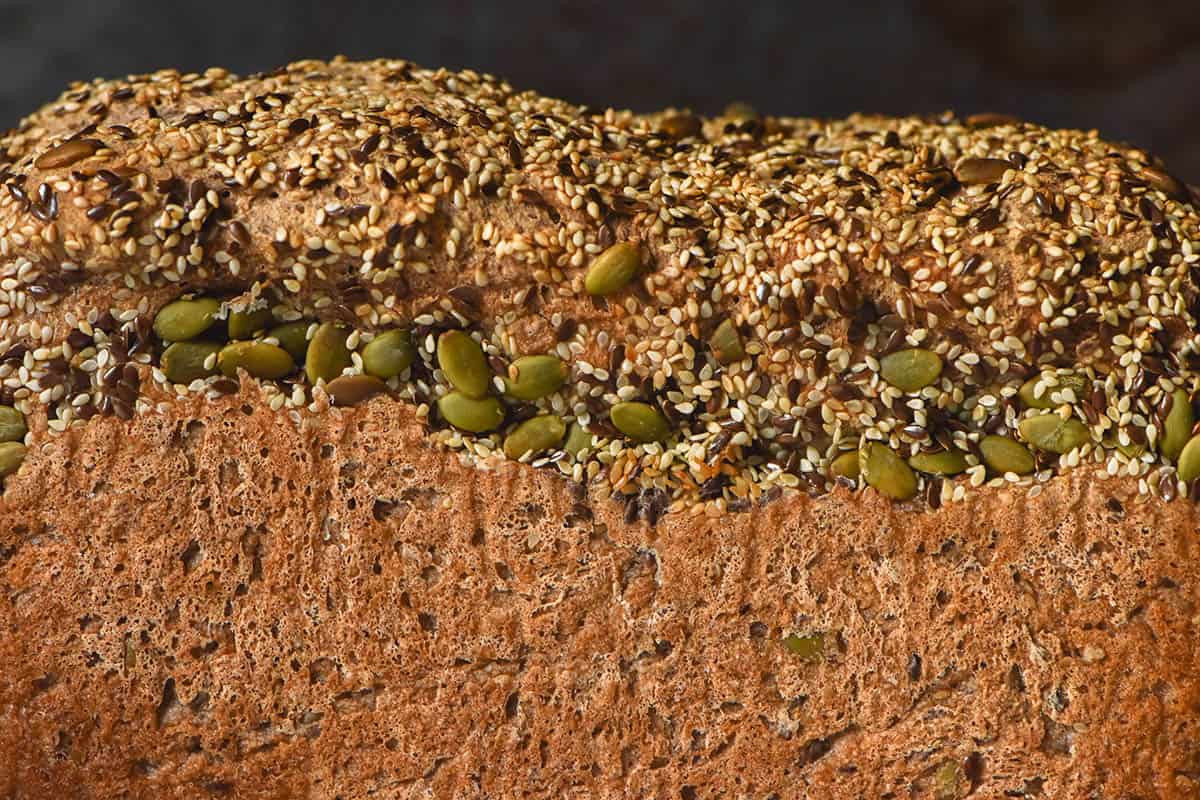
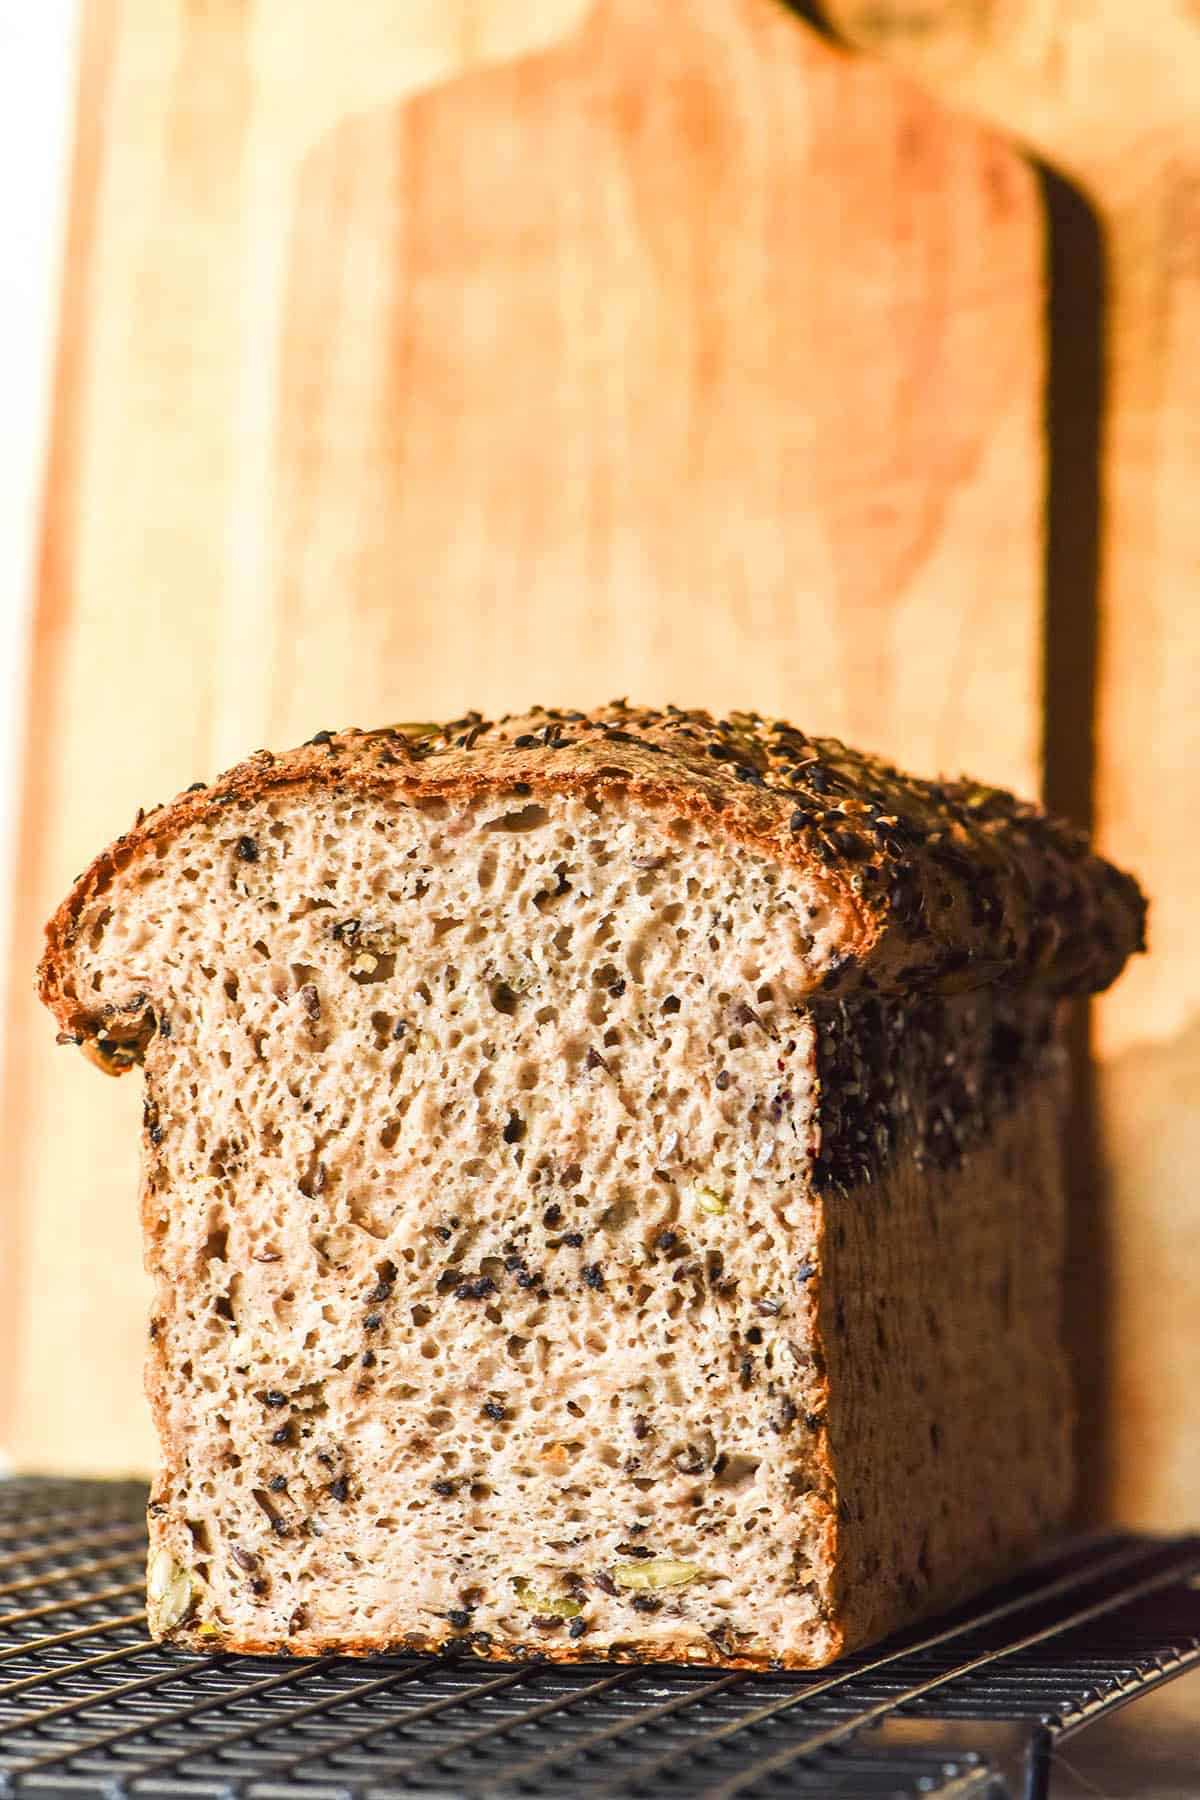
Gluten free seeded bread
This is one of the newer bread recipes on my site but already one of my favourites. It’s easy to make and packed with flavour.

Grain free ‘white bread’ (regular or vegan)
This grain free bread uses cassava flour, tapioca flour and potato starch for a grain free, nut free and xanthan gum free loaf. I love it so much that I developed a vegan version, too.

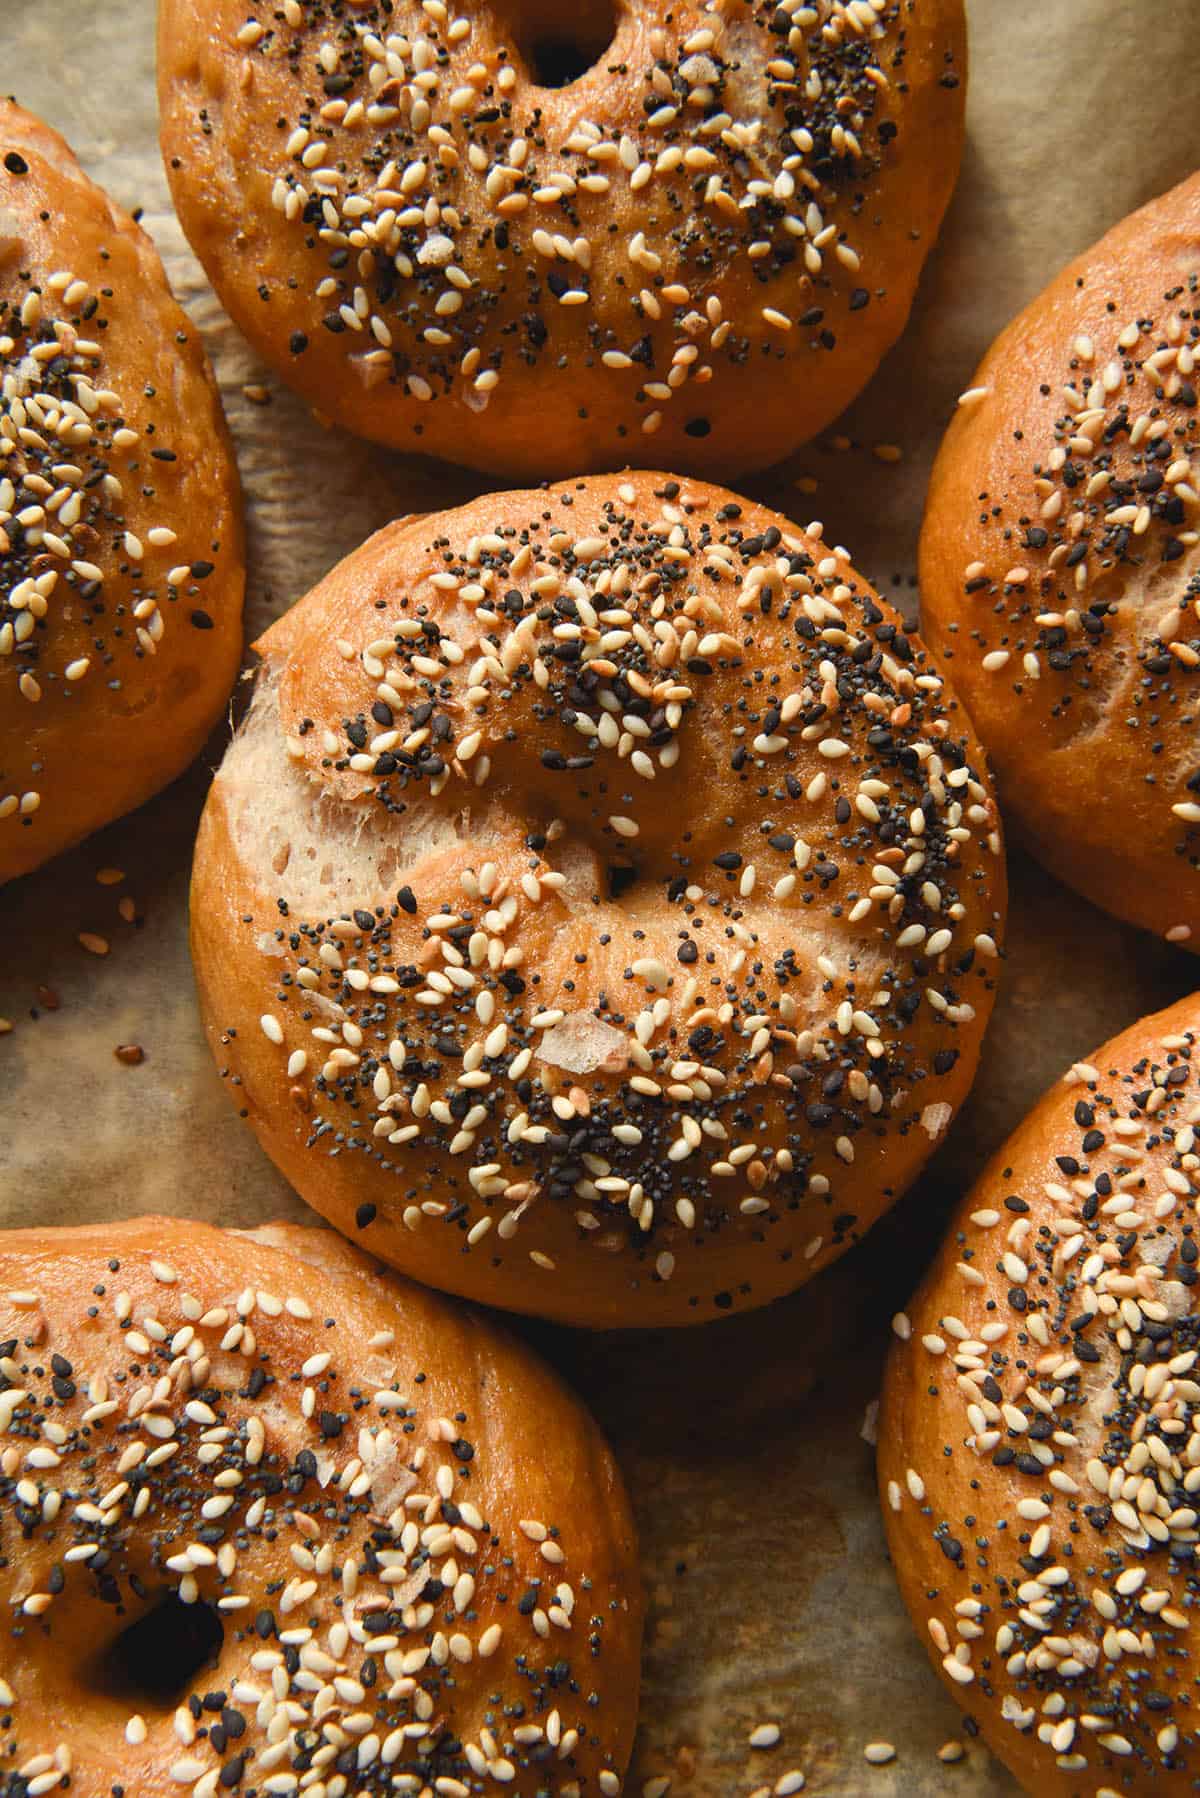
Gluten free bagels
These bagels are made the traditional way – boiled in a molasses bath and then baked in the oven. I use my low FODMAP everything bagel season to seal the deal. In need of some topping ideas? I like lactose free cream cheese and low FODMAP pickled red onion.

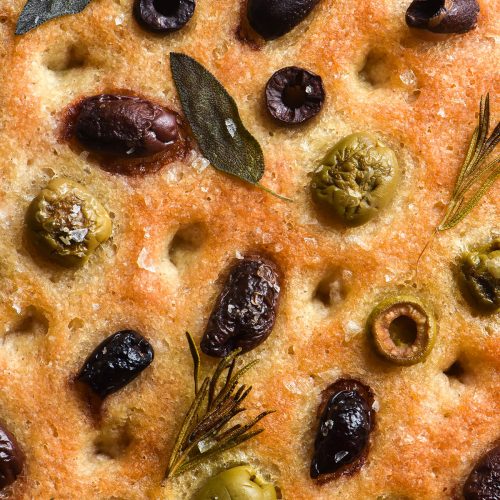
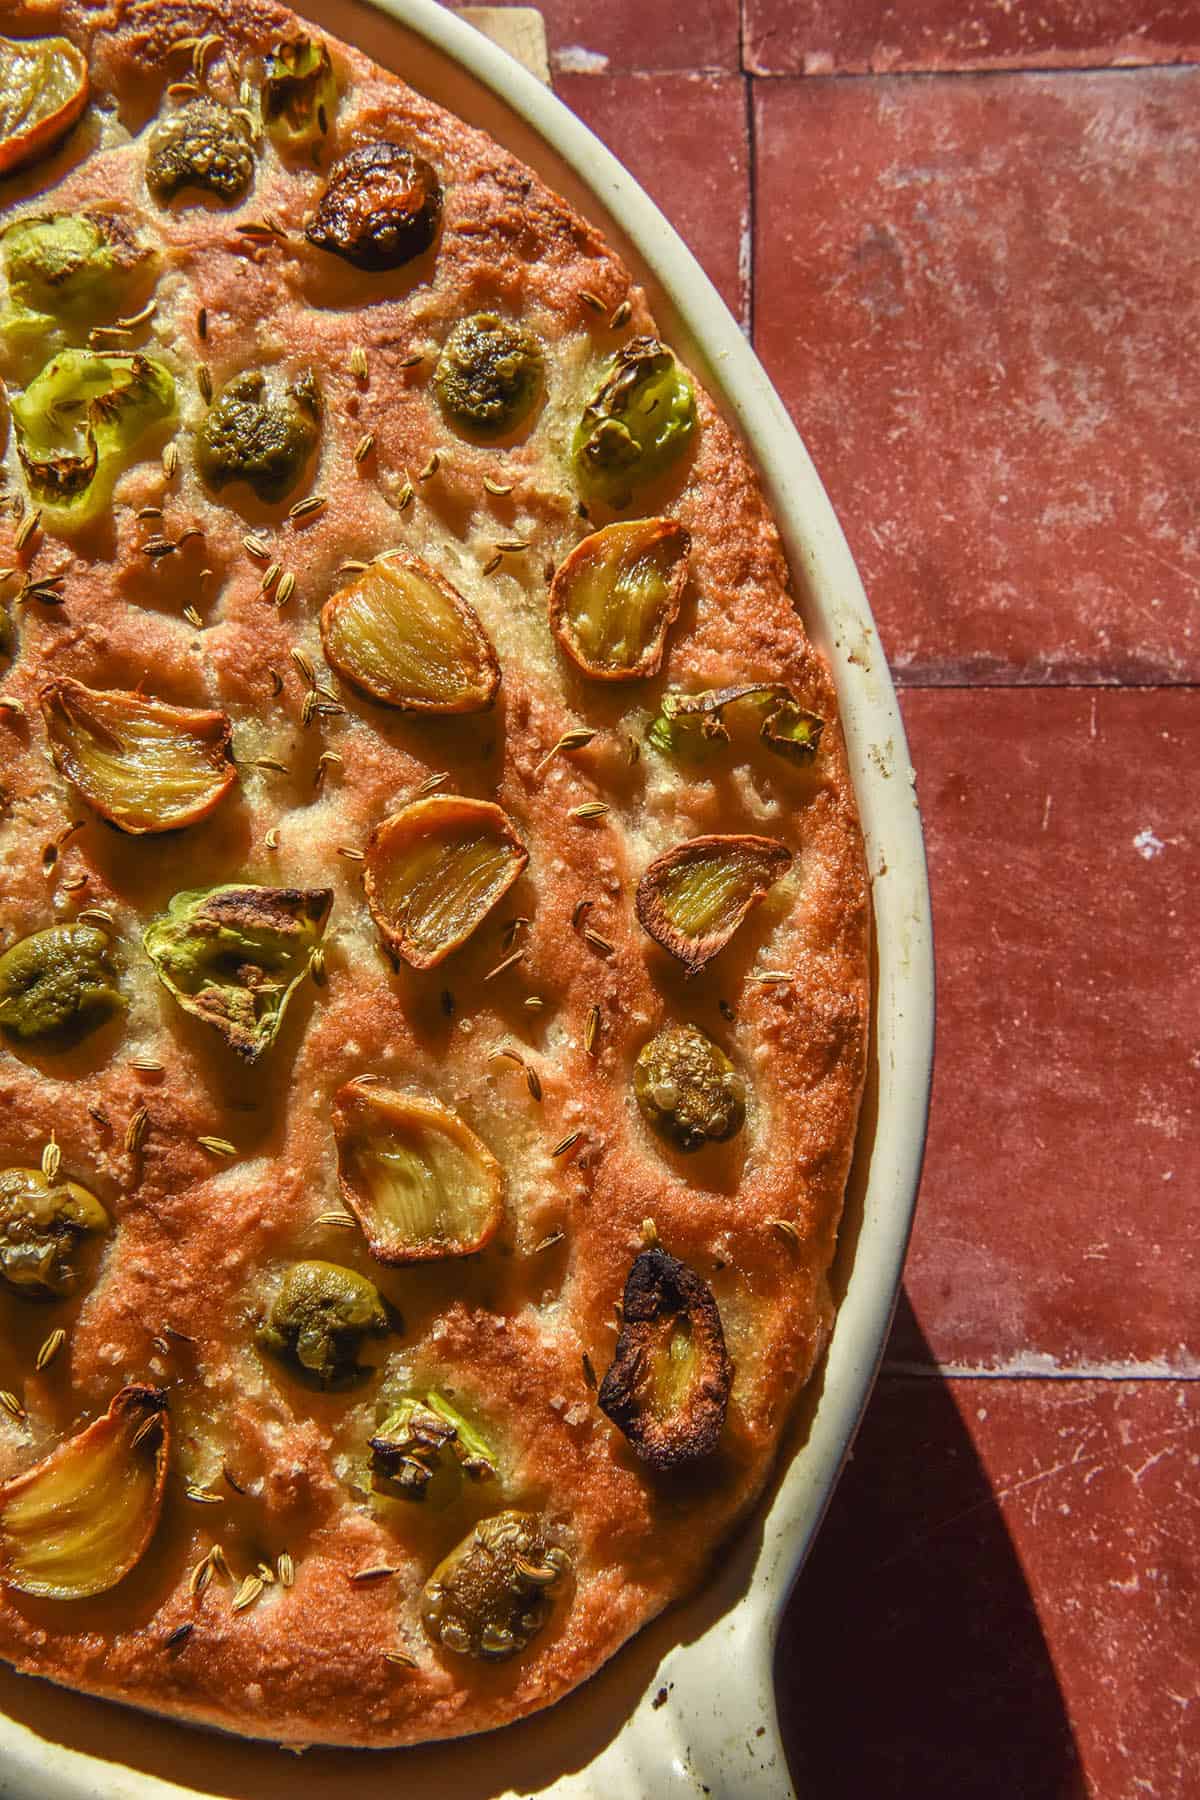
Gluten free focaccia
This focaccia took me months to perfect and I’m glad I persisted. It is fluffy, light and has the perfect open crumb. Better yet? It’s xanthan gum free and vegan as well.
Greetings! Dia here from Canada. Firstly our family would like to thank you for your incredible work. Our family has made your buckwheat blueberry muffins plus your buckwheat loaf that requires instant yeast it’s a lovely crumb. Sadly some members of our family can no longer have yeast so we would like to know do you have a vegan and gluten free buckwheat bread that doesn’t require yeast or have you made this bread without yeast.
Thank You Kindly
Hi –
Thanks for taking the time to develop all these GF breads! And for all your great advice – I’ve found it very helpful. Your methods are different than methods I’ve tried in the past; I’m still learning, but the results are better, so I’m encouraged. One question:
For yeast bread loaves, do you “punch down” the dough after the first rising before moving it to a pan? Or do you just gently drop it into the pan for the second proofing?
Thanks again!
Hi Sheri! So glad to hear you are enjoying the recipes 🙂
I don’t punch down the dough – I find that stirring up the dough to transfer it to the pan is sufficient.
Because the dough doesn’t have any gluten structure or strength, it doesn’t take much to ‘punch it down’.
You don’t need to be overtly gentle but no punching necessary either haha 🙂