I posted a recipe for gluten free bao buns recently. Inspired by their simplicity, I wanted to see if I could use them to develop some gluten free steamed buns. The gambit paid off, obviously, or else you wouldn’t be reading this post.
Gluten free steamed buns
These gluten steamed buns are xanthan gum free and egg free. They can be made with regular milk, dairy free milk or even water so they are easily dairy free or vegan. The dough is naturally low FODMAP and I have recipe for a number of low FODMAP vegetarian dumpling fillings that work here, too.
The buns are easy to make and only require one proof (but you can do two, if you like). The sugar level is easily adaptable and they can be frozen with ease. Make a batch on the weekend and you will have frozen buns to reach for throughout the week.
Can I make these gluten free steamed buns without yeast?
At the moment, no. However, I am working on a yeast free bao bun recipe without yeast. The moment I perfect that, I will re-test these gluten free steamed buns and update the post.
Can I freeze these steamed buns?
You certainly can! With that said, however, I recommend you fill them, fold them and steam them before freezing. They defrost really nicely, and there’s no guarantee the yeast would survive a long freeze to puff up as nicely as it would fresh. This is why I recommend steaming them first.
You can allow frozen buns to defrost on the bench or microwave them. You can also steam them in the same manner as you did originally.
What can I serve with these steamed buns?
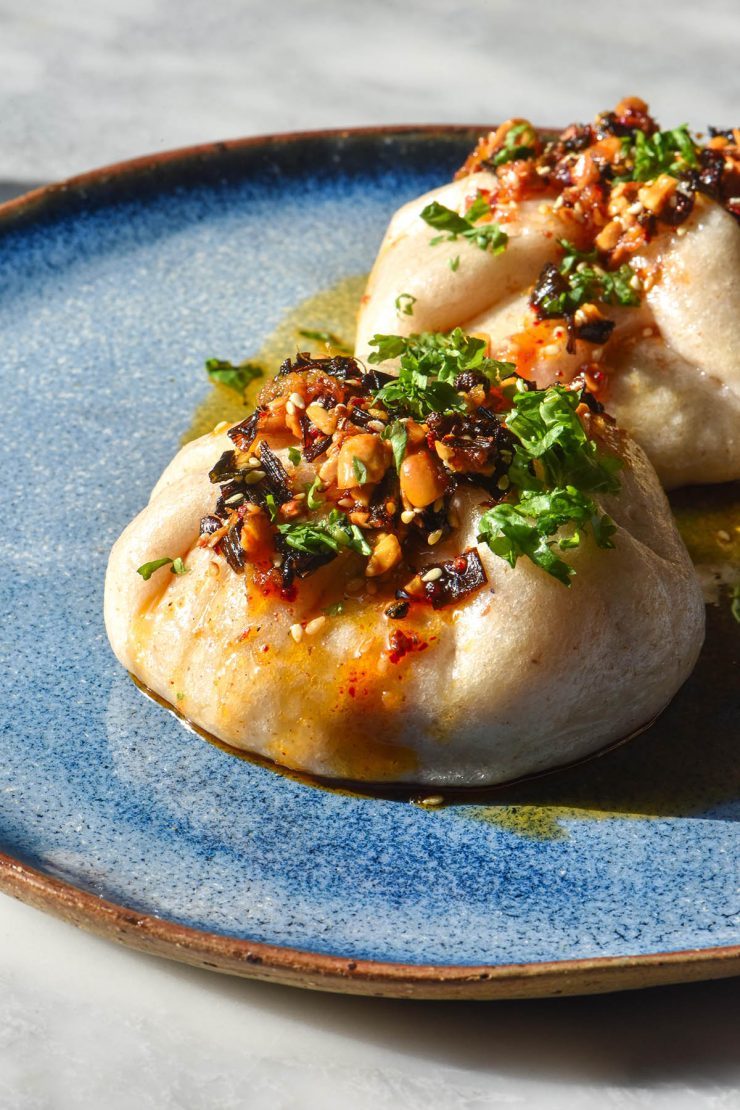
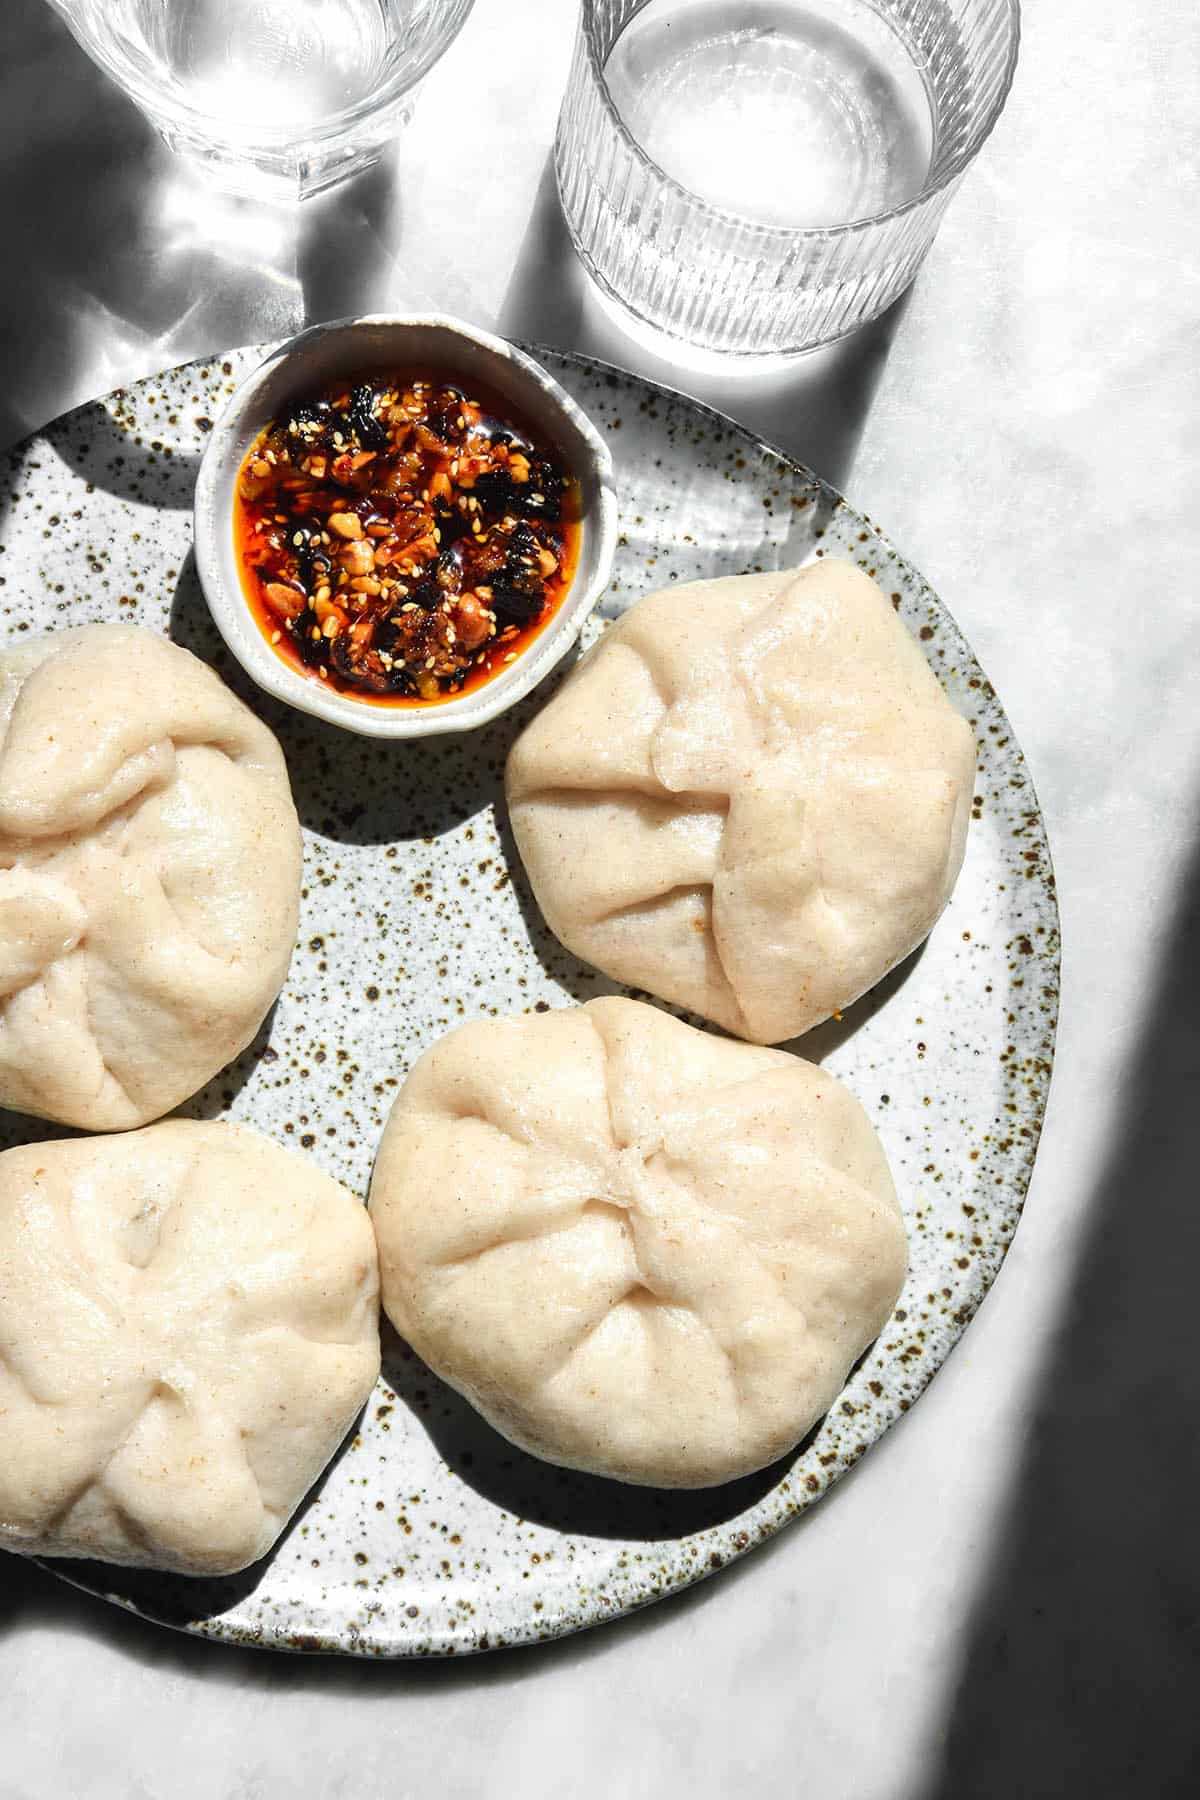
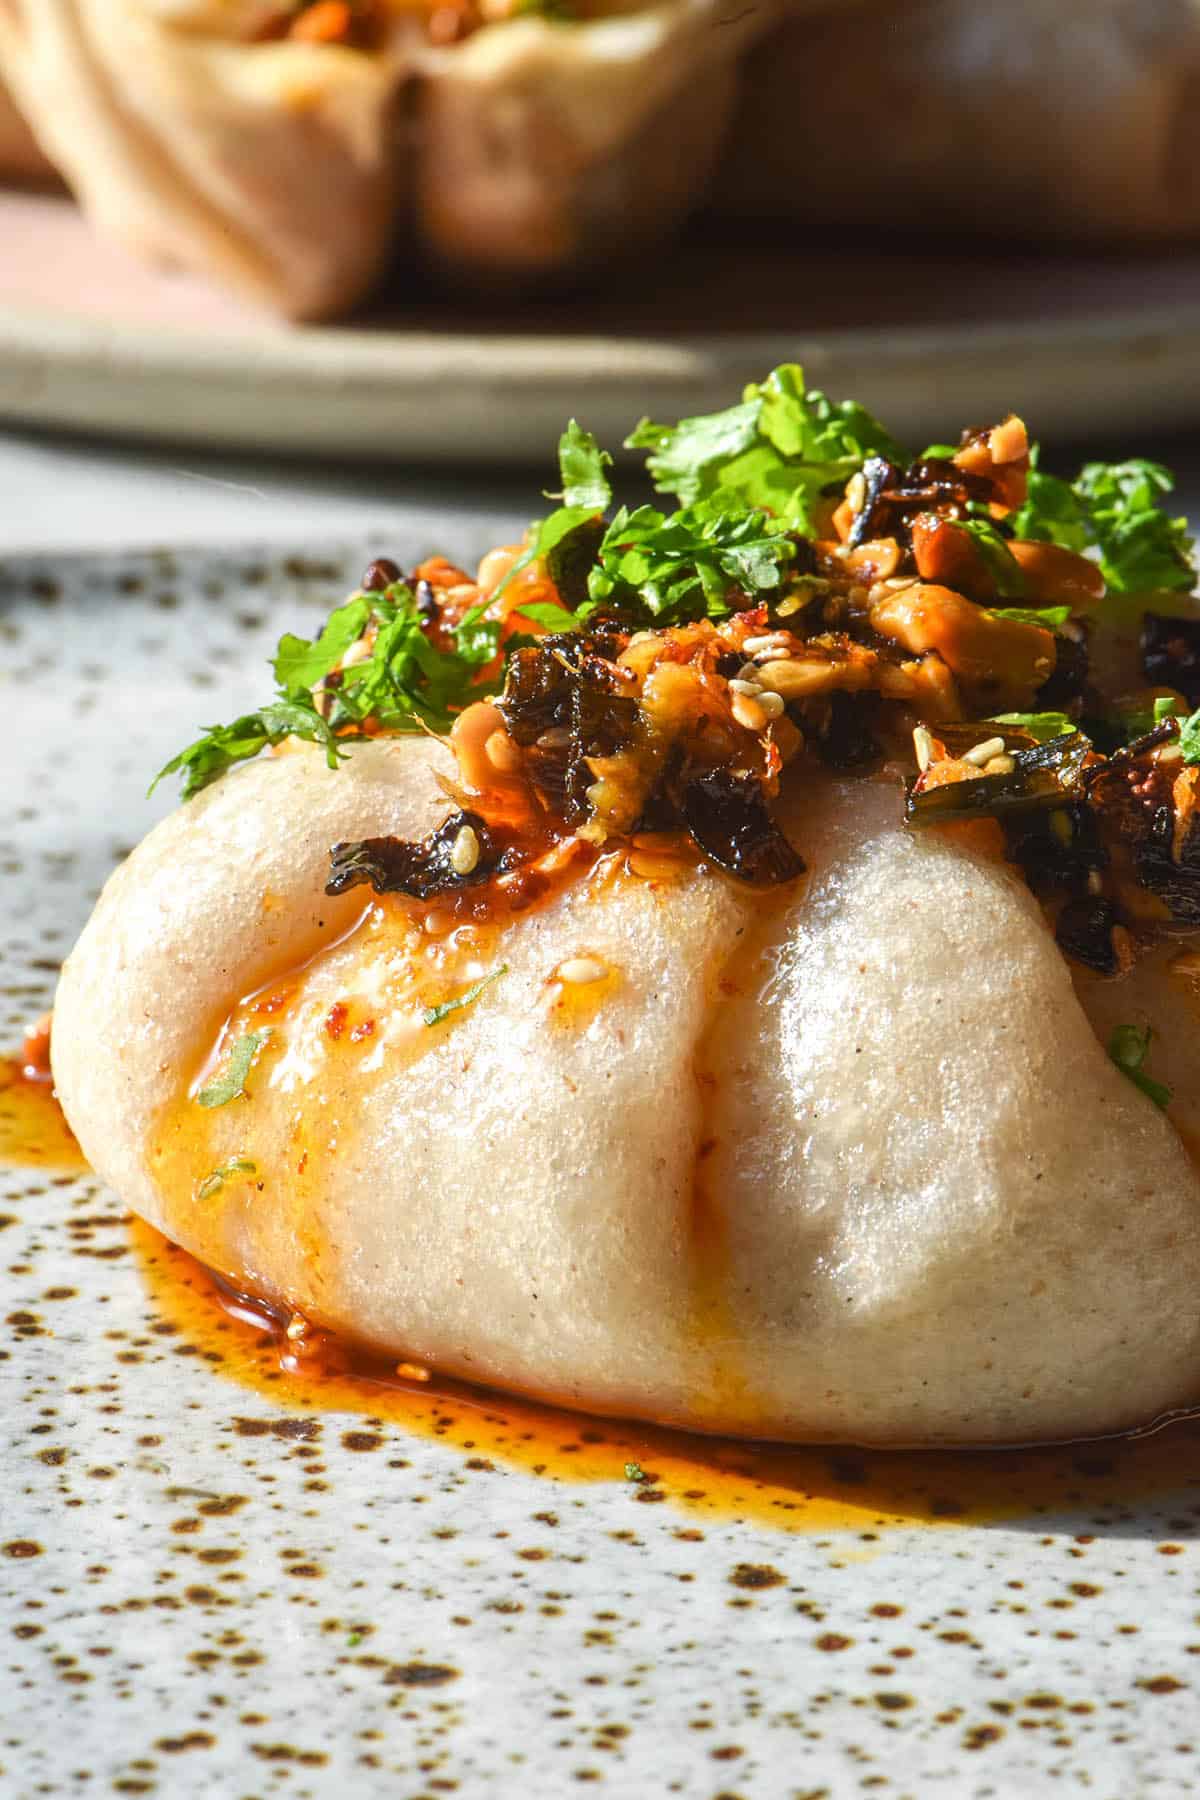
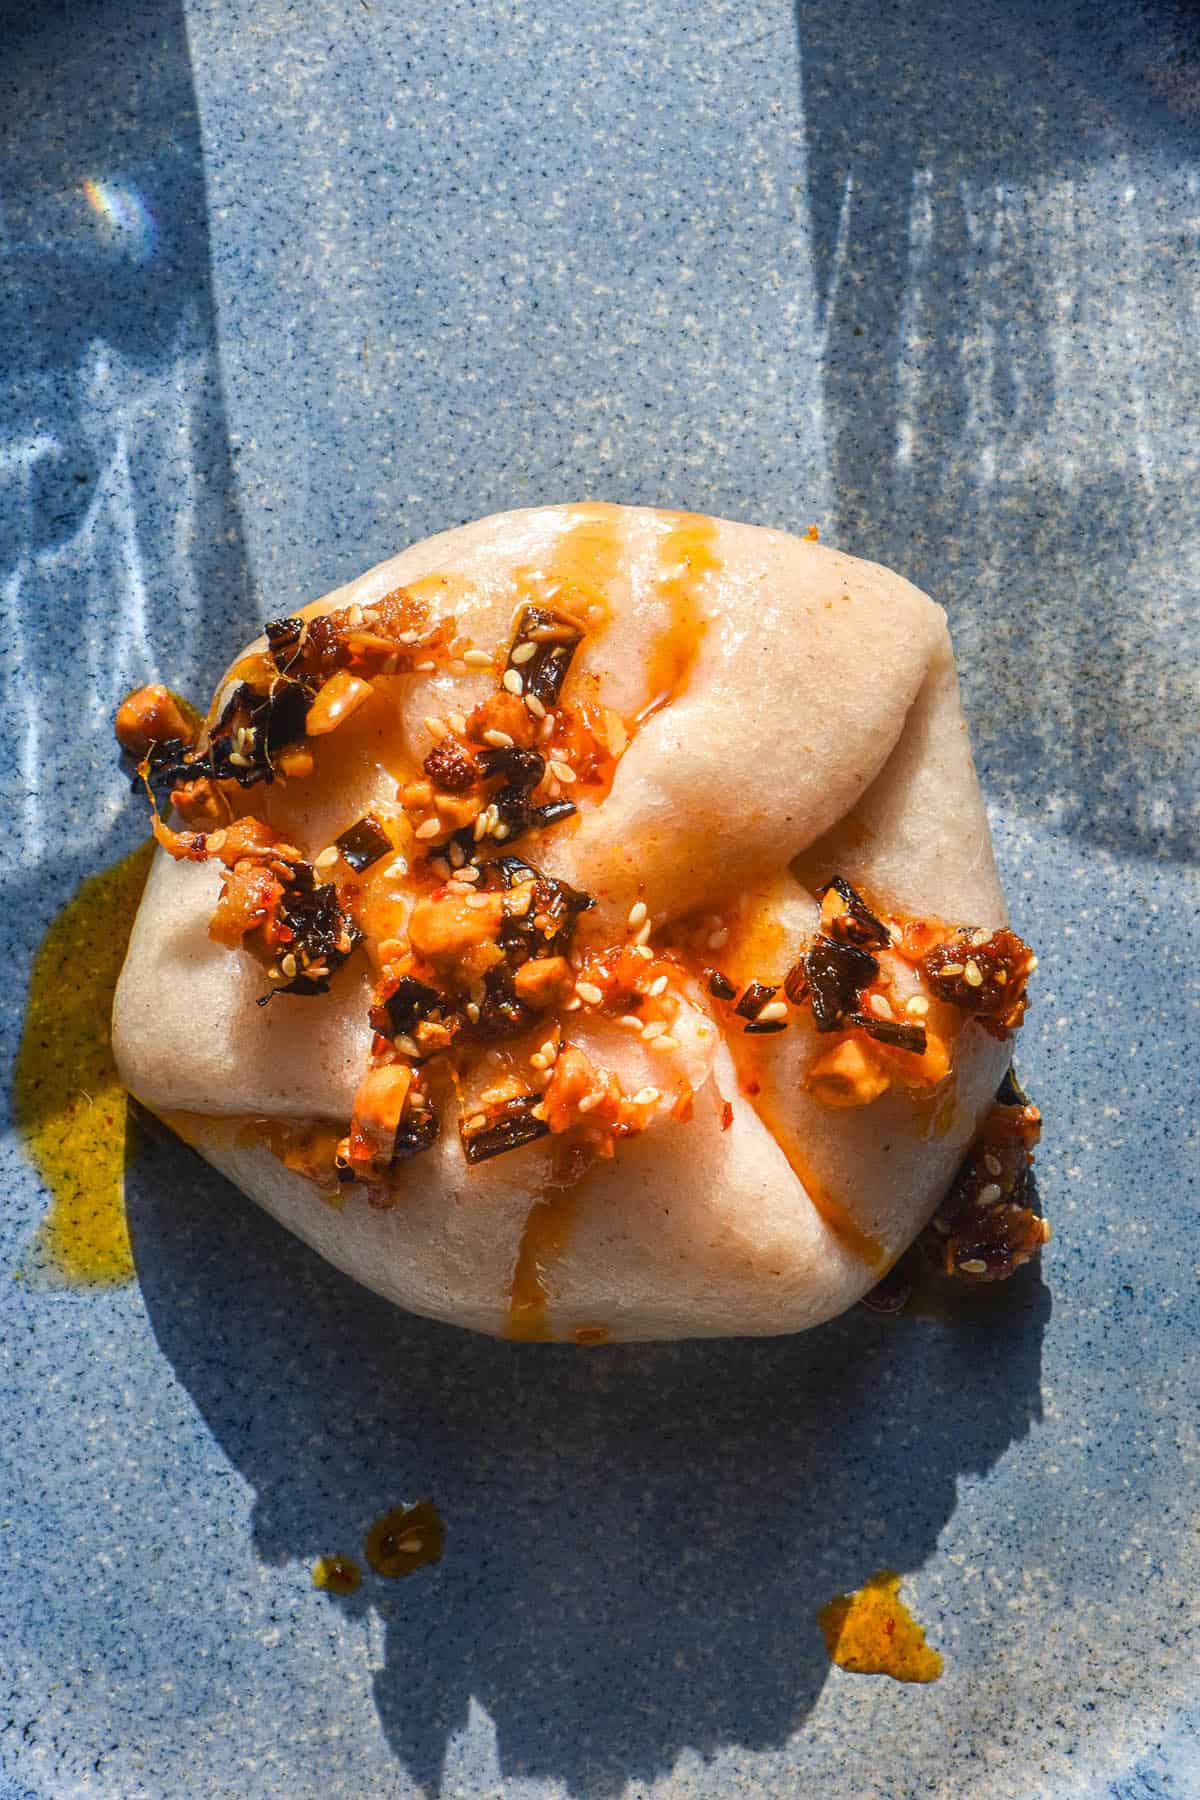
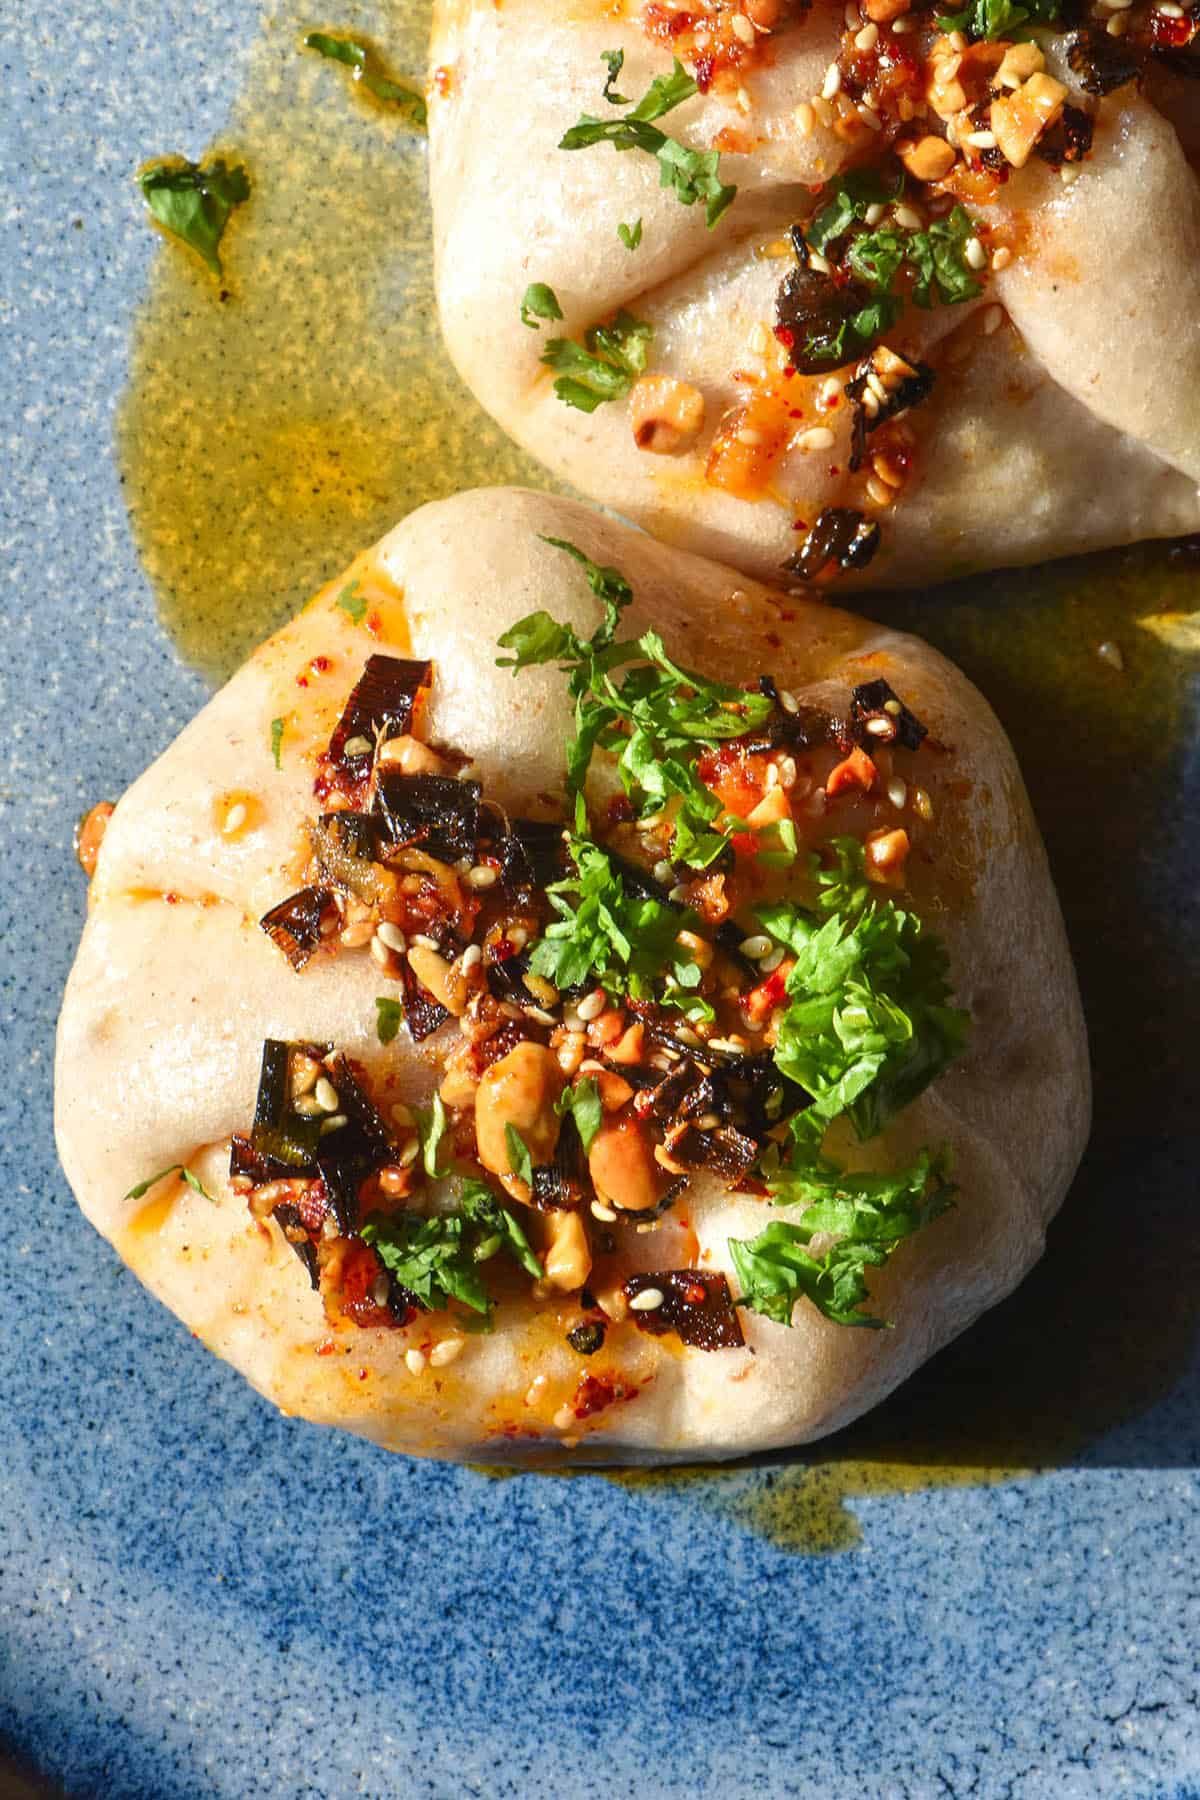
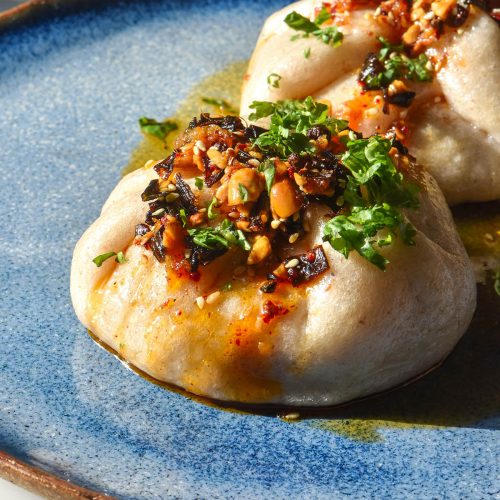
I served this buns drizzled with my low FODMAP chilli crisp and chopped coriander. I daresay that they would also be delicious with some low FODMAP dumpling sauce.
If I were to serve these as a main dish, I’d be inclined to serve them alongside some Asian greens. I like to sauté mine in ginger until soft, then drizzle with toasted sesame oil and Tamari.

Tips for your gluten free steamed buns
My biggest tip for any gluten free recipe (and the tip that most people seem to skim over) is that every bag of flour will have a different absorbency. If your dough seems particularly runny (or dry) I can almost guarantee it’s because your flour has a different absorbency than mine. I can’t test every single bag of flour in the world, so you need to use your intuition. If your dough looks or feels far different than what the recipe describes, adjust it.
Be sure to read the hydration notes below. These are super important to achieving the type of bun dough you prefer (and to the success of the recipe).
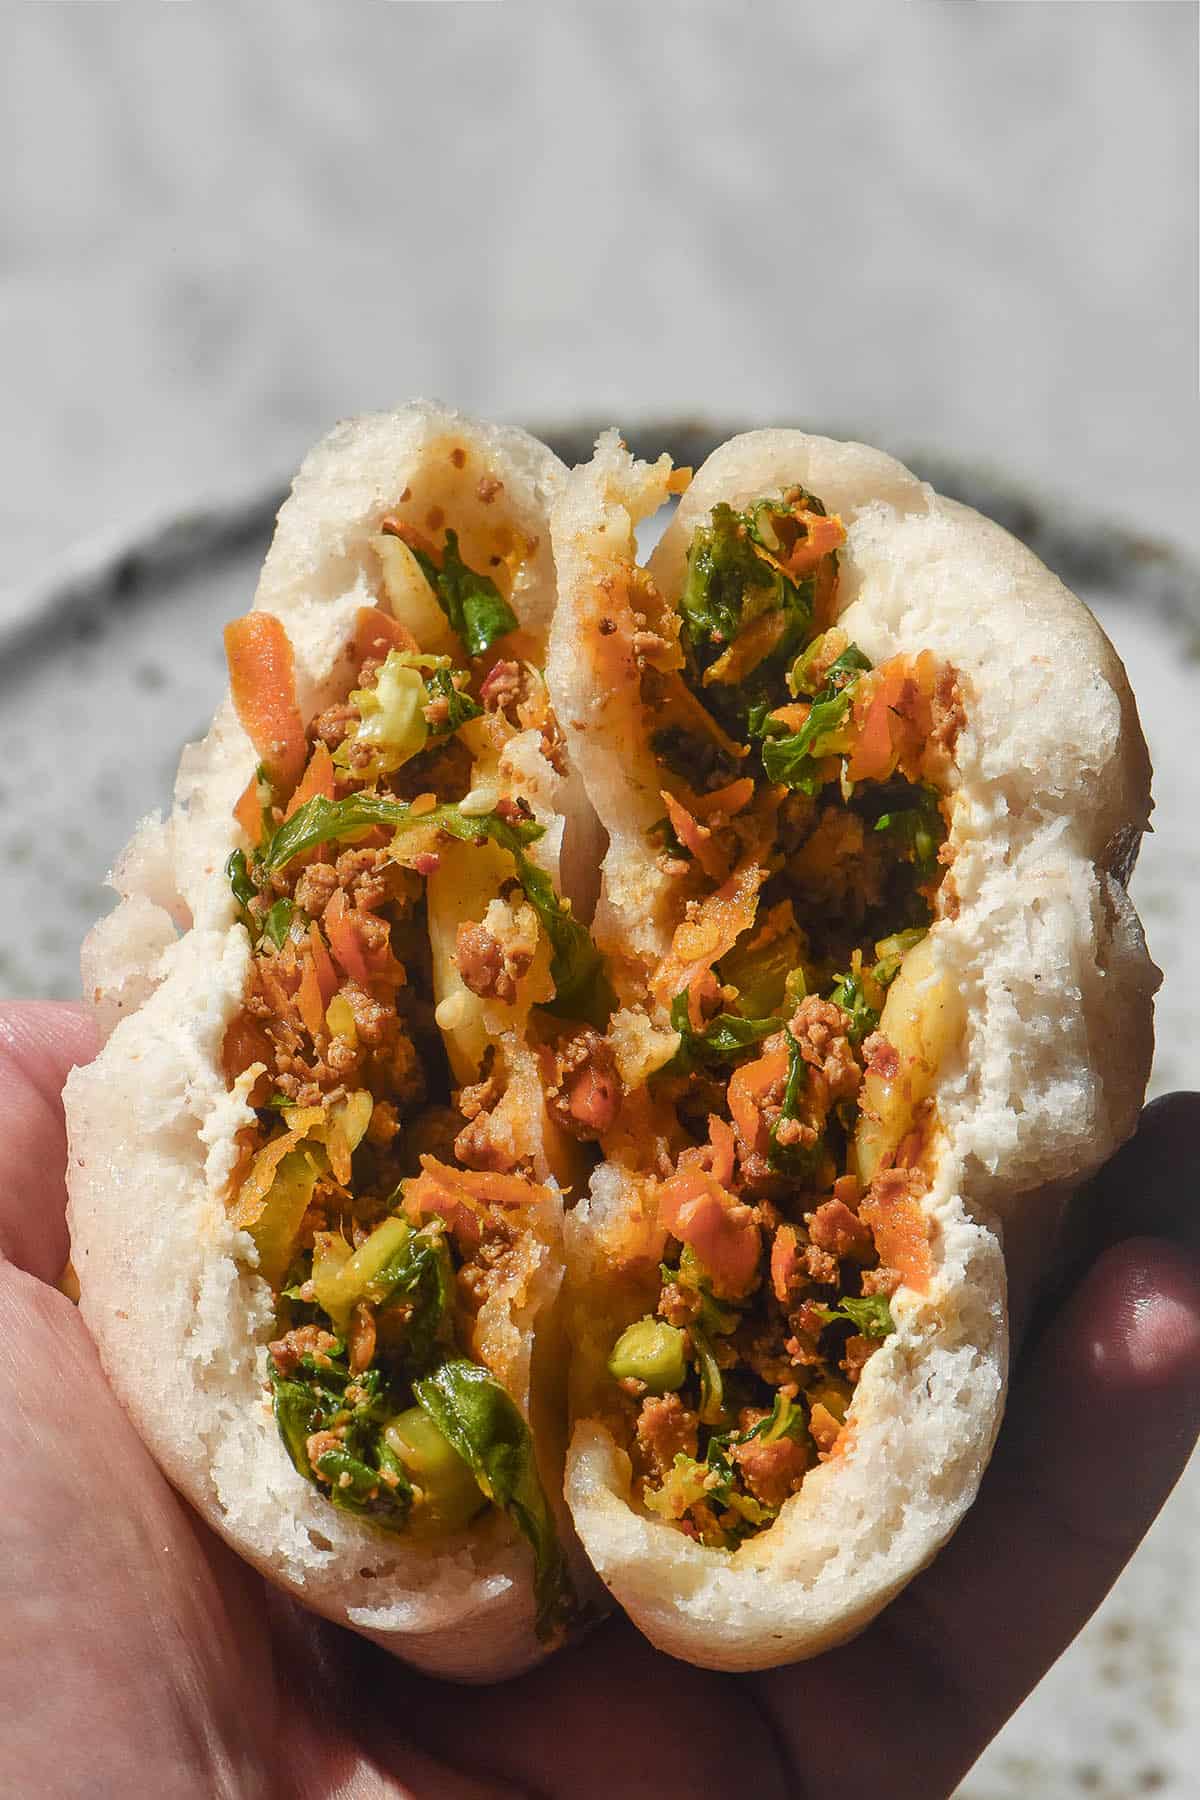
I have used my tofu and bok choi dumpling filling for this recipe. The dough makes enough for about 7 buns, which correlates to half the filling. I didn’t want to make this recipe too large, as I know lots of people (myself included) have small households. You can double the dough recipe to make 14-ish buns, which will use all the filling. You can also use whatever filling you prefer.
Always have a good amount of tapioca flour on hand for rolling out your vegetable buns. It is soft which makes it perfect for rolling. In addition, tapioca flour is cheap and easily accessible.
Ingredient notes and substitution options
I use white rice flour and tapioca flour because they are easily accessible and inexpensive. They are also two gluten free flours that most of my readership can tolerate. You can experiment with different flours, but I have not tried this and can offer no suggestions here.
As noted above, I don’t currently have a yeast free option for this recipe. I do intend to work on one and will update the post when I perfect it.
I have switched to using psyllium husk powder in all my recipes. I find that store bought powder tends to clump up easily and can turn things grey, so I grind psyllium husk flakes into powder myself. I use an inexpensive spice grinder for this purpose.
In terms of the milk, you can use any. I have tested whole milk and water, but any will work. Note that oat milk is not considered gluten free in Australia. Another thing to consider is choosing a low FODMAP milk if you need the buns to be low FODMAP.
Hydration notes for your gluten free steamed buns
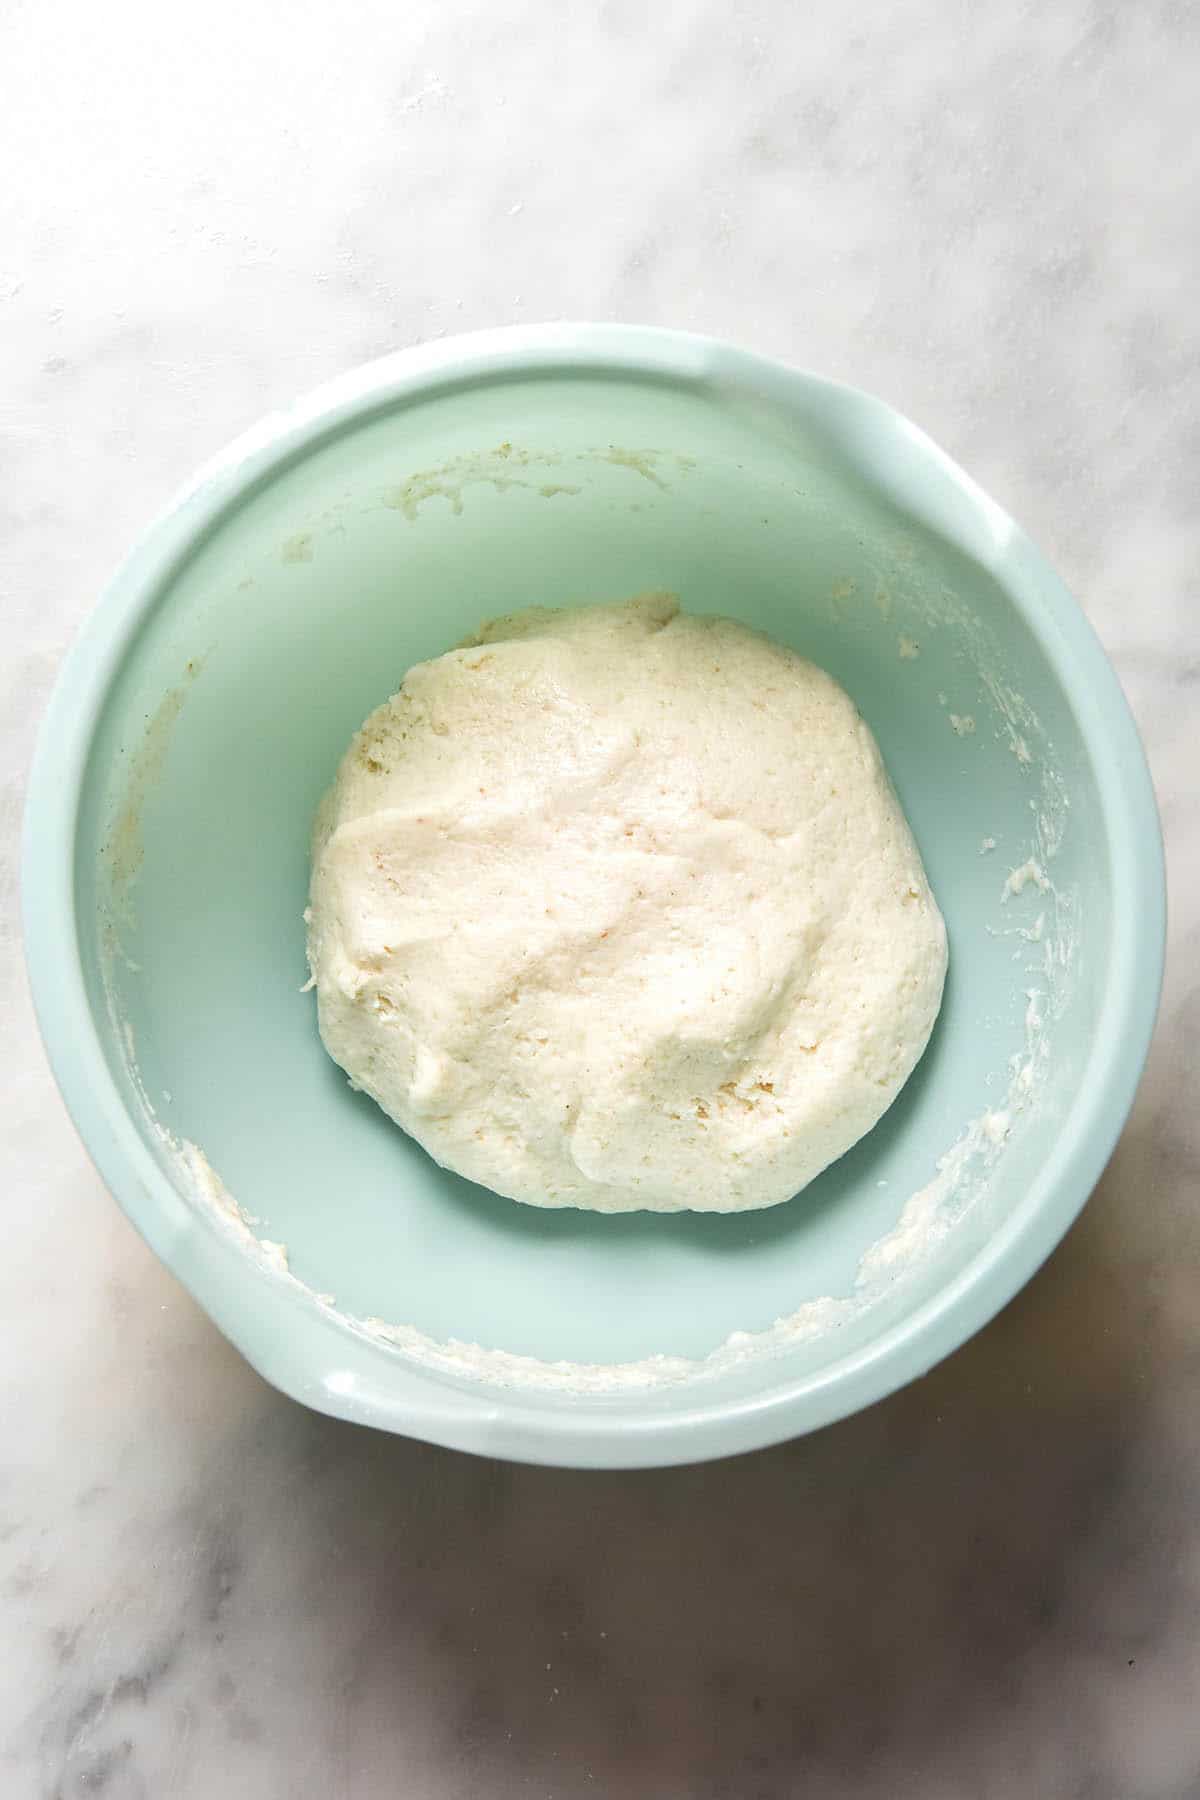
Getting the hydration right is key success when it comes to these buns. As we have already discussed, every bag of flour will absorb liquid differently and you need to use your intuition. However, this dough can also be manipulated to achieve the style of steamed bun you prefer.
The yeast in this dough needs liquid to rise. That means if your dough is dry or you can easily pick it up in one hand before proofing, it won’t rise nearly as much as a more liquid, wet dough. A drier dough is easier to roll out, but it won’t puff up to become that fluffy, plush style of bun dough.
If you like a thin, more dumpling like style of dough, you can use the lesser liquid option. However, I recommend the plush style of dough – it’s fluffy and delicious.
In order to achieve this, ensure your dough looks totally liquid as you mix it. It will thicken up as it proofs, I promise. If it is not easy to pick up once proofed, though, don’t stress. Simply add a tablespoon of tapioca flour and work it through, then assess. If you can pick up pieces of the dough and roll them out (on a well floured bench) great. If not, add a little extra tapioca flour and repeat.
I find this wetter dough option with added tapioca to be the best of both worlds. It’s a dough you can roll out but is still plush and fluffy.

Tips for rolling and folding your gluten free steamed buns
As you can see from the photos, I am not an expert in folding steamed buns. However, these are my tips for rolling out this dough in particular.
First and foremost: this is gluten free, xanthan gum free dough. Treat it accordingly! It will not have the strength and elasticity of traditional dough.
Secondly, make sure you have plenty of tapioca flour for rolling out your buns. Tapioca flour is soft and cheap and the added bonus is that it will help add some chew and stretch.
First, divide the dough into 7 balls. They may look small, but the dough should puff up as it steams. Take the first ball and roll it into a circle (around 13cm/5 inches in diameter) on a well floured surface. Roll it as thin as you possibly can without it breaking. I added the filling while the bun sat on the bench, but people seem to fill them cupping the dough in their hand, which I suspect would make for a taller bun.
Next, wet the edges of the dough circle. This will help it adhere together.
I used a much more basic version of the classic pleat which you can see in this video.
Pick the first edge of dough up and bring it into the centre. Repeat with the next section in a pleating pattern. Continue until you have brought all of the edges into the centre, then pinch them shut. It’s not art but it is gluten free, so?
More gluten free recipes
- Gluten free dumpling wrappers without xanthan gum
- Gluten free wonton wrappers without xanthan gum
- Low FODMAP, gluten free Varenyky
- Gluten free buckwheat soba noodles
- Gluten free samosas from Intolerance Friendly Kitchen
Gluten free steamed buns
Ingredients
- 160 g (1 cup)* white rice flour
- 60 g (1/2 cup) tapioca flour
- 25 g white sugar
- 7.5 g psyllium husk powder
- 4 g baking powder optional, for extra lift
- 3.5 g (half sachet)* instant yeast
- 40 ml (2 tablespoons)* vegetable oil
- 125 ml (1/2 cup)* hot milk of choice (I used full cream regular milk)
- 125 ml (1/2 cup)* water
- Your choice of filling for the dough
Instructions
To make the bun dough:
- Whisk together the dry ingredients in a medium non-reactive (glass or plastic) bowl. Add the wet ingredients and whisk until a smooth batter forms. It will be thin but don’t panic! The psyllium husk powder will absorb the excess liquid as it proofs.
- Set aside for one hour or until the dough is puffy and able to be picked up and moulded into a ball.
- While you’re waiting, cut 7 square pieces of baking paper out. They need to be big enough to hold each bun without it spilling off the paper.
- Take a large pot and fill the base of it with water. Place a steel colander over the water, ensuring the water doesn’t touch the base. Have the lid ready to pop on top. Obviously, if you have a steamer basket or a preferred way of steaming, you’re welcome to use that. Set aside.
To roll and fold the buns:
- When the dough is proofed, see if you can pick it up with relative ease for rolling and shaping. If it is still too thin, add 1 tablespoon of tapioca flour and knead the dough until it becomes a soft dough consistency that you will be able to roll out.
- Divide the dough into 7 even sized balls. Roll the ball of dough in your hands until it is smooth, round and crack free. Be gentle and careful: the dough is more prone to breakage than traditional dough.
- Place the dough onto a dry, well floured surface and roll it out into a circle, about around 13cm or 5 inches in diameter. Place 1 1/2 -2 tablespoons of filling in the centre of the dough.
- Wet the edges of the circle of dough. Pick up one section of dough between your thumb and forefinger and pull it up over the filling. Repeat with the next section in a pleated pattern. Continue until all edges are folded up, enclosing the filling. Pinch the centre shut and place the bun on one piece of the prepared baking paper squares. Patch up any holes in the dough with a lightly moistened finger.
- Repeat with the remaining dough and filling.
To steam the buns:
- Place as many buns as will comfortably fit inside your steamer basket. I have to cook mine in three batches. Ensure they are not touching as they cook as they will stick together.
- Steam for 9-10 minutes or until they are slightly translucent but soft. If you are using a raw meat filling, you might have to cook them for longer.
- Repeat with the remaining buns and stuff with the filling of your choice before serving. Leftovers can be stored in an airtight container and frozen then defrosted.
Notes
- If you need a filling recipe, see my tofu and bok choi dumpling filling. This batch of bun dough uses half the filling, so you can either double the bun dough or eat the leftover filling as it is.
- Use whatever milk works best for you. This recipe should work with any regular or plant based milk.
- Read the notes in the post, please! I don’t write them for fun. Of particular note, the hydration section.
- If you want to freeze the buns, steam them and allow them to cool before freezing. Microwave them to reheat.
These were very easy to make from an ingredient and assembly perspective and are the closest to gluten steamed buns that we’ve tried. The dough rolled out, formed and cooked as we hoped. Thank you for sharing this recipe!
So glad you enjoyed them Glenda! 🙂
I made this recipe and I used soy milk and wow, so bloody amazing. So easy and so tasty.
I was able to make 8 buns from the recipe and used a pork filing and they were still very large. Will be making these again and again and filing the freezer with these as well. Thank you!
I’m so glad you enjoyed them Lisa! Thanks for the lovely feedback 🙂
The recipe seemed too easy and I had my suspicions that it would work. But holy smokes. These are delicious. The dough was so easy to make, rolled out well and they steamed beautifully. They are soft and tender and just the right amount of chewiness. I made with rice milk and it worked well.