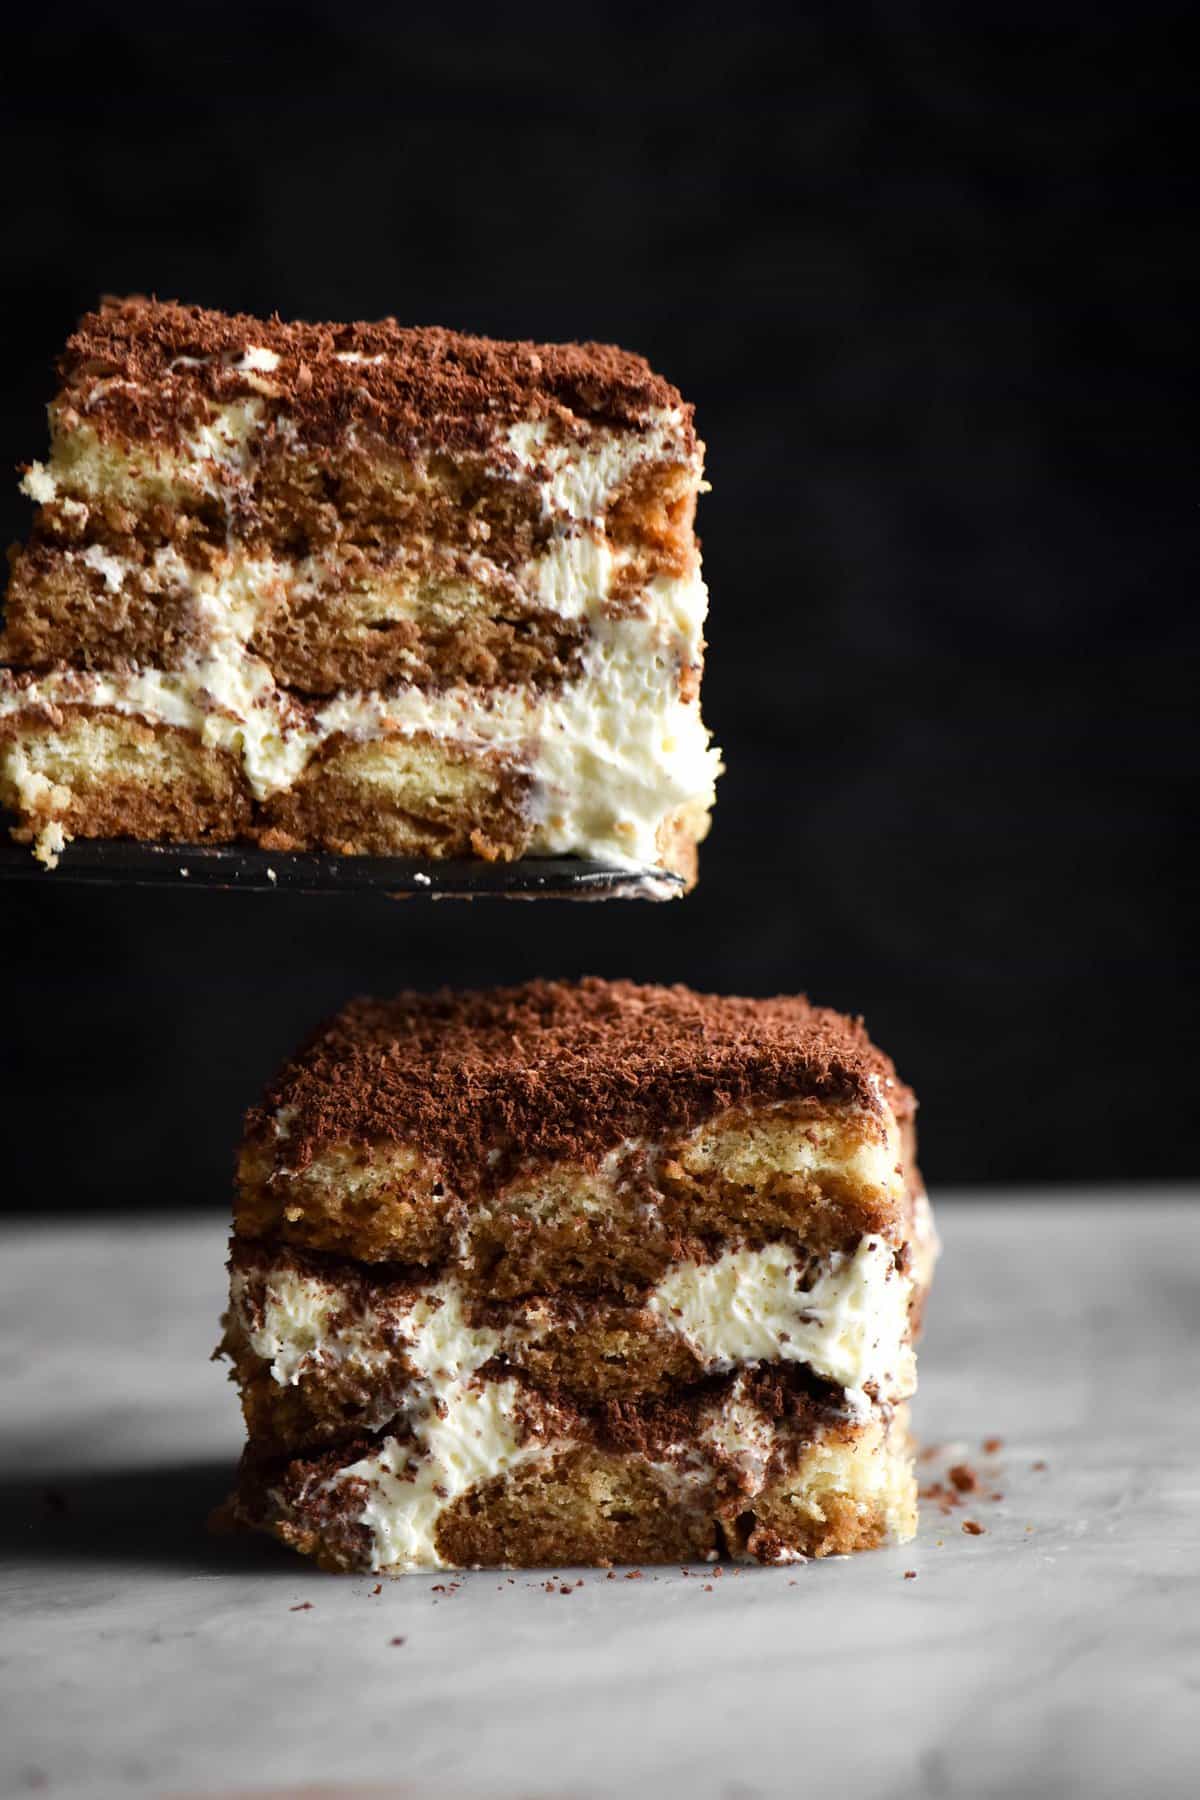
I have had a low FODMAP, gluten free tiramisu recipe on my website for a while now. A version of my gluten free savoiardi recipe is in that post, but I wanted to give it a bit more space. I have also made the recipe simpler and easier in that time. In this post, we’ll go through all the tips and tricks to ensure you get the best gluten free ladyfingers/savoiardi possible.
Gluten free savoiardi without xanthan gum
These gluten free savoiardi are an easy way to avoid spending some serious $$ on store bought savoiardi. These days, I have seen them pop up at a number of specialty stores in Australia. You can also buy them online. However, they are heinously expensive when you consider the basic ingredients required.
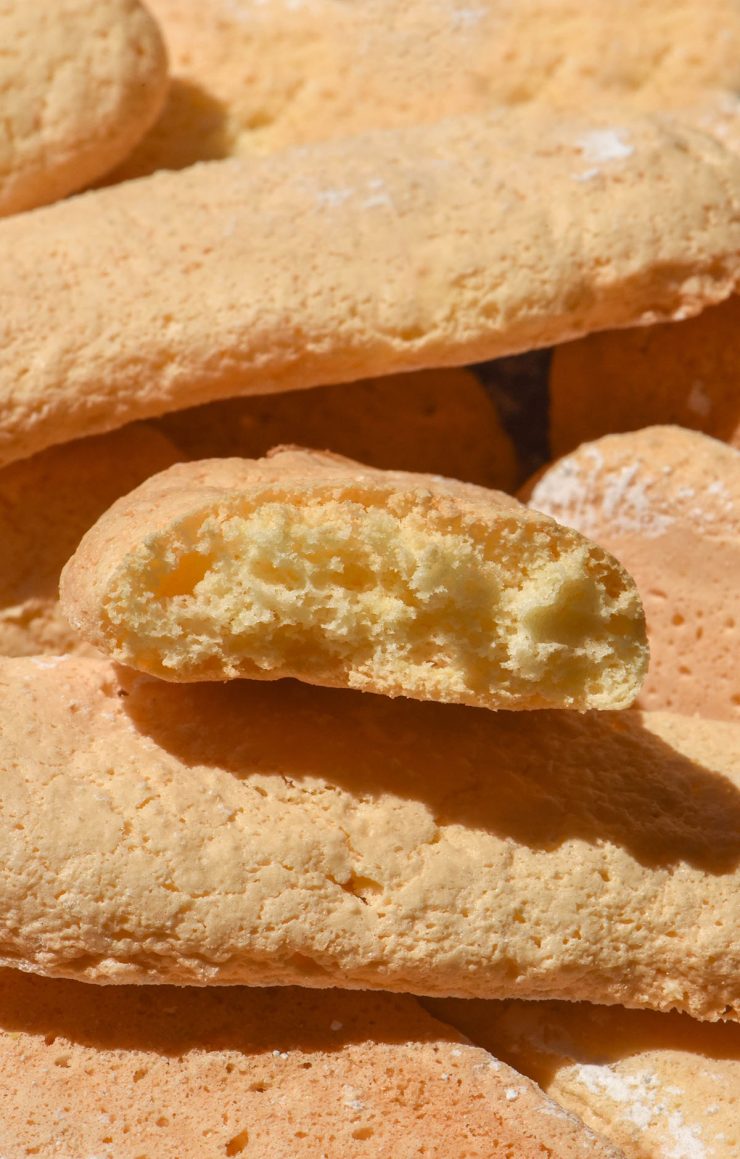
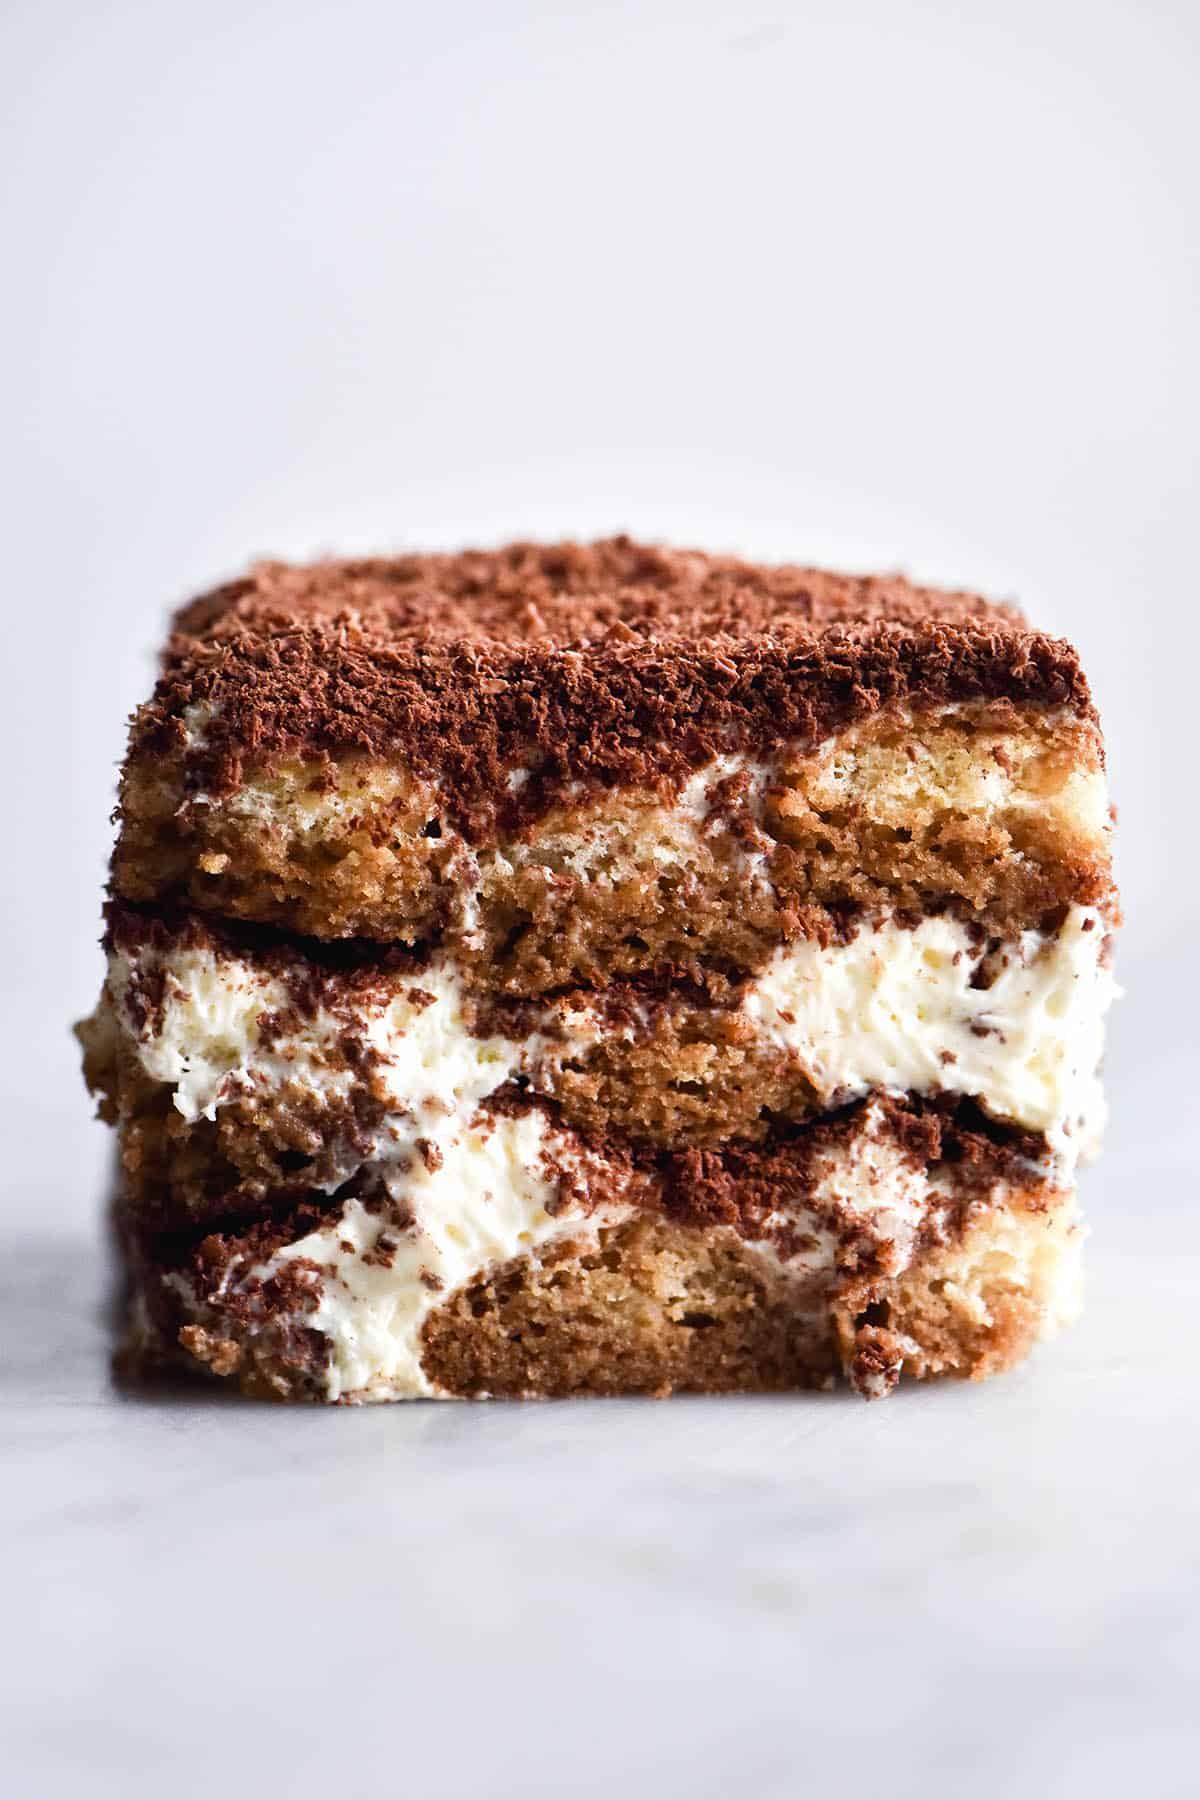
So! We’re making our own. These ladyfingers are made with rice flour for the flour component. They contain no starches, no xanthan gum and no nuts. While the recipe in my book was developed to ensure they were nice to eat as well as to use in Tiramisu, this recipe is more focused on Tiramisu. Not to say you can’t have them with coffee, but they are built to be dipped into liquid.
The only other ingredients required are eggs, sugar and some optional vanilla bean paste or extract for flavour. Lemon zest, although optional, adds an incredible layer of flavour that I highly recommend including. It really takes the savoiardi up a notch.
Simple, inexpensive and easy to whip up. Your next gluten free Tiramisu got a whole lot easier.
Tips for your gluten free ladyfingers or savoiardi
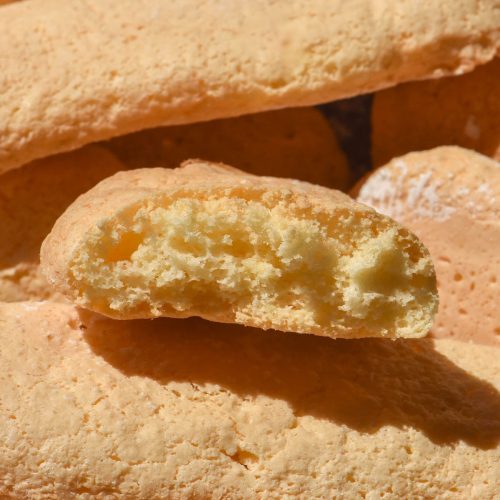
My most important tip when it comes to working with rice flour is to ensure that it is finely milled and fresh. I say this in every recipe with rice flour and I’ll repeat it here again: the boxed variety in Australian supermarkets is not suitable here. It’s super gritty and rough and will ruin your savoiardi – I promise.
Stale rice flour is another issue to contend with. It has a musty, floral flavour that can’t be disguised and is ruinous to the flavour of a baked good. Make sure you buy a fresh, finely milled rice flour for best results.
Making sure your bowls and beaters are super clean is key to getting a nice whipped egg white. The egg white is our source of volume and air bubbles so it’s important you get this right. If not, you risk getting a flat tray of savoiardi.
I recommend washing the bowl and beaters thoroughly with hot, soapy water and allowing them to air dry. For another layer of security, you can quickly swipe a slice lemon or kitchen towel with a bit of vinegar inside the bowl. This will ensure no grease is left behind.
Starting the process of whipping your egg whites before adding the sugar makes the process much quicker and more efficient.
Notes on the beaters
Quite honestly, I do feel you need at least a hand beater for this recipe. The egg whites need to be whipped to stiff peaks and this is hard to do by hand. Further than that, though; the egg yolks need beating too. Each ingredient needs to be ready quite close together to ensure they don’t start to deflate.
In an ideal world, you’d use both a stand mixer with the beater attachment and a hand beater. This is how I do it and I use the stand beater for the egg whites and a hand beater for the egg yolks. Of course, I am very lucky to have both.
If you only have a hand beater, I recommend doing the egg whites first. This is because they are so sensitive to fat globules – egg whites will not whip if there’s even a touch of fat in the bowl or on the beaters. Egg yolks contain fat, so you’d have to quickly and efficiently wash and dry your beaters before moving on.
So, egg whites and then egg yolks if you are using only one beater, whether that be a stand mixer or a hand beater.
Ingredient notes
I have no substitutes for anything in this recipe, unfortunately. White rice flour has been purposely chosen for its ability to become crispy while also having a neutral flavour. Other gluten free flours like sorghum can be bitter when used as the only flour in a recipe. White rice flour is lovely and bland.
Baking powder isn’t a traditional ingredient in savoiardi but it does help these gluten free ones puff up a little for a good inner crumb.
Of course, eggs are a must in savoiardi. Stiff peak egg whites provide most of the structure and air for your savoiardi. Whipping the egg yolks with sugar as well ensures every part of the egg has air incorporated for maximum lift.
I always use caster sugar/superfine sugar because it is easy to buy here in Australia. I daresay regular white sugar would be fine, you’ll just need to spend more time whipping it to dissolve the thicker crystals. You can also use a spice grinder or food processor to process white sugar and make finer crystals.
I have no sugar free substitutes and haven’t tested any sugar alternatives in this recipe.
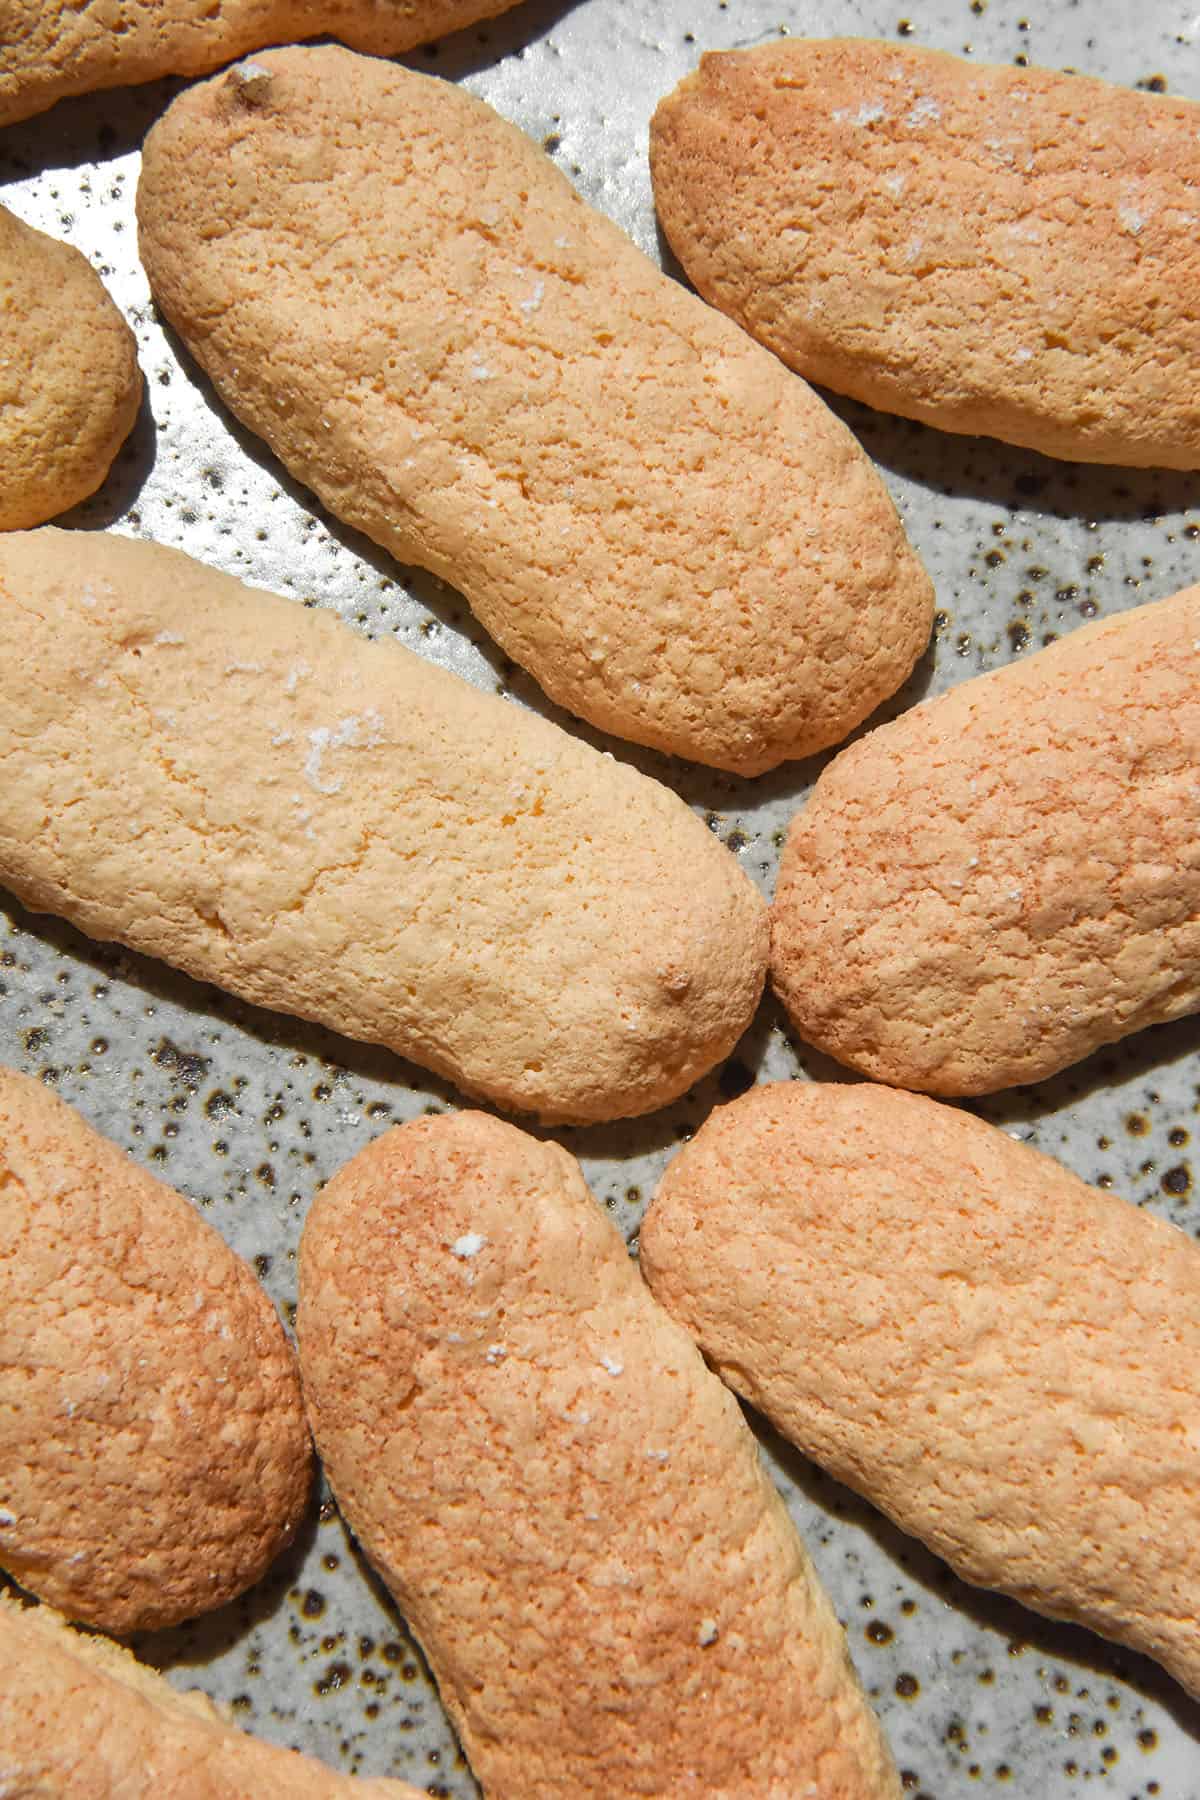
Icing sugar helps ensure your savoiardi don’t stick to the baking paper. It also has a positive effect on the look of your savoiardi once baked. They have nice crackly tops and browned surfaces.

More gluten free biscuit and cookie recipes without xanthan gum
- Gluten free banana cookies
- Gluten free brownie cookies (with a vegan version)
- Easy gluten free vegan tahini cookies
- Gluten free, oat free ANZAC biscuits
- Gluten free vegan choc chip cookies
Gluten free savoiardi
Ingredients
- 250 g fine white rice flour
- 5 g (1 teaspoon) gluten free baking powder
- 5 extra large eggs, separated (40-55g per egg, weighed out of shell)
- 220 g (1 cup)* caster sugar (use divided into 160g and 60g)
- 1 teaspoon vanilla bean paste (optional)
- 1 pinch fine salt
- 1/4 – 1/2 a lemon worth of zest (optional but delicious)
- Icing sugar, for sprinkling the trays and savoiardi
Instructions
- Make sure your bowls and beaters are scrupulously clean before you start. I like to wash mine in super hot soapy water then allow them to air dry. Before starting, I give them a tiny swipe with a piece of lemon or paper towel with a tiny bit of vinegar. This ensures there is no oily residue on the utensils that might stop the egg whites from whipping.
- Whisk together your flour and baking powder in a large bowl and set aside. Get your sieve out ready to go.
- Preheat your oven to 180C/356F and arrange your oven racks to bake two trays of savoiardi at a time. Line two large baking trays with baking paper. I like to spritz some water on the tray first so the paper doesn’t slide around when I pipe. Sprinkle the baking paper with a thin but thorough layer of icing sugar.
- Separate the eggs into two clean dry bowls. Transfer each clean egg white (meaning no hint of egg yolk has tainted it) to your whipping bowl before cracking the next egg. This ensures that no fat from the egg yolks gets into your egg whites.
- Place the egg whites in your stand beater bowl or a large mixing bowl. Using a stand mixer with the beater attachment or a hand beater, whip the egg whites for 2-3 minutes. Once they are fluffy, gradually add 160g sugar. Continue beating for 3-5 minutes or until stiff, shiny peaks form.
- If you are using one beater, wipe down the beating attachment. It doesn't need to be scrupulously clean as the egg yolks are not sensitive to fat like egg whites. Add the egg yolks and remaining 60g of caster sugar to your intended whipping bowl. Beat the mixture on a medium high speed for 3 minutes or so until it is light and creamy and looks slightly thickened.
- Add the egg yolk mixture, vanilla bean paste, pinch of salt and lemon zest to the large egg white bowl. Sieve in the flour and gently fold the ingredients together until the flour is just incorporated. Some really small bits of flour are fine, but gently separate any large chunks. You should notice the mixture become more sticky when the majority of the flour is incorporated.
- Place your piping bag in a long, tall glass. Add about half the mixture to the bag, leaving plenty of room so the bag doesn't overflow. Twist the open top to seal. Pipe the mixture onto the lined baking trays, making roughly 10cm long biscuits. Leave a bit of room for spread.
- Sprinkle the savoiardi with a bit more icing sugar to finish.
- Place two trays of savoiardi in the oven for 7 minutes. Rotate the trays after this time so that they have equal time in the top and bottom of the oven. Continue to bake for 5-7 minutes or until lightly golden and thoroughly cooked through.
- Remove the baked savoiardi from the oven and slide the baking paper off the trays. Repeat the process with the remaining batter. Keep in mind that the batter deflates a little as it sits, so your second round of savoiardi might be a bit flatter and more prone to spreading. Leave extra room between them to account for this.
- Allow the savoiardi to cool completely before using them or placing them in an airtight container. Keeping them in an airtight container is important to ensure they remain crisp. Overly moist savoiardi will easily become too soggy and break up as you dip them in the coffee liquid for Tiramisu.
Notes
- The absorbency of gluten free flour varies hugely between brand to brand, country to country. If you find your savoiardi are thin or spreading, add a bit more rice flour. Your flour could be less absorbent than mine.
- Similarly, if the mixture is looking very dry, it is likely that the flour is more absorbent than the variety I used. Slightly dry savoiardi aren’t a huge issue given that they are soaked in coffee prior to use, but it is something to keep in mind for next time.
- You can make savoiardi ahead of time and store them in an airtight container. I would recommend around a week at most so they don’t stale and ruin your Tiramisu.
No Comments