
My buckwheat bread recipe has been one of my more popular gluten free bread recipes for a while now. Given that I’m back into gluten free sourdough baking, I thought it was about time I shared this buckwheat sourdough bread recipe.
This recipe is gluten free, nut free, xanthan gum free, dairy free, egg free and vegan. I have tested a number of proofing options and sourdough quantities. This means that you can adjust the recipe according to your preferences and schedule for a loaf that works for you!
Ingredient notes for your buckwheat sourdough
- This recipe uses light buckwheat flour. There is a recipe scheduled for my paid Substack community for a gluten free dark buckwheat sourdough loaf.
- Tapioca flour/starch adds a bit of lightness and elasticity to the dough. You can experiment with using a different starch but I haven’t tested it myself. I have tested cassava flour in the original recipe but cassava can vary wildly with hydration. It is much thirstier than tapioca flour, so you may need to play around with the hydration.
- Psyllium husk powder provides elasticity, strength and liquid absorbing capacity for this loaf. There is no substitute in this recipe and I have not tested any replacements.
- I have not tested a regular, non-gluten free sourdough starter this recipe. If you don’t have a starter, you can find my guide to getting a gluten free sourdough starter up and running here.
- If you don’t have a sourdough starter, you can use my gluten free buckwheat bread recipe with yeast. If you can’t have yeast, use my gluten free buckwheat bread recipe without yeast.
Tips for your buckwheat sourdough bread
My first tip is always the same: you must make this bread in a Steel Pullman pan – 10.16 x 10.16 x 22.86 cm; 612.35 Grams or 9 x 4 x 4 inches. I use a USA Pan Pullman pan in size small for all my loaf recipes.
Gluten free bread doesn’t have any strength of its own, unlike regular bread. Because of this, it will proof outwards or sideways if given the chance. You must use a tall, steel sided bread pan here.
Hydration is a moving target, particularly with gluten free flours. What works for you 10 times might not work quite as well on the 11th bake. Such is the nature of the beast!
Expect for your bread to take longer to proof in winter and less time in summer. Yeast (commercial or wild) requires a warm, moist environment to thrive and proof the bread.
I don’t recommend using buckwheat flour in your sourdough starter. I have tested it and for whatever reason, it sent my starter into overdrive (and not in good way). It soured a lot quicker and was more prone to mould.
When making bread, you must ensure that it is fully covered in an airtight manner while it proofs. When the skin of the dough has too much contact with air, it dries out and hardens. Because the skin is hardened, the loaf cannot proof upwards. The result, in this case, will be a short, dense and possibly overly soured bread.

Proofing options
As you’ll likely know by now, sourdough is not a process that can always be strictly controlled in the home environment. How fast a loaf proof depends on the season, the humidity, where you live, your flours, your starter – the list goes on. So, when we’re walking about proofing options, these are just the likely outcomes rather than guarantees. Such is the nature of sourdough baking!
I have tested two proofing options for this loaf to suit different lifestyles and preferences.
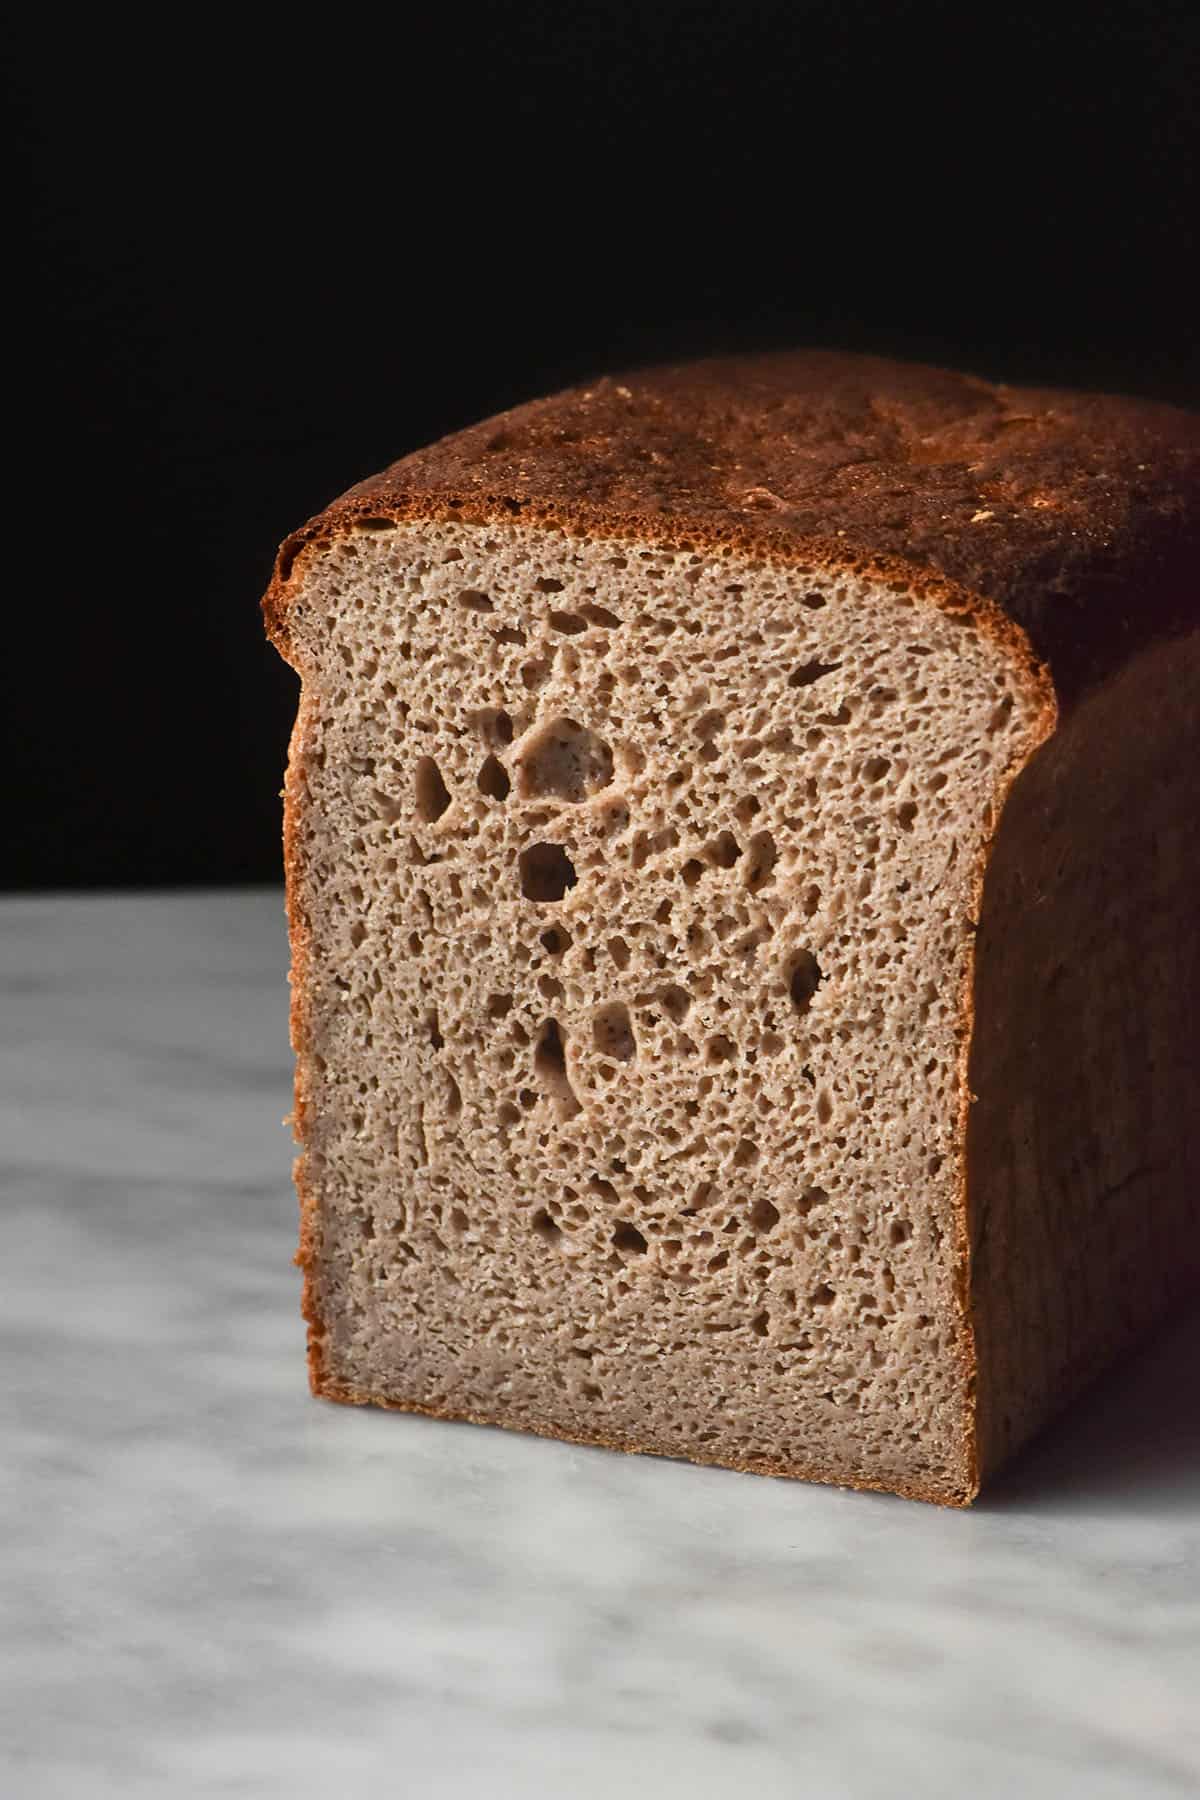
- Use 100g sourdough starter and proof the bread for 10-12+ hours (weather dependent). Bread will proof faster in warm, humid climates and take a lot longer in cold dry climates. I am very lucky these days that I have a Brod and Taylor proofer as it makes things more efficient and predictable (particularly in winter). I proofed the 100g sourdough loaf with 700g water for 11 hours at 27C/80F. Next time I would proof it for about 10 hours at that temperature as the top of the bread started to sink a little bit (slightly past it’s peak).
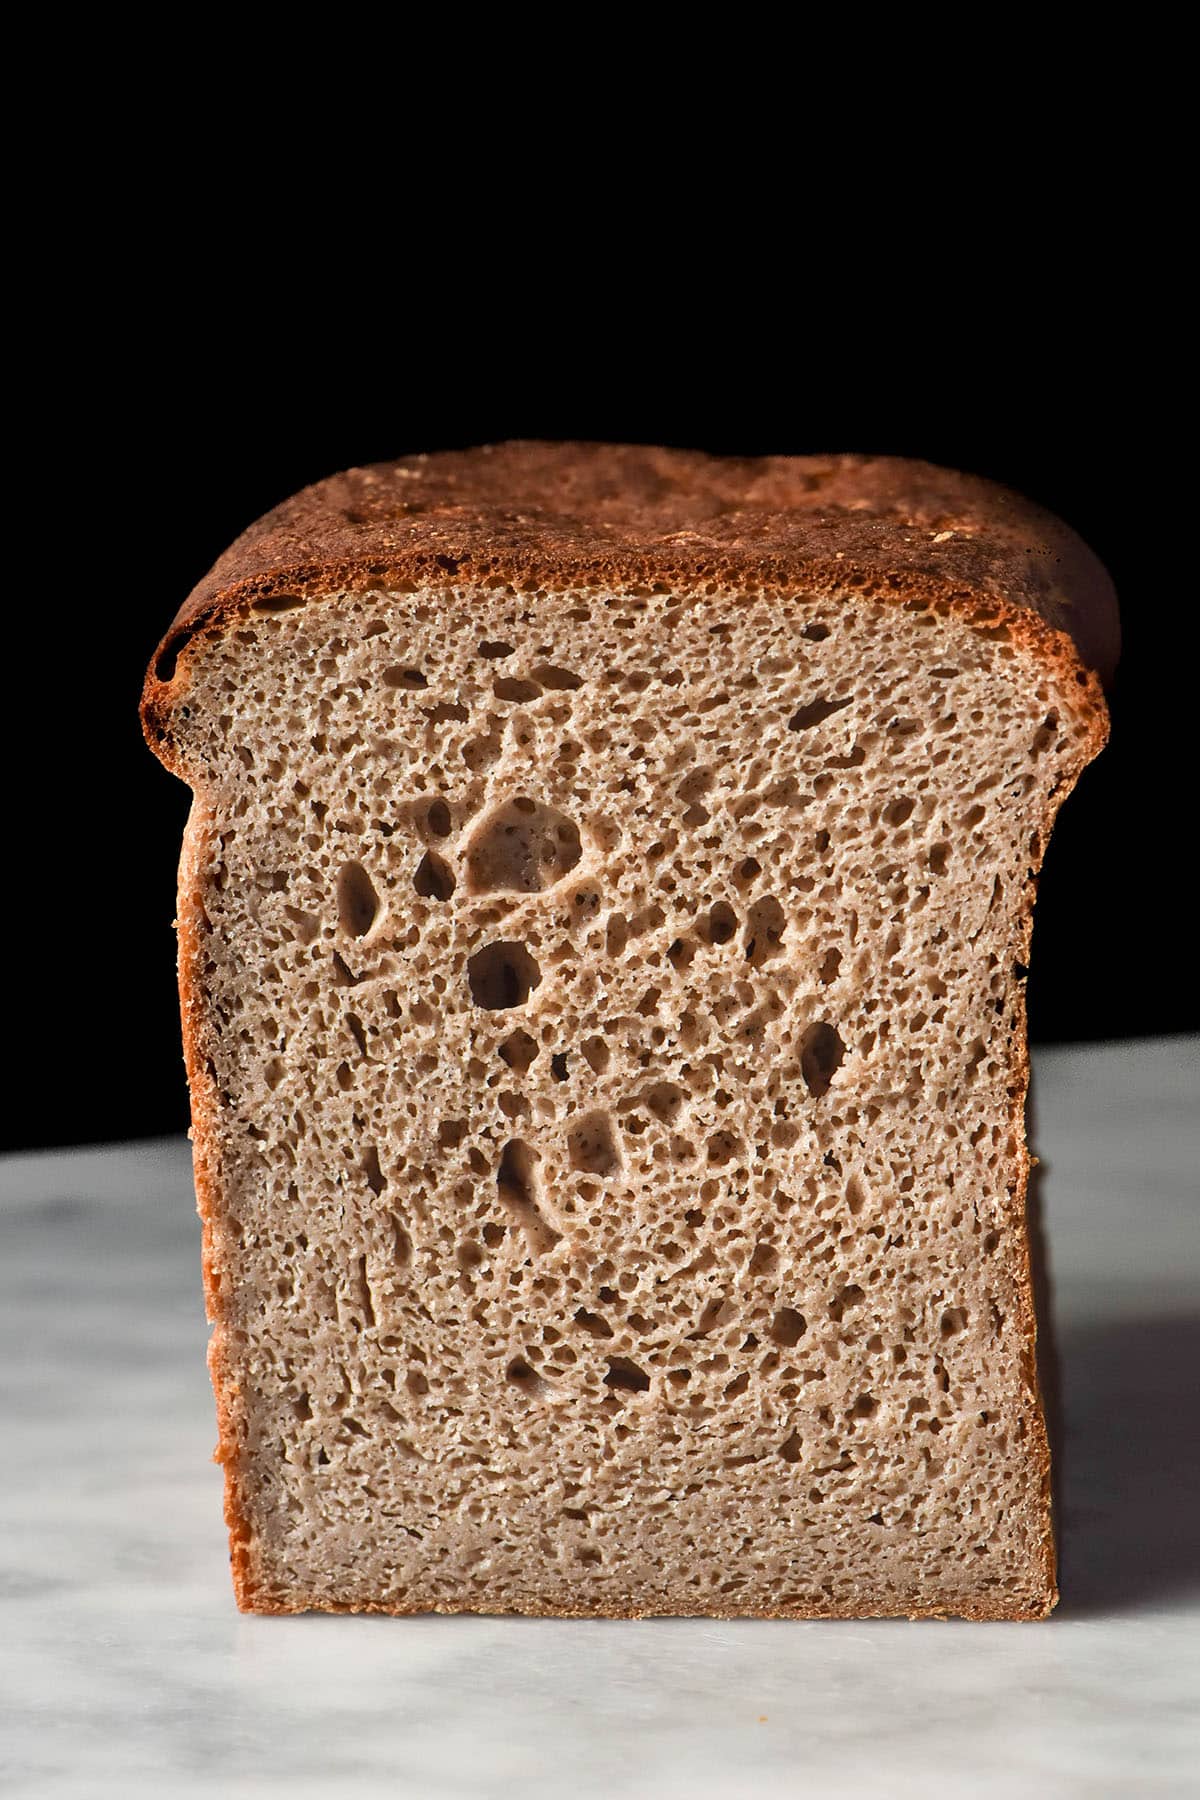
- Use 200g sourdough starter and proof the bread for 6-7 hours at 28C/82.5. This is obviously a good option if you want to proof and bake the bread on the same day. Keep in mind that you need to factor in feeding the starter and allowing it to proof before mixing up the buckwheat sourdough bread.
Adjusting the sourness of your loaf
Something that I find fascinating about sourdough (which actually makes sense) is that the more sourdough starter you add, the less sour your loaf will be.
Using more sourdough starter generally means your loaf will proof a lot more quickly than if you use a smaller volume. This means that your dough doesn’t have the chance to become as sour as it would during a long fermentation. The sour flavour is a result of acids that form as the flour is fermented, so a shorter fermentation time equals less acidity and sourness.
If you love a sour loaf, I’d recommend the longer proofing time with 100g sourdough starter. If that sourness is still not enough for you, you can incorporate a refrigerator proof before or after the bench proof. Cold proofing develops the acidity of the loaf while slowing the actual proofing. As such, your loaf continues to sour without over-proofing.
If you prefer a much milder loaf, I recommend using 200g sourdough starter and a shorter proofing time. You might be able to experiment with adding 250g or more, but I haven’t tested it myself.
Hydration notes
As we have discussed, my ideal hydration might not be exactly right for you. Always be open to adjusting the hydration in accordance with the conditions you’re working in.
For me, I found the ideal hydration for this loaf to be just slightly less than my yeasted version. That makes sense because sourdough is a liquid ingredient.
In the overnight loaf I made with 100g sourdough starter, I used 700g water. This made for a lovely lofty loaf but there was a small gummy layer at the bread of the bread. Next time, I’d drop the hydration back to 650-675g.
In the loaf I made with 200g sourdough starter, I used 650g water. This was the perfect amount for that loaf and I had no gummy layer at the base.
Troubleshooting
- If your loaf is short and dense: is your starter new? Sourdough starter takes a while to start producing a good proof. Did you add too little water for your flours? A high hydration = a better proof and a more open crumb (to an extent). Did you proof your loaf for long enough? Remember, this will take a lot longer in a cold kitchen or climate.
- If your loaf is gummy or wet inside: this is a relatively high hydration and gluten free bread does often feel quite moist. Did you slice it before it cooled? It’s important to allow the crumb to set after baking as the water needs time to evaporate. Consider adding 50-100g less water next time to see where that places you.
- If your bread spilled over the tin, drop the hydration back next time. A high or overly hydrated bread proofs more quickly, particularly in summer or humid climates.
- If your bread is too sour, use more sourdough starter and proof on the same day. If your bread is not sour enough, use less sourdough starter and proof overnight and/or in the fridge.
- If the top of your loaf sunk, you have over-proofed it a little or your hydration is a bit high. Higher hydration bread proofs faster, so these go hand in hand. Drop the liquid back a little next time and bake as soon as the loaf is doming over the tin.
More gluten free sourdough recipes
- Gluten free sourdough bagels
- Gluten free sourdough bread
- Gluten free sourdough starter crackers
- Gluten free sourdough pizza bases
- Gluten free sourdough brownie cookies
Buckwheat sourdough loaf (gluten free)
Equipment
- Steel Pullman pan – 10.16 x 10.16 x 22.86 cm; 612.35 Grams or 9 x 4 x 4 inches
Ingredients
- 100-200 g gluten free sourdough starter see notes
- 500 g light buckwheat flour see notes
- 100 g tapioca flour/starch
- 12 g fine salt
- 20 g psyllium husk powder
- 20 ml (4 teaspoons) neutral oil of choice
- 20 ml (4 teaspoons) maple syrup or sweetener of choice
- 600-700 g water see notes
Instructions
- Make sure your sourdough starter is fed and on a rise before you begin.
- Grease and line your steel Pullman loaf pan. Line the tin so that one strip of baking paper covers the thin sides of the tin and a larger strip covers the thick sides. Leave extra baking paper overhang to act as handles to lift the bread out later. I like to secure the baking paper with bulldog clips to ensure it won’t move around when I pour the dough in later.
- Whisk the dry ingredients together in a large mixing bowl. Add the wet ingredients to the dry ingredients and whisk thoroughly to combine. The mixture should thicken quite quickly, so you may need to switch to a silicone spatula or your hands to mix the dough and ensure there are no flour lumps.
- The dough should be stickier and thicker than a pancake batter but thinner than a dough. To move it around, you should need to use a silicone spatula. If it is drier than this, add 50g more water and assess the consistency. A dry loaf won’t reach a lovely lofty height, so we want to ensure the right consistency now.
- Pour the dough (or at least, use a spatula to encourage the dough) into the lined Pullman pan. Use a wet hand to flatten the top of the dough, then cover the dough in an airtight manner. I use an inverted plastic produce bag that sits snugly around the sides of the Pullman pan but gives the bread plenty of space to proof upwards.
- Proof anywhere from 6-12+ hours, depending on the heat in your kitchen and how much sourdough starter you use (see notes).
- The bread is proofed when it domes nicely over the top of the Pullman pan.
- About 30 minutes before the dough reaches a full proof, preheat the oven to 220C/428F.
- When the bread is ready to bake, remove the plastic bag and bulldog clips if you have used them. Place the dough in the oven. I like to add 3-4 ice cubes to the bottom of the oven when I add the loaf to add steam and encourage good oven spring.
- You can turn the oven down to 200C/400F for a lighter crust, or keep it as is for a darker crust. Bake for 40-45 minutes until golden brown.
- Remove the loaf from the oven and carefully. Use the baking paper handles to gently lift the bread onto a wire cooling rack. Peel away the baking paper.
- Allow the loaf to cool completely before slicing. You can flip the loaf from side to side and upside down as it cools to prevent the crumb from being crushed as the bread sets. I flip it every 10 minutes or so, but this is totally optional.
- The loaf keeps well on the bench for a day or two, but I like to slice it and keep it in the fridge or freezer. I use it for toast straight from frozen. If your loaf has a little mushroom top, it can be easier to flip it upside down to slice it.
Notes
- This recipe and the hydration are based on using light buckwheat flour which is the most common variety in Australia where I live. Your perfect hydration might be different to mine so you need to use your intuition. See the hydration notes in the body of the post.
- I have a recipe for dark buckwheat flour sourdough coming up on my paid Substack community. I have only tested Bob’s Red Mill dark buckwheat flour in that recipe.
- For a same day proof and bake, use 200g sourdough starter and proof for 6-8 hours (season dependent). This results in less sour loaf.
- For an overnight proof, use 100g sourdough starter and proof for 10-12+ hours (season dependent). This results in a more sour loaf.
- Proofing changes dramatically based on the weather. Sourdough takes much longer to proof in winter because yeast needs heat and humidity to thrive and grow.
- See notes in the body of the post for tips, ingredient notes, hydration notes and more.
This recipe is excellent! I baked regular sourdough for many years and even wrote two books on baking, but we have gone gluten-free since the beginning of the year for our son. And this was my favorite gluten-free sourdough recipe I’ve tried so far! It reminds me of my regular sourdough whole wheat breads I used to make. The rise is gorgeous and it expands well in the oven. The crumb is lovely and slices thin and clean for toast and sandwiches. Flavor is wonderful! My picky 3 year old begs for multiple slices and she’s been very critical of my gluten-free bakes. I love it toasted especially!
I am thrilled to hear you enjoyed it Jenny! Such a lovely review, you have made my day! <3