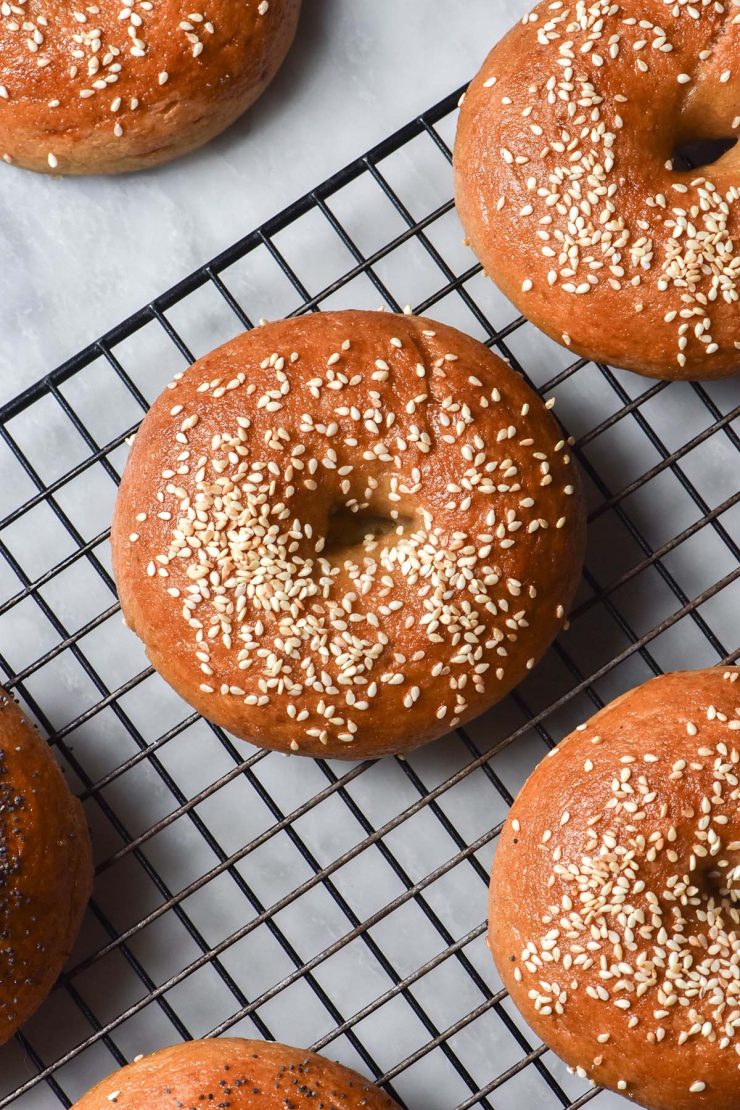
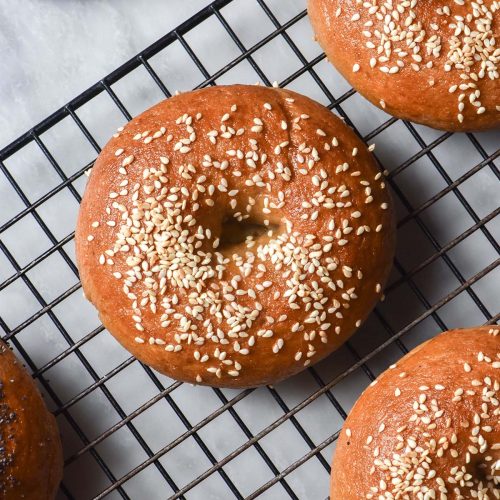
It has been a while but I am back with some new gluten free sourdough recipes. First on the menu? These delicious gluten free sourdough bagels. They are gluten free (obviously) xanthan gum free, nut free and dairy free. They are easily egg free/vegan with an alternate egg wash as they don’t use any animal products in the dough.
Gluten free sourdough bagels
These sourdough bagels are the baby of my gluten free bagel recipe (which uses yeast) and my gluten free sourdough starter. They use a scalded flour mix which helps the sourdough proof beautifully and aids in a chewy bagel texture.
The bagels have a sliding scale of sourdough which you can play around with according to tastes and the climate you’re baking in (more on this later).
How much sourdough starter should I add?
Sourdough is a bit of an art and what works well for me might not work for you. Yeasted products need a warm, moist environment to grow and thrive. If you live in a humid and hot climate, this is easy enough. In the depths of a cold, dry winter, though, it is a lot harder.
As a general rule of thumb, you can add a bit less sourdough starter in a hot and humid climate. You can also add less sourdough starter when you use more starches in gluten free baking. Starches are an easy food for the sourdough which enables it to grow more rapidly than a wholegrain loaf.
I started this recipe with 50g sourdough starter – just over 10% of the flour weight (for someone who is terrible at math). This batch took about 7 hours in my new bread proofer which was set to 32C/90F. I don’t think it is actually 32C (it feels a lot cooler than that) but I can’t deny that the bread proofer has come in handy regardless. At the time of developing this recipe, it is newly spring in Melbourne but the kitchen and air are still pretty cold and dry.
The 50g batch didn’t taste like sourdough at all – just like a regular, nondescript bagel. If you don’t like ‘sour’ flavour then you can experiment with lower starter volumes like this, but you will have to be patient with proofing times. They also didn’t float in the water during the boiling stage.
Anyway, back to sourdough. My next batch used 100g sourdough starter. These took 7 hours to proof at 30C/86F and had a more prominent sour flavour. I also tested the 100g sourdough dough with an overnight 12 hour proof at 26C/79F and they worked nicely too.

Quick recap
- I recommend 75-100g sourdough starter as an ideal ratio here.
- However, you can experiment with using a smaller volume of sourdough starter in a hot and humid climate or kitchen.
- I recommend adding higher volumes (ie 100g) of sourdough starter in cold and dry climates.
- If you’d like a non-sour bagel in a cold and dry climate, you will need to be very patient when proofing the bagels. You’ll also need a consistently warm and humid spot (like a bread proofer) to ensure they get enough heat and moisture to proof nicely.
- I will say that I didn’t find the sourness overbearing in any of my tests.
- If you like a sour bagel in a hot and humid climate, you can proof the bagels for a lot less time (just until they are puffy and nicely proofed) or proof them in the fridge. A cold proof slows down the fermentation and develops flavour, so this will make a nice sourdough bagel.
- Keep in mind, though, that your bagels will need to be covered in an airtight fashion to proof in the fridge. Air getting into your bagels will dry out and harden the bagel crust. Once the crust hardens, the bagel will struggle to proof beyond the stiff confines of the hardened crust. This is why proofing baked goods always need to be thoroughly covered when proofing.
A note on boiling your gluten free sourdough bagels
I feel this needs to be included here because how much sourdough starter you add may impact the boiling process. In my test where I only added 50g sourdough starter, the first few bagels sank when boiled and never surfaced. They were still nice bagels with a good crumb, so don’t throw the whole batch away if that happens to you.
Generally speaking, sourdough bagels that sink do not have enough air in them to keep them afloat. This means that you need to proof the bagels for longer. If you have the time, you can boil a bagel or two and continue to bake them even if they don’t float. The remainder of the bagels can then continue to proof and you can try again a bit later. With that said, if you don’t have the time then they will hopefully still make a nice bagel.
A caveat to this, though. You cannot be boiling freshly shaped bagels and hope for a good result. This is not a license to be lazy with your proofing and then wonder why your gluten free bagels aren’t good. I boiled the 50g sourdough batch of bagels after about 6-7 hours in a bread proofer set to 32C/90F. They had still had a decent amount of proofing time and they felt a little bit airy (although, in hindsight, not airy enough).
In an ideal world, your bagels should float when you boil them. This is what we are aiming for. All I am saying is that you don’t need to throw away a batch of proofed bagels because they are sinking when you boil them.
How do I know when my bagel is proofed?
In my experience, you know a proofed bagel when you pick it up. It should feel airy, puffy and delicate to pick up. When you pick up a proofed sourdough bagel, you should know instantly.
Of course, this is easy for me to say having made this recipe a number of times (and baking for a living). So, here are a few more things to look out for on top of an airy feeling. Keep in mind that these are indications of the yeast proofing the dough, not necessarily a perfect proof or a dough that is 100% ready for the oven. I do find these bagels hard to over-proof, so if in doubt I recommend allowing them to proof a little longer.
- The central hole being a lot smaller than when you shaped the bagels (taking a photo can help you judge this)
- The bagels touching each other when they weren’t before (again, a photo can be helpful here)
- Condensation in your airtight proofing tin
- Cracks on the surface or sides of a bagel that was nice and smooth before proofing
- If it comes down to it, some people (using gluten based dough, to be fair) test a bagel in cold water to see if it floats. I haven’t tried this myself, but it might be an option if you aren’t sure about your dough
Ingredient notes
- I have been testing various ratios of sourdough as opposed to different flours. As such, I have not tested any other flour combinations so far. With that said, the yeasted version of this recipe is very amenable to different flour combinations and I can’t imagine this version would be different.
- You can play around with using 40-60ml oil in this dough. In my earlier tests I was using 20ml, but I found the crust hardened in the oven. 60ml produces a lovely softer crust, but depending on the proof your bagel innards might look a smidge oily. I couldn’t taste it, but nonetheless. Play around and see what works for you.
- To use less oil and still have a lovely brown bagel, you could experiment with using a pinch of baking soda in the water bath,
- I do find that sourdough breads tend to require less water than yeasted breads. I could be wrong, but that’s the feeling I get when I work with sourdough. If you intend to do any flour switches, be sure to add the water conservatively to start. It can easily become over-hydrated and then all your ratios are off.
- I also find that sourdough recipes need more salt than yeasted. This is why the salt weight is higher than in my yeasted bagel recipe.
- I have switched to using psyllium husk that I grind myself. I find commercial powder too fine and prone to clumping. The flakes tend to leave little flecks in the bread and crust which I don’t love, hence my switch to powder.
Hydration notes
As always, hydration is a moving target when it comes to gluten free baking. What works for me might not work for you.
How absorbent your flours are, the climate you live in, your psyllium husk and the consistency of your sourdough starter (among other things) will impact how much liquid you need to add.
This dough needs to be shapeable on the bench, so there is a limit to how much water you can add. The first time you make the bagels, I recommend adding the water conservatively and to suit your dough. You might need far less than I did or you might need more. Be open to adjusting the recipe according to your dough consistency.
Your ideal dough holds together in a ball but is very soft and juicy. I find that when I have the hydration perfectly honed in, I can shape the bagels without using any flour on the bench. It is also easy to bring the ends of the dough together because it is sticky and moist enough for that.
All yeast needs moisture and humidity (along with heat) to proof. A dough that is dry and stiff or that cracks when you shape the bagels is not hydrated enough to proof well. If you are on the precipice of too dry or too moist, go for too moist. You can always correct the dough with flour on the bench when rolling it out, but a dough that is too dry will never proof a nice open crumb.
More gluten free sourdough recipes
- Gluten free sourdough bread
- Gluten free sourdough crackers
- Gluten free sourdough brownie cookies
- Gluten free sourdough pizza bases
- Gluten free sourdough ‘white’ bread
Gluten free sourdough bagels
Ingredients
For the bagel dough:
- 220 g (1 1/2 cups)* fine white rice flour
- 80 g (1/2 cup)* light sorghum flour
- 150 g boiling water
- 120 g (1 cup)* tapioca flour/starch
- 15 g psyllium husk powder
- 12 g salt
- 20 ml (1 tablespoon)* maple syrup or honey
- 60 ml (3 tablespoons)* vegetable or plain oil
- 100 g sourdough starter (see notes)
- 180-250 ml (3/4 – 1 cup)* water
To finish:
- 1 tablespoon molasses for water bath you can use whatever sort of water bath you like
- Egg wash to wash the bagels use a vegan alternative to keep these egg free/vegan
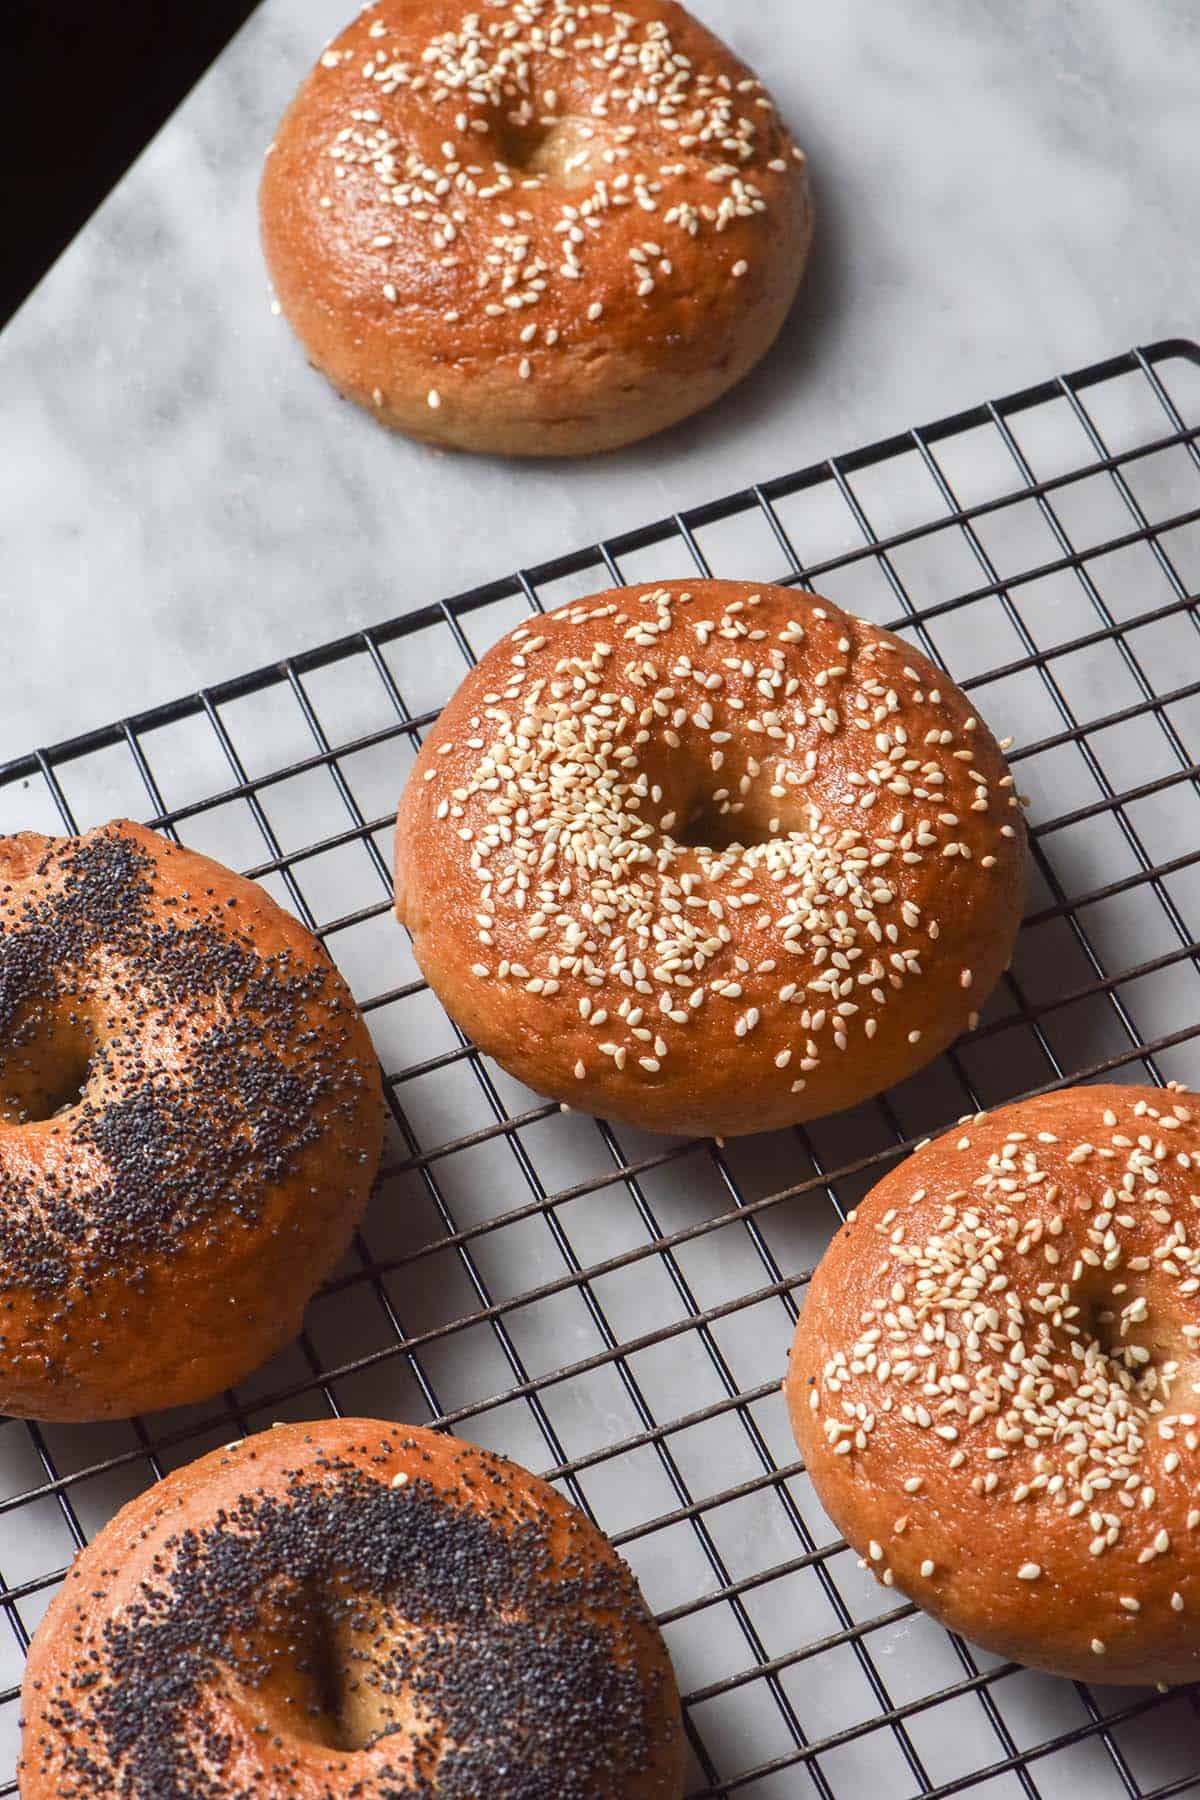
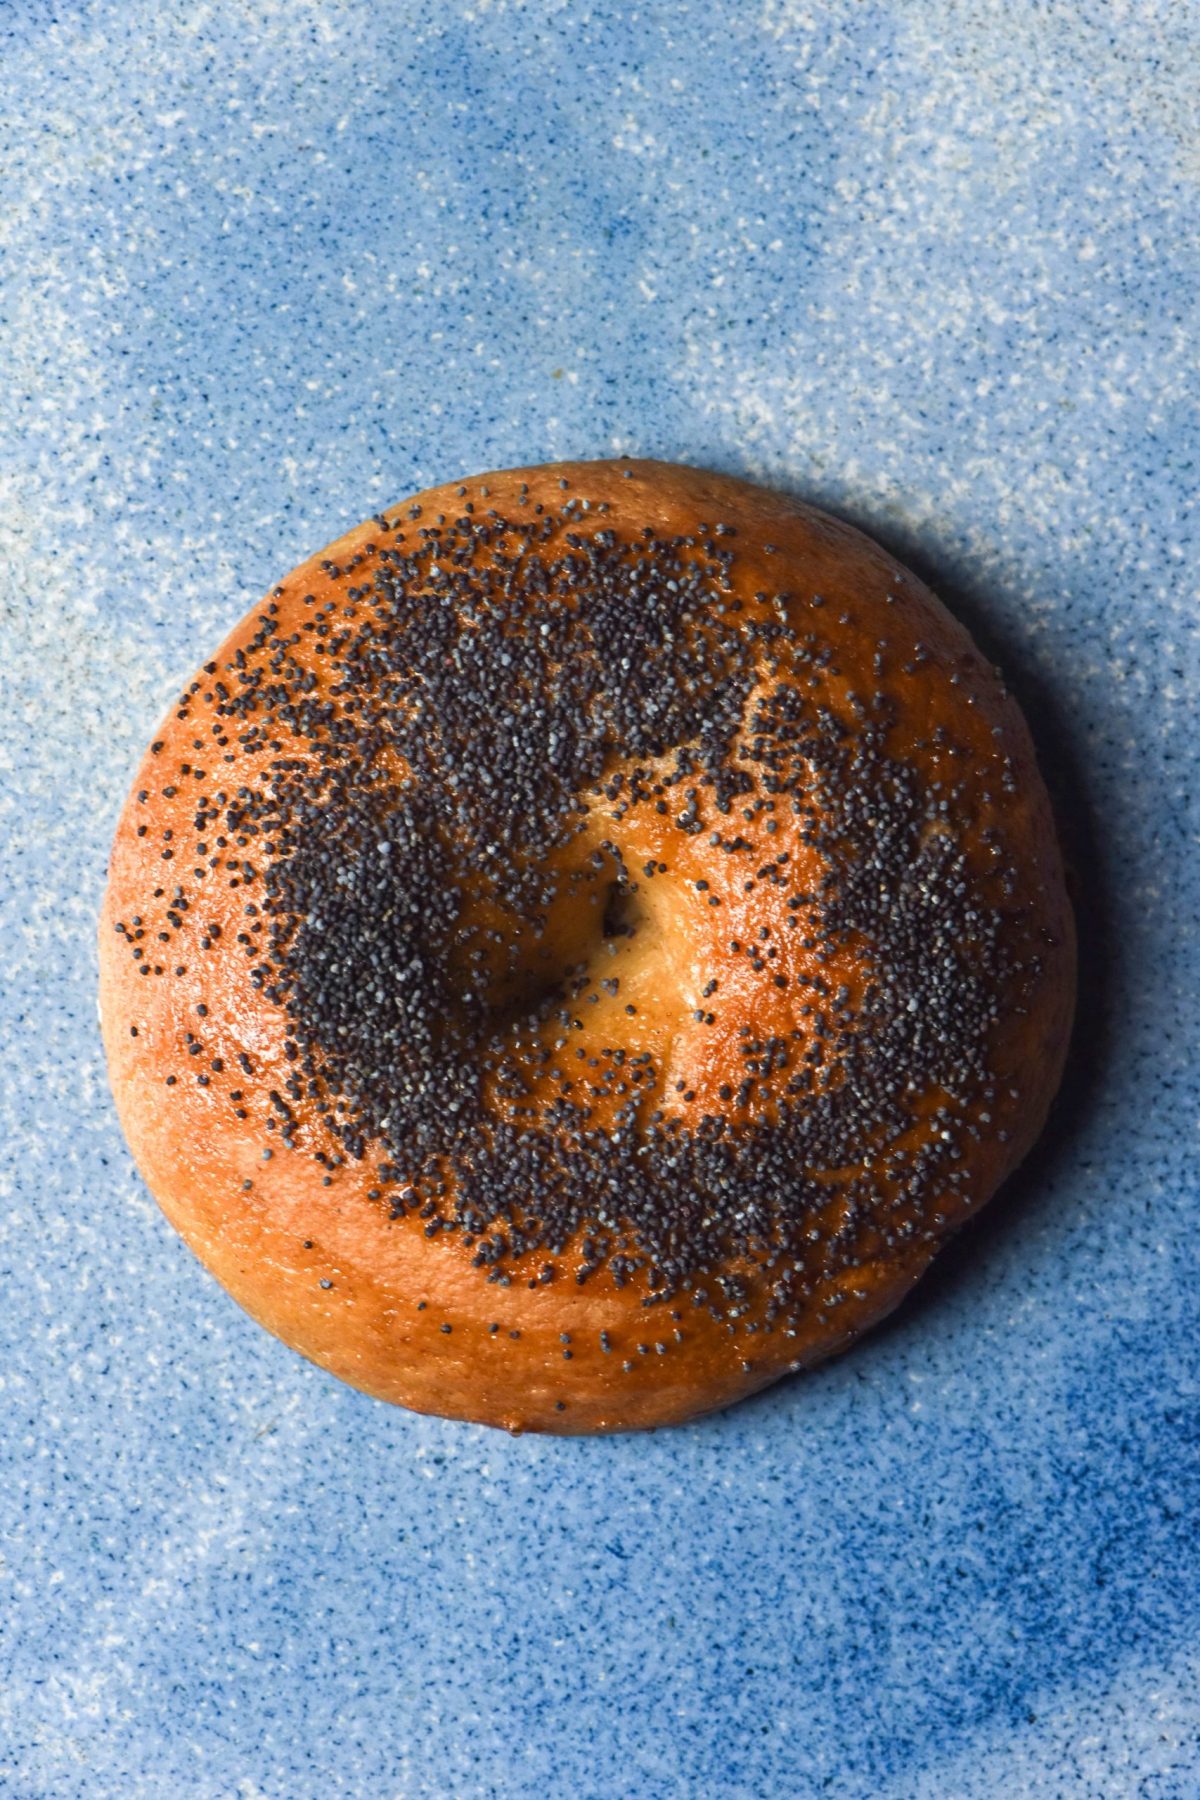
- Everything bagel seasoning or your topping of choice see body of post or notes section for a link to a FODMAP friendly everything bagel recipe
Instructions
To make the bagels dough:
- Weigh the sorghum flour and rice flour in a medium sized mixing bowl and whisk to combine. Measure 100g of that flour into another small bowl and set the first bowl aside. This small bowl will form our scald.
- Pour 150g of boiling water evenly over the flour in the smaller bowl to make the scald. Have a spoon at the ready and vigorously mix until a jelly like dough forms. It shouldn’t take more than 5-10 seconds. Set aside to cool a little.
- Add the tapioca flour, psyllium husk powder and salt to the larger, original bowl of flour. Whisk and set aside.
- Pour the contents of both bowls into your kitchen mixer with the paddle attachment.
- Process the dough on a low speed for 2-3 minutes until the scald has broken up completely in the dough.
- Add the maple syrup, oil and sourdough starter. Add the water gradually to suit your dough. It should be super moist and juicy but you should be able to pick it up by hand. A hydrated dough is a dough that proofs well, so take your time and add as much water as possible within the threshold without the dough becoming too wet to handle.
- Cover the dough and place into the fridge for 30 minutes to firm up.
To shape and proof the bagels:
- Take the dough out of the fridge and divide it into six balls. Depending on how hydrated the dough is, you may need to lightly flour the bench (I use tapioca flour) or you may not.
- To form bagels, you can either roll out each piece of dough into a log and then brings the ends firmly together (use water on the ends to ensure they seal together) or you can form bagel sized smooth disks of dough and use an oiled finger to create the bagel hole. Visually, I prefer the first option, but the second option is a bit easier and more foolproof.
- I like to cut out squares of baking paper for each shaped bagel to rest on. This makes it easy to lift them up later. Once you have shaped all the bagels, place them in a baking tin with tall sides and cover the tin with cling wrap. An airtight environment is crucial for a good proof on the bagels – particularly a long proof as with sourdough.
- Place the bagels in a warm spot for 6-12 hours. See notes on what I have tested in the body of the post and in the recipe notes.
- The bagels are ready when they are puffy and feel super light and airy. I found it difficult to overproof these bagels (and I used a proofing box which is a warm and humid environment) so really take your time.
To bake your bagels:
- Thoroughly preheat the oven to 220C/430F to ensure it is at the right temperature for good oven spring. Line a large baking tray with baking paper.
- Fill a medium pot 3/4 of the way with water and add the molasses and salt. Set it over a medium high heat and bring to a boil.
- When the water has boiled, place each bagel into the water for 30-45 seconds, flipping them halfway. See the notes in the body of the post if they don't float (ideally, they should). Remove each bagel with a slotted spatula and allow the liquid to drip off before placing it, with some room to spread, on the lined baking tray.
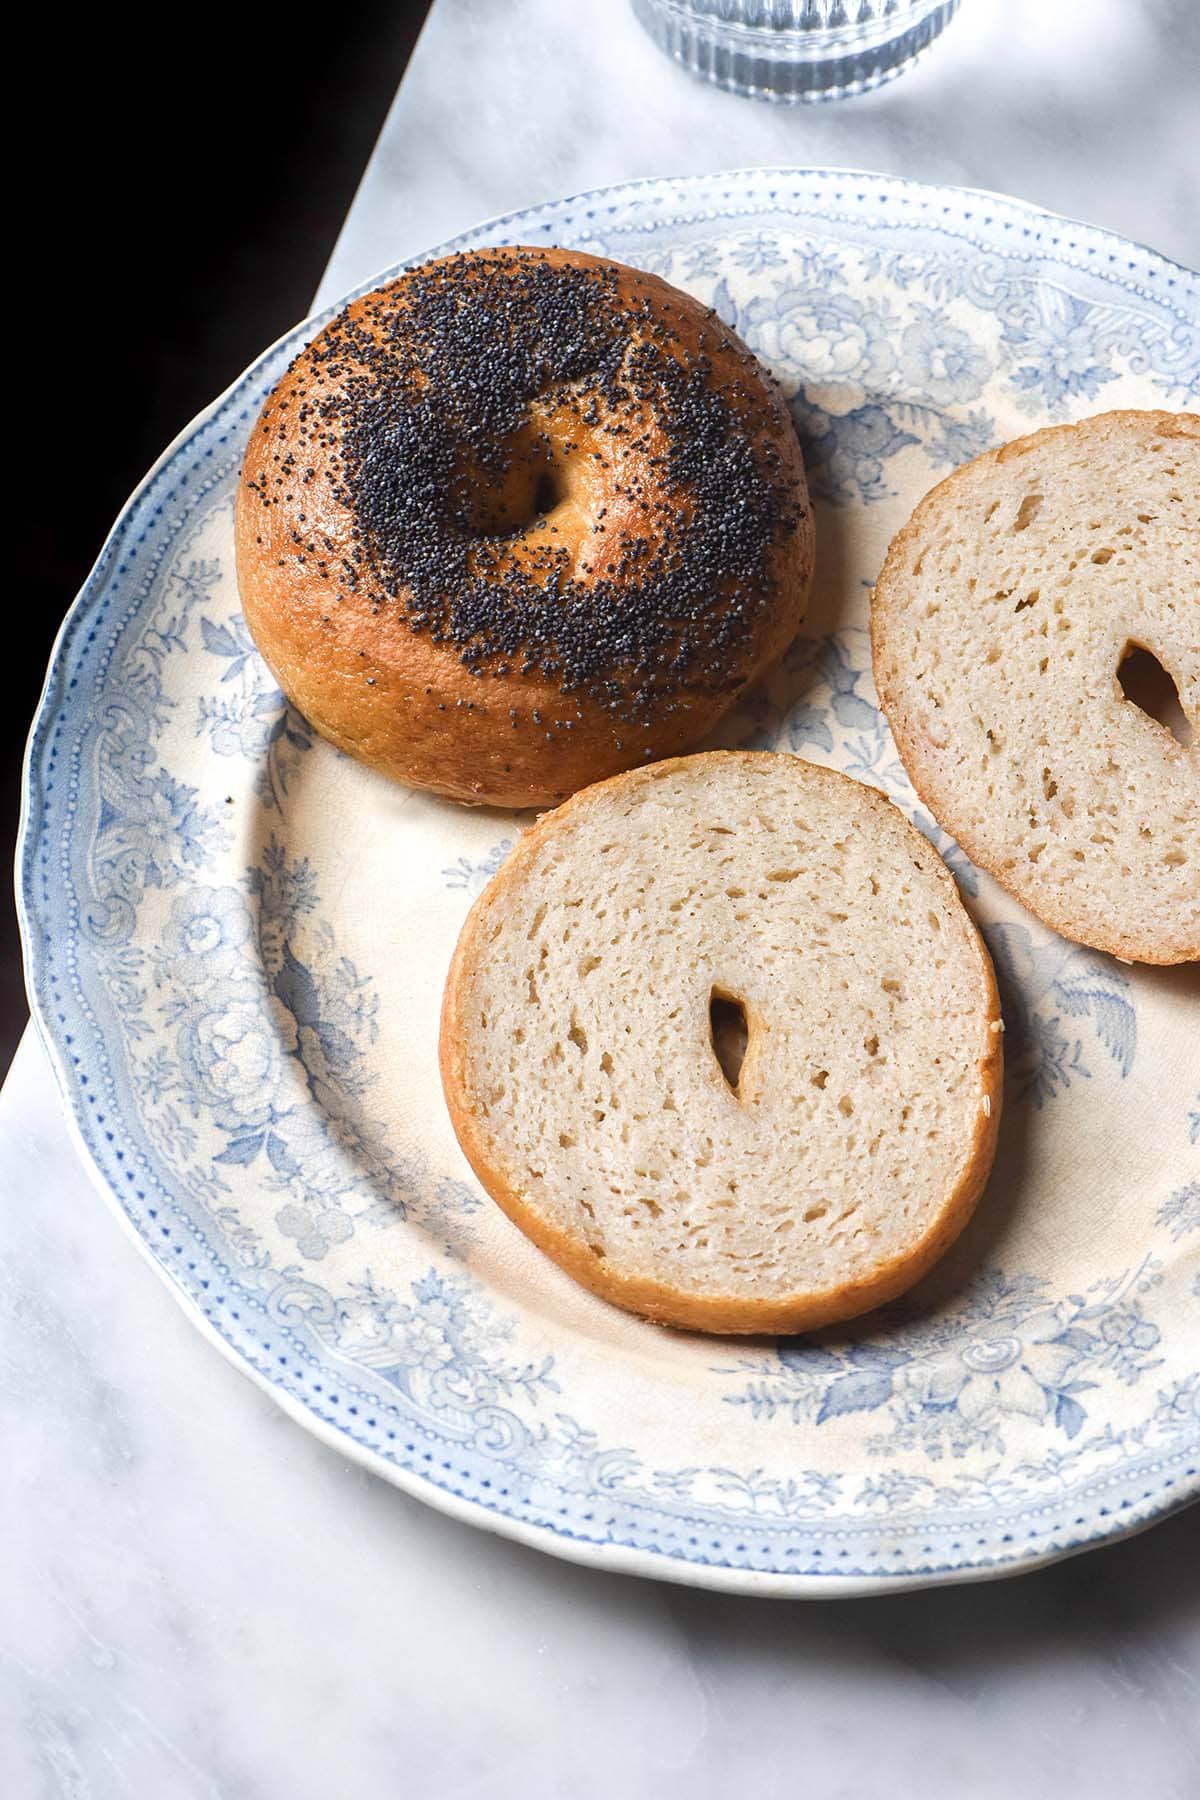
- Once you have boiled all the bagels, brush each bagel with egg wash or an alternative and then sprinkle with your chosen topping. Place into the oven and bake for 25-30 minutes or until golden, puffy and firm.
- If you are using a high hydration, wait until the crumb sets to eat one or else your bagel will be gummy.
- Leftovers keep really well for a number of days and can be frozen (I like to slice them prior to freezing). I do find that after the first day or two, these bagels are best warmed through to soften the crust and crumb.
Notes
- See notes in the body of the post for tips, tricks and ingredient notes.
- I have a guide to make a gluten free sourdough starter from scratch. Make sure your sourdough starter is fed and on a rise before use. I like to feed mine at around lunchtime and pop it in a warm place before I use it at dinner time to make bagel dough.
- PROOFING NOTES
- I have tested proofing these bagels for 6-7 hours in a bread proofer set to 32C/90F. I have also tested proofing the bagels for 12 hours in the proofer at 26C/79F and both worked nicely. You can play around with what works for you and the climate you live in. Warmer, more humid climates will require less proofing time than cold dry ones.
- Proofing takes as long as proofing takes – you cannot rush the process. You can slow proofing down if your bagels haven’t proofed by nightfall – place them (in the airtight baking tin) in the fridge overnight. You can then boil and bake them first thing in the morning.
No Comments