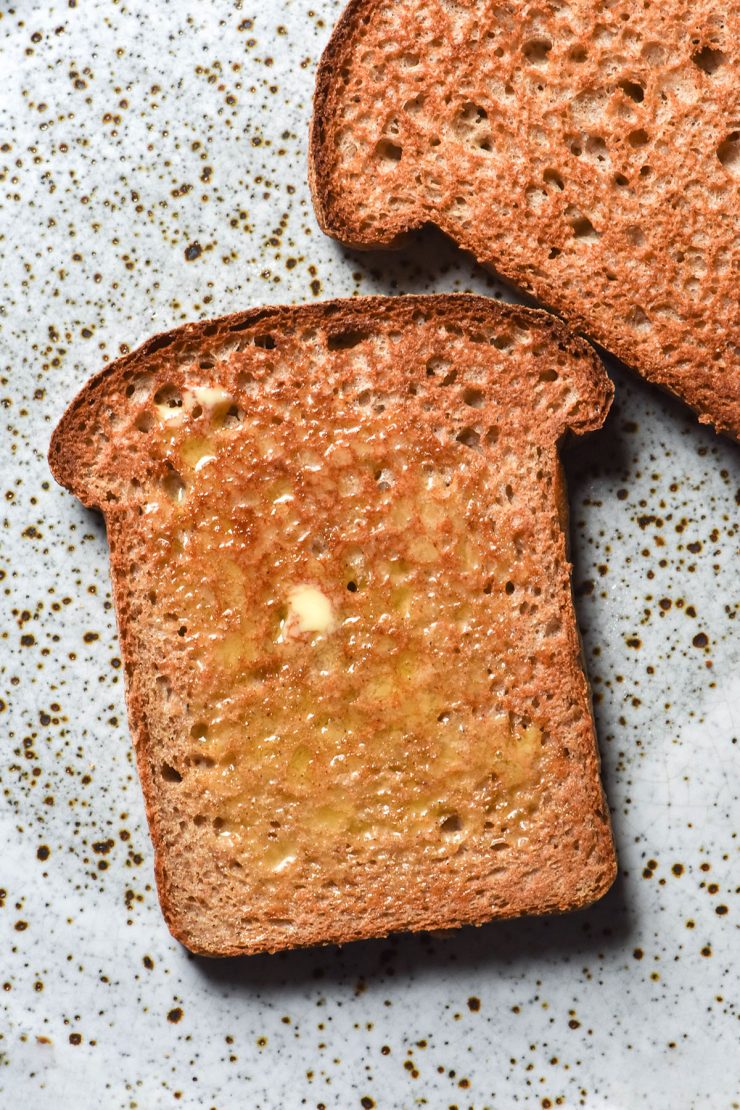
I am a big fan of majority wholegrain flour gluten free bread recipes. I have buckwheat bread, teff bread and quinoa bread recipes on my site. I’d hate for sorghum flour to feel left out, so I decided to develop this delicious gluten free and vegan sorghum bread recipe.
Sorghum bread
This bread recipe uses majority light sorghum flour. Like my quinoa bread recipe, I have found that sorghum flour requires a few other flours to balance everything out. Sorghum flour, although delicious and neutral in flavour, can be bitter and a bit silty. It has no inherent elasticity, which can make baking with 100% sorghum flour a little underwhelming.
So! Buckwheat flour and tapioca flour come to the rescue in this loaf. By coming these three flours, the loaf gains elasticity and a great chewy crumb.
Our old friend psyllium husk powder aids in the crumb structure, along with plenty of water and a small amount of oil. Maple syrup and salt add flavour and browning, while yeast is what allows the loaf to rise.
This recipe is gluten free, nut free, xanthan gum free, egg free, dairy free and completely vegan. It takes 10 minutes to mix up and the remaining time needed to make the loaf is mostly hands off. It is a delicious and simple gluten free bread recipe that has officially made it into my regular rotation.
Recipe notes
This recipe uses 400g sorghum flour, 100g light buckwheat flour and 100g tapioca flour. I find that sorghum needs the elasticity and the less sandy flours to balance it out.
I have used Bob’s Red Mill light sorghum flour to develop this recipe. Personally, I found that the bread does have a small amount of bitterness, but I find this to be the nature of sorghum flour.
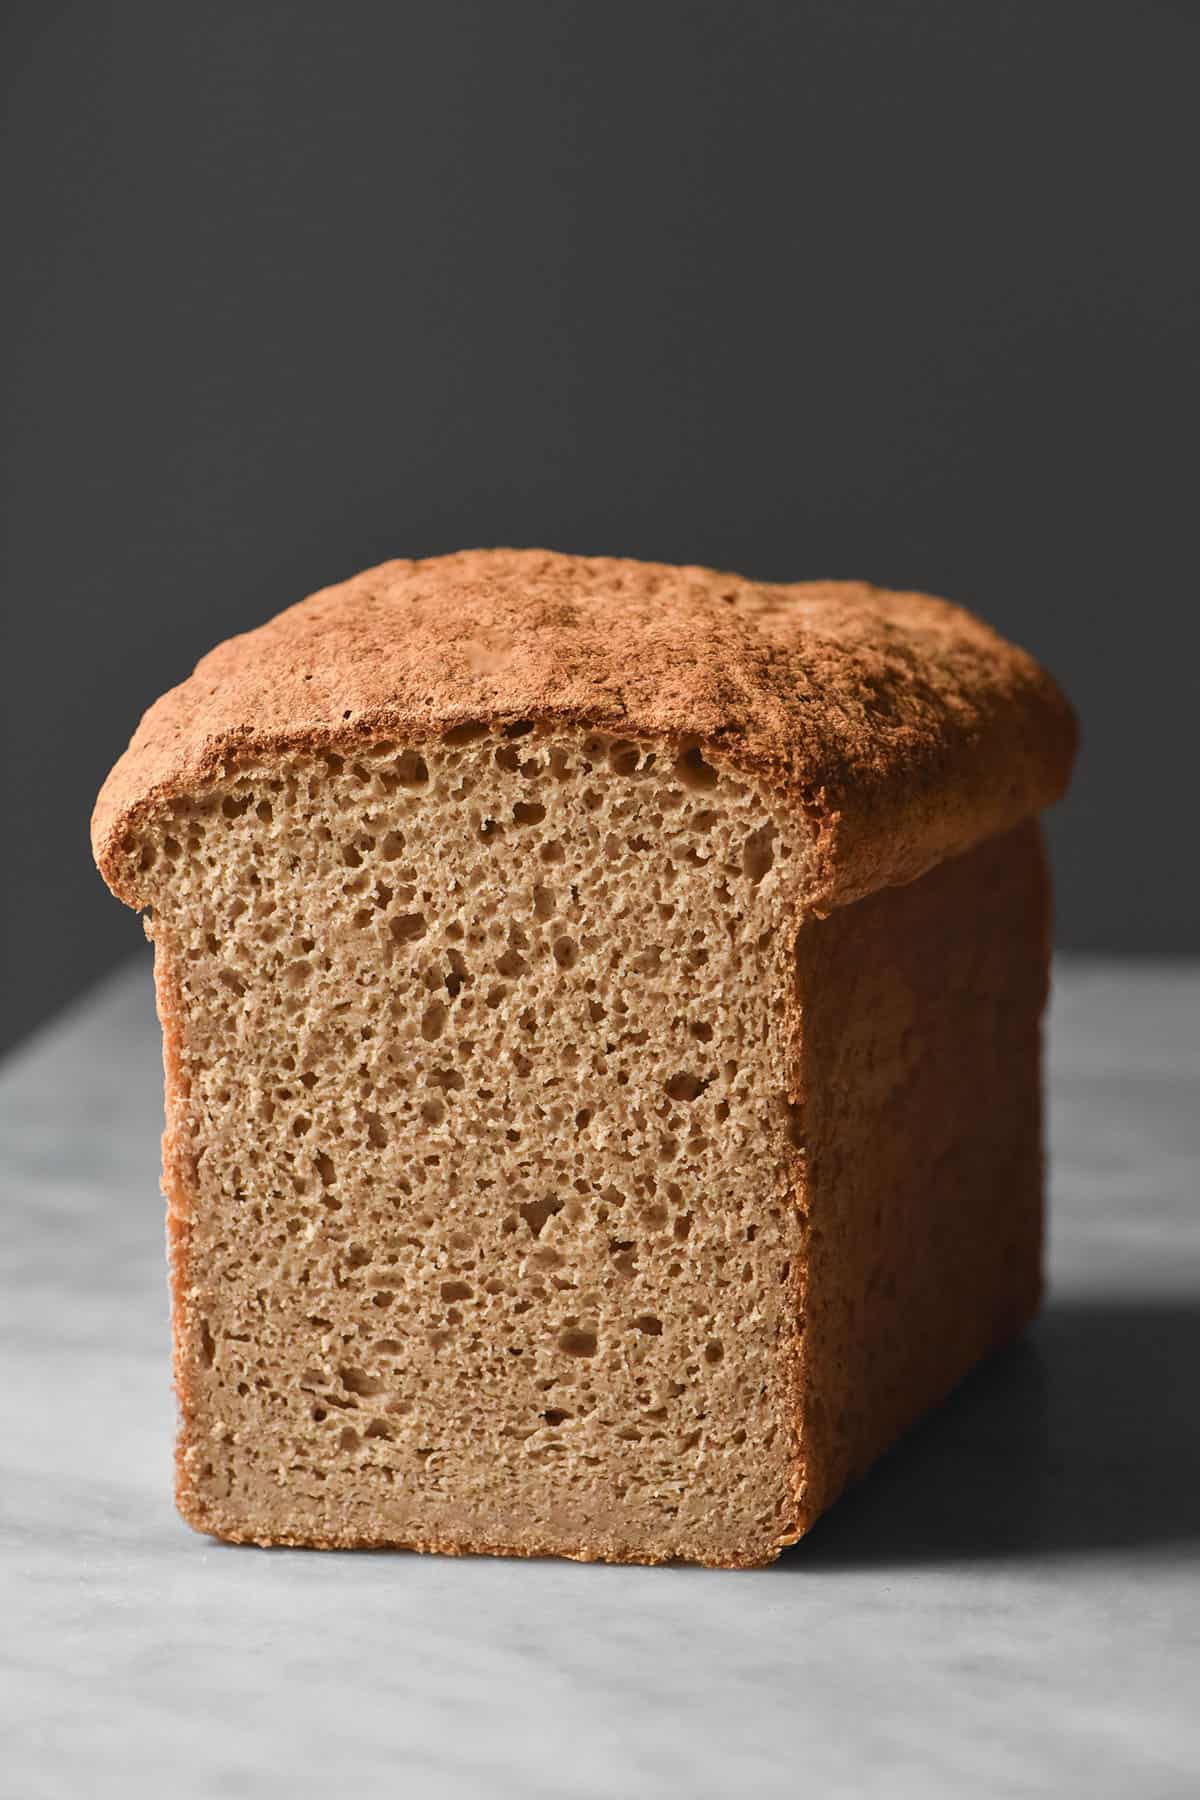
I was surprised to find that this bread required quite a high hydration. Quinoa flour is a similarly tricky flour to use as a majority flour in bread, and it was far less absorbent. The ideal hydration was 800-900g for me – I used 850g in the loaf pictured.
I haven’t tested any other flours or variations in this loaf. You’re welcome to, but you will be experimenting.
Can I use a silicon loaf pan for this bread?
No, you cannot. Gluten free bread has no real ‘strength’ to hold itself in and proof upwards. This means that if you proof gluten free bread in a container without walls to support it, it will just spread out. We want the bread to be supported as it proofs upwards to achieve a tall loaf with a nice crumb.
This recipe, as always, has been designed around a USA Pan Pullman pan in size small. The specs are 23cm length X 10cm width X 10cm height or 9 X 4 X 4 inches.
I am not sponsored by them and I no longer have any affiliate links on my site. This is simply the best pan for the job! The smaller size is best suited to gluten free recipes. The steel sides support the loaf and allow it to proof upwards. It is a great pan and I highly recommend it if you intend to bake my gluten free bread recipes often.
Ideal texture for your bread dough
Before proofing
This recipe will be almost liquid when you first mix up the dough. It will thicken quite quickly, but only to about the consistency of a thinner muffin batter. Sorghum flour really benefits from a high hydration, so don’t panic that the dough is more of a batter.
After proofing
In my tests of this bread, it puffed quite dramatically after proofing. The dough had formed a smooth surface which looked visibly inflated after an hour. I should note that I put my dough in a sunny spot because it is currently winter in Australia. My kitchen is quite cold in winter, so the bread benefits from a warm spot to proof.
If you are based in a humid or summer climate, the bread dough is best proofed in a temperature spot as opposed to direct sunlight. You can read more about my tips for making great gluten free bread here.
After proofing in the Pullman pan
Because this bread is high hydration, I find that it proofs quite quickly. In a sunny spot, one of my loaves proofed within 30 minutes. Proofing in a warm kitchen may take 30 – 60 minutes. In a cold kitchen, perhaps 1-2 hours. Proofing cannot be rushed – you need to watch the loaf and be patient.
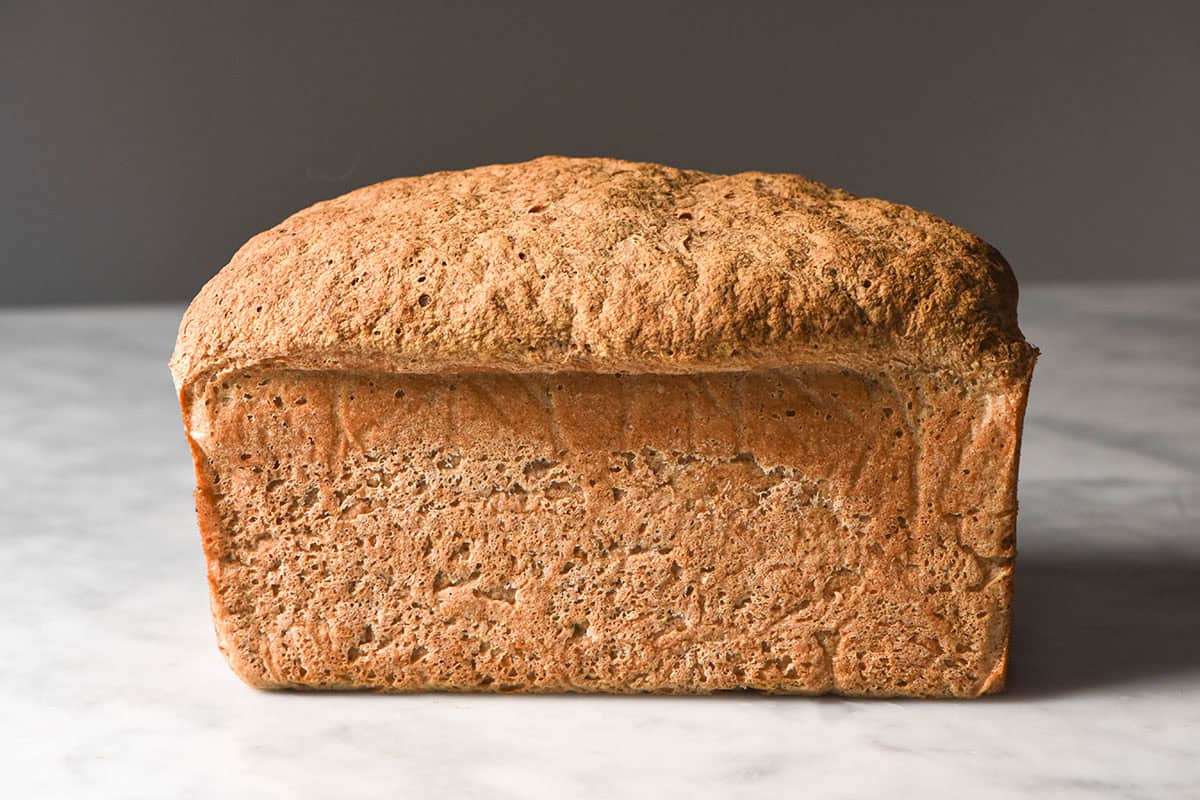
A fully proofed loaf of this sorghum bread will dome over the top of the Pullman pan. I suggest going for halfway between a subtle dome and a large one. The loaf will get some oven spring in the first 20 minutes of baking which will push the top of the dome upwards. If you allow the bread to proof too long, it might start to spill over the sides of the pan as it bakes.
A slightly under proofed loaf is always better than an over-proofed one. If your loaf has domed over the top of the Pullman pan and you’re not sure if it’s ready, just bake it.
Troubleshooting your sorghum bread
A quick fire troubleshooting section to solve all your queries and qualms.
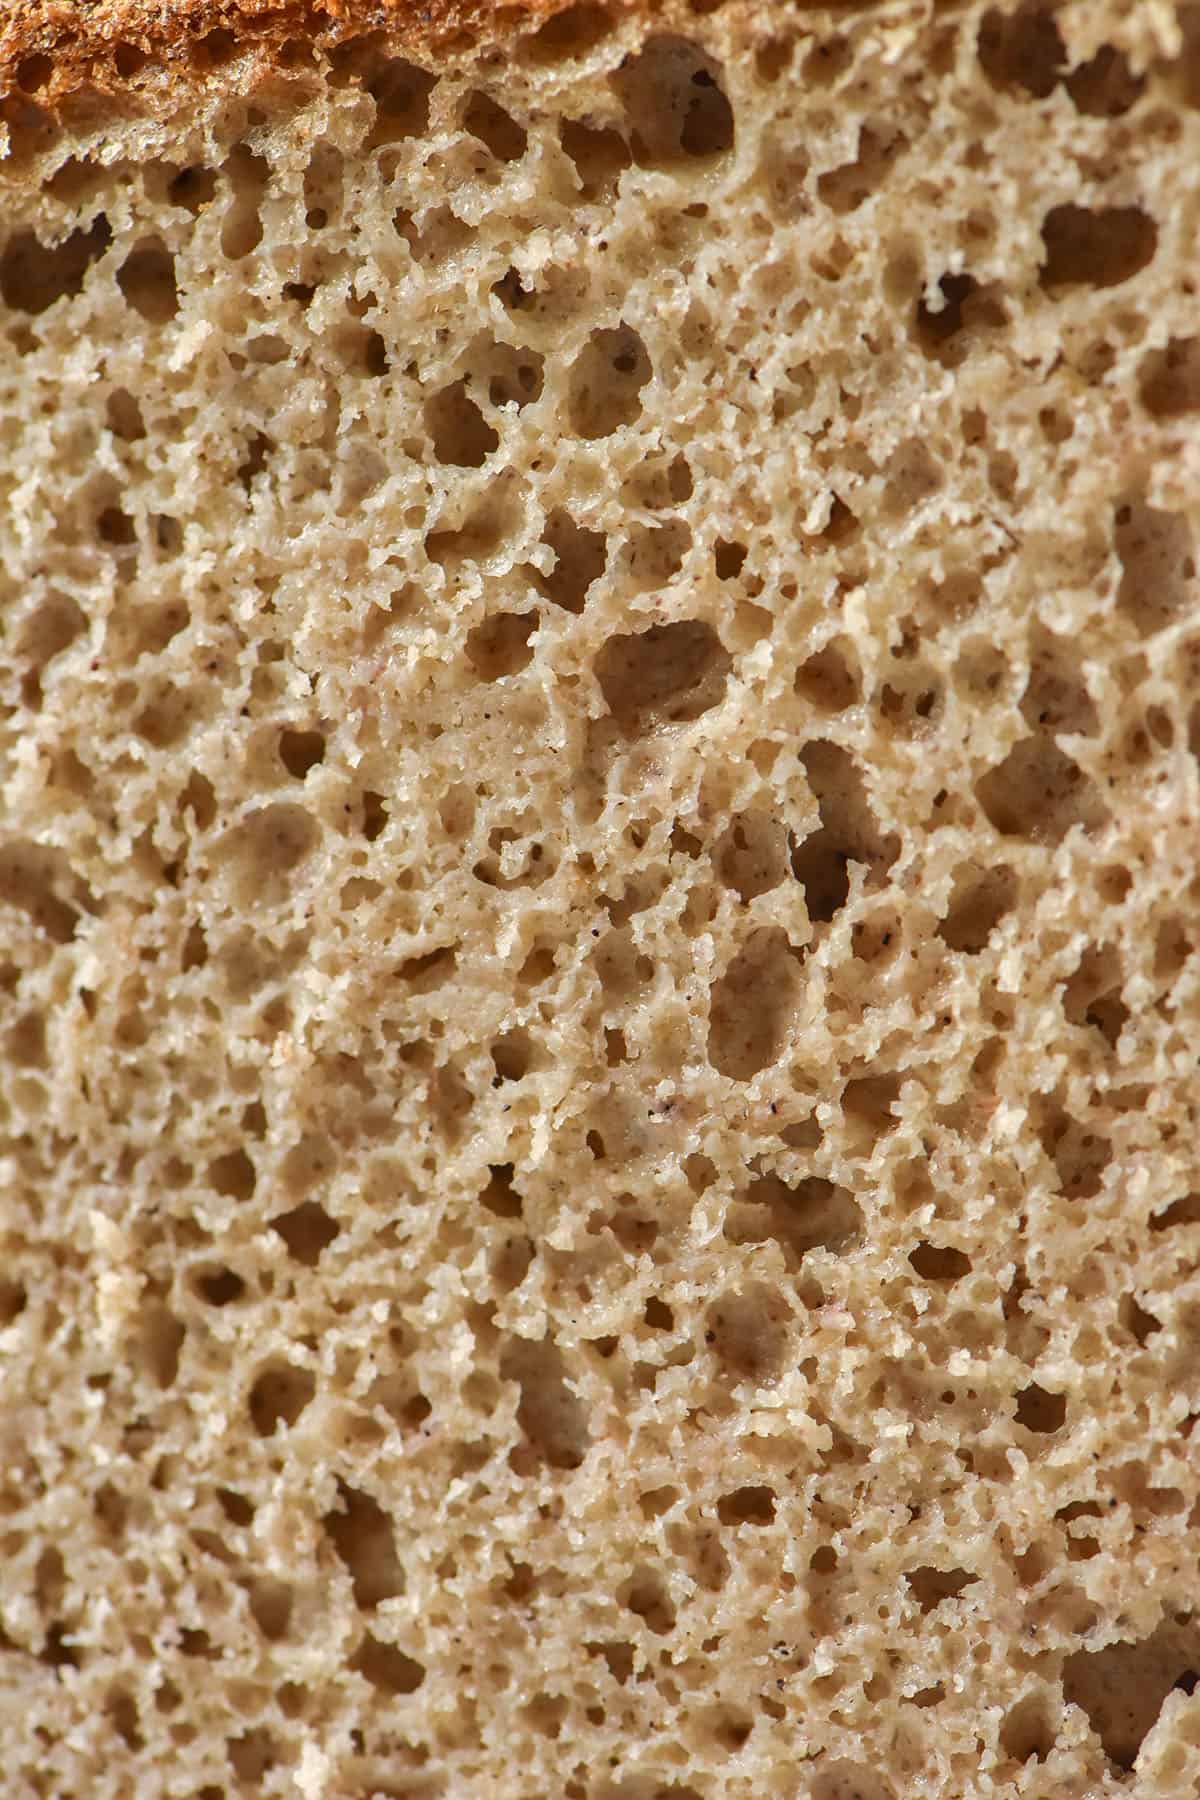
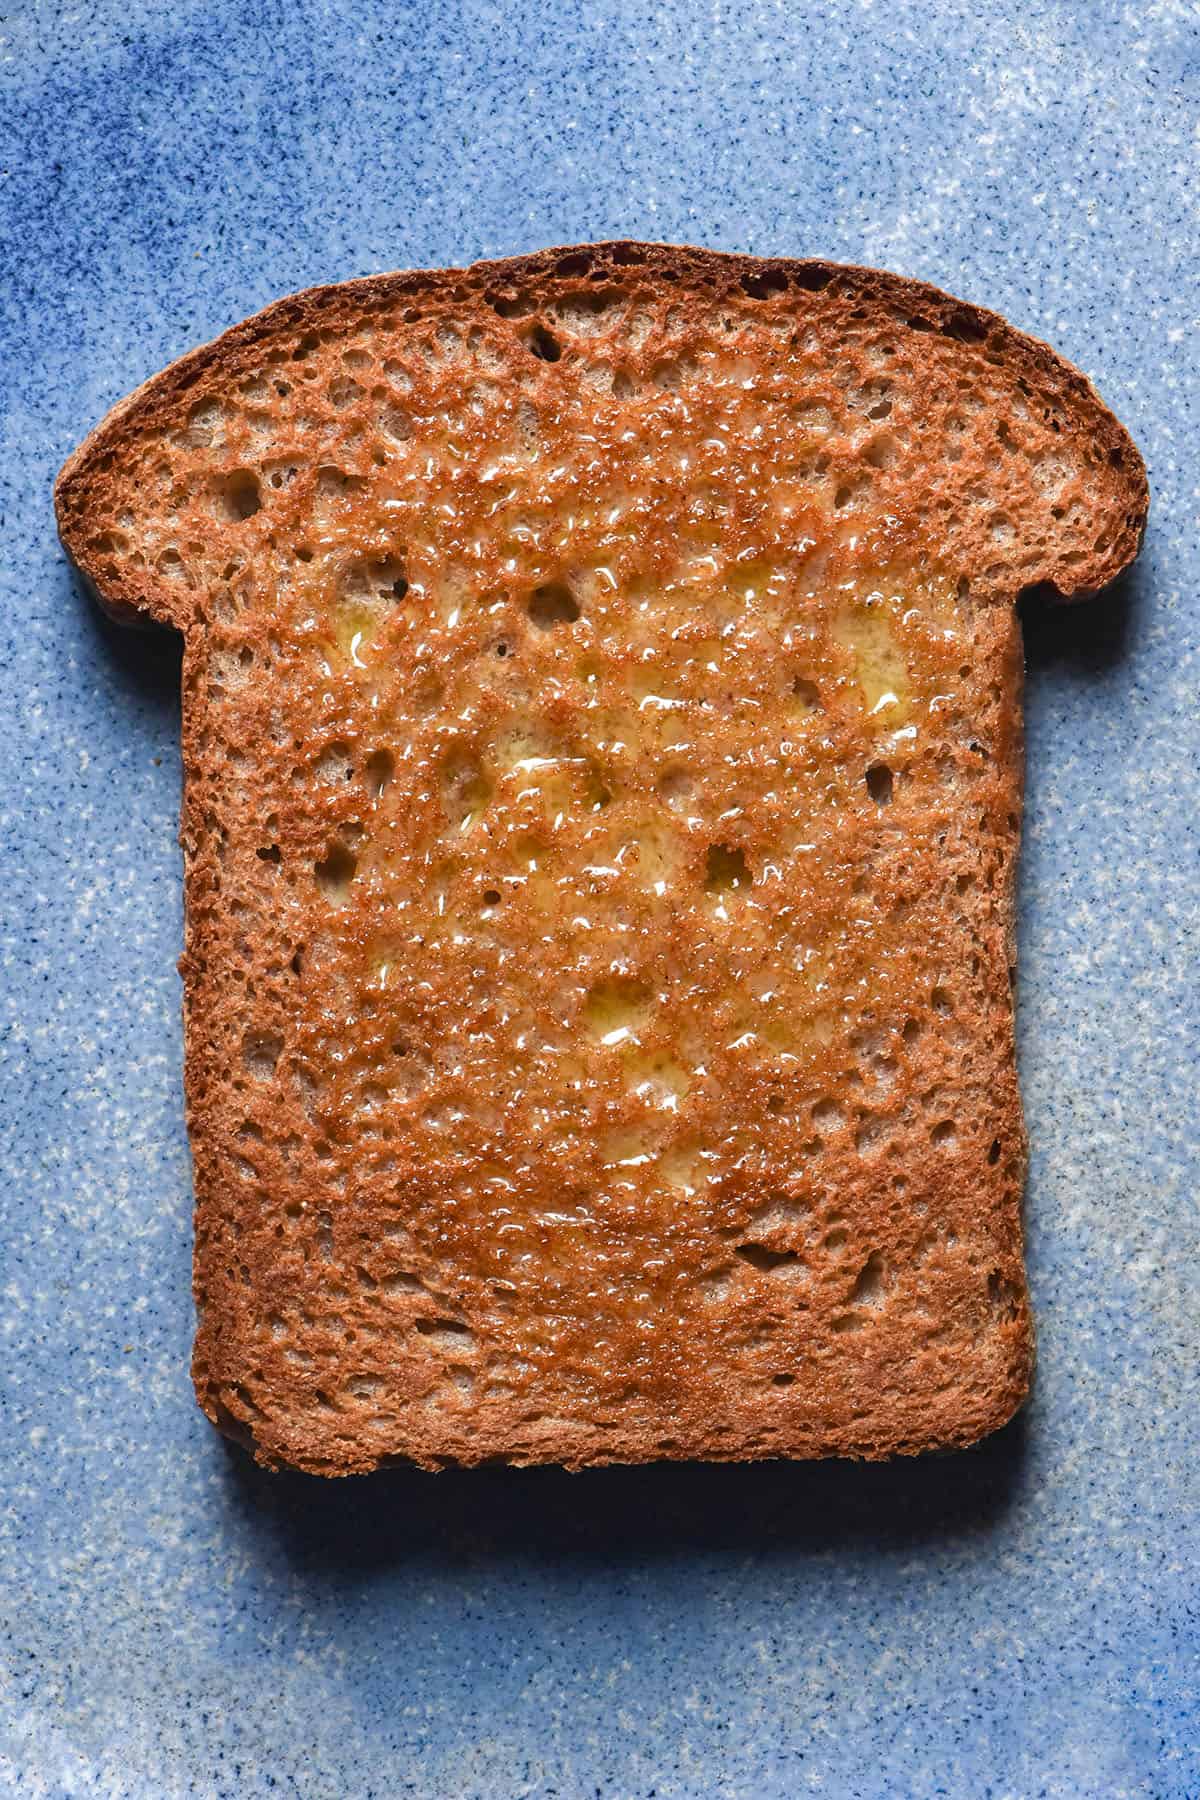
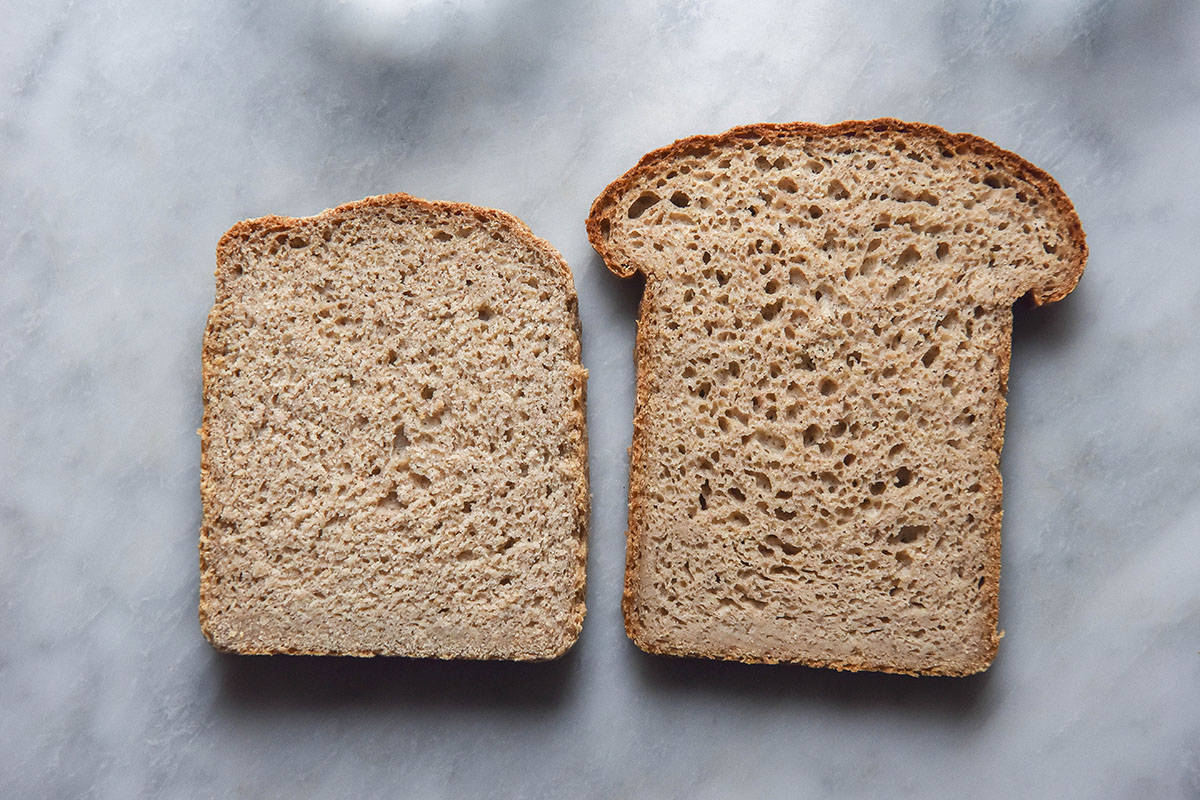
- If your loaf has a cottony, crumbly crumb, you need to add more water next time. The crumb shouldn’t look cottony or feel dry (see picture below for an indication).
- If your loaf has a wet bottom layer or is gummy, it has too much water added. Drop it back by 50g for your next bake. You can also add a bit less psyllium husk to see if that helps.
- As discussed, sorghum flour has a slight bitterness to it. This is just the nature of the flour. If you don’t like it, try one of my other gluten free bread recipes below.
- This is a high hydration loaf, so proofing can happen quickly. Make sure you watch it to ensure it doesn’t over proof.
- There is no substitute for a steel pan. Gluten free bread desperately needs something to hold it in.
- I have noticed that sorghum bread doesn’t brown as much as other loaves. Ensure your oven is thoroughly preheated to get a nicely browned loaf. Pale loaves are a result of an oven temperature that is too low.
More gluten free bread recipes
- Gluten free buckwheat bread
- Gluten free teff bread
- Gluten free quinoa bread
- Gluten free seeded bread
- Grain free vegan bread

Sorghum bread
Equipment
- 23cm length X 10cm width X 10cm height (9 X 4 X 4 inch) steel Pullman pan. Mine is USA Pan brand in size small.
Ingredients
- 400 g light sorghum flour (I used Bob's Red Mill)
- 100 g light buckwheat flour
- 100 g tapioca flour/starch
- 25 g psyllium husk powder (see notes)
- 7.5 g instant yeast
- 12g fine salt
- 40ml (2 tablespoons)* neutral oil
- 30ml (1 1/2 tablespoons)* maple syrup or liquid sweetener of choice
- 800-900 g water (see body of post for tips)
Instructions
- Grease and line your 23cm length X 10cm width X 10cm height (9 X 4 X 4 inch) steel Pullman pan. Mine is USA Pan brand in size small.
- Whisk the dry ingredients together in a large, non reactive (plastic or glass) mixing bowl.
- Whisk the wet ingredients into the dry, ensuring you get all the flour off the bottom of the bowl. The mixture should be nearly liquid at first, but thicken to a loose batter consistency as you whisk.
- Cover the bowl and set aside for 1 hour to proof. After proofing, the dough should have visible signs of aeration – a puffy top, lots of little air bubbles inside, etc.
- Preheat your oven to 220C/428F. This bread can proof quickly, so I recommend preheating the oven early if you are baking in a humid or hot climate (where high hydration bread proofs more quickly). Remove the top rack in the oven if your oven is small.
- Once the dough is proofed, decant it into your greased and lined Pullman pan. Use a moist hand to smooth down the top of the loaf, then cover the pan thoroughly without touching the bread. I use an inverted produce bag which keeps the bread in a sealed environment without touching it as it proofs.
- The loaf is proofed once it domes over the top of the Pullman pan. This can take as little as 20-30 minutes in a hot environment or up to 2 hours in a cold environment. Make sure you check on your loaf so that it doesn't over proof.
- When it is ready, place the bread in the oven for 20-30 minutes. Sorghum bread tends to be quite pale, so this time is to encourage oven spring but also browning.
- After 20-30 minutes, turn the oven down to 200C/400F and continue to bake for an additional 20 minutes for a total baking time of 40-50 minutes. The loaf should be golden brown on top and feel solid if you tap the top of the loaf.
- Allow the bread to cool in the pan for 15 minutes before transferring it onto a wire rack to cool. For best results, allow it to cool completely before slicing (the next day or 3+ hours after baking is ideal).
- Slices keep well in an airtight container in the fridge or can be frozen and defrosted.
Notes
- See notes in the body of the post for tips on proofing and hydration.
- I grind my own psyllium husk powder from the flakes using a spice grinder. I find that store bought psyllium husk powder is too fine and tends to clump up easily.
- Some brands of psyllium husk flakes can also turn your bread grey/purple. It is not a safety hazard but can look a bit off-putting. In Australia, I have been using BonVit brand. I used to like Coles brand but I started getting purple results from it recently.
- Sorghum flour can have a slightly bitter taste. This is just the way it is!
- See the troubleshooting section if you run into any issues with your loaf.
Hi, I have been making your bread. We love it in our home. I do have few questions.
I want to try replacing tapioca with rice flour, what would your advice be for that, should I do 1:1 replacement?
Also, I live in India and buckwheat is not available everywhere, is there any similar flour that I can use?
Hi Alya,
I’m so glad to hear you enjoy the recipes!
Unfortunately I wouldn’t recommend replacing the tapioca or the buckwheat here. Sorghum doesn’t have much elasticity and is often bitter and silty when used in large quantities.
Buckwheat is the only gluten free wholegrain flour that has elasticity so it helps with both the flavour and texture of the bread.
A starch is necessary for binding and elasticity of the crumb, which is why I don’t recommend using rice flour in it’s place.
If you type ‘bread’ into my website search bar, there are a number of different bread recipes with different flour combinations.
Hopefully there is one that suits your needs a bit better 🙂
How would this go with red sorghum flour?
I have never worked with red sorghum flour so I don’t know unfortunately! Let me know if you try it 🙂
Hi Georgia – YESSSS! Made this yesterday and used some in a flat bread version (added handful each pepitas and sunflower seeds). Used home-made sourdough starter, left out the sweetener and used 1/2 cup Amazake (again home-made) a fermented rice drink, in its place. Fantastic!
So happy with the result – the flour mix is perfect. As I am into GF big-time, this is an excellent addition to my bread recipes. Thank you for posting.
First of all, I really want to thank you for this recipe.
I just made it yesterday, and it’s not like any other gluten-free bread I’ve ever made.
I have a few questions. The bottom of the bread came out a bit gummy, so I’ll use 50 grams less water next time.
I used 850 grams this time.
I also think it’s because I didn’t remove it from the tin straight after it came out of the oven.
You wrote to wait 15 minutes, but when I did, there was a lot of drops of water. I think next time I’ll take it out immediately after baking.
Also, I have a question about the psyllium husk. You wrote to use 25 grams of psyllium husk powder, and then you said you ground your own powder from flakes.
I know that if you’re using flakes, you need to put more compared to powder. I used psyllium husk powder directly, and I feel like 25 grams is a bit too much.
How many grams should I use if I’m using psyllium husk powder?
Thank you so much again!
Hi Sapir,
The recipe says to leave the bread in the pan to ensure the crumb is set. If you take the bread out too early and it happens to be undercooked, the sides will bulge out and the bread will lose some of its height. It can result in a dense crumb and a stodgy bread. That said, if you are confident it is fully cooked and set then you can take it as soon as you like.
In terms of a gummy base layer, I think the key would be to drop back the liquid in the loaf itself.
I use 25g psyllium husk powder that I grind myself, as the recipe says. What makes you feel it was too much psyllium husk powder? Is there a specific issue you are looking to correct?
You definitely need a good amount to ensure the bread has structure and it absorbs enough liquid to finish up with a good crumb.
That said, every bag of flour will have a different absorbency and you might need less than I do.
Because 25g is the right amount for my loaves, I can’t say with 100% confidence what will work for you. I would recommend 5-10g less maximum based on my experience with sorghum and this bread, but you are welcome to experiment and see what works for you!
Hi George,
Does the water have to be lukewarm?
Thanks. I’m all ready to have a go.
Karen (Sydney)
Hi Karen,
No the water doesn’t need to be lukewarm. You can use lukewarm if you like and it could give the yeast a little boost in a cold kitchen, but It’s not necessary.
This recipe uses two proofs so you should get a good rise either way 🙂
Hey!
I’m not allowed wheat and wanted to see if I could replace the buckwheat with something else? Any ideas?
Thank you ♥️
Please ignore my last message, just realised it doesn’t contain wheat! Silly me!
Haha all good Shannon! Easy mistake to make 🙂
Hi there, noticed you recommended plastic or glass bowls. Any reason why I shouldn’t use one of my stainless steel mixing bowls or the metal mixing bowl that comes with my mixer?
Hi Ram! It is recommended that you use non-metal bowls when proofing yeasted dough because of a small risk the steel can interfere with the yeast.
How seriously it needs to be taken is open to experimentation – you might find it has no impact on your dough at all!
I just include it because gluten free is already tricky and expensive so I don’t want anyone to take risks 🙂