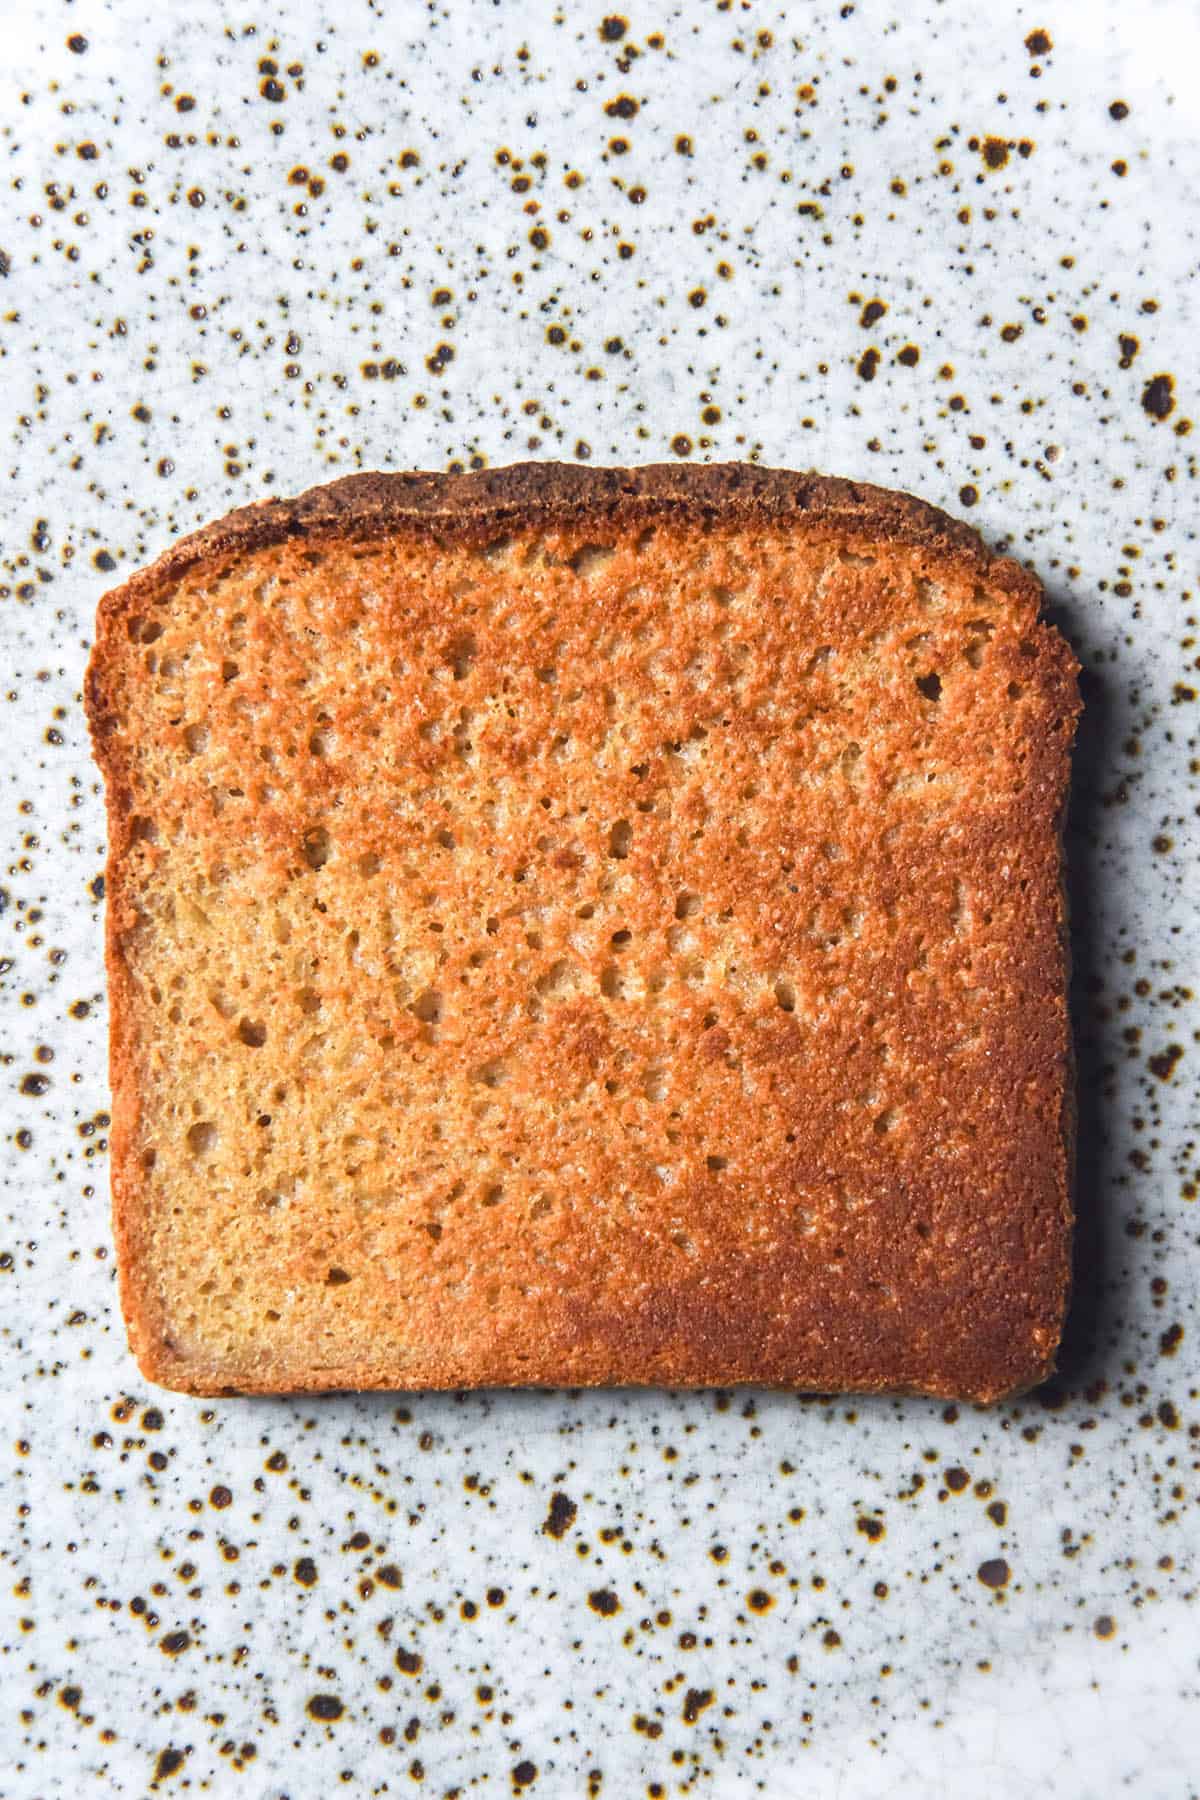
I’ve been on a wholegrain bread bender of late, and the next addition to my collection is this quinoa bread. It is gluten free, vegan, nut free, xanthan gum free and easy to make. Let’s dive right in!
Quinoa bread (gluten free)
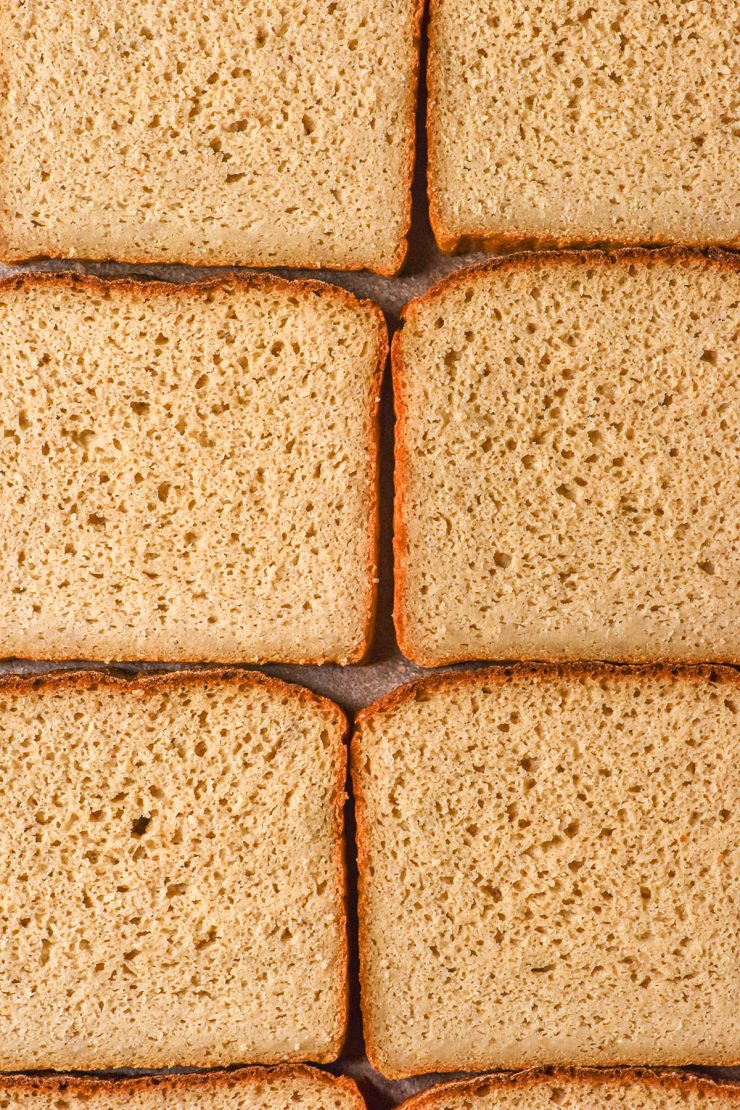
This quinoa bread contains a majority quinoa flour. To me, a bread called ‘quinoa bread’ needs to have quinoa as the dominant flour (like my buckwheat bread or teff bread).
Unlike those two breads, a bread made with majority quinoa flour needs a little extra tweaking. While both of those breads use 500g of their respective flour and 100g starch, this bread requires a third flour. Quinoa flour can be a finnicky beast at the best of times, so adding buckwheat flour (along with a starch) to the mix softens the quinoa and adds extra elasticity.
So, what else is in the bread? Instant yeast, salt, a small amount of oil and maple syrup, a lot of water and our pal, psyllium husk powder. Psyllium husk powder brings everything together to make a soft and fluffy loaf. It also helps give the bread structure to give it a nice loaf shape.
Ingredient notes
One annoying thing about quinoa flour is that it seems to go rancid very easily. I have purchased some from the supermarket or bulk food store only to find it is rancid more times than I can count. As such, I tend to make my own.
You can make your own quinoa flour by grinding whole white quinoa to flour in a food processor or NutriBullet. It only takes a few minutes and results in a lovely fresh flour. I recommend processing 500g white quinoa grains for approximately 480g flour.
In another post, someone once asked me about washing the quinoa prior to making flour. Quinoa is quoted as having saponin on the outer layer which can affect digestion, among other things. As far as I can understand, store bought quinoa is generally pre-rinsed. This means you don’t need to rinse it again.
I have tested both variations in this bread – rinsed and un-rinsed quinoa flour. Personally, I didn’t notice much of a difference in taste. The version that was un-rinsed probably had a little bit more of that grassy flavour, but that’s what makes it quinoa bread (to me, anyway). In terms of rising power, my un-rinsed loaves rose more but I suspect that was because the rinsed version was made on a very cold winter day.
If the packet you are using doesn’t say pre-rinsed or you’d like to be cautious, use the following instructions. Be warned, though: it takes time.
Rinsed quinoa grains for flour
- Thoroughly rinse 500g of your store bought white quinoa grains. I like to soak and rinse a few times. I haven’t tested anything other than white quinoa here.
- Allow it to drain off any excess liquid in a large fine meshed sieve over the sink. A lot of sieves have holes that are too large to catch quinoa grains, so you might need to use a nut milk bag.
- Arrange the quinoa in a flat layer on a large baking tray and preheat the oven to 120C/250F.
- Bake the quinoa in 30 minute increments, stirring to redistribute the grains each time. It took me 1 hour 30 minutes to completely dry the grains, but they were slightly browned. They might have done with 10 or 15 minutes less.
- Allow the grains to cool completely and be sure they are dry. If they are not completely dry, you will be unable to make flour out of them.
- Proceed with the recipe as written. You should have approximately 450g quinoa flour.

Tips for this quinoa bread
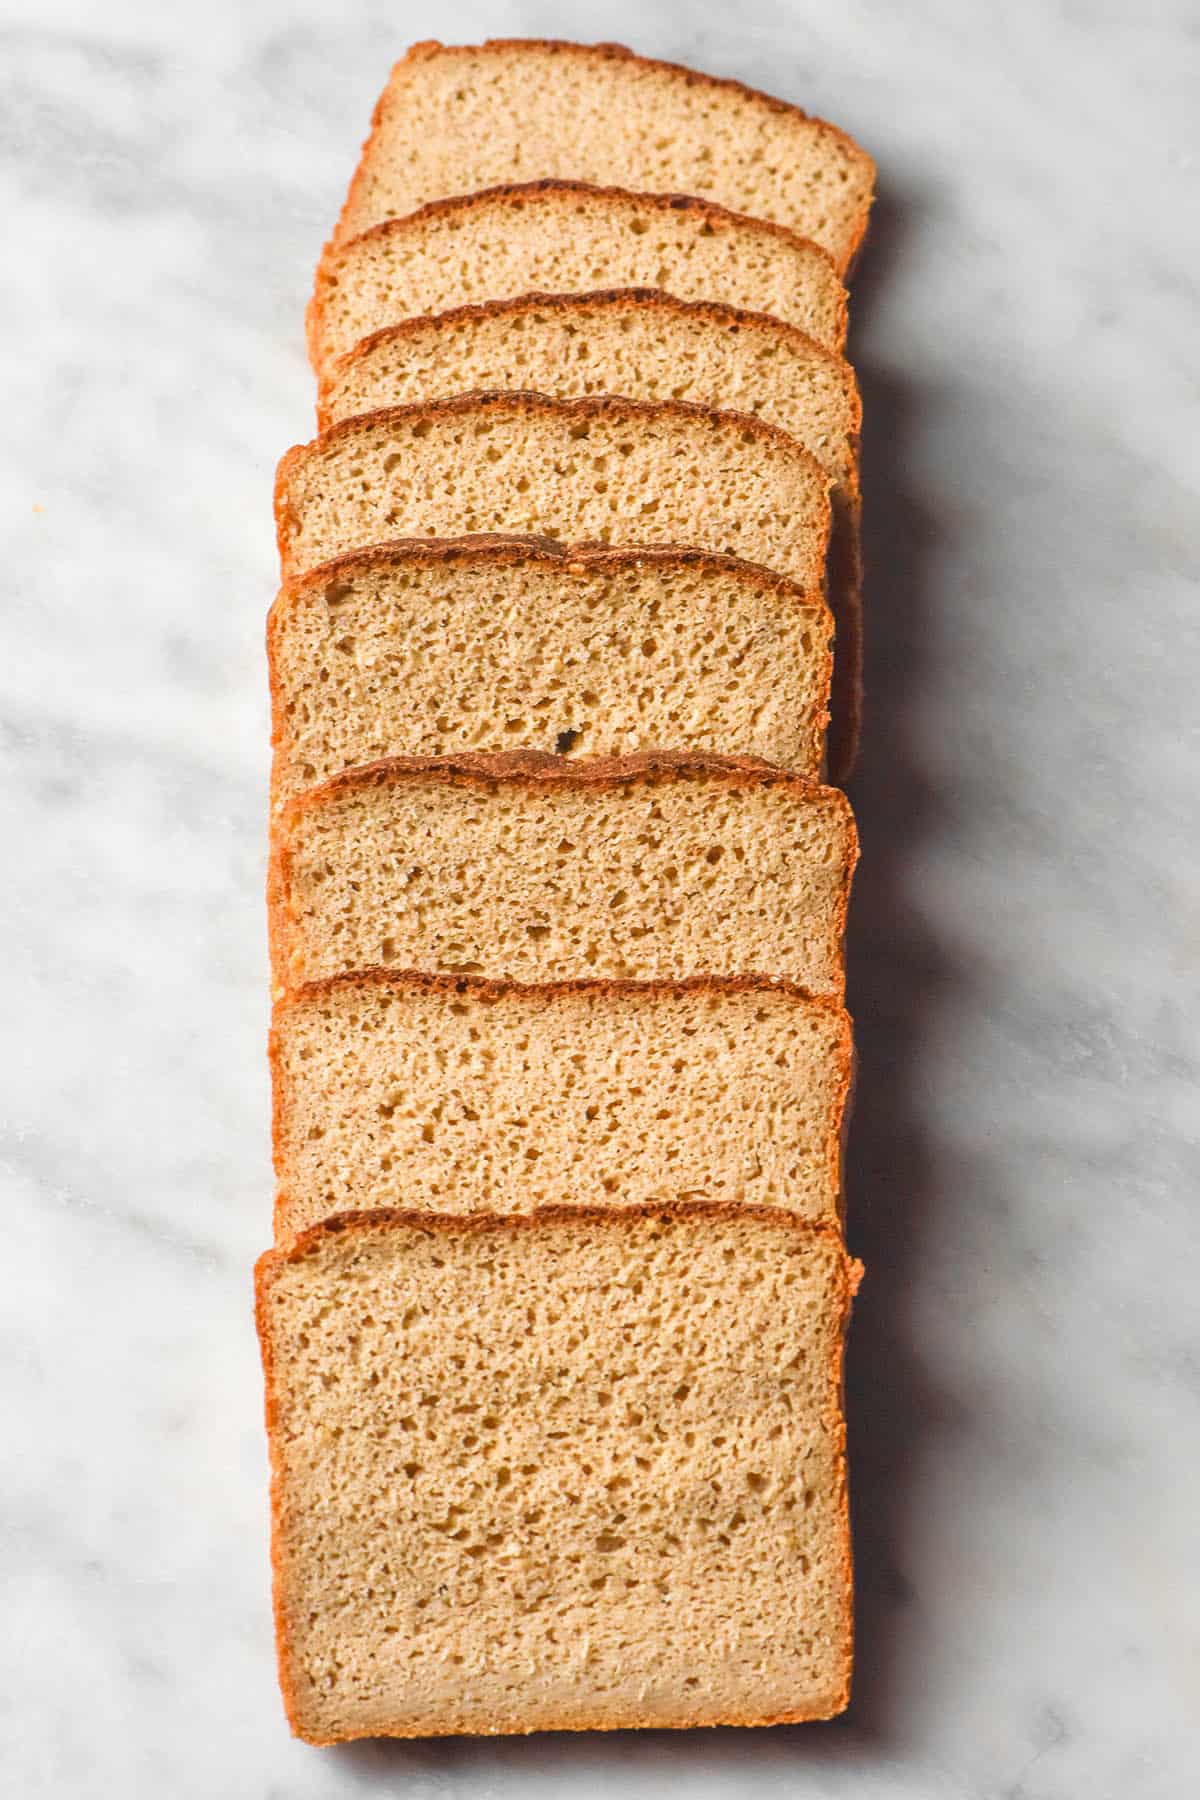
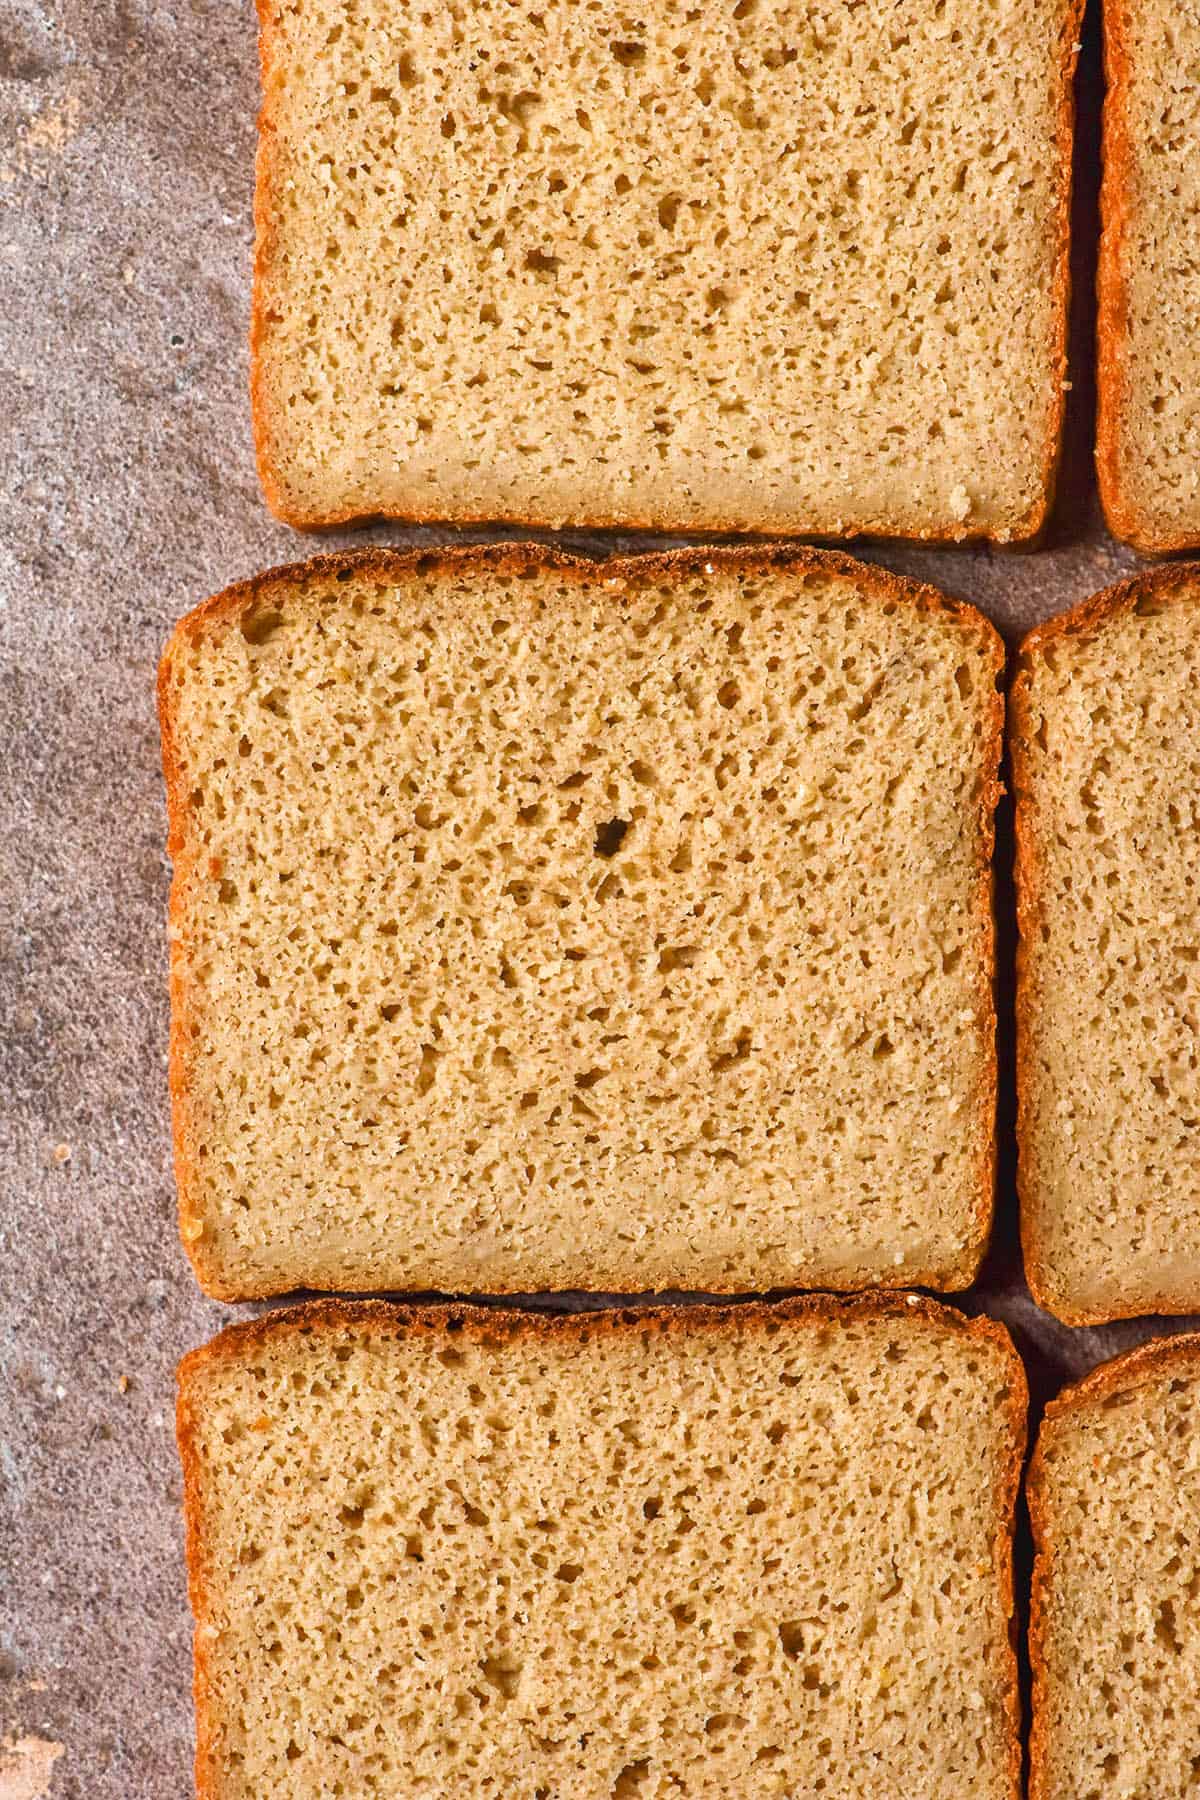
I haven’t quite figured out exactly what it is but quinoa flour works quite differently to other flours. It doesn’t feel like it absorbs water well, but at the same time it needs a fair bit of water. I have also noticed that it doesn’t proof as high as other gluten free breads.
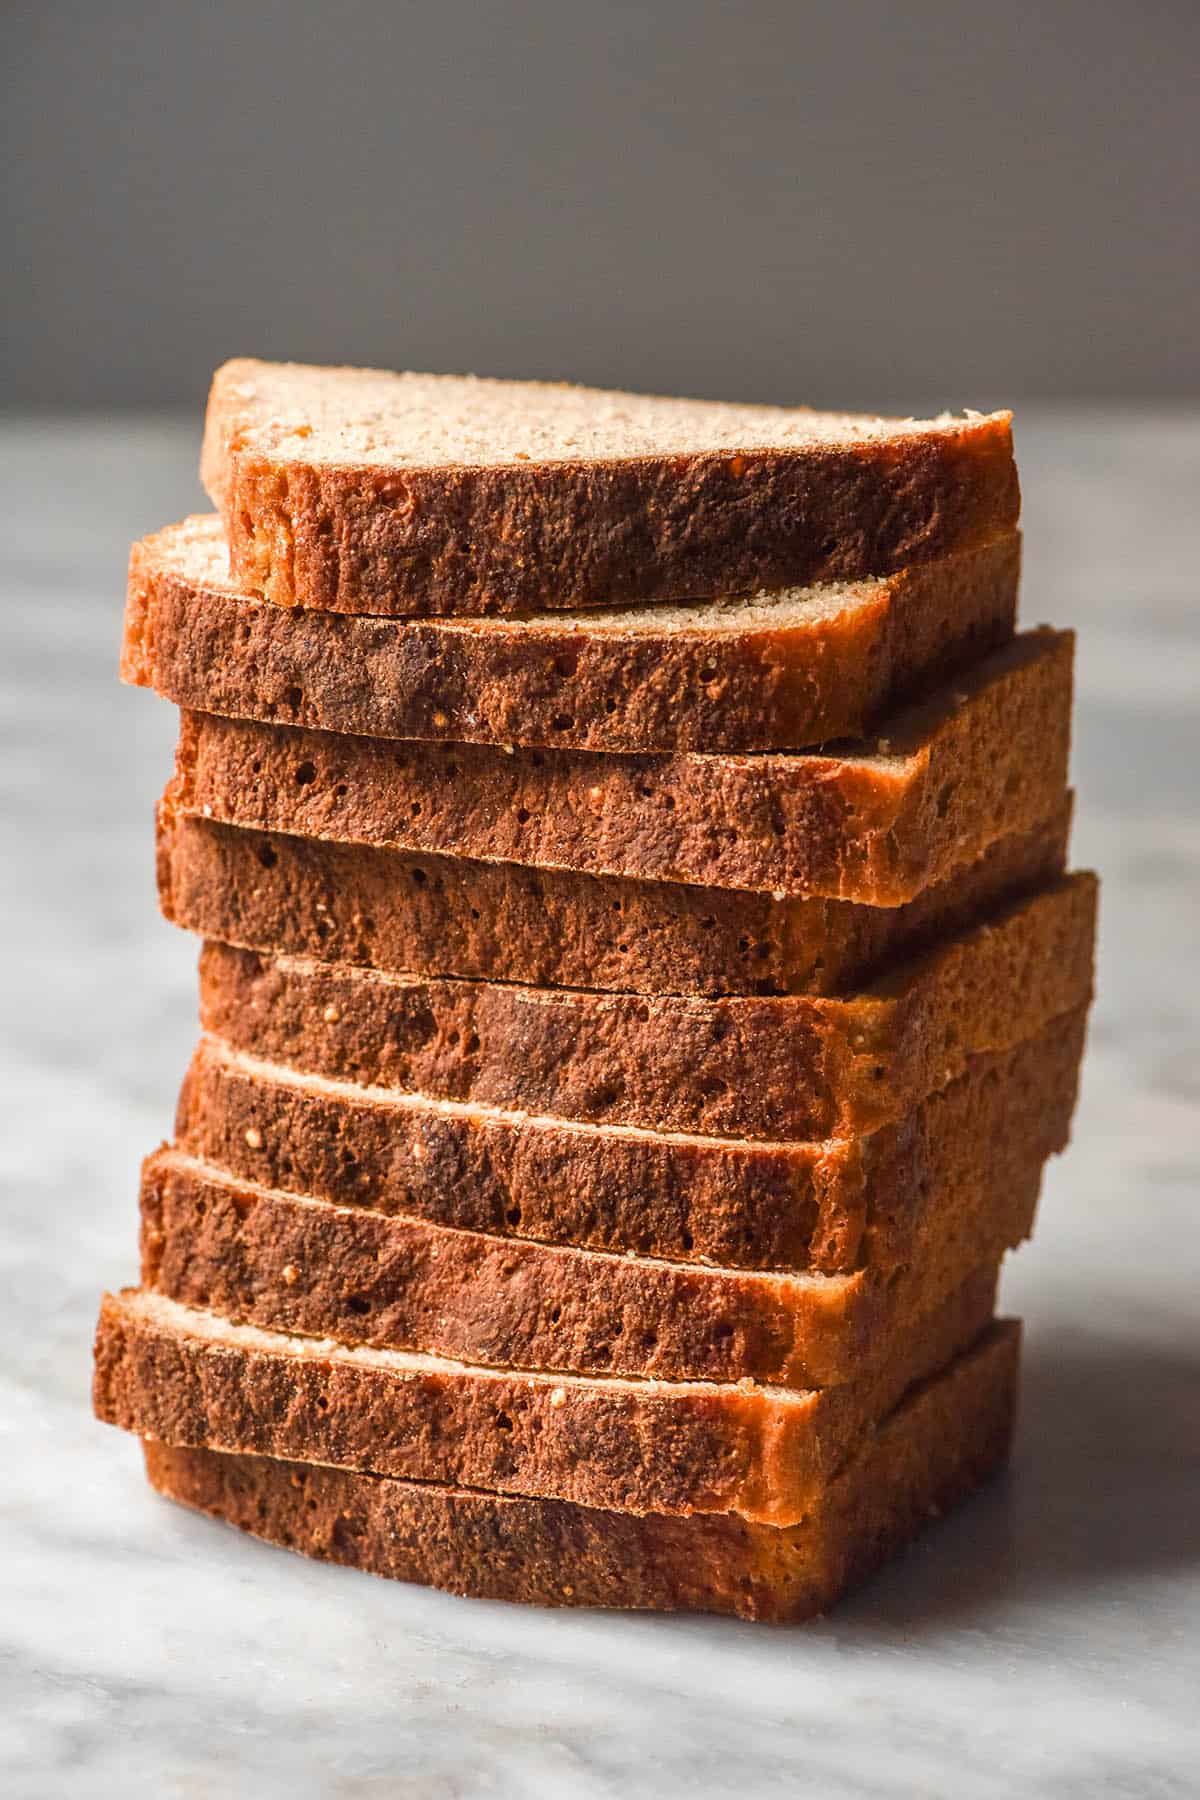
As such, know that this loaf is a little shorter than my other gluten free wholegrain loaves. It should just reach or dome slightly over the top of your baking tin prior to baking, but will likely flatten on top in the oven.
Once baked, the loaf should be about the same dimensions as the Pullman pan or a little smaller. It should have a flat top or a slightly domed top, but not a concave top.
One thing I have noticed as a bonus is that it seems to be a bit more difficult to over proof or make a gummy based loaf with quinoa flour. A win is a win!
Proofing a loaf of bread takes however long it takes. It is chilly winter in Australia at the moment, but I did feel this recipe took a while to proof on all the occasions I made it. I will make the loaf again in summer, but just know that you need to give your bread time to proof.

Ideal bread dough consistency
Working with quinoa flour can be a little trickier than other gluten free flours, in my opinion. This is because the dough feels a little drier than my other gluten free breads.
Quinoa flour tends to need less moisture but bakes up a moist bread. It’s almost as if it’s not very absorbent or something – I can’t quite put my finger on the difference.
Either way, the ideal consistency for this bread dough immediately after proofing is just wet enough to lose a bit of shape. If you hold your whisk up, the batter should fall back into the bowl in thick ribbons. The dough shouldn’t be liquid like other batters; more of a thick pancake batter or nut butter consistency.
This is tricky because it is unlike how most other gluten free flours behave. In the majority of my other gluten free bread recipes, we want the dough to be practically liquid after mixing. This dough needs to be quite firm in order to achieve the right consistency.
Can I use a silicon loaf pan?
No. Like all my gluten free loaf recipes, this bread requires a steel Pullman pan – specifically, a size small USA Pan Pullman pan – 23cm length X 10cm width X 10cm height or 9 X 4 X 4 inches.
I develop all my loaves around this pan because it is the perfect size for a gluten free loaf. It has solid, tall sides to hold the bread in and up as it proofs – support the dough requires without gluten.
I don’t get any kickbacks for recommending it but this is the best pan for gluten free loaves, in my opinion. I use it all my recipes so if you intend to make a few, it will be a good investment.
Troubleshooting
Baking can be fickle at the best of times, but we’re baking gluten free! Getting good loaves takes a bit of experience and practice, so let’s discuss everything that might have gone wrong. Before we go further, I have also written a guide to making the best gluten free bread possible, which covers all of what we will go into here (and then some).
My loaf was short and squat?
I have noticed that this bread doesn’t proof quite as high as my other gluten free breads. It also tends to flatten and drop into a rectangle shape as it bakes, but it should be the height of or just smaller than the Pullman pan.
With that all said, if your loaf didn’t proof enough to reach the lip of the Pullman pan, I have some tips.
Firstly, consider the season you are baking in. Bread proofs faster in summer as the yeast thrives in heat. It proofs a lot slower in cold, wintery kitchens. Because recipes often need to give a ballpark for proofing time, people baking in winter tend to put their loaf in the oven before it has finished proofing.
Proofing takes how long it takes – you can’t rush it and you can’t put an exact time on it. Some loaves proof quickly, others don’t. In gluten free bread baking, higher starch loaves proof more quickly than wholegrain loaves. This is because starch is an easy food for the yeast.
Another factor that matters? Hydration. Yeast needs a moist environment to thrive, so a drier dough will take a lot longer to proof (if it proofs at all!) than a wetter dough.
For next time:
If you followed the recipe and find that your dough is dry, you will need to add more water next time. Every bag of gluten free flour will have a different absorbency and water is really just a guide. If your dough doesn’t look like what is described in the recipe, you will need to use your intuition and add more water.
Once you have addressed hydration, you can move onto proofing. Improving the consistency of your dough with more water should help it proof more efficiently. Make sure you allow it time to proof fully, whether that takes 1 hour or 3.
If your bread hasn’t proofed within 3 hours, you are either baking in the arctic, have not added sufficient water or are working with expired yeast.
My bread is cakey?
Cakey bread is generally always bread that has not had enough water added. If there is not enough water to make a soft crumb, your bread will be cakey.
Add 100g more water for your next bake and see where that places you. If your dough is as described in the notes above, proceed with making bread. If it is still too dry, add 50g more water and repeat until you reach the desired consistency.
My bread is wet?
Firstly, I find that gluten free bread tends to feel a bit wetter than regular bread anyway. Because we need a certain amount of water for it to be edible, the slices tend to feel quite moist. This isn’t an issue (in fact, it’s better than a dry loaf of bread) but some people aren’t used to it.
If your bread is very wet, though, it means that you have added too much water for your flours. As we have discussed, every bag of flour will have a different absorbency level and sometimes it’s just too much liquid for your flour.
The annoying part? The perfect amount of water for your dough will change with every bag of flour. It’s a moving target and definitely keeps us on our toes.
If your bread is way too wet, consider adding 50-100g less water next time.
More gluten free bread recipes without xanthan gum
- Gluten free buckwheat bread
- Gluten free teff bread
- Gluten free sourdough bread
- Gluten free focaccia
- Gluten free seeded bread
Quinoa bread (gluten free)
Equipment
- size small USA Pan Pullman loaf pan – 23cm length X 10cm width X 10cm height or 9 X 4 X 4 inches.
Ingredients
- 400 g quinoa flour (see notes)
- 100 g light buckwheat flour
- 100 g tapioca flour
- 25 g psyllium husk powder
- 7.5 g instant yeast
- 20 ml (1 tablespoon)* oil of choice
- 20 ml (1 tablespoon)* maple syrup
- 10-12 g salt
- 645-745 g water
Instructions
- Grease and line your size small USA Pan Pullman loaf pan – 23cm length X 10cm width X 10cm height or 9 X 4 X 4 inches.
- Whisk together the dry ingredients and then whisk in the wet. The dough will be liquid to begin with, but will quickly firm up as you whisk.
- The ideal consistency for this bread dough immediately after proofing is just wet enough to lose a bit of shape. If you hold your whisk up, the batter should fall back into the bowl in thick ribbons. The dough shouldn't be liquid like other batters; more of a thick pancake batter or nut butter consistency. If your dough is thicker than this, add more water to adjust.
- Cover the bowl of dough and proof in a warm spot for 1 hour.
- After the dough has proofed, it should be subtly taller in the bowl. When you stir the dough, it should look and feel light and airy inside as you stir.
- Place the dough into the greased Pullman pan and use wet hands to smooth the top of the dough down to a flat top.
- Cover the bread with a snug cover that doesn’t touch the dough itself – I use an inverted produce bag.
- Proof for 1-2 hours (up to 3 in winter or a cold kitchen) or until the loaf reaches the lip or domes lightly over the sides of the Pullman pan.
- While you are waiting, preheat your oven to 220C/430F.
- Once the dough has fully proofed, place it in the oven for 30 minutes.
- After 30 minutes, turn the oven down to 200C/400F and cook for an additional 20-30 minutes.
- The loaf should be golden brown and might have sunk back to have a flat top that is the height of the Pullman pan (this is normal for this loaf).
- Remove from the oven and leave to cool in the tin for about 10-15 minutes. After this time, gently remove the bread from the tin and place it on a wire rack to cool completely. Don’t slice the loaf until it is completely cool.
- Leftovers keep well sliced and in an airtight container in the fridge or freezer.
Notes
- I generally find that store bought quinoa flour either goes rancid very quickly or is already rancid. I process whole quinoa grains in my NutriBullet to make my own quinoa flour. I process the grains through one cycle, open the lid for a few minutes to let out any heat, then process again. All up it takes about 5-10 minutes (including the time taken to let the flour cool off).
- See the body of the post if you want to rinse your quinoa prior to making flour.
- I have not tested any substitutes for any flours.
- See the body of the post for tips on making your best loaf.
This is an amazing gluten free high protein bread recipe! The absolute best and I am grateful that it is completely vegan too. Thank you so much Georgia.
I’m so glad you enjoyed it Laura! Gotta love quinoa 🙂