
I STILL have not stopped yapping on about my trip to Copenhagen (and Scandinavia more broadly) last year. I know. And you know what? Aforementioned yapping is set to continue while I talk you through this new recipe for gluten free rye bread. Of course, it is gluten free ‘rye bread’ because rye grain is not gluten free.
This loaf is made with majority buckwheat flour with some tapioca flour for flexibility. It uses dark cocoa powder and molasses for a traditional dark brown colour and funky, developed flavour. Although I am working on a sourdough version, this recipe is made with instant yeast to make it accessible for those without a starter.
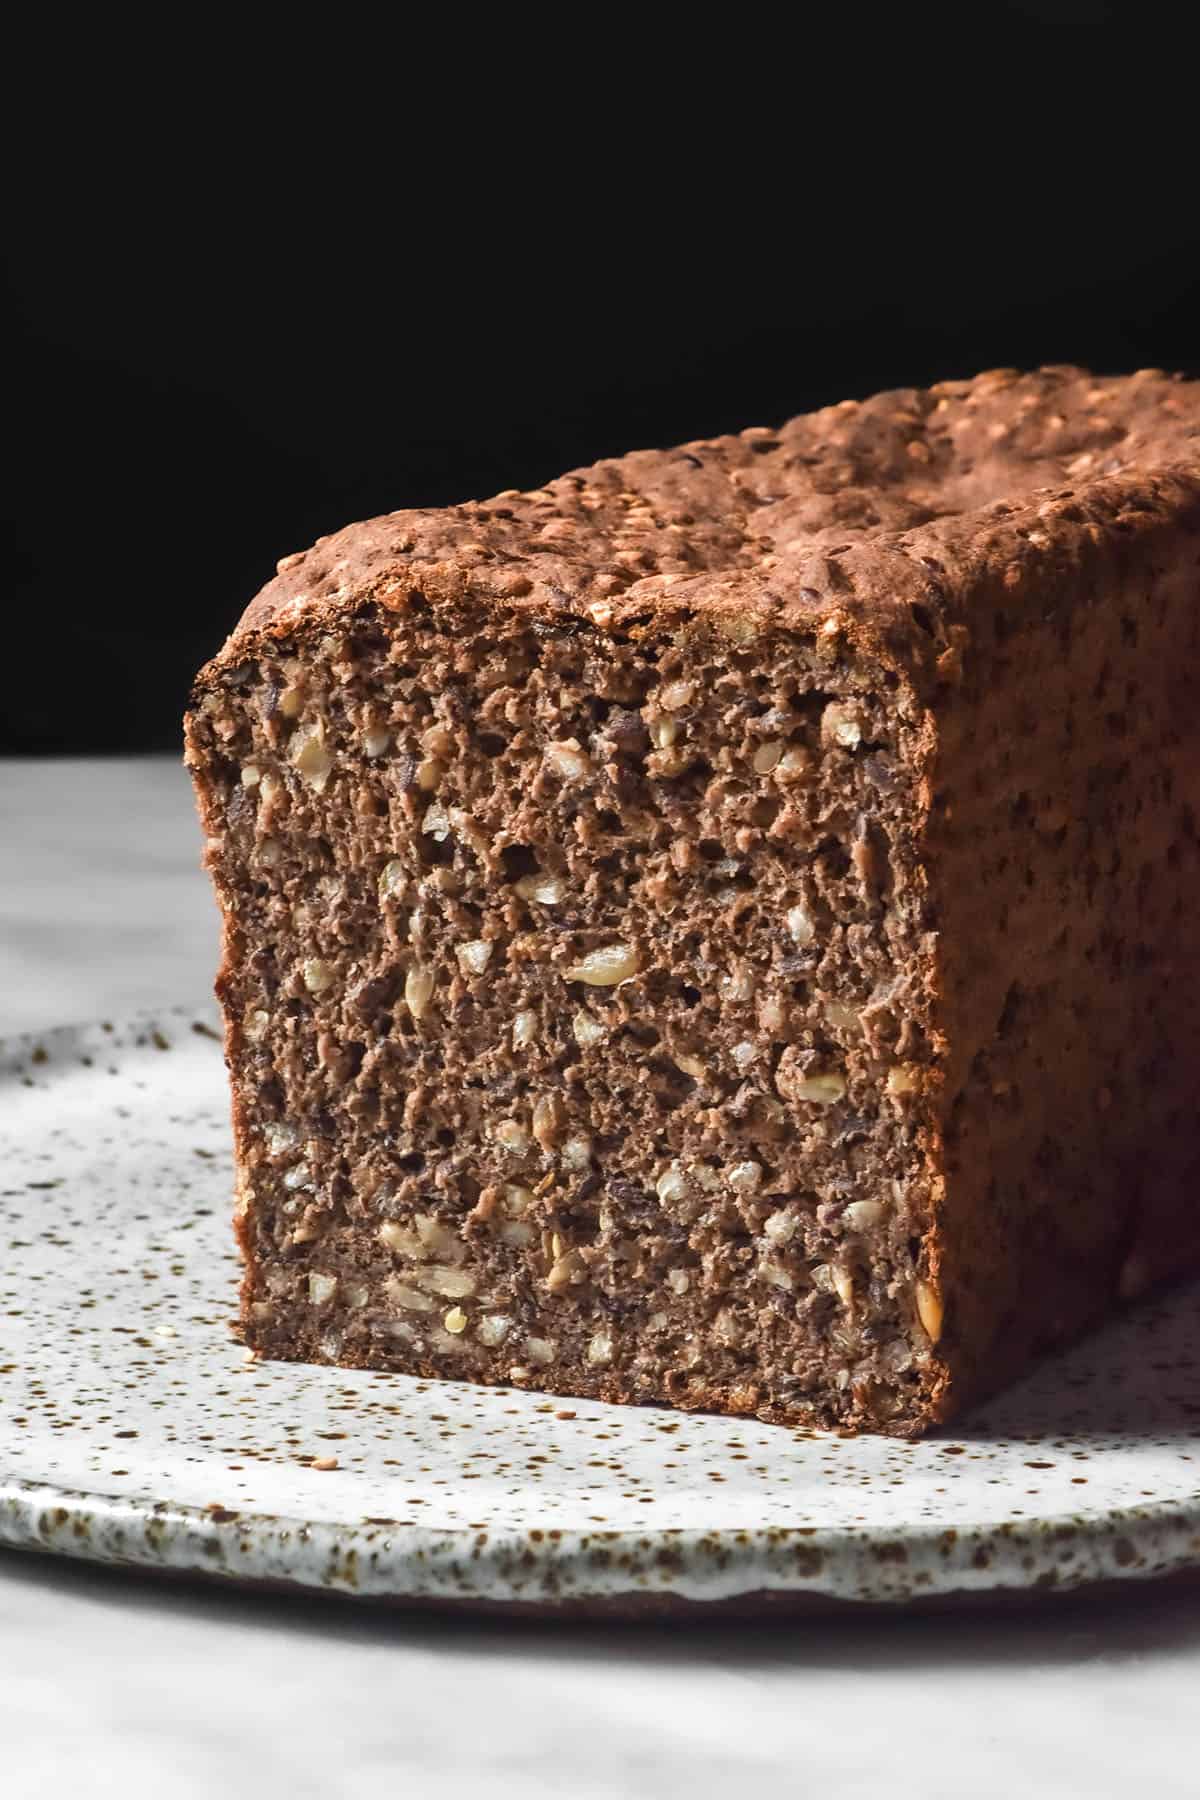
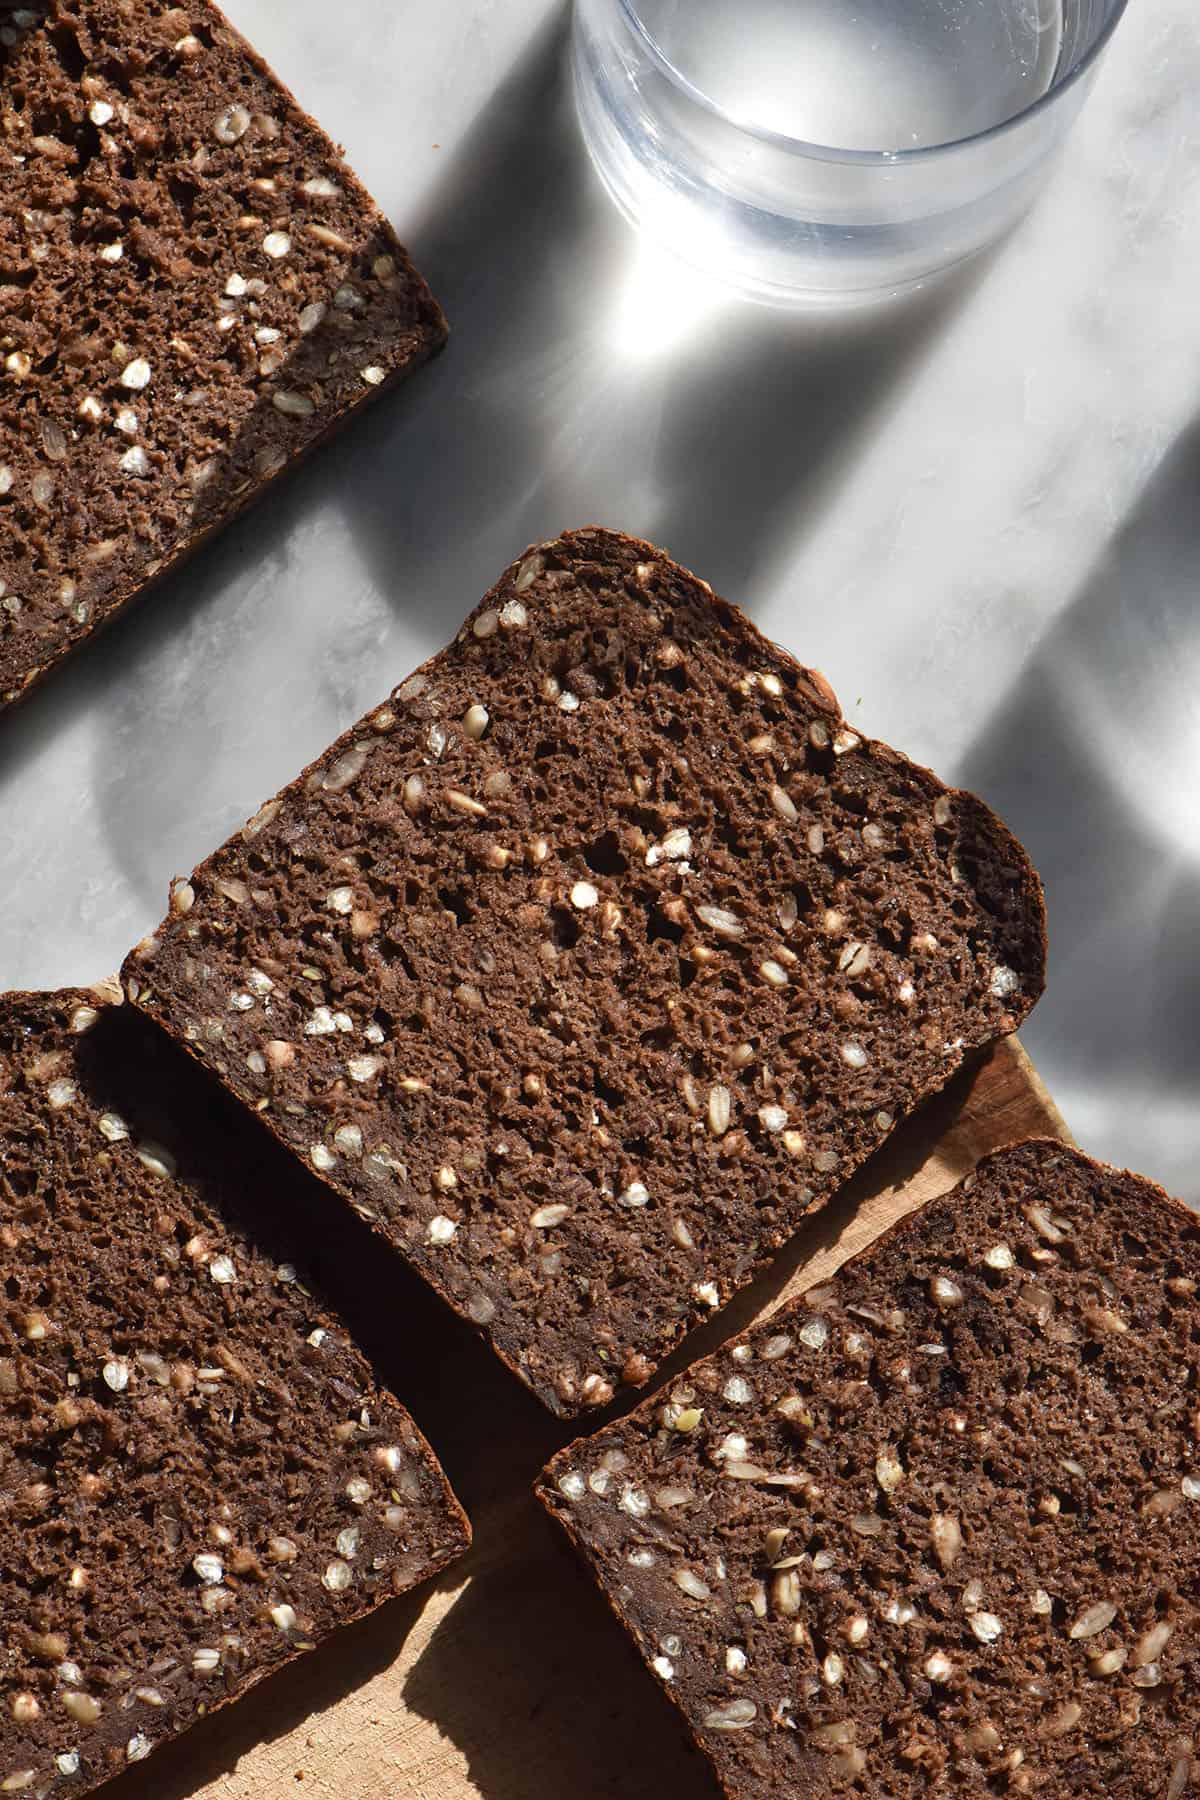
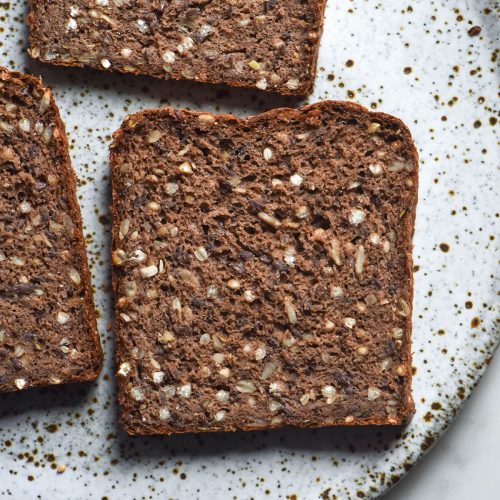
In the Danish style, this recipe is PACKED with seeds and buckwheat grain. I wanted to develop one of those hearty, super seedy loaves that are a meal in a slice. If you’re after a gluten free rye bread that isn’t dense and seedy, I recommend my gluten free pumpernickel bread recipe.
Shall we get straight into it?
Ingredient notes
- I have only tested light buckwheat flour in this recipe. I don’t know if dark buckwheat flour would have the elasticity needed to slice well with all the seeds in the recipe. When I get my hands on some dark buckwheat flour I will test it and update the post.
- I haven’t tested any substitutes for any ingredient. You’re welcome to experiment, but I can’t guarantee the results!
- The seed soaker needs to be made the night before to allow the buckwheat time to soften and the flax time to absorb all the liquid necessary. It’s not time critical thereafter; you can mix the bread up mid morning or when you get a chance.
- How much water you add depends on a number of factors which we will go into below.
- The Dutch processed cocoa and molasses give the bread a funky depth of flavour. I recommend keeping both in.
- I use psyllium husk powder that I grind myself from the flakes. I find the store bought powder can be quite clumpy when mixed with water and can result in a grey or purple tinge to your baked goods. A cheap little Breville spice grinder is what I use and it does the trick.
Hydration notes
Ah, hydration. How much water to add is a constant moving target and it will change based on a number of factors. First of all, how much water you add depends on what sort of bread you’re looking to make. In my limited experience, Danish style rye bread is a seedy and dense style of bread that isn’t overly lofty or soft. However, you can switch up this texture depending on your preference.
If you’d prefer a loftier loaf with a slightly taller profile and more open crumb, add more water. If you’d prefer a squatter, more dense loaf, use less water.
Next, the absorbency of your flours. How absorbent your flour is will determine how much water your dough needs. Some brands of flour are thirstier than others and this can depend on everything from how finely they are milled, where they are produced and the humidity where you live. What works perfectly for me might not work perfectly for you – such is the nature of gluten free baking.
The recipe suggests leaving the dough for 10 minutes after mixing for this reason. After 10 minutes, the psyllium husk powder and the flax have absorbed some liquid and you will get a slightly clearer picture of the hydration. If the dough is looking or feeling dry, crumbly or very stiff, you need to add more water. If the dough is too sticky to shape but still has a firmness and can stand up if you scoop a little from the bowl, it is a good level of hydration.
I will say that this bread is trickier than my other recipes to gauge your absolute perfect hydration. This is because of the seed soak and the stiffer dough. It might take some adjusting to achieve your perfect loaf.
Tips for baking and cooling
In developing this recipe, I noticed that the bread has a tendency to bake up with a dense bottom. My suspicion is that this is due to the heaviness of all the seeds weighing down the bread as it cools, although I could be wrong.
Either way, I recommend a 1 hour bake time for this loaf. The recipe uses a lower oven temperature because we don’t necessarily want a good oven spring here. Of course, we don’t want absolutely no oven spring, but a good Danish rye bread is dense.
So, I recommend a longer baking time on a lower heat (180C/356F). My other tip is to place the loaf upside down on a cooling rack for 5 minutes after baking. Set a timer and come back because you’ll notice the bottom is slightly concave after this time. Flip it back upwards after this time and allow it to cool as usual. You should have a nice even crumb throughout the loaf.
If you still have a soggy bottom, it could be that you have used slightly more water than your flours and dough needed. I’d recommend dropping the water back by 25-50g next time if the issue is minor or 50g if it is significant. Test and assess from there.
Flavour development options for your gluten free rye bread
We are using buckwheat flour, molasses and cocoa for a bit of a funky flavour and texture in this bread. However, there are more options for developing that rye flavour a little further.
My understanding is that rye bread is often a little sour and I am in the process of developing a sourdough recipe. I wanted this recipe to be accessible to people without a starter which is why it uses a less traditional instant yeast.
To develop the sour flavour, you could experiment with cold proofing this loaf instead of a bench proof. Simply prepare it, cover it in an airtight manner and place it in the fridge to proof until it reaches the sides of the Pullman pan. This will depend on how cold your fridge is (you might even be able to proof it overnight) and might need some experimentation.
On a forum, I saw a lady suggest that teff flour provided that nice sour flavour in a gluten free rye bread. I plan to test the theory next time I have some teff flour on hand and will update the recipe when I try it.
The next option is to consider adding a bit of coffee powder, garlic powder or asafoetida for a low FODMAP option. I have read that all of these ingredients add to a savoury rye-like flavour.
Next, of course, is caraway seeds. I haven’t used them in this recipe because they are getting harder to find where I live but they are key to my gluten free pumpernickel bread recipe. I recommend grinding the seeds to a powder as they are a bit pokey, but this is very optional. My pumpernickel bread uses 15g of caraway seeds.
More gluten free bread recipes
- Gluten free seeded bread
- Gluten free buckwheat sourdough bread
- Gluten free sourdough bagels
- Gluten free focaccia
- Gluten free millet bread
Gluten free rye bread (Danish style)
Equipment
- USA Pan Pullman steel loaf tin – 23cm length X 10cm width X 10cm height or 9 X 4 X 4 inches
Ingredients
For the overnight seed soak:
- 125 g buckwheat groats
- 125 g sunflower seeds
- 100 g whole flaxseeds
- 500 g water
For the gluten free rye bread:
- 300 g light buckwheat flour see notes
- 100 g tapioca flour
- 10 g Dutch processed cocoa
- 20 g psyllium husk powder see notes
- 12-15 g fine salt I used table salt
- 7.5 g instant yeast
- 10-15 caraway seeds ground (optional)
- 40 ml (2 tablespoons)* neutral oil of choice
- 20 ml (1 tablespoon)* maple syrup or sweetener of choice
- 20 ml (1 tablespoon)* molasses
- 125-225 g water see hydration notes in body of post
Instructions
To make the seed soak:
- The night before you intend to bake, prepare the seed soak by combining the ingredients in a medium bowl. Cover and place in the fridge. They don’t need to be used first thing in the morning, but it is important to leave them at least overnight so that the buckwheat groats have time to soften.
The next day:
- Combine the dry ingredients in a large mixing bowl. Add the seed soak, oil, maple syrup and molasses. Stir thoroughly to combine – adequately stirring here will give you a better sense of how much water you need to add.
- Add the water conservatively – 100-150g to start. Mix really thoroughly until there is no dry flour left in the bowl. The mixture should be quite stiff compared to my regular gluten free doughs, but still totally hydrated and sticky. Cover the bowl for 10 minutes.
- After the 10 minutes, assess the dough. If it feels extremely stiff and hard to move around the bowl, add 50g extra water. If it feels firm but too sticky to handle, proceed to the next step. The absolute perfect hydration will depend a little on your ideal style of bread: use slightly less water for a denser, drier style of rye and slightly more for a loftier loaf.
- Grease your 23cm length X 10cm width X 10cm height or 9 X 4 X 4 inches Pullman pan. Use a silicon spatula to encourage the dough into the pan (it will be too thick to pour) and use a wet hand to smooth down the top of the bread. Cover the loaf in an airtight manner. Air will harden the crust of the bread as it proofs which means it will be unable to proof upward, so make sure it is airtight. I use an inverted plastic produce bag secured with a rubber band – it is airtight but leaves plenty of space for the bread to proof upwards.
- Proof the bread in a warm spot for 1-2 hours. It should just reach the edges of the Pullman pan. This will take longer in winter and less time in summer or humid climates.
- While you'e waiting, preheat your oven to 200C/400F. When the bread has proofed, remove the proofing covering and place it in the oven for 1 hour.
- After this time, the bread should be lightly golden and firm on top. Remove it from the oven and invert it (crust side down) onto a wire cooling rack for 5 minutes. This helps eliminate any dense and wet bread bottom issues. After 5 minutes, flip the bread back upwards on the cooling rack and allow to cool completely.
- This bread keeps well stored cut side down on a wooden cutting board for a day or two, but then is best frozen and used as toast.
- To freeze, slice the bread and arrange it on a large lined tray. Freeze for 2-3 hours or until solid, then transfer the frozen slices to an airtight container.
Notes
- See the hydration notes in the body of the post before you start.
- I have only tested light buckwheat flour in this recipe.
- I grind whole psyllium husks to a powder in my spice grinder. I find the store bought powder clumps together too easily so I prefer grinding my own.
No Comments