
Homemade gluten free rough puff pastry is, in my opinion, the easiest way to achieve a flaky and delicious gluten free pastry. Store bought tend to be packed with weird ingredients and not actually that flaky. Homemade, however, is crunchy, light, buttery and delicious.
I have a number of pastry recipes on my site and in Intolerance Friendly Kitchen. There’s the grain free rough pastry and enriched pastry recipes online. In the cookbook, there’s gluten free puff pastry, rough puff pastry without xanthan gum, shortcrust pastry and more.
I wanted to combine the grain free puff pastry hero ingredient (cassava flour) with my gluten free rough puff pastry. In doing so, I figured I could create a gluten free rough puff pastry without rice flour.

Gluten free rough puff pastry without rice flour
This gluten free rough puff pastry is egg free, low lactose and made without rice flour. Rice flour doesn’t agree with everyone, and I use it a lot in my recipes (see: 40+ desserts that use rice flour).
This rough puff pastry uses a simple mix of sorghum flour, cassava flour and tapioca flour to achieve a light, flaky and buttery rough puff pastry. It’s easy to make and can be made ahead of time. The pastry freezes really well, too.
What is rough puff pastry?
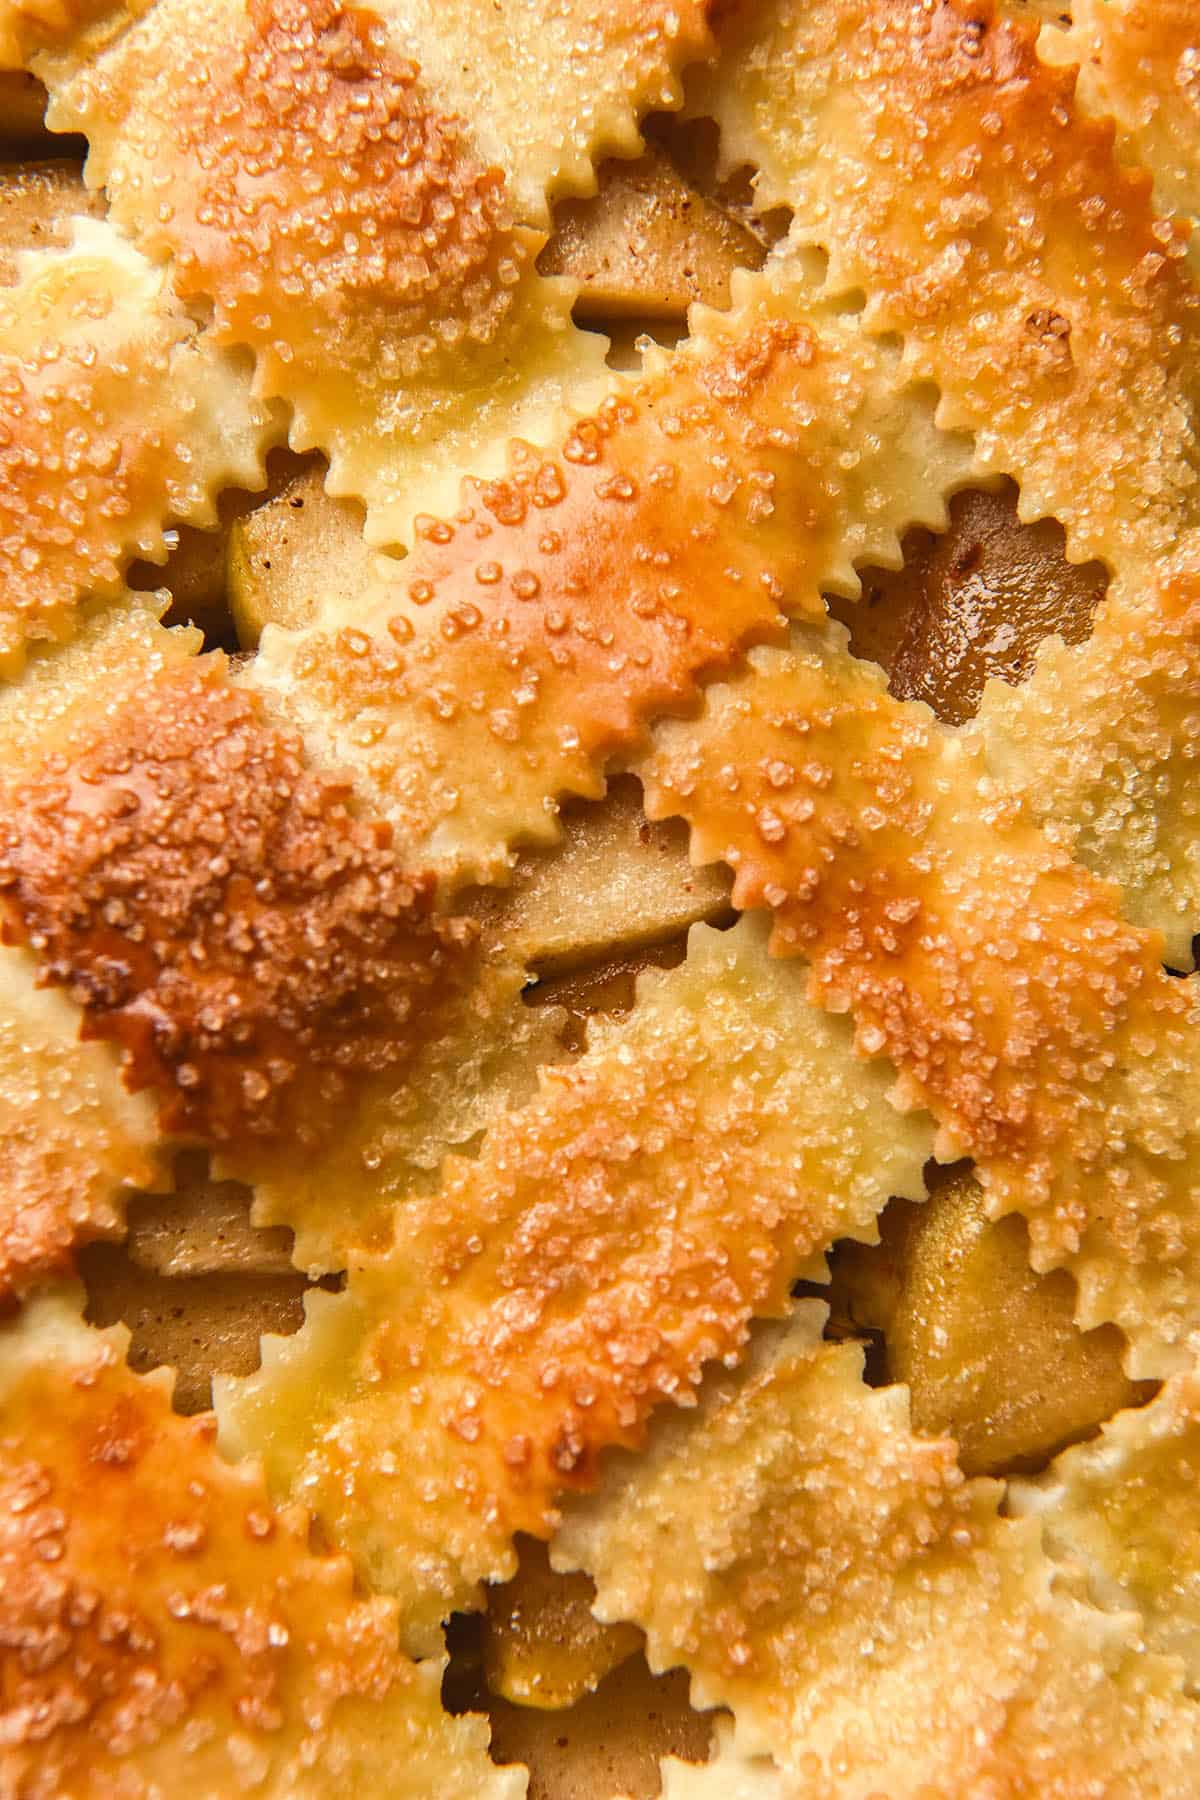
I like to think of rough puff pastry as a shortcut version of puff pastry. Instead of rolling a butter block into the dough, cubes of cold butter are rubbed into the flour. The pastry comes together with ice water and is then laminated to form layers of butter in the dough. These thin layers of butter result in shatteringly crispy and flaky gluten free pastry.
Although laminating sounds difficult, it is actually very simple to do. We will get into the process of laminating pastry below.
What is lamination?
Lamination is a technique whereby butter is rolled into dough to create small pockets and layers of butter. The word lamination shouldn’t scare you off – it’s quick and simple and makes for great pastry.
Think of making puff pastry. You roll and fold the butter into the dough, creating hundreds of layers of butter that puff up in the oven. This is what we want to achieve with this rough puff pastry, which basically just means easy puff pastry. I promise it is easier than it sounds!
Laminating grain free pastry gives it flakiness and texture that is a lot more akin to traditional pastry. It’s easy to do, I promise!
How do I laminate pastry?
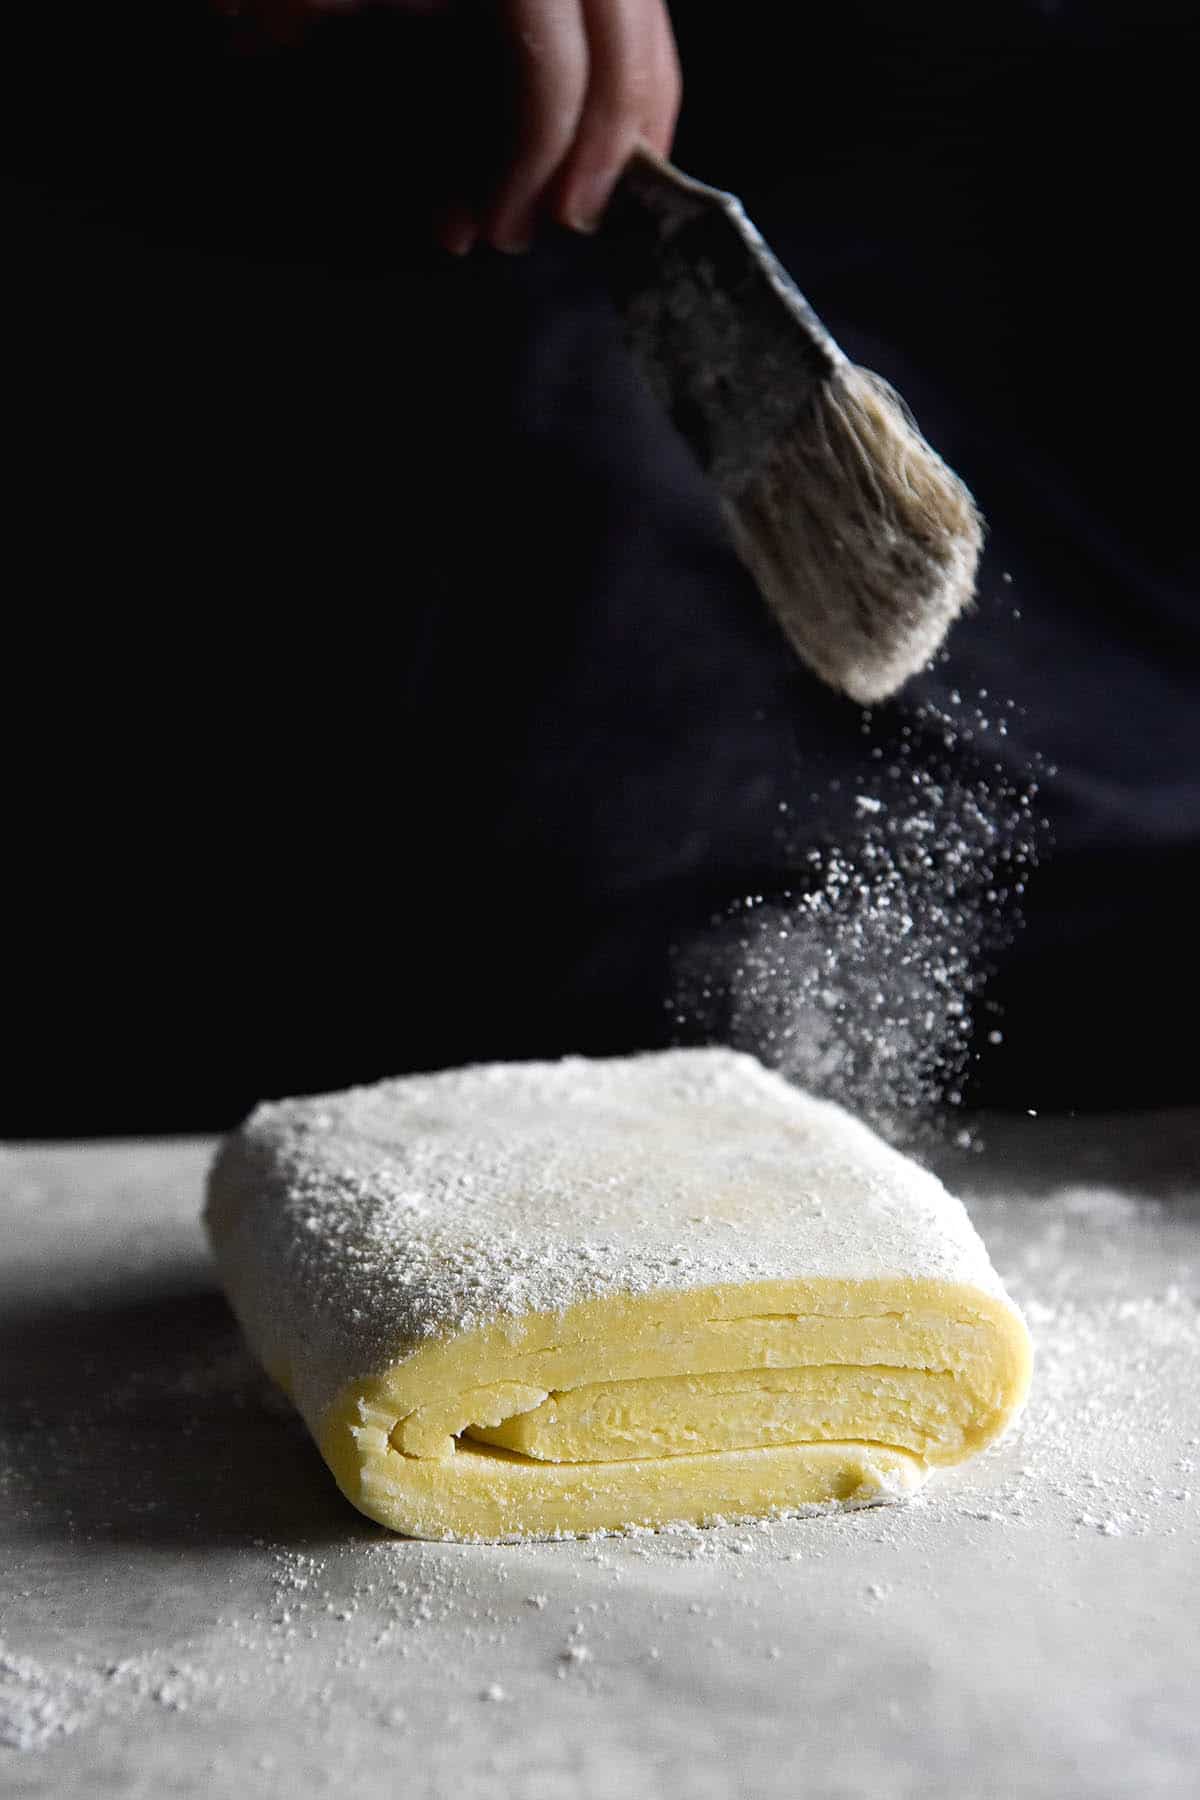
To laminate this gluten free pastry, flour a sheet of baking paper with tapioca flour. Baking paper ensures you can quickly whisk it into the fridge if it starts to get too warm or sticky. It also gives you something to help fold the pastry.
Roll the pastry into a rectangle about 30cm long and 15-20cm wide. The size doesn’t matter too much, but you need to be able to fold the dough into thirds.
Dust the pastry of excess flour then fold the top third of the pastry down onto the middle of the pastry. Dust again, then fold the bottom third up over the middle of the pastry. This is one business letter fold.
Next, turn the pastry so that the short side faces you. Complete the process of rolling and folding two more times, for a total of three folds.
Unlike croissant making, it’s not the end of the world if the pastry snaps as you roll it. In fact. you can expect it to snap (at least for the first two folds). Sometimes, by the final fold, the pastry doesn’t snap (but don’t worry if it does).
From here, your grain free rough puff pastry goes back into the fridge to chill before use.
Gluten free rough puff pastry tips
I don’t use xanthan gum when it isn’t necessary but I find it helpful here. It is particularly helpful when you are in the process of laminating the pastry, as the extra elasticity prevents the dough from breaking.
You can experiment with the flours that work best for you. I have kept the recipe card rice flour free, but you can use it if it works for your needs. Make sure you add water according to how much your dough needs if you use different flours. Some need more or less liquid than others.
On that note: make sure you add JUST as much water as necessary to bring the dough together. The dough should be mostly smooth with no completely dry flour spots, but a few tiny little crumbly spots are OK. You should be able to just bring it together into a ball. Remember, there is a lot of butter in this dough, so it won’t end up too dry. Too much liquid will make for a soggy pastry as opposed to a flaky and buttery one, so avoid adding too much liquid at all costs.
I recommend adding salt to both the savoury and sweet options. It adds a nuanced level of flavour.
More gluten free pastry recipes
- This grain free rough puff pastry
- The gluten free puff pastry from Intolerance Friendly Kitchen
- Shortcrust pastry from Intolerance Friendly Kitchen
- Rough puff pastry without xanthan gum from Intolerance Friendly Kitchen
- Gluten free buckwheat puff pastry without gums or starches from my buckwheat e-book
Gluten free rough puff pastry
Ingredients
- 200 g butter salted or unsalted, chilled and cubed
- 240 g (1 1/2 cups)* sorghum flour
- 80 g (1/2 cup)* cassava flour
- 30 g (1/4 cup)* tapioca flour
- 3/4 – 1 teaspoon xanthan gum
- 1/4 teaspoon fine salt for a sweet version or 1 teaspoon for a savoury version
- 75 g icing sugar omit for a savoury version
- 125ml (1/2 cup)* iced water, only as necessary
- Extra tapioca flour for rolling out the pastry
Instructions
To make the pastry:
- Make sure your butter is cubed and chilled before you begin.
- Whisk to combine all the dry ingredients in a large mixing bowl.
- Add the cubes of butter and use your fingertips to rub the butter into the flour mixture.
- Use a clicking motion to press the cubes of butter forwards through your fingers, creating small sheets of butter in the dough.
- Once all the cubes are rubbed in, carefully begin adding the water. You want the pastry to just come together without any dry spots, while adding as little water as possible. Less water (without the pastry being crumbly or dry) = crispier pastry.
- Continue adding water until you can just bring the dough together in a ball. There should be no dry spots. Decant the pastry into a large sheet of cling film. Wrap it loosely and then press it down into a flat rectangle. Place the pastry in the fridge to chill for 30 minutes.
To laminate the pastry:
- Once chilled, lay the pastry on a large piece of baking paper floured liberally with tapioca flour.
- When the pastry is warmed enough to be just a bit malleable, begin rolling it out into a rectangle. Size doesn’t matter, but it does need to be able to fold into three. I aim for about 30cm long.
- Once the pastry is rolled, dust off the excess flour. Take the top third of the pastry and fold it down onto the centre third of the pastry. Then, take the bottom third and fold it up over the middle third. It will likely crack at the sides and that’s fine. If you feel like it’s too cold to roll out, leave it to sit for 5 or so minutes (climate dependent – I developed this recipe in a warm kitchen, so your pastry might need longer).
- Turn the pastry stack so that the short side faces you. Repeat the process of folding and rolling the pastry two more times, for a total of three folds. Dust the pastry of excess flour and return it to the fridge to chill. After 30 minutes chilling the pastry is ready to use.
- For best results, use the pastry within a day. It can also be thoroughly wrapped and frozen. Allow frozen pastry to come to room temperature before use.
No Comments