
I have wanted to post a gluten free oat bread recipe for a while now, but it has stumped me at every turn. All of the yeasted versions I tried were too wet (even with a dry batter) sunken in and tasted bitter. Having only just finished my first gluten free yeast free e-book recently, I wondered if a yeast free version was the way to go. Low and behold, it was! A quick and easy loaf that tastes like porridge and has a perfect crumb. No bitterness, no sunken edges, no drama.
Gluten free oat bread
This oat bread is gluten free, yeast free, egg free, xanthan gum free and nut free. It uses yoghurt for binding and elasticity, but you can simply use coconut yoghurt for a dairy free/vegan oat bread.
The bread uses a simple combination of ingredients. Freshly ground oat flour and tapioca flour form the backbone of the loaf. A healthy amount of gluten free baking powder is responsible for the leavening in the absence of yeast and eggs.
Psyllium husk powder and a good amount of yoghurt bind everything together, create elasticity in the crumb and aid in browning.
A small amount of oil and maple syrup improve the consistency of the crumb, aid in browning and add flavour. Finally, water brings everything together and creates a batter that bakes up into a delicious, hearty gluten free loaf.
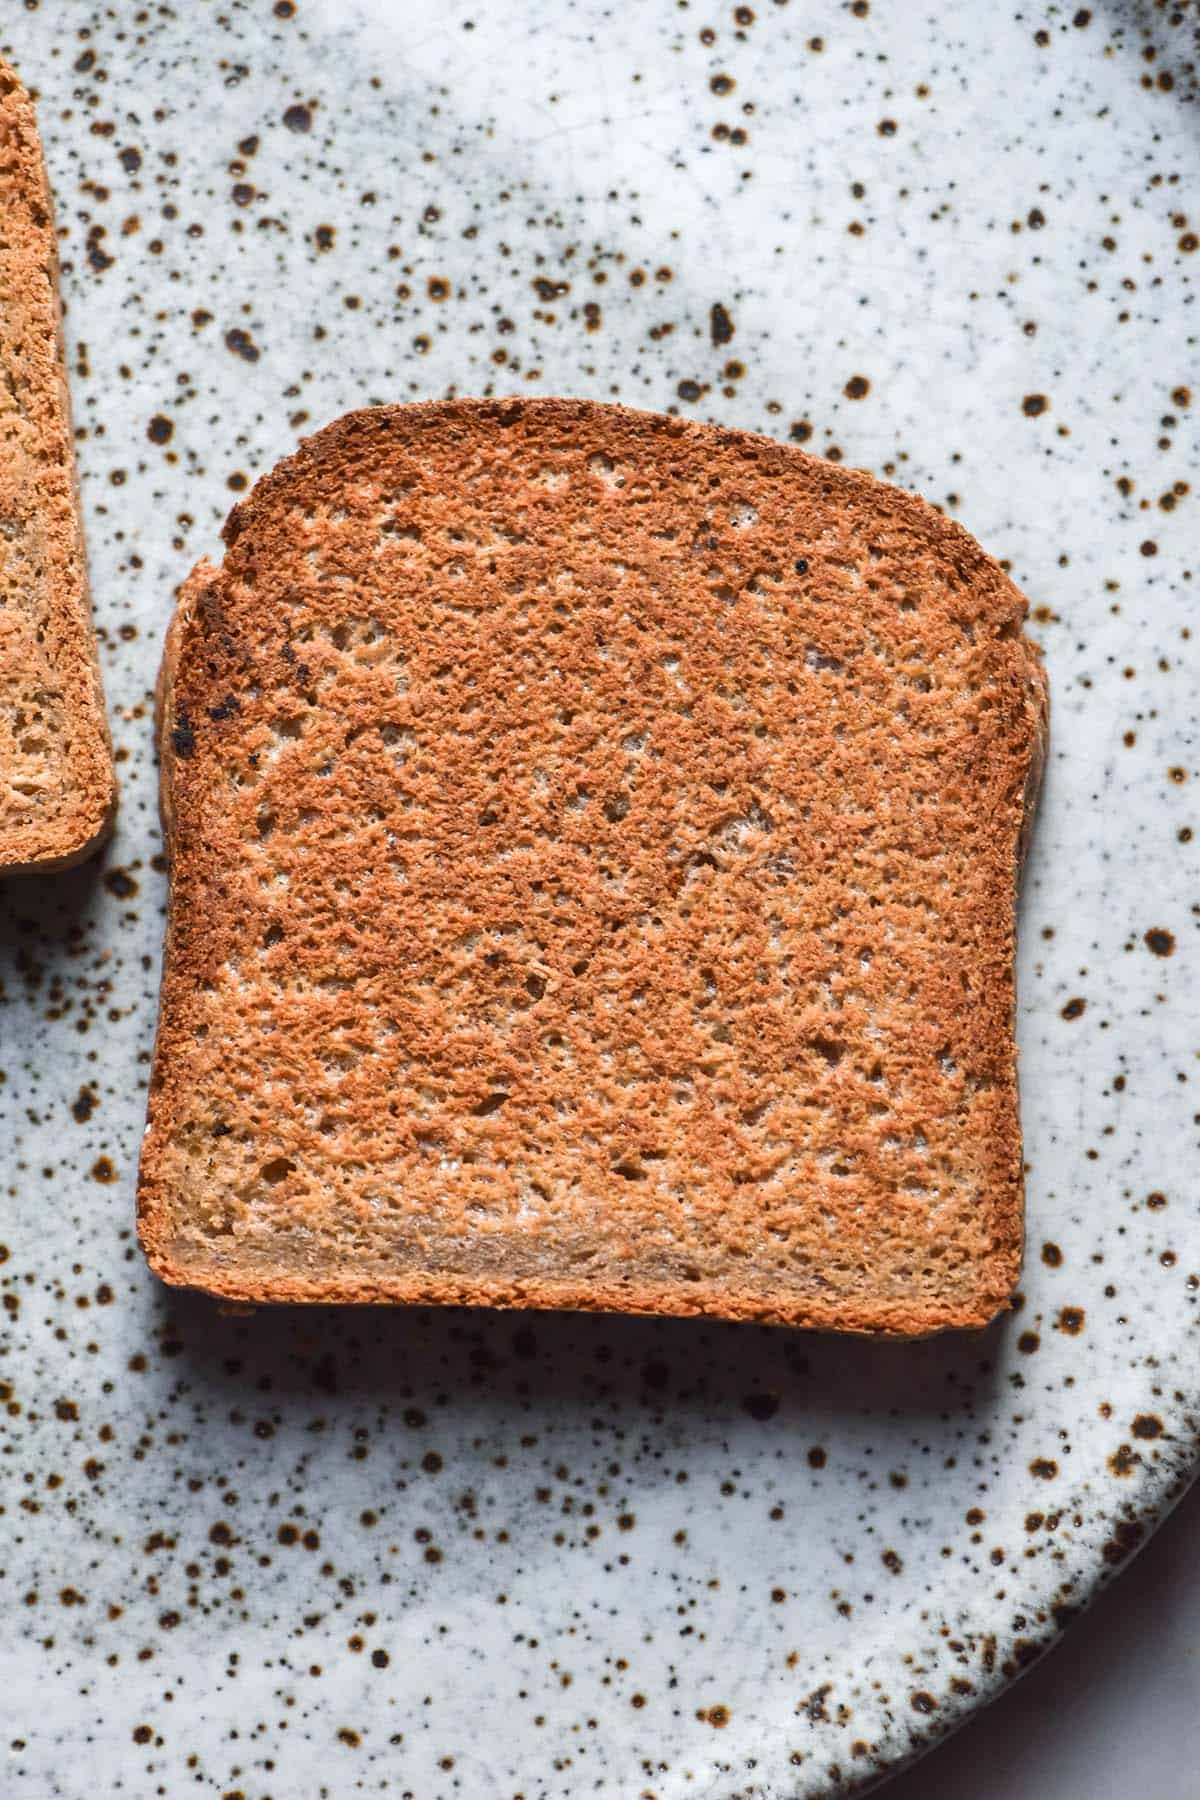
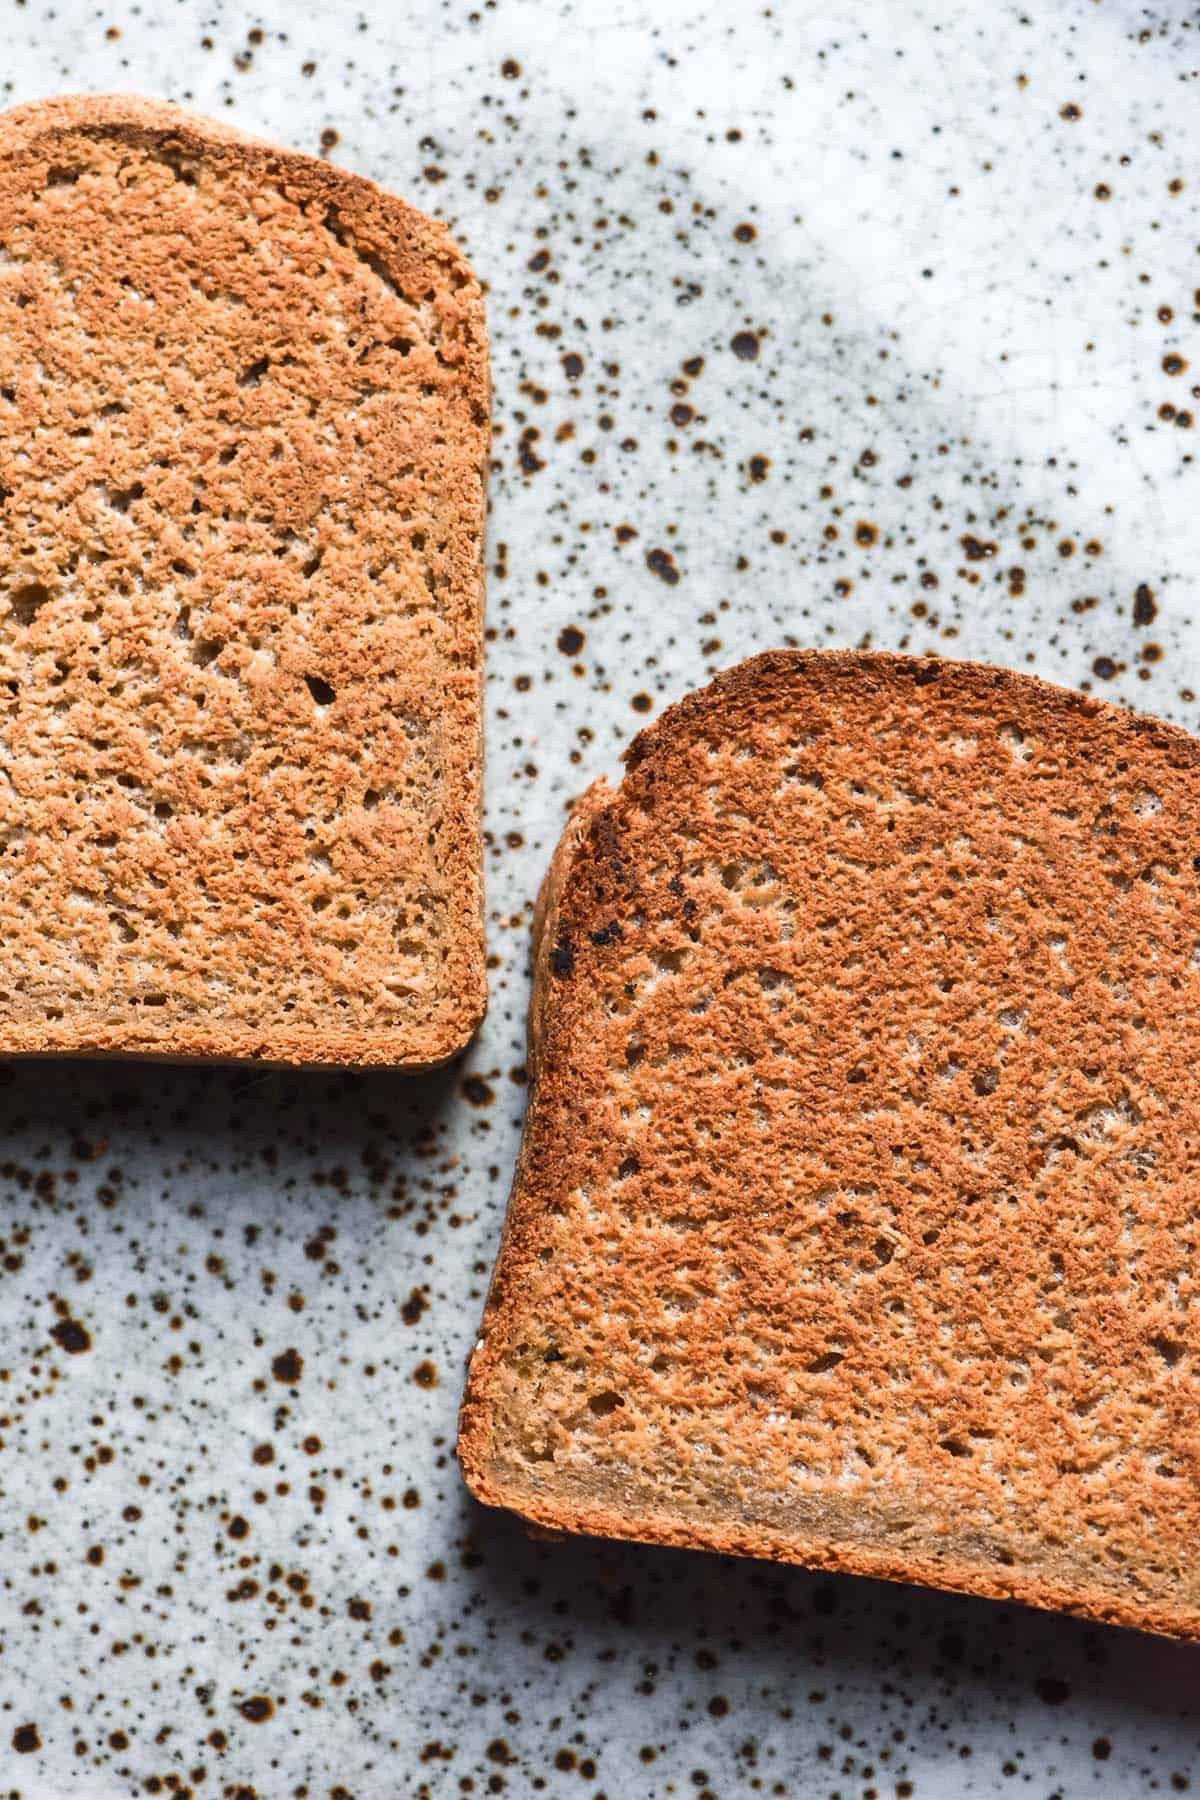
I would describe this as a loaf/bread. It has a nutty, porridge bread flavour and is almost a hybrid between a scone and a bread. You can absolutely use it to make a sandwich, but it has that scone or biscuit like flavour I really love.
A note on oats and gluten
I live in Australia where oats are not considered gluten free no matter how they are grown and manufactured. Allergy Australia says that the protein in oats is similar to the protein in gluten. They say that there is not enough research to conclude that coeliacs can safely eat oats.
In other countries, oats can be considered gluten free. If they are grown without the risk of cross contamination and processed in a dedicated facility, they are considered gluten free.
My website has a broad range of visitors from various countries. I have developed this loaf for people who can tolerate oats, whether they are gluten free or not. If you can’t tolerate oats or are not comfortable eating them, I have plenty of great gluten free bread recipes (linked below) for you to try instead.
If you are Australian, consider this a wheat free recipe rather than a gluten free recipe (provided you use wheat free oats, of course).
Ingredient notes for your gluten free oat bread
- I recommend grinding your own oat flour using wheat free oats (in Australia). The brand I use is Red Tractor. Abroad, use gluten free certified oats. Again, see the section above on oats and gluten if you are based in Australia.
- If you are not Australian based, you need to use rolled oats for this recipe. Quick oats are not suitable. This is another reason I recommend against using store bought oat flour unless they specify what sort of oats they are using. The hydration is tricky for this recipe and adding in an unknown ingredient (oats that may or may not be rolled) is a recipe for trouble.
- A lovely reader informed me that commercial oat flour has a different absorbency level to homemade oat flour because rolled oats are steamed, which gelatinises the starches (like a scald). I have not tested this recipe with store bought oat flour – I will at some point, but for now I recommend making your own oat flour for success.
- You can use plain thick Greek yoghurt or plain thick coconut yoghurt in this recipe.
- You can use tapioca flour or starch for this recipe. I intend to test cassava flour at some stage, although I do find it needs a lot more water than tapioca flour/starch.
Hydration notes
I won’t lie, I have found oats to be very finicky when it comes to perfecting a bread. My experience was that they didn’t do well in a yeasted bread, hence this recipe being yeast free.
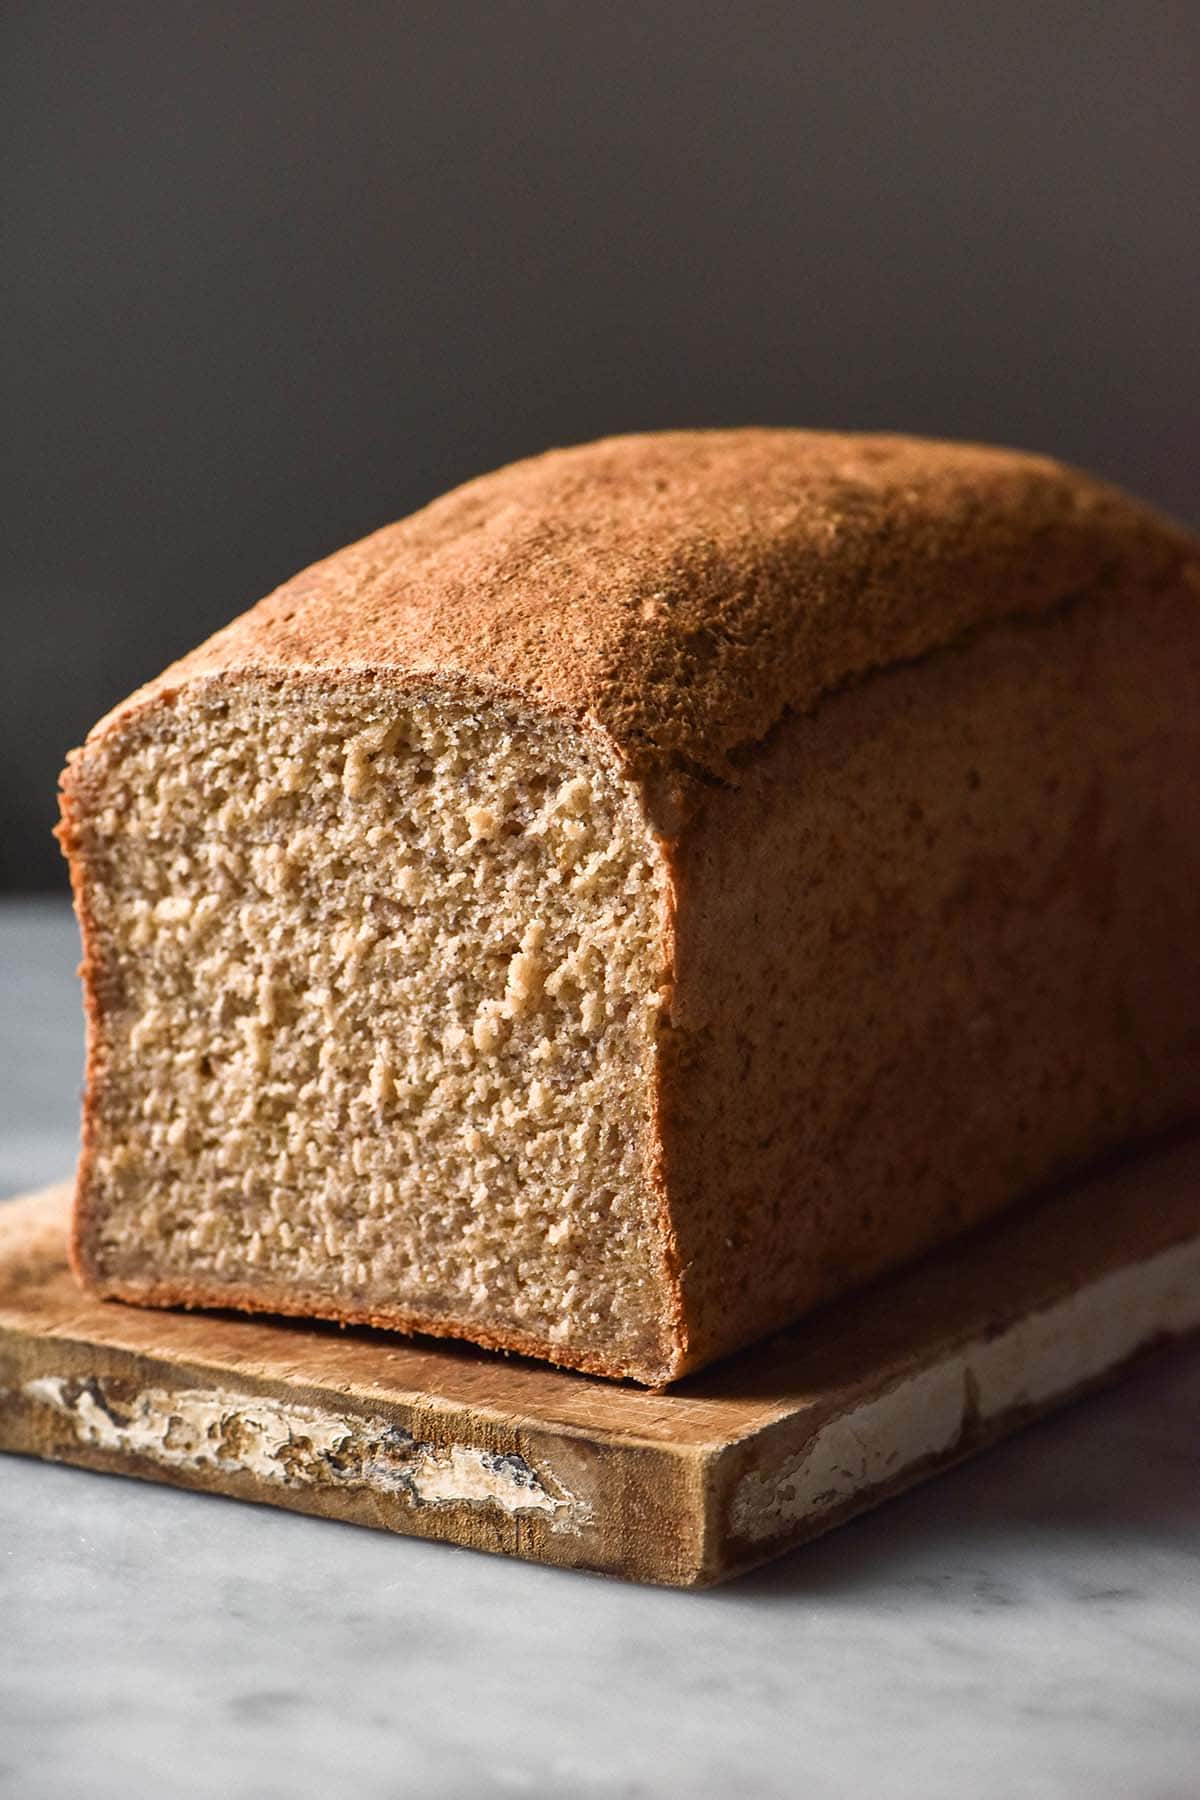
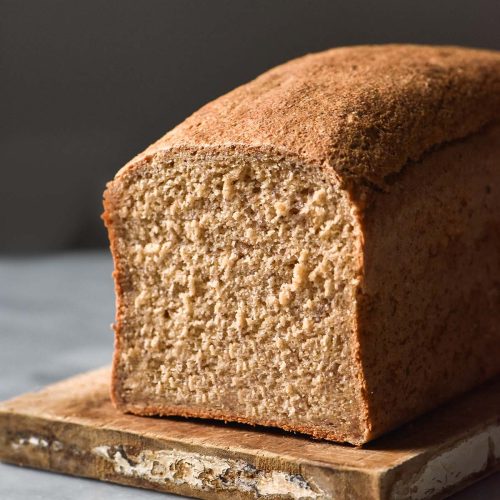
More than that, the perfect hydration is quite difficult to determine. The dough going into the pan can (and should) look much drier than a regular gluten free bread dough. However, this same loaf of bread can easily end up too wet inside and with a gummy base (an indicator of too much water).
An issue here is that every bag of oats will be different and require slightly different hydration. I can only test the wheat free oats available to me (Red Tractor brand in Australia) so the hydration that is perfect for you might be different.
Another issue is simply that oat flour is annoying to work with (in my biased opinion). You may have to bake the bread a few times to achieve the perfect level of hydration and unfortunately that’s just the way it is. The good news? All of my 80% perfect loaves were still absolutely delicious, even if they were slightly over or under hydrated.
Ideal consistency for your gluten free oat bread dough
This is the hardest part of an otherwise easy recipe. I have found that oat flour seems to absorb moisture like no tomorrow, only to produce a loaf with an overly wet crumb.
The ideal consistency for the dough is one that thickens up very quickly after you add the water. You really need to whisk quickly to ensure everything is incorporated prior to the dough becoming too firm to continue mixing.
The dough should need to be encouraged out of the mixing bowl with a spatula. How stiff it is will depend on your oats, but in my tests the dough held its shape in moist chunks (sorry) as I transferred it to the loaf pan.
The dough should be thoroughly mixed through with no dry bits of flour anywhere in the bowl. However, it should look a little stiff and a lot drier than a regular gluten free bread dough.
Troubleshooting
- If your loaf is squat and dense, add a little extra water next time. Also, check your baking powder is in date. You can experiment with adding the higher amount of baking powder if you didn’t already.
- If you can taste baking powder, drop it back a little. Keep in mind, too, that baking powder and baking soda are very different. We want baking powder here.
- If your loaf is wet inside or has a gummy layer at the base, drop the water back a little next time. Also, consider dropping the psyllium husk powder back a little as well. I use psyllium husk flakes that I grind to a powder myself, so it isn’t quite as fine as store bought powder. You might find that the store bought powder is more absorbent and you need less of it.
- You can also experiment with cooking the bread longer to see if it helps evaporate some of the excess liquid. You may need to cover the top of the loaf to ensure it doesn’t brown excessively.
Can I use a silicon loaf pan for this recipe?
My answer, as always, is no. This recipe, like all my other gluten free recipes, is designed to be made in a USA Pan Pullman pan in size small. I am not sponsored by them (I wish I was) but this is just the best loaf pan I have found for gluten free bread.
Gluten free bread does not have any inherent strength. It needs support (in the form of tall steel pan sides) to proof or bake upwards instead of outwards and out of the pan (likely onto the floor of your oven).
This recipe uses a considerable amount of baking powder and does grow in size. If the dough doesn’t have edges to guide it upwards, it will just spill out. Further than that, you will not get a tall loaf of bread.
The product specs are 10cm X 10cm X 22cm. In inches, this is 9 x 4 x 4 inches. If you cannot find or buy this particular bread pan, use one with as close measurements as humanly possible. I design all my bread recipes around this tin and I can’t guarantee results with other bread pans.
More gluten free bread recipes (xanthan gum free)
- Gluten free buckwheat bread
- Gluten free seeded bread
- Gluten free sourdough bread
- Gluten free focaccia
- Gluten free bread without yeast
Gluten free oat bread
Equipment
- 1 X USA Pan Small Pullman pan (10cm X 10cm X 22cm or 9 x 4 x 4 inches)
Ingredients
- 450 g oat flour freshly ground from wheat free/gluten free rolled oats (see notes)
- 150 g tapioca flour/starch
- 25-40 g psyllium husk powder (see notes)
- 30-40 g gluten free baking powder (see notes)
- 8-12 g fine salt (see notes)
- 300 g plain thick Greek yoghurt or thick plain coconut yoghurt
- 20 ml (1 tablespoon)* oil of choice (I used olive oil)
- 20 ml (1 tablespoon)* liquid sweetener of choice (I used maple syrup)
- 400 g water (see notes)
Instructions
- Preheat the oven to 200C/400F. Grease and line a USA pan Pullman pan in size small. Allow the baking paper to drape over the long edges of the pan to use as handles later. I pin the baking paper in place with bulldog clips so that it doesn’t slip around as I add the bread dough later.
- Whisk the dry ingredients together in a large mixing bowl.
- Add the yoghurt, oil and maple syrup and stir it to disperse. Start whisking vigorously as you add the water. The dough firms up quickly and everything needs to be combined before it does (as the dough is firm and sticky, which makes it very annoying to combine by hand if there is dry flour left). Adding more water will make for a loaf that is too wet, so we need to use it sparingly (particularly on your first bake, see the hydration notes in the body of the post for more information).
- Once the dough has been thoroughly combined, it should be sticky and hold its shape in the bowl. If you were to pick up a chunk and drop it back into the bowl, it should pretty much retain the shape it was in. With that said, the dough should be not excessively stiff or have any dry bits in the bowl or the dough. Oat flour is quite tricky to hydrate as it absorbs a lot of water but doesn’t need much for a hydrated loaf. Getting the hydration perfect for your flour might need a bit of trial and error.
- When your dough is mixed through and you have achieved the right consistency, scoop all of the dough into your prepared bread pan using a spatula. Wet your hands and use them to moisten and flatten the top of the bread, squishing it down to ensure it is evenly distributed in the bread tin. If you used them to secure the baking paper, remove the bulldog clips.
- Place the bread into the oven for 40-50 minutes or until golden brown and domed on the top. How domed will depend on how much liquid and how much baking powder you use. Once cooked, remove from the oven.
- After about 5 minutes, carefully lift the bread from the baking tin and onto a wire cooling rack. Allow to mostly cool before slicing. If the bread crumb balls up as you slice it, it needs to cool more before you continue. The crumb sets as the loaf cools, so it needs time to fully set.
- The bread keeps relatively well on the bench for a day or two, but in warm weather I would recommend keeping it in an airtight container in the fridge. Personally, I prefer to slice it and freeze it, then toast the bread straight from frozen.
Notes
- Oats are not considered gluten free in Australia. Red Tractor brand makes wheat free oats which are oats that have been grown and packaged in wheat free conditions. Oats are considered gluten free in other countries, so do what works for you.
- You need to use rolled oats here, not quick oats or any other sort of oat product.
- I grind my oat flour myself in a NutriBullet. I generally let it process for one cycle, open the lid for 2-3 minutes to allow any steam to escape, then process for another cycle.
- A lovely reader informed me that commercial oat flour has a different absorbency level to homemade oat flour because rolled oats are steamed, which gelatinises the starches (like a scald). I have not tested this recipe with store bought oat flour – I will at some point, but for now I recommend making your own oat flour for success.
- You can use anywhere from 25-40g psyllium husk powder in this bread. 25g makes the bread slightly easier to mix up as it takes a little longer to absorb all the liquid, giving you more time to mix before it firms up. However, 40g makes the loaf a lot easier to slice once baked. It also adds extra fibre to the bread.
- You can use 30-40g baking powder. 40g makes for a slightly taller loaf, but I personally can start to taste a little hint of baking powder at 40g. Experiment and see what works for you.
- The more baking powder you use, the less salt you should use (if you don’t like things too salty). I personally love a salty loaf and think it works well here, but drop the salt back a little if you know you don’t like it too salty.
- You can use plain coconut yoghurt in place of Greek yoghurt for a dairy free/vegan version. I find that the plant based version doesn’t get quite as brown and doesn’t get quite as tall. However, it often tends to have a slightly better crumb (probably due to the added starches or gums in the yoghurt). I use Nakula in Australia because it is made from coconut cream and doesn’t use any gums.
- Please please please read the hydration notes in the body of the post before starting this recipe. Oat flour works so differently to gluten free flours and you need to be prepared to do a bit of experimenting to achieve your perfect loaf. Unfortunately every bag of oats will have a different absorbency and you need to be flexible about adding more or less water as necessary.
Hi Georgia, I just wanted to offer an explanation for why you might have found the hydration tricky with this one. Flour made from ground rolled oats behaves quite differently from commercial oat flour (which is usually made from whole oat groats), because oats have to be steamed before they can be rolled. This in effect partially cooks them, meaning that flour made from rolled oats has a large proportion of pregelatinized starch (instant/quick oats have been steamed more aggressively and have an even higher proportion, which is why it behaves even more differently). The pregelatinized starch means that this flour absorbs a lot of liquid in its “raw” state but very little additional liquid while baking, leading to the dough seeming drier than normal before baking and wetter than normal afterwards. I see a lot of people online suggesting that homemade ground oats and commercial oat flour can be used interchangeably, but that’s only true if the proportion of oat in a flour blend is comparatively low or if the flour itself is a small component of the overall recipe. In a bread that relies on oat flour almost exclusively, the impact of the pregelatinized starch is much more noticeable. I regularly bake bread (yeasted and sourdough) with a large proportion of oat flour and learned the hard way that it’s not a negligible difference. You didn’t mention whether you’ve also experimented with commercially-made oat flour, but if not you may find more success developing yeasted recipes with it. If you can’t find it in a wheat-free version where you live, you can get closer to it by grinding your own steel-cut oats, which have only been minimally heat-treated (hence why they take so long to cook!). In any case, I hope this helps to shed a little light on your hydration difficulties 🙂
This is INCREDIBLE information, thank you so much! I was so shocked that more people weren’t complaining about oat flour haha, I found it so annoying to work with!
I haven’t tested this recipe (or any others) with commercial oat flour. I’m not sure where you are based (I’m in Australia) but we really only seem to have one brand of wheat free oats here (rolled ones) and no certified wheat free flours. Our allergy body says that oats are not gluten free but can be wheat free, which limits the scope for me and Aus readers. I was working on the assumption that at least some of my readers would be grinding flour from those oats as I did.
I will absolutely have to get my hands on some commercial oat flour or at least some steel cut oats and test this again! I had high hopes for oat breads and was sorely disappointed so this information might just reinvigorate my efforts haha.
Thank you again for such amazing info, I really appreciate it!