Gluten free apple pie is something I have wanted to make for a while. Nanna’s apple pie with a vanilla ice cream or custard was a Sunday night staple at my house growing up. These days, the idea of wheat fructans and apple fructose combined is a bridge too far for my digestion. Eliminating the apple from a true apple pie is a bit hard (but we have made a low FODMAP ‘apple’ pie). That leaves the wheat!
Gluten free apple pie recipe
A quick note, before we dive in. I know that the instructions in the recipe card look extensive and overwhelming. I’m sorry! Because I know that apple pie is often served at family gatherings or important events, I wanted to give you every possible tip and direction I have.
This gluten free apple pie is not FODMAP friendly. I love catering to all dietaries where I can but this is just not a low FODMAP recipe one. If you’re on the market for a gluten free and lower FODMAP fruit pie, there’s a strawberry and rhubarb number in my cookbook, Intolerance Friendly Kitchen. There’s also a jicama based ‘apple pie’ which is lower FODMAP on my website.
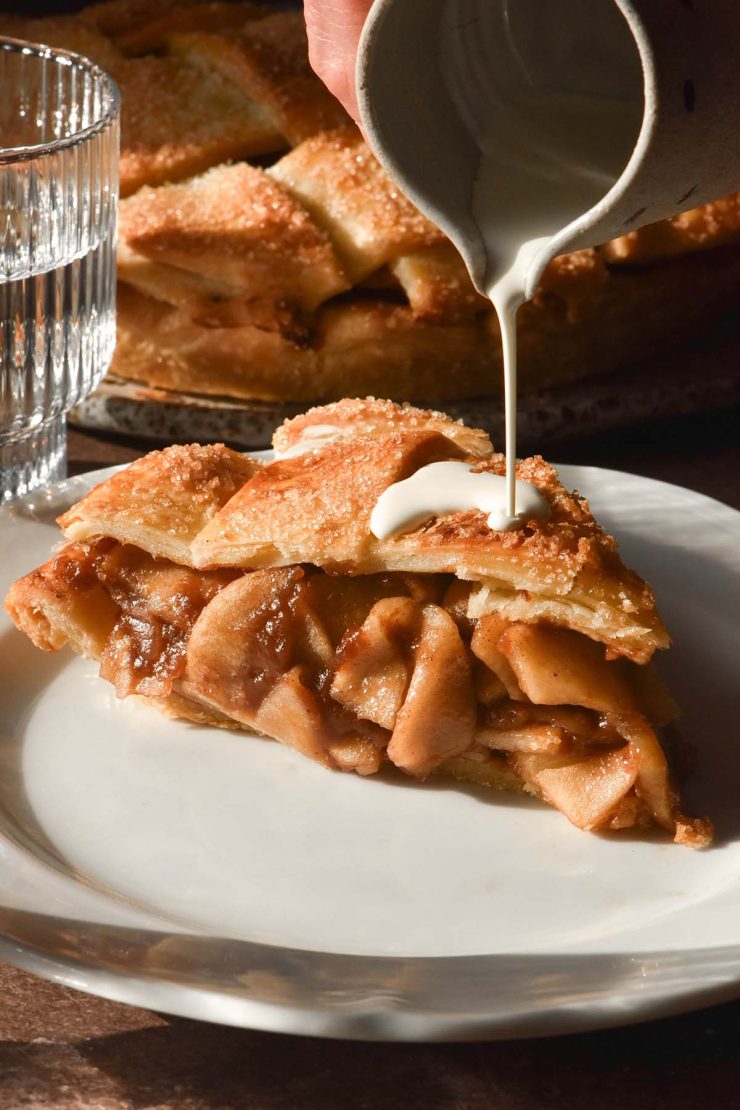
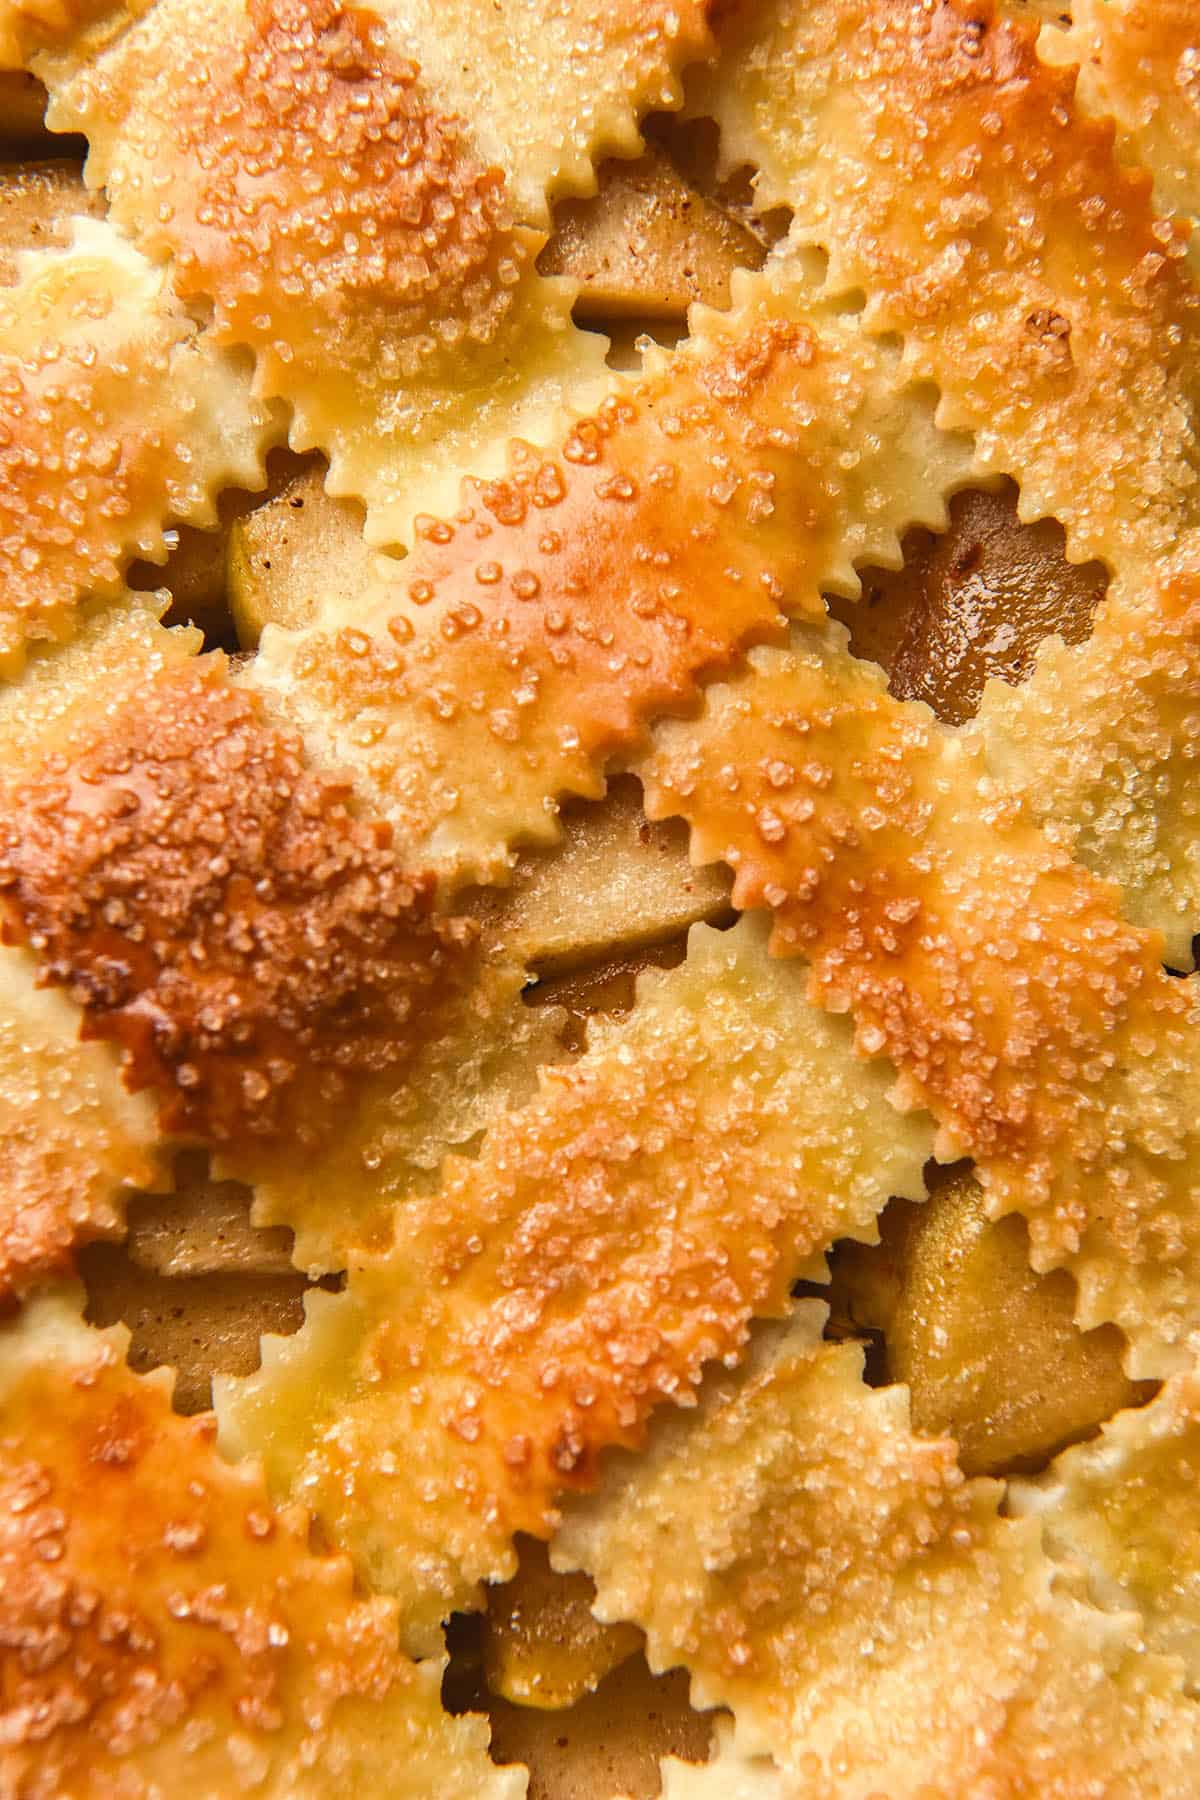
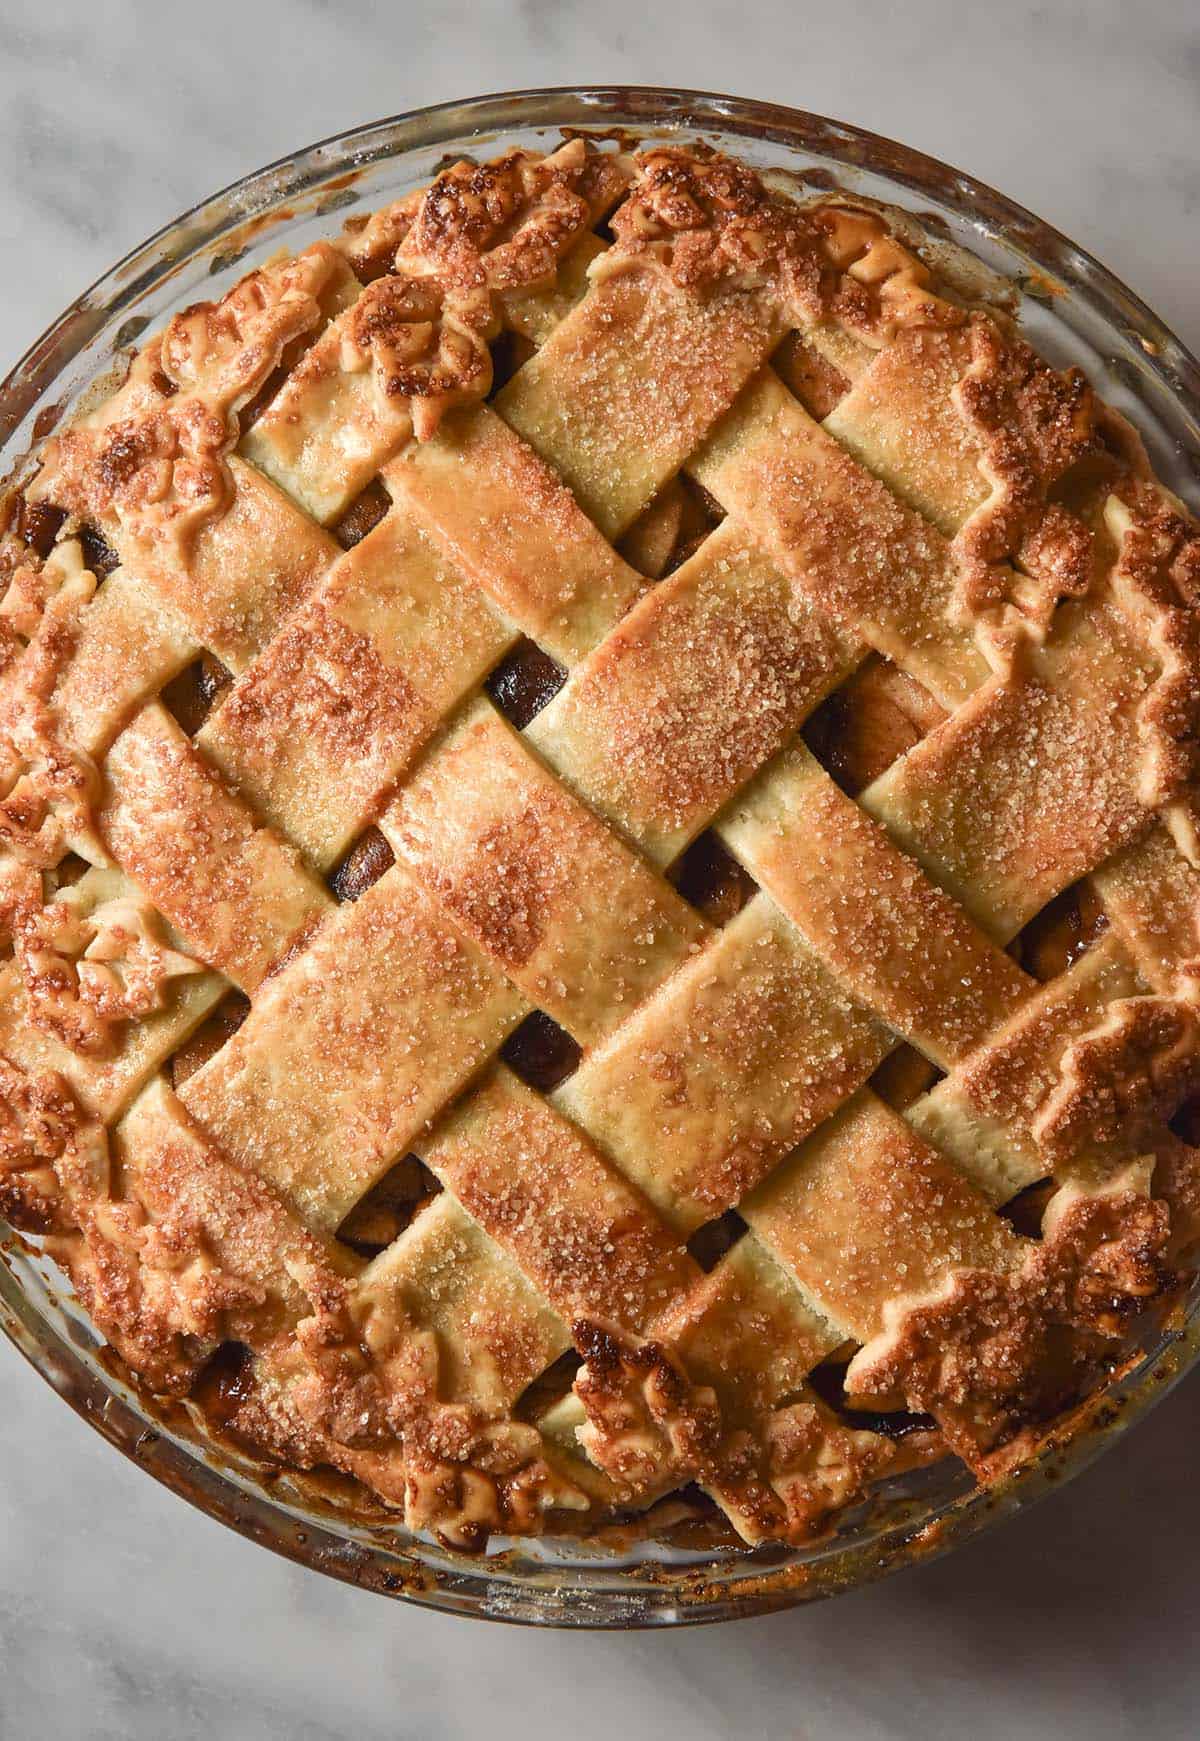
What it is, though? Absolutely, insanely delicious. The flaky, buttery pastry contrasts perfectly with the spice scented sweet apples for the ultimate cosy season dessert.
Gluten free apple pie recipe tips (for the apples)
Firstly, you must use Granny Smith apples here. The cooking times, sugar profile and everything in between are specifically for Granny Smith apples. Other varieties may be sweeter and more prone to turning mushy as they cook. This is not a recipe to use any apple you like – they must be Granny Smith.
Secondly, you need to cook the apple mixture. I have seen a lot of recipes online that soak the apples and then drain off all the liquid. I don’t understand it – maybe it’s a tradition thing? As I have learnt the hard way many times, things don’t cook much further when encased in pastry. Sure, if you bake the pie for 90 minutes they will eventually, but that comes at the expense of your pastry.
Cornstarch doesn’t bake off much under pastry either, which means your apple filling filling will taste pasty and fail to thicken.
Our apple filling uses brown butter which then blooms the spices. Not only does that help integrate the spices but also deepens their flavour and brings them out beautifully. The sweetness of the sugars (both brown and white) is offset with the acidity of some lemon juice and the tartness of the apples. You need to be open to scaling the sugar down a little and the lemon juice up a little if your apples are particularly sweet.
It’s important to slice the apple very finely (around 2-3mm) and not rush this step. Equally important is the need to cook the apple well before allowing it to cool. The thickest pieces should be slightly flexible – not stiff and crisp (unless that’s your preference).
You don’t need to fear the apple disintegrating unless you have been boiling it for an age. Granny Smith holds its shape very nicely which is why it is important to use this variety.
Gluten free pastry notes
I highly recommend salted butter for this pastry recipe. It infuses the pastry with a flavour enhancer – salt is so important to bring out flavour in sweet and savoury dishes.
I haven’t tested any flour combination other than the one listed. I chose this combination because it is neutral in flavour, has a small amount of inherent elasticity and isn’t excessively starch based. Too much starch in a buttery recipe can create a chewy, mochi-like texture. In testing, I found that a higher percentage of tapioca flour also had a more ‘gluten-free’ taste, whereas this version tastes more wholegrain (more ‘normal’ as my Mum kindly put it). I also just try to keep the starch to a minimum anyway given my SIBO issues.
I like (and deem it necessary) to laminate gluten free pastry two or three times to better incorporate some of the butter and to improve the flexibility of the pastry. My experience has been that gluten free pastry is more prone to developing holes where butter has melted, so lamination some of it in prevents this issue. We’re not quite making rough puff but a few turns does help.
On the flexibility front: laminating the dough just until it is soft, pliable and easy to work with makes this whole process so much easier. I find this recipe snaps and crumbles easy before you laminate. It’s a simple step but it really makes everything easier and more delicious.
Do I need to blind bake the pastry?
Some people say that their pastry recipe doesn’t require a blind bake. When it comes to something with a moist filling like apple pie, I have never found that to be the case. Gluten free pastry always benefits from a blind bake, in my opinion, so it’s not optional here. Nobody wants a soggy pie base.
This pastry does shrink a little if you’re not diligently with the pie weights, so make sure you are generous with the pie base and create pie edges that go right up to the edge of the dish (with extra pastry to roll them back down for a neat edge). Be sure to dock it with plenty of air holes, too.
Anecdotally, I have read that steel based pie dishes are much better at crisping up an apple pie base. I only have a glass dish so I haven’t tested the theory, but I will update the post if I do.
Do I need to use xanthan gum in the pastry?
For this recipe, I think it is key. The pastry is very buttery and apple filling is notoriously moist. This can mean that, without the extra strength, you will end up with a soggy pie bottom (and nobody wants that).
The xanthan gum also makes it infinitely easier to roll, shape and cut the pastry. Lattice work is so much easier with a xanthan based pastry as well.
I tested all varying levels of xanthan gum in this pastry and found that 10g was a perfect balance between flexibility and ease of use as well as taste.
Recipe tips for your gluten free apple pie
- The apple pie filling MUST be completely cool before you use it. You are working with a very buttery pastry dough and lamination requires a bit of fiddling. Your lattice pastry will melt as it touches hot apples and all of that work will be in vain.
- You will also need to allow your blind-baked pastry base to cool before you start the lattice work. Annoying but important!
- A great way to avoid waiting half the day for your apples to cool is to make them the night before you need them. This goes for the pastry, too – it can easily be made ahead and then blind baked. The case and apples will then be totally cool and ready for you to apply the lattice work before baking one final time.
- With that said, the pastry is far easier to work with when it has come to temperature. If you make it and chill it the night before, pull it out of the fridge with generous time to allow it to warm up a little (not excessively!).
- Ensuring the apple is cooked through but not overcooked is the most important part of the recipe, in my opinion. This will give you a juicy, cooked filling with a little bit of crispness – perfect!
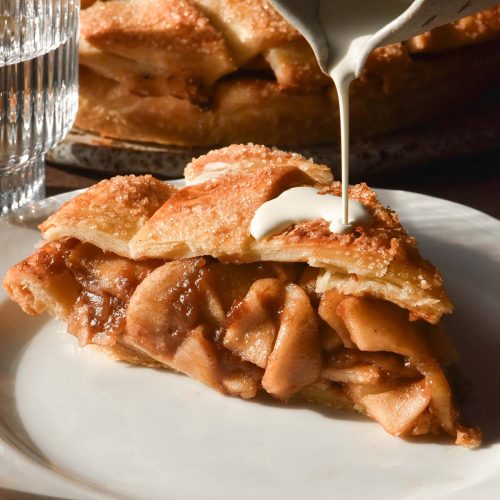
- Allowing the freshly cooked apple pie to cool a little helps minimise excessive juiciness. The liquid thins in heat and thickens as it cools.
- I love serving apple pie with either custard or ice cream. If you need, I have a recipe for low FODMAP custard and one for Ninja Creami vanilla ice cream (which can be lactose free).
More gluten free dessert recipes
- Gluten free lemon drizzle cake
- Gluten free vegan cinnamon rolls without yeast
- Gluten free pumpkin mug cake
- Gluten free sugar cookies (egg free)
- Gluten free vegan chocolate cake
Gluten free apple pie recipe
Equipment
- 1 X 1.2 litre capacity pie dish (24cm inside the flared rim, 21cm at the base) (40 ounce capacity pie dish, 9.5 inch inside the flared top rim, 8 inch at the base)
Ingredients
For the apple mixture:
- 1.5 kg Granny Smith apples becomes approximately 1.2kg after peeling and coring
- 50 g salted butter browned
- 3 teaspoons cinnamon powder
- 1/8th teaspoon allspice
- 1/8th teaspoon clove
- 100 g light brown sugar
- 50 g caster sugar
- 20 ml (1 tablespoon)* lemon juice
- 20ml (1 tablespoon)* water
- 20 g (1 ½ tablespoons)* cornstarch
- 20 ml (1 tablespoon)* lemon juice or water plus extra juices from the apple as necessary
- Good pinch of salt
For the gluten free pastry:
- 250 g fine white rice flour
- 50 g tapioca flour
- 10 g xanthan gum
- 4 g (½ teaspoon)* fine salt
- 50-75 g light brown sugar
- 225 g salted butter
- 80g/ ml (1/3 cup)* ice water
To finish:
- 1 egg for egg wash
- Finishing sugar, to sprinkle over the pastry (optional but very much recommended)
- Extra tapioca flour, for rolling out the pastry
Instructions
To make the apples:
- Start by making the apples as they need to be cool before assembling the pie. I prefer to make them the night before I need them as they are the most labour intensive part and also need to be cool before use.
- Measure out all the ingredients and have them ready to go. Once the apples are peeled and sliced things move quickly so it’s infinitely easier to be ready ahead of time.
- Peel, quarter, core and finely slice the apples into 2-3mm or very fine slices. This takes time but it’s important for the best textured pie. Try to keep them all a very similar size as this will ensure they cook evenly. Set aside the fine slices in a large bowl. Discard the skin and cores.
- Heat the butter in a large pot or Dutch oven until it is browned and fragrant. Flecks of light brown should bubble up onto the surface. Add the spices – they will sizzle and disperse. Stir to combine and allow them to bloom for 10-20 seconds.
- Add the sugar, 20ml (1 tablespoon)* of lemon juice and 20ml (1 tablespoon)* of water. The mixture will splatter and sizzle so stir it quickly before adding the apples.
- Stir the apple to coat in the spice mixture. Cook on a medium heat for 10-20 minutes or until the apples are flexible and translucent. I find Granny Smith apples take longer than you’d think to cook, so you can be a bit brave and push the cooking time a bit longer than you think the apples will need. They don’t cook too much more in the pie because of the pasty on top, so cook them nearly as well as you like your apple pie filling. The exact timing will depend on the heat used and your preferences.
- Taste the mixture and see if you think it needs a bit more lemon juice. If it does, combine 20ml (1 tablespoon )* of lemon juice with the cornstarch to form a slurry. Spoon extra juices from the apples into the slurry to make it liquid. If it doesn't need more lemon juice, use water instead of lemon juice.
- Once your apples are cooked to your liking, drizzle the cornstarch slurry over the apples as you stir. Continue stirring until the slurry is incorporated and cook a few minutes more or until the apple juices have thickened right up. This should happen quite quickly if you have cooked your apples for a while. Once the juices turn to a jam consistency, turn the heat off and allow the apples to cool completely.
To make the pastry:
- Combine the dry ingredients in a large bowl and whisk to combine. Sieve the mixture twice, pushing through any brown sugar clumps to break them up.
- Add the cubed butter and use your fingers to rub the butter into the flour until you have a course meal texture. There should only be small, fine chunks of butter in the dough. I like to use my thumb and forefinger to flatten cubes of butter into thin sheets.
- Once the butter is rubbed in, add the water. Use one hand to stir the mixture and gently squeeze it until it comes together. There should be no dry flour in the bowl and the dough should be juicy and elastic but not wet. Press it together into a ball and then flatten it out in some cling film. Cover and refrigerate for 1 hour or until the butter is firm but not hard.
To roll out the pastry:
- If you are baking straight away, preheat the oven to 180C/356F.
- Arrange a large piece of baking paper on a clean, dry bench and flour it with tapioca flour.
- Take the dough from the fridge and cut it into two pieces, one about 2/3 of the dough. Wrap the smaller piece and return it to the fridge.
- Place the dough on the floured paper. Lightly flour the top and bottom of the dough piece to prevent any sticking.
- Roll the dough out into a medium rectangle, paying no attention to any cracking at this stage. The short side of the rectangle should be facing you. Dust off any excess flour, then fold the top third of the pastry rectangle down onto the middle third of the dough. Fold the bottom third of pastry rectangle up over the middle third. Turn the rectangle of dough so that the short side of the rectangle faces you. Repeat this process two more times. By the third roll, you should have lovely pliable pastry dough that is flexible and easy to work with.
- Flour the paper again then roll the rectangle out into a large square, considerably wider than the 24cm/9.5inch pie plate. The pastry should be around 1/2cm or 1/4 inch thick.
- Trim any scraggly edges and set them aside to be incorporated back into the remaining dough.
- Place the inverted pie plate in the centre of the pastry square. Place one hand under the baking paper and hold the pie plate with the other hand. Carefully flip the pie plate upright so that the pastry falls into the pie plate. Gently peel away the baking paper.
- Begin gently pressing the pastry into the pie plate without stretching it. Be generous with the edges and don’t pull and tug as you mould the pastry into the plate.
- Trim excess edges with scissors, leaving enough pastry to fold the top of the raw pastry edge over itself on the pie plate side. This creates neater, thicker pie top edges that don’t burn as easily and taste better. Do this the whole way around the pie.
- You can crimp the edges if you like, but they won’t be a prominent visual part of the pie.
- Dock the pastry generously with a fork to allow any air to escape.
- Take two long pieces of baking paper and scrunch them up in your hands. Unfold them then place the first one carefully into the pie plate. The two longer sides of the baking paper should be hanging over two sides of the pastry edges, protecting them from over-baking.
- Place the second piece of baking paper inside the first with the overhang protecting the other two sides of pastry edge.
- Pour your pie weights into the baking paper. Work gently but thoroughly to ensure the baking paper and pie weights are right up against the pastry without crushing it. This will help hold the pastry in place during baking. My pie weights are an old bag of rice and lentils. You will need plenty of pie weights to hold the pastry in place – ideally they will fill the pie plate.
To bake the pastry:
- If your pastry is soft and warm after shaping, place it into the fridge or freezer for 10-15 minutes to allow the butter to firm up. You may need more time if you live in a humid or hot climate.
- When it is ready, place the pie in the oven for 30 minutes to bake.
- After the 30 minutes, carefully remove the pie base from the oven. Gently and carefully lift the pie weights out (they will be HOT) and place them in the baking paper on a heatproof surface (I use an oven tray or large cast iron).
- Very gently peel away the second piece of baking paper. It may have stuck to the pastry and will be enmeshed in grooves if you have crimped the pie edge.
- Once you have removed the pie weights and paper, brush the whole pie thoroughly with egg wash. This will aid in browning and also seal the pastry from soaking up moisture. Take your time and get every nook, then return the pie base to the oven for 10 minutes.
- After 10 minutes, the pastry should be golden brown and cooked through. The base should not be translucent and if you are using a glass pie dish, the base should look brown on the bottom too (be VERY careful checking and don’t drop it, obviously).
- Allow the base to cool before starting on the next step.
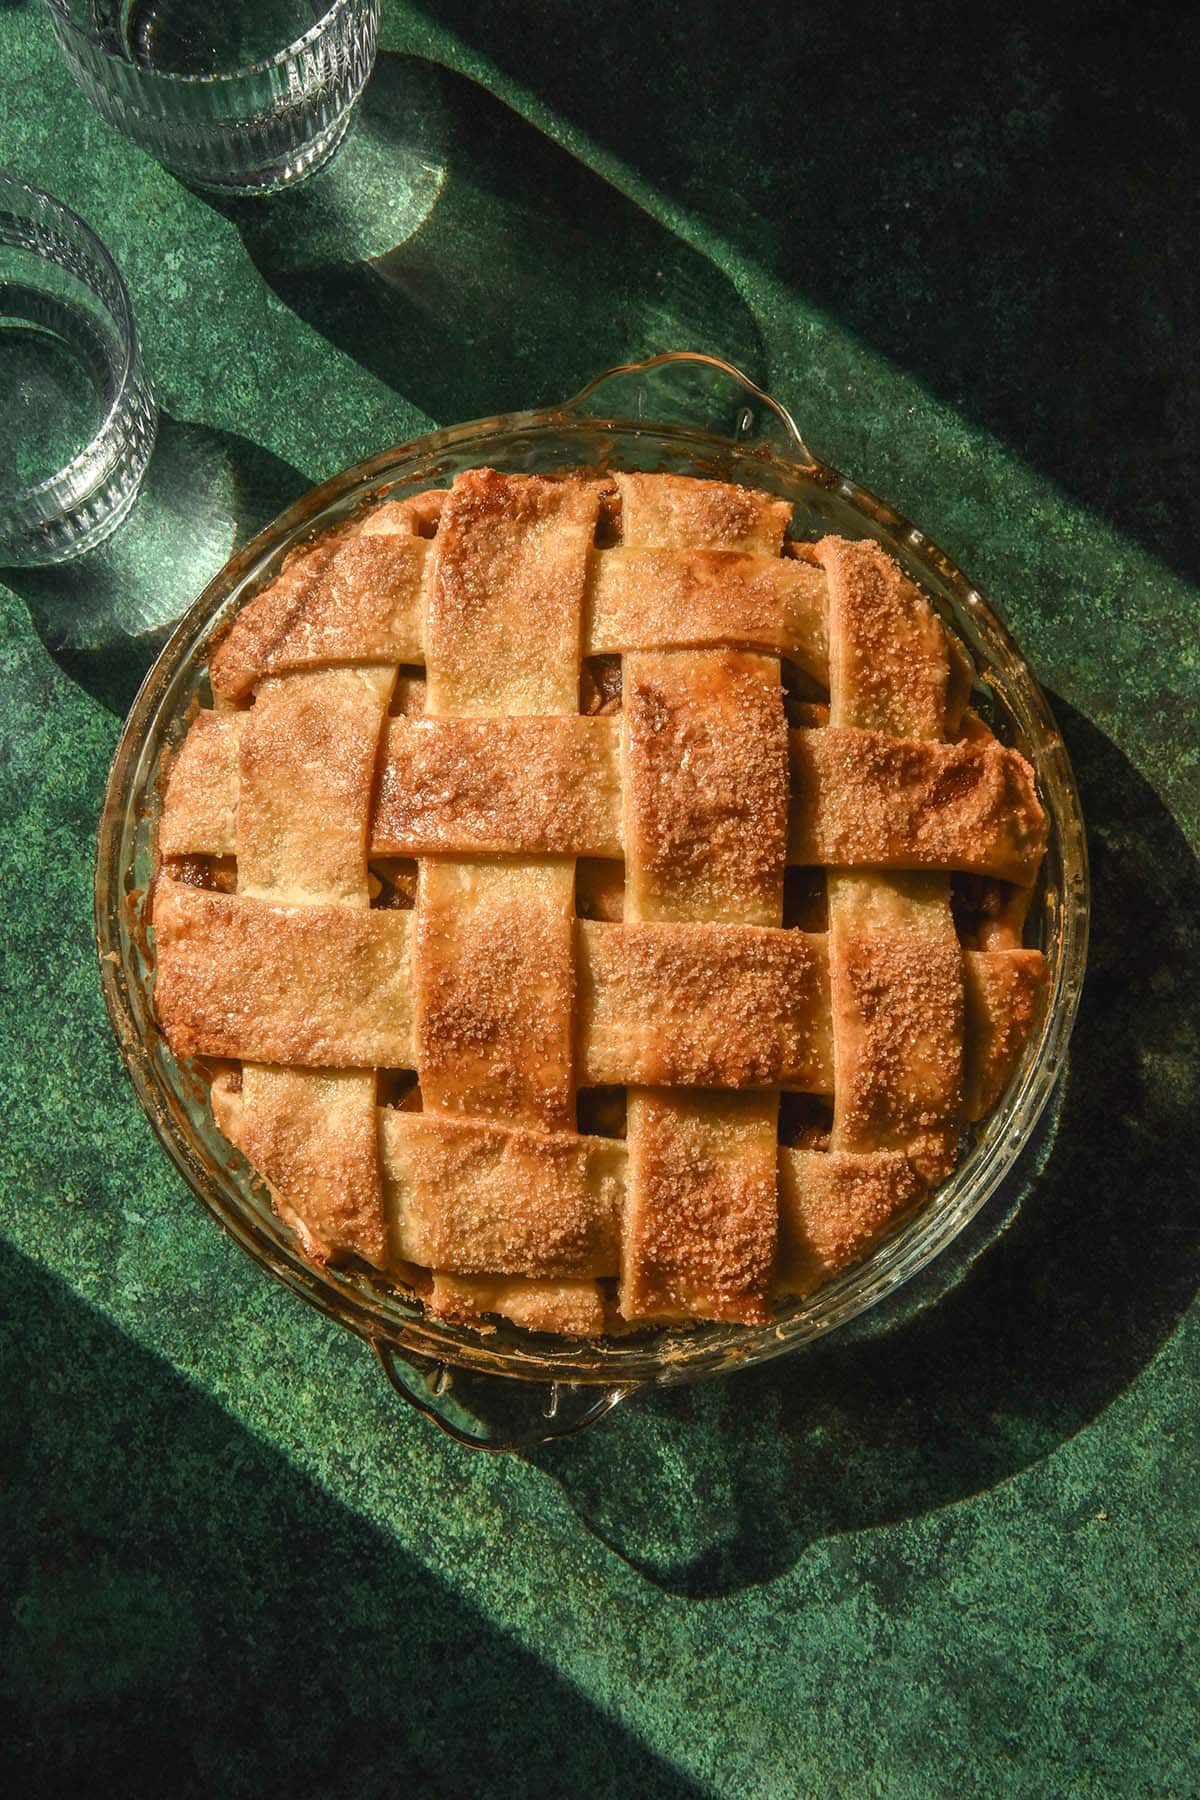
To create the lattice top and bake:
- About 5-10 minutes before you start, take the remaining raw pastry out of the fridge to allow it to soften slightly.
- Take a large sheet of baking paper and flour it with tapioca.
- Flour the piece of pastry on the top and bottom, then laminate it as we did with the base piece in step 5 of 'to roll out the pastry'. It should be smooth and pliable.
- Roll the pastry out into a large square larger than your 24cm/9.5 inch pie plate. You want the piece of pastry to be relatively thin (3-5mm) so that the overlapping latticework can cook through before the pie browns too much. However, the pastry shouldn’t be so thin that it becomes fragile.
- Cut anywhere from 8-12 evenly sized long strips of pastry from the dough to create the latticework. Use around 8 for thicker strips and 10-12 for thinner strips. This is mostly just an aesthetic preference, although thicker strips are a little easier for a latticework beginner.
- I highly recommend watching a latticework video because it is so much easier to see than to read through. I have linked a visual guide in the notes – it starts at the 40 second mark.
- Once you have created your lattice top, trim the edges of each piece just slightly. Press each edge firmly down onto the cooked pastry to adhere the lattice to the base. Don’t stretch the pastry to stick it down.
- Repeat until all the edges of the lattice are tucked in and stuck to the edges of the cooked pastry.
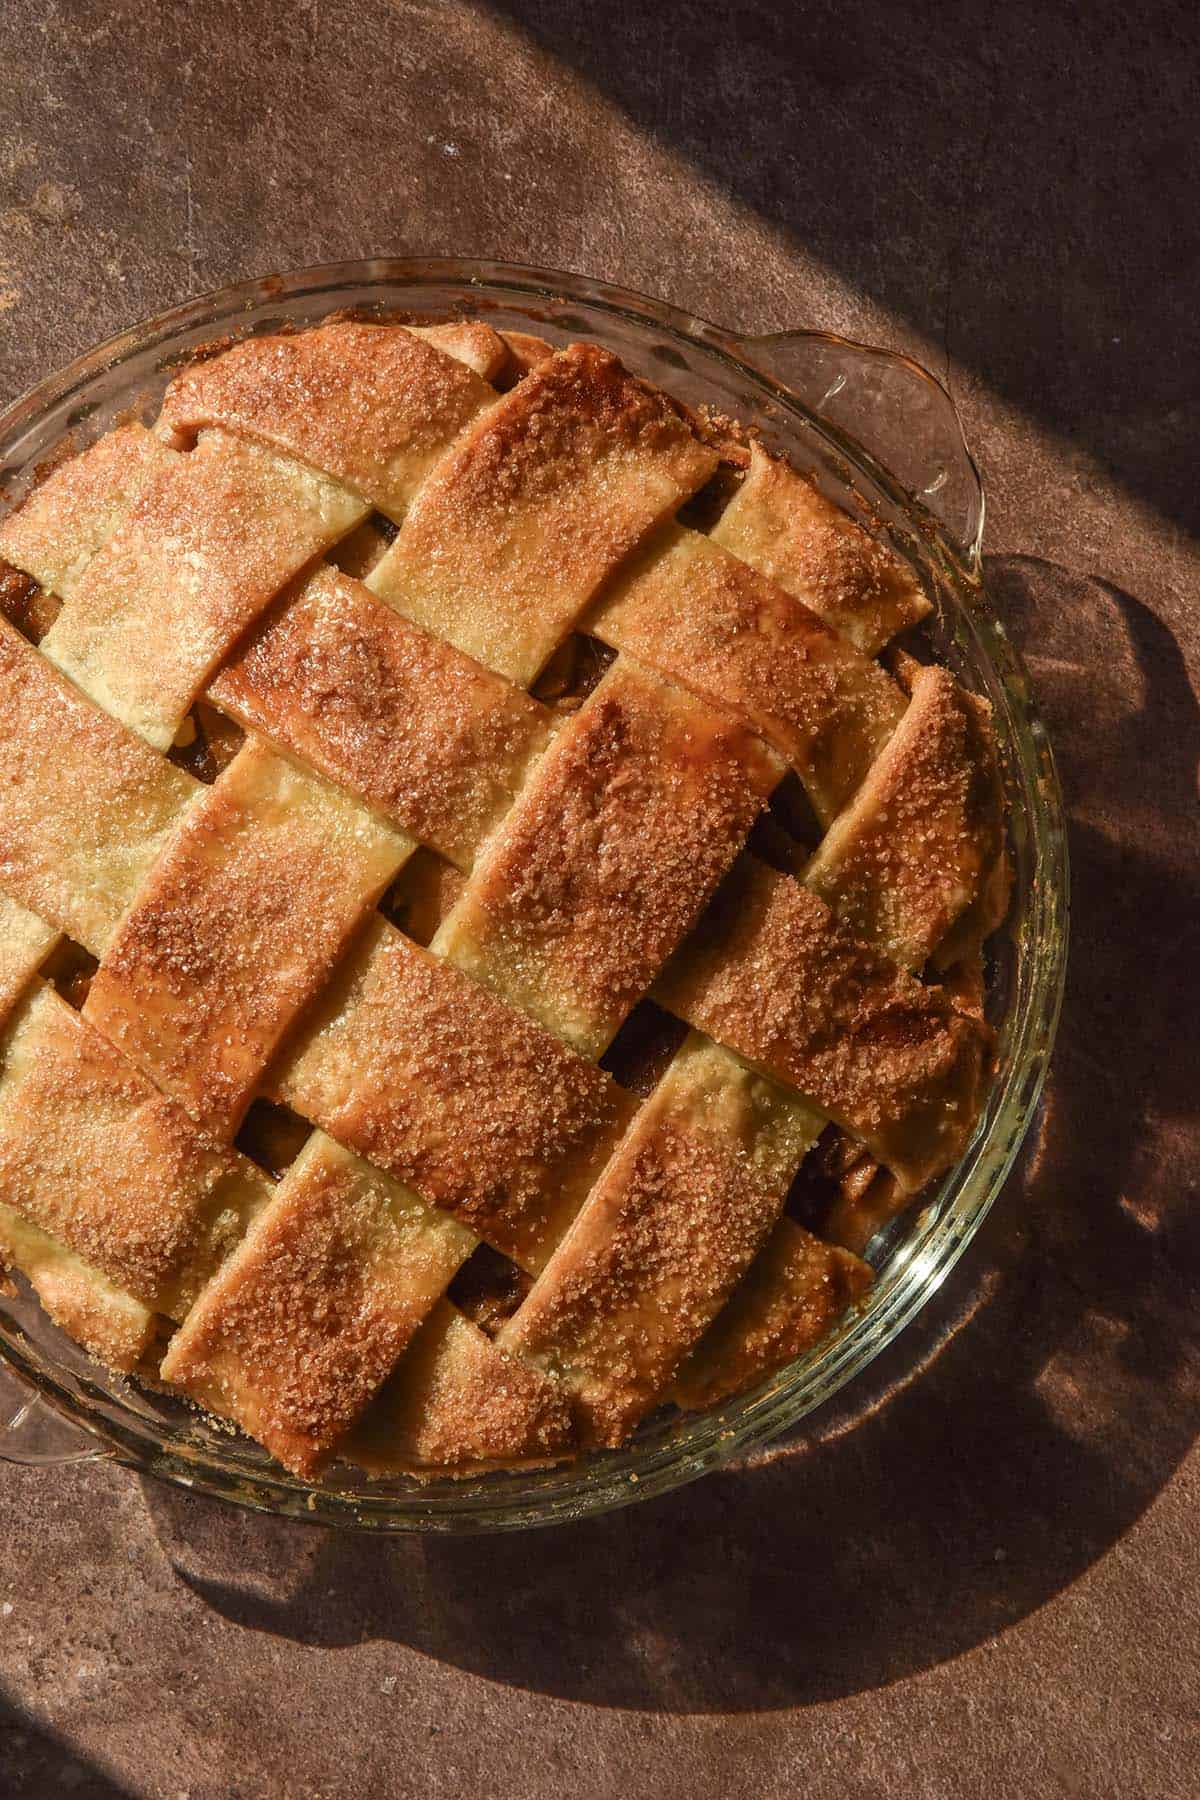
- Brush the pie thoroughly and liberally with egg wash then sprinkle with finishing sugar. Place the pie into the oven to bake for 30 minutes. After this time, assess the top and continue to bake until the pastry is browned to your desired colour. I normally bake mine around 40-50 minutes. Once the pastry is golden brown and the latticework is cooked through, remove the pie from the oven.
- It is very helpful to allow the pie to mostly cool before slicing. Use one hand to steady the back of the pie pastry as you slice – the pastry is very flaky and the pie edge can break backwards when sliced. Serve alone, with vanilla ice cream or custard (I have recipes for each in the body of the post).
- Leftovers can be stored in an airtight container for a number of days. They also freeze and defrost beautifully.
- You can store any leftover pie dough in the fridge or freezer to make a mini galette.
Notes
- See the latticework tutorial here.
- See the notes in the body of the post. I highly recommend reading them before you start to make the best possible apple pie.
- You must use Granny Smith apples in this recipe. I have not tested another variety and they all work differently in baking.
No Comments