The yeast free buckwheat bread from my second cookbook was the catalyst for all my buckwheat recipes. I started with my yeasted buckwheat bread, then moved on to two e-books filled with buckwheat flour recipes. I have learned a lot about working with buckwheat flour since I wrote that cookbook, so I wanted to share a slightly updated recipe to reflect those learnings. Enter: this recipe for buckwheat bread without yeast.
Buckwheat bread without yeast
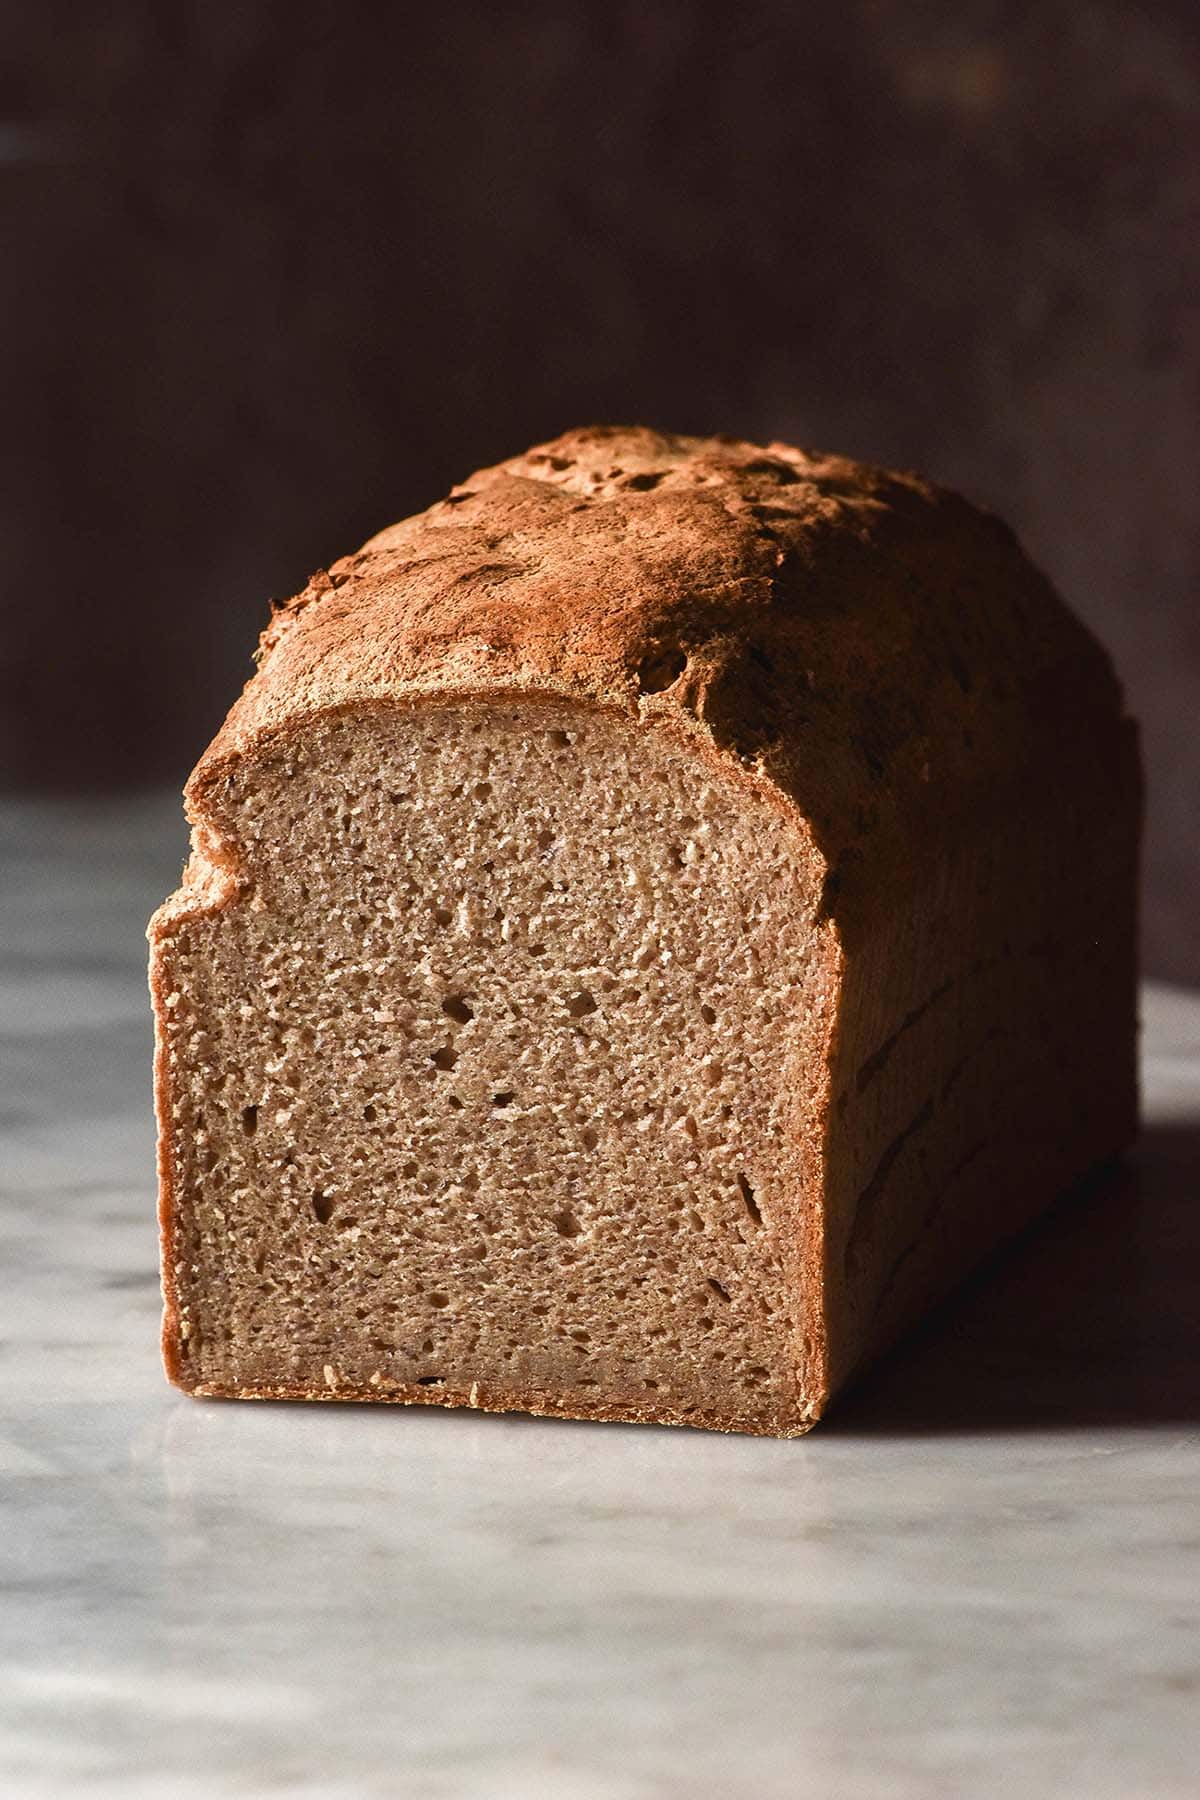
Before we begin, a note. Buckwheat bread without yeast is, well, heavy on the buckwheat. I have noticed that yeast really nullifies the flavour of buckwheat (which is often a good thing). While my yeasted buckwheat bread is subtly buckwheat flavoured, this bread is strong on the buckwheat.
So! If you’re not an enormous buckwheat fan, this bread may not be for you. Fear not, however: I have a recipe for gluten free, yeast free bread that is made without buckwheat.
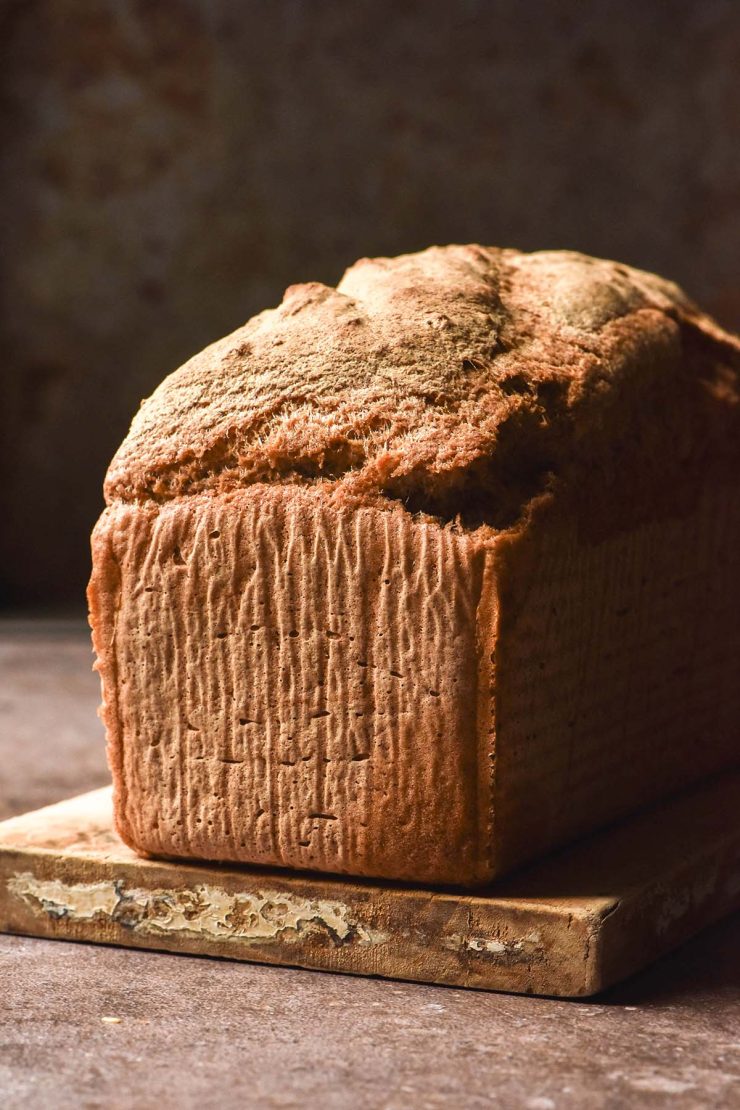
Let’s dive into this loaf a bit more, though. It uses light buckwheat flour and tapioca flour as the flour mix. A generous amount of psyllium husk powder (which I grind myself) holds the bread together and allows us to add sufficient liquid for a soft loaf.
A large quantity of baking powder (not baking soda) is our leavener of choice in the absence of yeast or eggs. It adds rise and oomph to the bread while keeping it yeast free.
Finally, the usual suspects: salt for flavour, maple syrup and oil for flavour and texture, plus plenty of water and yoghurt for body and a great crumb. A simple ingredient list for a delicious loaf of bread.
Things to keep in mind about this bread
Gluten free yeast free bread has a number of quirks so I want to make sure you are aware of them before we dive in.
- Yeast free bread tastes stronger than yeasted bread. This means the buckwheat has a more buckwheaty flavour in this recipe.
- It is a lot denser than yeasted bread. With only baking powder to leaven the bread, it is more dense.
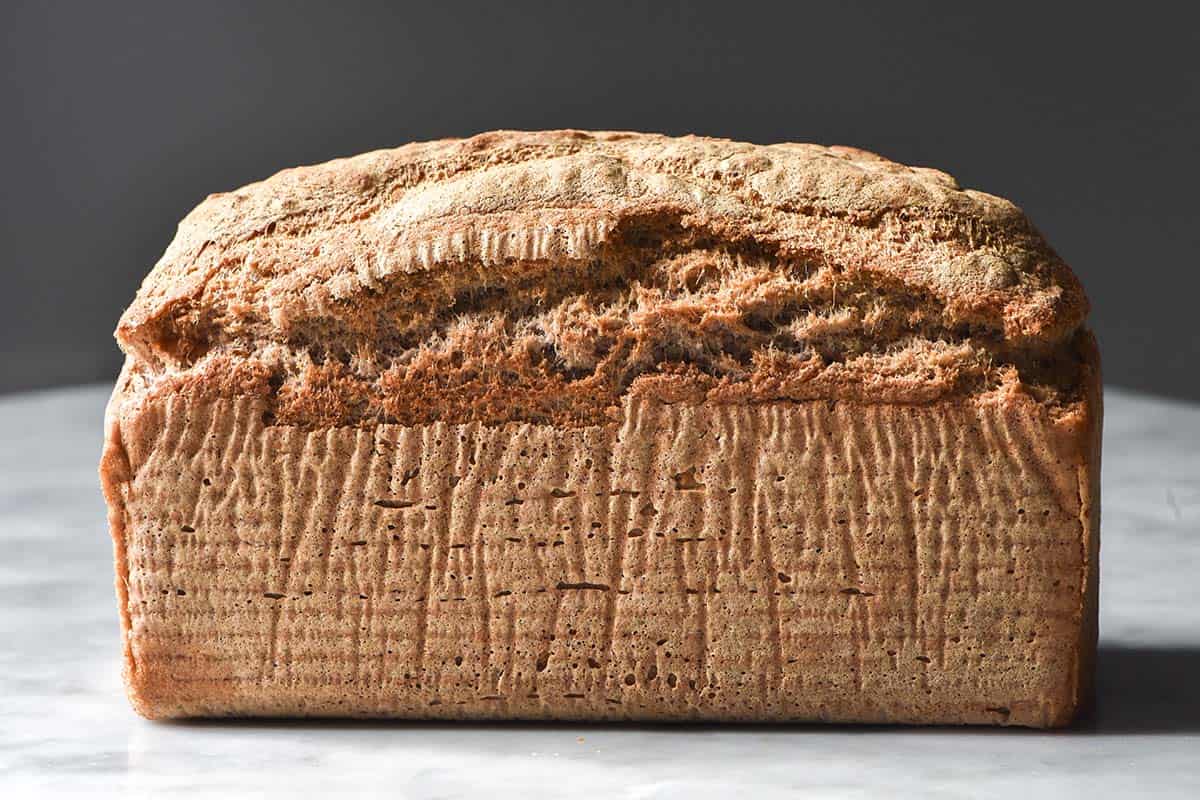
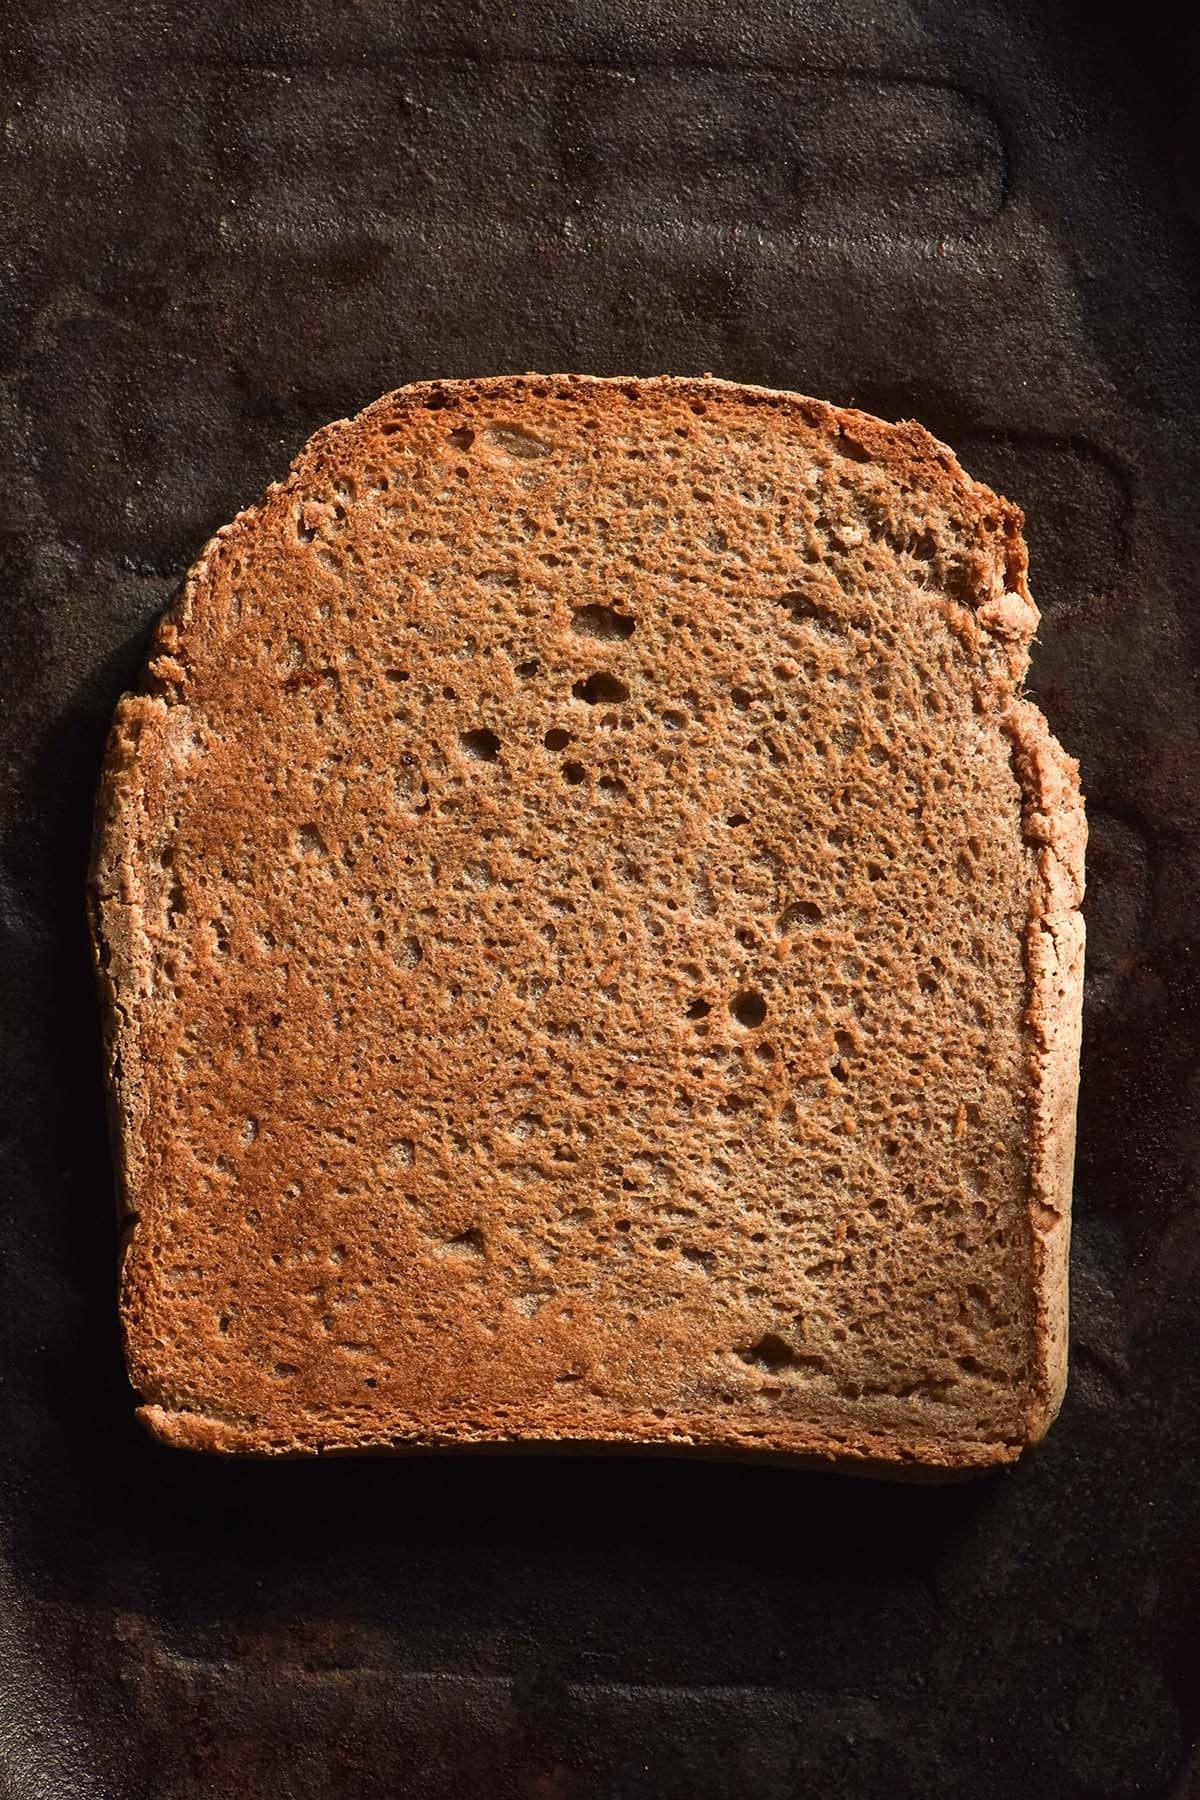
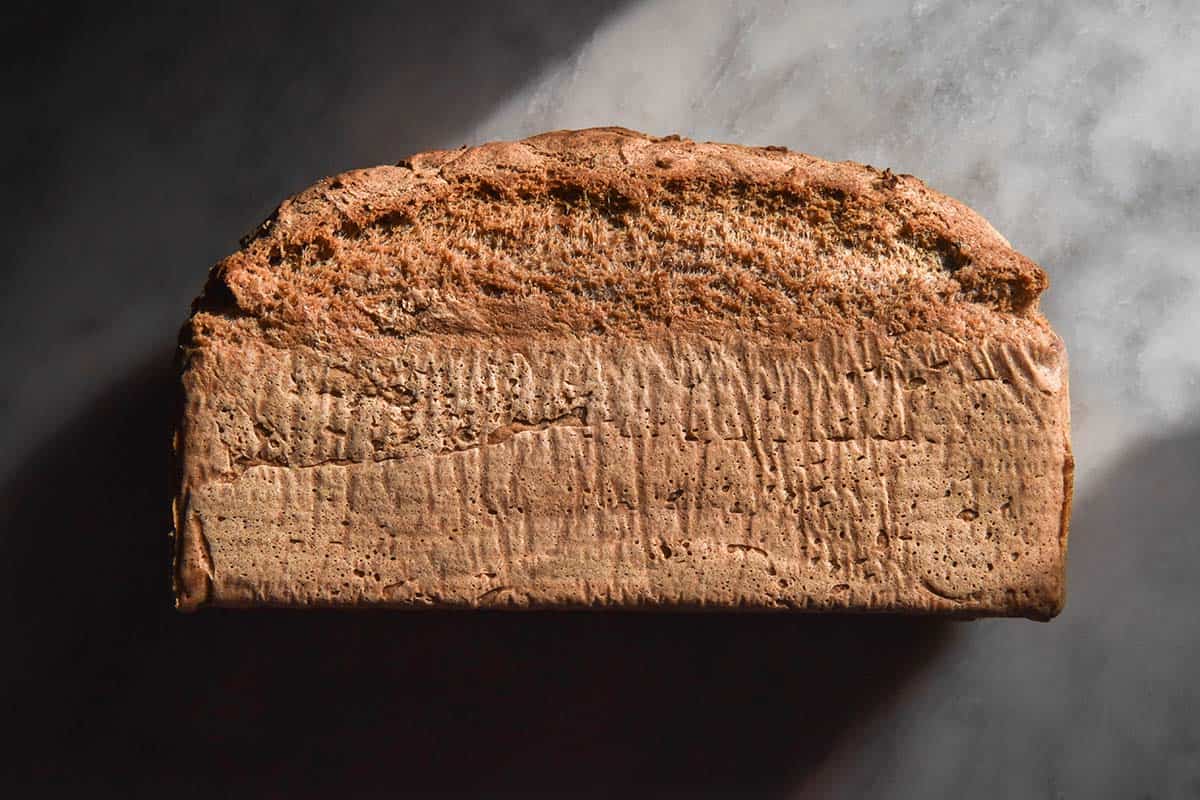
- To achieve bread with a more open crumb, we have to have add quite a bit of water. The result of this is that the bread does feel quite ‘wet’ when compared to regular bread.
- If you don’t add enough water, the crumb will be extremely finely knitted and there will be almost no air holes. This also makes the bread taste quite dry and prone to breaking once you have sliced it. So, wet bread is just the price you pay in this recipe.
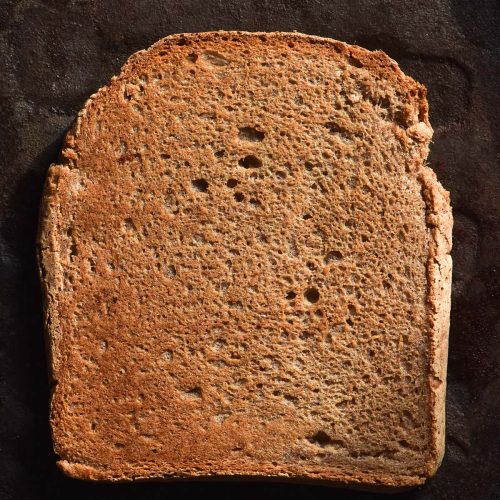
- With that in mind, I do think this bread is best as toast (particularly if you are not familiar with yeast free gluten free bread texture). It is quite easily disguised as toast, but not so much fresh.
- Bread without yeast barely browns in comparison to bread with yeast. This is why we’re using yoghurt, a bit of sweetener and a very high heat. Note that coconut yoghurt or plant based yoghurt doesn’t tend to brown quite as well as dairy based yoghurt.
Ingredient notes
First of all, the buckwheat! I have only tested this recipe with light buckwheat flour as that is what we have in Australia. I will say, from previous experience, that dark buckwheat flour doesn’t tend to have the same elasticity that light buckwheat flour has. My theory is that this is due to the fact that dark buckwheat flour is unhulled. Some of the flour is made up of the husk, which is not elastic like the groat flour is. Hence, there is less elasticity.
If you can, I would recommend using light buckwheat here. The bread lacks the elasticity of A) gluten containing bread and B) yeasted bread. It is a more stiff style of bread that, as we discussed, is best as toast in my opinion.
At the moment, there is no substitute for the tapioca flour, psyllium husk powder or baking powder. They are all key ingredients in this recipe. I am working on more yeast free bread recipes, so stay tuned.
You can use any liquid sweetener, any oil and any plain, unsweetened yoghurt here. Anecdotally, I thought that high protein Greek yoghurts gave my loaves a bit more height than regular ones but this could just be me. I have tested Chobani Fit and Danone Yopro. Both have added lactase in Australia so they are low FODMAP.
Hydration notes
As always, the key to perfecting this bread is in how much water you add. This will depend on how thirsty your flour is, the humidity where you live and a whole host of different factors. Unfortunately, hydration is a moving target! We need to have our wits about us and be open to adjusting a recipe as necessary.
In my experience, the ideal consistency for the dough of this bread is a thick, pourable cake batter style. I found that being able to handle the dough resulted in a loaf with a very tightly knitted crumb and stiff, drier slices.
The dough shouldn’t be runny or completely liquid, but you should be able to pour it into the loaf pan using a spatula to move it along. It should be almost a medium thickness Greek yoghurt consistency but with a more smoothly pouring texture. It should also feel airy and have popping air bubbles as you whisk.
As we have discussed, this produces slices of bread that do feel quite wet. However, they have a good crumb (not an open crumb, but not finely knitted). They are also more flexible and have a good aerated feeling if you squish the crumb between your fingers.
What sort of bread tin can I use?
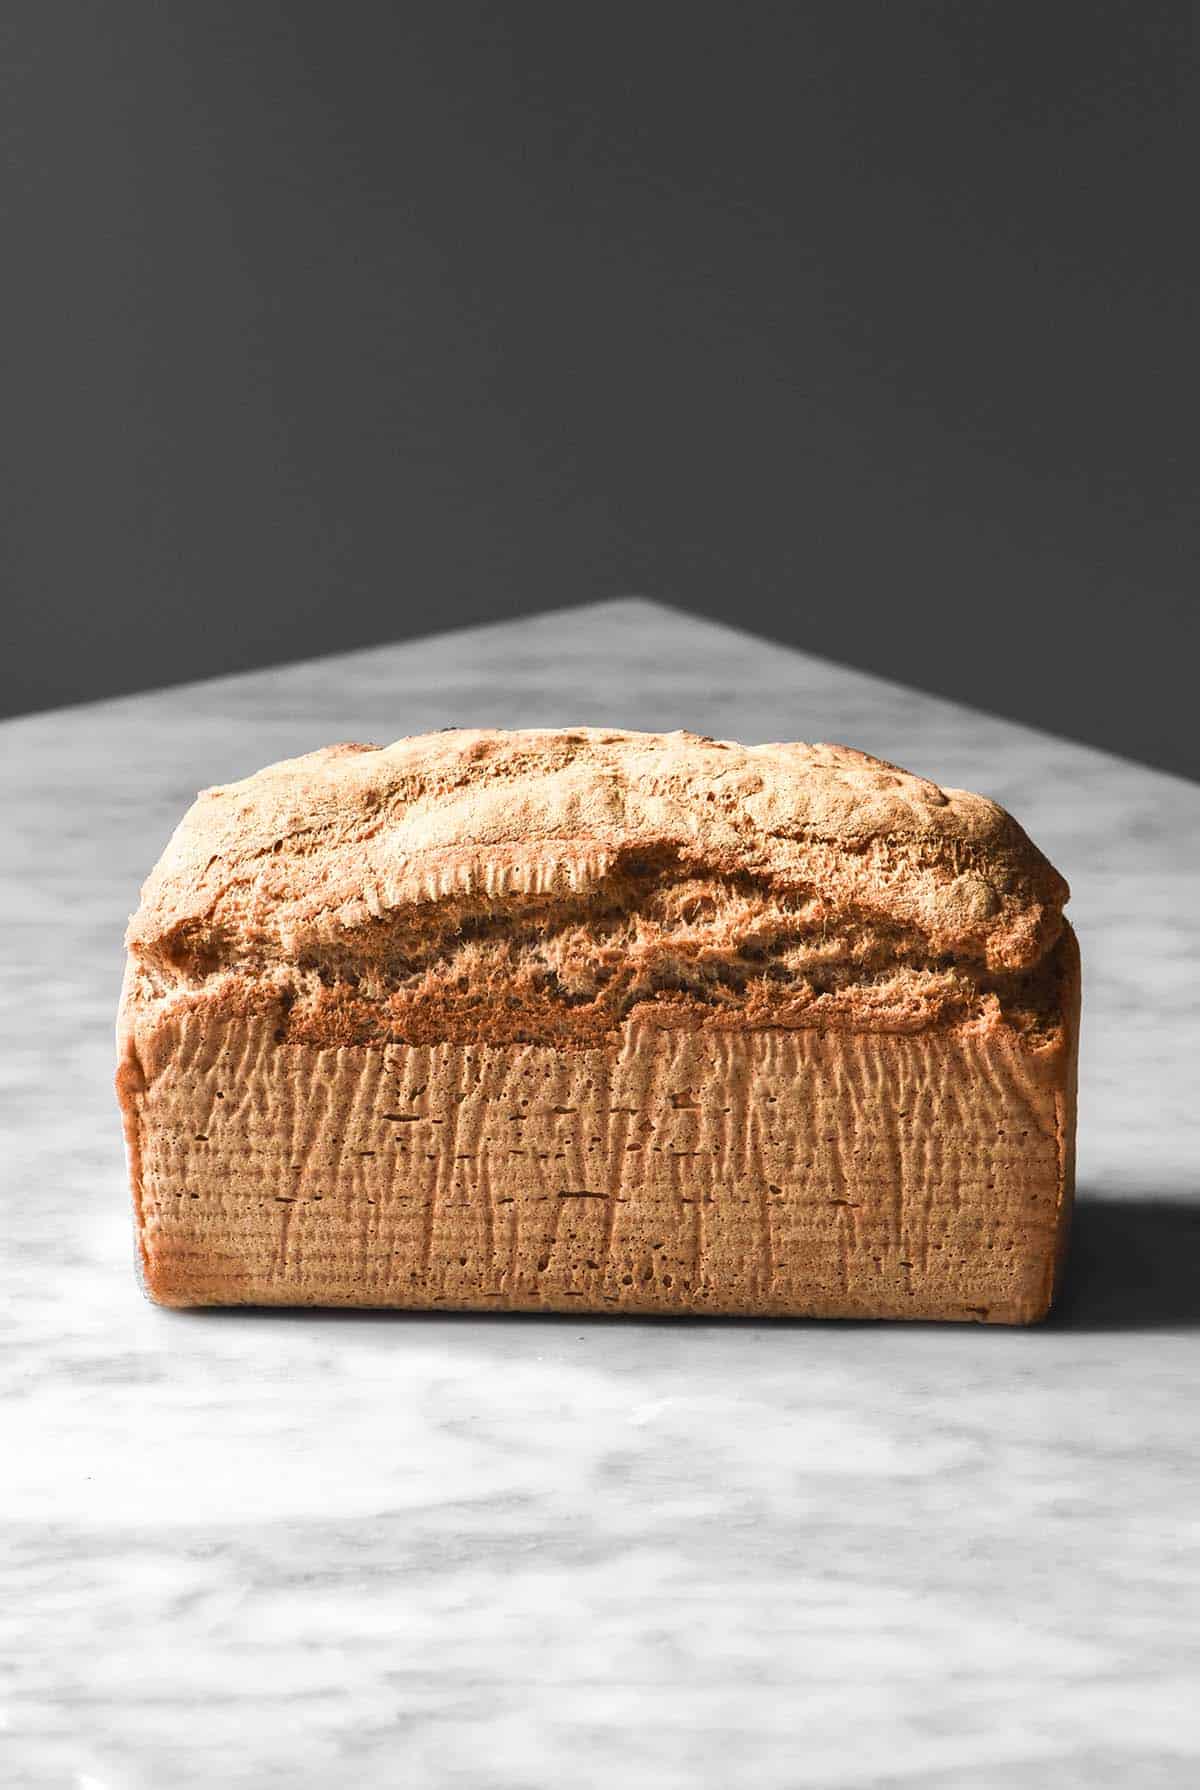
Another day, another instance of me harping on about the same loaf pan! You cannot bake this bread in a silicon tin, cake tin or short loaf tin. Silicon doesn’t have the strength to hold the dough in as it bakes and you won’t get any height on your loaf. A short tin won’t support the loaf as it bakes and it might spill over the edges. Using a much bigger tin will result in a flat and dense loaf because the dough will spread sideways instead of pushing upwards as it bakes.
This recipe, like all my other gluten free loaf recipes, uses a USA Pan Small Pullman loaf pan without the lid on. The specs are 10.16 x 10.16 x 22.86 cm; 612.35 Grams or 9 x 4 x 4 inches.
I live in Australia and I bought mine online. I have seen it on a number of different websites (I refuse to link to the big A any longer) including Dick Smith and Peters of Kensington.
If you can’t find this bread tin, choose a tall sided steel pan with the same specs. If you can’t find the same specs, I would recommend a very slightly smaller pan over a larger pan.
Note that I can’t guarantee results made in another pan as all my bread recipes are developed around this one. This isn’t an ad, it’s just my go-to gluten free bread pan.
Troubleshooting
- If your bread is dry or has a very tightly knitted crumb, add more water. It isn’t as simple as adding more baking powder, as I find that produces a bread with a chemical salty flavour.
- If your bread has a thick wet gummy band across the bottom, drop the hydration back or check on your psyllium husk powder. If you are using store bought psyllium husk powder, you can experiment with using a bit less to see if that helps with the gummy band.
- If the bread is perfect but the slices are wet, this is expected! This is one of the trade offs in this recipe. A properly hydrated bread will feel a little ‘damp’ when you slice it. If you don’t like that, either toast it or make wraps instead of bread.
- If your bread didn’t brown, turn the oven up or bake the bread for longer. Keep in mind that vegan yoghurt doesn’t brown as well as regular yoghurt.
- If you feel the bread tastes too strongly of buckwheat, again, this is a trade off of not including yeast. Make my gluten free yeast free bread recipe instead (it doesn’t use buckwheat flour).
More gluten free yeast free recipes
- Gluten free bread without yeast
- Gluten free vegan cinnamon rolls without yeast
- Gluten free flatbreads without yeast
- Gluten free hot cross buns without yeast
- Gluten free gozleme without yeast
Buckwheat bread without yeast (gluten free, egg free, vegan option)
Equipment
- USA Pan Pullman loaf tin in size small (10.16 x 10.16 x 22.86 cm or 9 x 4 x 4 inches)
Ingredients
- 200 g tapioca flour
- 450 g buckwheat flour
- 30 g baking powder (gluten free if needed)
- 40 g psyllium husk powder (see notes)
- 700-800 g water
- 150 g plain yoghurt (I have tested high protein lactose free Greek yoghurt and plain coconut yoghurt
- 7.5-10 g fine salt
- 20 ml (1 tablespoon)* oil of choice
- 20 ml (1 tablespoon)* pure maple syrup or sweetener of choice
Instructions
- Preheat the oven to 230-250C/446-482F. I bake at 250C/483F but some ovens don't go quite that high. Grease and line your steel loaf pan. I use binder clips to hold the baking paper in place. Remove your top oven rack and move the lower one down the oven to ensure you have room for your bread.
- Combine the dry ingredients in a large mixing bowl and whisk well to incorporate.
- Add the wet ingredients to the bowl and whisk well until a smooth, lump free batter forms. It should be about the consistency of a thick cake batter with plenty of air bubbles. There should be no dry spots but the batter should not be liquid either. A thick cake batter texture that drips off the whisk in thick ribbons is what we are after. If your batter is thicker than this, add more water.
- Ensure there are no lumps of flour left in the batter. Transfer the batter into the lined tin, remove the clips if you used them to hold the baking paper in place and place the loaf into the oven for 40-50 minutes.
- The loaf should be golden brown and domed on top after baking. Remove it from the oven and allow the cool in the tray for 15-20 minutes before transferring to a wire rack to cool.
- For best results, allow the bread to cool completely before slicing. It contains quite a lot of water (and thus steam) which needs to evaporate to allow the crumb to set properly.
- I like to slice my bread and freeze it on an oven tray, then transfer to a container in the freezer once frozen (this prevents the slices from sticking). I then simply toast it straight from frozen.
Notes
- I grind my own psyllium husk powder from the flakes in a spice grinder. I find commercial psyllium husk powder to be a bit too fine.
- Some brands of psyllium husk can turn your baked goods purple/grey. It can be hit and miss – the brands I have previously recommended have started going a bit purple on me recently.
- See extensive ingredient notes and troubleshooting in the body of the post.
- Read the section on hydration if you are having issues with the right hydration.
- Keep in mind that every bag of flour will have a different hydration need which makes it a bit of a moving target. What works for me might not work for you, so you need to be open to experimentation and baking intuitively.
- I have only tested light buckwheat flour in this recipe.
- When done right, this recipe produces slices of bread that are quite wet feeling. This is the trade off for being yeast free, gluten free and egg free!
- I think this bread is best as toast. I would recommend my other gluten free yeast free bread recipe for sandwiches.
No Comments