The gluten free croissant dough in my cookbook Intolerance Friendly Kitchen took me at least 100 attempts to perfect. Yes, 100. That’s because there are so many variables when it comes to laminated yeasted dough. Add in the gluten free factor and there are an infinite amount of things to nail down.
Although the recipe takes up the most space out of all the recipes in the book, I could go on forever about all the tips and tricks I have learned. That’s really why we’re here today; so that I can unleash every single thought I have ever had about gluten free croissant dough. In addition, I’ll go through all the flour substitutions I have had success with as well.
Gluten free croissant dough
Croissant dough is an art, because you need the dough to be warm enough for the yeast to proof, but cold enough for the butter to stay solid. It is a balancing act that takes time and patience. Add the gluten free aspect in and it even more of an art. Once you master it, though, it is an incredibly satisfying thing to make.

How does gluten free croissant dough differ from regular croissant dough?
This croissant dough has a few notable variations when comparing it to a regular croissant dough. Firstly, the dough contains eggs. This is to provide elasticity and binding to an otherwise weaker dough. Gluten free inherently has no structure, so eggs help to build this back in. Needless to say, structure is critical to the success of a croissant.
Secondly, the dough contains two binders – psyllium husk powder and xanthan gum. Using powdered psyllium husk is important because it is small enough in size not to disrupt the laminated butter in the dough. I found during testing that the psyllium husk flakes interrupted and sliced through the delicate butter. Lamination is what gives croissants lift, rise and a flaky layers inside. If your laminated butter is too broken up, the butter will seeps into the dough as it bakes and create an oily, flat croissant.
Thirdly, because gluten free croissant dough contains no gluten, it doesn’t need rest time to relax. Of course, if the butter is melting or warm, it absolutely needs to go straight into the fridge. BUT the dough itself has no tension, and therefore doesn’t need to rest.
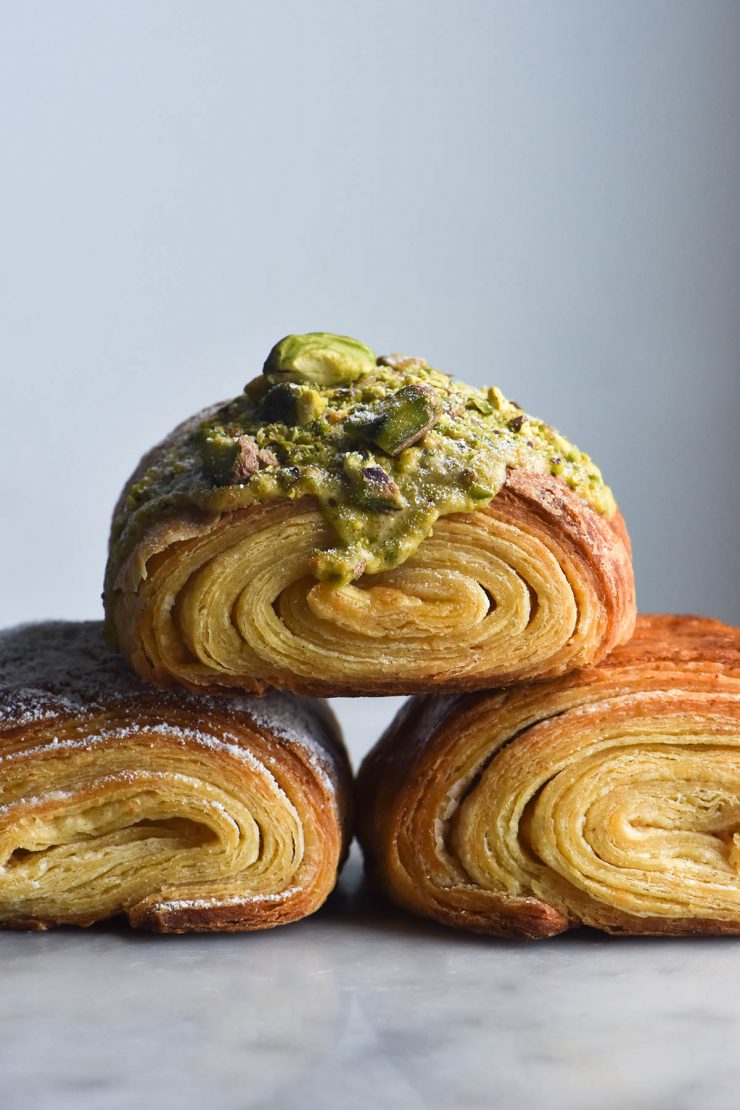
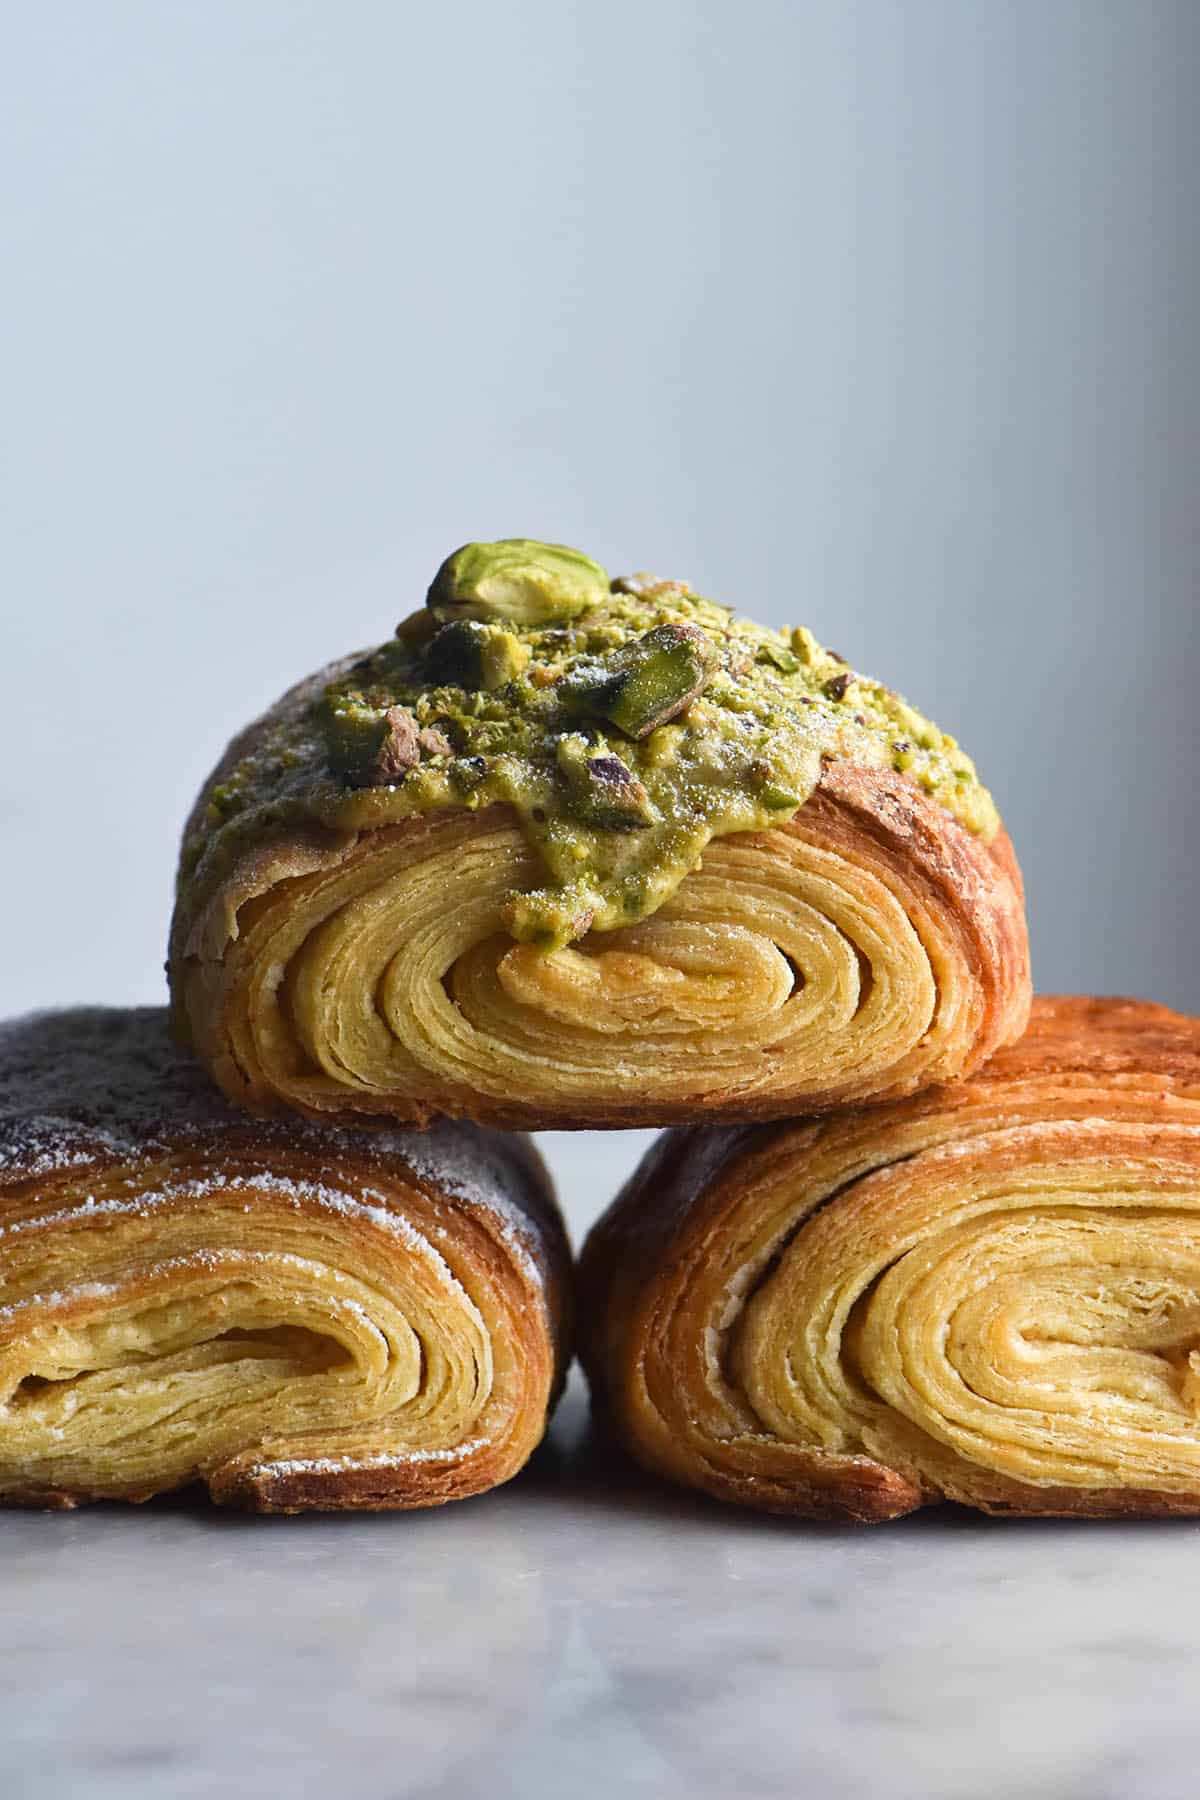
Finally, a combination of flours is needed to mimic the flavour of a regular croissant. It is worth keeping in mind that gluten free croissants are unlikely to have that same honeycomb like structure inside. They lack the elasticity and strength, but they still taste very good indeed.
The ‘why’ of each ingredient in the recipe
- Eggs provide structure, binding and pliability
- Psyllium husk powder provides binding and absorbs sufficient liquid to make the dough moist and pliable
- A small amount of xanthan gum provide structure and binding without tasting slimy or inhibiting the rise of the croissant
- Baking powder adds a little extra lift and acts as a bit of an insurance policy for any proofing issues
- Yeast provides rising capability and taste
- The butter block creates the rich, flaky layers and contributes to the rise
- White rice flour provides a bland wholegrain backbone to the croissant.
- Tapioca flour provides lightness and mellows the flavour of the rice flour
- Buckwheat flour or glutinous rice flour provide lightness but also extra elasticity
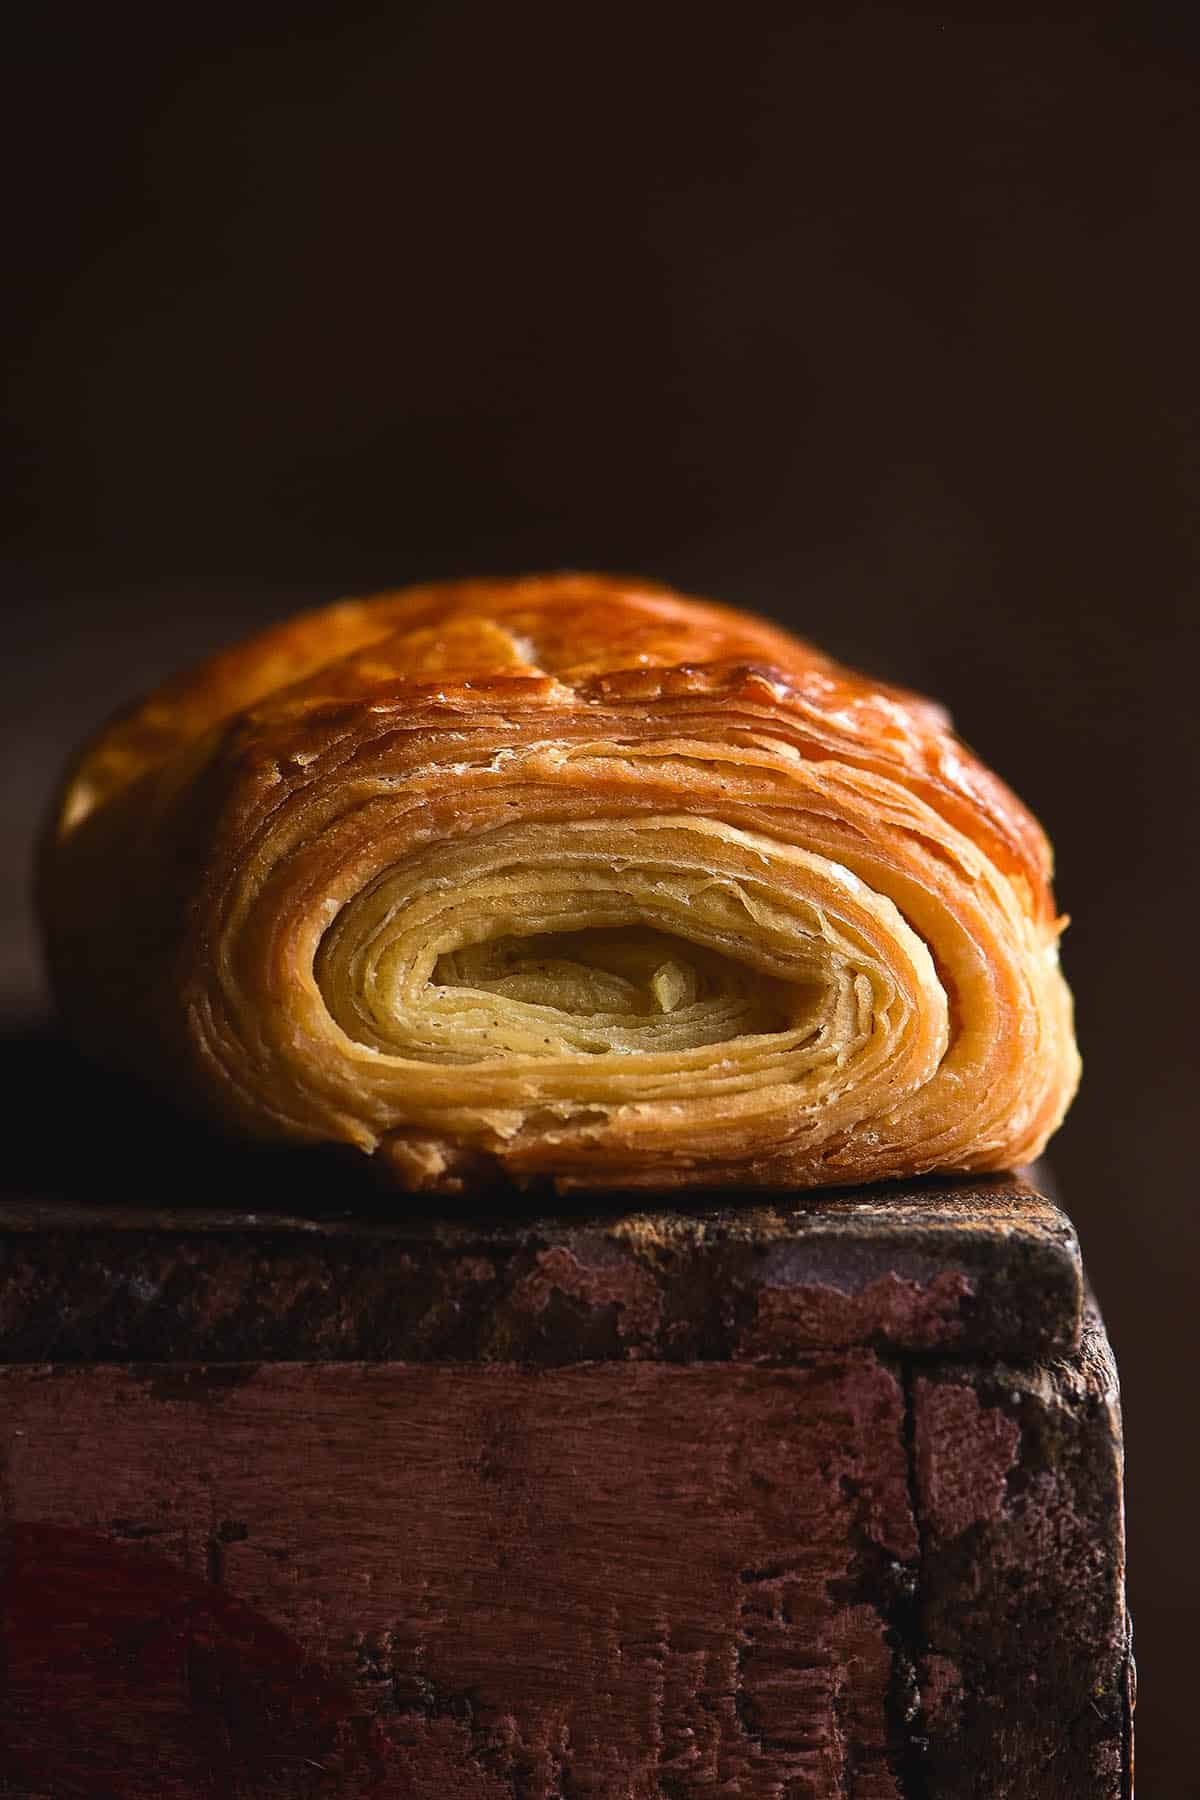
What is lamination and why is it important in gluten free croissant making?
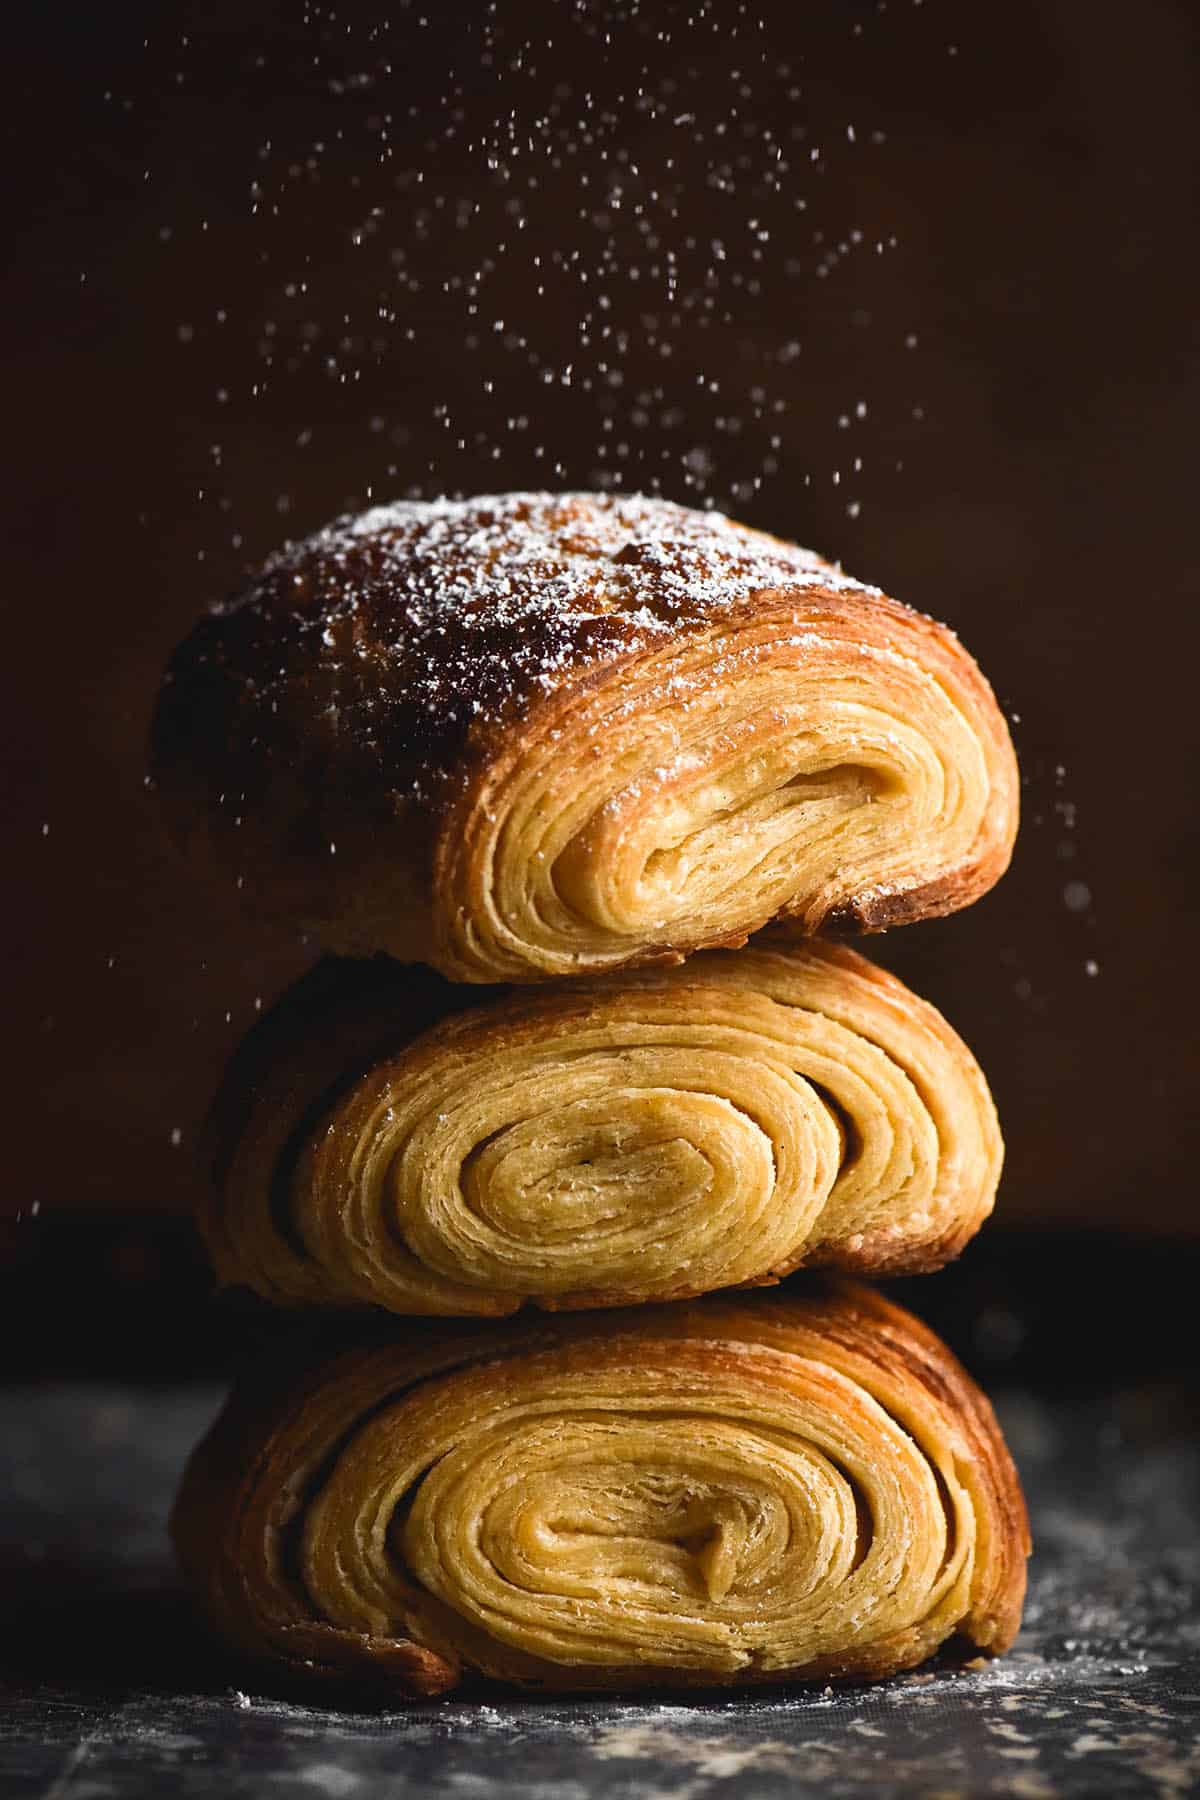
Lamination is the process of folding and rolling a block of butter (sometimes called beurrage) into croissant dough. The idea is to create thin, unbroken layers of cold butter in between the thin layers of dough. How does this work? Well, as Food and Wine writes: ‘Butter is composed of butterfat, milk solids, and water—the last of which accounts for 14 to 18% of butter’s volume. As a croissant bakes, the water in the solid butter quickly vaporizes into steam. This rapid change in state puffs up the pastry and creates steam pockets between the layers. Once the water evaporates completely, it leaves behind an open honeycomb structure, an airy yet stable interior that gives croissants their delicate mouthfeel. The butterfat then begins to essentially fry the layers of dough, creating a crisp, flaky pastry with a rich, buttery taste.
The exterior layers caramelize to reveal the striations developed during lamination, giving croissants their glossy, stripy appearance. The milk solids also help with caramelization, adding a toasty, nutty flavour. When making laminated dough, it’s crucial that the butter remains solid. Butter is an emulsion of fat and water; if it gets too warm and starts to melt, the emulsion will break, and the water from the butter will get absorbed into the dough, producing croissants that are bready instead of flaky.
Tips for lamination
Laminating a gluten free croissant is a little different to a regular dough. Namely because some breakage is to be expected. In my research I had read that the dough breaking is an absolute no-no in croissant making, but this is just a given in gluten free lamination. In fact, I always flip my gluten free croissant dough over to keep the seams from spilling open as I laminate. Gluten free dough doesn’t just seal together once rolled, like regular dough might.
It is important that your dough and butter block are at roughly even temperatures when laminating. The butter block needs to be pliable enough to bend and roll without snapping it, but cold enough not to melt into the dough. Developing an eye for the right butter temperature takes time, and is one of the things that took me the longest to learn.
Finally, the technique of laminating is hugely important. It’s not just a matter of absentmindedly rolling butter and dough together as you listen to a true crime podcast. It does require a bit of attention and focus, as we will go into below.
Lamination technique for your gluten free croissants
My croissants improved hugely when I started focusing on technique. The idea is to roll the butter into the dough in thin, even layers. To do this, you A) need the butter to be the right temperature, but B) need to roll in a consistent, even motion. Hacking at the dough is the quickest way to break up the butter and create oily croissants. Focus on keeping your piece of dough as even and flat as possible, each time you roll it. Focus on using even pressure right up and down the piece of dough.
I find it helpful to stabilise the dough by pressing down on it lightly with the rolling pin. See the video for a more visual explanation. This is the exception to the ‘keep dough as flat as possible’ rule. Why? Because stabilising the dough allows you to roll it out evenly, without the top and bottom becoming thicker or thinner than the rest of the dough.
It is important to keep track of how many turns you have made. More layers of butter aren’t better, especially when proofing is involved. If you create too many layers that are super thin, the butter will dissolve into the dough as the croissants proof.
In winter (somewhat controversially, perhaps) I like to roll my croissant dough out in one dough, without rests, if I can. I do this when the butter is pliable and cold. It’s really quite hard to have the butter reach that perfect pliable temperature, and I see no need to chill it and potentially mess that up when it’s already cold. This only applies in a cold kitchen in winter, though.
Notes on hydration
We have discussed hydration practically everywhere, but it’s worth discussing again here. All gluten free flour is different, brand to brand and country to country. You might need less (or more) milk than I do.
Croissant dough that is too wet is really difficult to roll out. It feels super soft and fluffy, which lulls you into a false sense of assuming your butter is the right temperature to start laminating. It also feels a bit like the butter is slipping around in the dough.
What inevitably happens to me with with overly hydrated croissant dough is I end up snapping the butter into chunks in the dough. This makes it harder to roll out, but also ruins any chance of having fine sheets of butter in the dough. You can tell the butter is broken if it looks zebra like in the dough. When you cut the croissants, you’ll see big chunks of butter in the edges, where thin sheets of butter should be.
This is not to say that you should just throw these croissants out, though. Just a note to say that they will probably not be exactly as you want them to be. Next time, drop the hydration back by 1/4 cup (60ml) and see if that works for you.
Adding the butter block and folding the dough
For my recipe, we use a book fold to incorporate the butter block into the dough. This is where you roll the butter out to roughly half the size of the dough rectangle, then fold the top half of dough over the butter. You will need to pinch the edges of dough together to secure and completely encapsulate the butter block. I chose a book fold because it’s the easiest way to ensure that as much dough as possible begins the lamination process with butter wedged in between it. We want a thin sheet of butter running through all the dough, so it makes sense to spread it as evenly as possible to begin with.
From there, we will complete three business letter folds. A business letter fold involves folding the top third of the dough down onto the middle, then the bottom third up over the top, pressing gently to seal. From there, I like to flour the bench thoroughly, flip the dough over and either pop it in the fridge or carry on with my next turn.
One thing that always confused me about turning the dough was that I had it in my head that you needed to complete a 360 degree revolution and keep track of which way you had turned it last. I know this sounds silly and it might just have been me, but I thought I’d mention it on the off chance someone else thought the same.
Turning the dough
Turning is really just the process of rolling the butter block into the dough, folding it up, and then turning the dough so the short side of the rectangle faces you. It doesn’t matter which way you turn it, as long as the short side faces you as you roll. Each time, you roll the dough into a long rectangle, fold it up, turn it and then repeat. At the end, you simply roll the dough out into a really long, thin rectangle and cut the croissants from that.
I find it helpful to complete my turns on a long sheet of baking paper. This is because I can easily lift the dough up to put it on a tray into the fridge if it starts to warm up. it’s also easier to get some flour under a sticky part, should the need arise.
On that note – use plenty of starch to flour the dough. I like to use tapioca flour because it’s cheap, accessible and soft. I absolutely would not recommend using a wholegrain flour for dusting, as they are grittier.
A note on the seams of the dough
If you have made these croissants, you will probably have noticed that the seams of the dough don’t really attach back to the dough when you’re rolling and turning it. You roll out the dough, and as you’re completing the next turn, you notice that the underside has flappy seams (for lack of better terminology). This dough doesn’t just meld back into itself like a regular dough would.
My preferred solution? Roll the dough out, ready to turn. Dust the top of the dough well with flour, then flip it up so the seams face upwards. Dust them of excess flour, then complete your turn. I find it a lot neater and less stressful to fold the seams back into the dough. I can’t see that doing it the other way would make much of a difference, but I find it just helps everything feel less chaotic.
Notes on temperature and proofing your gluten free croissants
I can’t even begin to say how important temperature is to a gluten free croissant. Too hot and the butter will melt, too cold and the yeast won’t activate. Croissants are a real test of temperature.
Of course, this will vary hugely based on where you live. If you live in a particularly hot and humid climate, your croissants will proof infinitely faster than those made in a frigid winter climate. It is important to take suggested timings with a grain of salt, particularly when you live in a different climate to the recipe creator. In Australian winter, I like to proof my croissants in my oven with a small dish of boiling water in the bottom. The thing is, though; depending on your dough, house, insulation, general kitchen draftiness (etc etc) boiling water might be too hot for your croissants. It really is all a learning curve. But back to my croissants: my most recent batch (in winter) needed around 4-5 hours proofing time, with me intermittently changing the boiling water.
In summer, I generally proof on the bench, and it can take 1 hour or more. The thing that slows croissant making down in summer is often the butter and heat – you need to continually monitor them for any sign of melted butter, and promptly pop them in the fridge at the first sign. Ideally, before the sign!
Proofing
- These croissants are well proofed when they feel like and airy, fluffy and warm without any melted butter. They might look like they have little pockets or air (or little air blisters) on their surfaces. If you (very very gently) pick them up, they should feel lighter than they look.
- There’s a lot of technique to croissants, but a good proof is (yet another) tricky aspect. I haven’t mastered knowing the exact perfect proof, and I have made these hundreds of time now. It can be easy to overproof as much as it can be to underproof. Either way, oily croissants tend to be the end result.
- As above, your proofing time will vary hugely depending on the conditions where you are making your croissants.
- I find a humid but controlled environment best for proofing. For me, that’s a closed oven with hot or boiling water in winter, and on the bench (away from windows) in hot weather. Placing your croissants in sunlight to proof is a surefire way to melt all the butter and thus your hard work.
Flour substitution options
Since the book has been released, I have come up with a couple of swaps. Namely:
- Glutinous rice flour is a suitable substitute for the buckwheat flour. It is still 100% gluten free and adds the same sort of elasticity and stretch. I actually prefer using glutinous rice flour these days, because it doesn’t add any flavour like buckwheat does.
- I have successfully used half white rice flour and half sweet white sorghum flour for the wholegrain component. This was a really nice combination – one that I would use again in the future if I had both flours on hand.
- I intend to try with all sorghum flour as the wholegrain component, and I will update the post when I do.
Tools for gluten free croissant making
The tools I have found most handy in my croissant making are simple ones. I made most of my croissants using a regular rolling pin, but when I invested in a French rolling pin, my results did improve. A french rolling pin is basically just a long dowel – no handles, no nothing. The reason this helps is because it is long enough to roll a big piece of dough out evenly, without creating indents on the edges of the dough. Because we want to try and keep the butter in thin, unbroken sheets, this is really helpful. That said, I made most of my croissants without one, so this is a very optional tool.
A dry, clean pastry brush is essential for dusting off the excess flour. You will be amazed (speaking from experience) how much more flour you can dust off with a brush than your fingers. You don’t want floury croissant innards, so make sure you dust them well between each turn.
More tips for your gluten free croissants
A very sharp, non-serrated knife for slicing the wonky edges off and slices the croissants into individual pieces. A blunt knife will blunt those beautiful buttery edges, so you want to keep the knife and movement sharp. When possible, slice on an angle and in a continuous motion, rather than cutting straight down (ie the whole blade of the knife hitting the bench).
Proofing only works if the croissants are 100% enclosed and covered. Any air getting in will dry them out. I bought some jumbo ziplock bags and my Le Creuset oven dishes (in which I proof my croissants) fit inside perfectly. I reuse and reuse and reuse them because they create a perfect proofing environment and I don’t like plastic waste.
If you are making croissants as opposed to pains au chocolat, I highly recommend using a tiny artists brush or a new, soft bristled eyeshadow brush. This ensures you have accuracy painting over the tops without accidentally painting the cut sides. Painting the cut sides will glue them together, meaning you won’t see those flaky edges you want to. It might also (although don’t quote me) inhibit the overall rise if the edges can’t lift with the dough.
Troubleshooting your croissants
Why did my dough have zebra like spots/chunks of butter in it?
If you have made the croissant recipe and noticed that your dough has zebra like spots/chunks of butter in the dough, the butter was too cold when you started laminating. The butter has broken up into chunks, which means that you do not have even, thin layers of butter in the dough. The results won’t be awful, but they are not the intended result. Your croissants might be a little flat and oily, but they’re still croissants!
When I roll my croissant dough, it almost looks like saggy skin?
Bear with me and excuse me for the poor description, but it’s what I think it looks like. When you try to laminate dough that is too hydrated, it rolls around like excess skin on the dough. It is difficult and unnerving to work with, because it feels like it will rip. This is a sign that the dough is too hydrated. You can still cook the croissants, even if they have broken butter underneath. They’ll likely leak a fair bit of butter, but they will still be yum. Next time, try dropping the hydration back by 1/4 cup (60ml).
Why did lots of butter leak out of my croissants?
This can be caused by a multitude of things. Firstly, you might have under proofed the croissants. You might also have over proofed them. The ambient temperature in your kitchen might have been too warm, so the butter was too warm when it hit the oven. On the flip side, your oven might not have been hot enough, meaning that the butter melted instead of creating a steam reaction to push upwards. Some butter leakage is OK, but a lot suggests that there is one of these elements that needs looking at.
Next time:
- Preheat the oven to 200C/400F ahead of time. Lower it when the croissants go into the oven. Load them in quickly, and don’t open the oven until the 15 minute mark to check their colour.
- Change up your proofing. If they didn’t feel puffy and have little blisters under the skin, proof them a little longer (and vice versa). Keep in mind that it is easier to over-proof in summer when it’s hot and humid.
- Once your croissants are proofed, I find it helpful to set the butter in the fridge for 20 odd minutes. Cold butter hitting a hot oven will produce steam, whereas warm butter will just melt.
My croissants are dense?
As with all of the other concerns, this could come down to a number of the usual suspects. The most likely are that your laminating needs a bit of work, or you have under-proofed the croissants. We check that the yeast is active before moving on in the recipe, so it can’t be that your yeast is dead (unless you proceeded without bubbly yeast).
Another potential issue could be that your butter is too soft when it hits the oven, or your oven temperature is lower than the dial suggests. As we discuss in the leaky butter section, warm butter will melt in the oven instead of creating steam. And again, if your oven isn’t hot enough, the butter (cold or not) will have no choice but to melt.
Keep in mind that these will always be denser than a gluten containing croissant – it just is what it is in a dough without gluten. But if their denseness is unpleasant, check that all of the above is in fine order.
My croissants don’t taste sweet – they taste a little bit like alcohol?
This is a sign that your croissants have been over proofed. The yeast has consumed all the sugar as food, and the byproduct of the yeast is a mildly alcoholic or beer type taste and smell. Next time, proof them for a shorter amount of time. If this is consistently an issue for you, it might be that the climate or kitchen you’re in is hot and humid. You can experiment with adding less yeast to see if that helps.
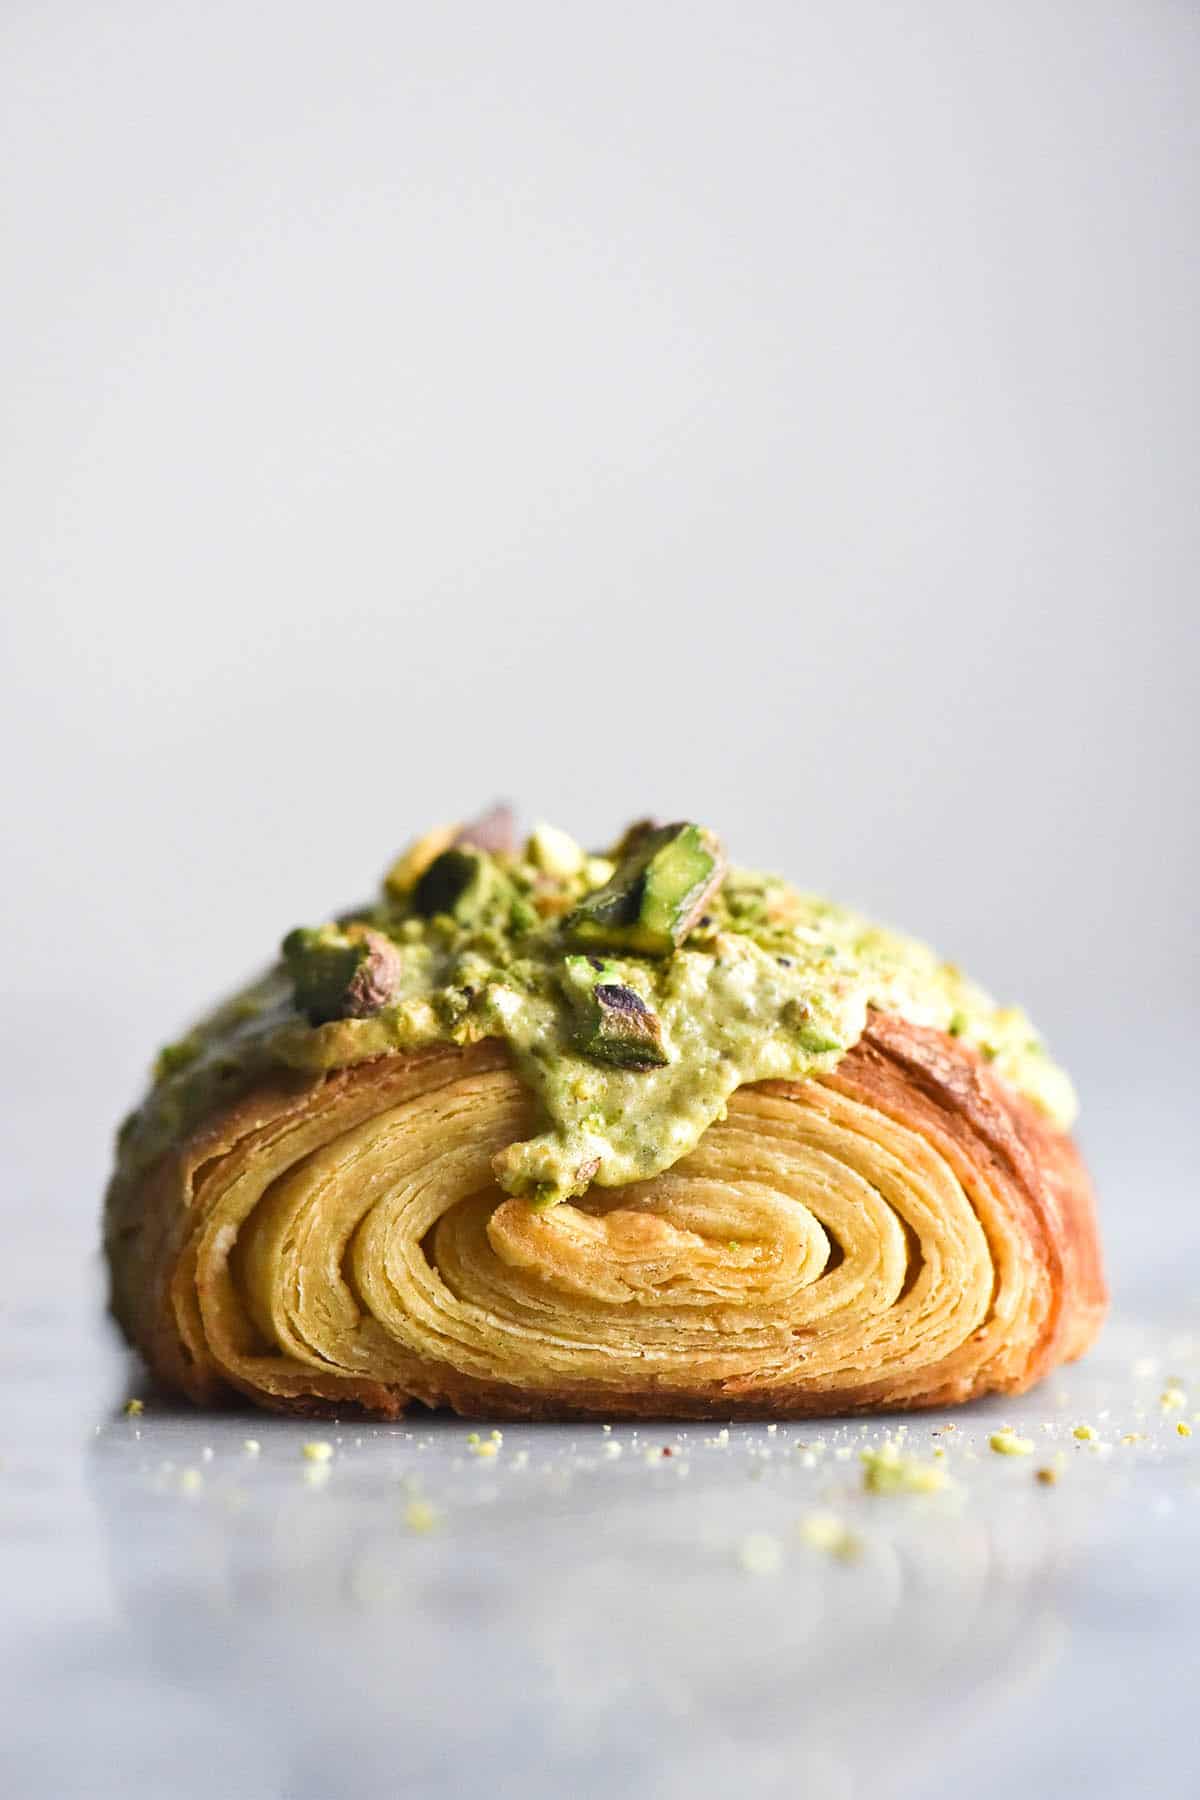
You can’t see the layers in the sides of my croissants?
First and foremost, this could be an issue with your lamination. It might be that your technique needs a little work, that your butter was too warm (and thus absorbed into the dough) or that you accidentally turned the dough too many times, which means the butter sheets might have absorbed. It could also be that you brushed the egg wash onto the cut sides of the dough, which seals the edges all together.
Recommendations for beginners
- Cut a pain au chocolat version rather than a croissant. This is easier to get your head around, easier to slice, and easier to paint egg wash onto without congealing the edges. It’s an all round easier shape for a beginner.
- You can’t rush a croissant. It takes how long it takes and you really just have to wait. If you bake the croissant before it is fully proofed, it will be underwhelming and probably oily. Simple as that.
- I find it helpful to practice lamination technique on puff pastry first. The process is the same, except that you laminate puff pastry a few more times, and you don’t need to balance the proofing of yeast with keeping the butter cool.
- Placing your dough on a sheet of well floured baking paper to roll out is helpful as a beginner. This is because it’s much easier to transport to the fridge if your dough gets too warm. It’s a lot harder (nay, impossible) to do that if you’re working on the bench. Once you get a feel for the right temperature of the dough, you can work straight on a bench, if you like.
Flavour suggestions
- Filling pain au chocolat with Caramilk (caramelised white chocolate) and halva is my new favourite combo. White chocolate isn’t lactose friendly, so that is something to keep in mind.
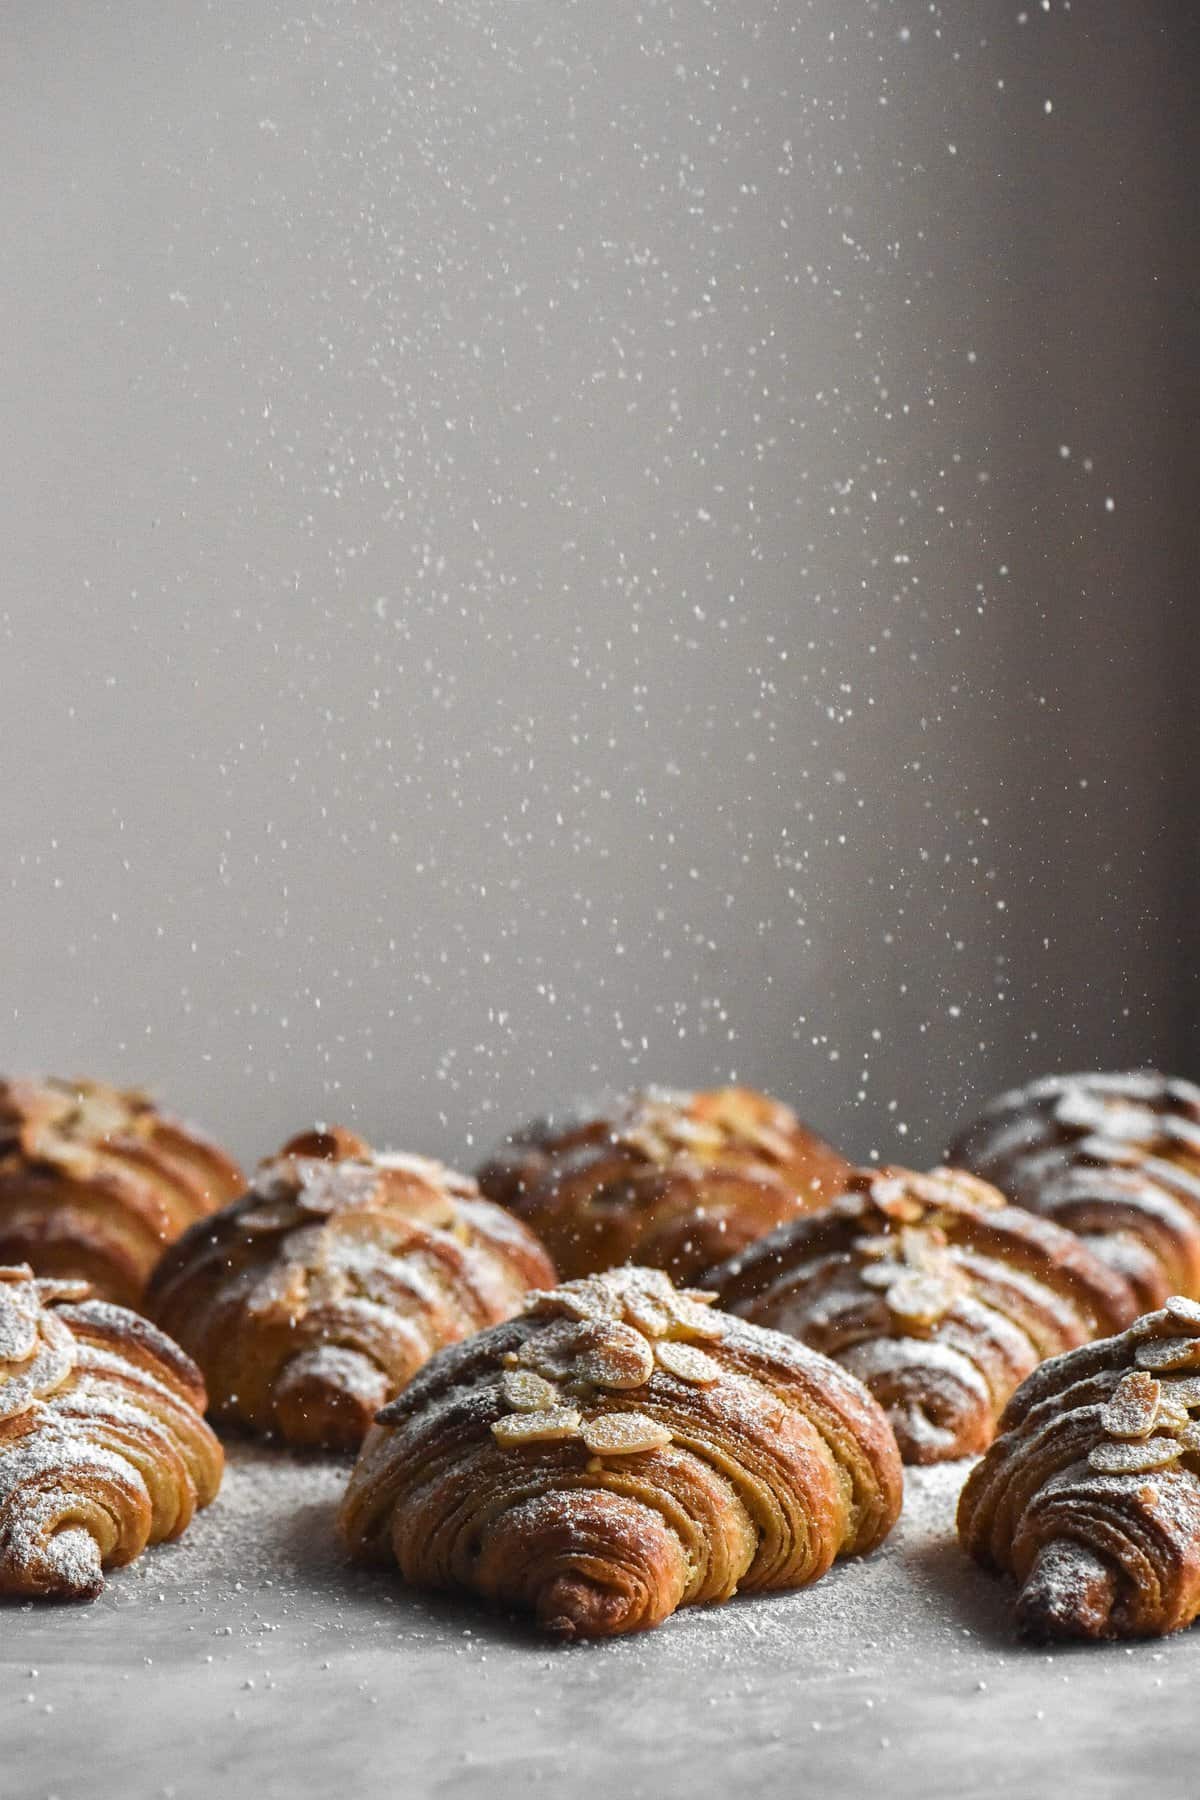
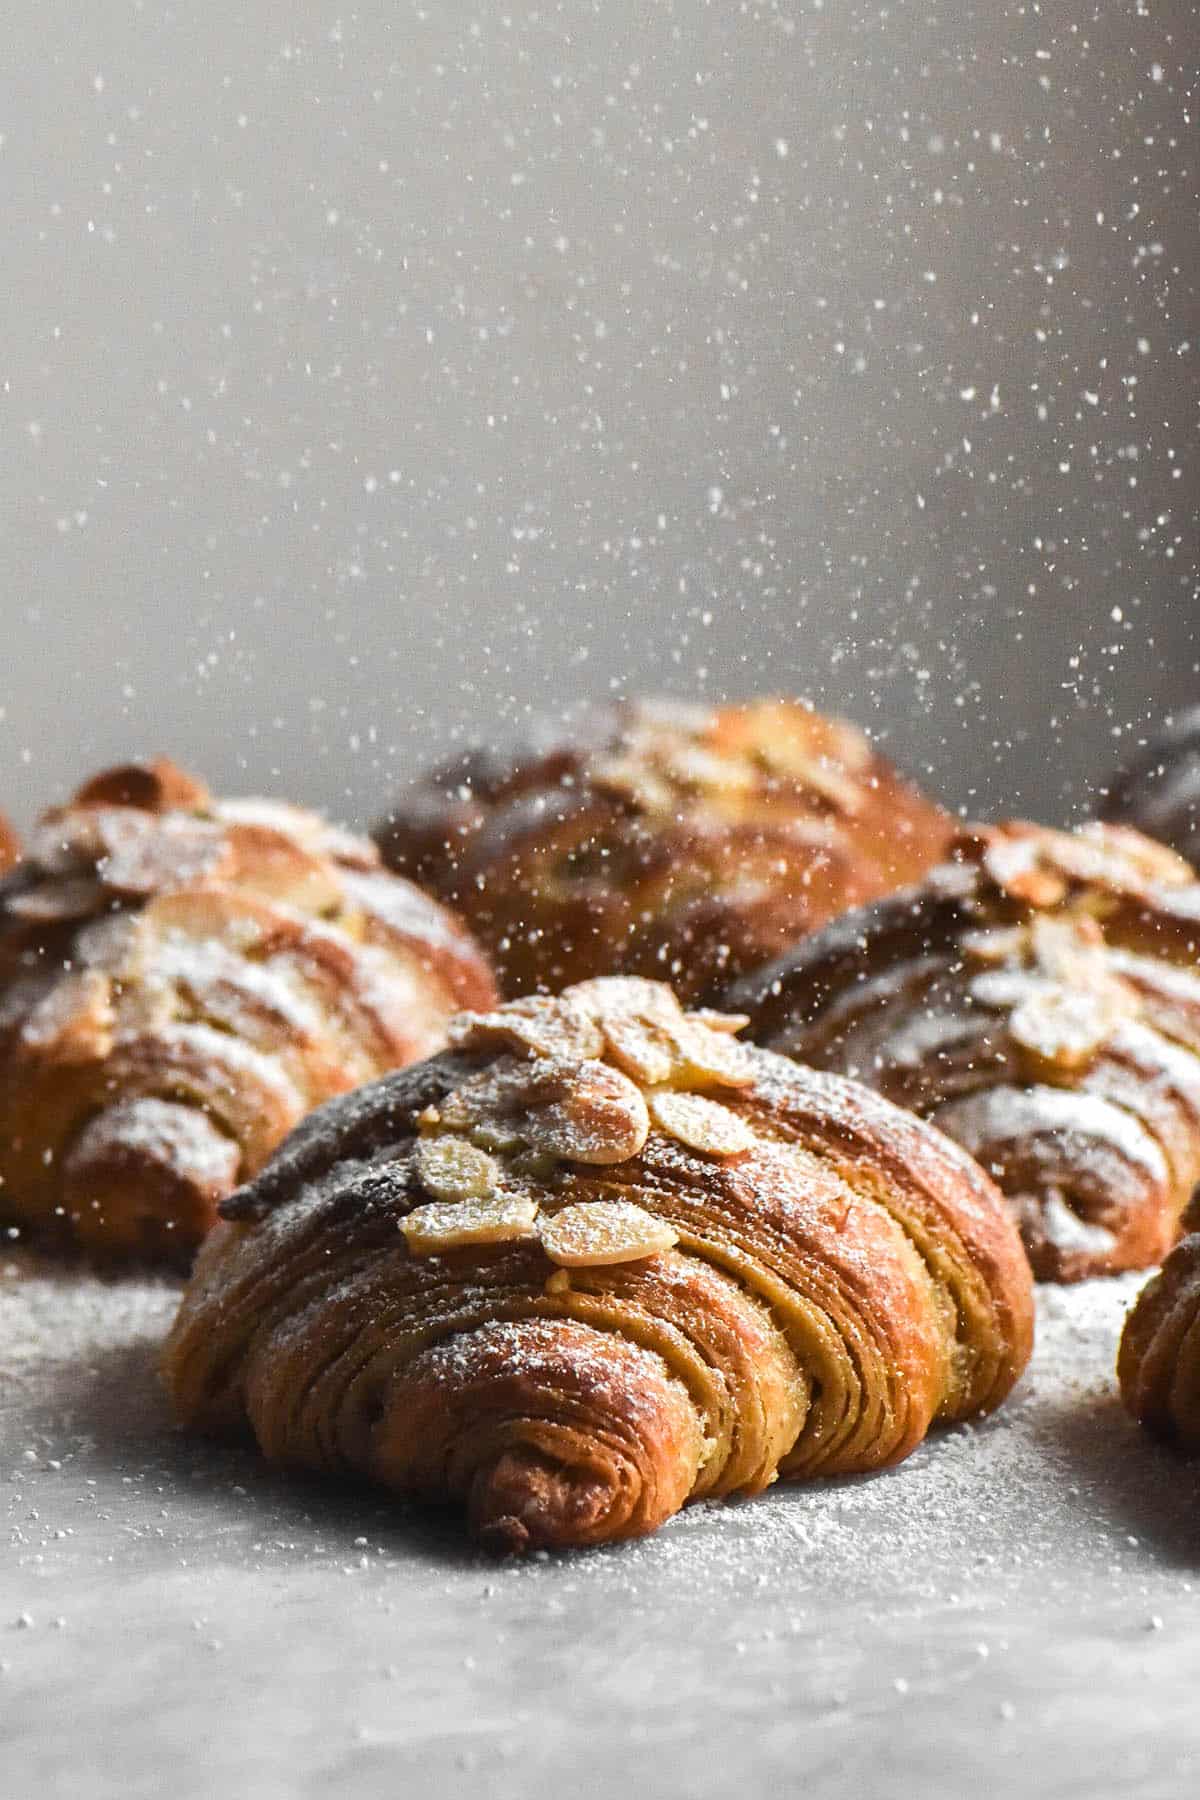
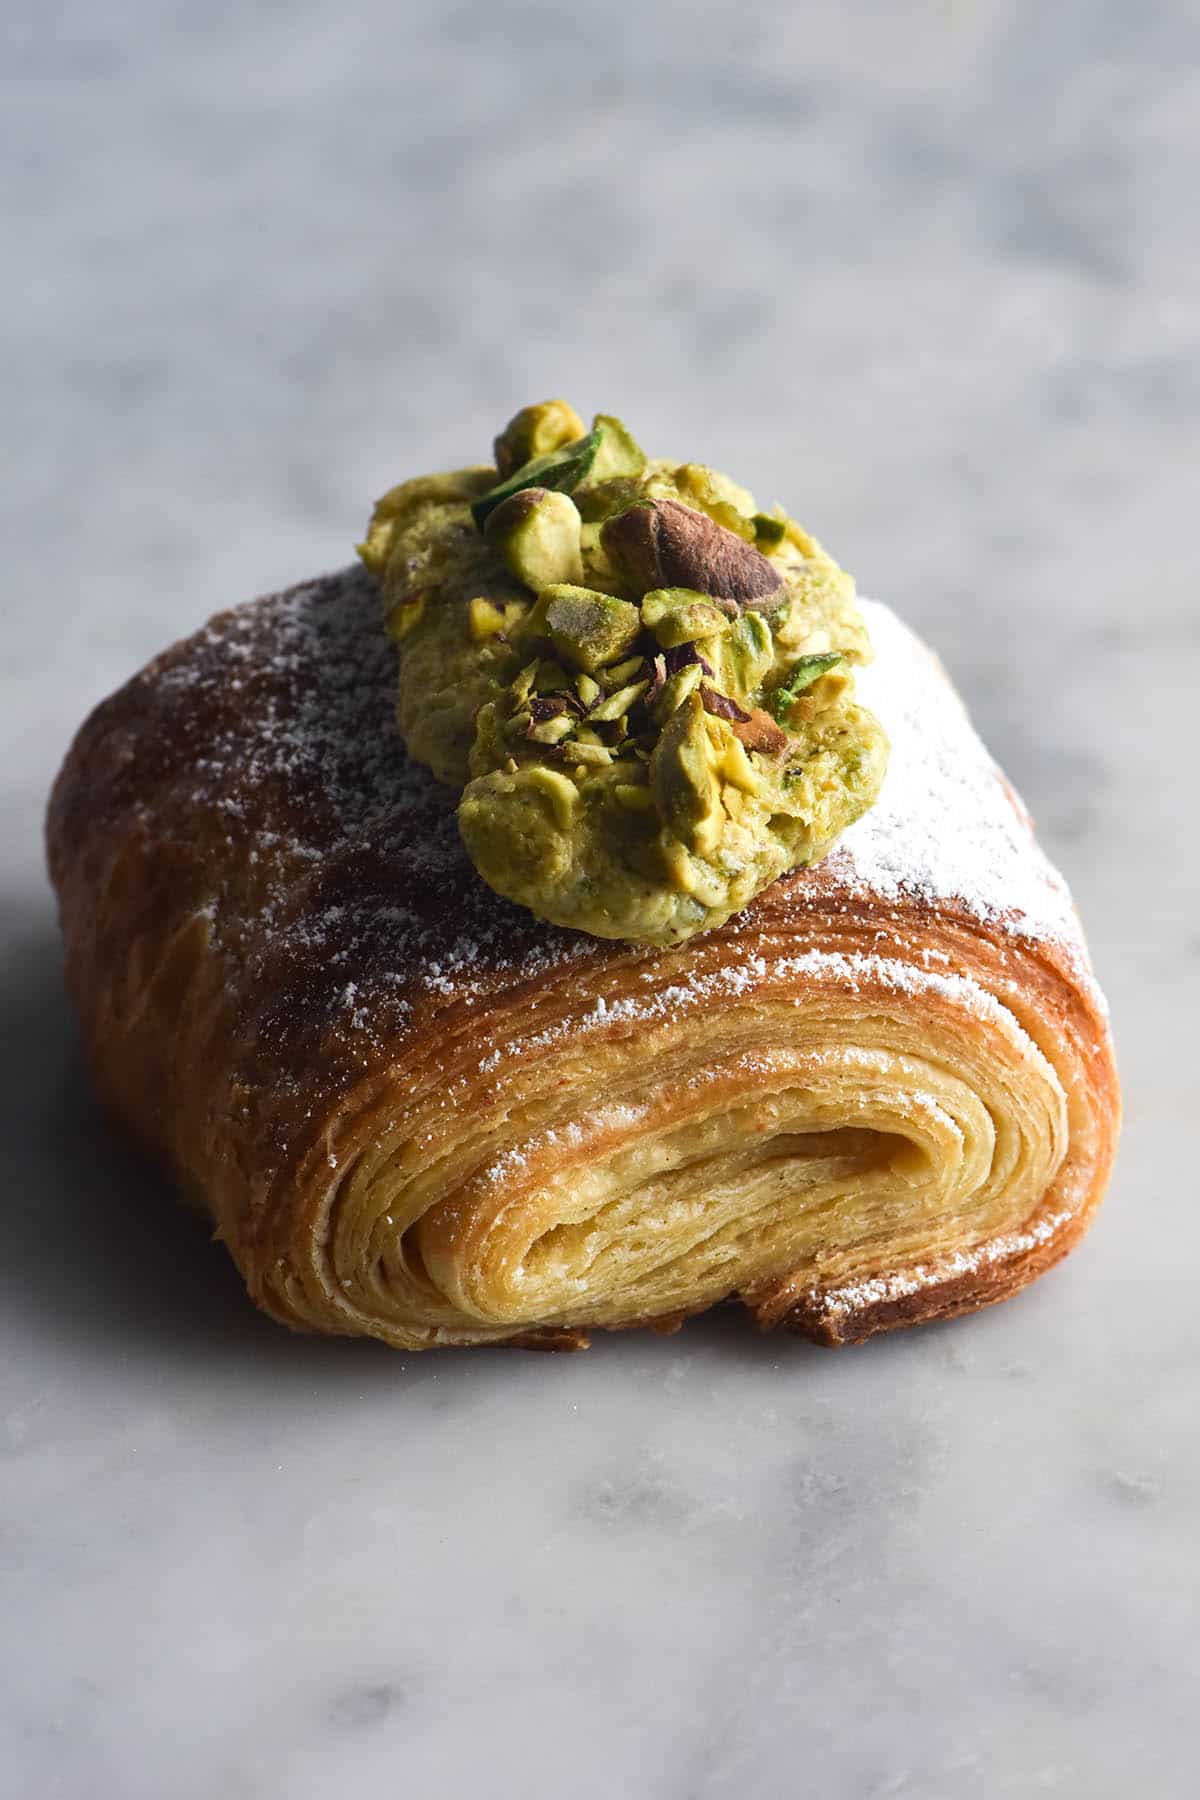
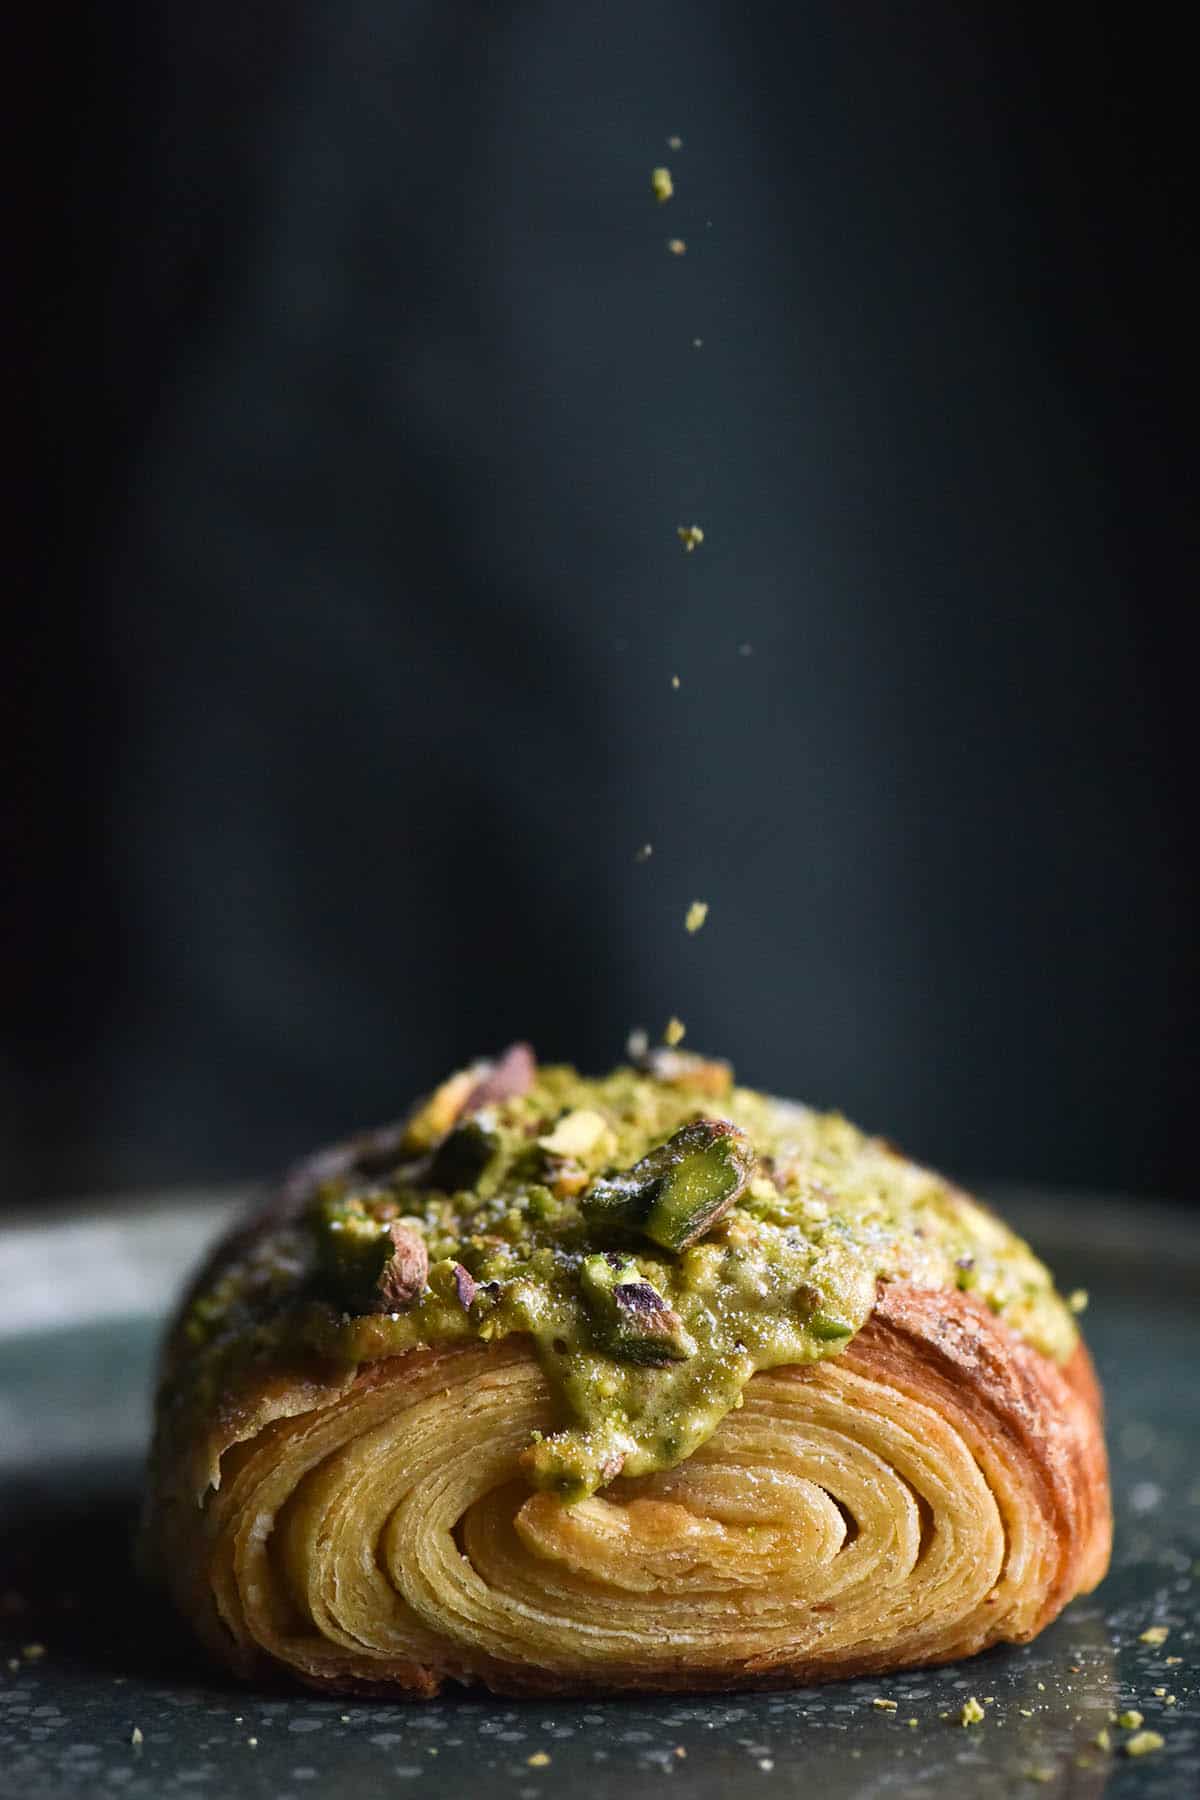
- Another non-FODMAP suggestion is to make pistachio croissants instead of almond. Simply substitute the almond meal in the almond croissant recipe for finely ground pistachios. I used my little Kitchenaid blender to whizz it into a fine crumb. Don’t take it too far and don’t be worried about little bits of pistachio chunk.
Hi! I love your book, I recently tried the yeasted croissants and they smelled and tasted exactly like croissants (atleast what I remember croissants to taste like it’s been a while) however I’m having trouble making them flaky the inide kind of went like a cake or muffin so oil you have any tips on getting the flakyness, I think I might have rolled the dough too thin or I don’t even know but thank you so much for the recipe!
Hi Grace! Generally a muffin-like centre is an issue with lamination. If the lamination isn’t carefully done or the temperature of the butter becomes too high, it absorbs into the dough rather than separating it to create flaky innards.
Laminating gluten free pastry is really hard because it doesn’t have the strength that regular dough does. It’s very easy to break up the lamination as you work because the dough isn’t as flexible.
Be really really slow and considerate when you laminate and try to keep the dough perfectly even. If you go to fold the dough and it resists, let it sit for a while. If the butter is too cold for lamination then you can snap it and create that spotty butter look in the dough. On the flipside, make sure the butter isn’t too soft and melty or it will soak into the dough.
My lamination skills are still not airtight and I have done it hundreds of times now. It really is a skill and some batches are better than others!
Hello, Georgia!
Can you substitute sorghum flour for buckwheat flour, instead of glutinous rice flour? I have both, I’ve just always thought that sorghum had a similar structure to buckwheat flour, and it would be cheaper for me.
Thank you so much!
Hi Sophie!
Just to clarify: are you asking if you can substitute sorghum for buckwheat flour or for glutinous rice flour (or for both?)
I haven’t tried this but I don’t know if it would work. Sorghum doesn’t have the elastic qualities that buckwheat flour has and so you’re losing some flexibility in the dough.
The same applies for substituting sorghum flour for glutinous rice flour – you’re losing elasticity (but also starch which helps the dough proof a little quicker).
Does this answer your question?
Yes, thank you, it does!
Hi Georgia! I bought your cookbook specifically for this recipe (though I’m loving everything else in it!!)
My dough was superrrrr sticky after leaving it in the fridge overnight. Like wouldn’t even come off the parchment I was rolling it on. Is there a specific reason for this?
Hi Rylee! Sorry to hear that but so glad you’re loving the book 🙂
As discussed in the notes on hydration section, how much liquid you add is highly dependent on a number of different factors that I can’t test for. Different bags of flour have different absorbency, then there’s climate (humid or cold) altitude, etc.
So it’s likely that your flours just need less liquid than mine did for this recipe.
Are you based in Australia? Just asking because the measurements are in Australian cups and measures which might throw you off a little if you use it internationally.
Hi, I was looking forward to make these croissants, but it seems there isn’t actually a recipe posted here? A full ingredient list and amount as well as baking instructions would be helpful.
Hi Mary, the recipe for the croissants is in my cookbook Intolerance Friendly Kitchen. I wrote this post to expand on the tips and tricks that I gave in the cookbook because I could only dedicate a finite amount of pages to one recipe
These look delicious and the detailed tips and explanations are great! Thank you so much for sharing. I react badly to xanthan gum and I see pysillium already there, any suggestions that might replace the xanthan portion of the recipe?
Unfortunately not at the moment Kat! Because croissants are so reliant on structure, I haven’t figured out a xanthan gum free version. It is on my to-do list though 🙂
I would like to watch your croissant-making video but am having difficulty. I don’t find a link in the article; a browser search only shows me it’s on TikTok but when I try to watch it goes to another video in 2 seconds (and then to another)
Hi Peggy,
I will try and film a video to embed directly into my website soon 🙂
Be nice if theres could be paleo to?
Hello! I think a paleo croissant would be quite tricky given the limited number of flours and sugars that you could use to create one. Might be possible but I think there would be a paleo recipe recipe creator with more expertise on the topic than me 🙂
Happy New Year Georgia!
I was thinking of giving a try at the croissants and am delighted to see that there is a swap for buckwheat (household allergies). Is the swap for buckwheat an equal weight of glutinous rice flour (~60g)? Please let me know. Many thanks.
Hi Jannice, yes it is! Cassava flour might also work – I’m going to try it soon and update the post 🙂
Hi Georgia!
Many thanks for your reply. Ooo, cassava flour! I’ll keep watching your post for how it turns out, as I like how your recipe doesn’t use any store-bought mixes (household allergies to long string of items including buckwheat, sorghum, millet, teff, coconut, nuts…). Thanks again and you are the best!
Hi Georgia, Thank you, thank you, thank you for your 100 attempts that produced this recipe. I refer to croissants as the ‘Mt Everest of gluten-free baking’ & have made numerous attempts with fairly sad results – not 100 though! My first attempt at your recipe was OK, not great ( since I regularly make gf puff pastry, I arrogantly went for the full amount of milk) but the second was WONDERFUL.
I aim to keep improving, but in the mean time…. they are delicious.
Lucky I’ve got 6 people to eat them.
Thanks again, you’ve made my year.
Such lovely feedback, thank you Dorothy! Always happy to hear that my year of frantic croissant making was worthwhile haha. Everest indeed!