
I have a lot of gluten free bread recipes on my site, in my second cookbook and in my e-books. What I don’t have many of, however, is gluten free yeast free bread recipes. Today I’m changing that with this easy recipe for gluten free bread without yeast. This loaf is nut free, xanthan gum free, egg free and easily vegan. It’s tall, delicious and easy to make. I am SO excited to share this bread – it’s perfect for sandwiches, toast and everything in between.
Gluten free bread without yeast
This recipe uses a mix of two flours – white rice flour and tapioca flour. These work together to create a flexible, mild flavoured bread with a lovely amount of chew.
Next we add yoghurt (which can be regular or plant based). Yoghurt performs a number of functions here. Firstly, it aids in the browning of the loaf which is something yeast normally provides. An anaemic looking loaf is never appetising and a browned crust tastes better.
Secondly, it creates a soft and plush crumb and adds some elasticity to the loaf. You can use regular yoghurt (I recommend thick Greek yoghurt, lactose free or regular) or a vegan alternative. If you go the latter route, ensure the yoghurt is plain and thick for best results (I like coconut yoghurt).
The loaf uses psyllium husk powder for elasticity, binding and to draw enough liquid in to create a soft and fluffy crumb. It uses a LOT of baking powder for leavening in the absence of yeast.
Finally, a small amount of maple syrup and a small amount of oil add flavour and improve the crumb texture.
What is the difference when making gluten free bread with yeast vs gluten free bread without yeast?
I wanted to include this section because working with a yeast free bread is a totally different animal. If you intend to play around with this recipe, I hope you find these notes helpful.
The first difference I noticed when it comes to a yeast free version is that it doesn’t brown as quickly. In fact, in earlier loaves without the yoghurt the bread barely browned at all. This is why this recipe uses yoghurt and a high heat. These things work together to provide the golden brown crust that we’re accustomed to on a good loaf of bread.
Secondly (as already discussed) I noticed that you can taste all the ingredients far more than you can in a yeasted version. I have found that yeast nullifies a lot of strong flavours in bread making. It is why the flavour of my gluten free buckwheat bread (to me, at least) has quite a pleasantly neutral buckwheat flavour. In versions of this loaf I tested with more buckwheat flour, the flavour was strong (even for a buckwheat lover like me).
Thirdly, non-yeasted gluten free bread needs less liquid than yeasted bread. How much less is still a moving target and subject to your flours. I have to say, as someone who bakes every day for a living, I found yeast free breads to be a completely new animal in terms of hydration and what to look for.
Recipe substitutions
There aren’t many, at this stage! I have spent forever and a day nailing down this recipe, so there aren’t too many substitutes at present. As I make more loaves, I will endeavour to update the post.
In the meantime, a few substitutions that are tested.
As mentioned, you can use plant based yoghurt instead of regular yoghurt. Choose a plain variety that you know to be thick (and read the labels if you have multiple dietaries). Note that you may taste it a little in the bread.
You can use any sort of oil as it is only a small amount. Similarly, rice malt syrup, honey or perhaps even brown sugar will work in place of maple syrup.
I have posted a yeast free buckwheat bread recipe if you need a yeast free bread without rice flour.
Ingredients there is no substitute for
Yes, this recipe uses a lot more psyllium husk powder than my other bread recipes. This is because yeast seems to have a positive impact on binding a loaf together and soaking up a lot of liquid. Whether this is because the psyllium husk has more time to absorb liquid as the bread proofs or because of the yeast itself, I don’t know.
Because the yeast seems to help hold everything together, we need to add more psyllium husk to replace that binding capacity. This allows us to add enough water to create a soft textured loaf while still allowing the bread to retain a shape.
So! There is no substitute for psyllium husk powder. I buy whole flakes and grind them to a powder myself using a cheap Breville spice grinder. I find the store bought stuff to be too fine and often leaves bread with a grey or purple tinge. Some brands of whole flakes do this too, so buy a brand you know doesn’t. I can’t recommend any at the moment because they all tend to be a bit hit and miss in this regard.
There is also no substitute for baking powder. In my tests, I found that baking soda contributed too much of that classic soapy taste to this loaf. It also turned the crust brown and then tough before the loaf was cooked through.
What sort of bread tin can I use?
As always, my answer here is the same. You cannot bake this bread in a silicon tin, cake tin or short loaf tin. Silicon doesn’t have the strength to hold the dough in as it bakes and you won’t get any height on your loaf. A short tin won’t support the loaf as it bakes and it might spill over the edges. Using a much bigger tin will result in a flat and dense loaf because the dough will spread outwards as it bakes.
This recipe, like all my other gluten free loaf recipes, uses a USA Pan Small Pullman loaf pan without the lid on. The specs are 10.16 x 10.16 x 22.86 cm; 612.35 Grams or 9 x 4 x 4 inches.
I live in Australia and I bought mine online. I have seen it on a number of different websites (I refuse to link to the big A any longer) including Dick Smith and Peters of Kensington.
If you can’t find this bread tin, choose a tall sided steel pan with the same specs. If you can’t find the same specs, I would recommend a slightly smaller pan.
Note that I can’t guarantee results made in another pan as all my bread recipes are developed around this one. This isn’t an ad, it is just my go-to gluten free bread pan.
Tips for your gluten free yeast free bread
A few things I have noticed in regards to yeast free bread: you can taste individual ‘flavours’ more than with a yeasted version. This means you need to add less salt to a yeast free version, for starters.
I feel that the flavours of this bread are quite balanced and you can’t taste any flour over the others. It is something to keep in mind with the variety of yoghurt you use if you choose to make a vegan loaf, though.
Another thing to make sure of is that you use fresh and finely milled white rice flour. Rice flour that is coarsely milled or rancid has a gritty texture and a musty, floral taste and smell. You will be able to detect both of these in the loaf, so make sure you get fresh and fine white rice flour.
Like all my other breads, a steel Pullman pan is required to make this loaf work. Gluten free loaves benefit from solid tall sides of a tin to allow it to bake upwards instead of outwards. Gluten free dough doesn’t have much inherent strength, so it needs a guard rail, so to speak.
One thing that really threw me with developing this loaf is that it needs a lot less liquid than my yeasted breads. When you have become accustomed to very liquid dough prior to proofing, it can be tricky to get used to a thicker dough. More on this in the section below.
What is the ideal consistency for this bread dough?
As mentioned, one of the many things that threw me while developing this recipe was that yeast free gluten free breads require a lot less liquid than yeasted versions. When you are used to super liquid dough, it is quite hard to reframe what the ideal consistency of a dough should be prior to baking.
Another thing that throws me is that the dough can feel drier than you are used to, but the bread itself has a wetter feel than a yeasted bread.
The best way to get within striking distance of your ideal hydration is to add water 50-100g at a time once you reach a certain point of mixing the dough. You need to have one hand in the dough, feeling for the right consistency, and the other hand pouring the water.
The ideal dough consistency for this bread is a solid dough that no longer feels crumbly or like it will squish into various little chunks if you squeeze it between your hand. It should feel like a smooth, uniform piece of dough that is sticky and moist but not totally wet or pourable. If you squish it in your hand, the dough should feel more like slime (consistency wise) than, say, pastry dough. It should be just a little bit too sticky to roll out with ease.
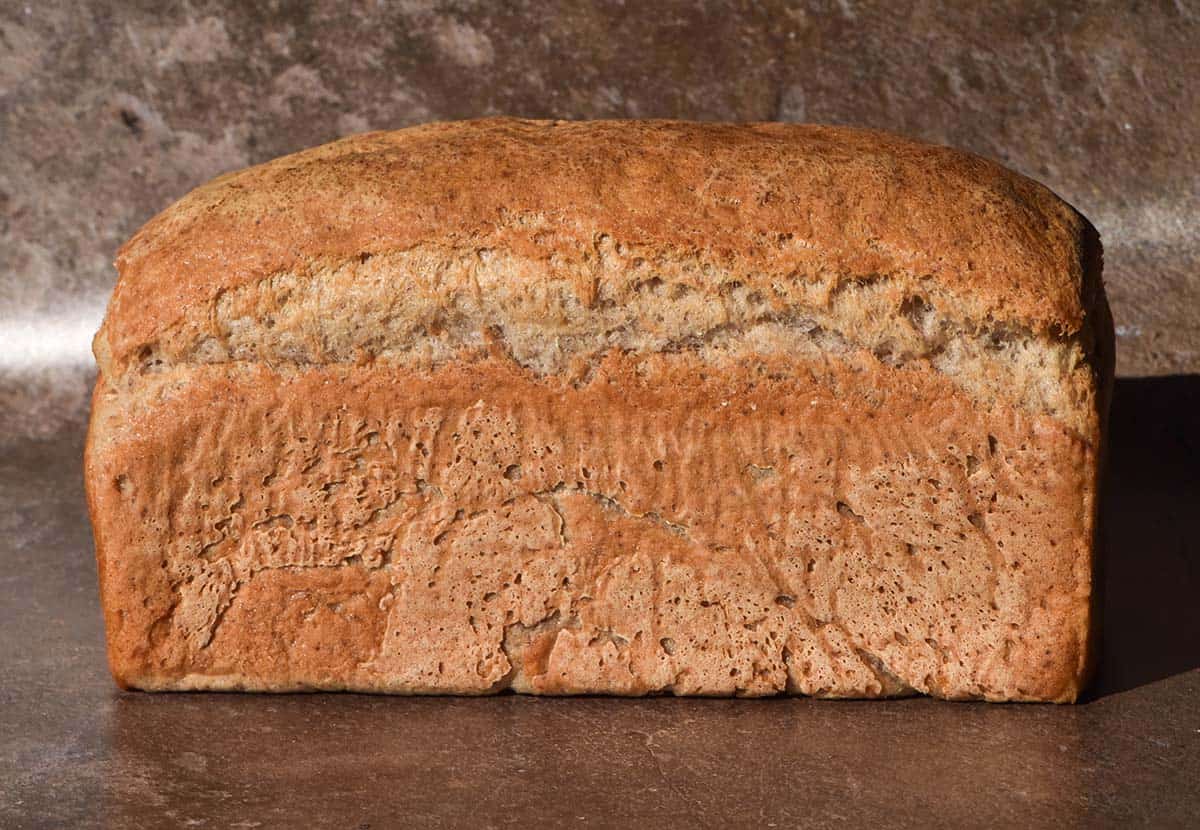
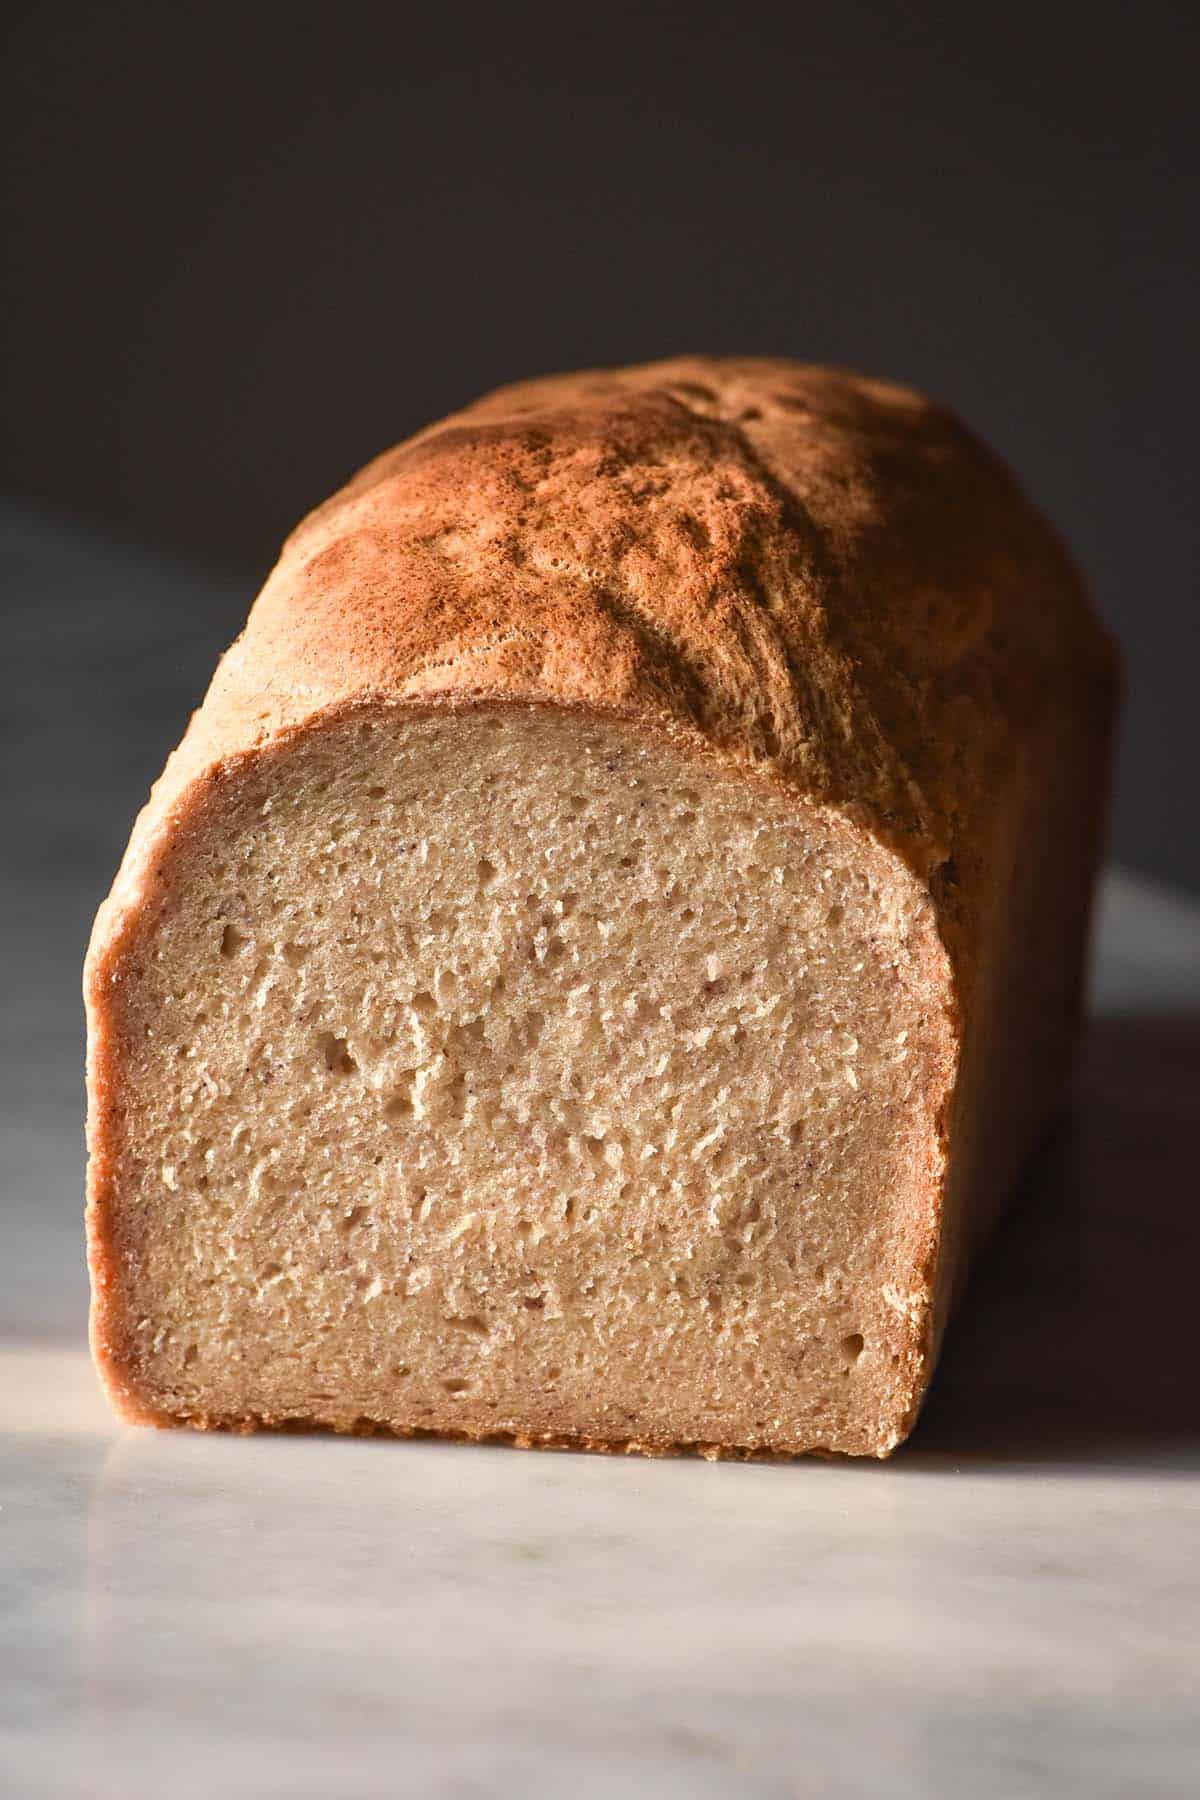
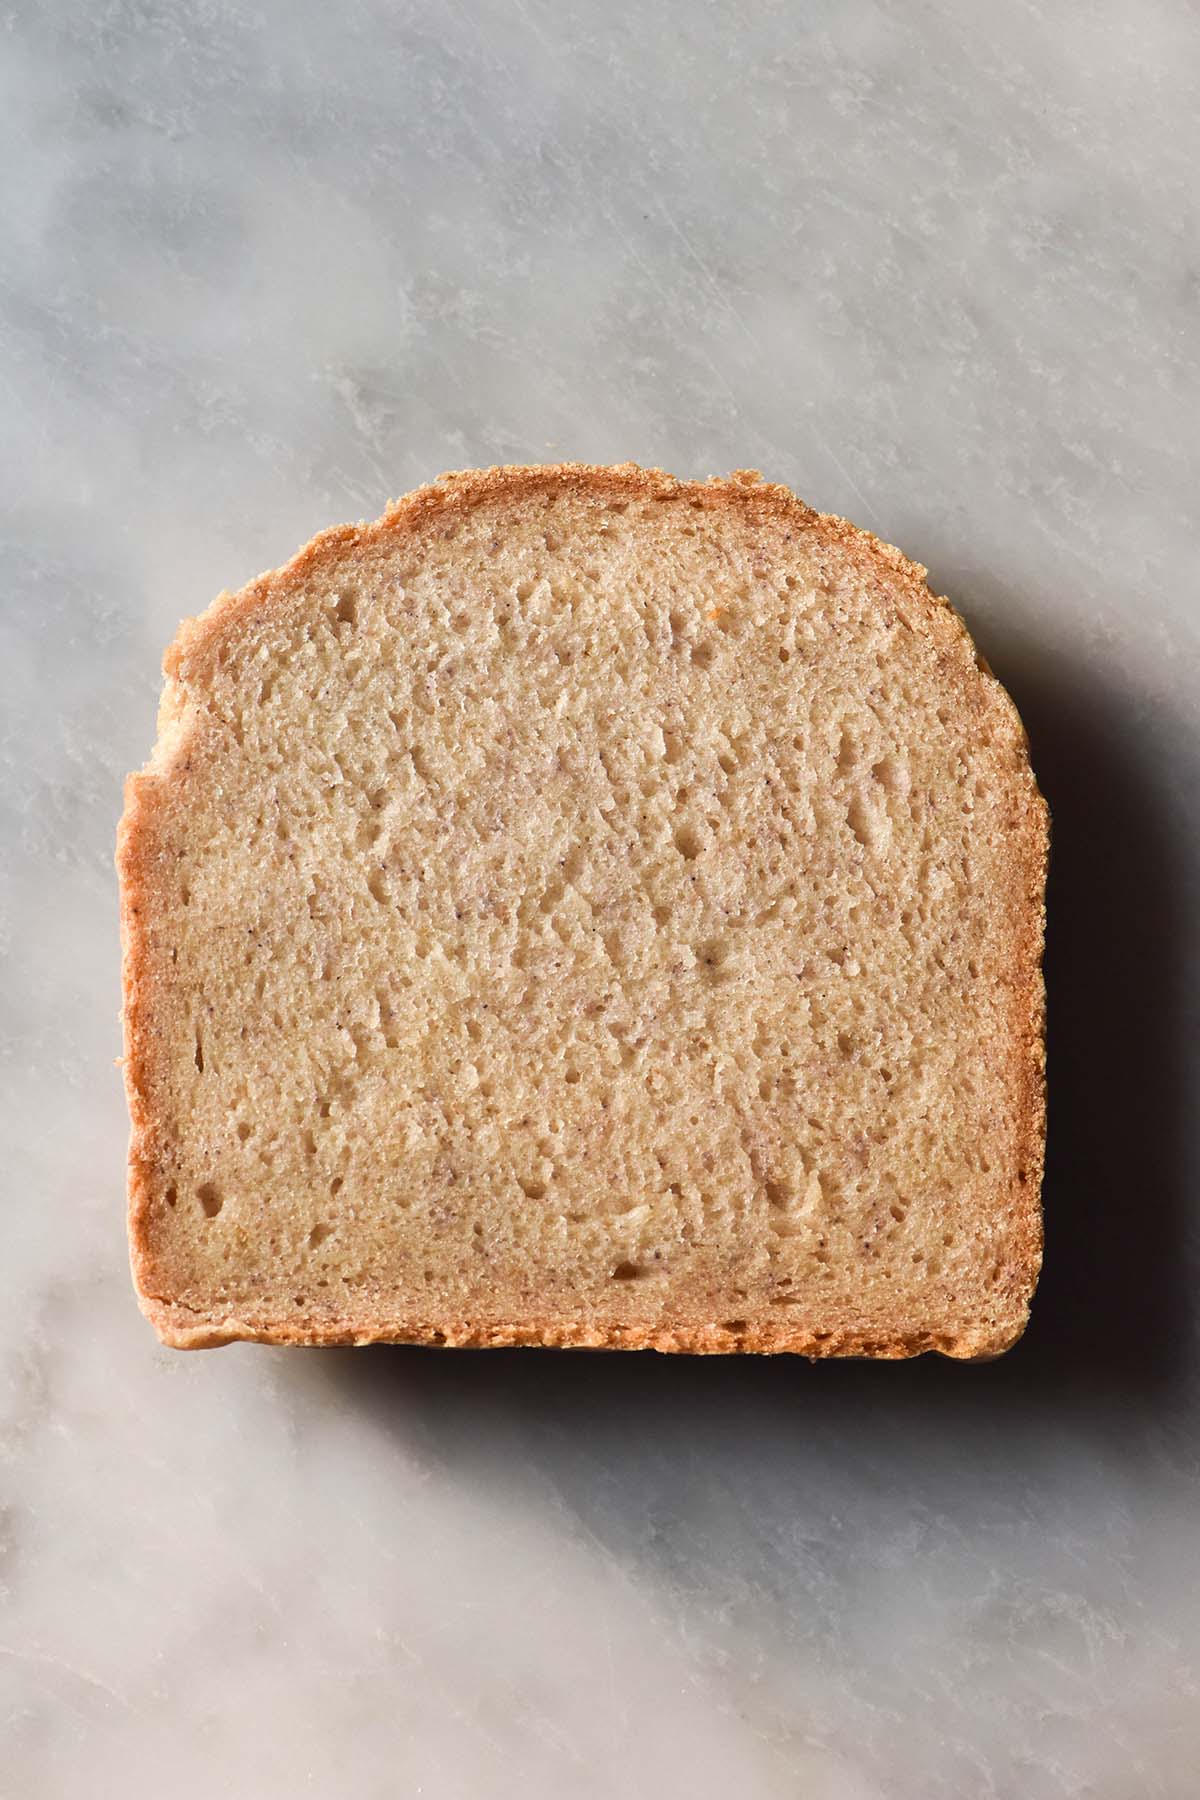
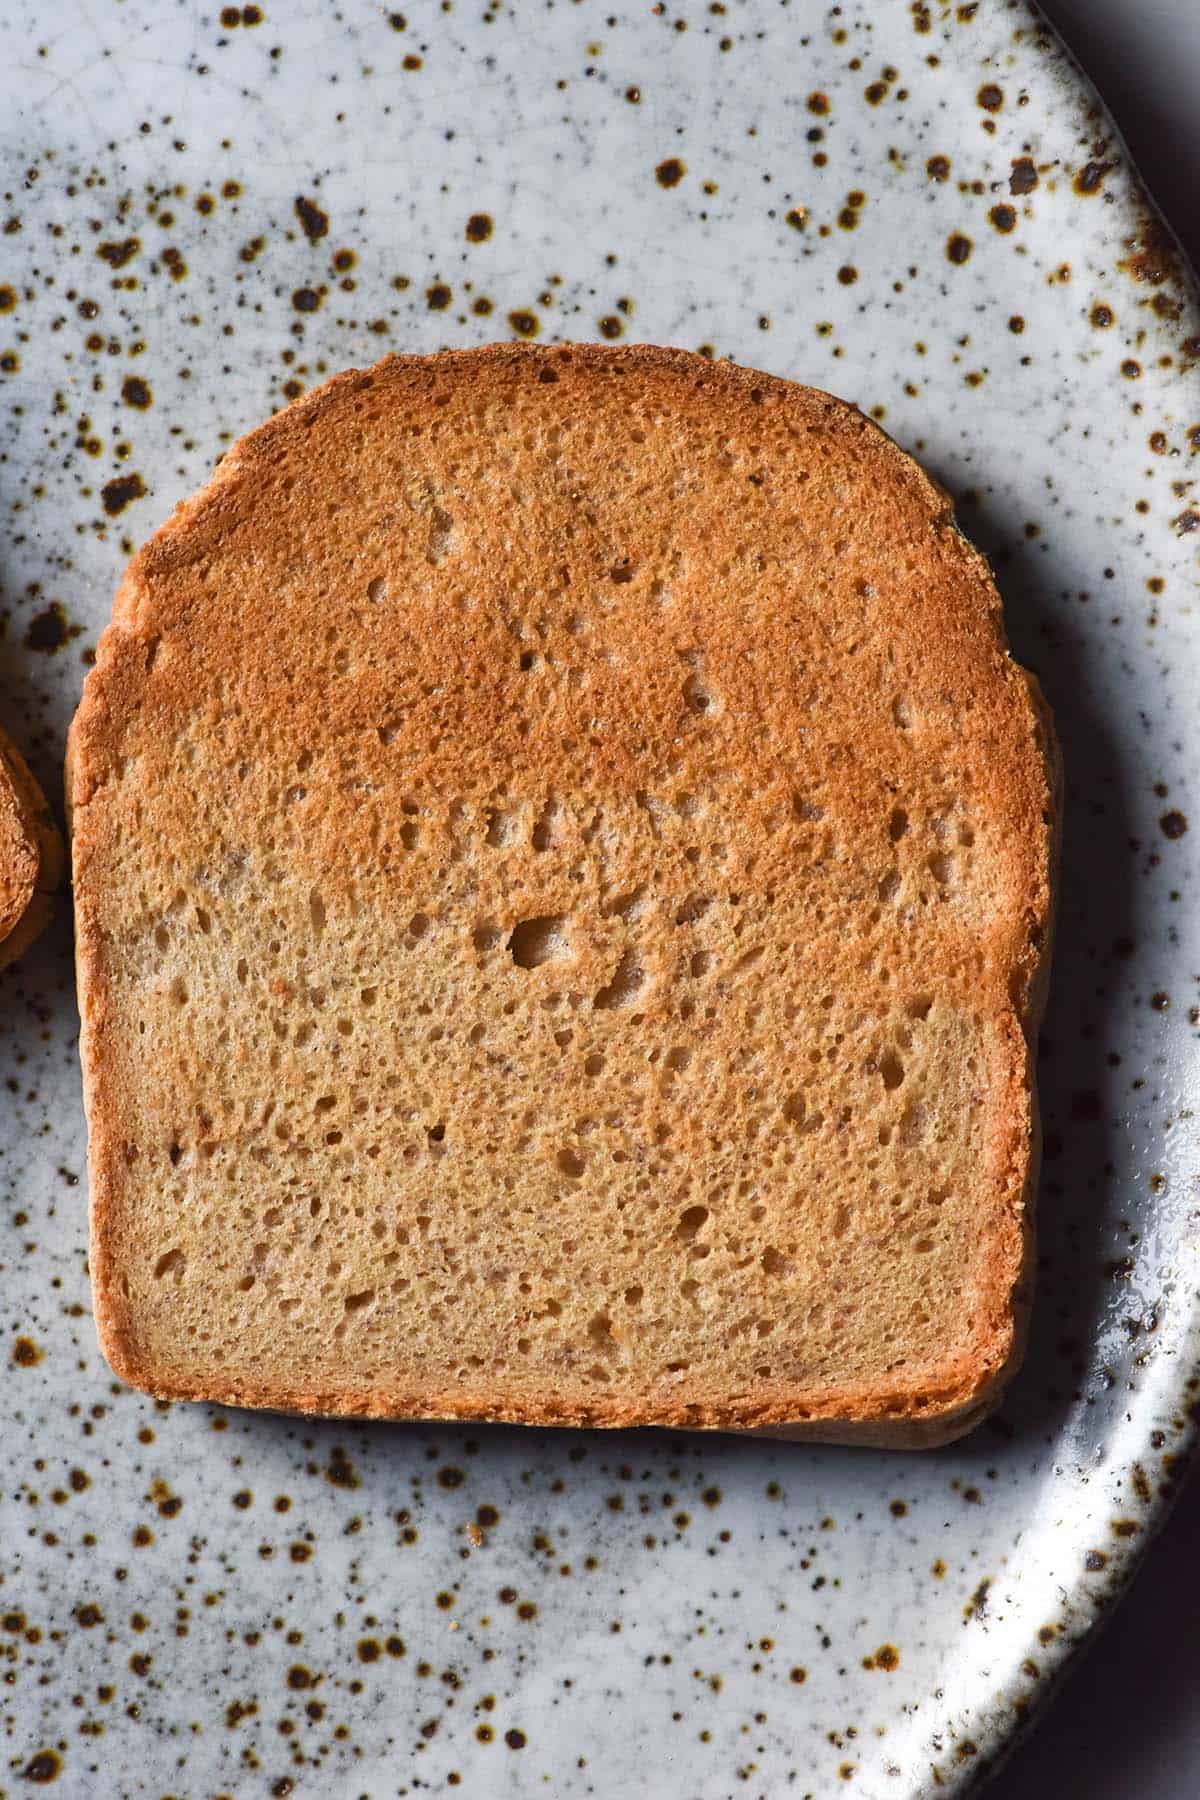
The consistency of the baked bread should be soft and flexible with little or no gummy layer down the bottom of the loaf. The crumb is more dense and can feel a lot more ‘wet’ than a yeasted bread, but it should have some little air bubbles and a nice soft crumb.
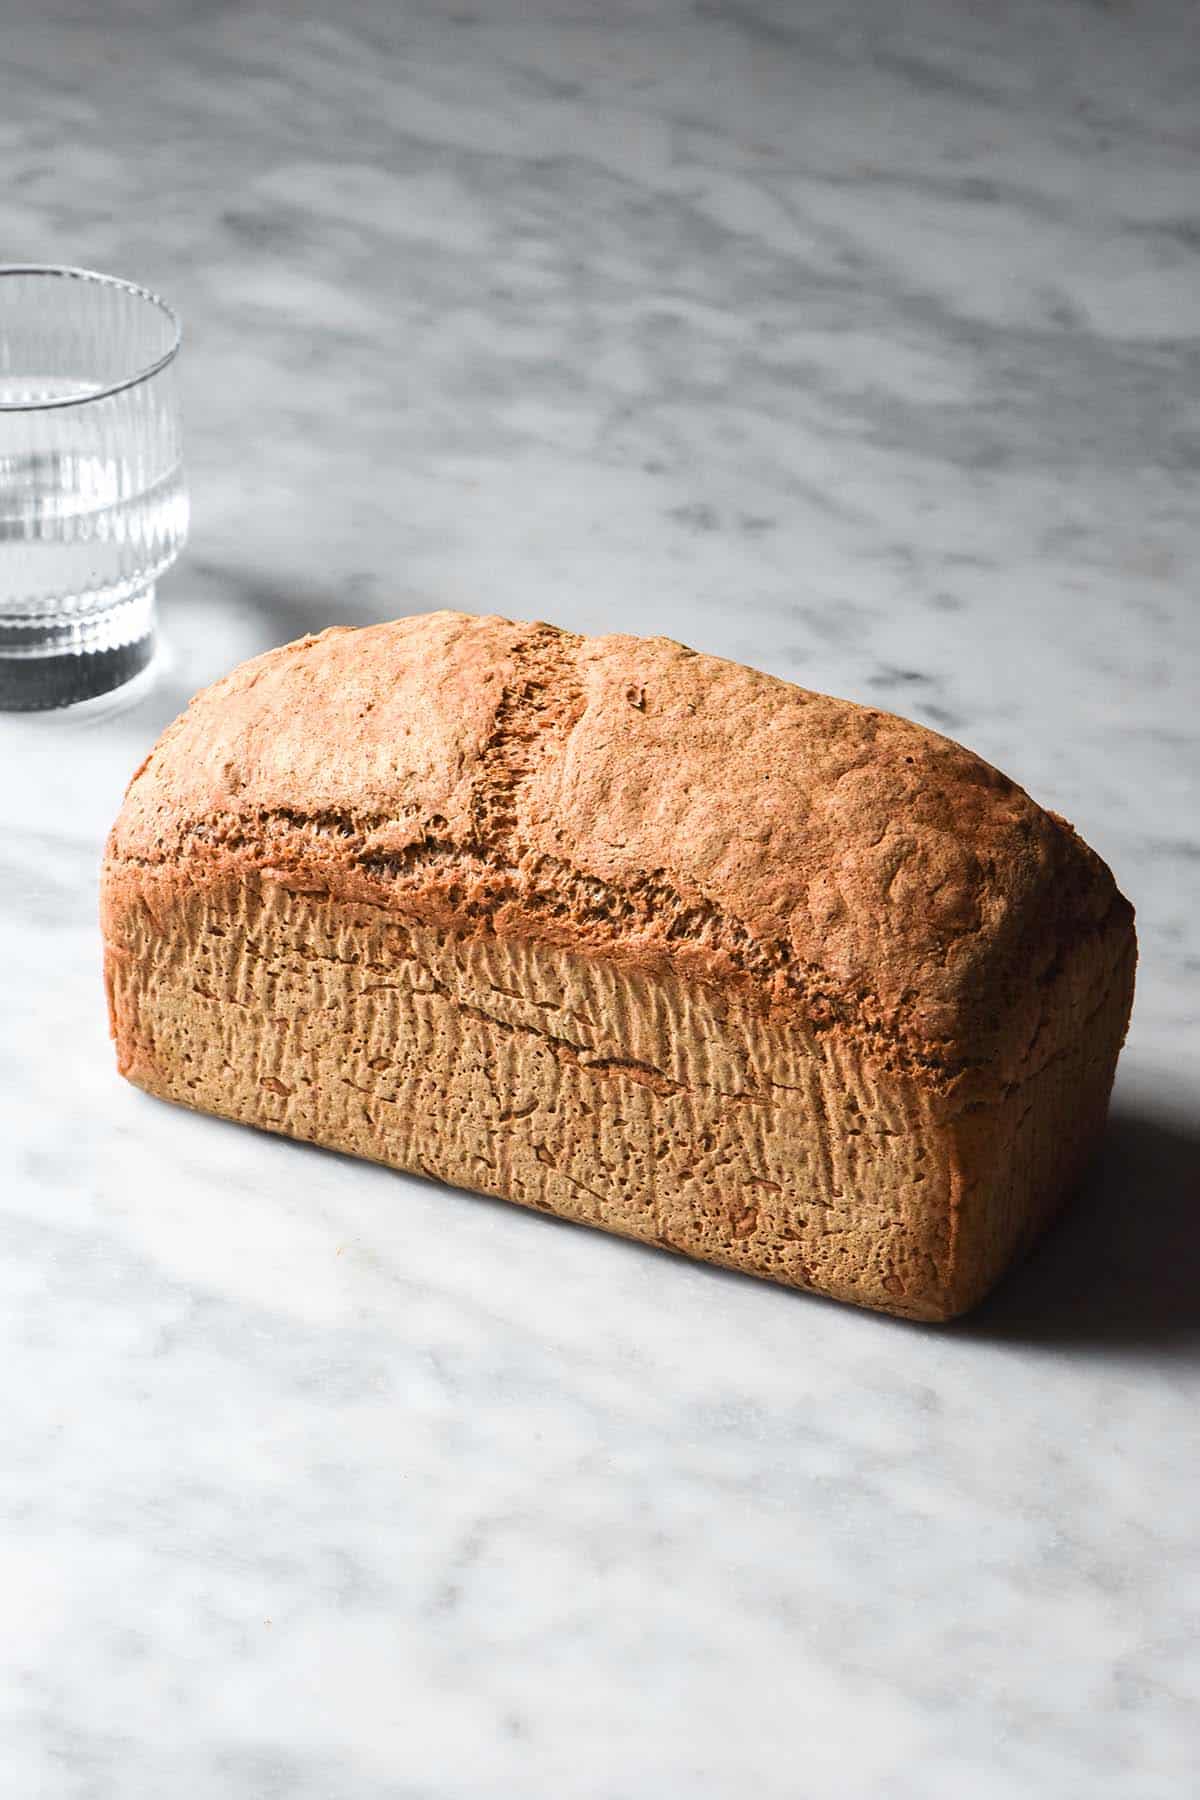
The loaf should be light to medium brown and have nearly reached the height of the bread tin.
Troubleshooting your yeast free gluten free bread
The main thing that will cause you issues with this recipe is the amount of water added. The annoying thing about this is that flour varies greatly in how much water it needs; brand to brand, country to country.
Where my loaf works well with the amount of water specified in the recipe, yours might need more or less. It depends on your flours, the humidity, your oven – a whole host of different variables.
If you don’t add enough water, your loaf will be flat and dense. Keep in mind that this is a more tightly knitted crumb to be begin with – it’s gluten free and yeast free, after all. However, the bread will be very dense and dry if you don’t add enough liquid.
If you add too much liquid, your bread will be very wet and chewy. It will have a gummy looking bottom when you slice the loaf, and potentially the sides will be gummy too. I actually don’t mind a wetter bread once you get past the feel – it has a great chew and texture.
A bit more troubleshooting (and solutions)
So! some tips to ensure we get the best loaf of bread possible. Firstly, make sure you follow the visual instructions in terms of what to do look out for in your dough. Adding water without assessing your dough or using any intuition will likely land you with a loaf that isn’t as good as it could be.
Next, allow the loaf to cool COMPLETELY before even so much as cutting off a crust. We need all of the steam (aka: liquid) to leave the loaf before cutting it. This allows the crumb to set and harden a little. If you cut into the bread too early (even if the hydration is perfect) your loaf can be a bit gummy.
Finally, accept that this is a part of gluten free baking. We’re making a yeast free, gluten free, xanthan gum free and vegan bread lol. Not all of my loaves come out perfect either – it is the nature of the beast. Keep notes and adjust the water content for your next bake.
Quick tips
- If your loaf is flat and dry, add more liquid next time. Using a tin that is too large or expired baking powder will also create a squat loaf.
- If your bread slices are super wet, drop the hydration back a little next time.
- If you have a gummy layer on the bottom of the loaf, this isn’t necessarily a problem UNLESS you don’t like it and the bread isn’t too your tastes. If that’s the case, drop the hydration back. You can also try adding a little bit less psyllium husk powder as this sometimes helps.
- If your loaf is pale and white, cook it on a higher oven setting or preheat the oven for longer next time. I find that the coconut yoghurt option can be a little paler, so just cook it for an extra 5-10 minutes.
- This is anecdotal, but I have noticed that using a high protein Greek yoghurt (I use Chobani Fit, which has added lactase) seems to produce a taller loaf. This could just be luck of the draw, but I thought I’d mention it.
- If your loaf is too brown, turn the oven down or place it on a lower rack.
- Keep in mind that this is a yeast free, gluten free bread recipe. You will never achieve a huge open crumb like a regular gluten and yeast based bread.
More gluten free yeast free recipes
- Gluten free vegan cinnamon rolls without yeast
- Gluten free, yeast free hot cross buns
- The yeast free buckwheat bread in Intolerance Friendly Kitchen
- Gluten free flatbreads without yeast
- Gluten free buckwheat bread without yeast
Gluten free bread without yeast
Equipment
- 1 X Small USA Pan Pullman pan (10.16 x 10.16 x 22.86 cm or 9 x 4 x 4 inches)
Ingredients
- 200 g tapioca flour
- 450 g fine white rice flour
- 30 g (yes, 30g) baking powder (gluten free if it needs to be)
- 40 g psyllium husk powder (see notes)
- 7.5 g fine salt (I use table salt)
- 150 g yoghurt I have tested Greek yoghurt and plain coconut yoghurt
- 20 ml (1 tablespoon)* oil of choice
- 20 ml (1 tablespoon)* maple syrup or liquid sweetener of choice
- 550-650 g water see notes
Instructions
- Preheat your oven to 250C/480F or the highest setting if your oven doesn't go this high. Grease and line your USA Pan Small Pullman loaf tin.
- Whisk the dry ingredients together thoroughly in a large bowl. Add the yoghurt, oil, sweetener and 400-500g water. Whisk to combine, then get your hand into the dough to squish it through your fingers.
- The ideal dough consistency squishes through your hand while still feeling like a moist, smooth dough. It shouldn’t crumble into the pieces as you squish it and there should be no dry pieces of dough in the bowl. The dough should feel slightly sticky but you should be able to pick it up in a ball with ease – it should not be pourable or too sticky to handle like my other gluten free bread recipes. It should be just a bit too sticky to roll onto a bench.
- Add water as you need to reach this consistency. I used 600-625g in my tests, but you might need slightly more or less. This is why we’re adding the bulk of it first and then adding as necessary towards the end.
- When you are happy with the dough consistency, transfer it to your lined Pullman pan. Thoroughly dampen your hands with water and use them to smooth down the top of the loaf. With sufficient water, you can make the top of the bread completely flat.
- Place the bread in the oven for 40-50 minutes or until it is domed and golden brown. The loaf should feel firm if you tap on the top.
- Allow it to cool in the container for 20-30 minutes before transferring to a wire rack to cool (remove the baking paper if it is adhered to the loaf). I truly strongly recommend waiting to cut this loaf until the next day or at the very least until it is absolutely room temperature. The loaf needs time to cool and set.
- After the first few days, I recommend slicing the bread and storing it in the freezer to use as toast. Higher starch breads tend to stale faster.
Notes
- Every bag of flour will have a different absorbency level. I can only test what I have available to me, so you will need to use your intuition when it comes to how much water your bread needs. Read the troubleshooting section in the body of the post if your loaf hasn’t come out the way you wanted it to.
- Hydration is a moving target in gluten free baking and what works perfectly for me might not work perfectly for you. Add water according to your dough and not just what the recipe says.
- I grind my own psyllium husk powder from whole flakes in a spice grinder. I find store bought powder is too fine and tends to clump up easily. I also find that the store bought brands available to me tend to turn my baked goods a bit grey/purple. This is because of the psyllium husk they use.
- If you are using store bought psyllium husk powder, use 30g. You can also experiment with 30g if you are a more advanced gluten free baker. This may resolve persistent issues with gumminess on the base if that is happening to you.
- To avoid a slightly grey/purple tinge, choose a brand that you know doesn’t have that issue.
- Manage your expectations! This is a gluten free, egg free and yeast free loaf. It is denser than regular bread by definition.
- See the body of the post for recipe tips and substitution options. Note that I do not have flour substitution suggestions at the moment.
- Bread without yeast needs high heat to brown sufficiently. If the oven isn’t hot enough, the bread will be very pale. Note that non dairy breads (ie the version with coconut yoghurt) will be paler than the version with regular yoghurt.
- See the body of the post for extensive tips and tricks.
Thank you for this recipe! It is the best low histamine (using a nondairy yogurt) bread that I’ve made. Low histamine diet has resolved all my long suffering ibs especially when using a probiotic that is dominant in bifidobacterium strains which also lowers gut histamine. Yay!
Hi Suzanne! I am so glad you enjoyed the recipe 🙂
I have to say that low histamine has been helping me enormously as well (which is sad because I didn’t want to do it haha).
I do also have a low histamine bread recipe which doesn’t use any yoghurt at all – https://georgeats.com/recipes/low-histamine-bread-gluten-free-yeast-free/
Personally I think this recipe is perhaps a little bit more to my taste but I developed that one for people who can’t have any yoghurt at all – plant based or regular.
🙂
Hey! You have yoghurt in this recipe which is very high in histamines due to the fermentation. I replaced it with coconut milk and it turned out well.
Hello! I think you may have gotten a couple of my recipes mixed up. I do have a low histamine bread recipe but it’s here – https://georgeats.com/recipes/low-histamine-bread-gluten-free-yeast-free/ – and doesn’t use yoghurt. This yeast free recipe is just for people who need to avoid yeast, I didn’t take histamines into consideration.
Amazing to know that it works with coconut milk though!
you are just amazing… thank you for the recipes..
You are very kind Karla! Thank you 🙂