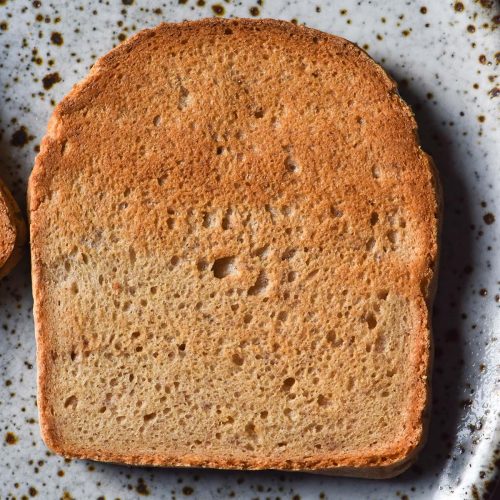
Gluten free bread without yeast
Xanthan gum free, egg free, nut free vegan option*Tablespoons are in Australian tablespoons which are 20ml as opposed to the more common 15ml. Add an extra teaspoon (5ml) for each tablespoon if your tablespoons are 15ml.
Equipment
- 1 X Small USA Pan Pullman pan (10.16 x 10.16 x 22.86 cm or 9 x 4 x 4 inches)
Ingredients
- 200 g tapioca flour
- 450 g fine white rice flour
- 30 g (yes, 30g) baking powder (gluten free if it needs to be)
- 40 g psyllium husk powder (see notes)
- 7.5 g fine salt (I use table salt)
- 150 g yoghurt I have tested Greek yoghurt and plain coconut yoghurt
- 20 ml (1 tablespoon)* oil of choice
- 20 ml (1 tablespoon)* maple syrup or liquid sweetener of choice
- 550-650 g water see notes
Instructions
- Preheat your oven to 250C/480F or the highest setting if your oven doesn't go this high. Grease and line your USA Pan Small Pullman loaf tin.
- Whisk the dry ingredients together thoroughly in a large bowl. Add the yoghurt, oil, sweetener and 400-500g water. Whisk to combine, then get your hand into the dough to squish it through your fingers.
- The ideal dough consistency squishes through your hand while still feeling like a moist, smooth dough. It shouldn’t crumble into the pieces as you squish it and there should be no dry pieces of dough in the bowl. The dough should feel slightly sticky but you should be able to pick it up in a ball with ease – it should not be pourable or too sticky to handle like my other gluten free bread recipes. It should be just a bit too sticky to roll onto a bench.
- Add water as you need to reach this consistency. I used 600-625g in my tests, but you might need slightly more or less. This is why we’re adding the bulk of it first and then adding as necessary towards the end.
- When you are happy with the dough consistency, transfer it to your lined Pullman pan. Thoroughly dampen your hands with water and use them to smooth down the top of the loaf. With sufficient water, you can make the top of the bread completely flat.
- Place the bread in the oven for 40-50 minutes or until it is domed and golden brown. The loaf should feel firm if you tap on the top.
- Allow it to cool in the container for 20-30 minutes before transferring to a wire rack to cool (remove the baking paper if it is adhered to the loaf). I truly strongly recommend waiting to cut this loaf until the next day or at the very least until it is absolutely room temperature. The loaf needs time to cool and set.
- After the first few days, I recommend slicing the bread and storing it in the freezer to use as toast. Higher starch breads tend to stale faster.
Notes
- Every bag of flour will have a different absorbency level. I can only test what I have available to me, so you will need to use your intuition when it comes to how much water your bread needs. Read the troubleshooting section in the body of the post if your loaf hasn’t come out the way you wanted it to.
- Hydration is a moving target in gluten free baking and what works perfectly for me might not work perfectly for you. Add water according to your dough and not just what the recipe says.
- I grind my own psyllium husk powder from whole flakes in a spice grinder. I find store bought powder is too fine and tends to clump up easily. I also find that the store bought brands available to me tend to turn my baked goods a bit grey/purple. This is because of the psyllium husk they use.
- If you are using store bought psyllium husk powder, use 30g. You can also experiment with 30g if you are a more advanced gluten free baker. This may resolve persistent issues with gumminess on the base if that is happening to you.
- To avoid a slightly grey/purple tinge, choose a brand that you know doesn't have that issue.
- Manage your expectations! This is a gluten free, egg free and yeast free loaf. It is denser than regular bread by definition.
- See the body of the post for recipe tips and substitution options. Note that I do not have flour substitution suggestions at the moment.
- Bread without yeast needs high heat to brown sufficiently. If the oven isn't hot enough, the bread will be very pale. Note that non dairy breads (ie the version with coconut yoghurt) will be paler than the version with regular yoghurt.
- See the body of the post for extensive tips and tricks.
Tried this recipe?Let us know how it was!