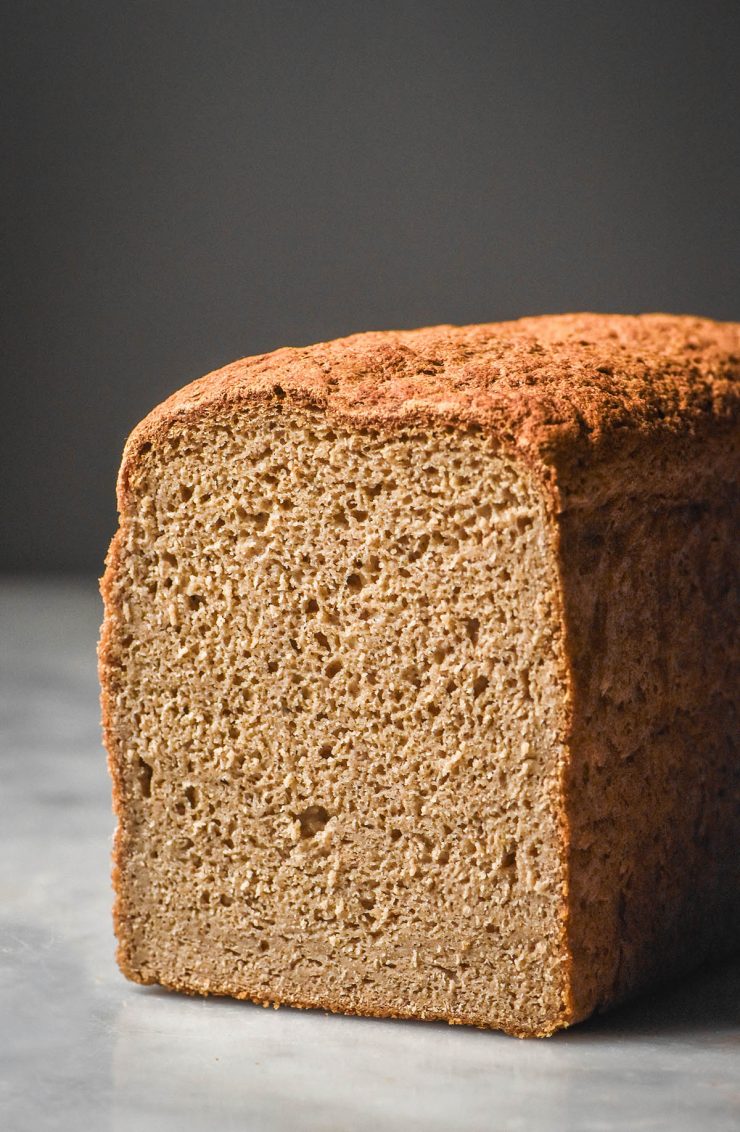
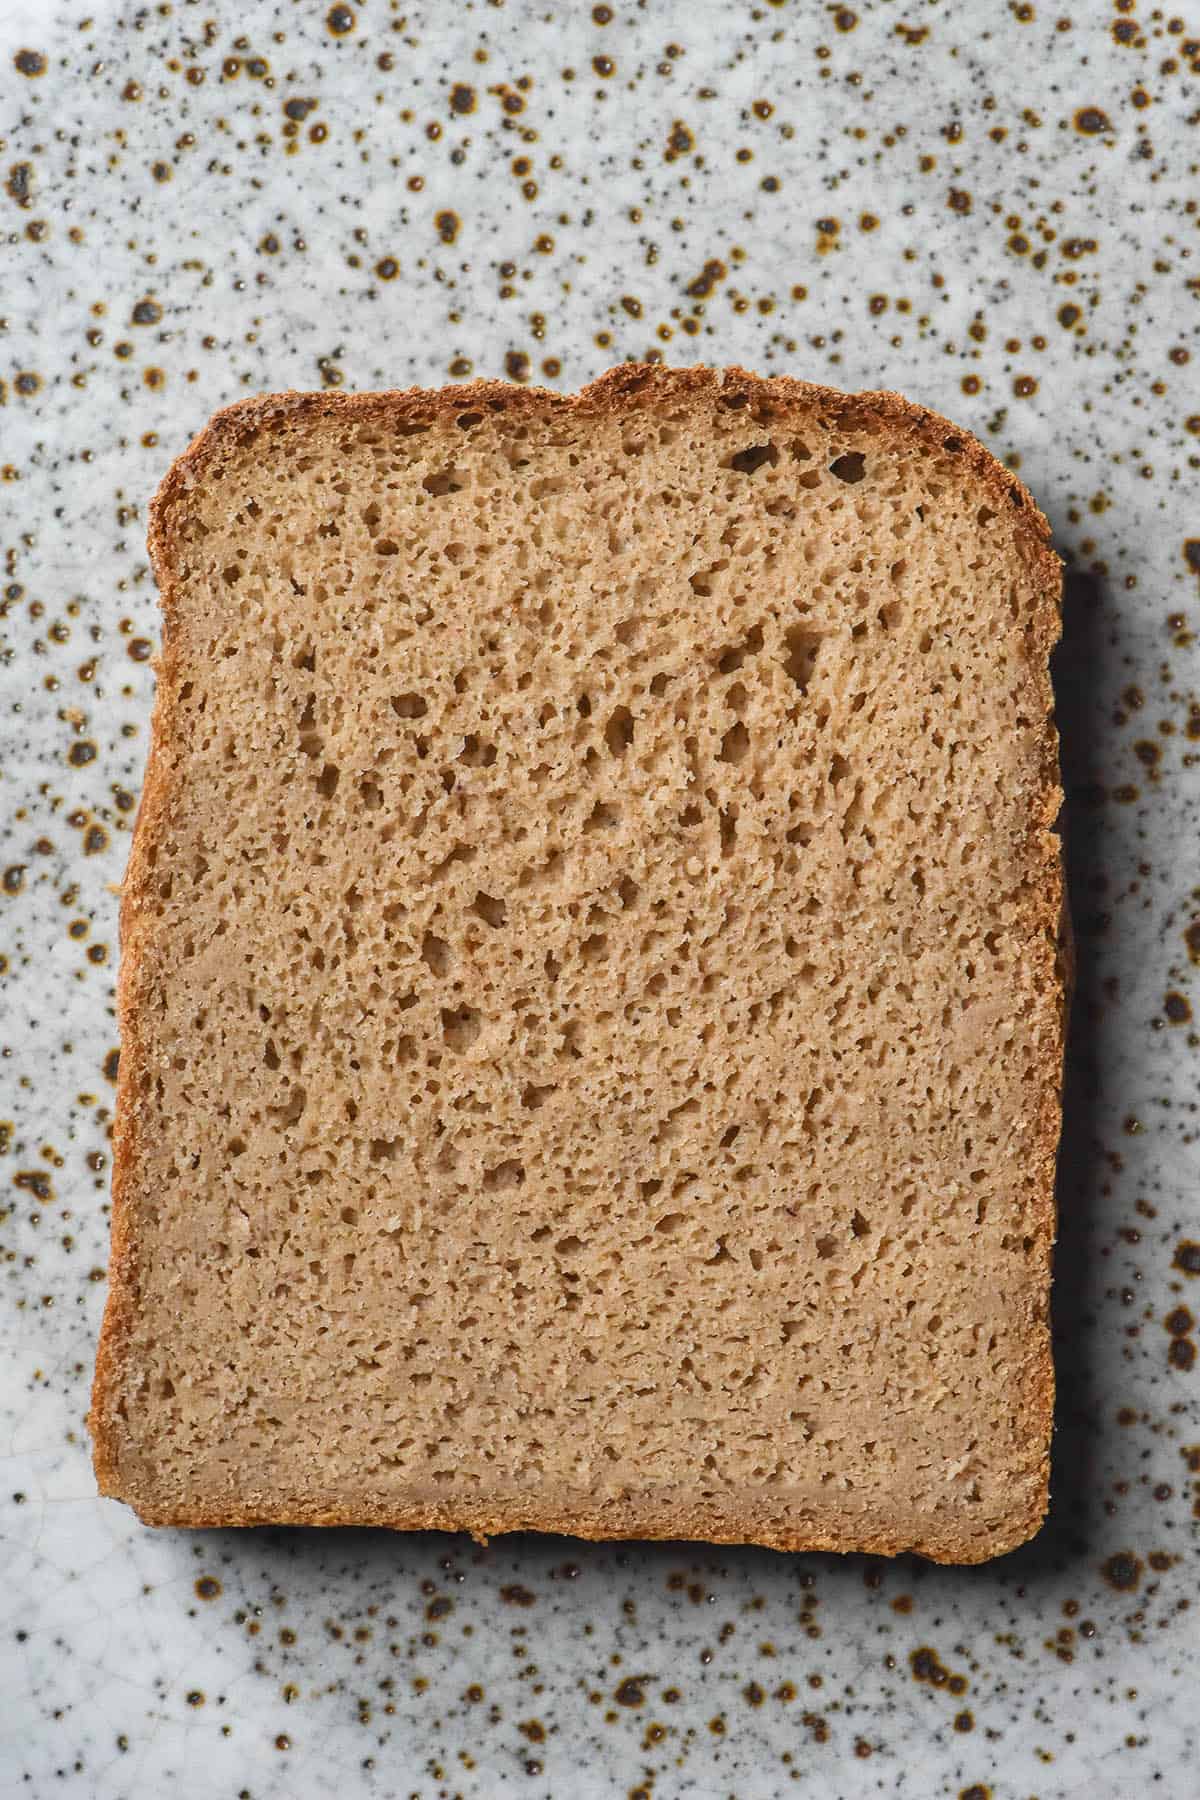
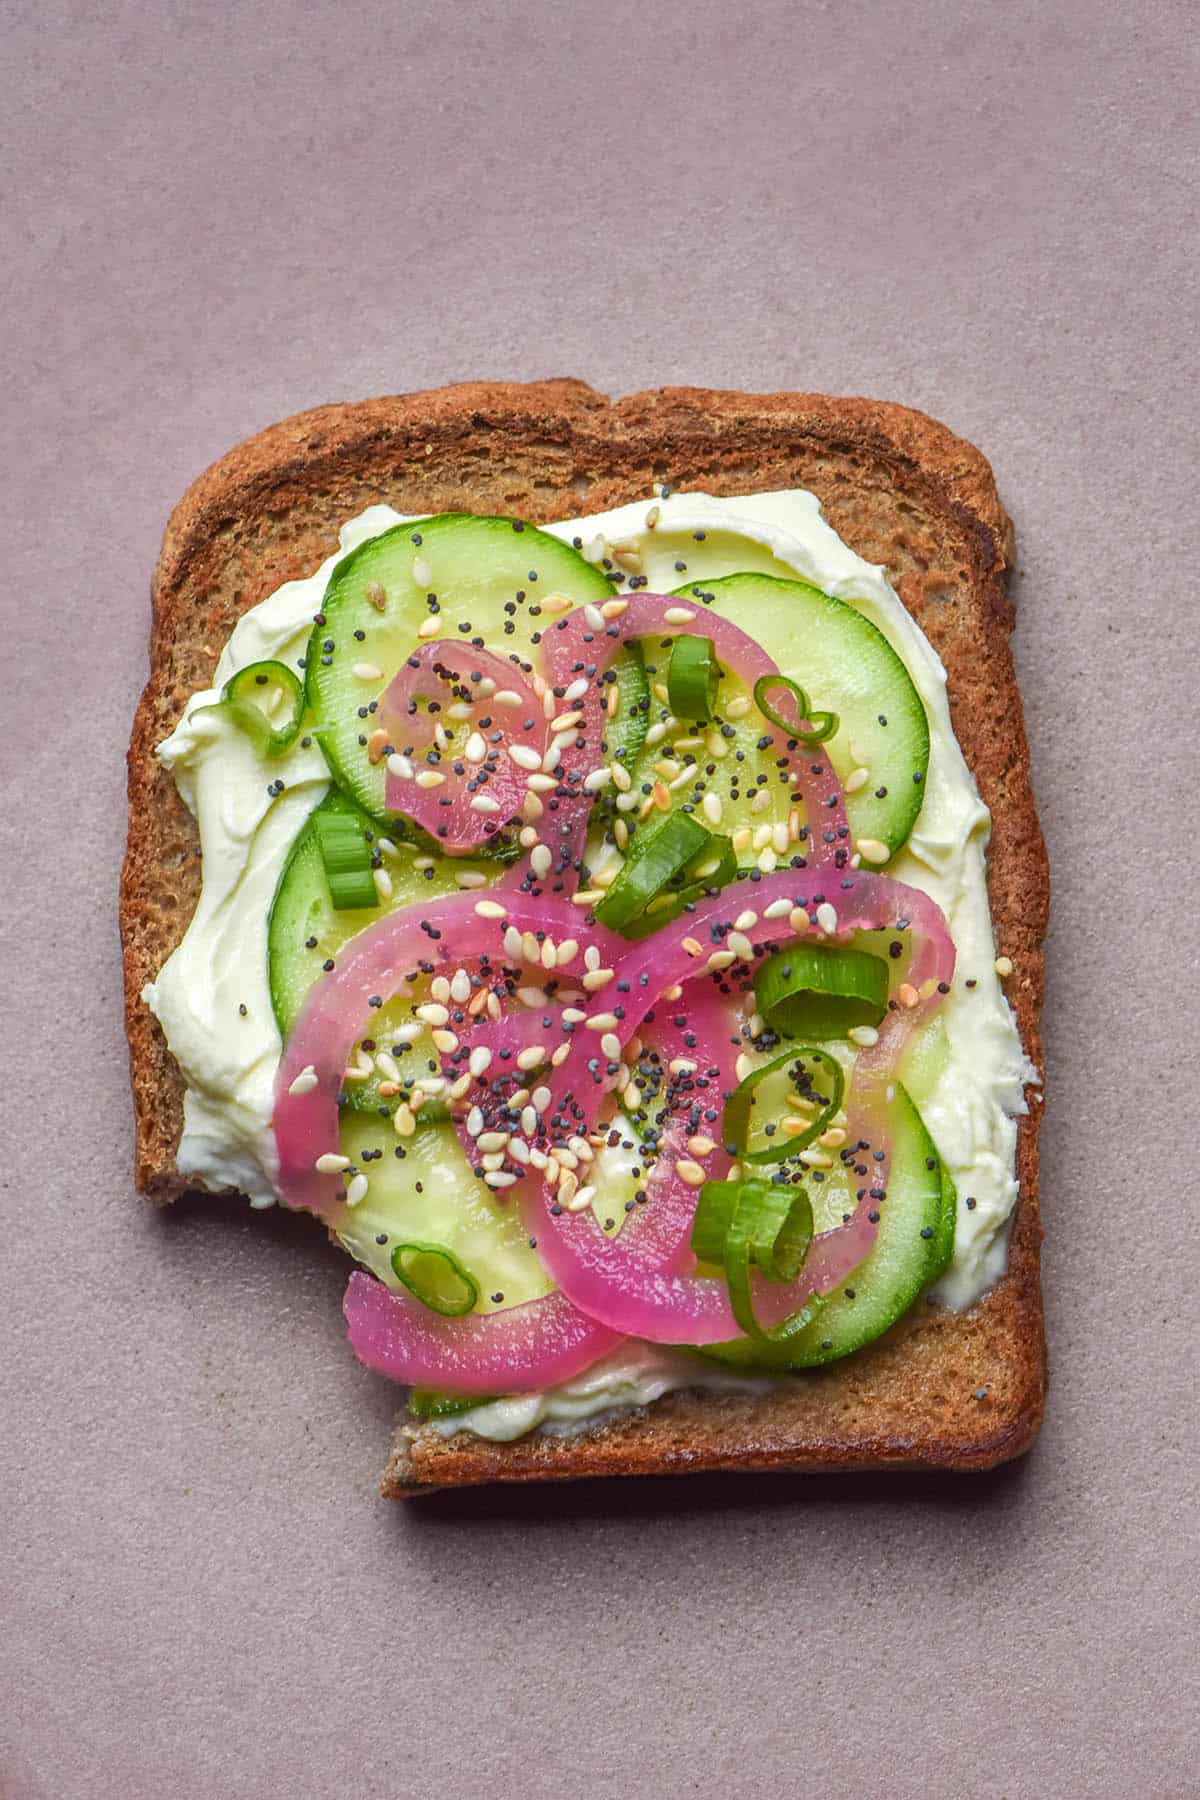
I have been busy whipping up a bunch of new gluten free bread recipes, but I knew I wanted to finish this recipe first. This recipe for teff bread is similar in nature to my gluten free buckwheat bread recipe – majority teff flour with just a small amount of starch. The result is a nutty yet elastic loaf that is at home as a sandwich or as toast.
Teff bread (gluten free)
This teff bread is made from 500g of white teff flour and 100g of tapioca flour or cassava flour. I wanted to keep the ratio majority wholegrain, but I find that wholegrain gluten free breads benefit from a small amount of starch. The starch content of the bread adds lightness, elasticity and binding as well the characteristic chew you expect from a slice of bread.
The bread is bound together with psyllium husk powder. Not only does this create structure in the bread, but it also absorbs enough liquid to create a soft and plush slice of bread. In my testing, I found that teff flour is quite an absorbent flour. As such, this bread needs both a generous amount of water and psyllium husk to hold all that water in.
Yeast is the leavening agent of choice for this bread. There is no option to omit the yeast in this recipe at the moment, but I do have some yeast free gluten free recipes on my site.
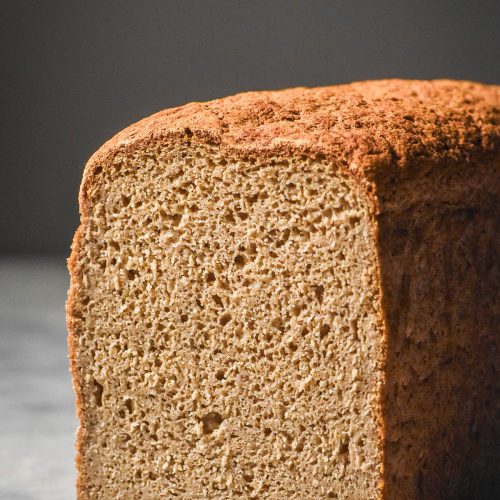
Finally, salt, maple syrup and oil add flavour, texture and crumb softness. All of these ingredients work together to create a beautifully toothsome and tall teff bread.

Can I use brown teff flour?
I haven’t tested brown teff flour yet. It is harder to find than white teff flour here in Australia (which is already tricky to find). When I get my hands on some, I will test it in the recipe.
I should also note, while we’re here, that I have only tested white teff flour from a local bulk food store. As time goes on I promise I’ll test different brands of white (and hopefully brown) teff to see if there are any differences in texture or absorbencies.
Can I use any baking tin?
If you’d like to make a bad loaf of bread, sure. Otherwise, no. Like all my gluten free bread recipes, this loaf uses a USA pan small Pullman tin. Not a large, not a medium – a small. This is the pan I use for all my gluten free loaves, so if you make my recipes often it is a worthy investment.
Because all quantities are based around this size loaf tin, using a different size won’t work the same way. A larger tin will produce a shorter loaf that might be over-baked. A silicon tin does not have the strength (or the capacity) to hold all this dough and push it upwards as it proofs. If you want the best chance of success, I highly recommend using that bread tin.
I’m not sponsored by them and I removed Amazon affiliates because I don’t feel their business practices align with mine. So, know that I am recommending it purely because it’s good and not because I am making any money from it.

Ideal texture for your dough, before and after proofing
Before proofing: When freshly whisked, your dough should look and feel like a thin, aerated batter. It should feel light under the whisk and have little air bubbles on the surface. I would describe it as a thin batter with baking soda that just had vinegar added – that sort of light and aerated. If your dough is significantly thicker than this immediately after whisking, add more water until you reach this consistency. NB: the dough/batter will thicken relatively quickly as the psyllium husk absorbs liquid, so you need to assess the batter right after mixing.
After proofing: When you take the cover off the dough, it should be firm with bubbles on top. Depending on how much liquid you added, you should be able to pick it up in a ball, even if it is soft and floppy. If you break the dough apart with your hands, it should feel nice and bubbly.
After proofing in the Pullman pan: The loaf should dome just slightly over the Pullman pan edges. This teff bread does get some rise in the oven, so just domed is the perfect time to put it in the oven. Proofing takes as long as it takes: you can’t rush it and you can’t bake an under-proofed loaf and expect it to turn out perfectly. In Australian winter, my loaf takes about 2 hours to dome over the Pullman pan.
Troubleshooting
I recently wrote a guide to making the best gluten free bread which I think solves most issues you can encounter with this recipe. I highly recommend reading it as I have included every tip I can possibly think of to help you in your bread making journey. However:
My bread is dense?
Dense bread has a few main causes, but I’d argue that the number one cause is insufficient water. Yeast needs a moist environment to thrive and grow, pushing up the bread dough to create an airy loaf of bread. If your dough is too dry, the yeast will not proof the way it should. It doesn’t matter if you leave it for hours or proof it in a warm place. So, make sure your dough is moist.
This teff bread dough is more like a batter when you first mix it. To me, it looks like a liquid dough that has had baking soda and an acid added. It is quite bubbly and feels aerated under the whisk. After you first mix it, you should be able to pour the batter as opposed to spooning it or using your hands. Anything less than a pourable batter is not hydrated enough for this recipe.
How might a bread dough be too dry when you’re following a recipe, you might ask? Different flours have different absorbencies. It depends on how finely they are milled, how they’re milled, the humidity, the grain in question, etc. No two bags of flour will ever be the same.
Where my dough might be liquid with 800g of water, yours might be more of a dough. You need to use your intuition and adjust your dough as necessary until it is as described.
My bread is dense part 2?
What are the other causes of dense bread? Not giving your bread sufficient time to proof, old yeast and an oven temperature that is too low.
Bread recipes give proofing times, but they are always purely estimates. There are so many factors that will change from kitchen to kitchen – the dough itself, your yeast, the temperature in your kitchen, the season, the climate, etc. A bread dough is proofed when a bread dough is proofed. If you put it in the oven before it has finished proofing, it will be dense. The yeast creates air pockets in the dough, so if you don’t allow it time to do this then you will have dense bread.
As a general rule, bread proofs faster in hot kitchens, hot climates and humid climates. It takes longer in cold kitchens and cold climates. A loaf made in a hot kitchen in summer will be easier to proof than a loaf in a cold winter kitchen. As an example, most of my tests of this bread took the first 1 hour proof, then required a further 2 hour proof to reach the top of the Pullman pan. I daresay in an Australian summer, this proofing time will be different. I will update the post in summer.
My loaf is short?
Firstly, read through the ‘my loaf is dense’ sections. If there’s no room for improvement there: did you use a larger baking tin than specified? This will make for a shorter, squat loaf. Up the hydration a little, proof thoroughly without rushing, check your yeast and use the right size Pullman loaf tin for this recipe.
My bread is sour?
I had a couple of sour loaves that almost tasted like sourdough when developing this recipe. Most of them, however, weren’t sour. Which leads me to my hypothesis: sour teff bread is made from rancid teff flour. Not all of the loaves were sour, and teff flour is a bit more niche and thus more likely to sit on the shelf.
This is why the recipe contains 40ml of maple syrup. Not only does this help with browning, boosting the yeast and developing the flavour, but it also helps disguise any sourness if your teff flour happens to be rancid.
My bread is cakey?
In my experience of making this recipe, cakey bread is simply dough that didn’t have enough water added. Teff flour, unlike buckwheat flour, does not have any inherent elasticity. It needs to be a high hydration dough to ensure the bread isn’t stiff and cakey.
My bread is wet?
Firstly, I think it’s worth noting that gluten free breads are often ‘wet’. They need to have sufficient liquid to be edible and I think some people aren’t used to the feeling of a moist slice of bread. Dry gluten free bread is never a good time, so wet is much better than dry. I also think that this gluten free teff bread produces wetter feeling slices than my other gluten free loaves.
However, it can sometimes be too wet. Wet bread can sometimes be a case of cutting the bread too early, before the steam and liquid have evaporated and the crumb has set. Bread that is fresh out of the oven will likely feel quite wet, which is why recipes specify to cut it after it has cooled completely (ideally, overnight).
Wet bread can also simply mean that too much water has been added to the loaf. With batter style dough, it can be difficult to know if you have added too much water (whereas it’s easier to tell if you haven’t added enough). Next time, cut the liquid back by 100g.
My bread has a gummy line in the bottom?
This means you have added a little too much liquid for your flours. Cut the liquid back by 50-100g for your next bake and see what happens. Ideally, you’ll be able to remove the gummy layer.
Keep in mind, too, that a gummy layer can be an insufficient proof in conjunction with too much liquid. Make sure you’re allowing the loaf to fully proof before baking.
One last thing to try is dropping the psyllium husk powder back a bit. I find this can sometimes help with a gummy base layer.
More gluten free bread recipes without xanthan gum
- Gluten free seeded bread
- Gluten free bagels
- Gluten free focaccia
- Gluten free buckwheat bread
- Gluten free vegan high protein bread
Teff bread (gluten free, vegan)
Equipment
- small USA pan Pullman pan – 23cm length X 10cm width X 10cm height (9 X 4 X 4 inches)
Ingredients
- 500 g white teff flour
- 100 g tapioca flour or cassava flour
- 25 g psyllium husk powder
- 10-12 g salt
- 1 X 7.5g sachet instant yeast
- 40 ml (2 tablespoons)* maple syrup (8 American teaspoons)
- 20 ml (1 tablespoon)* oil (4 American teaspoons)
- 750-850 g water
Instructions
- Grease and line your small USA pan Pullman pan – 23cm length X 10cm width X 10cm height (9 X 4 X 4 inches). I like to line my tin so that there are baking paper handles to lift the bread out at the end of baking.
- Combine the dry ingredients in a large mixing bowl and whisk thoroughly.
- Add the wet ingredients and whisk thoroughly until completely combined.
- When freshly whisked, your dough should look and feel like a thin, aerated batter. It should feel light under the whisk and have little air bubbles on the surface. I would describe it as a thin batter with baking soda that just had an acid added – that sort of light and aerated. If your dough is significantly thicker than this immediately after whisking, add more water until you reach this consistency. Hydration is hugely dependent on your individual flours, so you need to use your intuition as opposed to following a recipe without assessing your own dough. See the body of the post for a more in depth description of what you are looking for.
- Cover the bowl and allow to proof for 1 hour. After the first proof, the dough should be firm with bubbles on top. Depending on how much liquid you added, you should be able to pick it up in a ball, even if it is soft and floppy. If you break the dough apart with your hands, it should feel nice and bubbly.
- Transfer the dough into your lined Pullman pan and use a moistened hand to smooth down the top. Cover the tin with a tight fitting cover that won’t touch the loaf (I use an inverted produce bag) and allow to proof for an additional 1-2 hours (season dependent, see notes in body of post) until domed on top.
- Preheat the oven to max temperature about 30-40 minutes before your loaf is ready to bake.
- Your loaf is proofed when it domes nicely (but not too dramatically) over the top of the Pullman pan. The more liquid you add and the hotter your kitchen, the quicker your loaf will proof (see notes in body of post).
- Place the loaf in the oven and turn the heat down to 220C/430F. Bake for 20 minutes, then turn the heat down to 200C/400F and bake for an additional 30-40 minutes. The top of the loaf should be golden brown and firm to the touch.
- Remove the loaf from the oven and allow to cool for 20 minutes before carefully removing from the tin and transferring to a cooling rack. Allow to cool completely before slicing. Leftover slices keep well in an airtight container in the fridge and can also be frozen and defrosted (but are best as toast after defrosting).
Notes
- Note that this bread necessarily produces quite moist feeling slices. The liquid content is necessary to properly hydrate the teff flour and to produce a flexible, elastic and soft crumb as opposed to a cakey crumb. If you don’t love wetter feeling slices of bread, this recipe might not be for you.
- There is such a thing as too much liquid, though, so see the troubleshooting section if you feel your bread is too wet.
- Hydration is highly dependent on your individual flours. Read through the notes and troubleshooting in the post. I find that cassava flour is more absorbent than tapioca flour, so you might need to tinker if you use cassava flour.
- See the notes in the body of the post for anything you could ever want to know about this loaf.
- As soon as I test dark teff flour I will update the post.
- Most international teaspoons are 5ml and tablespoons are 15ml. Australia (where I live) uses 5ml teaspoons, but our tablespoons are 20ml. This is why I offer American teaspoon measures – they offer the moist straightforward conversion ml wise.
Hi! Just a question, Tapioca flour is starch or flour?? Just to understand exactly which one I need. I am starting to do your recipes. Thanks
Hi Irina,
They are generally the same thing; some brands label them starch and some flour. As long as what you are using is labelled either tapioca flour or tapioca starch and snow white in colour then you have the right product 🙂
This recipe is the best! Have not been able to find store bought gluten free bread without vegetable gums or unappealing taste or texture. This works every time (once I worked out how long to cook and how much water, and purchased the Pullman tin). Delicious and smells so good when baking!
I’m so glad you’re enjoying it Jane! Always so great to hear 🙂
I followed the recipe to the letter and the dough was so stiff that I couldn’t stir it. I added more water as suggested but think the psyllium husk started to thicken. I still had a stiff dough when I put it to prove so carried on as per recipe. After about 30 mins of the second proving it was overflowing the tin so I rushed it to the oven where it continued to overflow. It’s in a silicone bread tin and under the hard crust was very soft. It had 70mins in the oven and was still very soft under the crust. As expected it’s very doughy and sticky but the crust is lovely and the flavour good.
Would it not be better to save the psyllium husk till the dough is mixed so the correct water quantity can be gauged, then add the husk and mix well till it starts to thicken.
Hi Mark,
Are you using a silicon loaf tin? I highly advise against silicone for any gluten free bread recipes of mine. Because the recipes are high hydration and have no inherent strength (ie no gluten to hold the dough together), a silicone loaf pan is not strong enough to hold them in. The steel Pullman pan I use for all my gluten free bread recipes also conducts heat unlike silicone, which may be why your loaf didn’t bake properly.
If the dough was stiff but then spilled out of the silicon loaf pan, I suspect the pan was far too small to accomodate the volume of bread dough. A stiff dough generally doesn’t become an out of control dough, so I think the issue is your baking vessel.
Psyllium husk starts absorbing water immediately, so adding it last means that it might not be distributed evenly and you will have pockets of gummy psyllium in your bread.
The issue of how much liquid to add remains the same because you don’t know exactly how much water the psyllium will absorb and how thick the dough will become.
I suggest investing in a steel Pullman Pan (I use the USA pan brand and the measurements are in the recipe). I do really think that this will solve most of the issues you encountered here.
Gluten free bread hydration is always a bit of a moving target but I think these issues come down to the pan.
Good luck and happy baking!
Hi Georgia,
Thanks for the reply, lots of good information in there.
At the time I didn’t have a Pullman pan but I do now, and I’ve tried lots more recipes since, including sourdough.
I’ll come back to this recipe soon and hopefully have better luck.
Thanks for your help.
Thank you for this recipe it is fantastic, delicious nutty and so tasty even the kids want to eat it! I used brown teff and it was awesome! Also agree with you re using a tin to bake. Def no solicon