
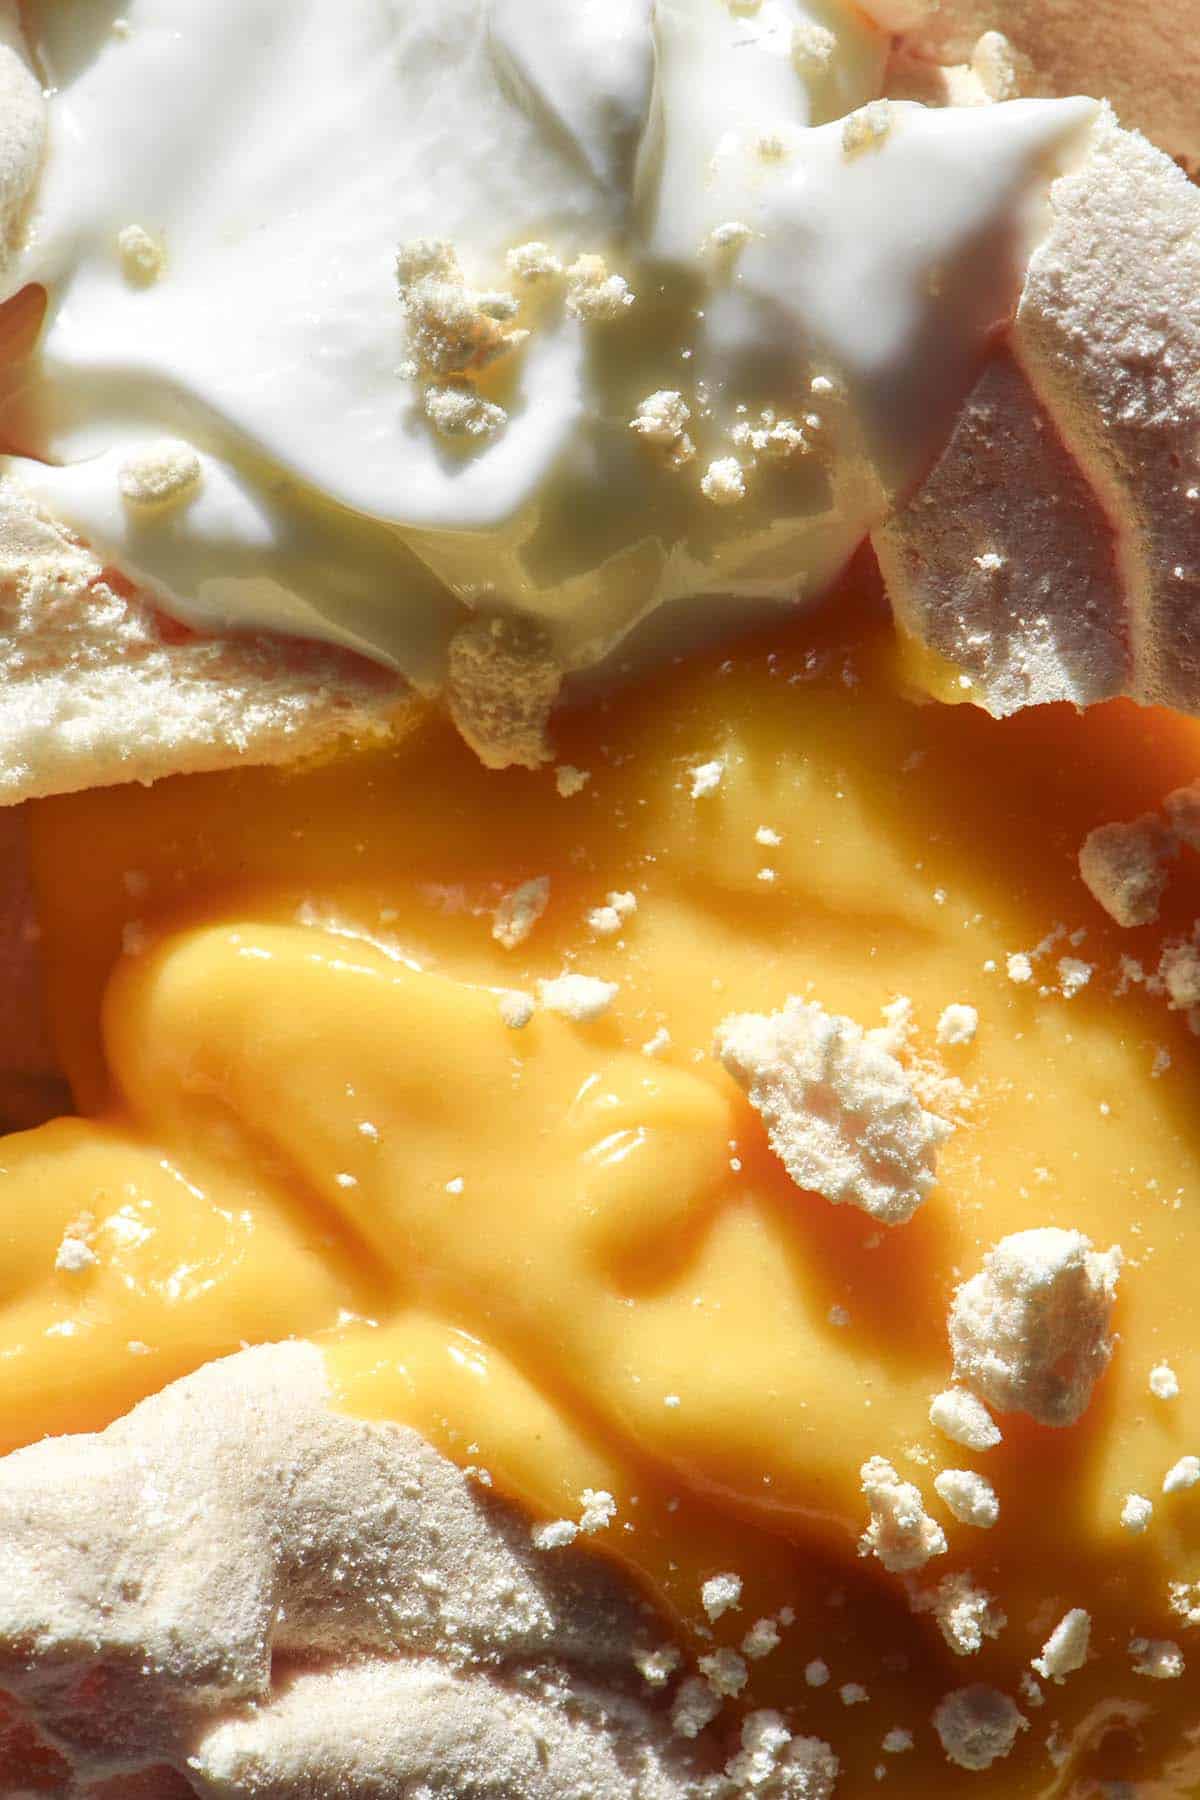
It is coming into mango season here in Australia so what better time to make this mango curd? It is dairy free, easy to make and goes perfectly on a pavlova, in a dessert or wherever else you’d use a curd. It is fresh and zingy, mango forward and really simple to make.
Notes on the mango puree
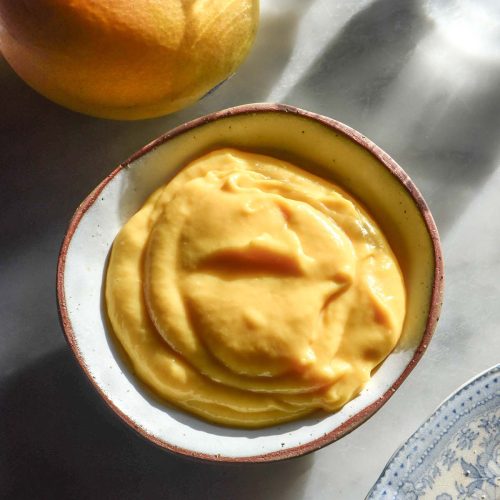
I have only tested this recipe with fresh mango that I have made into puree myself. Personally, I love to blitz up more puree than needed and strain it through a fine sieve before weighing the amount needed for the curd. In my experience, sieving the curd really takes it to the next level. It is an optional step but one that I highly recommend. It happens relatively quickly and makes for a lovely smooth curd.
How many mangoes you’ll need depends on how big they are, how much flesh they have on them and how much you scrape off the skin and seed. It also depends on how fibrous they are and how much (if any) fibre you sieve out.
All this to say, I highly recommend buying more mango than you think you need. Fresh and pureed mango both freeze well so it’s a good safety precaution to have extra.
I haven’t tested this recipe with any store bought mango puree (if that exists?) or canned mangoes. Anything with added syrup or sugar (looking at you, canned mango) will add extra sweetness to the mango curd and that’s not what we want. I daresay you could defrost, puree and sieve frozen mango but make sure it doesn’t have sugar or any other ingredients added.

Ingredient notes for your mango curd
I haven’t tested anything other than fresh mango in this recipe. My food processor of choice for little things like this is the mini KitchenAid because it handles small volumes nicely.
Another thing I have not tested? Any sugar substitutes or coconut oil substitutes. You are welcome to try, but you will be experimenting.
One last thing? I haven’t tested this recipe without the egg yolks. They are the key thickener here so you cannot omit them.
But back to the coconut oil: I don’t think you can taste it in any of my dairy free curd recipes. If you are a coconut hater, though, you can be deodorised/refined coconut oil. It truly tastes like nothing! Generally it is available at health food stores.
One thing to note is that deodorised coconut oil is not suitable for a coconut allergy. I haven’t tested a coconut replacement at the moment but I will add it to my ever growing list of things to try.
Tips for your mango curd
- How much sugar you add depends on how ripe your mangoes are. In turn, how much lemon juice you add depends on how tart your mangoes are and how much sugar you added. Balance these ingredients first before adding anything else.
- Once you add the coconut oil, it becomes a bit harder to taste the other ingredients for the oily film on top. This is why I really recommend getting the flavour balance right before adding the oil.
- Mango is a wet ingredient, as is sugar. Play around with the sugar but know that the more you use, the softer your curd will be.
- I highly recommend sieving the mango puree if you can. It creates such a lovely smooth texture from the start. I also find that it alleviates the panic of ‘oh god have I overcooked the curd?!’ courtesy of stringy mango bits that could hypothetically be overcooked egg.
- Another thing I highly recommend is making the curd the day before you need it. This gives it time to firm up properly which makes it easier to use.
- Stirring the curd constantly is annoying but it does ensure you don’t overcook it. Once the curd is combined, I use a silicon spatula to keep it moving in the bowl.

More dairy free dessert recipes
- Vegan panna cotta with agar agar
- Gluten free vegan banana muffins
- Ninja Creami coconut ice cream
- 3 ingredient tahini cookies
- Vegan gluten free brownie cookies
Mango curd (dairy free)
Ingredients
- 200 g mango puree (I recommend sieving it prior to weighing it, see notes in the body of the post)
- 75-100 g caster/superfine sugar (this depends on your preferences and the sweetness of your mango, see notes)
- 40ml (2 tablespoons)* lime or lemon juice
- Pinch of fine salt
- 4 egg yolks from extra large eggs
- 75 g coconut oil (deodorised or regular)
Instructions
- Combine the mango puree and sugar in a medium heatproof bowl. Add the lime juice and a pinch of fine salt to taste.
- Once you're happy with the flavour, add the eggs and whisk to combine.
- Melt the coconut oil using your preferred method, being careful not to burn it (it takes on a flavour once burnt). Allow it to cool a little before adding it to the curd mixture.
- Place the heatproof bowl on a small sauce filled 1/3 with water. Make sure the bowl doesn't touch the water. Cook the curd on the smallest hob at a medium heat for 10-15 minutes, stirring very regularly. I like to use a silicon spatula to ensure that I am moving the curd around efficiently. This prevents any patches from over-cooking.
- The curd should have lightened just a little in colour and become tangibly thicker. It will thicken further in the fridge, but it should easily coat a spoon and form small track lines in the surface as you stir.
- Take the curd off the heat. As a precaution, you can place the bowl in an ice bath to stop the cooking time and speed up cooling.
- After about 15 minutes, cover the surface of the curd with cling film and place in the fridge to cool and set. I like to make this curd the night before I need it so it is lovely and thick and ready to go.
- Curd keeps well in the fridge for a number of days and can be frozen and defrosted.
Notes
- See the notes in the body of the post for tips, tricks and substitutions.
- Sugar is a wet ingredient and so the more you add, the subtly softer your curd will be. I recommend keeping the sugar within the 75-100g zone. For a sweet summer mango, use 75g. You might be able to experiment with even less, but I haven’t tested this. For a tart mango, use 100g and use the citrus juice to your taste.
- I highly recommend making curd the day before you need it. It needs time to firm up in the fridge.
- This recipe also makes an incredibly delicious dairy free mango Ninja Creami ice cream with an incredible texture. Simply make it, chill it and then freeze it in the 470ml Ninja Creami tub 16-24 hours before spinning it using the ice cream function. It only fills about 1/2 the tub but does increase in volume when you spin it.
- Anecdotally, I used a generic brand coconut oil in this recipe and it left it with an odd, almost smoked paprika like taste. Just in case this happens to you, I recommend using a good quality brand here.
No Comments