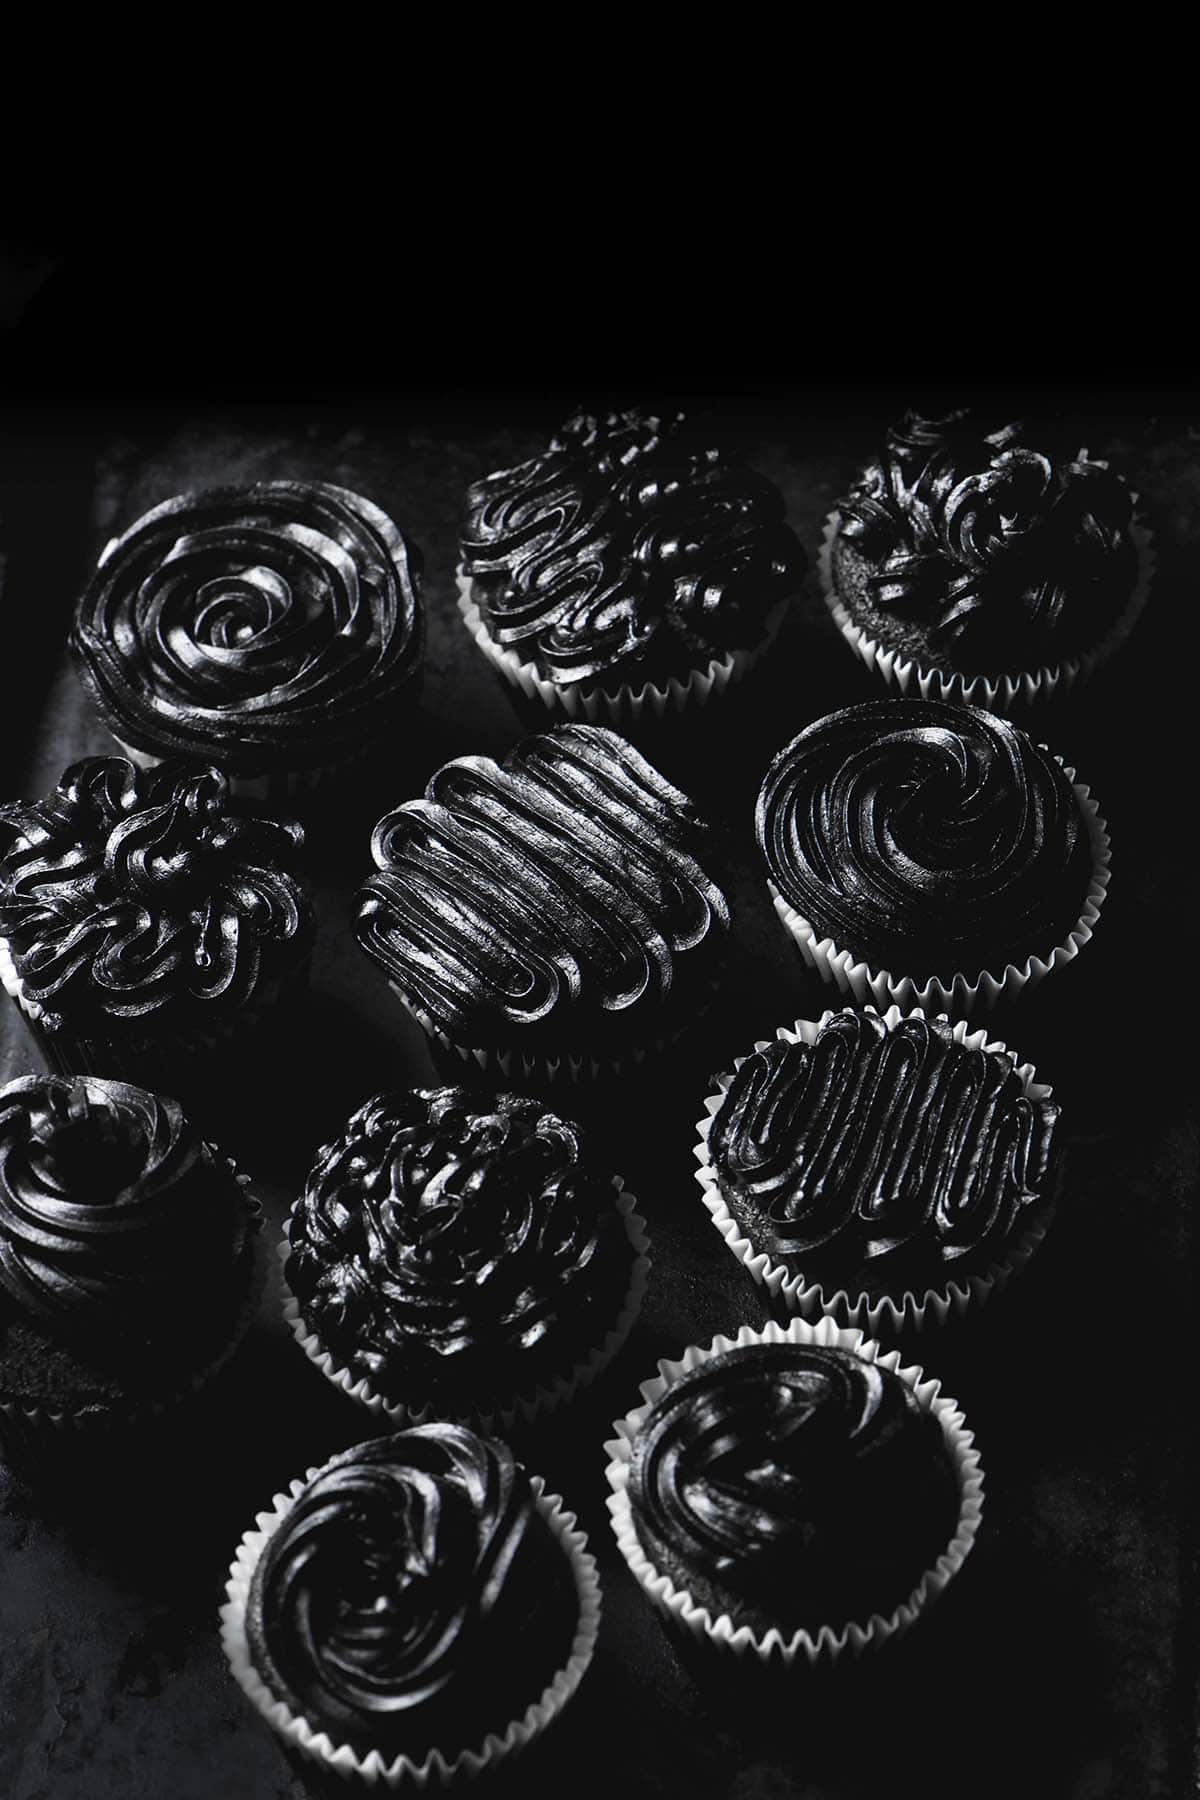
I recently gave into a long term desire to experiment with black cocoa. I had seen it floating around online and have been trying to resist an impulse purchase for a while now. With Halloween right around the corner, though, I had to give in. Namely, to make this black buttercream without food coloring.
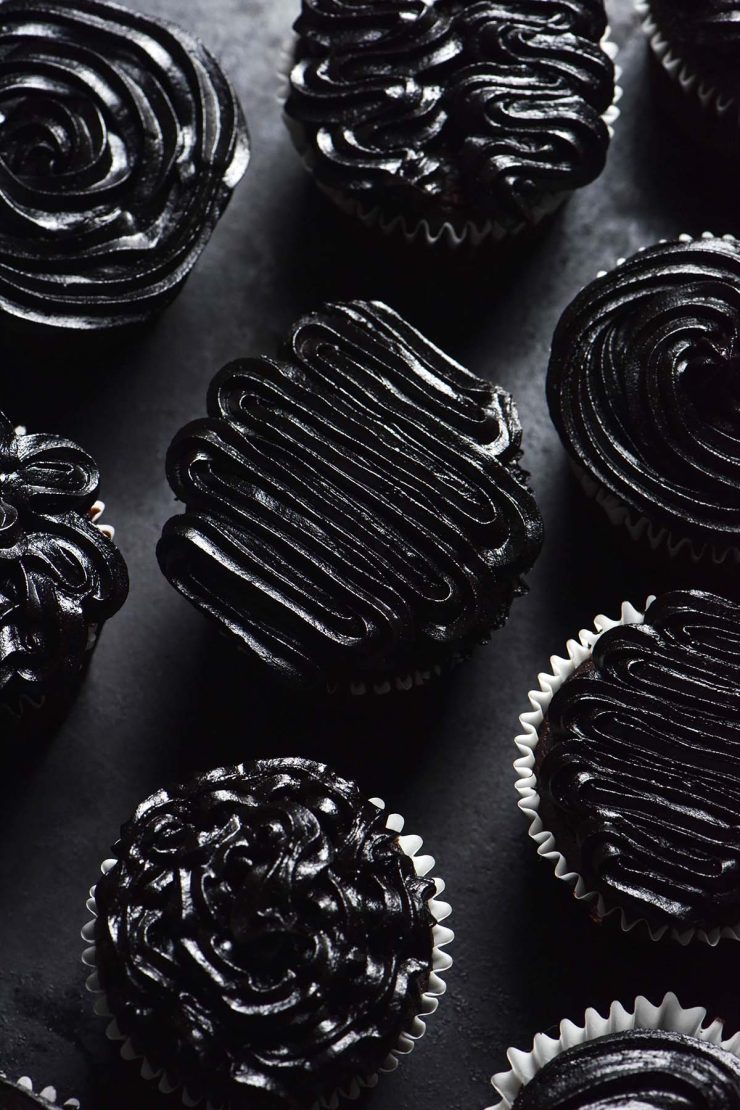
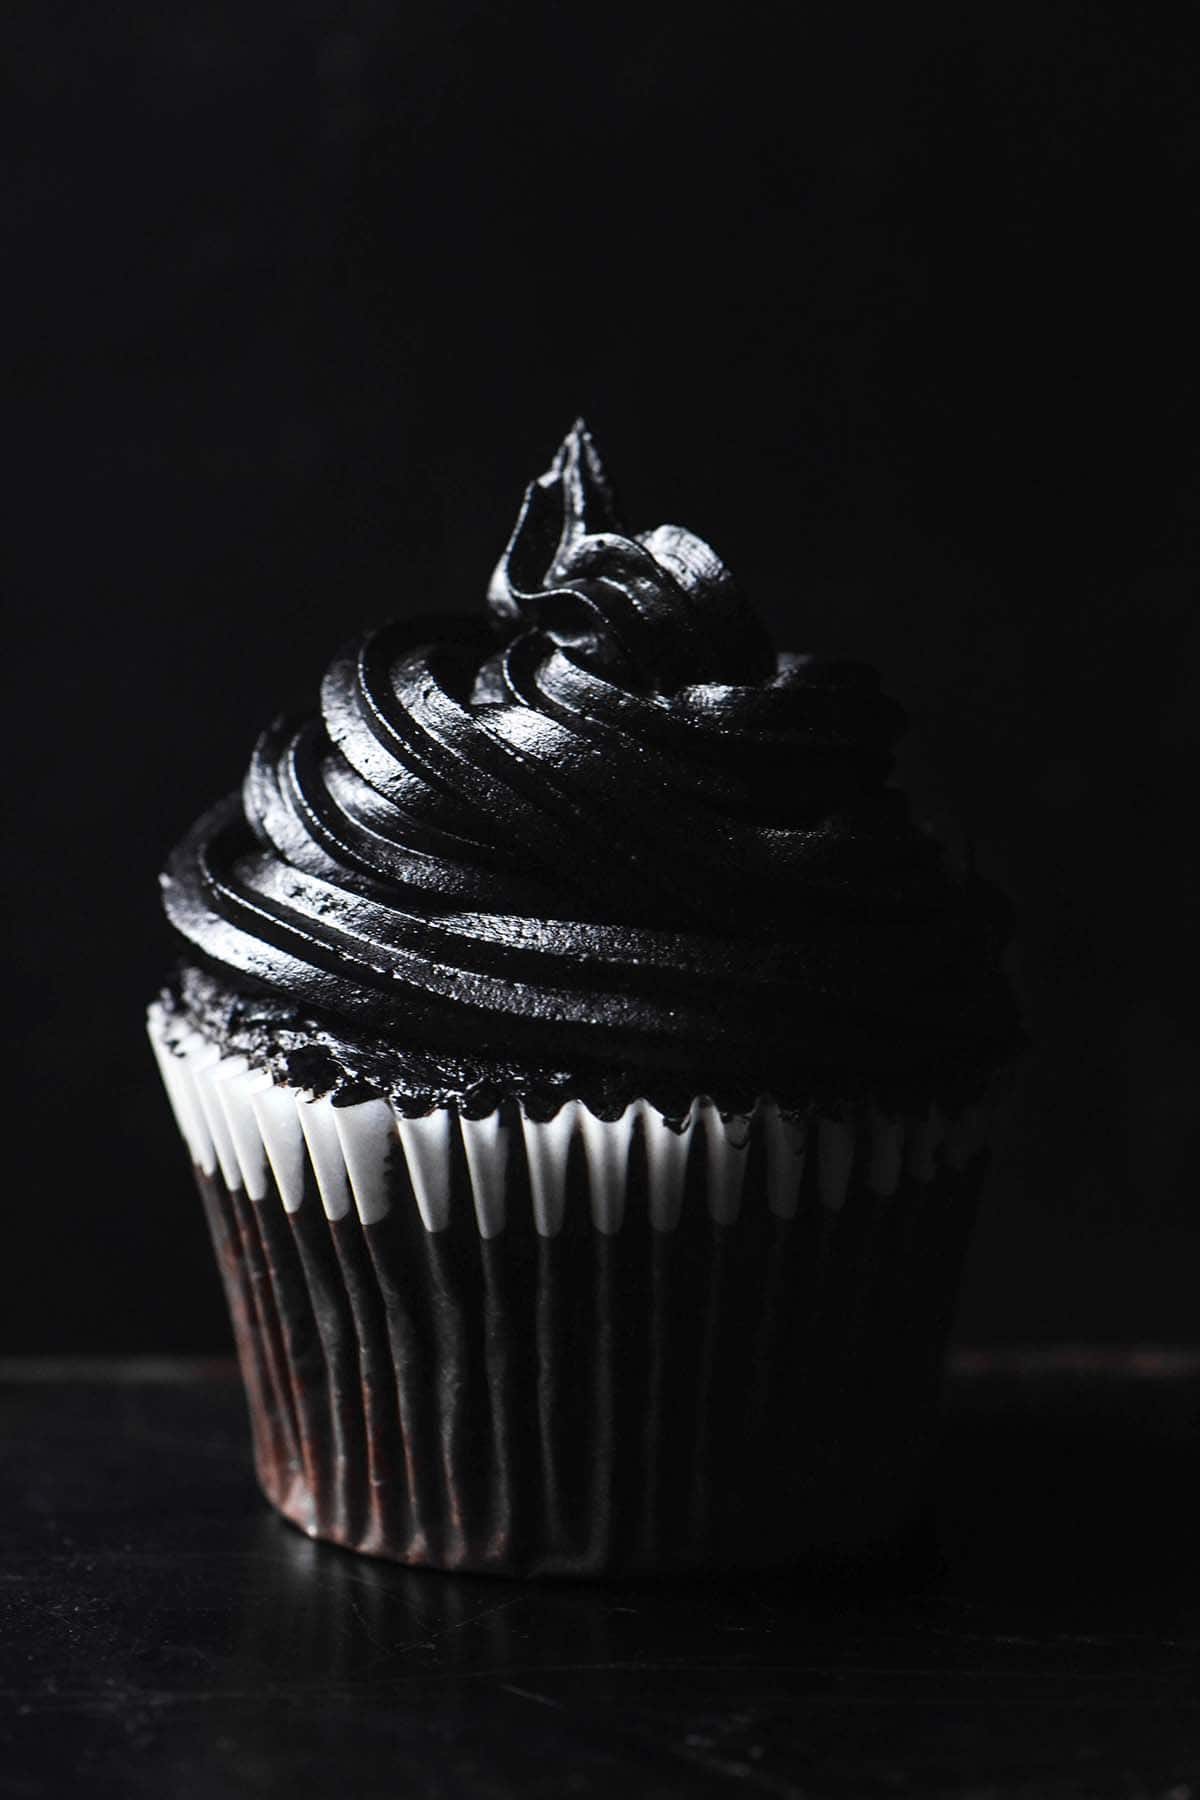
Black buttercream without food coloring
Before we begin, I just want to say that I am not a professional cake decorator and I have developed this recipe for home bakers. I’m absolutely sure that professionals would have their own ratios and method of making buttercream – this is how I do it.
This recipe requires two compulsory elements: black cocoa powder and an immersion blender (known as a soup stick at my house).
We’re using two different methods – blooming the cocoa and emulsifying the colour with the immersion blender – to achieve a deep, dark chocolate colour. No food coloring, charcoal or any other superfluous ingredients required.
This recipe is easy to make, not super sweet and looks great on your spooky season bakes. Better yet? It won’t stain your teeth.
What is black cocoa and what does it taste like?
Black cocoa is a variety of cocoa that has been heavily alkanised or dutched (think: dutch processed cocoa). It is a darker, more acidic version of dutch processed cocoa. Interestingly, it has a much less chocolatey taste in my opinion. It is almost like fainter chocolate with a hint of vanilla (to me anyway!).
Black cocoa isn’t widely available in stores, so I bought mine online. I am based in Australia so I bought mine from Baking Pleasures. If you search black cocoa, you should be able to find some where you live.
I am newer to black cocoa so I plan to play around and come back with some suggestions on where else to use it. However, I have successfully made a black Ninja creami chocolate ice cream using my chocolate ice cream recipe. Stay tuned for more!
Blooming the cocoa
First up, we’re blooming the black cocoa. This involves pouring boiling water over the cocoa to bring out the colour and flavour. Of course, we need to do this ahead of time to ensure that the mixture has cooled prior to making the buttercream.
The aim of the game here is to create a smooth paste of black cocoa without adding excessive liquid. The liquid we are adding here obviously contributes liquid to the buttercream and we don’t want to add too much.
As such, it is really important to measure carefully without sloshing the kettle around. Worst comes to worst, I do find that black cocoa has quite a mild flavour, so you might be able to add a bit of extra cocoa to correct any over-pouring of the boiling water.
I actually try to keep the water to an equal ratio – 50g of boiling water to 50g of black cocoa. This means I can add thickened cream at the end to thin out the buttercream. I find that thickened cream helps emulsify everything together nicely and gives your icing a glossy sheen.
Tips for your black buttercream
- This is not an overly sweet recipe as I find some buttercream way too sweet.
- Icing sugar is also called confectioner’s sugar or powdered sugar in America. You are after the squeaky white powdered variety – not granular in any way.
- I am not a professional baker and am using this buttercream for home baking. If you are a professional baker, I am sure you already have your own buttercream ratio and method already.
- Try to add as little liquid as possible to the blooming cocoa. Adding too much will mean your buttercream is too liquid and you’ll have to add some icing sugar to correct it.
- I have seen buttercream recipes vary wildly in whether to whip or beat, high or low speed, etc. In my experience, whipping the butter with the paddle attachment on medium high and then adding the sugar on a lower speed seemed to work nicely. I saw a lady say that a low speed helps ensure the buttercream isn’t super airy and that worked for me.
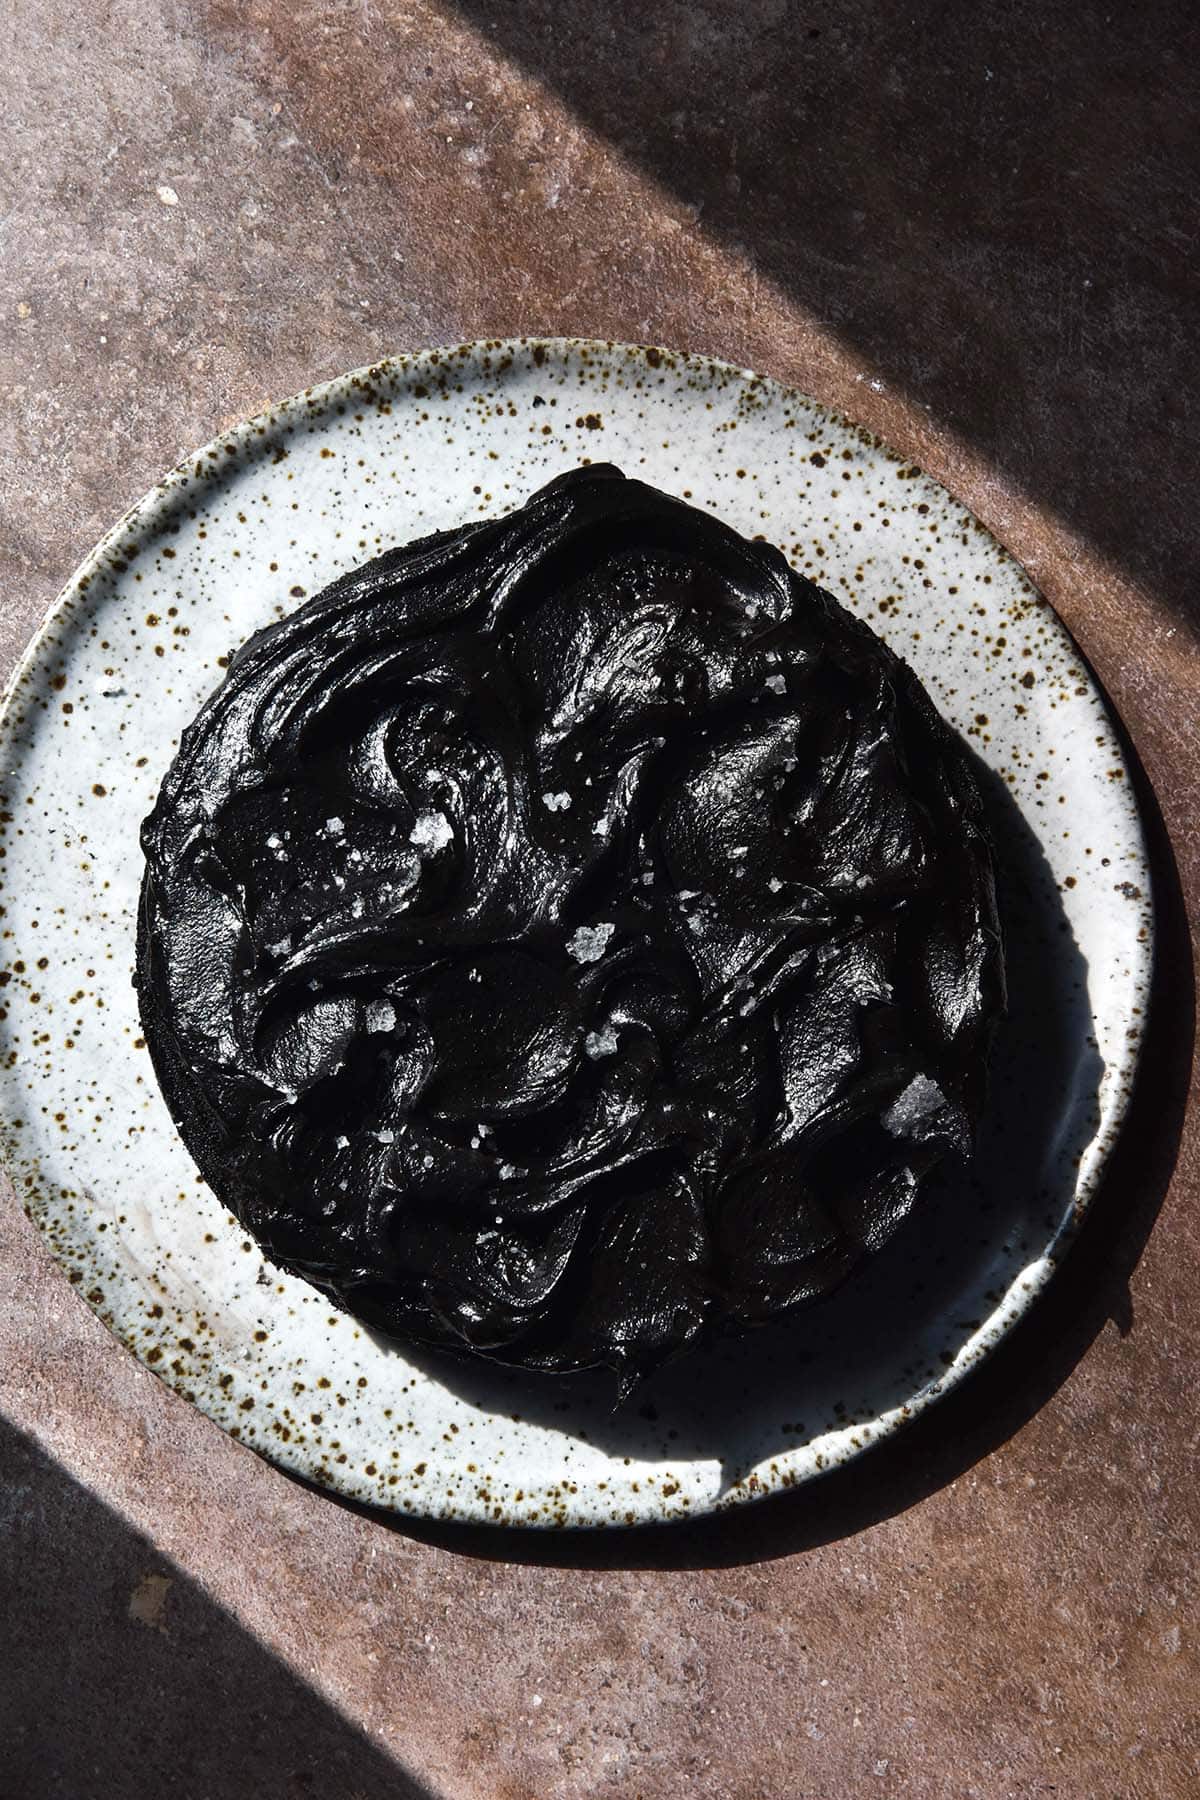
- If you want to try and deepen your buttercream to an even further black, take about 1/4 – 1/3 cup of the mixture and microwave it for 3-4 seconds. Incorporate the soft buttercream back into the mixture and it should deepen the black colour.
Ingredient notes for your black buttercream
Because this recipe is made without food coloring, charcoal, squid ink or any other colouring ingredients, you MUST use black cocoa. That is where the black colour is coming from, so there is no substitute here. Dutch processed cocoa will not produce anything similar.
After adding the boiling water and allowing to cool, the bloomed black cocoa will be thick enough to roll into a ball. If you are putting it aside for a while, cover it to make sure it doesn’t dry out. Add it to the whipping butter in clumps – I promise it will disperse if you give it time.
If 50g of boiling water really, truly doesn’t form a paste, add 10-20g more water. Make sure you stir it extremely thoroughly before you make this assessment, though. Not stirring it thoroughly and then adding too much water is only cheating yourself of the perfect buttercream consistency.
Make sure to sieve your icing sugar before you use it. This helps avoid clumpy bits in your buttercream and allows the sugar to dissolve better.
Speaking of, I highly recommend adding the sugar gradually. My experience is that this helps dissolve the sugar so you don’t get quite as gritty of a texture.
I never used to buy into adding thickened cream to icing sugar, but I have recently come around. My main reason? The versions of this buttercream I made with cream were more glossy and smooth. As such, I recommend it for the aesthetic alone.
More chocolate recipes
- Gluten free chocolate cake
- Vegan gluten free chocolate cake
- Chocolate Ninja Creami ice cream
- Flourless, nut free chocolate berry roulade
- Halva and pistachio brownies

Black buttercream without food coloring
Equipment
- Immersion blender
Ingredients
- 50 g black cocoa powder
- 50 g boiling water
- 125 – 150g softened butter (see notes)
- 200 g icing sugar/powdered sugar
- 20 ml (1 tablespoon)* thickened cream/whipping cream (1 Australian tablespoon is 20ml, which is 4 US teaspoons) see notes
- Pinch of fine salt, to taste
Instructions
- Measure the black cocoa powder into a medium heatproof bowl and pour over the boiling water. Stir thoroughly to combine – a thick paste should form. Cover and set aside to cool.
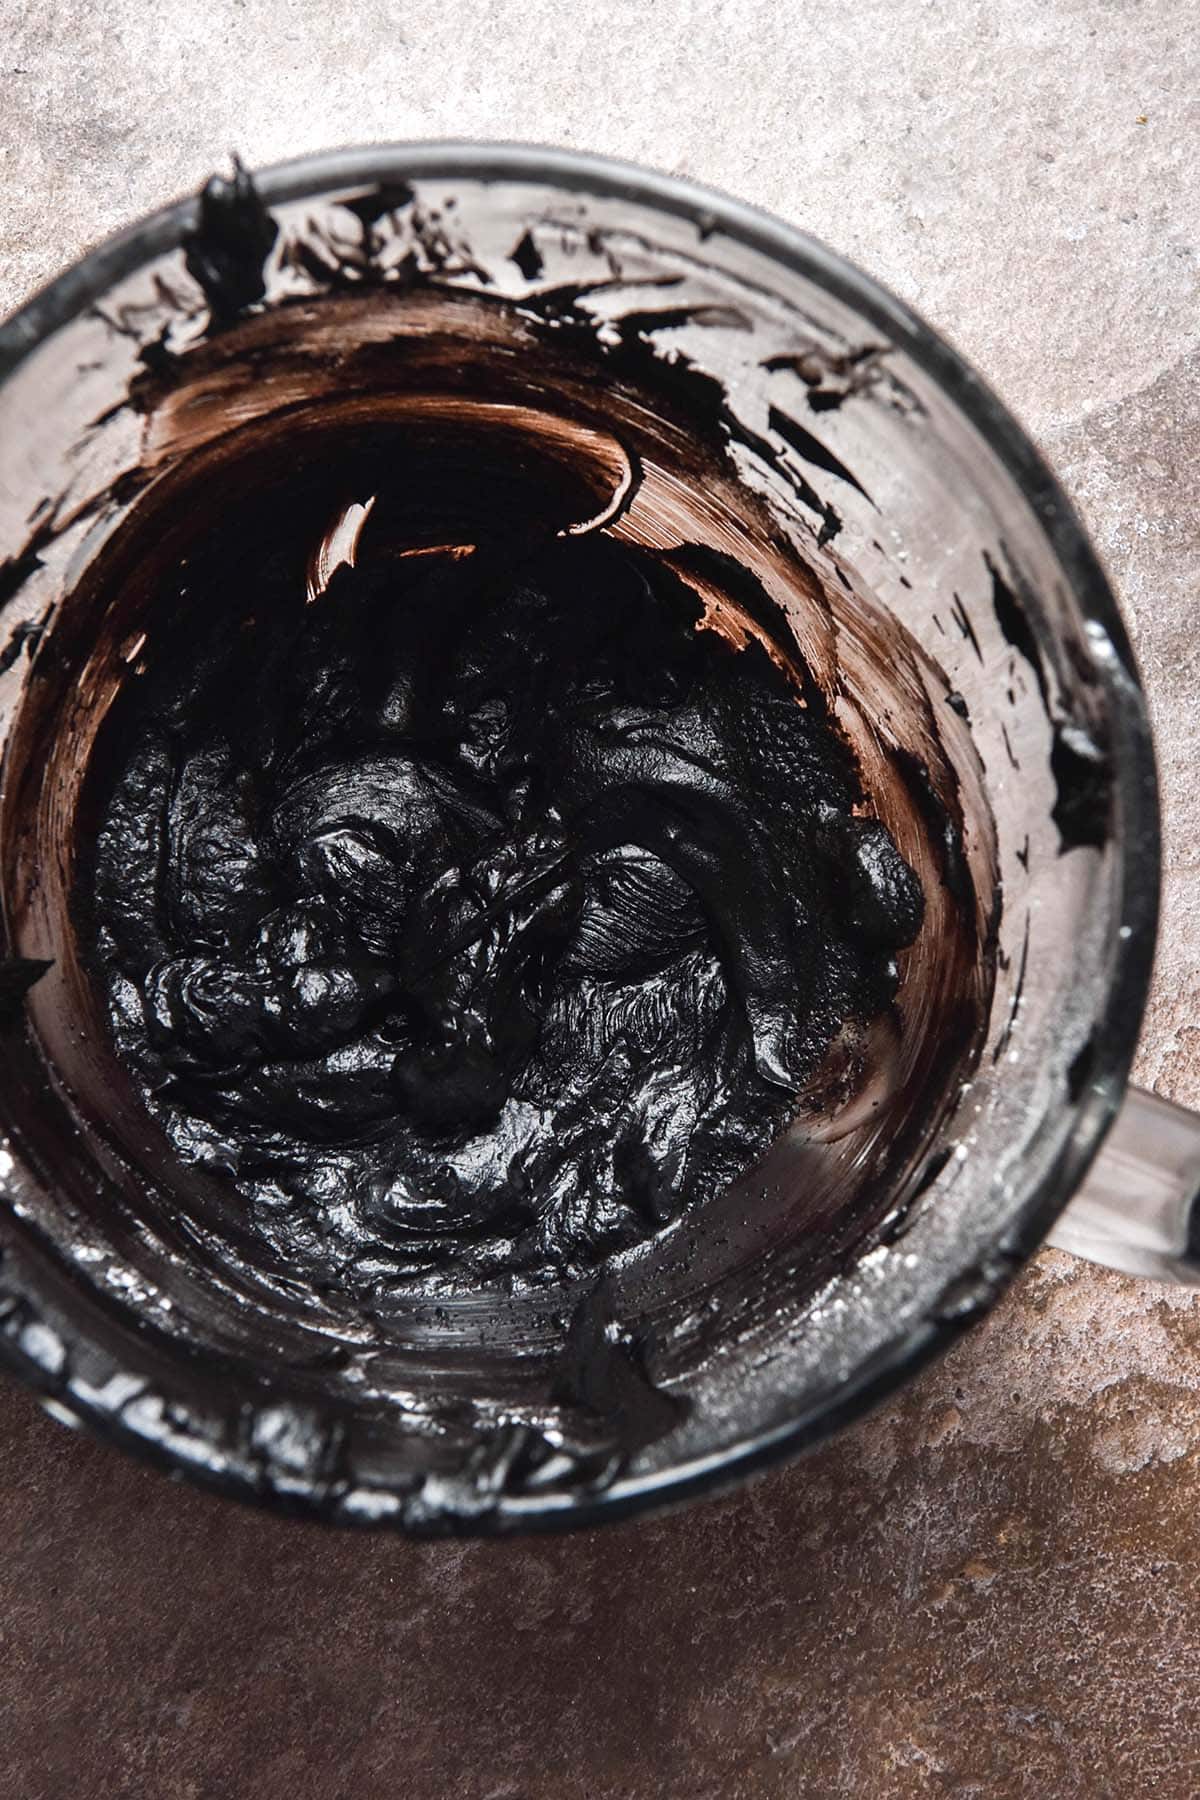
- Whip the butter on medium-high using the paddle attachment or your hand beaters until it is lightened in colour and starting to get airy. Add the cooled black cocoa powder paste with the speed on low. Scrape down the bowl and continue to beat until combined – the butter should have turned a grey/black colour.
- Add the powdered sugar in increments while the mixer is on a low speed. Continue scraping down, adding sugar and processing until all the sugar is added. The mixture should be a light black or dark grey colour and have a fluffy, buttercream texture.
- Add the cream and salt and mix again on low to combine. If your buttercream is looking thick, you can add an extra tablespoon or more of cream until you reach your desired consistency.
- Once you are happy with the buttercream consistency, remove it from the stand mixer. If it is looking or feeling soft, pop it in the fridge for 10 minutes to firm up.
- Use your immersion blender/soup stick to blitz the buttercream. You should notice that it is immediately a darker black colour if you lift the blade. Continue until you have emulsified all the buttercream.
- If the buttercream is still a little grey, take about 1/4 – 1/3 cup and microwave it for 3-4 seconds. Return the melty buttercream to the bowl and use a spatula to fold it into the mixture. This should further deepen the black colour.
- Use to generously frost 12+ cupcakes or 1 large cake. I estimate you could very thinly frost two 20cm/8 inch cakes with this batch, although I'd recommend making either 1 1/2 – 2 batches to be on the safe side.
Notes
- You must use black cocoa here – Dutch processed or any other variety will not yield a black colour. I bought mine online in Australia so I recommend searching out an online store near where you live.
- Blooming the cocoa with the boiling water brings out the flavour but also the black colour. Don’t skip this step. Make sure it has cooled before you use it, though, or you risk melting your butter.
- Use less better for a firm, more easily piped (and sweeter) buttercream or a buttercream that needs to hold up to hot weather, and more for a buttery buttercream good for swirling on a cake.
- The cream is optional but it does add a nice glossy sheen and rich texture to a buttercream.
- In Australia, thickened cream is generally around 35% fat and contains a thickener such as guar gum. Any cream with a fat profile similar to this will work here.
- The immersion blender is what takes the buttercream from a light black to a true black so I don’t recommend skipping this step.
- Read the notes in the body of the post for getting the most out of this recipe.
No Comments