I recently returned from a stunningly gorgeous winter trip through Scandinavia. As I am from Australia (aka the Southern hemisphere) this means returning from -20C temperatures to +40C temperatures in 24 hours. Summer is in full swing down here which means it is well and truly stone fruit season. Although stone fruit and I don’t generally get along digestively, I HAD to make a gorgeous gluten free peach cobbler.
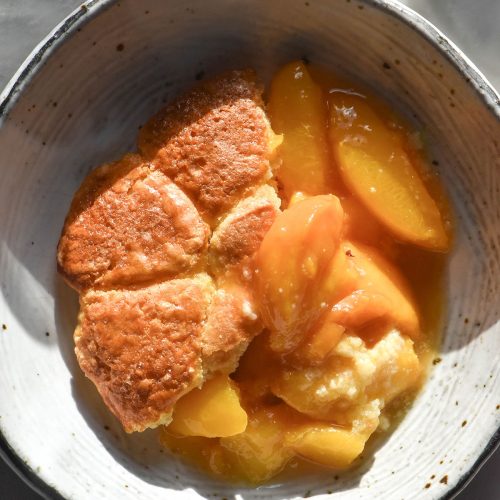
This peach cobbler is gluten free, of course. I much prefer the scone or ‘biscuit’ style of topping, as evidenced by my gluten free strawberry cobbler and my gluten free blueberry cobbler recipes. This recipe follows suit with a buttery, rich and slightly sweet cobbler topping that is crunchy and soft in the same bite.
Before we dive in, some dietaries: this recipe is gluten free, nut free, xanthan gum free and easily low lactose. Sadly for the low FODMAP amongst us, peaches are not low FODMAP or low fructose. I’d recommend my blueberry cobbler for you!
How to peel peaches
I figured I’d start here because it is easy and integral but involves a few steps. Firstly, I found that ripe peaches are easier to peel. Their skin is a little more ‘wobbly’ which means it will come off a lot easier.
- Cut a small X in the bottom of each peach. Get an ice water bath ready or at least get the ice into the bowl ready to fill with water.
- Submerge the peaches in boiling water for 30-60 seconds.
- Gently drain the peaches and then transfer them to the ice water bath.
- From here, you should be able to peel the skin up and off from the X in the base of the peach.
- If your peaches are firm, leave them in the boiling water for longer than if they are ripe.
How to pit your peaches
Once we have peeled the peaches, it’s time to pit and slice them. This can be a bit of a slippery and messy job (particularly with soft, ripe peaches) but it is in pursuit of a delicious result.
By all accounts, peaches can be clingstone (flesh clings to the stone) or freestone (flesh detaches from the stone easily). Apparently this depends on the timing of the season as well as the varietal in question. Australian supermarkets are absolutely rubbish at labelling some types of produce (most potatoes are just called ‘brushed potatoes’ or white potatoes for example). As such, it can be difficult to know whether you have clingstone or freestone. I have no idea which variety I have tested in this recipe.
Freestone yellow peaches, if you can find them, would be ideal in this recipe. Clingstone will still work too, but you might need to do a bit more needling to get the pit out of your peach.
Which brings me to my peach pitting tip. I have always assumed the logical way to pit a peach was to slice all the way around the peach from the stem to the bottom and back. However, a quick search has revealed to me that cutting your peach on the ‘equator’ is a much more efficient way to cleanly remove a pit. I couldn’t visualise this advice so I looked it up – here is a very quick video which demonstrates how to slice a peach on the equator. I tried it with a leftover peach and can confirm it works like a charm.
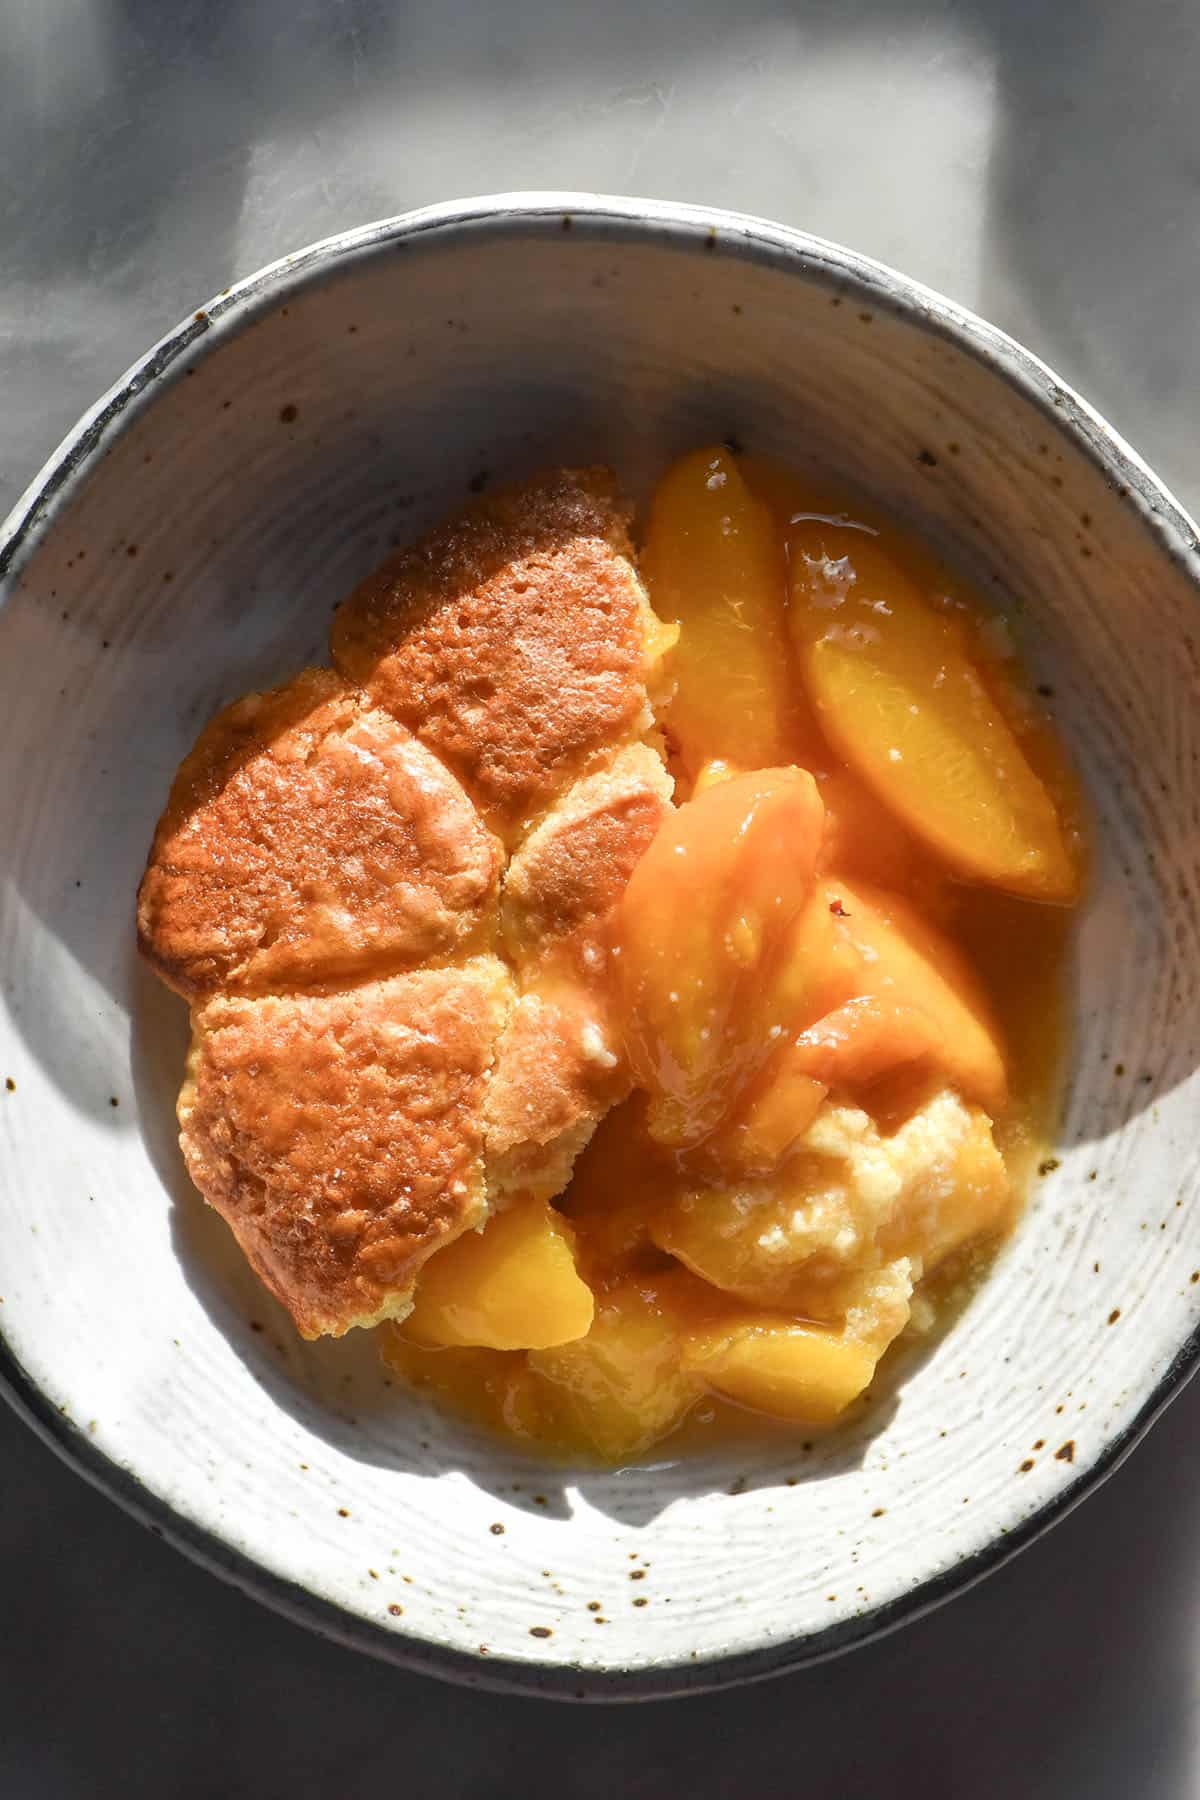
After you have pitted the peach, you can slice each piece into 4 slices of peach. Done!
Thickening the peach mixture
As you will know if you have ever made a fruit cobbler, fruit is a variable ingredient. It can be sweet and juicy, tart and drier or anything in between. This means that we need to be open to adjusting the recipe as necessary to suit the fruit we are using.
First of all, we need to assess how much sugar to add. I have given the threshold of 50-75g sugar. My peaches were of medium ripeness and I used 20ml (1 tablespoon) lemon juice as specified in the recipe. 75g was a good amount of sugar for me. If your peaches are exceedingly sweet and ripe or you don’t like things very sweet, feel free to use less.
Once we’ve got the sugar down pat, it’s time to work on thickening the juices. The peaches will release moisture as soon as you add the sugar. We need to use a thickening starch (I used cornstarch) to help thicken this into a lovely peach syrup.
Because cobbler has a thick, pastry topping, the heat doesn’t reach the peaches as easily as it would without the topping. This tends to mean that the cornstarch won’t thicken as efficiently and your peach mixture will be wet and liquid rather than thick and syrupy.
To counteract this, we need to cook the peaches and get the mixture bubbling prior to adding the cobbler filling. If you’d prefer, you can do this in the oven. Simply bake the peaches until bubbling and thickened and then add the cobbler topping.
The alternative (which is much quicker but might require more washing up) is to cook the peaches on the stovetop. Cornstarch doesn’t take long to thicken on the stove over a medium heat and this will set you up for success later. Simply cook the peaches (stirring very gently to avoid breaking them down) until the liquid has thickened into a syrup. Too easy!
A note on the cornstarch
Not everybody can have corn, which is why I have included this little section. Unfortunately cornstarch is the best thickener for sauces and gravies but we do have some other potential options.
In my experience, potato starch is a good thickener that I have used as a 1:1 replacement in some recipes (not this one, I haven’t tested it here). However, the internet seems to suggest that you can use double the tapioca flour (so, 2 tablespoons/20g) for the same thickening as cornstarch.
I haven’t tested this theory yet, but I do intend to at some point. There is only so much peach cobbler a girl can have in the house at any one time!
Ingredient notes
- We are using yellow peaches in this recipe as they tend to hold up much better to baking.
- I haven’t tested a starch other than cornstarch for thickening the peaches in this recipe. My suggestion would be potato starch, but you may also be able to work with tapioca flour. Reddit users suggest using double the amount of tapioca flour when using it instead of cornstarch. See more in the section above on tips for the peach mixture.
- I have not tested any other flours in this recipe. There are two options for the cobbler mixture – the recipe as specified in the recipe card or a less starchy version in my blueberry cobbler recipe.
- I have used lactose free full fat cream and regular full fat cream in this recipe. I daresay you’d be able to use vegan cream (I’d recommend Flora Plant Cream) and a good quality vegan butter to make this recipe dairy free.
- At the moment I don’t have a substitute for the egg in the cobbler mixture. You are welcome to try it, but I can’t guarantee the result.
- At the time of writing I have not tested canned peaches in this recipe. I intend to at some point and I will update the recipe when I do.
More gluten free dessert recipes
- Gluten free apple pie recipe
- Gluten free chocolate tart recipe
- Gluten free edible cookie dough
- Gluten free pistachio Tiramisu
- Gluten free dairy free chocolate cake
Gluten free peach cobbler
Equipment
- 28cm (1.6 litre) baking dish (the dimensions of my Le Creuset in the images are 30cm L x 20cm W x 6cm H) or a rectangular a 28cm x 22cm baking dish (4cm depth)
- 1 x 4cm mini scone cutter (or small cutter of your choice)
Ingredients
For the cobbler topping:
- 120 g tapioca flour
- 120 g white rice flour
- 10 g (2 teaspoons) baking powder
- 50 g caster/superfine sugar
- 100 g butter salted or unsalted
- 1 extra large egg whisked
- 150ml (½ cup + 1 tablespoon)* 150g? thickened cream
- Pinch of fine salt
For the peaches:
- 1.5 kg yellow peaches (they are better for cooking) becomes approximately 1.25kg after peeling and pe-pipping
- 50-75 g caster sugar
- 20 ml (1 tablespoon)* lemon juice
- 10 g (1 tablespoon)* corn starch
- Pinch of fine salt
To finish:
- 1 egg whisked (for egg wash)
- Finishing sugar, to sprinkle over the cobbler
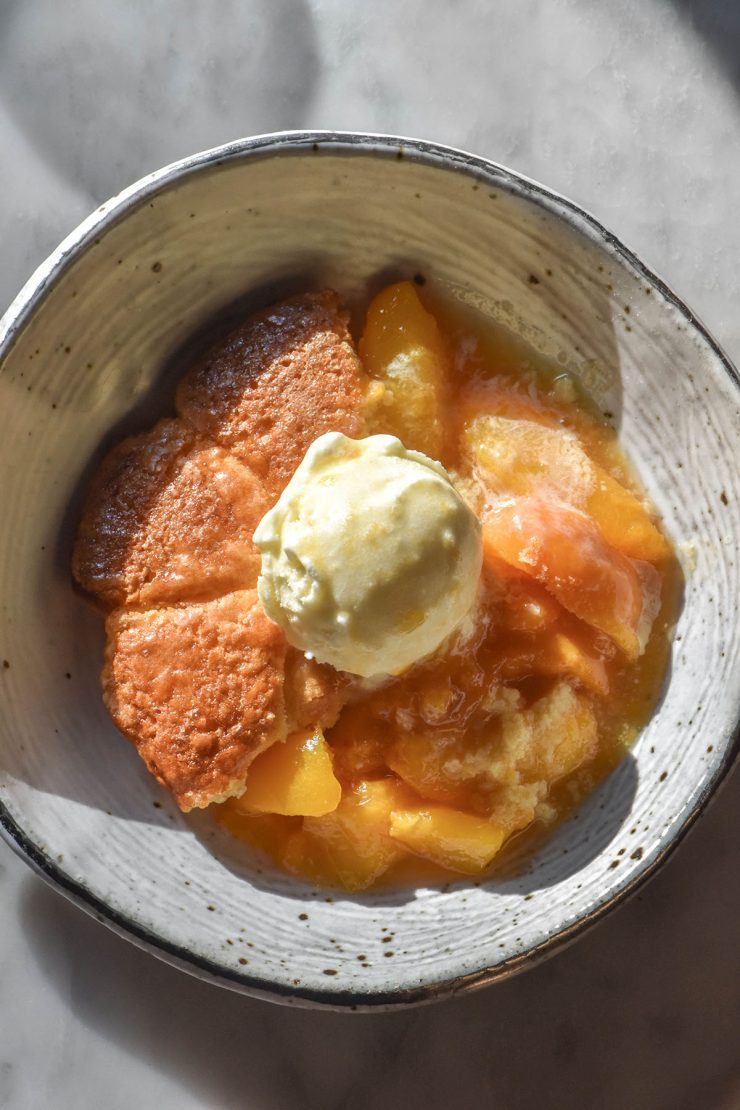
- Vanilla ice cream, to serve (optional)
- Pinch of cinnamon powder, to serve (optional)
Instructions
To make the cobbler topping:
- Line a large baking tray with baking paper and set aside. In a large bowl, combine the flours, baking powder and sugar. Stir them well to combine.
- Add the butter pieces to the flour and rub the flour into the mixture. Keep going until the mixture looks a little sandy. There should be no huge chunks of butter but it shouldn’t be entirely dissolved or incorporated. Little sheets of butter are what we’re after. If it’s summer and your butter starts melting, pop the mixture in the fridge for 5-10 minutes.
- Add the whisked egg and use a spoon to gently incorporate it.
- Add the cream, 1/4 cup at a time. Gently push the mixture around to combine without being too rough or flattening in the pieces of butter. The dough should be a little bit shaggy but all the loose bits of flour should be wet or attached to the main ball of dough. There should be no dry or crumbly flour. You might not need all the cream; assess as you go.
- Gather the dough into a ball in the bowl and cover. Place in the fridge for 15-20 minutes to firm up.
- Flour a clean, dry surface with tapioca flour. Place the chilled dough onto the surface, and use a rolling pin or your hands to create a rectangle of dough, about 3 centimetres thick. Keep moving the dough and making sure it isn’t sticking. Add tapioca flour whenever necessary.
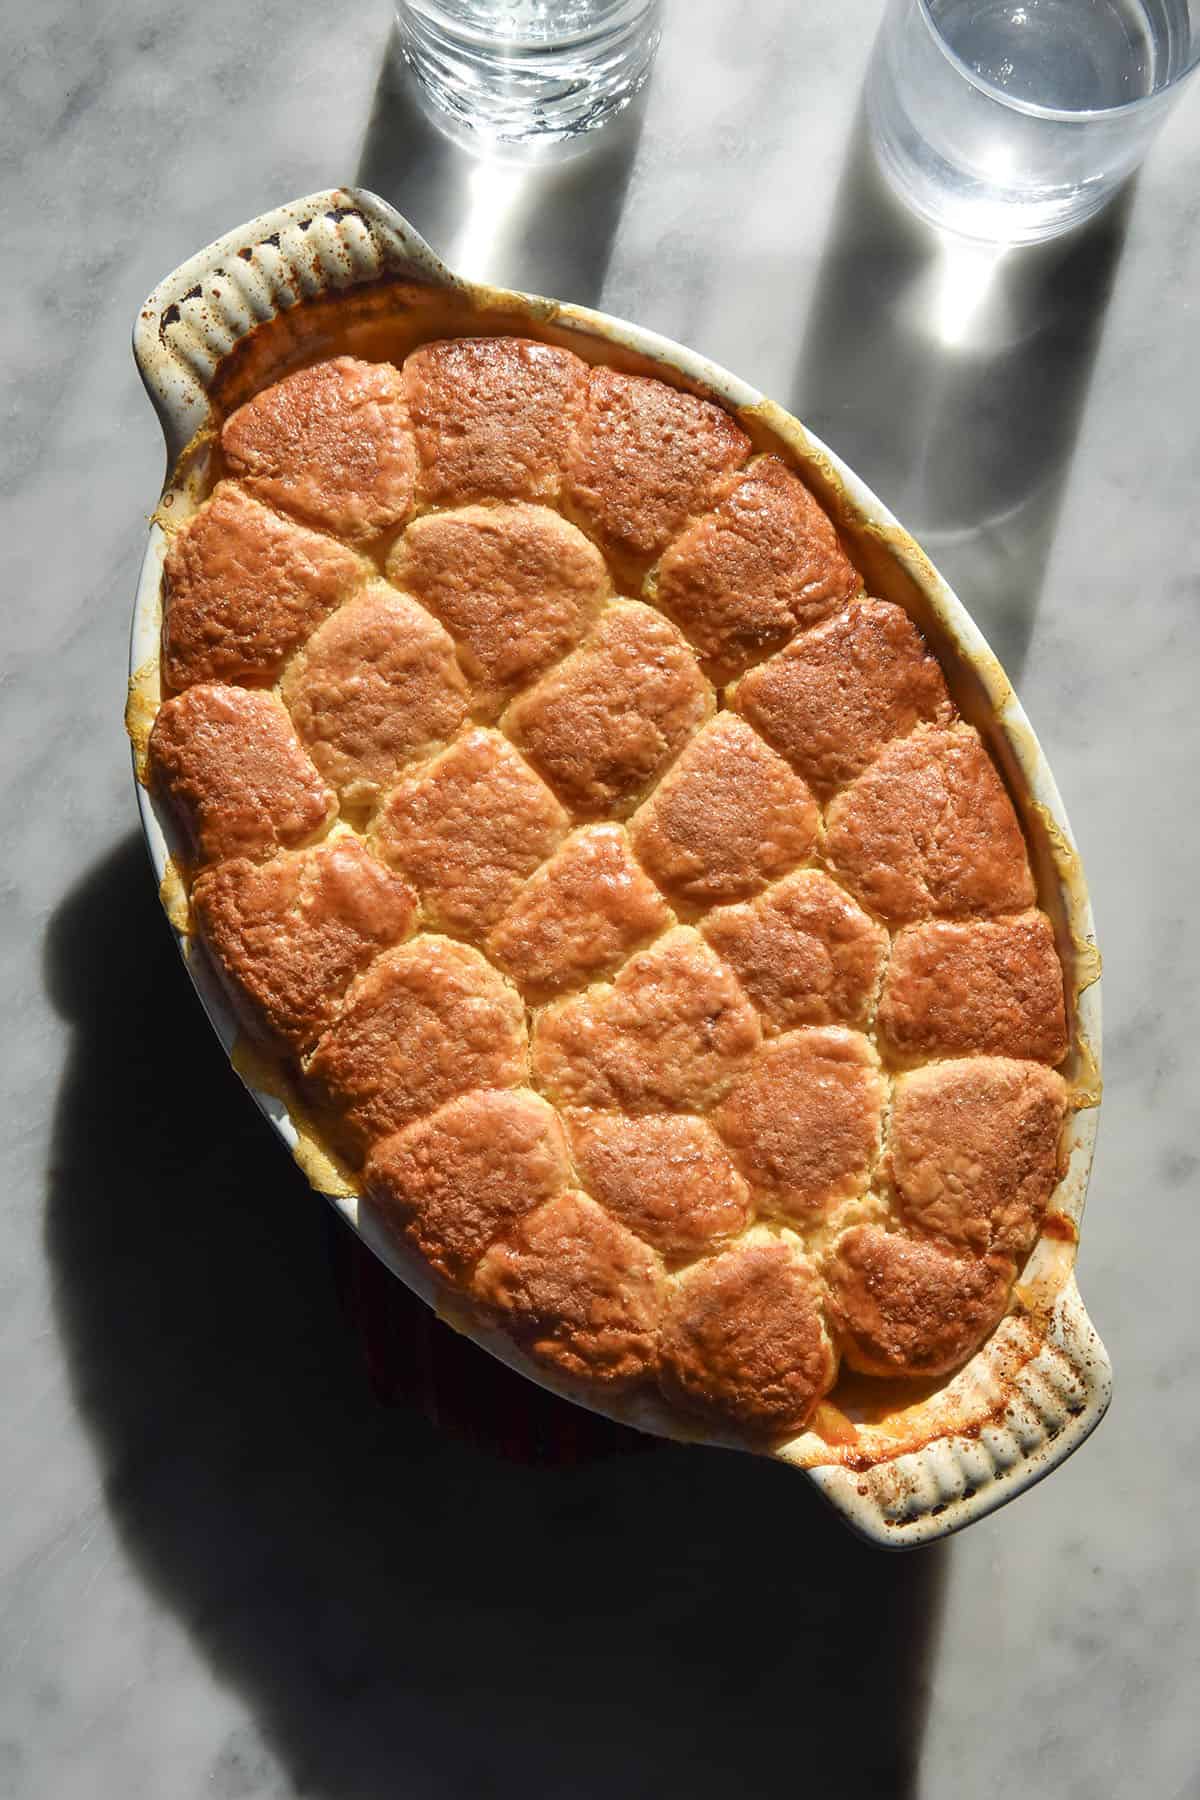
- Use your scone cutter to cut out the cobbler bits, flouring it liberally and whenever necessary. Place the cut scones onto the lined baking tray, and continue until you have used all the dough. Depending on the size of your cutter, you should have 18-24 little scone bits. I like to place them in the freezer for a little while to set the butter and encourage lift in the oven but the fridge is fine too.
- Preheat the oven to 200C/400F.
To make the peach mixture:
- Score the skin of each peach with a little X on the base and place them in a large bowl.
- Prepare a large amount of boiling water and a separate ice water bath.
- Submerge the peaches in the boiling water for 30-60 seconds – more time for firmer peaches and less time for ripe and soft peaches.
- Gently transfer the pieces to the ice water bath to shock them and discard the boiling water.
- Use your hands to peel the skin off each peach and discard the skins.
- Cut each peeled peach on the equator (see notes in body of post) and wriggle the pit to remove it. Slice each side of the cut piece into 4 wedges for a total of 8 wedges per peach.
- The peach mixture needs to be thickened by cooking. We can do this in the oven (about 20-30 minutes) or on the stovetop (about 5-10 minutes). Choose which option you would prefer.
- Place the sliced peaches in a bowl or your baking dish (if you are baking the peaches) or large pot (if you are cooking them on the stovetop) and sprinkle over the sugar. Mix gently to combine – the peaches should become very juicy.
- Mix the cornstarch and lemon juice in a small bowl to form a slurry.
- Pour the slurry into the peaches and stir to combine. Add a pinch of fine salt. If you are baking the peach mixture, place it into your baking dish on a large baking tray (to catch any drips) and into the oven for 20-30 minutes or until the liquid is bubbling and syrupy in consistency (as opposed to being a thin liquid).
- If you are cooking the peaches on the stovetop, cook the mixture on a medium heat for 5-10 minutes or until the liquid has become a syrupy consistency. Don’t stir too roughly or too often or you will break up the peach pieces.
To finish and bake:
- Take the cobbler pieces out of the fridge. Brush them with the egg for egg wash and sprinkle them with the finishing sugar.
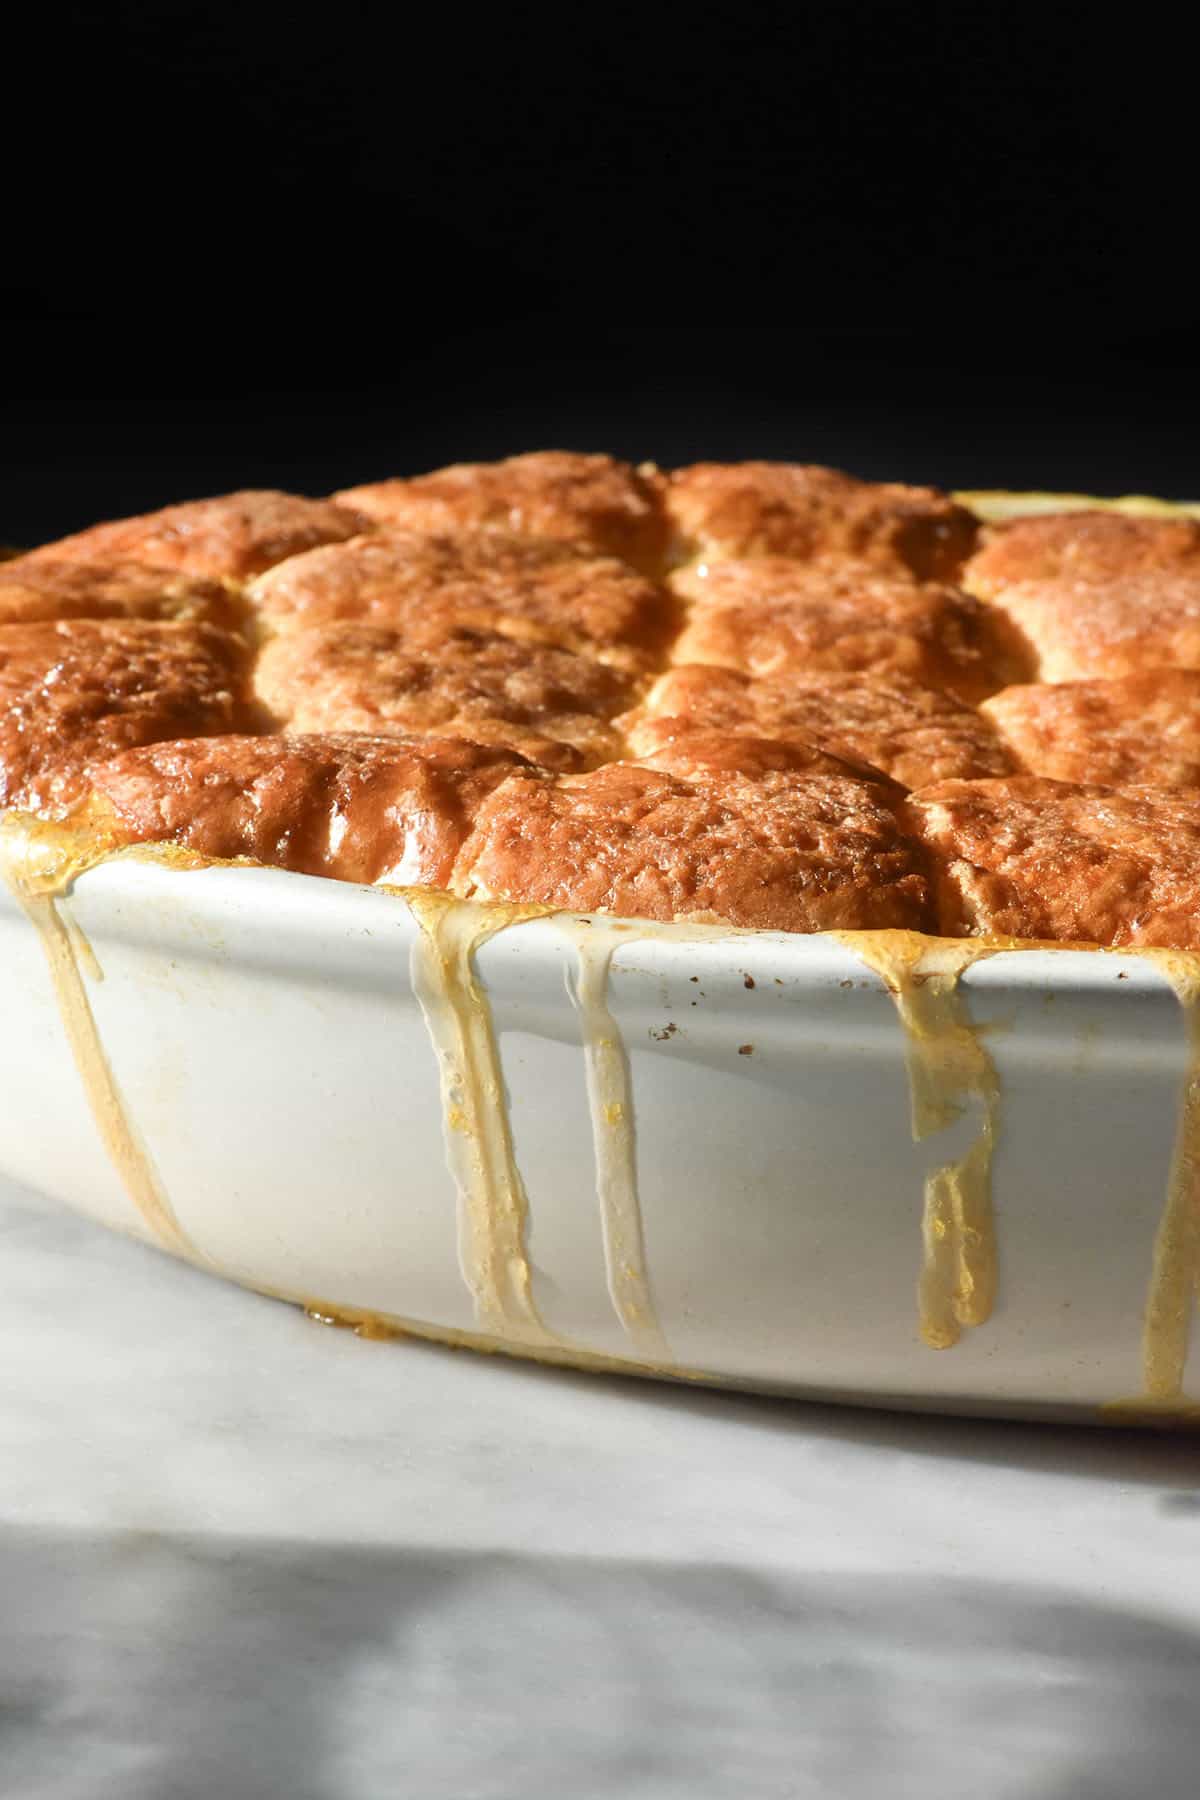
- Work quickly to place them evenly atop the peach mixture – because the peaches will be warm, the cobbler pieces will start to melt. Place the baking dish on a large oven tray to catch any dripping juices if you haven't already.
- Once assembled, place the cobbler in the oven and turn the heat down to 180C/356F. Bake the cobbler for 20-30 minutes or until the cobbler is golden brown and the juices are syrupy and bubbling up.
- Serve warm or cooled – the juices will thicken up as the cobbler cools. I highly recommend serving with some vanilla ice cream and maybe a sprinkle of cinnamon atop the cobbler.
Notes
- See the body of the post for tips and ingredient notes.
- I highly recommend serving this with my Ninja Creami vanilla ice cream recipe. I also have a lactose free version if you need it to be lactose free.
- I haven’t tested crumbling the cobbler topping onto the peaches instead of shaping the pieces individually. I imagine it would work nicely but might be harder to brush with egg.
- I haven’t tested canned peaches in this recipe yet. Stay tuned!
- I have not tested any other flours in this recipe. There are two options for the cobbler mixture – the recipe as specified in the recipe card or a less starchy version in my blueberry cobbler recipe.
No Comments