
If you’re a subscriber to my Substack, you’ll know that I recently started a SIBO bi phasic and low histamine elimination diet. I only realised that histamines might be an issue recently and have already found some significant symptom relief from the low histamine diet. With the histamine element in mind, I decided to riff on my gluten free, yeast free bread recipe to make this low histamine bread.
A quick note, before we dive in: I am not a doctor or a medical professional. I’m just a gal developing recipes for all the food intolerances she is dealing with. It is always recommended to consult a health professional before undertaking any sort of elimination diet. My aim with these recipes is simply to provide options for those with dietary intolerances and allergies.
Low histamine bread
This bread is gluten free, yeast free, egg free, xanthan gum free and nut free. It has a dairy free and vegan option. It uses white rice flour and tapioca flour as the flour component of the bread, and baking powder for the rise. Salt, melted butter or oil and maple syrup or agave syrup add flavour. Finally, psyllium husk powder and water bring everything together for a soft and simple loaf.
Is this is the best bread you’ve ever had in your life? Probably not. But it does put bread back on the menu for those with histamine intolerances.
I am relatively new to the histamine game, but it seems that the SIGHI list is the most trusted source. With that said, it is to be taken with a grain of salt so you can figure out what works for you personally.
So, most of the ingredients in this gluten free bread are 0 on the SIGHI list. The exception is tapioca flour, which is missing on the SIGHI list but quoted as either 0 or 1 in other source material.
Recipe notes
As with any of my gluten free bread recipes, this recipe requires finely ground, fresh white rice flour. The variety in the supermarket (particularly the boxes in Australian supermarket) is generally too course and too old. Stale rice flour has a musty, floral taste and smell that does not cook out, meaning it will change the taste of your bread.
I use tapioca flour and tapioca starch interchangeably. Arrowroot flour is also quite similar and seems to be on a number of low histamine lists (although not on SIGHI).
The recipe uses a decent quantity of baking powder to make it rise in the absence of yeast or eggs. Baking powder itself is not on the SIGHI list, but baking soda is listed as 0. However, the ingredients for baking powder (baking soda and cream of tartar) are both listed as 0. The other thing that a gluten free baking powder generally contains is a flour – normally rice flour or corn starch. Rice products and corn products are both 0 on the SIGHI list.
You can use melted butter or any neutral oil that works well for you in this bread. In terms of the sugars, maple syrup and honey are both 0 on the SIGHI list, although honey seems to be hit and miss. Other options are agave syrup, glucose syrup and regular sugar.
Things to note about this low histamine bread
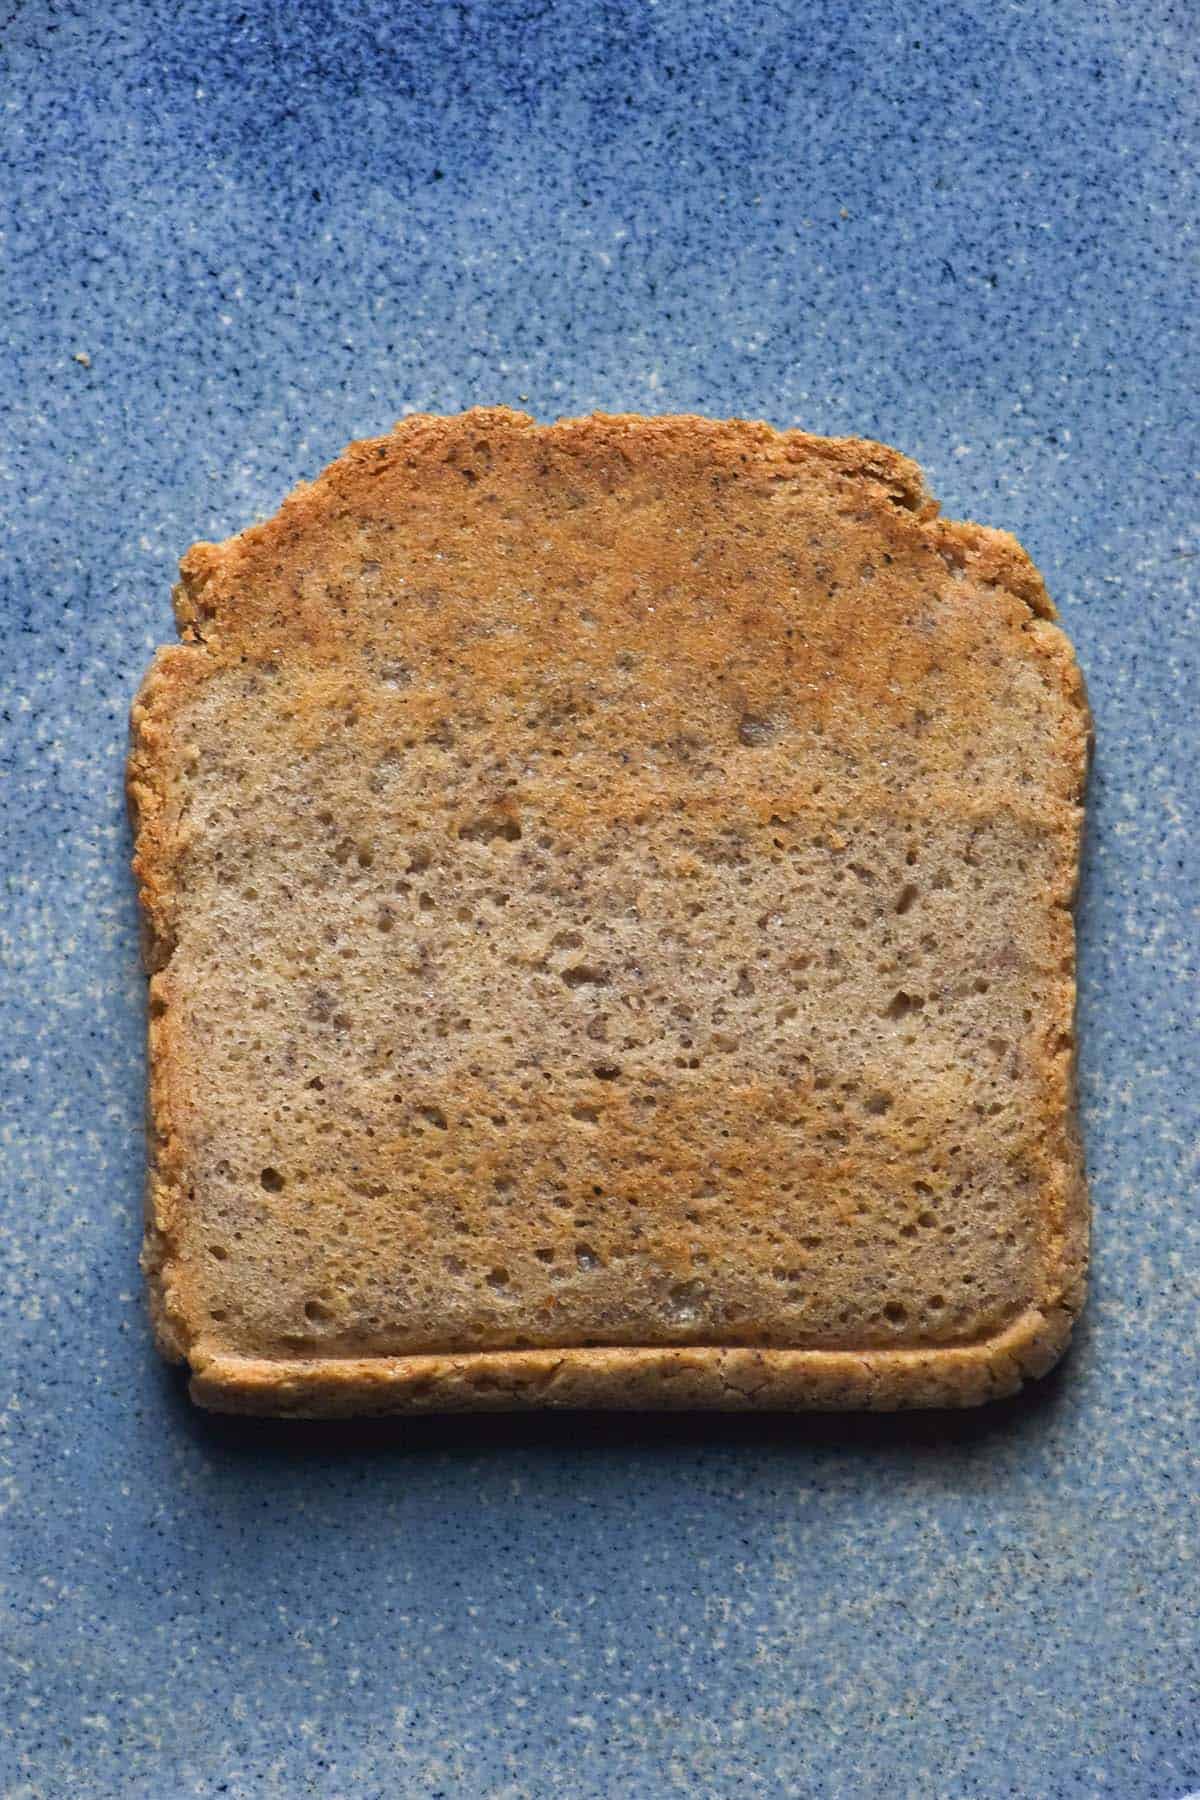
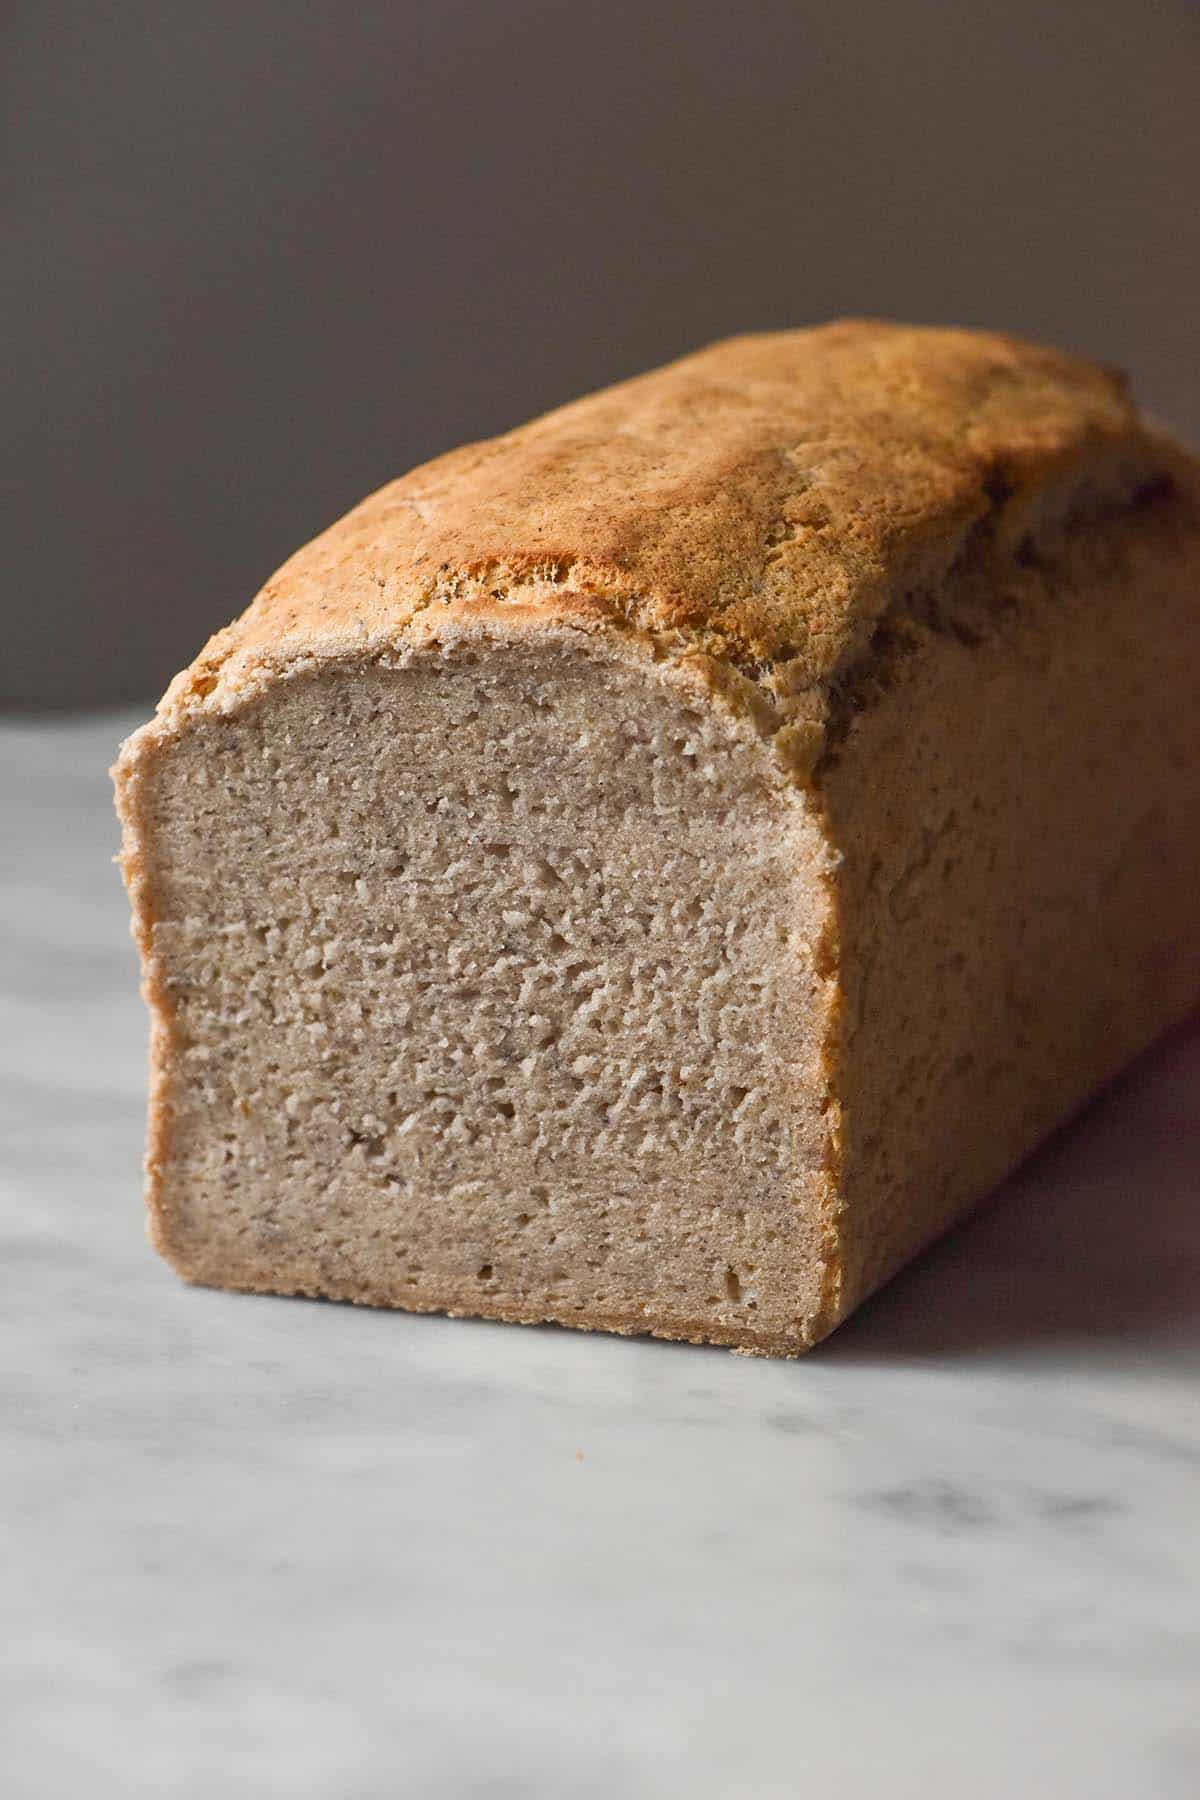
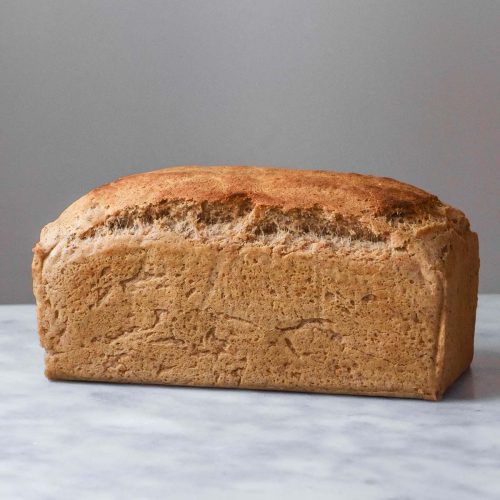
- Bread without dairy or yeast doesn’t brown much, if it all. That is why this bread is cooked on a high temperature for a long time. It is still quite a pale bread even after baking. Using melted butter as the fat helps with this.
- This is also applicable to toasting a slice – it doesn’t brown as much as a regular bread would.
- The bread has quite a dense crumb but is surprisingly flexible when you cut a slice. It might be one of my more flexible breads.
- My taste tester while I am on the SIBO diet (my Mum) said that the bread is wetter than other breads. This is necessary to achieve a soft and flexible crumb. She tasted it fresh and toasted and said both were great and had good texture, but to expect a slightly wetter crumb.
- Everyone has different histamine triggers. Although I have endeavoured to develop this bread with all low histamine ingredients, there might be something that doesn’t work for you. It is trial and error, so it seems.
- Every batch of bread will require a different amount of water. As with all my other gluten free bread recipes, you need to use your intuition. If your dough looks crumbly or dry, it needs more water – it doesn’t matter if you have added the amount the recipe says. Proper hydration for gluten free bread is a moving target.
- If you can tolerate yoghurt (any variety) my gluten free, yeast free bread recipe has a slightly better appearance and taste, in my opinion. This bread is still excellent if you can’t, though!
Can I use a cake pan or silicon pan for this bread?
No! Sorry. Gluten free bread has no inherent strength and requires solid steel edges to grow taller in the oven. Without anything holding it in, this dough will simply grow outwards. In a large tin, this means it will spread sideways. In a small tin, this means it will spill out of the tin and onto the base of your oven. Not ideal.
The pan I use for all my gluten free bread recipes is a USA Pullman pan in size small. It is 23cm length X 10cm width X 10cm height or 9 X 4 X 4 inches. I use the pan with the lid off – it’s just the perfect size bread tin for a gluten free recipe.
I highly recommend this pan or a very similar pan for best results. Because I develop all my gluten free recipes around this pan specifically, I cannot guarantee that the recipe will work in a larger or smaller pan.
More gluten free bread recipes that are lower (not necessarily low) histamine
- Gluten free yeast free bread (this recipe uses yoghurt which can be plant based or regular)
- Gluten free yeast free buckwheat bread (the SIGHI list specifies that hulled buckwheat may be low histamine)
- Gluten free yeast free focaccia from my yeast free e-book (the dough uses regular or coconut yoghurt which you may or may not tolerate)
- Gluten free buckwheat bread (if you tolerate yeast)
- Gluten free rice flour bread (if you tolerate regular or coconut yoghurt)
Low histamine bread
Equipment
- 1 X USA Pan Pullman steel loaf pan in size small ( 23cm length X 10cm width X 10cm height or 9 X 4 X 4 inches)
Ingredients
Dry ingredients:
- 650 g fine, fresh white rice flour
- 150 g tapioca flour/starch
- 30 g psyllium husk powder (see notes)
- 30 g gluten free baking powder
- 7-12 g fine salt (see notes)
Wet ingredients:
- 75 g butter, melted (or 20-40ml neutral oil of choice)
- 20- 40ml maple syrup or agave syrup
- 700- 800g water (see notes)
Instructions
- Preheat your oven to 250C/482F or the highest possible setting if your oven doesn't go that high. Grease and line your steel USA pan Pullman pan (23cm X 10cm X 10cm or 9 X 4 X 4 inches). I like to create handles with the baking paper so I can easily lift the loaf out later. I also use bulldog clips to secure the baking paper in place while I add the dough to the pan.
- Whisk the dry ingredients together in a large mixing bowl.
- Add the maple syrup and melted butter and stir a little to loosely incorporate it. Add 600-700g water while whisking as the dough firms up quickly.
- Once the dough becomes too stiff to whisk, get one hand into the dough and squelch the dough through your fingers, stirring and picking up any dry flour into the dough as you work.
- You are looking for dough that feels moist and cohesive with no dry bits in the bowl. If you squish a piece of dough in your hands, it should feel cohesive and snack out of your hand like a wet dough would.
- If your dough feels fluffy and squishes out of your hand in a slightly chunky or non-cohesive way, add more water. All of my tests needed around 750-800g water, but this will depend on your flours (see notes in the body of the post).
- Once you are happy with the consistency of the dough, transfer it to the lined Pullman pan. Use a moistened hand to smooth down the top of the loaf thoroughly.
- Remove the bulldog clips if you have used them and place the bread in the oven for 40-50 minutes. If you have made the version with butter, it should be lightly golden on top. If you have made the oil version, it will be quite pale.
- Allow the loaf to cool in the tin for 15-20 minutes and then transfer it to a cooling rack. I find that this bread stales quite quickly on the bench – I recommend slicing it and freezing it on a tray, then transferring the frozen slices to an airtight container. I toast the bread straight from frozen.
Notes
- I grind psyllium husk flakes to a powder using a cheap Breville spice grinder. I find the store bought powder too fine. Some varieties of psyllium husk (powder and flakes) can give your baked goods a purple/grey appearance.
- Because this loaf contains a lot of baking powder, it can taste a bit salty as is. Add salt according to your preference for salt, but also according to whether you use salted butter, unsalted butter or oil.
- Hydration is a moving target when it comes to gluten free baking. What works for me might not be perfect for you. Make sure you add water according to the description of the dough rather than just the number listed in the recipe.
Can oil be used instead of butter like olive, avocado ?
Hi Karina, yes you can – as the recipe card says you can replace the butter with 20-40ml of an oil of your choice 🙂