While I was in Mallorca, my Instagram feed rapidly transitioned from late summer to full on fall recipes. Not wanting to miss out, I decided to develop these delicious and easy gluten free pumpkin bagels. They are a little savoury fall hit that is guaranteed to please even gluten eaters.
Gluten free pumpkin bagels
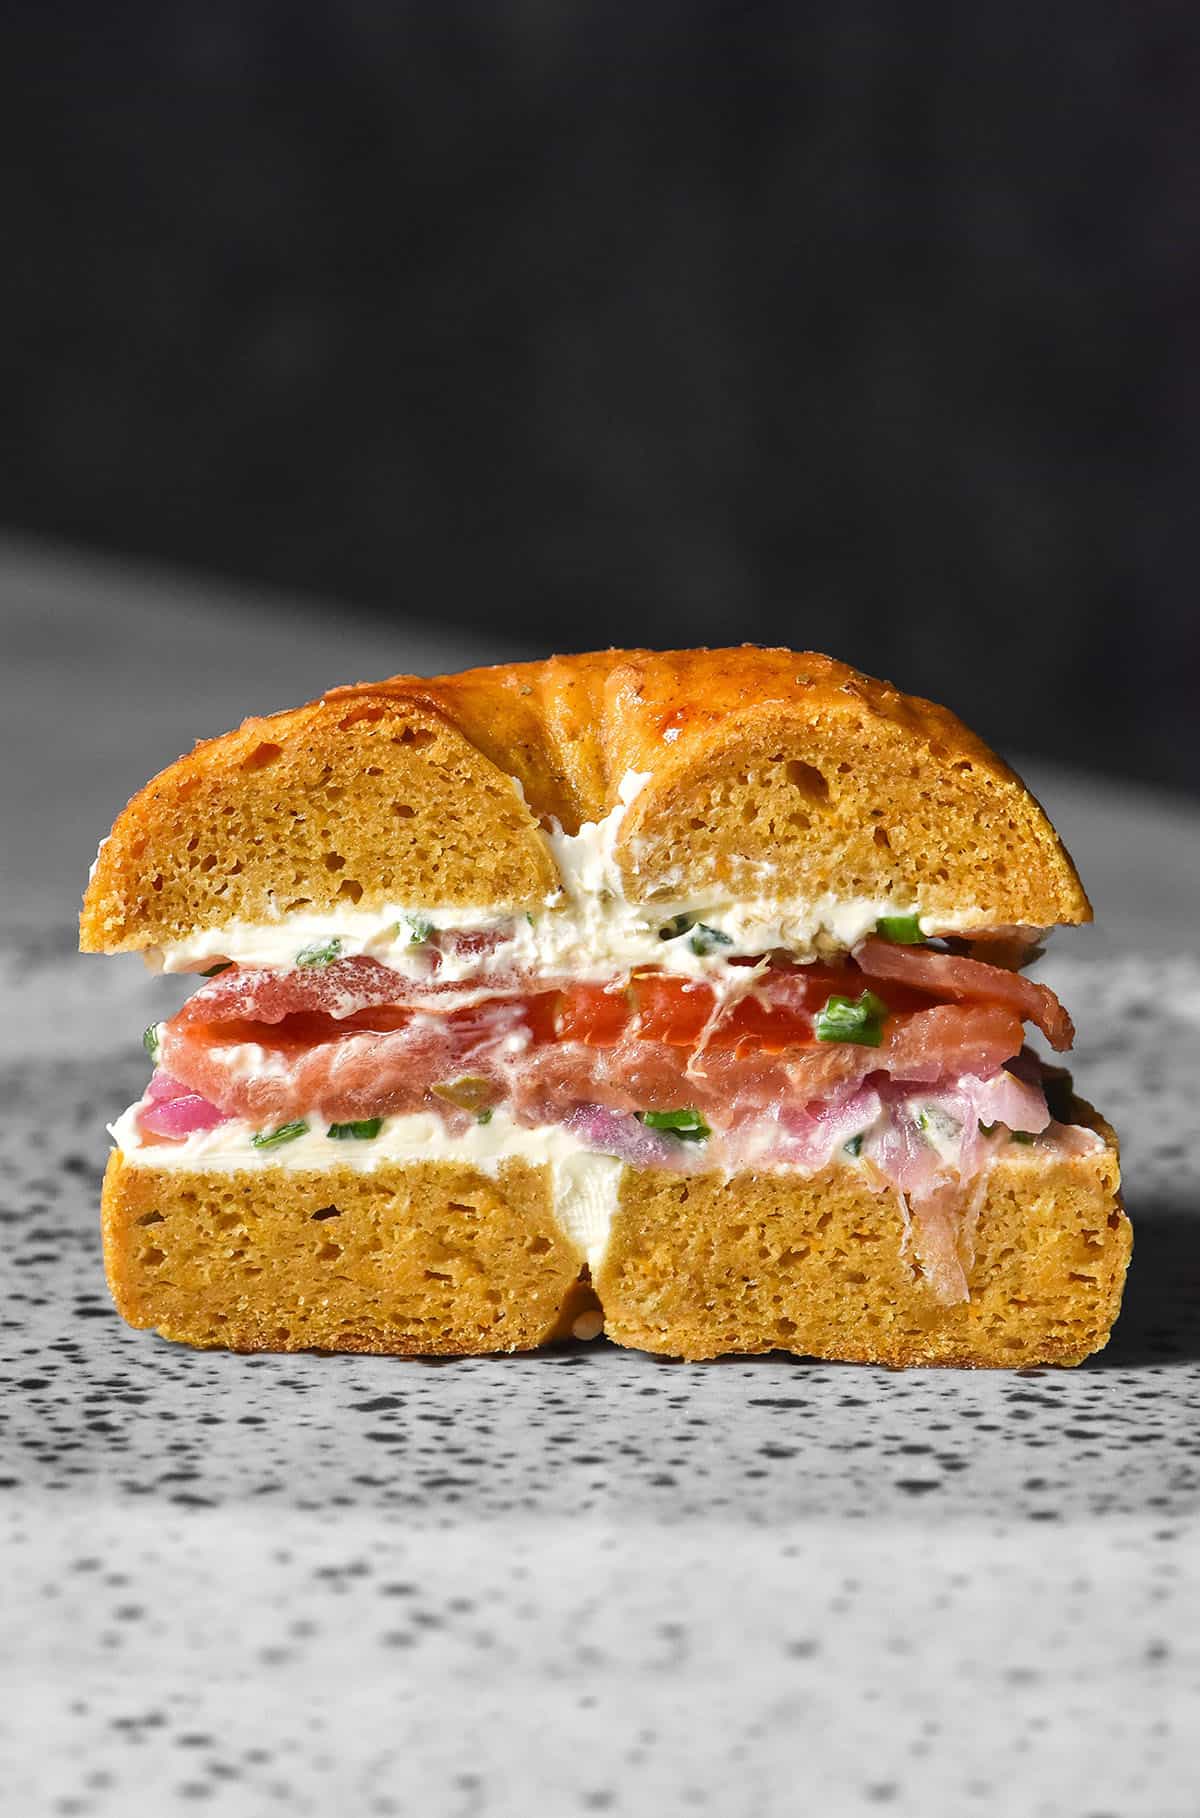
These gluten free pumpkin bagels are nut free, dairy free and xanthan gum free. They use no corn containing ingredients and you can substitute another seed (or even simply use sea salt) for sesame allergies. The bagels themselves are naturally vegan, so using a vegan egg wash will make these bagels vegan and gluten free.
The bagel dough is based on my original gluten free bagel recipe which I love so much. It uses a scald to create flexibility in the dough and to supercharge the yeast. These pumpkin bagels also use a scald, but incorporate 300-350g pumpkin puree as well.
The bagel dough utilises psyllium husk powder in addition to the scald to hold everything together. A small amount of water and a tablespoon of oil add cohesion and a good chew to your bagels.
Salt and a little bit of pumpkin spice bring the flavour and the general fall vibes.
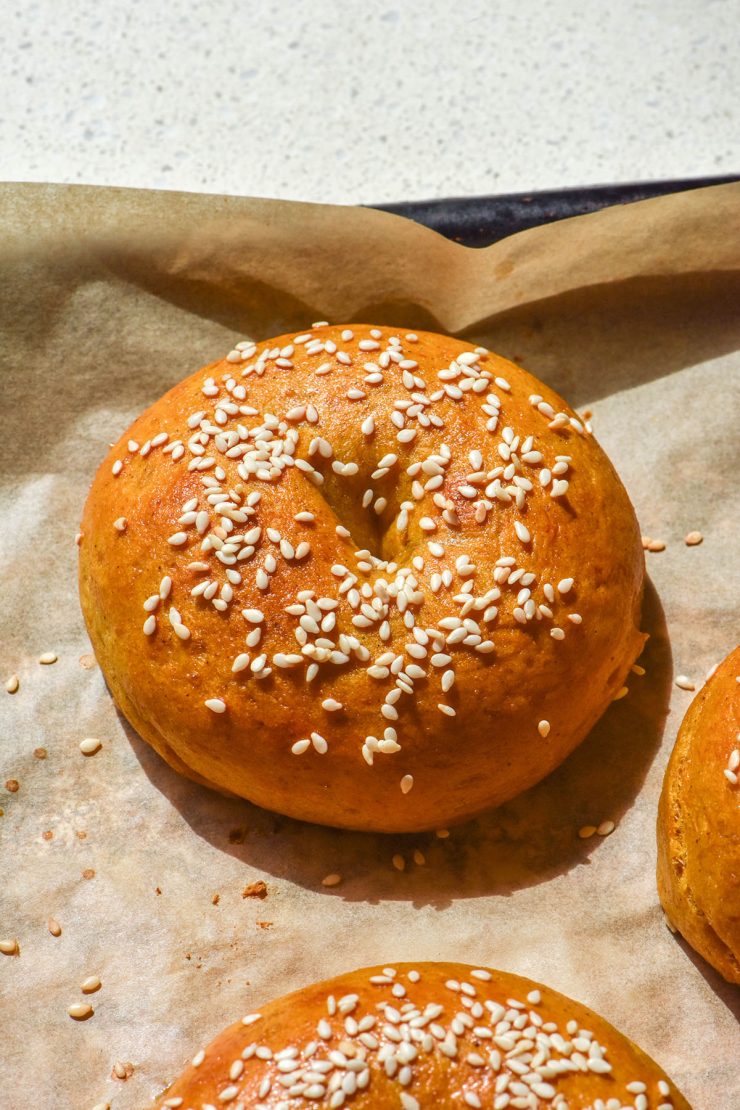
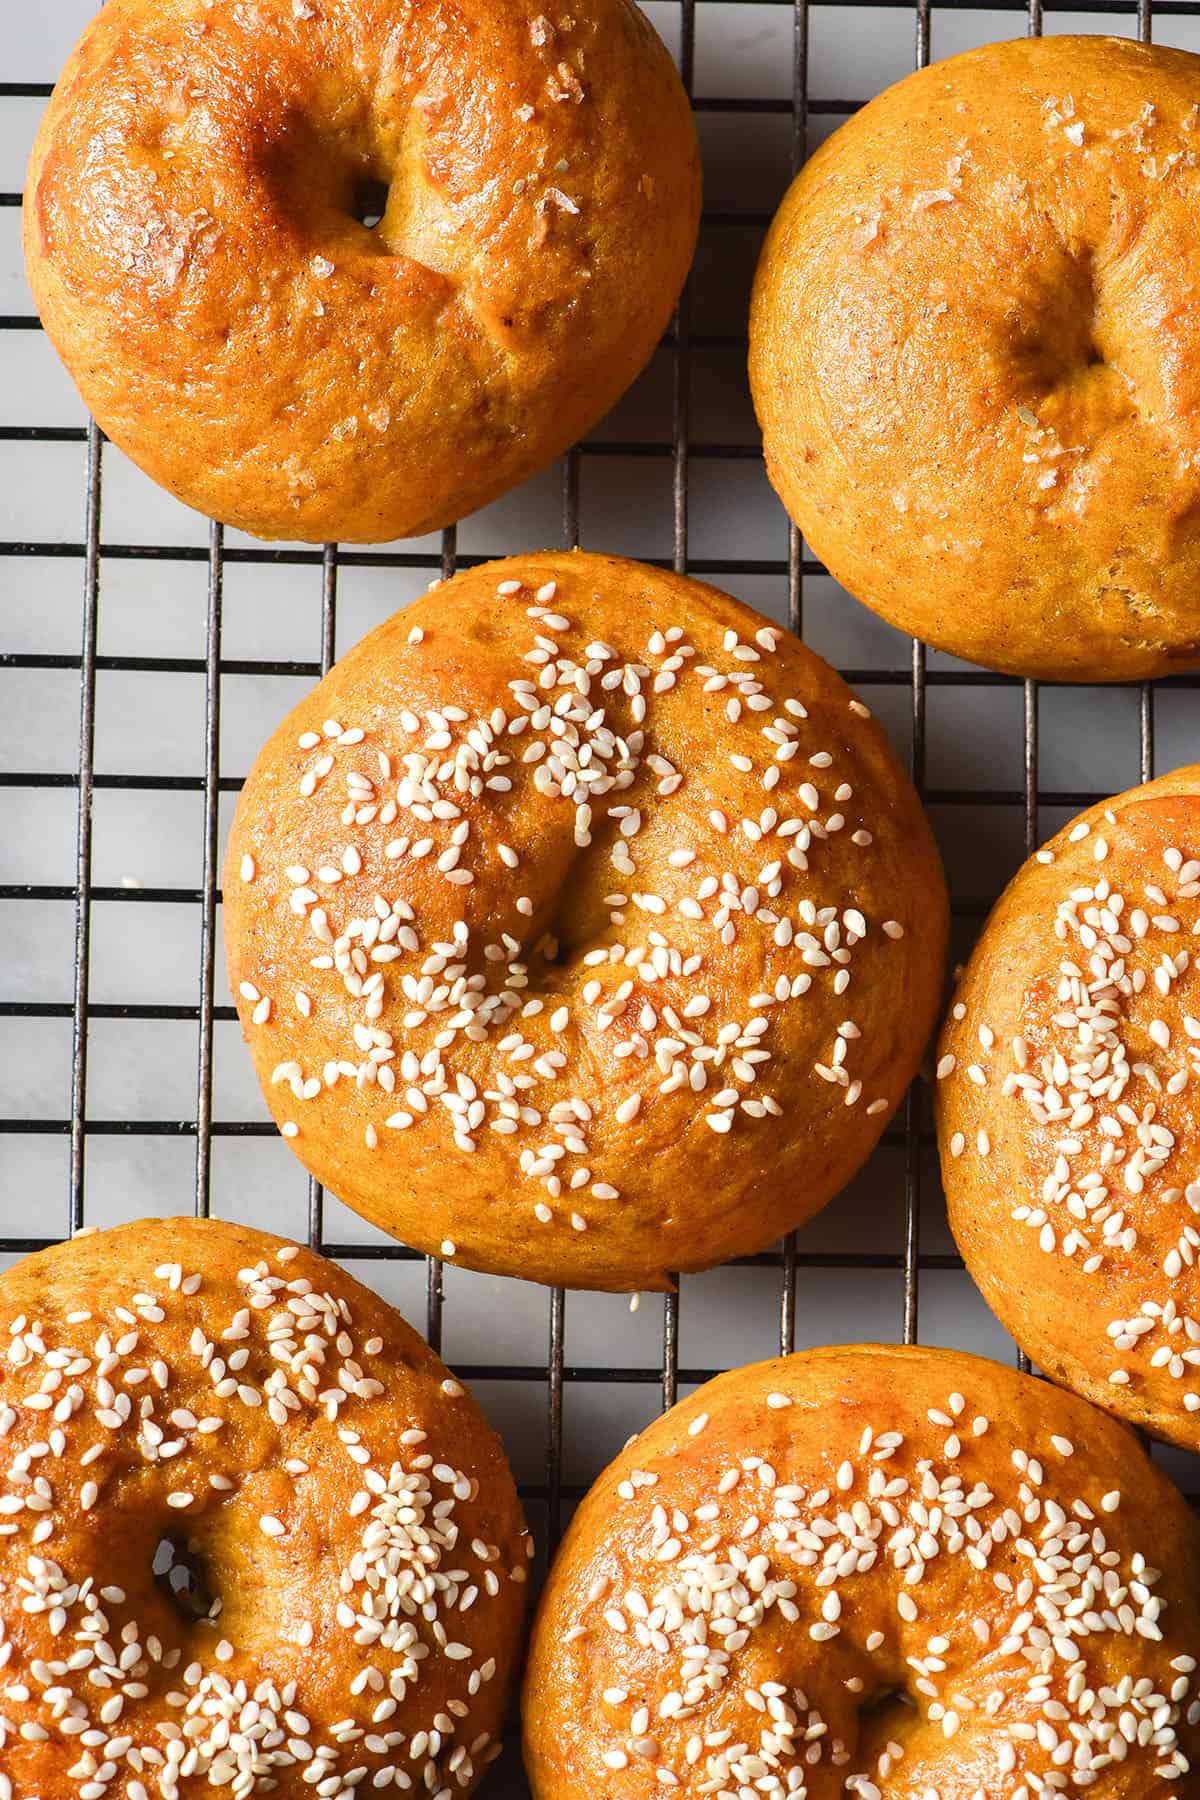
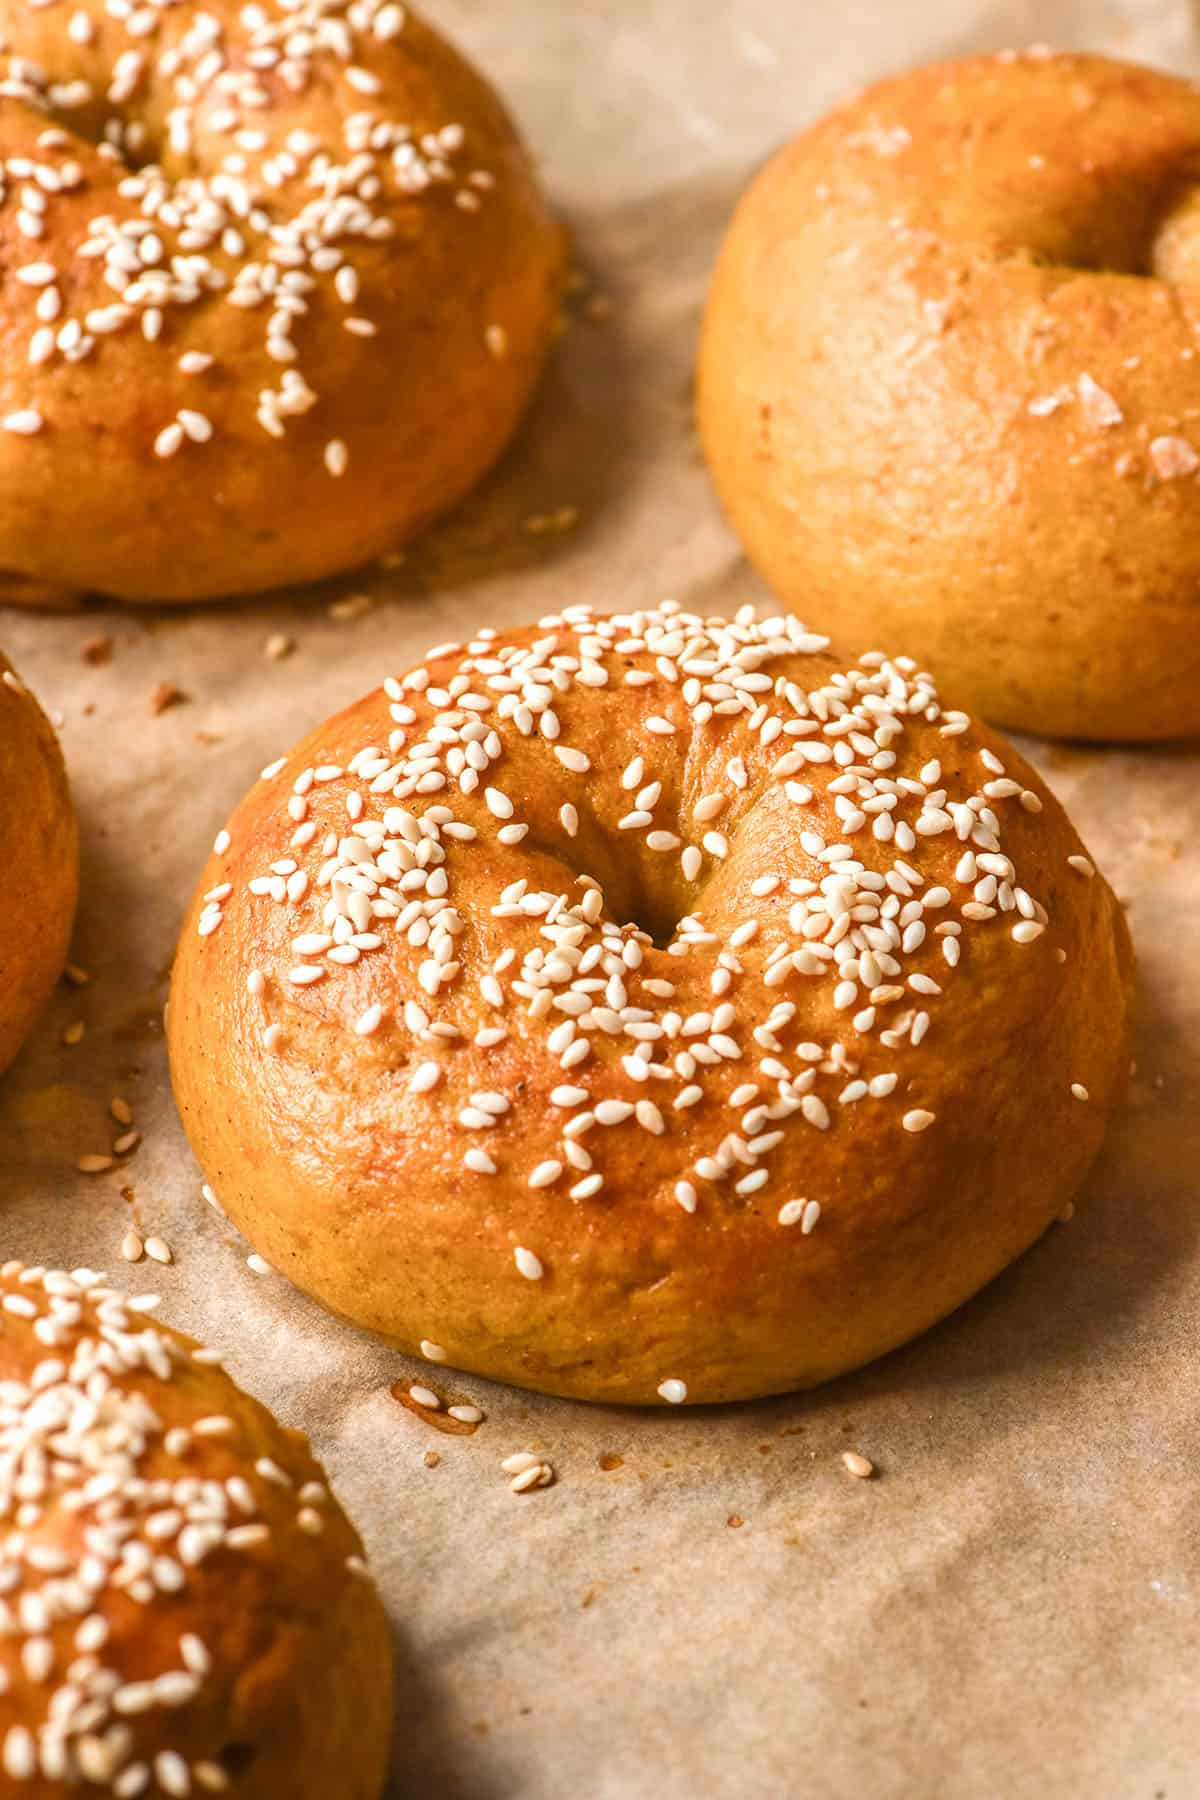
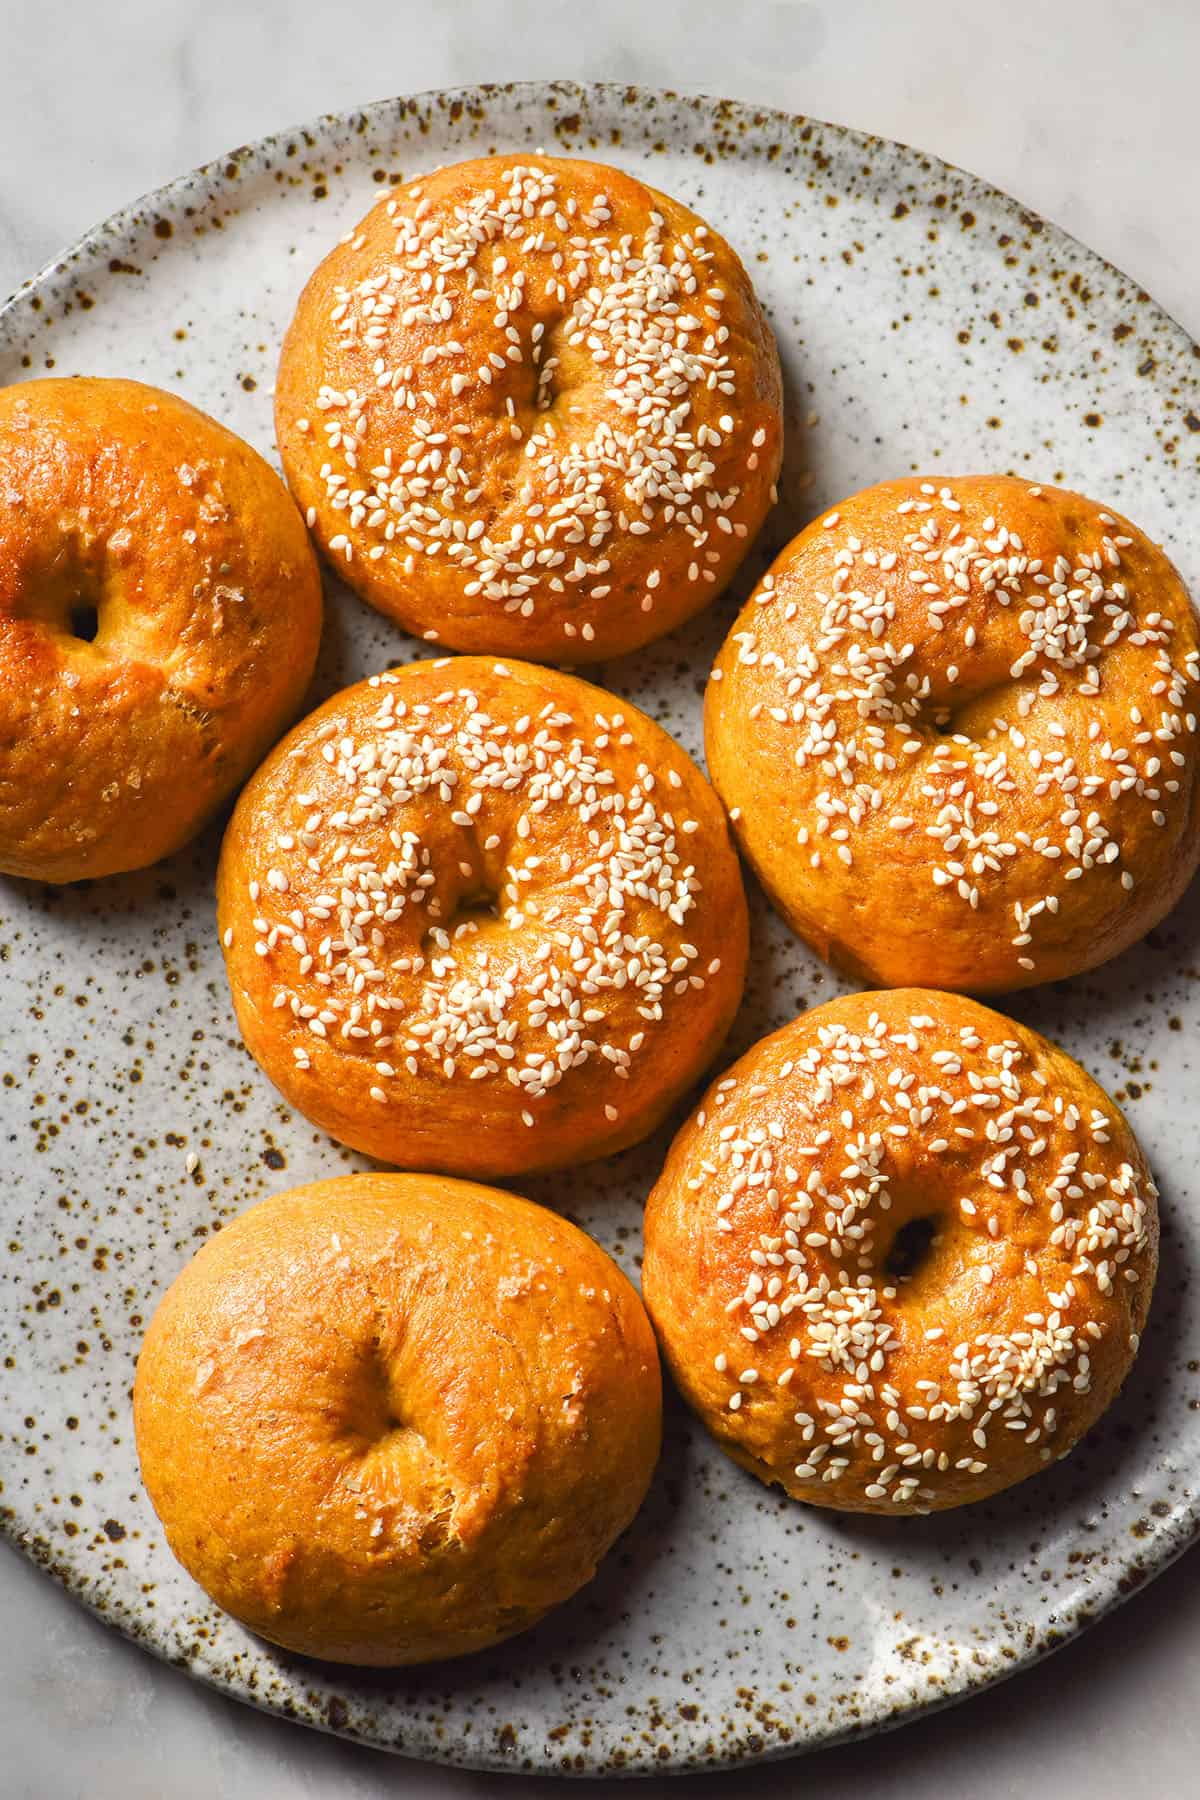
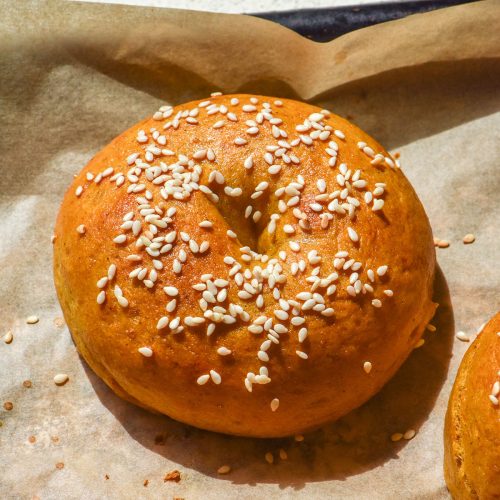
The process of making these bagels is straightforward and uses the classic method of boiling the bagels. This gives them a lovely chewy and browned exterior. Finally, the bagels are brushed in a wash, coated in whatever you fancy and baked.
Ingredient notes for your gluten free pumpkin bagels
These bagels are savoury! They use a small amount of pumpkin spice to add a little something something, but they are savoury on the whole. I want to experiment with adding a bit of dried thyme to amp up the savoury flavours at some point. It is also optional – no need to include it if you don’t want to.
Canned pumpkin puree is not widely available in Australia. Controversially, I’m not a huge fan of it anyway. I tried a can of Libby’s (which cost me an astronomical amount of money) and it tasted very tannic and astringent to me. Of course, I haven’t grown up with it so I’m sure it has a nostalgic element for many people. Either way, I make my own pumpkin puree in the microwave.
Microwave pumpkin puree is speedy (much quicker than roasting pumpkin) and you can use the pumpkin you prefer. I use Jap/Kent pumpkin because it is the lowest FODMAP pumpkin according to Monash. I also think it’s just a lovely sweet variety.
At the moment, I have no substitutions for the flours. This is all I have tested in this recipe. I do have a recipe for buckwheat flour bagels in my first buckwheat e-book. There is also a high protein gluten free bagel recipe here.
Proofing notes for your gluten free bagels
These bagels have a few options for proofing, but these days I tend to make the version that involves the least work. Because the dough has a high quantity of scalded flour (which is like espresso for yeast) the bagels don’t need much proofing.
After the dough is mixed, it is put in the fridge for 30 minutes to firm up. It should be a little bit tacky to handle (we can fix this with tapioca flour as the bagels are rolled out). The dough should feel very fluffy and light if you pick up a piece. Although it will be tacky, you should be able to pick the whole ball of dough up in one hand.
This is really the only proofing that is required. The dough is divided into 8 balls, each floured with tapioca, before being shaped into bagels. You can proof the shaped bagels if you like, but I find the second proof unnecessary and a bit cumbersome. The bagels need to be completely covered as they proof but not touching each other. If yeasted goods dry out as they proof, their skin will harden and they will not be able to proof any further. This is why they need to be covered. I don’t have a plastic cover large enough to cover 8 bagels, so I skip this step. If you want to read a bit more about it, see my original bagel post.
Ideal dough consistency for your gluten free pumpkin bagels
Before proofing: after mixing your bagel dough, it should be moist. Ideally, the dough should almost like a slightly wet cookie dough consistency. If you pick up a piece of dough between your hands, you should just be able to roll it into a ball. The dough should easily retain its shape in the bowl and if you pick up a piece of it.
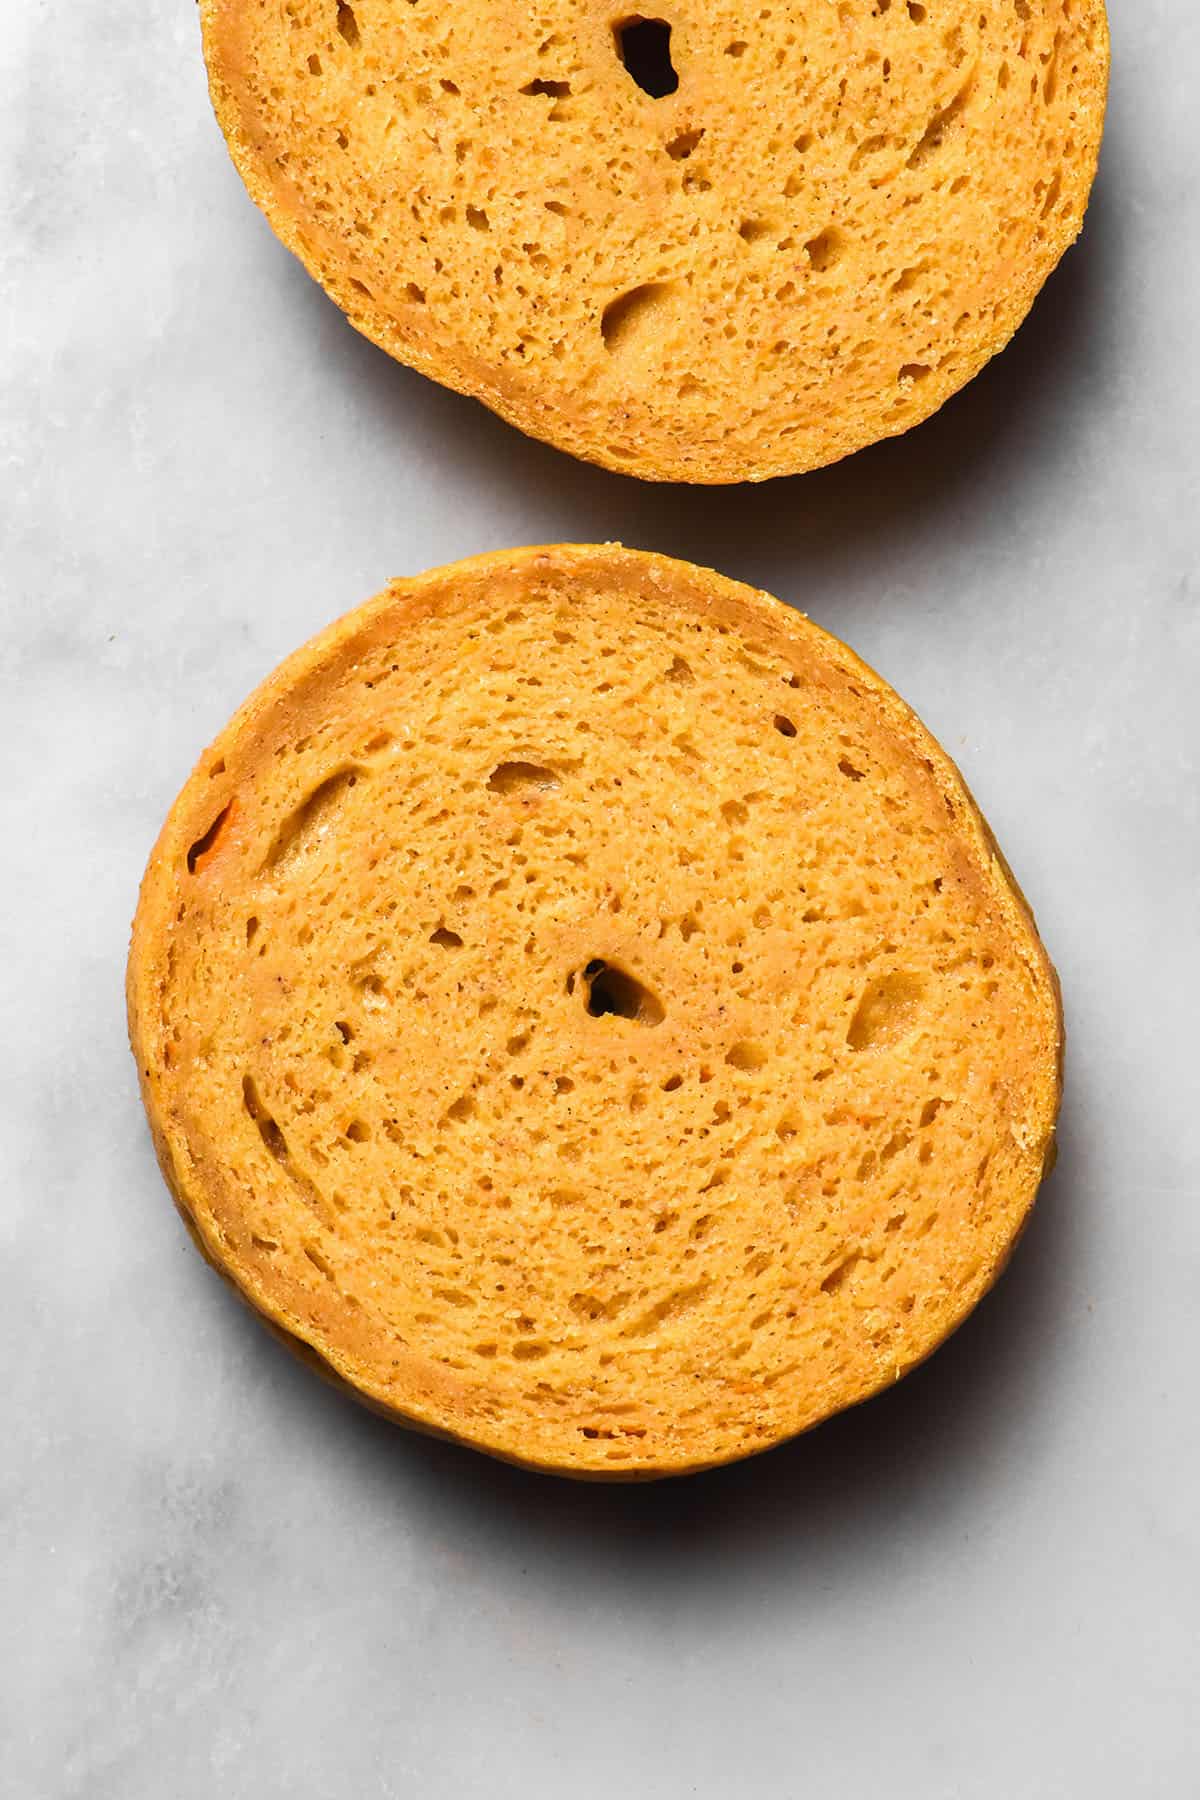
There are two important things to remember when assessing your dough. Firstly, yeast needs moisture to thrive. Without a moist environment, the yeast will not multiply with nearly as much enthusiasm. This means that your proof will be lacklustre. You will have flatter bagels and a tightly knitted crumb when you cut into your bagels.
The second thing to remember is that proofed dough is firmer than dough fresh out of the mixer. The chilling time sets the dough up a little and it’s easier to handle. This is also because the psyllium husk has time to absorb some of the extra liquid.
Keep these things in mind when assessing your dough hydration. You don’t want it to be a runny, un-shapeable dough, but a dry dough will not produce a good bagel either. The goal is to add as much hydration as possible without tipping the dough into wet territory (as opposed to hydrated but firm territory).
Hydration notes
As always, hydration is a moving target. The hydration for my flours and your flours will likely be a little (or a lot) different. Every bag of flour will have a different absorbency, so this will change from brand to brand, country to country, etc.
I recommend adding 250-300g of pumpkin puree to start. The water is an important finishing ingredient to bring everything together without being too pasty. If you find that you need to cut back on a liquid ingredient, cut back on the pumpkin puree rather than the scald or the water.
So, add the pumpkin puree and the water. From here, assess: is the dough the ideal consistency as described above? If so, great; no need to add more pumpkin puree. If it is drier than this, add 50-100g pumpkin puree and re-mix. How much you add will depend on how your dough is looking. The goal is to reach the described consistency. This is more important than following numbers in a recipe, so if you need more water than the recipe specifies, do that.
Tips for shaping your gluten free bagels
There are two ways of shaping these bagels and we’ll go into both of them briefly. Aesthetically I prefer the first option, but the second option is easier for beginners. Choose whatever works best for you.
The first option is to roll the dough into a smooth log approximately 15cm (around 6 inches) long. You will get a sense quite quickly for how long and thick each log needs to be in order to make a nice bagel shape.
Next, moisten the ends of the log with water. With a hand on each end, bend them in towards each other to form a circle. Place one end of the log on top of the other and press gently but firmly to adhere. Use a moistened finger to close all the cracks and meld the dough pieces together completely. Failure to adhere them together might mean the bagel unfurls as you boil it.
Which brings me to the easier option. Shape your bagel into a smooth disk shape. Any cracks in the dough will remain after baking, so I like to spend a bit of time to ensure the dough is smooth before I start.
Next, lightly oil your index finger and press it into the centre of the dough disk, right down to the bottom. Widen the hole you have created by wiggling your finger.
More gluten free fall recipes
- Gluten free vegan cinnamon rolls without yeast
- Low FODMAP gluten free pumpkin pasta
- Low FODMAP pumpkin risotto
- Gluten free lower FODMAP ‘apple’ pie
- Gluten free egg free cornbread (and a vegan version)
Gluten free pumpkin bagels (no xanthan gum)
Ingredients
For the bagels:
- 220 g (1 1/2 cups)* white rice flour
- 80 g (1/2 cup)* sorghum flour
- 150-165 g boiling water
- 120 g (1 cup)* tapioca flour
- 15 g psyllium husk powder
- 7.5 g instant yeast
- 5 -7.5g (1 – 1 1/2 teaspoons) fine salt to your taste
- ½ – 1 teaspoon pumpkin spice optional
- 10 g (2 teaspoons) sugar (I use white sugar but brown is fine too)
- 300-350 g pumpkin puree see notes
- 20 ml (1 tablespoon)* neutral oil
- 60 ml (1/4 cup)* water, see notes
To finish:
- 1 tablespoon molasses or honey for the water bath (for colour, but you can substitute a dark honey or maple syrup)
- 2 teaspoons baking soda for the water bath
- 1 egg or egg wash alternative see notes
- Topping of choice everything bagel seasoning, sesame seeds or sea salt flakes are my favourites
Instructions
To make the dough:
- Line a large baking tray with baking paper.
- Weigh the sorghum and rice flour in a medium sized mixing bowl and stir to combine. Measure 100g of that flour into another small bowl. This small bowl will form our scald which adds elasticity and proofing power to our dough.
- Pour 150-165g of boiling water evenly over the flour in the smaller bowl to make the scald. Have a spoon at the ready and vigorously mix until a gelatinous paste forms. It shouldn’t take more than 5-10 seconds. Set aside to cool a little.
- Add the tapioca flour, psyllium husk powder, yeast, salt, optional pumpkin spice and sugar to the larger, original bowl of flour and whisk to combine.
- Pour the contents of both bowls into your kitchen mixer with the paddle attachment. You can also weigh everything directly in your stand mixer bowl but my glass mixer bowl is too heavy for my scales.
- Process the dough on a low speed for 2 or so minutes until the scald has broken up completely in the dough.
- Add 250g pumpkin puree along with the oil and water. Reserve the remaining 100g pumpkin puree to add if your dough needs it.
- Your ideal dough texture is almost like a moist cookie dough consistency prior to chilling. If you pick up a piece of dough between your hands, you should just be able to roll it into a ball. The dough should easily retain its shape in the bowl and if you pick up a piece of it.
- If your dough is slightly wetter than this, you can fix this up in the rolling stage with extra tapioca flour on the bench. If your dough is drier than this, add the remaining pumpkin puree. You can also add 20ml water at a time to reach this consistency if it is still too dry.
- Process the dough until all the pumpkin puree has been incorporated and the dough is orange and smooth.
- Cover the dough bowl and place into the fridge for 30 minutes to firm up and proof a little.
- While you wait, thoroughly preheat the oven. I like to preheat mine at 220C/430F to ensure it is at the right temperature for good oven spring.
To boil, shape and bake the bagels:
- Fill a medium pot 3/4 of the way with water. Add the molasses and baking soda. Set it over a medium heat and bring to a boil.
- While you wait, take the dough out of the fridge and divide it into six or eight balls. Depending on how hydrated the dough is, you may need to lightly flour the bench (I use tapioca flour) or you may not.
- To form bagels, you can either roll out each piece of dough into an approximately 15cm log and then brings the ends firmly together (use water on the ends to ensure they seal together) or you can form bagel sized disks of dough and use an oiled finger to create the bagel hole. Visually, I prefer the first option, but the second option is a bit easier and more foolproof.
- When the water has boiled, place one or two bagels at a time into the water for 30-45 seconds. Have a slotted spatula on hand to very gently encourage the bagel off the bottom if necessary (and to remove the bagels from the water). Flip each bagel over at about halfway to ensure both sides are boiled.
- As you remove a bagel from the boiling water, allow it to drain before gently sliding it into place on your baking tray.
- Once you have boiled all the bagels, brush each bagel with egg wash or an alternative then sprinkle with your chosen topping (eg: sesame seeds or everything bagel seasoning). Place into the oven, adjust the heat to 200C/400F, then bake for 20-30 minutes or until golden, puffy and firm.
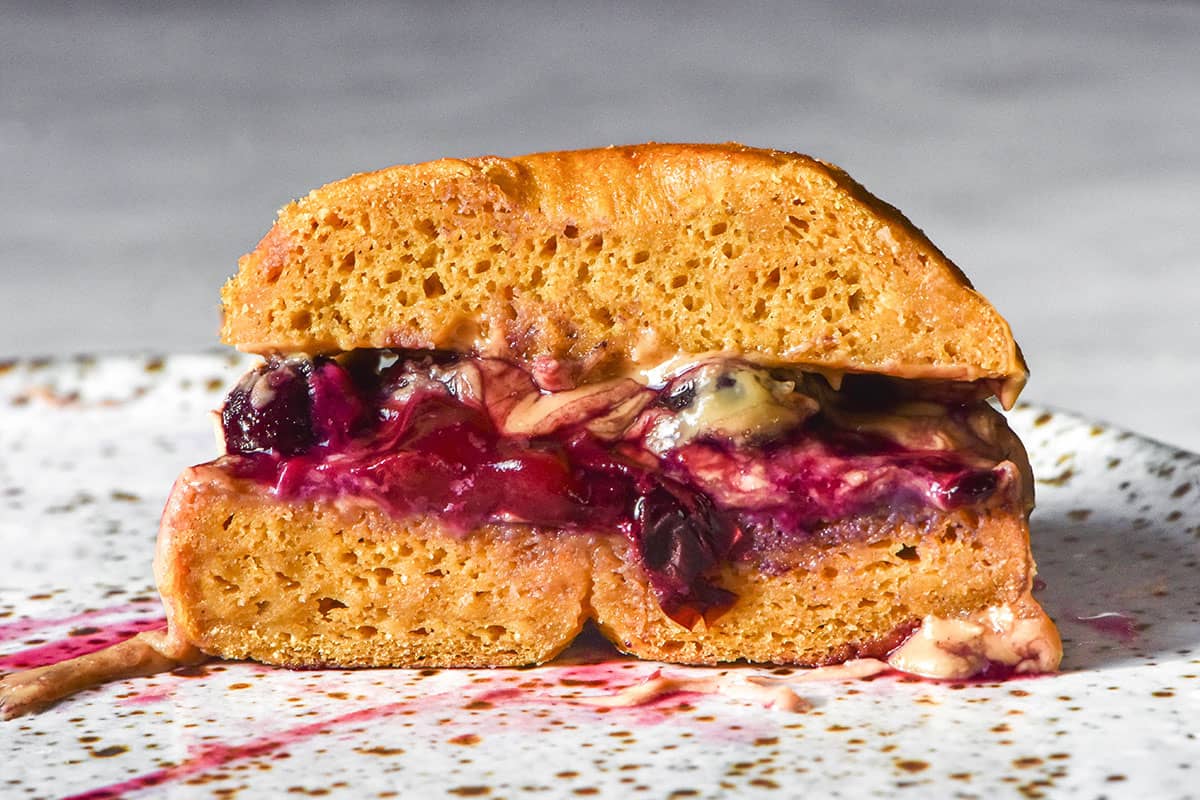
- Wait until the crumb sets and the bagel cools to eat one or else your bagel will be gummy. Leftovers keep really well for a number of days and can be frozen (I like to slice them prior to freezing). I recommend reheating them before eating (microwave, toaster or a steamy oven) as they harden relatively quickly but will soften again once warmed through.
Notes
- There are extensive notes on proofing, hydration and substitutions (or lack thereof) in the body of the post. Please read them before you bake for the best results.
- I have only tried the flours listed in the recipe so I can’t speak to how other flours would work. You are welcome to try but you will be experimenting 🙂
- Every bag of flour will have a different level of absorbency which is why I recommend adding the pumpkin puree in increments. If you don’t add enough liquid to your bagel dough it will be dry and fail to rise, but if you add too much your bagels will be gummy inside.
- For a vegan egg wash, see my gluten free vegan bagels recipe.
20/10 Incredible Bagel Recipe. I have never in my 7 years of eating Gluten free, found a bagel recipe that was worth eating, just tasted like circular bread (lol) or tasted anything like a REAL bagel. ( Criteria for “Real Bagel” being I don’t feel like I’m missing out on anything and trying to convince myself it tastes like a bagel the whole time!) Kudos for this Incredible recipe. My Bagels just came out and are setting- of course I had to sacrifice one for testing, so I’m not quite sure on the SET crumb yet, but these are incredible in every way.
Instructions are incredibly clear and well written and super helpful so be sure to read all of them.
A Few Things that helped me!
1. Canned Pumpkin
I took the risk and used Canned Pumpkin because I read that if you cook it on Medium low heat for 10 minutes, it pulls the flavor out more, and this way you save both Time/Money on a whole pumpkin! The flavor in my bagels was incredible and I used almost every bit of one can, save maybe a spoonful left. For a lazy Girl on a budget- this saved me around 6$ and I didn’t have to fuss with a real pumpkin!
2. Water
I used WAY more boiling water than called for, even with the additional water noted – USE YOUR BEST JUDGEMENT- pay attention to the consistency and add it slowly. Her description of the dough is perfect and helpful, so READ HER DESCRIBED DOUGH CONSISTENCY. It should be like a moist cookie dough,but not really sticky, and mine was almost fluffy and a satisfying squishy texture when it rolled out perfectly, with no cracking yet no stickiness.
Thanks again For this amazing Recipe! As someone who is only 25 and has struggled majorly with Food allergies and inflammation, finding your website found like finding gold. I’m currently doing the FODMAP diet again, after years, to reduce inflammation and intend on trying to keep on the lower inflammation side of eating long term- and knowing that I can eat something that doesn’t make me feel subpar to what everyone else is eating, as someone who loves food and cooking, is amazing! My favorite part is that she didn’t make us buy 100 flours to make a special mix, she just told us the ones she used for this so I didn’t need to use any more flour than necessary.