My gluten free buckwheat bread recipe is one of the most popular recipes on my website. It does require a Pullman pan, though, and not everybody has one. In order to make a loaf that those without a Pullman pan can enjoy, I decided to develop this gluten free buckwheat boule.
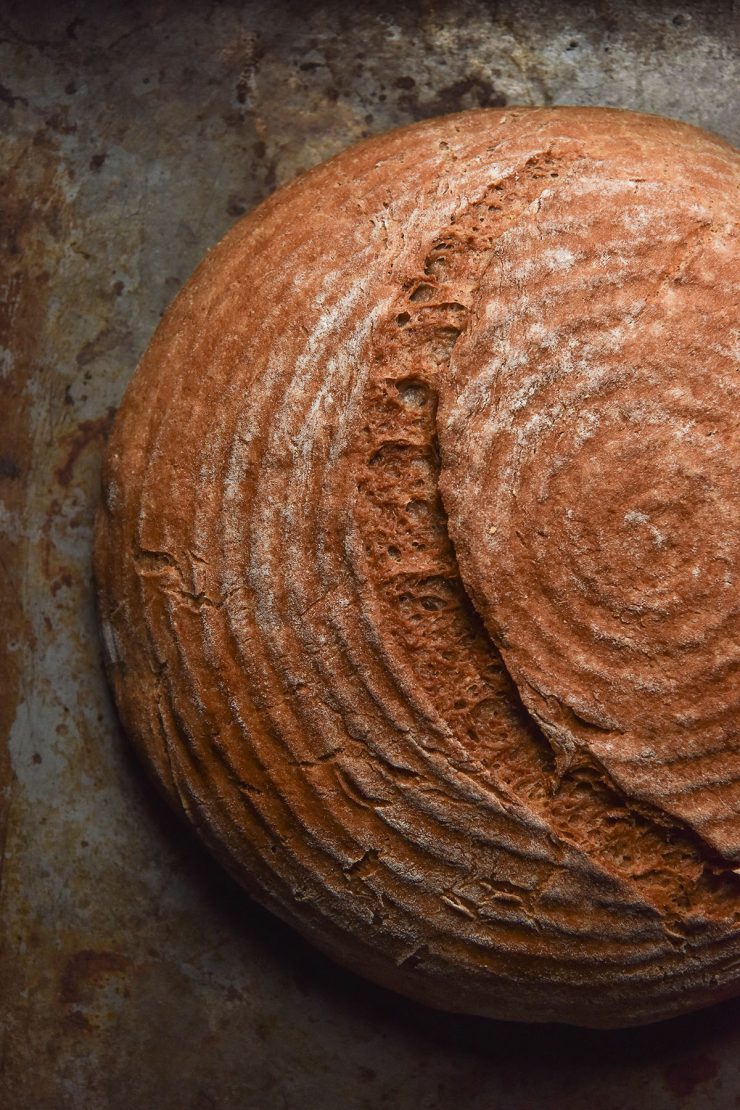
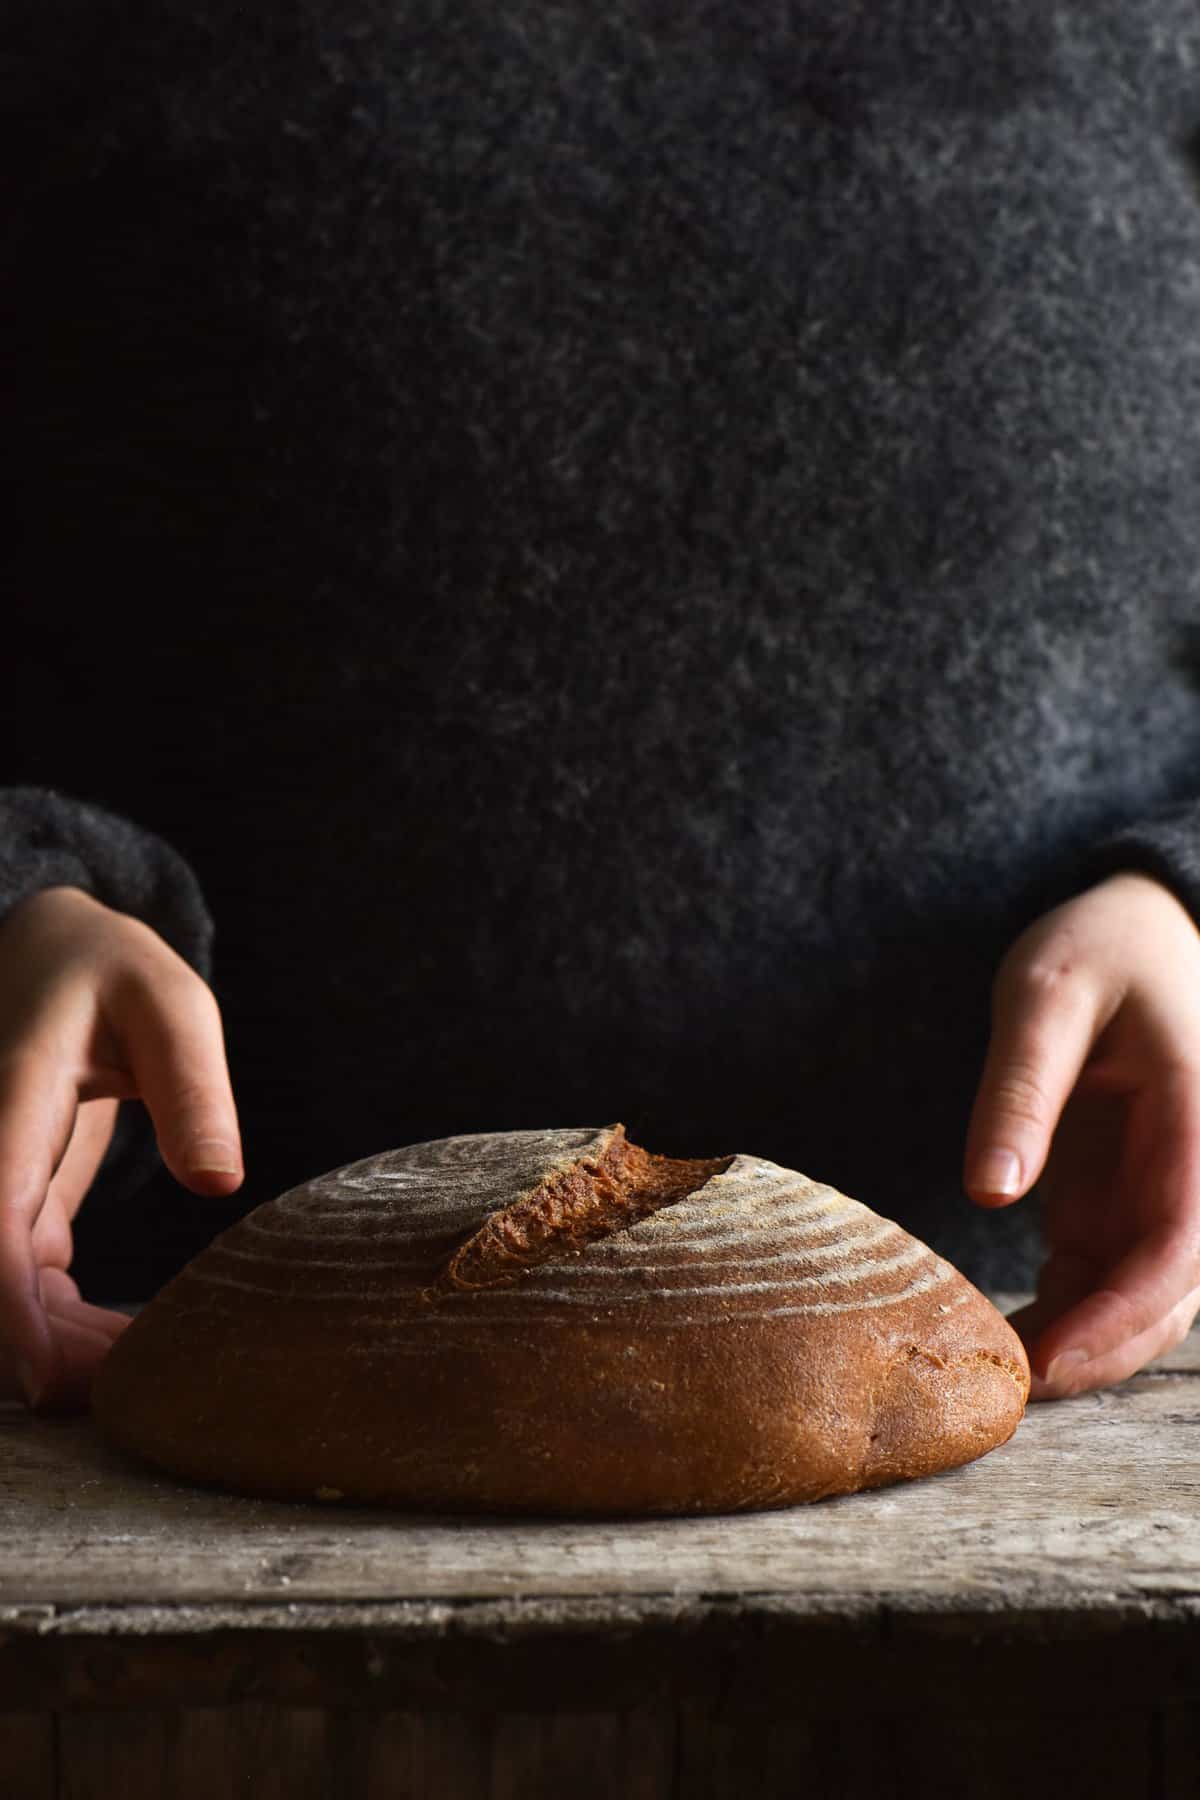
Gluten free buckwheat boule
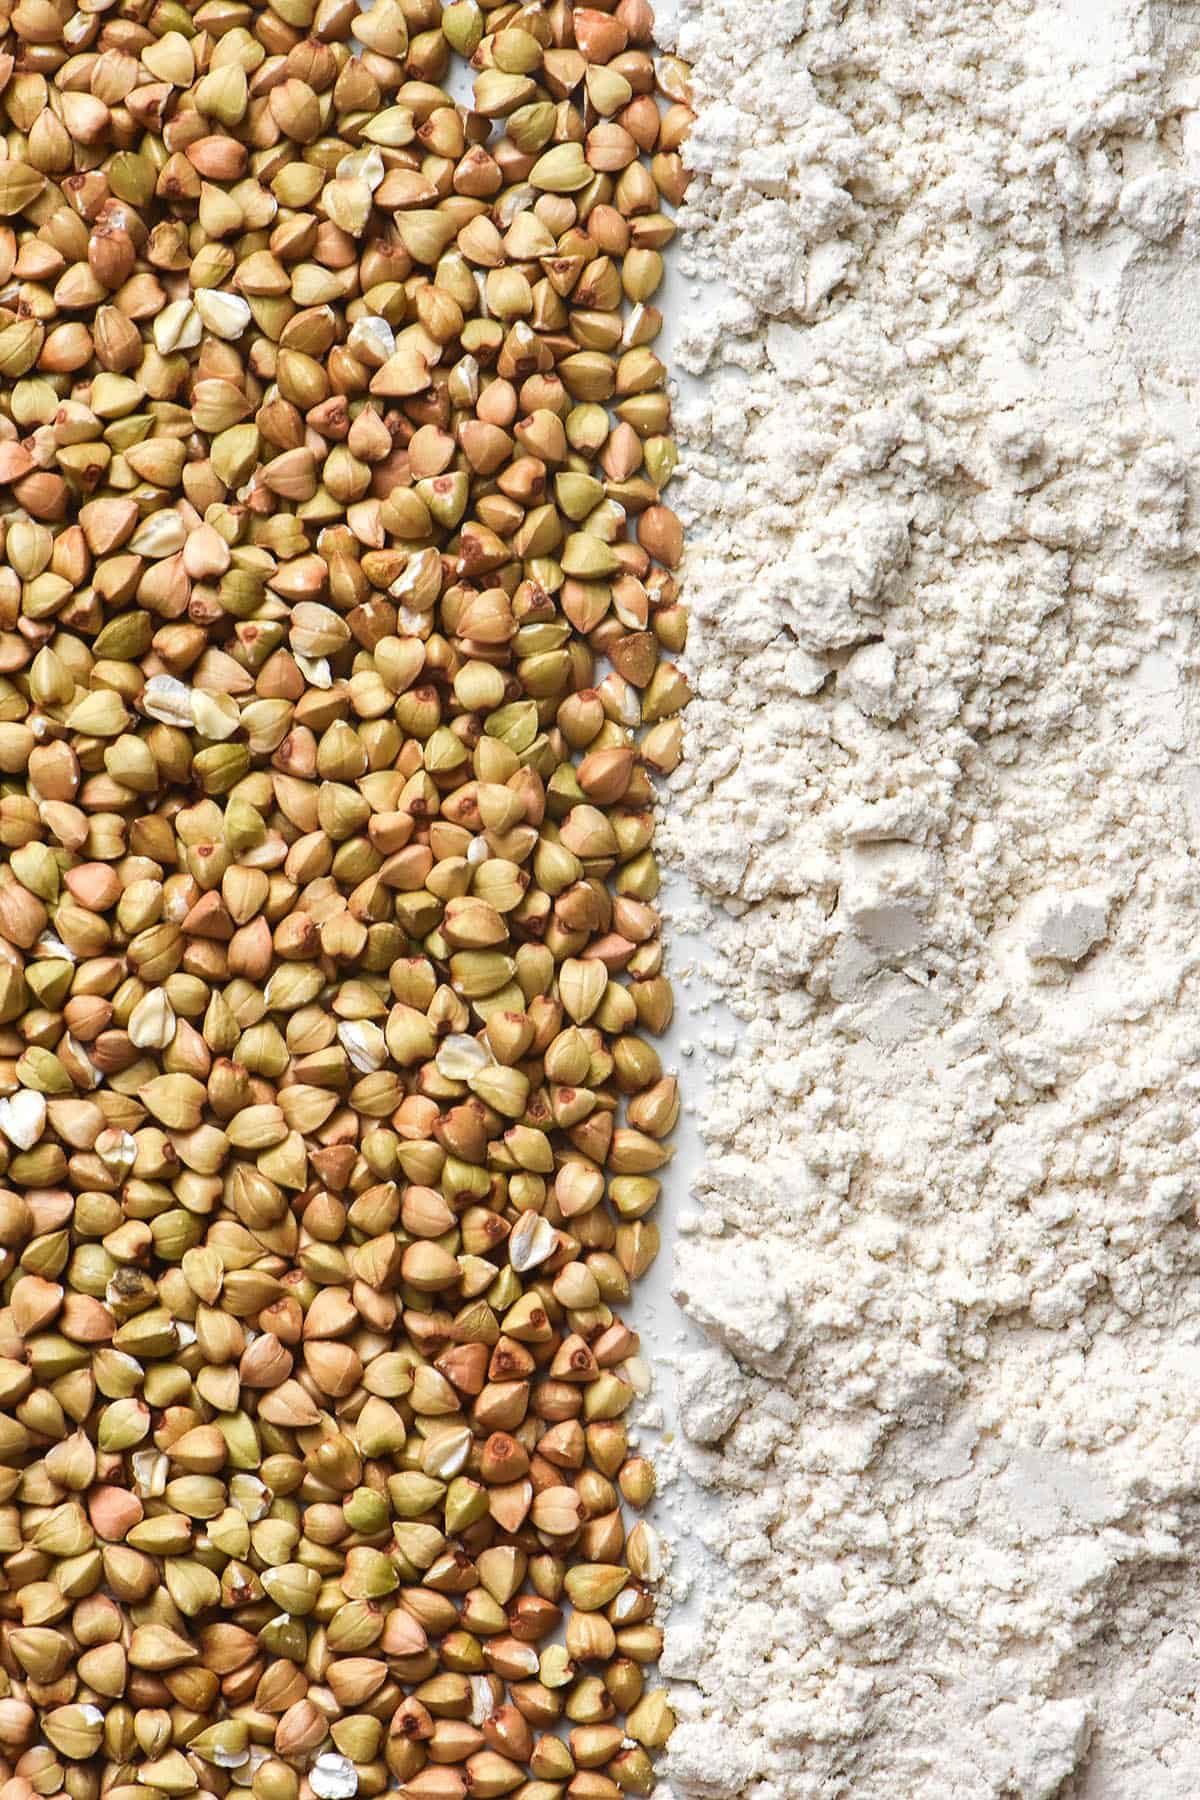
This buckwheat boule is gluten free, vegan, xanthan gum free and nut free. It is made with majority buckwheat flour and a small amount of tapioca flour.
The bread is held together with the help of psyllium husk powder. Plenty of water, a small amount of oil and a small amount of maple syrup bind the loaf and aid in browning, flavour and crust texture. Salt adds flavour and browning, too.
Instant yeast is responsible for the rising of the loaf and creates a light crumb. I have found yeast mutes some of the buckwheat flavour, giving the loaf a more subtle taste.
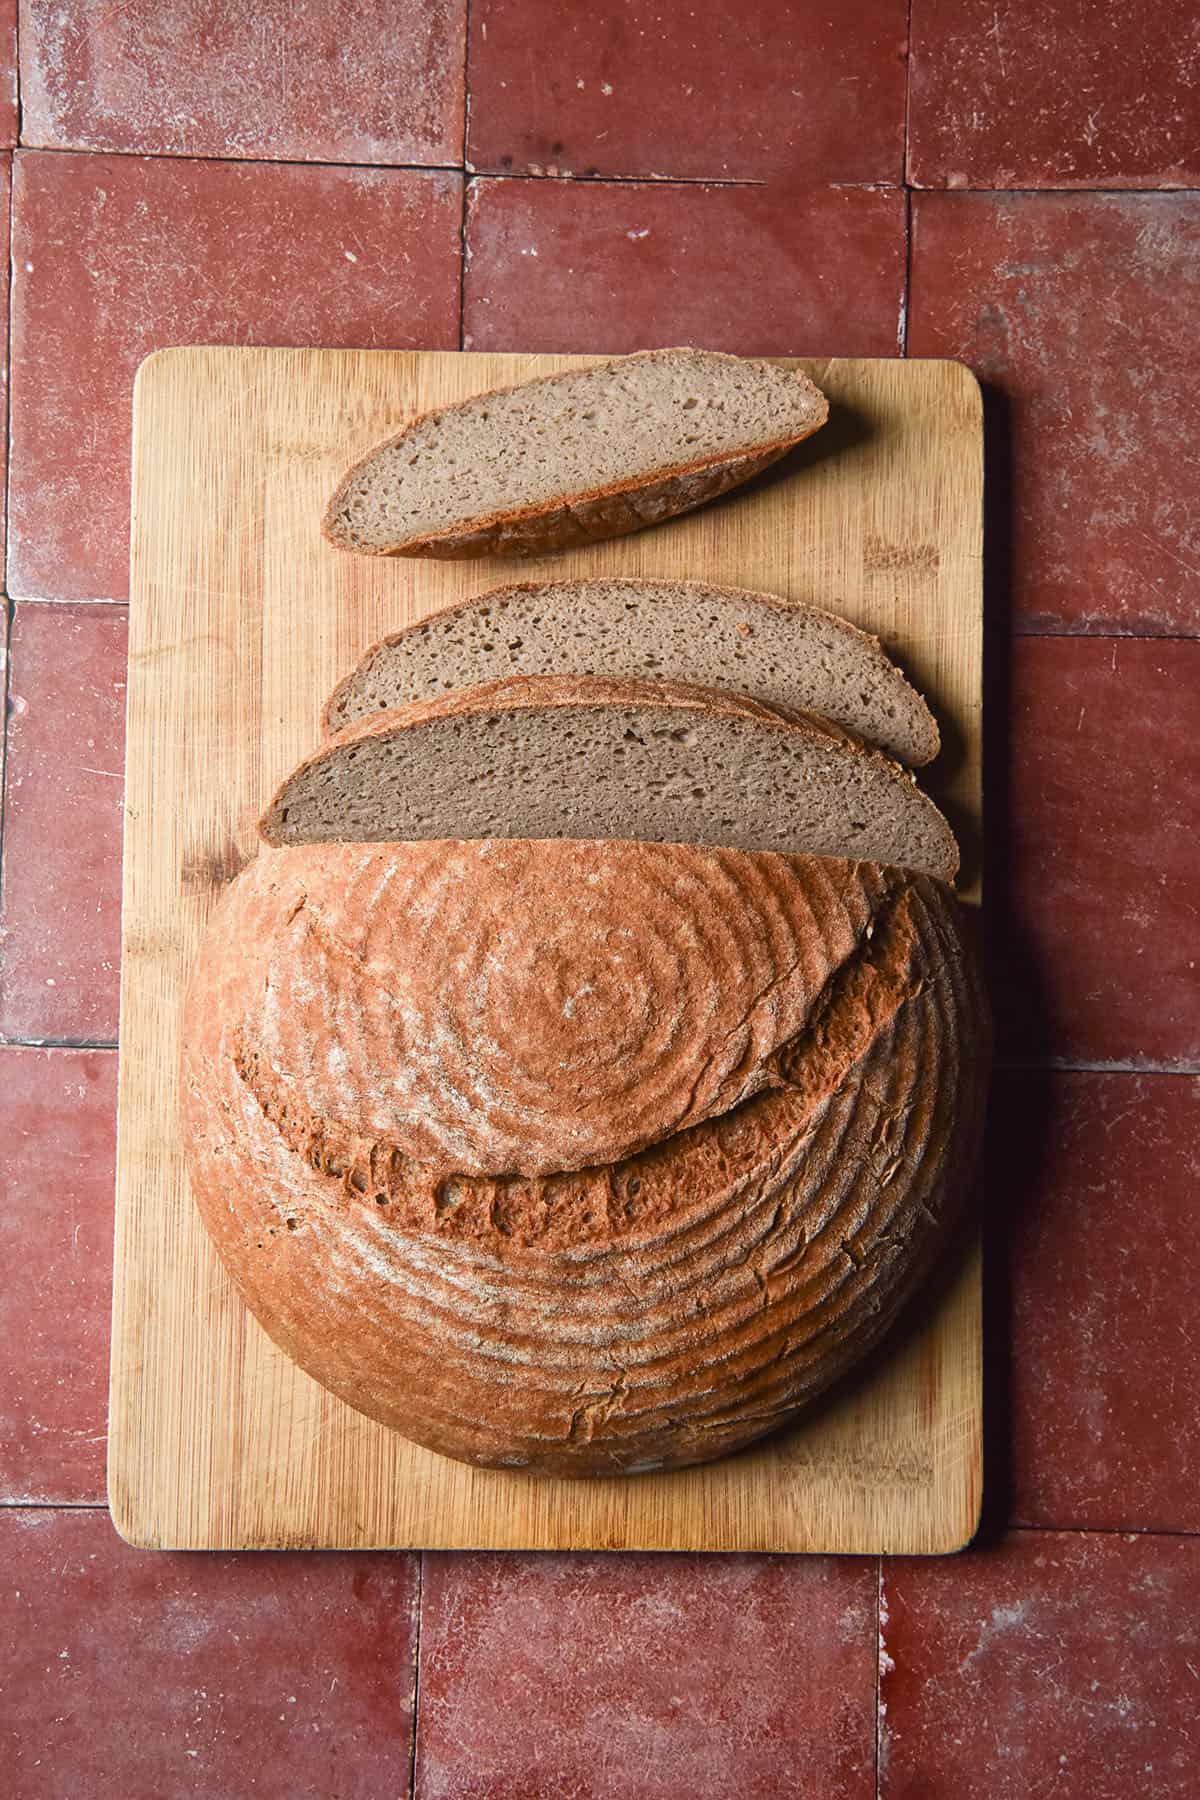
And that’s it! These ingredients are all you need to make a delicious gluten free buckwheat boule. This makes lovely sandwiches, toast; whatever you need some gluten free bread for.
How is the buckwheat boule different to my buckwheat loaf?
This boule is only a little bit different from my buckwheat bread. It uses majority buckwheat flour (500g) with a small amount of tapioca flour (100g). This provides a delicious buckwheat flavour but also some chew and elasticity in the crumb.
The amount of flour is slightly higher in this recipe vs the loaf recipe. This is because I wanted to ensure the boule yields a nice big slice of bread. Sometimes gluten free bread boules can end up quite small and you get less bread per slice. So, a little more flour is the first difference.
The second difference is that this bread uses significantly less water. Because you need to be able to shape a boule, the dough needs to be less hydrated. An overly wet dough will be very hard to shape and will lose its form when you turn the bread out of the banneton. Gluten free dough doesn’t have inherent structure like regular bread, so wet dough will relax outwards.
I have still pushed it to the maximum hydration the flours will handle, though. Hydrated dough = a good proof and a good rise. If you are ever having trouble with a dense, tightly knitted crumb, try adding more water. Yeast only thrives in a moist environment.
Ingredient notes and substitution options
There are very few substitutions available for this recipe. Let’s get the biggest one out of the way first.
I have not tried it, but I don’t think I would recommend using dark buckwheat flour for this recipe. In testing my original buckwheat bread with dark buckwheat flour, I found it lacked the same elasticity. This made for a crumb that broke much more easily.
Because a boule relies on the elasticity of the buckwheat and tapioca flours to help hold it together, I worry a boule with dark buckwheat flour would spread more. This makes for a flatter loaf (more of a focaccia than a loaf of bread). I also found the dark buckwheat bread was harder to cut and broke as I sliced it. Still delicious, but a different result.
I haven’t tested a tapioca flour substitute in this recipe. Arrowroot or cassava flours would likely work, but I can’t say how the hydration would change (if at all).
There is no substitute for psyllium husk powder. I buy the whole flakes and grind them myself in a spice grinder. I find that the store bought ones can turn bread purple and the powder is actually too fine. It clumps up easily which I find annoying and not user friendly. The grinder I use is an inexpensive Breville one.
You can use any liquid sweetener or neutral oil of choice.
Do I need a banneton?
Bannetons make a really lovely pattern on the top of your loaf, but you don’t strictly need one. You do, however, need to use a tea towel lined bowl instead. Gluten free bread left to rise on a flat surface will just proof outwards. A bowl or banneton will hold everything in and allow the loaf to proof upwards a little. Make sure the tea towel is clean, ideally linen and doesn’t have any prints on it (the ink might transfer onto your bread).
Do I need a dutch oven?
I haven’t tested this recipe without a dutch oven. My dutch oven is cracked, has had the handle blown off and is generally worse for wear but it still does the job. There are plenty of more inexpensive dutch ovens out there that I highly recommend one. They can just used for everything, not just bread baking. Mine is 27cm diameter (10 inch).
But to answer the question: can I make this without a dutch oven? You’re welcome to try, but I can’t guarantee the results. A well heated dutch oven traps heat and helps make your home oven hotter and more efficient. Placing bread in a super hot oven for the first 20 minutes encourages oven spring and great browning.
You’re welcome to try using other methods online. I would recommend researching them on other websites as I have no experience with a cloche, a makeshift foil lid, etc. There’s only so many loaves I can make.
Things to note
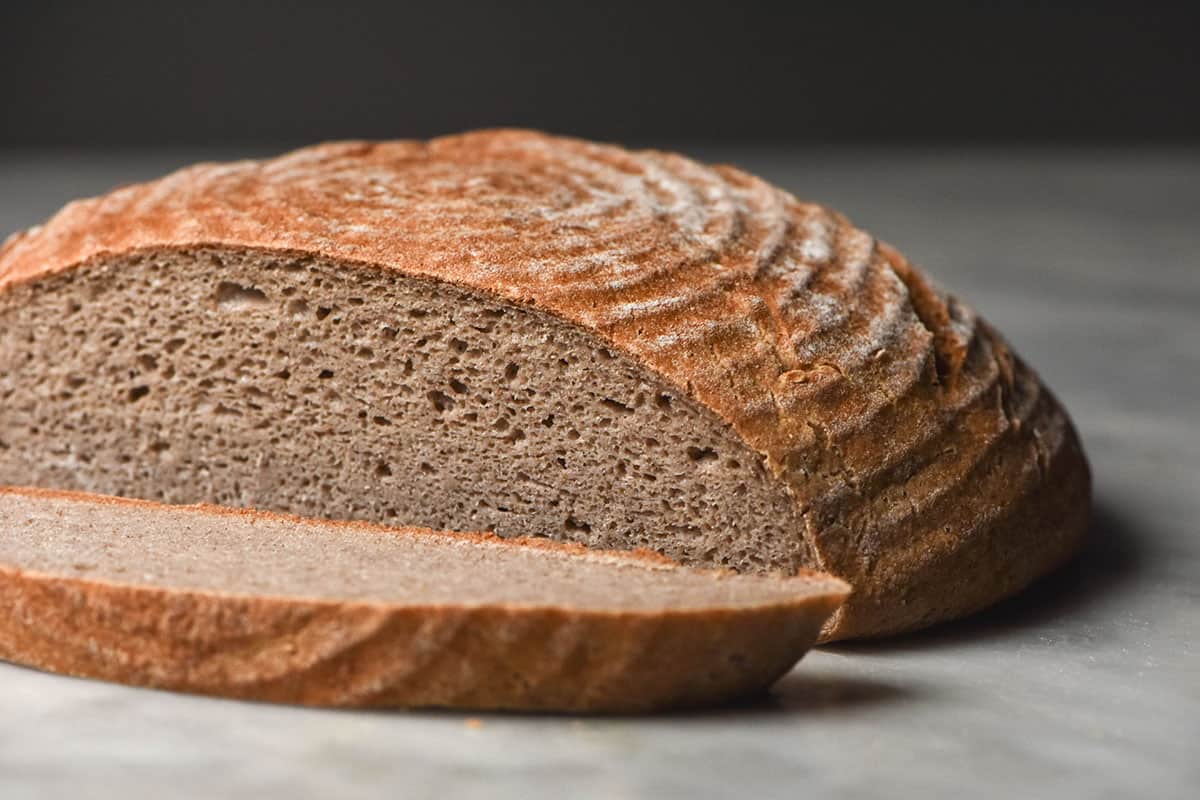
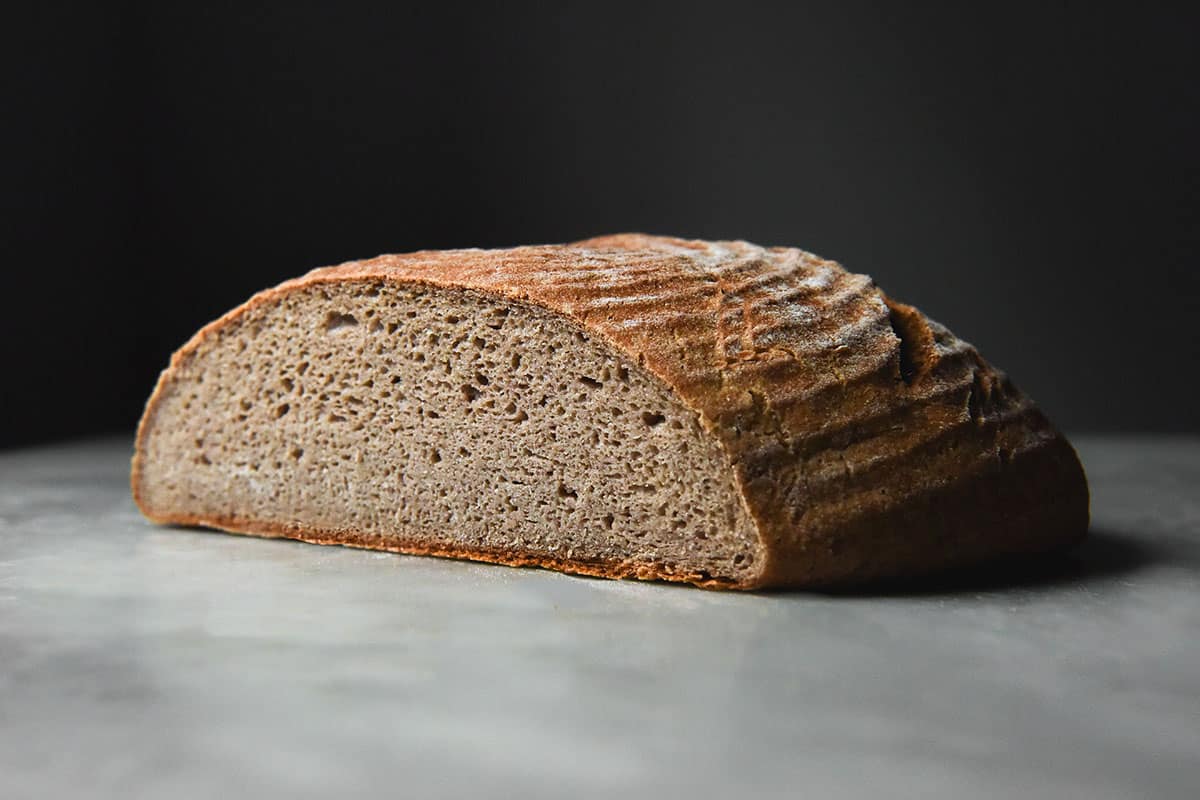
The most important thing to note about a gluten free boule is that they tend to have a finer, more tightly knitted crumb. High hydration bread recipes create open, airy crumbs in bread making. This is because the yeast thrives in moist conditions.
Because this loaf is gluten free, it has none of the inherent strength that regular bread has because of gluten. It is easier to make a regular bread boule with an open crumb because you have worked the gluten to provide the dough with strength to hold together. There is no option to do this with gluten free bread.
When baking gluten free, you are more likely to get an open crumb when you use a steel bread pan. Gluten free bread has no elasticity so it cannot hold itself together in the absence of support. A steel bread pan provides this support and allows the bread to proof upwards.
This is not to say that it’s completely impossible to make a gluten free boule with an open crumb. It is more difficult, particularly if you are a beginner and not confident with high hydration dough. My dough felt quite soft when I shaped the bread and still produced a relatively tight crumb. You’d need to push the hydration (and be comfortable working with high hydration dough) to achieve a more open crumb.
A caveat
People tend to struggle most with the water when baking my gluten free bread recipes, so this is worth mentioning. Sometimes, when you have a super tightly knitted crumb, you have not added enough water for your flours.
If the dough doesn’t feel soft and jiggly (and a bit too soft to handle) after proofing, you might not have added enough water. As we have discussed (below and in all my other bread recipes) hydration is a moving target. Every bag of buckwheat flour will have a different absorbency level and I can’t test every bag. It will also depend a little on the seasons and climate where you live.
Make sure you follow the description instructions more than the exact gram instructions for water in this recipe. You should always go by the feel of your dough rather than a number that worked for me. This makes gluten free baking trickier, but also satisfying when you nail it.
Tips for this gluten free buckwheat boule
My primary tip is to consider a few things when you are deciding on the hydration of this loaf. Firstly, consider your flours (if you have worked with the brand you are using before). Every single bag of flour will have a different absorbency. This will vary from brand to brand, country to country. If you have used the brand before, try to remember if it baked up drier or wetter than the recipe specified and add water accordingly.
Secondly, consider your skill level. Handling a wetter, more hydrated dough takes a little bit of experience and/or confidence. If you are a beginner, consider using a little less water to start. It will make a bread with a more dense crumb, but it will be easier to handle.
Next, consider the season and temperature in your kitchen. Yeast needs longer to proof in winter and less time in summer or humid climates. It thrives in moist, humid climates. If you’re baking in a tropical climate, a high hydration bread might proof too much. If you are in a dry, cold climate, extra hydration should help boost your proofing a little bit.
Troubleshooting your gluten free buckwheat boule
Your dough should be too wet to handle when you first mix it. After a few minutes, you should already see it thicken to a paste like consistency. After proofing for 1 hour, you should be able to just handle the dough. It will be sticky and will require some rice flour to stop it from adhering to your hands and the bench. Still, it should hold form in a ball of dough on your (floured) bench top.
If your dough is dry, cracking or has leftover flour in the bowl, it is not hydrated enough. Add more water until you reach the described consistency. A dry dough will not rise as yeast needs moisture to grow. More than that, it will be dry and unpleasant to eat.
When making a boule, of course, it is a balance in ensuring your dough is moist enough but not so moist that you are unable to shape it. This is a balance that changes with every bag of flour. If your dough is too wet to be handled: do you have a steel bread pan? Haha kidding (sort of). You can attempt to bring it back into a shapeable consistency by adding equal parts tapioca flour and buckwheat flour. Make sure you knead it in incredibly thoroughly or you will have dry patches of flour throughout your bread.
Proofing takes longer in winter and cold climates than it does in warm or humid climates. If your bread isn’t proofing, it could be that you haven’t added enough water. However, it could also be that you just need to leave it to proof for longer.
I have a guide on making the best possible gluten free bread which you can find here.

More gluten free bread recipes
- Gluten free sorghum bread
- Grain free vegan bread
- Gluten free vegan sourdough bread
- Gluten free vegan focaccia
- Gluten free seeded bread

Gluten free buckwheat boule
Equipment
- 1 X large Dutch oven (make sure it is suitable for baking at high temperatures and that the lid handle is heatproof) mine is 27cm/10 inch diameter
- 1 X banneton (round or oval) (mine is 21cm/8 inch diameter)
Ingredients
- 500 g light buckwheat flour
- 100 g tapioca flour
- 25 g psyllium husk powder (see notes)
- 12 g salt
- 7.5 g instant yeast
- 20 ml (1 tablespoon)* oil
- 20 ml (1 tablespoon)* maple syrup
- 600-700 g water I used 650g, see notes
- Rice flour for shaping the dough and for the banneton
Instructions
- Lightly flour your banneton with rice flour and get your dutch oven ready. Make sure the dutch oven you use has a heat safe handle (I found this out the hard way).
- Whisk the dry ingredients together in a large non-reactive (glass or plastic) bowl. Whisk in the oil, maple syrup and water. Initially, the dough will look alarmingly wet. Within a few minutes, the dough should start to thicken to the consistency of a paste. Make sure you have removed all the lumps of flour and the mixture is smooth.
- Cover the bowl using an airtight method (I invert a snug plastic bag over the top of the bowl) and set aside to proof for 1 hour.
- Once the dough has proofed, it should feel airy and more solid. The ideal consistency is just slightly too sticky to pick up, but still a ball of dough that you can easily hold in one (floured) hand.
- If your dough is drier than this, add more water to reach this consistency. If your dough is wetter than this, add scant amounts of buckwheat flour and tapioca flour and knead them through thoroughly. Dough that is too wet won’t hold together in a boule shape and will spread as it proofs, so it’s important that the dough is not too hydrated either.
- Turn the dough out onto a clean bench floured with rice flour. Sprinkle every surface of the dough with a small amount of rice flour so you can touch it without it sticking.
- Flatten the dough slightly into a circle, then bring one edge of the dough up at a time into the centre like you are wrapping a present. Pinch and twist the edges together in the centre of the dough to secure them together. I like to ‘knit’ them by pulling a small piece across to one side and another piece across from the other side. I also like to double check the bottom of the dough (which will be the top of the bread) is smooth before I commit. A cracked bottom of the dough (aka the top of the bread) will become a cracked looking loaf of bread at the end. It will also encourage the loaf to crack in unpredictable ways, whereas scoring your bread will control where the steam escapes and minimise cracking elsewhere on the loaf.
- Gently pick up the dough and place it, seam side facing up, into your 21cm/8 inch banneton. See notes in body of the post if you don't have a banneton.
- Cover your banneton without touching it (again, I use an inverted plastic bag that covers the bottom and sides of the banneton) and proof for 1 hour or until the loaf is puffy and springs back when you touch it. Note that proofing takes longer in winter than it does in summer.
- Preheat your oven to 220-230C/428-446F with your dutch oven inside about 30-40 minutes before you bake. Make sure the dutch oven is safe for high temperature baking.
- When your loaf is proofed, carefully invert it onto a sturdy piece of baking paper. So many brands of baking paper are so thin these days – use two pieces if you are in doubt (or use reusable stuff which is stronger).
- Use a lame or a sharp knife to score the bread however you like. I generally keep it simple but I’m not very skilled at doing lovely patterns, so go for it if you are.
- Working quickly but very carefully, remove the dutch oven from the oven. Take the lid off and gently place the loaf inside. I like to quickly slip an ice cube in (to create steam, which will help with oven spring) before placing the lid back on. Return the dutch oven to the oven and bake for 20 minutes.
- After 20 minutes, carefully remove the lid from the dutch oven. The loaf should have grown a little in size and should have started browning on top. Your scoring should be more evident as the loaf has expanded.
- Turn the oven down to 200C/400F and bake for an additional 20-30 minutes until the loaf is a nice light golden brown. You should be able to knock on the crust – it will be firm.
- Remove the bread from the dutch oven and transfer to a cooling rack. Ideally, leave the bread until it is completely cool to slice.
- Store the bread in an airtight container. I like to slice it fresh and then store the slices in a container in the fridge to eat as toast after the first couple of days.
- The bread can also be sliced and frozen, then toasted straight from frozen.
Notes
- Gluten free boules are a balancing act. The dough needs to be wet enough to ensure it proofs (yeast only grows in moist environments) but you still need to be able to handle the dough to shape it.
- A dough that is too dry will not proof, but a dough that is too wet will be unable to hold it’s shape as it proofs and you will end up with a flat bread blob.
- Use extreme judgement when determining how much water to add to your dough. Every bag of flour will have a different absorbency and I can’t test them all. Read through the body of the post and the notes to understand how the dough should feel and what to expect. Add water according to the description of the dough as opposed to just the number in the recipe card. Hydration can vary wildly and you need to use some initiative in determining if your dough is striking a good balance.
- Substitution notes are in the body of the post, as are notes on using something other than a banneton or a Dutch oven.
No Comments