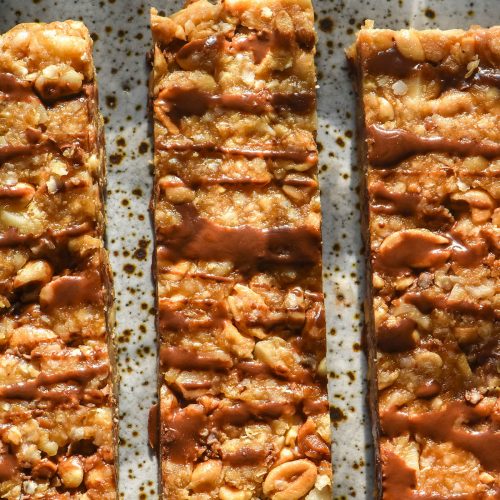
Low FODMAP granola bars
Gluten free, oat free, vegan *Cups and measures are in Australian cups and measures. Use gram for international accuracy. Makes 10-12 granola bars
Ingredients
- 100 g (1 cup)* quinoa flakes
- 160 g (1 cup)* macadamias
- 160 g (1 cup)* peanuts
- 150 g (1/2 cup)* natural smooth peanut butter (see notes)
- 150g (1/2 cup)* pure maple syrup (not maple flavoured syrup or any sugar alternative syrups)
- Pinch of fine salt
- Vanilla extract or any spices optional
Instructions
- Preheat the oven to 180C/356F.
- Line a 18.5cm (7 inch) square baking tin with a large piece of cling film with enough overhang to fold over the granola bars.
- Combine the dry ingredients in a heat safe mixing bowl. Pour the combined mixture onto an oven tray and bake for 10-15 minutes. Baking is both to warm up the ingredients (so the peanut butter mixture won’t seize up when it hits cold nuts) and to toast the ingredients. You can toast them for longer if you’d like, but keep an eye on the quinoa flakes as they are prone to burning.
- Five minutes before the nut mixture has finished cooking, combine the peanut butter and maple syrup in a small pan over a low medium heat. Use a heatproof silicon spatula to stir the mixture and ensure none is catching on the bottom of the pan.
- Cook the mixture for around 4 minutes. First, it will look grainy and like the peanut butter is separated from the syrup. Next, it will come together and look glossy. If you draw a line in the mixture with your spatula, it should take a second for the mixture to melt back together.
- As soon as little bits of cooked peanut butter start to form (they will look like little clumps) take the mixture off the heat.
- Carefully decant the hot nut and quinoa flakes back into the heat proof bowl, then pour over the hot peanut butter mixture. Work quickly to coat all the mixture in the peanut butter – this is what will hold your muesli bars together, so everything needs to be coated and combined.
- Once you’re happy, pour the mixture into the lined tin. Place the overhanging pieces of film down over the granola bars, then use the base of a smaller container (I use a square Tupperware) to press the bars down firmly and evenly into the tray. You need to use pressure so that the bars stay together in bar form once cooled.
- Carefully remove the cling film cover so that the bars don’t sweat and allow them to cool. Allow the bars to cool completely before slicing in 10-12 bars. I slice the square in half through the centre, then into individual bars - 5 or 6 per half.
- You can store the bars as a slice in the fridge or cut them up and store them in individual containers.
Notes
- Read the notes in the body of the post for tips and tricks as well as FODMAP notes.
- Use smooth natural peanut butter. Your peanut butter should not contain anything other than peanuts and salt.
- Further, your peanut butter needs to contain a good amount of oil. Homemade peanut butter or the dry parts at the bottom of the jar will be harder to form into a smooth binding mixture and might result in bars that are too dry.
- Maple flavoured syrup is artificial syrup and won't work here.
- I have successfully tested this recipe with 1/2 maple syrup and 1/2 rice malt syrup for a less sweet version.
- Weights are more important than cups in this recipe. To keep the recipe within FODMAP thresholds (particularly if you use the added variety version) use the weights provided as opposed to cups. This recipe, like all my recipes, is in Australian cups which are slightly larger than most.
- That said, you can slice the bars into larger ones and still have a Low FODMAP stack if you use the combination in the recipe card above. It contains no high FODMAP ingredients.
- You need to use a tin the same size as mine (or a little smaller) for best results. Using a larger tin will result in thin granola bars and nobody likes that.
- See notes in the body of the post if you don’t have a tin the same size as mine.
- Getting the consistency of the peanut butter mixture right is crucial to success. Too soft and the bars won’t stick together. Too firm and you have essentially made nut brittle – it will be extremely chewy and crispy (trust me, been there).
- If your bars don’t hold together, you have either not cooked the peanut mixture for long enough or you haven’t pressed them down firmly enough (or both). Fixing one or both of these should result in a better consistency next time.
- If your bars are too chewy or even brittle like in consistency, you have cooked the peanut mixture too long. Cook it for less time next time.
- You can drizzle the granola bars with some chocolate once cooled and cut, if you like. I like dark chocolate, but use whatever works for you.
- These granola bars can easily be frozen and defrosted.
½ cup (75g) hemp seeds 75g = 7.5g or less per serve
½ cup (90g) pumpkin seeds 90g = 9g or less per serve
½ cup (80g) peanuts
½ cup (80g) macadamias
Tried this recipe?Let us know how it was!