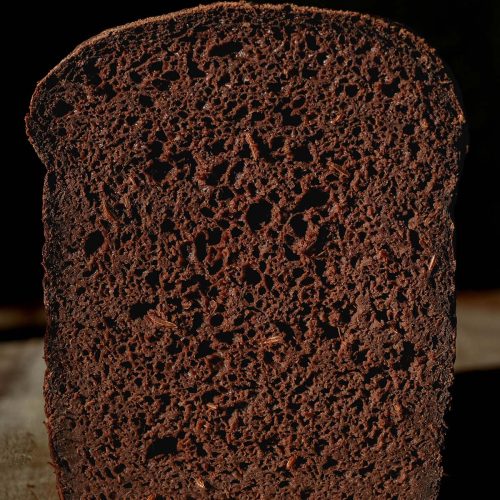
Gluten free pumpernickel bread (vegan)
Dairy free, egg free, xanthan gum free, nut free *Tablespoons are in Australian tablespoons which are 20ml as opposed to the more common 15ml. Use gram and ml for international accuracy.
Equipment
- USA Pan Pullman steel loaf tin - 23cm length X 10cm width X 10cm height or 9 X 4 X 4 inches
Ingredients
- 500 g light buckwheat flour (see notes)
- 50 g tapioca flour
- 50 g Dutch processed cocoa
- 25 g psyllium husk powder (see notes)
- 12-15 g fine salt (I used table salt)
- 15 g caraway seeds (see notes)
- 7.5 g (1 sachet) instant yeast
- 750-850 g water (see hydration notes in body of post)
- 40ml (2 tablespoons)* neutral oil of choice
- 40ml (2 tablespoons)* maple syrup or sweetener of choice
- 20-40ml (1-2 tablespoons)* molasses (see notes)
Instructions
To mix and proof your dough:
- Whisk the dry ingredients together in a large, non-reactive (glass or plastic) mixing bowl. Add the wet ingredients and whisk thoroughly to combine.
- I like to start whisking in the centre of the bowl and work my way out so I don't splash any ingredients out of the bowl. Continue whisking until there is no dry flour or lumps of flour in the bowl. Make sure to scrape the bottom to be sure.
- Initially the dough will look far too wet. Give it a minute or two, though, and it should start to thicken significantly under your whisk.
- Cover the bowl thoroughly (I use an inverted produce bag) and proof for 1 hour. In summer or a humid kitchen, proof it anywhere you like. In winter, proof it in a warm or sunny spot. Yeast requires heat and liquid to multiply.
- While you're waiting, grease and line the 23cm length X 10cm width X 10cm height (9 X 4 X 4 inch) steel loaf pan. I like to hold the baking paper in place with bulldog clips.
For the second proof:
- Preheat your oven to 220C/428F.
- After 1 hour, the dough should have some air bubbles when you stir. It should be thick enough to sit on a spoon, but too sticky and thin to roll out on a bench.
- Use a silicon spatula to scrape all of the dough into the prepared loaf tin. Use a moistened hand to smooth down the top of the dough and distribute it evenly in the tin.
- Cover the loaf again (again, I use an inverted produce bag). Proof for anywhere from 20-60 minutes, depending on the climate you're baking in. It takes less time in a humid climate than a cold one, so just go by when the loaf reaches the top of the tin. Also have a read of the notes on making this a denser bread, if that's your preferred pumpernickel style.
To bake:
- When the bread has reached the top of the tin, it is ready to bake. Place it into the oven for 15 minutes, then turn down the heat to 200C/400F and bake for 25 minutes more (a total of 40 minutes).
- The loaf should be lofty and just slightly browned on top (if you can tell).
- Allow it to cool in the tin for about 15-20 minutes before transferring it to a wire rack to cool. With higher hydration loaves, it can help to cool them on their side (and alternate the side) to ensure the crumb isn't squashed by the weight of the loaf.
- Allow to cool completely. This bread keeps well on the bench for a number of days and can also be sliced and refrigerated in an airtight container. It can also be frozen and defrosted - I recommend freezing slices on a lined baking tray with space between them and moving them to a container once frozen. This just means they are frozen as separate pieces of bread rather than one giant piece stuck together.
Notes
- Light buckwheat flour is the variety most commonly available in Australia. To use dark buckwheat flour (I tested Bob's Red Mill brand) see the notes in the body of the post.
- I grind my psyllium husk powder myself in a cheap spice grinder. I find store bought psyllium husk powder is way too fine and tends to clump up.
- If you have a spice grinder, I recommend grinding the caraway seeds. They are fine whole but a bit annoying when they're poking out. Personally, I prefer having them ground but either way will work.
- As with all my bread recipes, you cannot use a silicone loaf pan and I have no advice to offer on different sized bread tins. I test all my gluten free loaves the USA Pan Pullman pan to make it easy if you intend to use my recipes. Using a larger or smaller tin may result in a different outcome than intended.
- If you leave your dough uncovered to proof, it will form a hardened skin that will prevent it from proofing further. Make sure it is covered in an airtight way but with room to proof.
- Proofing takes longer in summer and less time in winter. Rushing the proofing process only deprives you of the best possible loaf.
- I haven't tested a loaf without molasses. It adds a nice funkiness so I recommend using it. I have tested using 2 tablespoons molasses and I found it a bit too molasses-y, but you might like that.
Tried this recipe?Let us know how it was!