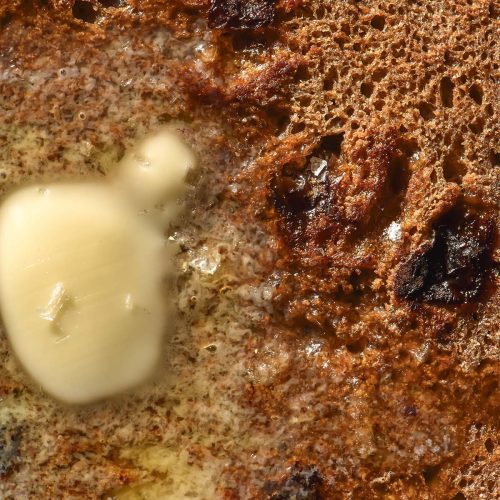
Gluten free cinnamon raisin bread
Xanthan gum free, vegan, nut free *Tablespoons are in Australian tablespoons which are 20ml as opposed to the more common 15ml. Use ml for international accuracy.
Equipment
- 1 X USA Pan Pullman steel loaf pan in size small ( 23cm length X 10cm width X 10cm height or 9 X 4 X 4 inches)
Ingredients
- 200 g fine white rice flour
- 150 g tapioca flour/starch
- 150 g sorghum flour
- 100 g light buckwheat flour
- 12 g fine salt (I use table salt)
- 25-30 g ground cinnamon (yes, grams)
- 25 g psyllium husk powder (I grind my own in a spice grinder)
- 7.5 g (1 sachet) instant yeast
- 250 g+ raisins (see notes)
- 90-100g (3 tablespoons)* maple syrup
- 20ml (1 tablespoon)* oil of choice
- 700-800 g water (see hydration notes in the body of the post)
Instructions
To make up the cinnamon raisin dough:
- Whisk all of the dry ingredients together (except for the raisins) in a large, non-reactive (glass or plastic) bowl.
- Once everything is combined, add in the raisins and mix to incorporate.
- Add the wet ingredients and whisk until a smooth batter forms. Be sure that you have whisked in all the flour on the sides and edges of the bowl and that no lumps of dry ingredients remain.
- Quite quickly, your dough should begin to thicken up thanks to the psyllium husk. You can play around a little with the hydration, but I find this bread gets a gummy bottom layer quite easily thanks to all the fruit and the maple syrup. So, I generally go for a lower hydration.
- At a lower hydration, the dough should look like you might just be able to shape it into loose balls if you have greased hands. It should be more of a sticky dough than a batter. On the higher end hydration, the dough should look just too wet to pick up.
- Adjust your hydration (adding more water if needed) to reach the above descriptions. If this is your first time making this recipe (or any gluten free bread) I recommend aiming for a lower hydration. It might not be 700g exactly - go for the description of the dough rather than the number.
- Cover the bowl and proof for 1 hour. In winter or a cold kitchen, proof it in a sunny, warm spot. In summer or a humid kitchen, anywhere is fine.
- Grease and line your USA Pan Pullman steel loaf pan in size small ( 23cm length X 10cm width X 10cm height or 9 X 4 X 4 inches). Preheat the oven to 220C/428F.
- After 1 hour, the dough should feel and look bubbly when you mix it. It might have domed slightly for a higher hydration dough, but it probably won't for a lower hydration dough. The bubbles in the dough itself should be evident, though.
To assemble and bake:
- Use a silicone spatula to transfer the dough into your greased and lined USA Pullman pan. Use a moistened hand to smooth down the top of the loaf and distribute the dough evenly.
- Cover the Pullman pan in an airtight manner but with room for the loaf to proof. I use a plastic produce bag which inverts snugly over the Pullman pan.
- Proof the loaf for 30-60 minutes or until it reaches or slightly domes over the top of the Pullman pan. This took 90 minutes for me in an Australian winter and using a lower hydration (700g). Higher hydration loaves proof faster but they also have slightly more volume from the extra water.
- When the dough is proofed, remove any covering and place it in the oven for 15 minutes. After this time, turn the oven down to 200C/400F and bake for an additional 25 minutes (40 minutes total). The loaf should look golden brown and domed on top once baked.
- Remove the loaf from the oven and allow to sit in the tin for 15 minutes. Carefully remove from the tin using the baking paper and place it on a cooling rack to cool completely (remove the baking paper to allow the base to cool too).
- I like to slice the loaf and store it in an airtight container in the fridge. You can also slice the loaf and freeze the slices on a lined baking tray. Once frozen, transfer the slices to an airtight container. Toast the slices straight from frozen.
- Hot tip: use a sharp serrated knife to cut this loaf in small sawing motions. This keeps the raisins in place instead of pulling them out as you slice.
Notes
- Read the body of the post for all the tips, tricks and FODMAP notes.
- I loved this quantity of raisins but my tester (my Mum) wanted more. She LOVES a fully stuffed fruit loaf. You can experiment with adding more, but they do add moisture to the loaf. You may need to test a different hydration to suit, but play around and see what works for you.
- If you are in Australia, I really like the Sunbeam raisins here. They are smaller, juicier and stickier compared to the Coles generic brand, which makes for a jammier, sweeter loaf.
Tried this recipe?Let us know how it was!